UR580 - Alarm clock radio Soundmaster - Free user manual and instructions
Find the device manual for free UR580 Soundmaster in PDF.
Document temporarily unavailable
The manual is currently being transferred to our new server. It will be accessible again in a few hours. Thank you for your patience.
| Product type | Radio alarm clock |
| Brand | Soundmaster |
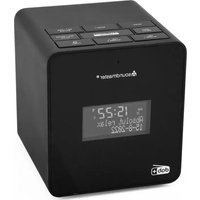
| Model | UR580 |
| Main power | Supplied AC adapter (DC 5V ?) |
| Backup battery | 1 CR2032 lithium battery (not included) |
| Vibration pad power supply | 3 LR03 (AAA) 1.5 V batteries (not included) |
| Radio | FM, manual and automatic tuning, 10 presets |
| Alarms | 2 independent alarms with choice of tone, radio or vibration |
| Sleep function | Adjustable sleep timer: 5, 10, 15, 30, 45, 60, 75, 90 min |
| USB port | 1 USB port 5 V / 1 A for charging |
| Display | LED display with brightness dimmer |
| Speaker | Built-in speaker |
| Antenna | FM antenna |
| Care and cleaning | Clean with a dry cloth; do not use detergents |
| Safety | Do not open (risk of electric shock); use only indoors in a dry place; do not expose to water or heat sources |
| General information | Designed for moderate climates; not suitable for tropics; CE marking |
Frequently Asked Questions - UR580 Soundmaster
User questions about UR580 Soundmaster
0 question about this device. Answer the ones you know or ask your own.
Ask a new question about this device
Download the instructions for your Alarm clock radio in PDF format for free! Find your manual UR580 - Soundmaster and take your electronic device back in hand. On this page are published all the documents necessary for the use of your device. UR580 by Soundmaster.