
GL7033 - Brush cutter BLACK & DECKER - Free user manual and instructions
Find the device manual for free GL7033 BLACK & DECKER in PDF.
| Product Type | Electric brushcutter / grass trimmer |
| Brand | Black & Decker |
| Model | GL7033 |
| Power | 700 W |
| Supply Voltage | 230 V AC |
| No-load Speed | 7000 min⁻¹ |
| Weight | 3.2 kg |
| Sound Pressure Level (LpA) | 80 dB(A) (uncertainty K=2 dB(A)) |
| Sound Power Level (LwA) | 94 dB(A) (uncertainty K=2 dB(A)) |
| Vibration Values (ah) | 8.2 m/s² (uncertainty K=1.5 m/s²) |
| Double Insulation | Yes |
| Cutting System | AFS (automatic single line feed) and HDL (dual line for tough work) |
| Cutting Line Length | 11 cm protruding from housing |
| Recommended Extension Cord | Up to 30 m, type HO5VV-F 1.5 mm², suitable for outdoor use |
| Usage Modes | Trimming and edging (adjustable head) |
| Height Adjustment | Telescopic (multiple positions) |
| Secondary Handle | Adjustable position |
| Protection | Skirt blade and protective guard |
| Warranty | 24 months (domestic use) |
| Intended Use | Cutting and finishing lawn edges, grass in confined spaces (domestic) |
Frequently Asked Questions - GL7033 BLACK & DECKER
User questions about GL7033 BLACK & DECKER
0 question about this device. Answer the ones you know or ask your own.
Ask a new question about this device
Download the instructions for your Brush cutter in PDF format for free! Find your manual GL7033 - BLACK & DECKER and take your electronic device back in hand. On this page are published all the documents necessary for the use of your device. GL7033 by BLACK & DECKER.
USER MANUAL GL7033 BLACK & DECKER
English (Original instructions) 6
Your Black & Decker trimmer has been designed for trimming and finishing lawn edges and to cut grass in confined spaces. This appliance is intended for consumer use only.
Safety instructions
Warning! When using mains-powered appliances, basic safety precautions, including the following, should always be followed to reduce the risk of fire, electric shock, personal injury and material damage.
Warning! When using the machine the safety rules must be followed. For your own safety and bystanders please read these instructions before operating the machine. Please keep the instructions safe for later use.
Read all of this manual carefully before operating the appliance.
The intended use is described in this manual. The use of any accessory or attachment or the performance of any operation with this appliance other than those recommended in this instruction manual may present a risk of personal injury.
Retain this manual for future reference.
Using your appliance
Always take care when using the appliance.
Always use safety glasses or goggles.
- Never allow children or people unfamiliar with the instructions to use the appliance.
Do not allow children or animals to come near the work area or to touch the appliance or power supply cord.
Close supervision is necessary when the appliance is used near children.
This appliance is not intended for use by young or infirm persons without supervision.
This appliance is not to be used as a toy.
Only use the appliance in daylight or good artificial light.
Use in a dry location only. Do not allow the appliance to become wet.
Do not immerse the appliance in water.
Do not open the body casing. There are not user-serviceable parts inside.
Do not operate the appliance in explosive atmospheres, such as in the presence of flammable liquids, gases or dust.
To reduce the risk of damage to plugs or cords, never pull the cable to remove the plug from a socket.
Safety of others
This appliance is not intended for use by persons (including children) with reduced physical, sensory or mental capabilities, or lack of experience and knowledge, unless they have been given supervision or instruction concerning use of the appliance by a person responsible for their safety.
Children must be supervised to ensure that they do not play with the appliance.
Stop using the machine while people, especially children, or pets are nearby.
Residual risks.
Additional residual risks may arise when using the tool which may not be included in the enclosed safety warnings. These risks can arise from misuse, prolonged use etc.
Even with the application of the relevant safety regulations and the implementation of safety devices, certain residual risks can not be avoided.
These include:
Injuries caused by touching any rotating/moving parts.
Injuries caused when changing any parts, blades or accessories.
Injuries caused by prolonged use of a tool. When using any tool for prolonged periods ensure you take regular breaks.
Impairment of hearing.
Health hazards caused by breathing dust developed when using your tool (example:- working with wood, especially oak, beech and MDF.)
After use
When not in use, the appliance should be stored in a dry, well ventilated place out of reach of children.
Children should not have access to stored appliances.
When the appliance is stored or transported in a vehicle it should be placed in the boot or restrained to prevent movement following sudden changes in speed or direction.
Inspection and repairs
Disconnect the machine from the mains before checking, cleaning or working on the machine and when it is in use.
Before use, check the appliance for damaged or defective parts. Check for breakage of parts and any other conditions that may affect its operation.
Do not use the appliance if any part is damaged or defective.
ENGLISH
Have any damaged or defective parts repaired or replaced by an authorised repair agent.
Never attempt to remove or replace any parts other than those specified in this manual.
Using an extension cable
Always use an approved extension cable suitable for the power input of this appliance (see technical data). The extension cable must be suitable for outdoor use and marked accordingly. Up to 30m of 1.5mm^2 HO5VV-F extension cable can be used without loss of product performance. Before use, inspect the extension cable for signs of damage, wear and ageing. Replace the extension cable if damaged or defective. When using a cable reel, always unwind the cable completely.
Additional safety instructions for grass trimmers
Warning! Cutting elements continue to rotate after the motor is switched off.
Be familiar with the controls and the proper use of the appliance.
Before use, check the power supply cord and extension cord for signs of damage, ageing and wear. If a cord becomes damaged during use, disconnect the cord from the mains supply immediately. DO NOT TOUCH THE CORD BEFORE DISCONNECTING THE SUPPLY.
Do not use the appliance if the cords are damaged or worn.
Wear stout shoes or boots to protect your feet.
Wear long trousers to protect your legs.
Before using the appliance, check that your cutting path is free from sticks, stones, wire and any other obstacles.
Only use the appliance in the upright position, with the cutting line near the ground. Never switch the appliance on in any other position.
Move slowly when using the appliance. Be aware that freshly cut grass is damp and slippery.
Do not work on steep slopes. Work across the face of slopes, not up and down.
Never cross gravel paths or roads while the appliance is running.
Never touch the cutting line while the appliance is running.
Do not put the appliance down until the cutting line has come to a complete standstill.
Use only the appropriate type of cutting line. Never use metal cutting line or fi shing line.
Be careful not to touch the line trimming blade.
Take care to keep the mains cable away from the cutting line. Always be aware of the position of the cable.
Keep hands and feet away from the cutting line at all times, especially when switching on the motor.
Before using the appliance and after any impact, check for signs of wear or damage and repair as necessary.
Never operate the appliance with damaged guards or without guards in place.
Take care against injury from any device fitted for trimming the filament line length. After extending new cutter line always return the machine to its normal operating position before switching on.
Always ensure that the ventilation slots are kept clear of debris.
Do not use the lawn trimmer (edge trimmer), if the cords are damaged or worn.
Keep extension cords away from cutting elements.
Labels on appliance
The following warning symbols are found on the appliance:

Read the manual prior to operation.

Wear safety glasses or goggles when operating this appliance.

Wear suitable ear protectors when operating this appliance.

Always remove the plug from the socket before inspecting a damaged cable. Do not use your strimmer if the cable is damaged.
Beware of flying objects. Keep bystanders away from the cutting area.

Do not expose the appliance to rain or high humidity.

Directive 2000/14/EC guaranteed sound power.
Electrical safety

This appliance is double insulated; therefore no earth wire is required. Always check that the power supply corresponds to the voltage on the rating plate.
ENGLISH
If the supply cord is damaged, it must be replaced the second handle (5) into the required placed by the manufacturer or an authorisation.
Black & Decker Service Centre in order to avoid a hazard.
Electric safety can be further improved by using a highsensitivity 30mA Residual Current Device (RCD).
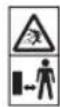
Features
This appliance includes some or all of the following features.
- On/Off switch
- Handle
- Cable restraint
- Power inlet
- Secondary handle
- Adjustment button
- Tube
- Spare spool storage
- HDL cap
- Guard
- Line trimming blade
- Spool housing
- Cutting line
- Edge wheel
Assembly
Warning! Before assembly, make sure that the tool is switched off and unplugged.
Fitting the guard (fig. A & B)
Remove the screw (15) from the guard (10).
Place the guard (10) onto the tool as shown.
Firmly press the guard until it snaps into place.
Secure the guard with the screw.
Tighten the screw.
Warning! Never use the tool unless the guard is properly fitted.
Attaching the secondary handle (fi g. C)
Press in and hold the adjustment button (6) on the side of the main body.
Slide the secondary handle (5) in place over the adjustment button (6).
Warning! Ensure that the teeth on the button are correctly aligned in slots in the handle and that the handle is secure.
Adjusting the position of the secondary handle (fig. D)
The secondary handle (5) can be adjusted to provide optimum balance and comfort.
Press in the adjustment button (6) on the left side of the handle.
Release the adjustment button (6).
Warning! Ensure that the teeth on the button are correctly aligned in slots in the handle and that the handle is secure.
Adjusting the height of the tool (fig. E & F)
This tool has a telescopic mechanism, allowing you to set it to a comfortable height. There are multiple height settings. To adjust the height setting, proceed as follows:
Release the height adjust locking clamp (16).
Gently pull the tube (7) up or down to the desired height.
Close the height adjust locking clamp (16).
Releasing the cutting line
In transit, the cutting line is taped to the spool housing.
Remove the tape holding the cutting line to the spool housing (12).
Storing the spool not in use (fi g. G)
The tool has two cutting systems:
AFS: Single line autofeed for light trimming and edging.
HDL: Heavy Duty Dual Line cutting system for more overgrown areas.
Note: The HDL spool may be used in trimming mode only.
The cutting system not in use can be stored in the spare spool storage (GL8033 & GL9035 Only).
Align the tabs (17) on the spool cover with the cut outs (18) in the spare spool storage (8).
Push the cover onto the spare spool storage until it snaps securely into place.
Connecting the tool to the mains (fi g. H)
Connect the female plug of a suitable extension cable to the power inlet (4).
Loop the cable through the cable restraint (3).
Insert the mains plug into a mains outlet.
For wired in cable units: Make sure the cable is looped through the cable restraint prior to connecting the plug to the mains outlet.
Warning! The extension cable must be suitable for outdoor use.
Use
Warning! Let the tool work at its own pace. Do not overload.
ENGLISH
Setting the tool to trimming or edging mode (fi g. I & J)
The tool can be used in trimming mode as show in fig. I or in edging mode to trim overhanging grass along lawn edges and flower beds as shown in fig. J.
Trimming mode (fi g.1)
For trimming, the trimmer head should be in the position shown in fig.1. If it is not:
Release the height adjust locking clamp (16).
Rotate the tube (7) clockwise.
When the head is in position, close the height adjust locking clamp (16).
Note: The tube will only rotate in one direction.
Note: The HDL spool may be used in trimming mode.
Edging mode (fi g. J)
For edging, the trimmer head should be in the position shown in fig. J. If it is not:
Release the height adjust locking clamp (16).
Rotate the tube (7) anti-clockwise.
When the head is in position, close the height adjust locking clamp (16).
Note: The tube will only rotate in one direction.
Switching on and off
To switch the tool on, squeeze the on/off switch (1).
To switch the tool off, release the trigger lever.
Warning! Never attempt to lock the trigger lever in the on position.
Hints for optimum use
General
In order to achieve optimum cutting results, only cut dry grass.
Trimming
Hold the tool as shown in fig. K.
Gently swing the trimmer from side to side.
When cutting long grass, work in stages from the top. Take small cuts.
Keep the tool away from hard objects and delicate plants.
Cutting line will wear faster and require more feeding if the cutting is done along pavements or other abrasive surfaces or heavier weeds are being cut.
If the tool starts running slowly, reduce the load.
Edging
Optimum cutting results are achieved on edges deeper than 50~mm
Do not use the tool to create edges. To create edges, use an edging spade.
Guide the tool on its wheel as shown in fig. L.
To make a closer cut, slightly tilt the tool.
Fitting a new spool of cutting line (fi g. M & N)
Replacement spools of cutting line are available from your Black & Decker dealer (cat. no. A6482). Packs containing 3 spools of cutting line are also available (cat. no. A6486).
Unplug the tool.
Keep the tabs (17) depressed and remove the spool cover (21) from the housing (12) (fig. M).
Remove the empty spool (22) from the spool cover.
Remove any dirt and grass from the spool cover and housing.
Unclip the end of of the cutting line and guide the line into the eyelet (23) (fig. M). The line should protrude approx. 11 cm from the spool cover.
Note: Take care not to allow the line on the spool to unravel. Hold it firmly with one hand at all times.
Take the new spool and push it onto the boss in the spool cover. Rotate the spool slightly until it is seated.
Align the tabs (17) on the spool cover with the cut outs (24) in the housing (12).
Push the cover onto the housing until it snaps securely into place.
Warning! If the cutting lines protrude beyond the trimming blade (11), cut it off so that it just reaches the blade.
Fitting a new piece of heavy duty cutting line (fi g. O & P)
Replacement packs of 10 heavy duty cutting lines are available from your Black & Decker dealer (cat. no. A6489). To fit a new piece of cutting line, proceed as follows:
Unplug the tool.
Keep the tabs (17) depressed and remove them HDL cap (9) from the housing (12).
Remove any dirt and grass from the HDL cap (9) and housing.
Remove the used piece of line from the HDL cap (9).
Thread a new piece of line (20) through the eyelets (27) in either side of the HDL cap.
Put the central ferrule (28) in the indicated position (Fig. P).
Re-fi t the HDL cap.
Warning! Only use the appropriate type of Black & Decker cutting line.
ENGLISH
Mains plug replacement (U.K. & Ireland only)
If a new mains plug needs to be fitted:
Safely dispose of the old plug.
Connect the brown lead to the live terminal in the new plug.
Connect the blue lead to the neutral terminal.
Warning! No connection is to be made to the earth terminal. Follow the fitting instructions supplied with good quality plugs. Recommended fuse: 5 A.
Troubleshooting
If your tool seems not to operate properly, follow the instructions below. If this does not solve the problem, please contact your local Black & Decker repair agent.
Warning! Before proceeding, unplug the tool.
Tool runs slowly
Check that the spool housing can rotate freely. Carefully clean it if necessary.
Check that the cutting line does not protrude more than 11~cm from the spool housing. If it does, cut it off so that it just reaches the line trimming blade.
Automatic line feed does not work
Keep the tabs depressed and remove the spool cover from the housing.
Pull the cutting line until it protrudes 11~cm from the housing. If insufficient cutting line is left on the spool, install a new spool of cutting line as instructed above.
Align the tabs on the spool cover with the cut outs in the housing.
Push the cover onto the housing until it snaps securely into place.
If the cutting line protrudes beyond the trimming blade, cut it off so that it just reaches the blade. If the automatic line feed still does not work or the spool is jammed, try the following suggestions:
Carefully clean the spool cover and housing.
Remove the spool and check if the lever can move freely.
Remove the spool and unwind the cutting line, then wind it on neatly again as described above. Replace the spool as instructed.
Protecting the environment

Separate collection. This product must not be disposed of with normal household waste.
Should you find one day that your Black & Decker product needs replacement, or if it is of no further
use to you, do not dispose of it with household waste.
Make this product available for separate collection.

Separate collection of used products and packaging allows materials to be recycled and used again. Re-use of recycled materials helps prevent environmental pollution and reduces the demand for raw materials.
Local regulations may provide for separate collection of electrical products from the household, at municipal waste sites or by the retailer when you purchase a new product.
Black & Decker provides a facility for the collection and recycling of Black & Decker products once they have reached the end of their working life. To take advantage of this service please return your product to any authorised repair agent who will collect them on our behalf.
You can check the location of your nearest authorised repair agent by contacting your local Black & Decker offi ce at the address indicated in this manual. Alternatively, a list of authorised Black & Decker repair agents and full details of our after-sales service and contacts are available on the Internet at: www.2helpU.com.
Technical data
| GL7033 | GL8033 | GL9035 | ||
| (Type 1) | (Type 1) | (Type 1) | ||
| Voltage | \( V_{AC} \) | 230 | 230 | 230 |
| Power input | W | 700 | 800 | 900 |
| No-load speed | min-1 | 7000 | 7000 | 7000 |
| Weight | kg | 3.2 | 3.2 | 3.2 |
Level of sound pressure:
Sound pressure (LpA) 80 dB(A), uncertainty (K) 2 dB(A), Sound power (LWA) 94 dB(A), uncertainty (K) 2 dB(A)
Vibration total values (triax vector sum) according to EN 786:
Vibration emission value (a_h) 8.2m / s^2 uncertainty (K) 1.5m / s^2
ENGLISH
EC declaration of conformity
MACHINERY DIRECTIVE OUTDOOR NOISE DIRECTIVE

GL7033/GL8033/GL9035
Black & Decker declares that these products described under,technical data are in compliance with:2006/42/EC,EN 60335-1,EN 60335-2-91 2000/14/EC,Lawn Trimmer, L≤ 50~cm Annex VIII KEMA Quality B.V., Utrechtseweg 310, 6802 ED Arnhem, The Netherlands Notifi ed Body ID No.:0344
Level of sound power according to 2000/14/EC (Article 12, Annex III, L ≤ 50 cm): L_WA (measured sound power) 94 dB(A)
uncertainty (K) = 2 dB(A) L_WA (guaranteed sound power) 96 dB(A)
uncertainty (K) = 2 dB(A)
These products also comply with directive 2004/108/ EC and 2011/65/EU.
For more information, please contact Black & Decker at the following address or refer to the back of the manual. The undersigned is responsible for compilation of the technical file and makes this declaration on behalf of Black & Decker.

Kevin Hewitt Vice-President Global Engineering Black & Decker Europe, 210 Bath Road, Slough, Berkshire, SL1 3YD United Kingdom 17-10-2012
Guarantee
Black & Decker is confident of the quality of its products and offers an outstanding guarantee. This guarantee statement is in addition to and in no way prejudices your statutory rights. The guarantee is valid within the territories of the Member States of the European Union and the European Free Trade Area.
If a Black & Decker product becomes defective due to faulty materials, workmanship or lack of conformity, within 24 months from the date of purchase, Black & Decker guarantees to replace defective parts, repair products subjected to fair wear and tear or replace such products to ensure minimum inconvenience to the customer unless:
The product has been used for trade, professional or hire purposes;
The product has been subjected to misuse or neglect;
The product has sustained damage through foreign objects, substances or accidents;
Repairs have been attempted by persons other than authorised repair agents or Black & Decker service staff.
To claim on the guarantee, you will need to submit proof of purchase to the seller or an authorised repair agent. You can check the location of your nearest authorised repair agent by contacting your local Black & Decker offi ce at the address indicated in this manual. Alternatively, a list of authorised Black & Decker repair agents and full details of our aftersales service and contacts are available on the Internet at: www.2helpU.com.
Please visit our website www.blackanddecker.co.uk to register your new Black & Decker product and to be kept up to date on new products and special offers. Further information on the Black & Decker brand and our range of products is available at www.blackanddecker.co.uk.
DEUTSCH
Mode talle (figure 1)
210 Bath Road, Slough,
Berkshire, SL1 3YD
Royaume-Uni
04-10-2012
Garantie
210 Bath Road, Slough,
Berkshire, SL1 3YD
United Kingdom
17-10-2012
230
900
Zaruka
210 Bath Road, Slough,
Berkshire, SL1 3YD
Egyesült Királyság
17-10-2012
210 Bath Road, Slough, 1016. Budapest,
Berkshire, SL13YD, Mészáros u. 58/B
Egyesult Kiralysag
POLSKI
Zastosowanie zgodne
z przyeznaczeniem
210 Bath Road, Slough
Berkshire, SL1 3YD
Wielka Brytania
17-10-2012
POLSKI
Black & Decker
WARUNKI GWARANCJI:
NcNoJIb3OBaHHeMHCTpyMeHTa
Bcerda co6JIIOaIte ocToPOxHocTb npn pa6oTe C daHHbIM nHCTpyMeHTOM.
Bcerda nCnoJb3yIe 3aunTHbIe ouKn nn macky.
He donyckaIte DeTeH nIO6bIX NnU, He 3HaKoMbIX C daHHbIM npaBUNamn TexHNKu 6e3onacHOCTN, K pa6ote IHCTPymEHTOM.
He no3BoJrTe DeTjam nn JxNBOTbIM HaXoJntbcB B pa6oey 3OHe, DToParuBaTbcDo INHCTpyMeHTa nn Do 3NeKtpnueckoro Ka6eJra.
Bybte Oc06eHb BHMaTeJIbHbI npn nCNoJIb-3OBAHN HCHTpMeHTa B pncyTCTBn DeTei.
IcnoIb3ObaHne IHCTpyMeHTa DeTbMn HHeONbIThbIMN JUaAMN DONYCKaETCRA TOnbKO NOJ KOHTPOJEM OTBETCTBeHHORo 3a INx 6e3onacHOCTb Jua.
He nCnoB3yIe DaHHbI INHCTpyMeHT B KaueCTBe IrgPyuK.
Pa6otaIe HnCTpyMeHToM TOnbKO npn DHeB-HOM CBTe NIN B yCNoBmX XopoWero NCKyc-CTBEHHORO OCBeSeHn.
Исплььтугелунчытейнчытейнчытейнчытейнчытейнчытейнчытейнчытейнчытейнчытейнчытейнчытейнчытейнчытейнчытейнчытейнчытейнчытейнчытейнчытейнчыт leyнчыт leyнчыт leyнчыт leyнчыт leyнчыт leyнчыт leyнчыт leyнчыт leyнчыт leyнчыт leyнчыт leyнчыт leyнчыт leyнчыт leyнчыт leyнчыт leyнчыт leyнчыт leyнчыт leyнчыт LeynchТВИBЛaRi.
He norpykaiTe nHcTpymeHT B Body.
He pa36paIte Kopnyc nHcTpymeHTa.BHytpn HeT o6cnykBaembIX NOB3OBaTeIeM DeTaJIen.
He nCnoJIb3yIte HnCTpyMeH,ecnIeCTb onacHOCTb BO3rOpAHn IIN B3pblBa,HanpIMep,6Nn3n NERKO BOCnIaMeHraUxC8 XnKDocTei,ra3OB INN IIbII.
Bo n36eKaHne pncKa nobpeKdEHHa WTeNceIe N 3NeKtpnuecknx Ka6eJe, HNKoRda He TAHnTe 3a Ka6eJb, YTO6bl OTKJIIOHTb IHCTpyMeHT OT WTeNCEJIbHOH PO3ETKN.
B30nacHOCTb NOcTOPOHnX Iu
DAnHbInHCTpyMeHT He MoKET HcNoJIb3ObaTbCra IIOdbMn (BkIIOUaJdTei) CO CHIXKeHHbIMNΦIN3uYeCKIMn, CeHCOPHbIMn UymCTBeHHbIMN CNOco6HOCTaMn INn PnP OTCyTCTBN Heo6xODmOrO ONbTA INn HABbIka, 3a NckJIIOUeHNEm, ECIN OHN BbINOHNrOTo pAbOTy NOpnpCMOTpOM INn NOnyUINn IHCTpyKcUNn OTHOcNTeNbHOpa60tbl C 3TNm IHCTpyMeHTOM OT JNuCA, OTBeuaOJero 3a INx 6e3ONaCHOCTb.
He no3BOJIATe DeTAMnIgpaTb CnHCTpyMeHTOM.
HnKOrda He nCnONb3yTe 3NeKTPoHcTpyMeHT B6n3n IIOdeN,OCO6eHHO,DeTeN,NIN XNBOTHbIX.
OcTaToUHbIe pNCKn
Pp pa6ote C daHHbIM HNCTpyMeHToM BO3MOXHO BO3HNKHOBEHHe DOONHHTeNbHbIX OCTaTOHybIX pNCKOB, KOtOpBie He BOuNN B ONuCAHHbIe 3Decb npabUNaTexnIK 6e3OnaCHOCTn. 3Tu PNCKMOryT BO3HNKHYb Pp HnPaBnHOM NIN PPOJOnKNTeJbHOM NCNOJB3OBAHN N3DeJIIN T.I.
HecmotpHa co6JHOeHHe COOTBETCTBYUOxN HnCTpyKcHn NO texHnke 6e3OnaCHoCTn N cNoIb- 3OBaHHe npeOxApaHnteJbHbIXyCTpoiCTB, HEKOTOp bie OCTaTOuHbE pUCKn HeBO3MOXHO NOJHOCTbO NCKJIIOHTb. K Hm OTHOcTcR:
TpabMbI Bpe3yNbTaTe KacaHnBpaaioxxCra/ DBNraIOxXcYacTee HNCTpyMeHTa.
Pnck nolyeHn TpaBmBo BpeM CmeHb DeTaneHnHCTpymeHTa,HoKe HnHaCaoK.
Pnck noJyehn TpaBMbl, Cb3aHHb c npoDOnXnTeNbHbIM nCNoJIb3OBAHEm nHCTpyMeHTa. PpNcNoJIb3OBAHm yCTpoIcTBaB TeueHne
PYCCKNЯ3bIK
npoJnKnteHbHorO nepnoa BpeMeHn DeJaTe peyIrpHbIe nepepbIbI bpa6ote.
YxuDWeHne cnyxa.
YUeep63DOpOBbBpe3yNbTaTe BdbixHnna HblnB npoucepe pa60Tb C nHCTpyMeHTOM (HaPpImep, npn 6pa60Te dpeBecnHb, B oco-6eHHoCTn, dy6a, 6yka n DBl).
Pocne nCNoB3OBaHnA
XpaHnte He NcNoJb3yEmbl INHCTpyMeHT B cyXOM, XopoO BoBHTnIpyEmom MceTe, He-doCTynHom dna deTei.
Дети He DoJnxHbI IMeTb DoCTyN K y6paHHbIM Ha xpaHeHne IHCTpyMeHTam.
BoBpemxpaHEnn nnpeB03Kn HcTpyMeHTa B aBTOMo6nne, nomeaaTe erO B6aRaxHKnn 3akpennIte, yTObblckNIOHTbeero nepemeueHne npn pe3KOM n3MeHeHNCKOPoCTn nn HapabNeHn DnKeHn.
Ocmotp nppeMOHT
Ipeed ocmotpom, uctko nI npoebeHneM texnueckoro 06cnykuaHna OTKJUOaTe HCTpyMeHT OT NCTOCHKA NITAHNA.
NpeiHaayanom 3KcnnyatauH, Bcerda npoBepaHTe nCnpaBHOCTb IHCTpyMeHTa. PpOBePraTe ueIOCTHOCTb DeTaneN IIO6bIX dpynx 3JIeMeHToB IHCTpyMeHTa, BO3dEInCTByIOxNX Ha erOp a60Ty.
He nCnoJb3yIte HnCTpyMeHT,ecnIOBpeKdeHa nn HeNCnpaBaHa KaKa-Jn6o erO detaIb.
Pemontynte nIIN 3aMeHnTe NOBpeKDeHHbIE nI IN HeNCpABHbIe DeTaN TOJbKO B aBTOpN0BaHHOM cepBnCHOM ueHTpe Black & Decker.
HnB Koem cnlyae He ChmMaTe n He 3ameHnTe DeTaN, 3a NCKIIOUeHNEm DeTaJEn, yKa3aHbIX B DaHHOM pyKOBODCTBe NO 3KcNJIyatauIN.
IcnoJb3ObaHne ydnnHtTeJbHoro ka6eJra
Bcerda nCnoB3yIte yDnHInTeJbHbIe KabeJn yCTaHOBHeHHoro 6pa3ua, COOTBeTCTByIOUne BXoHDH MoUHOCTN DaHHORO IHCTpyMeHTa (CM. pa3dJI «TexHueckne xapaKtepncTkn»). YdNHNHeBbHbI Ka6JIb DOJXeH 6bITb PnroDeH IINcNoB3OBAHNA HA OTKpbITOM BO3dyXe HmEtB COOTBeTCTByUOuyo MapKnPOBky. NcNoB3OBaHne yDnHInTeJbHO Ra6eH OHO5VV-F dNHHoI Do 30 M nDnAmETpOM B nonpeuHOM ceyHn1,5 MM2 He CHN3NT pOn3BOJTEbHOCTb INCTpyMeHTa. Npeed nCnoB3OBaHnEM npOBepbTe yDnHInTeB- hI Ka6eNb Ha HAnuye npn3HaKOB NOBpeKJdeHn, CTapeHn I n3HoCA. B cnYae o6hApyKeHn NOBpeKJHn yDnHInTeJbHbI Ka6JIb NoDnEeKNT 3aMeHe. Ppi nCnoB3OBaHn Ka6eBHOrO 6apabaha, Bcerda noNHOCTbIO pa3MaTbIBaIte Ka6eNB.
IOnoJIHnTeJbHbIe npaBnla 6e3onacHOCTn npu pa6Ote ra3OHokocnKamn
BHMaHHe! Nocne BbIKNoeHnE 3JIeKToPdBNrataTeJ, pexyui MExaHn3M HeKOTOpoe BpeM Bpauaetcno HepuN.
3yUHTe BCE cpeIcTBa ynpaBJIeHn IHCtpyMeHTOM N NCNoJIb3yJTe eRO NO Ha3HaYeHHIO.
IpeedncnoJb3oBaHHe mHcTpymeHTA BnMaTeIbHO npOBepBe cTeBOu yDInHtEJIbHbI Ka6eHN HaOTcyTCTBne NOBpeXdEHn n CTapeHnHaN3HocA.Bcnyae NOBpeKdEHn Ka6eNr BO Bpempa60tbl, HeMeDNeHNO BbIHbTe erO BNkY n3 wTeNCbHOn po3EtKn. HE IPINKACAITECb KKA6EJIIO, NOKA OH HE bYdET OTCOEINHEH OT 3JEKTPOCETN.
He nCnoJIb3yIte HnCTpymeHT,ecIn erO ka6eNIOBpeKdEhblnnn3HOWeHbI.
NcnoIb3yIte IJIra 3aunTbI Baunx Hor KpeKne, HeckoJIb3aJnue 6OTnHKn nn CanOrn.
HaedeBaTeIINHHbIe 6pIOKn IJIa3aUNTbI Baunx Hor.
Πepeɪ Ḥaʊən mpaδθbɪ yδeɪntεcb,уTO B pa-boʊeɪ 3ɔːhe HET naIOK, kʌmHæŋ, npɒBOJOKn I dpyrɪx npeɪdmetOB.
IcnoIb3yIte ra3OHOKocNky ToIbKO B BepTnKaIbHOM NIOJKeHN, CpeXyUeJneCKoB03Je NOBepxHOCtN 3emN. Hb KcEm cnyuaeHe BKlOuaTe ra3OHOKocNky, ecn OHa HaXoDITcB JIO6OM dpyrom NIOJKeHN!
IpeBnraTecb BO Bpempa60TbIcra3oHOKocnKoTOnbKO BMeDneHHOM Temne. NOMHnTe, YTO CBExeCKoWeHHa TpaBa BnaXHaN CkOJIb3KaJ.
He pa6oTaIe Ha KpyTbIX CkNoHax. CtpnIte TpaBy nonepeK yKnOHa, Hn B Koem cnyyae He CBepxv Bn3!
HnB Koem Cnyaae He nepeceKaTe rpaBnHbIe TpOuHKn N DOpoxKn npu pa6oTaUoSei ra3oHOKocNIke!
HnB Koem cnyuae He kacaTecb pexyuei neck npaobotaoe raohokocnilke!
He KnaIte Ha 3emnIg ra3oHOKcNkY do MoMeHTa, Noka pexkyaa Jecka noJHOCTbO He OCTaHOBNTc.
Испосьуитepжушию necky,pekomehobaHHyo n3rOToBnTeJem ra3OHokcunKn. Hn B Koem cnyuae He IcNoIb3yIte MeTaJIuYeCKne pexkyuue HHTn nnn pb6oJOBHyO necky!
BybTe BnMaTeIbHbI, yTo6bl cyuayHo He KocHyTbcr OTCeKaTeJpeKyuJe neckn!
Hapabnayte 3neKtpueckn Ka6eB B ctopohy ot pexyuie neckn. NocToaHHO cneDnte 3a noIoxhenem Ka6eJia.
Cneinte, TTo6b Baun pyuH Hn HnocToHHn HaxoDnncb Ha 6e3onacHom pacctOAHn OT pexyuero MexaHn3Ma, Oc0eHNo npn BKnHOeHN 3NeKtpoDburatela.
Ipeep nCnoJb3ObaHnem HnCTpyMeHTa n OOKOHuaHn pa60tI npOBepaTe ero HaHaJIuYne npu3HakOB CTapeHn nn NobpeKdEHN; B Cnyae Heo6xOaMocTn cdaTte HnCTpyMeHT B peMOHT.
HnBkoemcnyae He nCnoJIb3yIte ra3oHOKOCNkY C NOBpeKJdeHHbIMN 3aUHTHBIMN KOxyXAMn, a TaKke 6e3 yCTaHOBJEHHbIX 3aUHTHBIXKOxyXOB.
BydbTe ocToPOxHbI npn pa6oTe c IIO6bIMn HNCTpyMeHTaMn, OChaSeHHbIMn peXyuee Nccko; HeBHMaTeIbHOcTb MoKeT npNBecTN K NOyueHNO TpaMbI. Nocne toro, KaK 6ydet BbITra HOBa pexyua Jnecka, BePHnte HNCTpyMeHT Bero HopMaNbHoE pa6Ooye NOOxHHe N TOBko TOrda BKNIOaNe IHCTpyMeHT.
CneDnte, YTo6bI BeHTnlaUHOHbIe npope3n 3NeKtpoDBuRaTeI BcERda OCTaBaJInCb OTKpbITbIMN UHCTbIMN.
He nCnoJIb3yIte raoHokocnky,ecn Ka6eNIOBpeKdEhblnn 3HOWeHbl.
Hapabnayte yndnHnteNbI Ka6eB B CTOpoHy oT peKyuero KOpda.
MapKnpoBka HNCTpyMeHTa
Ha nHCTpyMeHTe HMeIOTc cJeDyUOuNe npEynpeJdaUOuNE CnMBoJIb:

Ipepa6oTo npOHTne noJHocTb0 daHHoe pyKOBODCTBO NO 3KnNyataaun.

Ppna pa6ote daHHbIM nHCTpyMeHTOM ha-DeHbTe 3aUHTbIe OcKn nnMACKy.

Pp npa6oTe cHnCTpyMeHTo mCNoIb3yIe CpeIcTBA 3aunIbI opraHOB cnyxa.

IpeepocmpoNOBpeKdHoroKa6eB Bcerda BbHMaTe Bnky Ka6eNn3 po3eTKn 3neKtpocTe. He nCnonb3ynte ra30HOKOCNIky,ecn ee Ka6eJb NOBpeKdH.

OcTepeaTecb pa3JeTaUxxCn peD MeTOB.CneIte,HTo6bIB 30He pa6oTB He 6blNO NOCTOPOHnx nui.

He nCnoB3yIe HNcTpymEnT noDdoXdEm IIN BO BnAekHOI cpeJe.

TapaHTnpOBaHHa aKcYCTnuecka MoUHOCTb B COOTBeTCTBn C DnpeKTnBOI 2000/14/EC.
3NeKtpo6e30nacHocTb

DAnHbI 3NeKTPoHHCTpymeHT 3aunueH DBOHON H0Jauen, YTO NCKIOUcaET NOTpe6HOCTb B3a3emJHOUcEM PPOBODE. CneDNTe 3a HanpJKeHNEm 3NeKTPuYeCKO CEIN, OHO DOJNXHO COOTBETCTBOBaT BeIN- UHHe, O6O3NaueHHo HA INHOpMaUHOHHo Ta6NIuKe INHCTpymeHTa.
Bo n36eXaHHe HeCuaCTHO rO CnyuA, 3aMeHa NOBpeXdEHHOro Ka6eI IITaHn DOJxHa npO IN3BOIDtBcT TObKO Ha 3aBOe-N3ROBNTeIe INB ABTOpN3OBaHHOM CepBnCHOM cEHtpe Black & Decker.
3NeKtpo6e30nacHocTb MoKeT 6bItb NObBWeHa npu nCNoJIb3OBAHN BBICOKOyBCTBNTeJIbHOrO 30 mA yctpoNCTBa 3aunTHOrO oTKIIOUHeHn (Y3O).
CocTabHbIe yactn
BaHnctpymeHT MoKet CoepKaTaB BCE HnH HeKoTOpbIe N3 NepeuNCJIeHHbIX Hxke COCTaBHbIX qacten:
- KnaBnua npckOBoro BbIKIOuOaTeNa
- PyKoTka
- Ka6eJbHbI 3axnM
-
CoeHHTeHbHbI eHMeHr BXoJa 3NeKtpoNHTAHn
-
BcnoomorateIbHa pyKoRTka
- Khonka peryunpoBkn noJooKeHn pyKoAeTkn
- Wtahra
- MecTo xpaHEny 3anachOn KaTuKn C neckOu
- KpbuHka HDL
- 3aunTHbI KOxyx
- OtcekaTeIb pexyuee Ieckn
- Kopnyc kaTyuKn
- Pekyua necka
- HanpaBnaIooee koneco Ira noopaBnBaHna Kpomok
C6opka
BhImaHne!IpeH naJalom c6opKn y6eUntecb, YTO INCTpyMeHT BbIKJIuOyen OTCoeUHeH OT 3JIeKTPocetn.
YcTaHOBka 3aunTHoro kOxyxa (Pnc. A n B)
OTBNTHTe BHT (15) Ha 3aunTHOM KOKyxe (10).
YcTaHOBnte 3aUHTbI KoxyX (10) Ha HnHCTpyMeHT, KaK NOKa3aHO Ha PucyHKe.
Haxmte Ha 3aunTHbIKoKyxdoOuysaemOn
3aKpeNTE 3auNTbI KOxv BXHTOM.
3aTnHTe BnHT.
PYCCKNЯ3bIK
BHHMaHHe! NcNoJIb3yIte Ra3OHOKOcnJIky ToJIbKO C npaBnJIbHO yCTaHOBJIeHHbIM 3aUHTbIM KOKyXOM.
YcTaHOBka DOnOJIHnTeJbHoI pyKoAaTKu (Pnc.C)
Haxmnte u ydepknBaIte perynipOBOHyIO KhoNky (6), pacnoJoxeHHyIO Ha 6okOBoCtOpoHe OCHOBHOpyKoTKn.
HaBnHbTe DOnONHHTeNbHyIO pyKoTky (5) HaMeTo NOBepx peryInpOBOuHOH KHOJOKN (6).
BHHMaHHe! CJIeIInTe, YTO6bI 3y6uKN Ha KHOKe NOHOCbIO BOUIN B Na3bI Ha pyKoTKe. IpOBepbTe, YTO pyKoTka HAnEJHo 3aKpenNeHa.
PerynpoBka noJoxeHn DOONHHTeJbHou pyKoTKn (Pnc. D)
Дя obecneeyn onTumalbHoro 6anaHca n KOMΦopTa npn nCNoB3OBAHn, noLoXeHne BCNOMoRatEnbHry pykoTkn (5) moKHO OtperyLnpoBaTb.
Haxmte Ha perynpoBouHyo KhoNky (6) c neBoi CTOpOHbI pyKoTKn.
ΠOBePHNte DOnONHnTeJbHyO pyKoRrKy (5) BKeJaemoe NOnOKeHne.
OTnyctnte perynilnpoBoHyIO KhoNky (6).
BHHMaHHe! CJIeIInTe, YTO6bI 3y6uKN Ha KHOJKe NOHOCbIO BOUIN B Na3bI Ha pyKoTKe. IpOBepbTe, YTO pyKoTka HAnEgKHO 3aKpEnnHa.
PerynpoBaHne BbICOTbI HcTpymeHa (Pnc.E n F)
DaHbIn HcTpymeHT 6OpdyoBaH TeNeckOnnueCKM MExaHn3MOM, No3BOJnIOUm yCTaHaBnBaTb yO6HyIO dNra Bac BicOTy. PpeDycmTopeHO HeCKONbKO yCTaHOBOK BICOTbl. Inpa peryu npOBaHNA BBICOTbl NOcTynITE cneDyUOUM o6pa30M:
OTKpoTe 3axmHOn pbIar peryIpOBKn BblcoTb1 (16).
AkkypaTHOBdBUNHbTe NnN BblBbHbTe Wtahry (7)Ha jeJaemyo dInHy.
3aKpOte 3axmHOn pbUar peryIuPoBKn BblcoTb1 (16).
Pndrotobka pexyuee neckn
Pn noctabke pekyuaa necka npkpenneHa K Kopnyc KaTyuKN KneiKoN JeHToN.
YdaNITE KneKyHNeHTy, KOtOpO peKxUaJ necka npKpEnIeHa K KopNyc KaTyuKn (12).
XpaHHe He nCnoJb3yEmoK KaTyuKn (Pnc.G)
AnHHbI INHCTpyMeHT NMeET DBe CnCTeMbI Cka- WnBaHn:
AFS: ABTOMaTHecka NOdaa OOnHapHoJ NcCKn DJI KCAUINBaHHB JERKOM pexmE INoDpaBHbAHN KpOMOK.
HDL:CnCTemaDBOHOH CBepxnpoHNoJecknДЯO6pa6OTKn CnIshKOM 3apocuXyacTkoB.
PnmueyaHne:Katyka c HDL-Necko moXeT nCNoB3OBAtbcra TOnbKO bpeXmE cKaunBaHn. He nCNoB3yEma B daHHbi MOMENT CnCTema MoXeT coDePkaTbcra B MeCTe dJa XpaHeHna 3anachoi katuKn (ToIbKO GL8033 n GL9035).
CoBmecTnTe r3bUKN (17) Ha KpbIuKe KaTuWKn C BbIpe3aMn (18) B MeCte XpaHeHn 3anacHOI KaTuWKn (8).
HaandaBnte Ha KpbIkwky npnKmTe ee K MeCtY xpaHeHna, noka OHa He BCTaHET Ha CBOE MecTo.
IopKnIOueHHe HNCTpyMeHTa K3JeKtpoCeTn (Pnc.H)
BCTaBbTe WTeNcIbHyO po3eTkY noXoJaIeTo yDJIINHITeJIbHOro Ka6eJRA B CoeINHITeJIb-HbIy 3IeMeHT (4) CnIOBOr BOxOda ra3OHOKoCNIKN.
HapabBte ydInHHTeIbHbI Ka6eIbYepe3 Ka6eIbHbI 3aXIM (3).
BCTaBbTe BnIky yIINHHTeNbHoro ka6eBnB WTeNCeBHyIO po3ETy 3NeKtpocetN.
IINCKHIOUeHNcIyauHOro pa3beDInHeHN 1WTENCelbHO rpa3bema NOB03dEINCTBnEM pAC TAYBaHOJero yCNIIa, KaJbI pa3 nepeI NOKJIIOUeHEm 3JEKTPoHnCTpyMeHTa KWTencJIbHOI PO3eTKe CNEIte, YTO6bl yDNHHTeNbI bKn6bI npOXOIN Upe3 Ka6bHLbN3aXIM.
BhMaHHe! YdNInHnteHbHn Ka6eJb DoJxKeH 6bItb npirodeH nla 3KcNpyataun Ha OTKpbITOM BO3dyXe.
3Kcnpnyatauia
BHMaHne! He φορсύπητe paδούην προεcc. Μ36eraɪte neperpy3κι NHCTpymēnta.
HacTpoiKa ra3OHOKocNkHa cKaaUNBaHne Hn NOppaBHNBaHne KpOMok (Pnc.IuJ)
HaHHyOra30HOKocnky MoKHO nCNOJb30BaTb DnA CKaUNBaHNr TpaBbl, KaN oKA3aHo Ha Pnc. I, a TaKke dIy Cpe3aHn r TpaBbl BDoNb KpOMOkra3oHa N CBetOHybIX KJyM6, KaN oKA3aHo Ha Pnc. J.
PeknM ckaunBaHnA (Pnc.1)
Pn cKaaunBaHHrOIOBka raoHOKoNKn DOJXHa HaxoINTbcra B noIOxKeHH, noka3aHHOM Ha Pnc. I. Ecn 3To He TAK, NoCTynTe CneDyUoM o6pa30m:
OTKpoTe 3axmHOn pbIar perynpOBKn BblcoTbI (16).
NobepHnTe uTaHry (7) no yacobOc TpeJKe.
YcTaHOBnB rOIOBky rA3OHOKOCNIKN B HxKHOe NOIOXKeHne, 3aKpOte 3aXIMHOH pbIar peryNipOBKn BBICOTbl (16).
PnmeHne: 7aHra MoKeT NOBopauBaTbcr TOJIbKO B ONDHy CTOpOHy.
PnmeHne:Katyka c HDL-Necko MoKeT nCNoB3OBaTbCra TOnbKO BpeKmE CkaUWBHa.
Pekn m noDpaBnBaHnKpOMok (Pnc. J)
Pn nopaBbHbAHN KpOMOK rONOBKa r30HOKocNJKn DOJIKHa HaxOJNbC8 B NOJIOXeHN, NOka3AHHom Ha Pnc. J. Ecnn 3TO He TaK, NoCTyInTe cJeDyUoUm 6pa30m:
OTKpoTe 3axmHOn pbUar perynnpOBKn BblcoTbI (16).
Повернenteштану (7) npOTnB YacOBON CTpeJIKN.
YcTaHOBnB rOIOBky rAOHOKOCUNKn B HxKHOe NOIOXKeHne, 3aKpOte 3aXIMHOH pbIar peryNIpOBKn BBICOTbl (16).
PnmeHne: 1tahra MoKet noBopauBaTbcr TOJIbKO B ONDHy CTOpOHy.
BkIIOueHne N BbIKIOueHne
YTO6bl BKJIOUHTb HNCTpyMeH, HAKMITE Ha KnaBnuy NyCKOBORO BbIKIOUaTeTn (1).
YTO6bI BbIKHouHTb HcHCTpyMeHT, OTNcyCTnte KnaBnuy NyCKOBORo BBKJIIOUaTeTn.
BHHMaHHe! Hn B Koem Cnyuae He NbTaIaTeCb 3a-6JIOKIpOBaTb KnaBnUy NyckOBOr BO BKIIIOeHHOM NOIOXeHN!
PekomeHdaunnoonTmahlHomy nCNoJb3OBAHIO
06uine Tpe6oBaHn
ДяdoctnxkeHnHaunnyuwxpe3yIbTaTOB, cpe3aTeToIbKO cyxuyo TpaBy.
CkaunBaHne TpaBbI
Depknte HnctpyMeHT, KaK noka3aHo Ha Pnc. K.
Плавно Beinte ra3OHokocnky n3 CTopoHbI BCTOPOHy.
BbICOKyIO TpaBy CtpnIrTe NoCTeNEHHO, He6oJIbShIMN CNoAIMN, HauINHaR CBepxY. CtpnIrTe He6oJIbShIMN CNoAIMN.
I36eraTe KOHTaTaNHCTpyMeHTa CTBepdbIMN ppeDMeTaMn HxKbIMn paCTeHnAIM.
PnCtpnKTe TpaBbI BDOJI TpoTyapOB IN DpyRnx abpa3NBbIX NOBepxHocTeN, a TaKKe npCpe3AHIN COpHAKOB HA TOJcTBIX CTe6nX, peKyu7a JneCa 6bICTpee npNDET H HeroDHOCTb N Notpe6yETc8 Gonee Yactrae ee noDaay.
Ecnn HnctpymEnT Chn3nI Temn pa60tbl, yMeHbWnte Harpy3Ky.
IoppaBnBaHne kPOMOK
Hannyuchpe3ynbTaTbIOCTnraOTc npu BBICOT Kpomok 50 n6oJe MMnMMetpoB.
He nCnoB3yIe ra3OHOKocnKy dIraΦopMnPOBaHnHOBbIX KpOMOK. IaCo3dAHHNHOBBIX KpOMOK INcNoB3yIe CneuaJIbHO ppeHa3Ha-HeHHyIO TTOI nonATky.
Beinte ra3oHOKOcNIky,OnnpaCb Ha HnpaBnaHOooee KOJIeCO,KaK noka3aHo Ha Pnc.L.
YTO6bI cpe3aTb TpaBy KaK MOxHO 6JINXe K NOBepXHOCTN 3eMn, HEMHO HAKJIOHHTe HHCTpyMeHT.
YcTaHOBka HOBOI KaTyuIKn CpeKyuIe IeCKo (Pnc.MnN)
Hobbie KaTyuKn Cpexyuee necko Moxho npno6peCTyn BaWero dunepa Black & Decker (No 3aKa3a A6482).Takke moxho npno6peCTn KomnneKT n3 Tpex kaTyweC c necko (No dna 3aka3a A6486).
OTKIOUHTe HCTpyMeHrOT NCTOCHKA nHTaHH.
YdepknBaJ3bUKN(17)HaxaTbIM,CHMNTe KpbIuKy (21)c Kopnyca KaTyuKn (12)(Pnc.M).
3BneKeTe ncyTo KaTykUy (22) n3 KpbIuKn.
UdAnIte BCIO rpa3b n 6pe3Kn TpaBbIC KpbIkwK kAtywnnNn3 Kopnyca.
KoHcEByu qacTb pexyueJeckn HappaBbTe B npoyunHy (23) (Pnc. M). Jecka doJxHa BblCTynatb n3 KpbIuKn npin6n3nte bHo Ha 11 cm.
PnmeaHne: CneiTe, YTo6bI neCKa He pa3MoTanaC KaTuKKn.ДЯ 3TOrO BCE BpEmr NnotHO npndepkBaIte Necky pyKo.
HaeneHbTe HOByo KaTykU Ha cTepeXeHb KpbIuKn. CnerKa nobepHnte kaTykU, do ouyuaemOuKcaun.
CoBmecTnTe Ra3bUKN (17) Ha KpbIuKe KaTuWKn C BbIpe3aMn (24) B Kopnyce (12).
Haadabnte Ha KpbIkwky npnxMnTe ee K KopnyCy, noka OHa He BCTaHc HcBOE MeCTO.
BHHMaHHe! EcIn peKyuzaJ neCa BbICTynaet 3a otCeKaTeJIb (11), o6peKbTe neCKy, yTo6bl OHa doXOdIna TOnbKO Do OTceKaTeJIa.
YcTaHOBka HOBOrO MOTKa CBepxnpoHOn peKyuSei neckn (Pnc. O n P)
Ha6obpI n3 DecaT MOTKOB CBepxnpoHou peKyu ueckno pnoobpectny Baewero dInepa Black & Decker (NdJa 3aka3a A6489).YTo6bI yCTaHOBNTb HObIM MOTOK NeCK, JeHCTBynte cNeNyUcM O6pa3OM:
OTKIOHTe HCTpyMeHrOT NCTOCHKA HnTaHH.
YdepknBaJ3bUKN(17)HaxaTbIMN,CHMnTe HDL-KpbIuKy (9)c Kopnyca KaTyuKn (12).
YdaJIte BcIO rpa3b n o6pe3Kn TpaBbl c HDL-KpbIuKN (9) n n3 Kopnyca.
13BneKeNTe n3 HDL- · pbluKN (9) nCNoIb3OBaH-HbIMOTOKNECKN.
PYCCKNЯ3bIK
Πponyctnte KOHcbl HOBOro MoTKa Jeckn (20) Ype3 npoyuHHbI (27), pacnoJIOxKeHHbIe no o6eIM cTOpOHAM HDL-KpbUKN.
Pacnoonoknte ueHtpaBHyu Btynky (28) TaKIM o6pa30M, kakn3o6paxeHo Ha Pnc. P.
YctaHOBtE Ha MeCTo HDL-KpbIiKy.
BHHMaHHe! NcnoJb3yIe ToIbko OpnHaJIbHyOpexKyUIO necky Black & Decker.
Bo3moXhble HencnpaBHOCTn n cno6bI nx yctpaHenna
B cnyuae Bo3HKnHOBeHn HapyuHn B pa6oTe HNCTpyMeHTa, BbINOHNrTe npNBeEHbIe HNxKe yKa3AHn. Ecnn HeNCnPabHocTb CBOIMn CnJAmn YcTpaHnTb He ydAcTcR, ObpaNTecb B aBTOpN3O-BaHHb cepBnChb IeHTp Black & Decker.
BHHMaHHe! PpeKdE Yem npnCTyNTb K yctpaHeHNHO HEnCnpaBHOCTe,OTKnHOHTe INHCTpyMeHT OT NCTOCHKA NITAHN.
Ta30Hokocnka pa6oTaet MeJneHNO
Y6eIntecb, yTo KOpNyc KaTyuKn Bpaaetcra Cbo6oJHo. Ppr Heo6xoJIMocTn TuaTeJbHo erO ouHCTne.
Y6eIntecb, yTo dInHa BbvCTynaIOuSei n3 Kopnyca KaTywKn pexyuei neckn He npebblwaet 11 cm. Ppi Heo6xOaMocTn o6peXbTe ee, yTo6bl OHa DoxoDnla ToNbKO do OTceKaTeJ.
He pa6oTaet aBtOMaTnuecka noDaHa peKyu- neckn
YdepknBaJ3bUKNHaXaTbIMN,CHMNTe KpbIkwC Kopnyca KaTywKn.
BbIaHnTe pexyuyo necy Ha 11 cm n3 Kopnyca kaTyuKn. Ecnn pexyue neckn Ha kaTyuKe HeIOCTaTOUHO, BcTaBBte HOByu KaTyuKy C JeCKO, KAK ONiCAHO Bblwe.
CoBmecTnTe Ra3bUKN KpbIuKN KaTyUKN C Bblpe3amN Bkopnyce.
HaIaBnTe Ha KpbIuKy n npJxMnTE ee K KopnyCy, noka OHa He BCTaHc HcBOe MeCTO.
Ecnn pekuyaa Jncka Bbictynaet 3a OTeKaTeNb, opekte Necky, YTo6bl OHa DoxoDnna TOnbko Do OTceKaTeJI.
Ecnn aBToMaTnuecka noDaaypejxuei neckn BCE Je He npOn3BOJNTcN nn 3aklnHIO KaTyuKy, nonpo6yIte NoCTynITb cJeDyUoIm o6pa30m:
TuaTeIbHO OuHCTnTe KpbIuKy I Kopnyc KaTyuKn.
13BnEKeNTe KaTyuKy, n npOBepbTe, MoKet nn CBO6oDnHO Dnuratbcra pbVa.
3BnkeKe KaTyuKy npa3MoTaIe peKyuNo necky; 3aTeM cHOBA aKKypaTHo HAMotaIe necky, kak 6blIO ONuCAHO Bblwe. YcTaHOBtE KaTyuKy Ha CBOE MeCTO, kak ONuCAHO Bblwe.
3aunTa OkpykaOuSei cpebl

Pa3dJIbHbIc6Op.JaHHoe n3dJIe HeJIb- 3y yTnJIN3npoBaTb BmEcTe C o6blHbIMN 6blTOBbIMN OTXODAMN.
Ecnn OndhkbBb 3axoTne 3ameHntb Baw 3neKtponHcTpyment Black & Decker nn Bbl 60nbwe B hem He HyxdaeTecb, He Bbl6paCbBaNte erO BmecTe C 6blTObIMN OTxOaMn. OTheCtne n3- dJIeBnBnBn npmeMHn nyHKT.

Pa3dIbHbI c6Op n3dEnn C nCTeKuHM CpOKOM cnyk6bl nIX ynaKOBOK n03BOJAreT nyckaTb nx B nepepa6OTky N nobTOpho nCnoB3OBaTb. NcNoB3ObaHne nepepa6OtaHHbIX MaTePnaIOB NOMaER 3aun- uatb OkpykaIOU cyPeDy OT 3aarp3HeHn I CHNkaeT pAcXOD cbIpBeBbIX MaTePnaIOB.
Mecthoe 3aKoHOdaTeNbCTBO MOxET ObecneuHb C6op CTapbIX 3NeKtpnuecknx PpOdyKTOB OTDeJIbHO OT 6bITOBORo MyCopa Ha MyHUnnaJbHbIX CBaNkax OTXODOB, INI Bbl Moxete CdaBaT bX B TopROBOM PpeDnPnATn Pn NOKyNke HOBOr n3dEJIIN.
ΦnnpMa Black & Decker obecneuBaet npneM n nepepa60ky oTcnykBwix cBoi cPoK u3denni Black & Decker. YTo6bl BocnoJb3oBaTbc8 3Toy ycnyro, Bb moKeTe cdaTb BaWe u3dJeNe B IIO-6oB aBTOpH3OBAHHbI cepBnCHbI ueHTp, KOTOpbI co6npaet nx no haWemy npuyehnio.
BbMoKeTe y3HaTb MeTo haxOxKeHnBaWero 6bnXaIWeRo ABTopn3OBaHHoro cepBnCHoro ceHTpa,obpaTHBwncb B BaW MeCThbl OΦNC Black & Decker no aDpeCy,yka3aHHomy B daHHompykoBoDCTBe no 3KcnnyatauN. Kpome TOrO, cnCOK ABTopn3OBaHHbIX cepBnChbIX cEHTPOB Black & Decker n nonHyIO INHcpMaunO hAWeM noclenpoJdXHom 0cCnyXnBAHN N KOHTaTKax Bbl MoKeTe HaHTB b HHTepHete No aDpeCy: www.2helpU.com.
TexHnueckne xapaKTepeNCTnKn
YPOBHe b AkyCTnueCKo MOuHOCrN, n3MepeHHbI B COOTBeTcTBn C 2000/14/EC
(CTaTb12, PpInoJxHeHne III, L ≤ 50 cm):
LwA (n3mpeHHa akyctnuecka MoHoctb) 94 nB(A)
IorpeuHocTb (K) = 2 D E(A)
LwA (rapaHTnpoBaHHa akyCTnuecka MoHocTb) 96 dB(A)
PorpeuHocTb (K) = 2 dE(A)
ДанныnpодуктыТakжecoOTBeTcTByIOTДиpeKTNbAm2004/108/ECn2011/65/EU.
3a donoHnHtBHOH nHΦopMauné ObpaaTecb B Black & Decker no yka3aHHOMy Hxke aDpeCy IINno aDpeCy, yka3aHHOMy Ha NocJeHne CtpaHnue pykoBOcTBa. HxkeNoDnncABWeecr IInO NOHOCbTO OTBeUaET 3a COOTBECTBNE TEXHnueCKNX daHHbIX nDeJaET 3TO 3aRbHeHne OT IMeHN φnpMbI Black & Decker.

KebuH XbHouTT (Kevin Hewitt)
Bnue-npe3nndent Otdena
MnpoBoro npoeKtnpoBaHna
Black & Decker Europe,
210 Bath Road, Slough,
Berkshire, SL1 3YD
United Kingdom
17-10-2012
PYCCKN J3bIK
БЛЗК энд ДЕКKEP
rapaHTnHbIe ycIOBnA
YbKaembni nokynateJIb!
- Πο3ДравлЯмВасnoskyновБысоко-kaчecтBEHHORnI3dENyB LACK&DECKER n BbIpaKaemPnI3HaTeNbHocTb 3a BaW bI6Op.
1.1. Hadejha pa6oTa daHHoro n3denra B teueHne BCero cpoKa 3KcNlyatauun - npEmet ocoboi 3a60tbi Haux CepBnchbix Cnyk6. B cnyae BO3HnKHOBEHnRA KAKX-JI6o npOBeM B npOceCE 3KcNlyatauun n3deJnpeKOMeHdyem Bam o6paatbcra ToIbKO aBTOpn3OBaHHbIe cepBnchbIe opraHn3aun, aDpeca n TeJefoHbI KOToPbIX Bbl CMOKeTe HaHTB R fapaHTNHOM TaIOHe IIN y3HaTb B MaarAnHe.
Haun cepBnchbIe CTaHcun -3TO He TOnbKO KBaINΦNcIPOBaHHbI peMOHT, HO INuPOKN BblOp 3anacte n npHaJdJeXHOCTe.
1.2. Pn nokynke n3dennr Tpe6ynte npoBepkn erO KOMnIeKTHocTn NcnpaBHOCTN B Baem npcyTCTBn, HcTpyKUHNO NO 3KcNpIyatauNNn 3anONHeHHbIgapAHTnHbI TaON Ha PyCCKOM 3bIke. Pn OTCyTCTBn y Bac npabUNbHO 3anONHeHHORo TapaHTnHORo TanoHa Mbl 6ydem BblHyJKeHbOTKnOHnTB Baun npTeH3nn no KaueCTBy DAHHORO n3dEINR.
1.3.Bo n36eKaHne HeOpa3yMeHn y6eHnteBHO npocm Bac nepeH hauanom pa60tbc H3dennEM BHIMATEbHO O3HaKOMITbCc HcTpyKUneI NO erO 3KcNpyataun.
1.4. 06paaaem BaIe BHMaHne Ha NCKJIOHTeJIbHO 6bITOBoe Ha3NaueHne DaHHoro I3dennr.
2. IpaBOOIOCHOBOHACTOUHX rapaHTMHbIX ycIOBn YBnRETCJeCTByUoCee 3aKoHOdaTeIbCTBO N, BuaCTHOCTN, 3aKOH"O 3aunTe npab notpe6nteJ".
3. TapaANTnHbI cPOK Ha DaHHe n3dEIne coCTaBnIeT 24 Mecau HncnCnIeTCo DnH npOdaXn Upe3 Po3HnHyIO TopROByIO CeTB. B Cnyae yctpaHEnHa HeIOCTaTKOB n3dEIna, rapaHTnHbI cPOK npOdaNeBaETc Ha nepNoID, B TeueHne KOTOPOr OHO He NcNOb3OBAJOCb.
4. Cpok cnykbni3dienra-5 let (MHHmAlbHbI, ycTaHOBJIeHHbI B COOTBeTCTBUN C 3aKOHOM "O 3aunTe npab nOtpe6ntene").
5. Hau n rapaHTnHbIe 063aTeNbCTBa pacnpocTpaHryOTc TOnbKO Ha HeNCnPABHOCtN, BByBHeHHbIe B TeueHne rapaHTnHOrO Cpoka N ObyCNoBHeHHbIe npOn3BOdCTBeHHbIMn N KOHCTpyKTNBbIMn PaKTopAMn.
6. RaapntnHbIe 06aTeJIbCTBa He pacnpoctpaHOTc:
6.1. Ha HencnpabHocTn n3denn, Bo3HnKwne B pe3yIbTaTe:
6.1.1.HecobnOeHn noIb30BaTeEm npedncaHn HNCTpyKmN NO 3KcnnyatauN n3deJnA.
6.1.2.MexaHueckoro noBpeKDeHnA, Bb3BaHHOro BHeuHM yDapHbIM IINI JIO6bIM INHbIM BO3dEYCTBnEM.
6.1.3.Испоьзовиниинденивпрфесноаньнх龟яи nобъжax,В кOMМерчecknx龟яx。
6.1.4. Ппимененииндалий He no Ha3haeHHIO.
6.1.5.CtuxnHoro 6eDCTBna
6.1.6.He6naropnraTbIX atMoccepehBIX INHbIX BHeuHX BO3deIcTBn Ha n3dene, TaKNX KaKdoXb,CHER,NOBbiueHHaBlaXHOCTb, HarpeB, arpeccNBhie Cpebl, HeCOOTBetCTBne npapaMeTPOB NITaIOe 3JNEKTpocETn yka3aHHbIM Ha IHCTpymeme.
6.1.7. NcnoIb3OBAHn npHaJnxKHOCTe, paXoHbIX MaTePnaIOB n 3aNpacte, He peKOMeHDoBaHHbIX INn He Odo6peHHbIX pOn3BQdntEnem.
6.1.8. Проннковая BHTьн Здени noctopоннixпразmetов, HacekombIX, MATEPNANOBИNBESECTB, HeЯBLIQUxXcR OTXOdAMn,COPOBOKDAIOUIMMnpIMeHHeNeNoHa3NaueHNO,TaKIMNAK CTpykKaONJIKN INp..
6.2.Ha HnHcTpymEnbI, noBepraBwnec BCKpbTnIO, peMOHTy INN MoINΦnKaunn BHe yNOJHOMOeHHoCepBnCHO CTAHUN.
6.3.Ha npinaJnepHocTn,3anpactn,BbIeJUne n3 cTpor BCJIeDCTBHe HOpMaJIbHOrO n3HOca, npacxoHbIe MaTePnaJIbI, TaKne KaK npINBOHbIe peMHN,yroJIbHbIe 电ETKn,AKKyMnyTOpHbIe 6aTapeN,HOxN,NNIKN,abpa3uNBbl,NIIbHbIe DNCKN,CBepNa,6ypbl nT.I..
6.4.Ha HeicnpabHocTN, Bo3HNKwne B pe3yIbTaTe nepeerpy3KN HnCTpyMeHTA, NOBNeKwE BbIXoN I3 CTPO8 3NEKTPoDBuratEnr Nnn DpyRnx y3IOB n Detanee.K 6e3ycNoBhIM np3HaKaM nepERpy3KN 3dENrOTHOCATcR, NOMMO npOHyX: NOABLeHne UBeTob NO6ExaJIoCTN, DeOpMaunr INn ONJaBHeHne DetaneRn y3NOB n3dEnrna, NOTEmHeHne INn O6yrlBaHne IN0JraCIN npOBoDOb 3IEKTPoDBuratEnr NOD BO3DeIcTBnEM BblCOKO TemNepaTypbl.

ME77

007
B3K 3Hd DeKeep FM6x B3K 3Hd DeKeep Utpacce,40 65510 NduTain,RepeMaHH
06naCTb 3acTocyBaHHa
Bawtpmep Bnpo6nTuBA KomnaHII Black & Decker 6yb po3p06JIeHn IJy NiDiPI3aHHra Ta HadaHHKpacnBOrO BuIy BaWOMy rAOHy Ta IJy o6pi3aHHr TpaBN Ha BaxKOocTyNHx DiJHkax. LcInCTpyMeNT np3HaueHn Nlle DnA no6yTOBOro BVKOpNCtAHH.
IHCtpyku3 TeXhik6e3neKu
NonepexeHn!Pn BnKOpncTaHHI npncTpoIB 3XNBHeHnM BiD eNeKtpnuHoi MepeXi Heo6xIdHO DToPMyBaTncb OCHOBHX 3axOrib 6e3neKN, BKIOuOHy nactynHi, 063Hn3NTn pN3NK BnHNKHeHnnoXei, ypaXeHH eNeKtpnuHm CtpymOM, TpaBM Ta MaTepiAnbHex ukoKdoXeHb.
NonepexeH!Pn BkOpncTahHi npncTpOHeo6xidHO doTpmyBaTncb npabIn Texhikn 6e3neKn. Npeed BkOpncTahHm MaunH npouHTaTe ci IHcpykuII dnn BnacHOi 6e3neKn Ta IJn 6e3neKn IIOdei, kI 3NaXoJaTBcN oPraD. Byd naCka 36epiraTe IHcpykuB 6e3neHOMy Micu IJN BkOpncTahH B Ma6yTHbOMy.
Ipeepo60ToIO 3 npncTpoem yBaXHo npOHTaIte ue kepiBnUcTBO.
BukopncTahnHa 3a npn3haeHHm onucaHe Bcbomy KepiBHNCTbi. BukopncTahnHa 6ydb-aknx akcecyapib qn DoqatKOBnx IHcTpymeHTIB, a6o BnuKoHaHnO npaui 3 np6Opom, HeonncAHnx Bcbomy KepiBHNCTBI, MoKe npn3BeCTn Do oco6nCTNX TpaBM.
36epiraTe ue KepiBnUcTBO dIa OTpMaHHH iHOpMaui B noaJIbWOMy.
BukopncTAnHn npucptpo
Bydbte ybaekhi npn Bnkopnctahnn npnctpo.
3aBKnBuKOpncToByTe 3axnChi OkyIpyn.
Hikon He Do3BOnrTe dtam Ta oO6am, aKi He 3HaOTb BCix IHcTpyKciu, BnKOpncTOByBaTu eN npucpti.
He do3B0JnTe dIaM a6o TBapuHaH nixOuTN do po6oOoi 3OH Ta TOPKaTuCA npucTpoIB a6o eJeKtpuHx uHypib.
Heo6xidHn peTeIbHn HargJ, KOJI npucpti BUKOPNCOTOBVETcB 6iJa dTei.
LcH npCtpi He npu3HaueHm IJRA BnKOpncTAHH MOnOUMn Ta XBOPUMN JIOdbMn 6e3 HArJaDy.
LcH npucpi HcMOxHa BnKOpncTOByBaNTBRAKOCTIirpaWK.
BukopncToBynte cen npncptpi Jnne BdeHb a6o 3a yMOBNXopoWORO wTyHORO oCBiTJeHHra.
BnKOpncToBynte nIse B cyxomy micci. He Do3BOJnTe, 06 npncptpi 6yB BOJOrm.
He 3aHypoiTe npucTpiy y Body.
He BiKpnBaIe Kopnyc. BcepeHni BiCyTHi DeTani, kI KOpNCTyBaM MoKe 06CnyroByBaTu camOCTiHIO.
He BnKopncToBynte ue npncTpiy Bn6bxyOhe63neuHx yMObax, HapnKJaD, B npcyTHoCTi neRko3aMnCTnx pIDNH, razib a60 nny.
3Hn3HTn pN3NK NOWKoJxEHn BUNOK Ta Whypib, HIKON He TargHtB 3a Ka6eJb, 06 BN- TAYHyTN BUNKy 3 PO3ETKn.
Be3neKa cTOpOHHX IIODeI
LcHpymHe np3Haehn Iy BnKOpCTaHHO Oo6amn (BKnHouaOuN dTei) i3 3HNxEHMM F3NCHMM, CEHCOPHMn a0o po- 3ymOBIMMOJINBOCTMn, aTAKoX Oo6amn, RkI He MaOTb DOCBIDy Ta 3HaHb, 3a BNHTKOM BnnaKIB, KOJI BOH NpaioHO TB NiHarJIAOM a0o OTPMaII BiNDIOHl IHCTpyKci II Odo BnKOpCTaHHn PnCtpoIO BID OCO6n, BiINO-BidaJbHOi 3a 6e3neky.
DITN NOBHHI 3HaxoHTncb NiKoHTpoEm, 06 rapaHTyBaTn, 00 BOHN He 6ydyTb rpaTn 3 npCTpoem.
PpnnnHtB BnKOpncTaHHn npncTPO, KOHn no-pa3haxoJrbcn HwI JIOu, OcO6nBO dITN.
3aIIuIkoBipn3nKn.
Pn BnKOpNCTaHHI IHCTpyMeHTy MOKyTB BuHnKHyTNdoatKOBI 3aIIuKOBi pN3IKN, kI MOKyTB 6ytN HeBHeceHi Do nOpeJxKeHb 0oTo TexHkN 6e3neKnCboro KepiBnTBA. Li pn3KN MoKyTB BuHnKHyTNk pe3yIbTaT He npabunbHoro BnKOpNCTaHHa, TpNBALORo BnKOpNCTaHHa, ToIO.
He3BaXaOuH Na BnKoHaHHBcix BiNobiDnHex npabunTexhikn 6e3neKn Ta BnKOpncTahHn npnCTpoIB 6e3neKn, HEMOXINBO yHnKHyTN DeKnx 3aIIuKOBHX pN3NKIB.COHN HAnEkaTb:
TpabMn uepe3 KOHTaKT 3 DeTaNJaMn, IIO pyxaHOTbCra/O6eptaHOTbcra.
TpaBMn npn 3amHl deTaJeN, ne3 a6o akcecy apiB.
TpaBMnuepe33aHaTo TpNBaNe BnKOpncTaHnIHCTpymEnTy. Pn BnKOpncTaHHi 6yNb-koHO IHCTpymEnTy npOTARom TpNBaIoro nepioDy yacy He 3a6yBaIe TopeoBtu peryJnphi nepePBn.
UkoJKeHHcnyx.
He6e3neKaIJIa 3IOPOB'Yepe3 BAnxAHNnIy, yO yTBOpHcBc npn BNKOpNCaHHi INCTpyMeHTy (HanpNKJa, npnpo6Ot 3 DepeBOM, oO6nBO 3 dy6om, 6pe30o Ta DBI).
NicjBnKOpncTaHH
KoNn npncpi He BnKOpncTobyEcBc, noTo Heo6xio 36epiratn B cyxomy, do6pe npoiTpBOAHOMy Ta HeDOCTynHomy dIaTei Micu.
yKPAIHcBKA
DiTAM 3a6bOpOHReTbcra Matn Doctyn Do npnCTpoIO B Micci 36epirahHH.
RaKuo npucpii 36epiraeTbca a6o TpaHcnpTy- eTbcB aBTOMo6ini, Noro Heo6xidno nomictnB 6araXnK a6o 3aΦikCyBaTn, Uo6 yHnKHytn pyxibuepe3 panTObi 3mHn WbNdkocti a6o Ha-npymky.
IpebeBipka Ta peMOHT
BiiKlouitb npucpii BiMpexi KINBneHHn peepi nepeBipkoO, ouuieHHaM a6o po6oto3 Hm, a TAKOX KOI npucpii He BUKOpncTOByETbcra.
IpepeBnKOpNCtAHHm npeBipTe npucTpiHa HaraBHicTB noWKoDxKeHnx Detanei. IpeBipTe He haraBHicTB noWKoDxKeHnx Detanei Ta iHux yMOB, 10 MOKyTB BnNHyTu Ha po6Oty.
He BnKOpncToByTe npncTpi, kkuo BnBnEHO nowkoDkeHHa6o depeKTn kOicb Detani.
NowkoJxHei a6o depeKTHi Detani Heo6xHOB BiDpemOHyBaTu a6o 3amHHTn, 3BepHyBunCb Do aBTOpu3ObaHO ueHTpy 3 pEmOHTy.
HikoJn He HamaraTecb 3Himatn a6o 3amHOBaTn DeTani, 3a BnHrTKOM TUX, 10 BkA3aHi B cBOMy KepiBnUcTBI.
BnKopncTaHnnoDobKyuOyoro shypa
3aBxDn BnKOpNCToByIte peKomeHDoBaHnNoDobKyOHy nHyp, 0o BiNIOBIAe BxIHHi NOTyXHOCTi npictpo (dHB. TexhiH i daHI). NodBxyOuyn shyprnoBHe nIXoHTn dny BnKOpNCtAHHa ByuNci Ta NOBHe H MaTH BIDNOIBHe MapkyBaHH. Do 30 M noDobKyOyo OShypa 3 nloueio nepetHy 1,5 MM2 HO5VV-F MoXHa BnKOpNCTOByBaTH 6e3BtpaTn npOdyKTNBHOCTi pObOt BnPo6y. Ipeed BnKOpNCtaHHm OrJnHbTe Ka6eNb Ha O3HKn NoWkoJKeHH, 3HOCy Ta CTapIHH. 3amHt b Ka6eNb, RaHcBn oNt KOnKOJKeHH a60 Ma e Kicb DepeKeTN. PnBnKOpNCtAHHi Ka6eNbHoro 6apa6aHy 3abKn BuTaryIte BeCb Ka6eNb.
Iodatkobi iHCTpykuii 3Texhikn 6e3neKn dJa MOTOKocapkn
NonepeJxehn! Pixyie enemeHTn npoOBxuytbo6epTaTcnc nCnBmKHeHH MoTopy.
O3HaHOMTecbB npaBnAmyynpaBlinHH Ta BiIOBIDHO BUKOpNCtAHN npncToIO.
Ipeed BnKOpNCtAHnM OrlIhBte Ka6JIb XnBHeHH Ta NODOBKyUOHy nHyp Ha 03Ha- KN NOnKoDKeHH, 3Hocy Ta cTapINH. RaIO shypr NOnKoDxyETbc Ni d Yac BnKOpNCtAHnH, HeraiHO Bi'EdNaHTe NOro BiEneKTpomepXi. HE TOPKAInTECb lHUPA, DOKN BIH HE BIDcHNHBI ENEKTPOMEPEXI.
He BnKOpncTOByNe npncTpi, JaKIO noRo Ka6eni nowkoJxehi a6o 3HoWeHi.
Пиберпь міцHe Heслньke B3yTTЯДЯ 3a-xuctу Hr.
BdraTe doBri wTaHn, 063axnCTnHorn.
NpeeBnKOpNCTaHHm npicTpO npeBipTe, 0o NiHia BaWoRo po3pi3y BInbHa BiD npTyIB, KaMHHra, npOBoKn Ta iHwix nepewkoJ.
Bukopctobyte cen npictpi Jnwe y BepTkaIbHomy noJoxeHHi TaK, 06 pixyabONocih 6yna HeJaNEKO BiD 3emni. Hikon HeBMkainTe IHCTpymeHT B IHOWMy noJoxeHHI.
Пи Викорисанни пистою pyхайтесь NOBIbHO. Nam'Ятын'te, со ckошеHa Трава BOJORA ta слИЗьka.
He npaioTe, cToaHnHa haxuHeni NobepxHi. PyxaTeCb no cxiny nonepeK, a He Bropy a6o BHn3.
HikoJn He nepexoBte rpaBiEbi dopixkN Ta Ioporu 3 yBIMKHeHm npucTpoem.
Hikon He TopkaTecb pKyuOi BOnocHi, KON iHCTpyMeHT yBIMKHeHn.
Hikon He knaiItb iHcTpMeHT,doKPiKyuN enemENT NOBHCIO He 3yUnHHTbcra.
BukopncObyTe Inue BiINOBiHN TnpiKyuOoi BONocHI.3a6oPOnHReTbcraBukOpncObyBaTn MetaJIeBy Ta pnbacky BONOCIb.
Hikon He TopkaTecb Je3a niDiPi3Horo HoXa.
3BepHbYbaryHaTe,06Ka6eJIb 3HaXoINBCaHa 6e3neuHi BicTaHi BiD pixyUoro enemEnTy. CTeKTe 3a noJoxeHHam Ka6eIIO npu po6Oti.
TpumaiTe pykTu HOrn noJani BiD pixyoi BoNocini, oco6nBO npu BBIMKHeHHi IHcTpymentI.
Npeed BnKOpncTahHnmpntpoTa nicna 6ydb-akoi p0bOt 3 HmnpeBipnTe npnctpiHa O3hKn 3Hocy a6o NowkOJxehn Ta BnKOHyIte pemOH 3a Heo6XiHocti.
HikoJIN He BnKOpNCTOByIte IHCTpyMeHT i3 no- WKOJKeHIMN 3aNo6IXHKnKAMn a60 6e3 HNX.
BybTe o6epeKHi, 06 He nooKoDnTcB JaMocb npucTpoE M, BCTaHOBHeHIM dIyPi3Kn DOBXHN pIXyOi BOnciHi. IicnBaTpyBaHH HOBoi pIXyOi BOnciHi 3aBXdN NOBepTaIte npncTpi y HopMaJIbHe pOboe NoIOXeHHa NepeD yBIMKHeHHm Ioro.
CTeKTe 3a TmM,IO BENTnIaI Hi OTBOpN 6ynn NCTmN.
He BnKopncToByIe TpMep dIra3oHIB (TpInmep IJIa 6Opo6Kn KpaIO ra3oHy), RaIIO shHy pOnkOdkJeHn a60 3HOWeHn.
YtpmyTe nooOBxuyuHn HHypi noaI BiD pixyuX enemEnTIB.
MapkyBaHHa npncTpoi
Ha iHCTpymEnTI e HAcTynHi nonepaYBaIbHI CnMBOJI:

IpounTaune iinctpykui neped BnKOpnc-TaHHM.

BukopncToByTe 3axnchi okynap npnpo60ti 3 IHCTpymENTom.

PnBukOpncTaHHI npntpoB uKOpncToByTe 3ac06n 3axncty opraHb cnxy.

3aBKn BnTgAute BnKky 3 po3eTk npeo orJyOM noKoDxeHoro Ka6enIO. He BNkOpNCTOByTe TpIMep, kUO ka6enb NOKKoDKeHNI.

BepexitbcjneTounx 6'ekTiB. TpmaTe cToPOHHix nOdei noaJI biD pIXyooI NOBepxHi.

He 3aIiwaIte iHCTpymeHT iDdoUeEM Ta B yMOBax iIDBnueHOI BOJorOCTi.

BДиpeKtBi 2000/14/EC Bka3aHa rapaHTOBaHa 3ByKOb aNotyHicTb.
EnektpnHa 6e3neka

LeynpctpiMaeNoDbinyi30nayio;Tomy 3a3emneHHe He Heo6xihm.3abknd nepebipraTe,zoJxepeno KINBneHHa BIDNOBIaE Hanpy3i,ka Bka3aHa Ha Ta6nuci 3 nacnopTHMn DaHMM.
YKuo shyup XnBHeHH noxKOJKeHn, Ioro Heo6XiDHO 3amHHTu BnpO6Hnka a6o B ophiunHomCy cepbichOMy cHTpi KOMnaHI Black & Decker dny HnKHeHH He6e3neKn.
Pibenb eJneKtpnHoi 6e3neKn MoXHa TaKoN iDnBnHTn, BnKOpncTOByOuyn BnCOKOuyTnNBn npncptpi 3aNNkoBOrO cTpyM (RCD) 30 mA.
Dertani
Cen npicpi Mae Bci a6o deaKi 3 Hxue nepepaxOBAHx Detanei.
- Bumukau
- Puyka
- Φικατορ καδεηθ
4.Bxid enektpoknBneHHa
5.ДодаТКОВа ручka - Khonka HanaWtYBaHHa
- Tpy6ka
- Bicik dna 36epiraHHa 3anachoi kotyukn
-
Kpnska HDL
-
3axinchnoKoKoyx
11.Пдірізнінініk - Kopnyc dny KoTywn
- Pikyuва Волocиь
- Koneco dIa o6p6kn kpaio
36npaHH
NonepexeHH! Pep36ipkoInepeKoHaTeC, 10 iHCTpyMeHT BmKHeHO Ta BNkA BnTgHyTa 3 pO3ETKn.
BcTaHOBJIeHHaXnCHOro Koxyxa (MaI.AiB)
3HIMITb rBnHT (15) i3 3axuchooro koxyxy (10).
Po3a7yIte 3axnchn koxyx (10) Ha iHctpymenti, kN NOKa3aHO.
Μόbpe Hαπchɪt b Ha 3axnchɪ Koxy, DOKn BīH He BCTaHe Ha Micue.
3akpinitb 3axnchn koxyx 3a donomoroo rBuHTa.
3aTHiB rBuHT.
Nonepdxhen! He BnKOpncTOByIe iHCTpyMeHT, kUO 3axuChN KOxYBCTaHOHe npabunbHo.
BcTaHOBJIeHHIdoaTKOBoI pyuKn (MaI.C)
HaTnCHiB Ta yTpmyIe KhoNky HanaaHTyBaHn (6) 3 06ox 6okib pyKn.
BcTaHOBIb IOnaTkoBy pyky (5)HaMiche HKnONkAMn HaNaHTyBaHHa (6).
NonepexeHn! NpekoHaTecra, 0o 3y6ui Ha Khoi npabunbHO BupBHHI BiNOBiHO Do na3IB pyuK i opo yka HaiHIO 3aΦikCoBaHa.
HaJauStyBaHHNoIOXeHHaOaTkoBoi pyuKn (MaN.D)
IodatkoBa pyka (5) HanaWToBYeTbCn 3a6e3neueHHOnTmAmNbHOro 6aJHaCy Ta KOMΦopTy.
Hatncitb ha KhoNky HanaWtyBaHHa (6) HaJIiBii cTOpOH pyKn.
NObepHItb npry pyky (5) y Heo6xIDhe noJIOXKeHHa.
BiDnyctiB KHONky HanaawTybaHHa (6).
NonepexeHn! NpekoHaTecs, 0o 3y6ci Ha Khoi npabunbHO BupBHNi BiNOBiHO Do na3IB pyKn i opo yka HaiHIO 3aΦikCoBaHa.
HanaatyBaHHBnCOTn iHcTpymEnTy (MaI.EiF)
LcienhctpymEnOchaueHnTeleckoniuHmMeXaHI3MOM,KnIO3BOJNAeBCTaHOBNTKOMΦOpTHy DOBXNHy pyKn. DocTyHi pi3Hi 3HaueHHBUCOTN.
HanaTByBn BucOTy IHCTpyMeHTy, BkoHaTe HAcTyNHi II:
yKPAIHcBKA
BiDnyctitb ikcatop HanaaTuBaHHB BnCOTn (16).
O6epexHNO notTHiB Tpy6ky (7) Bn3 a60 BBepx, BCTaHOBBuN 6axaHy Bucoty.
3akpniTe pfikcatop HanaWtYBaHHB BucOTn (16).
Pirotobka pixyoi BOJocini do po6oTH
PtpaHcnpOpTyBaHHi pixyua BONocInb npNKneEHa do Kopnycy KOTyUKN.
3HIMITb KneIky cTpiKy, yTpmyOuyn pIXyUy BOJocIHb Ha Kopnyci KotyUKN (12).
36epirahnKaToyukn, 0He BnKOpNCTOBYcTBcra (MaI.G)
IhctpymEnT OCHaueHo DbOMa pIXyUIMN CnCTeMaMn:
AFS: ABTomatuHa noa a Ondiei BOnocini InI ndtpraHH Ta BnpBHOBAHH KpaIO ra3OHy.
HDL: Notyxkha cncTeMa niDcptpuraHH TaPBA3 noDBiHo BOLOciHHIO nIraMICb, de ra3OH Bnipic 6ilbW nnHnM.
Pnmitka:Kotuoka HDL Moke BnkopncToByBaTNCb NwBpeKmPiDtpuraHn TpaBn.
Pikyu KaKoTuKa MoKe 36epiratncy CneuiaIbHOM My BicKiD nAanacHOi KoTuKn, KOJI BOHa He BnKOpucToByeTbcra (NIIe dnn moJeel GL8033 i GL9035).
BupibnTe pikcaTopn (17) Ha Kopnyci Kotywn Bidno 18) Bicky Jna 36epiraHHa 3anacho Kotywn (8).
HaTnchIb Ha KpuuKy BiDciKy, 06BOHa BCTana Ha CBOE Micue Ha Kopnyci.
IiKJIIOUeHHIHCtpymEnTy Do MepeXIKINBHeHHa (MaJ.H)
3'eHaHte WTeNceBHy po3EtKy BiINoBIHoro noOBKyUOHO Ka6ENo 3 OTBOpOM BXOy KInBJIeHHa (4).
3akpiitb ka6eB B φikcaTopi (3).
Пдкночь Мереки Кабьdo Мереки KИВЛЕНЯ.
PonepeJxehn:PeepiikKIOeHHM MepeXHOro Ka6JIIO do MepeKj KINBLeHHa nepeKoHaITeCb, 00 BIn 3akpinneHn fikcaTopom.
PonepeKeHH! POnOBKyUChn UHyp NOBHeH nIXOHTN DnBVKOpNCaHH Ha ByNiCi.
BukopncTahn
PonepeJxHnHa! IHCTpyMeHT NOBHeH npaIOBaTn i3 peKomeHDoBaHO IO WbUdKiCtIO. He nepeBaHTaJ KyIte Ioro.
HaiaawTyBaHH iHcTpymeHTy IJn iDCTpuraHH TpaBn i BnpiBHOBaHH KpaIO (MaI. I J)
Baw ihctpyment MoKe 6ytn BnKOpncTaHn dnn niDcTpuraHH TaPbN, k Noka3aHo Ha Man. I a6o dnn BnipIBHIOBaHH KpaO ra3ohy a6o KBiTkoBux Knym6, kNoka3aHO Ha man. J.
Pekn m nidctpuraHn TpaBn (MaI.1)
Ii ndpuraHH TaBn rojibKa Tpmepy NOHna 6yTN BCTAHOBHeHa y noIOxKeHH, noka3aHe Ha man. I. Kaio ce He TaK:
Biinycitb ikcatop HanaWtuBaHHB Bucotn (16).
ΠOBepHITb Tpy6ky (7)3a rOdINHHNKOBIO cTpiI-KOIO.
KoNurOribKa BCTaHOBJeHa y BiPHe NOnOKeHHa 3aKpInTe ikcatop HanaWtYBaHHB BNCOTn (16).
Pnmitka: Tpy6ka MoKe NOBepTaTncr Nnwe B OndHy CTOpOHy.
Pnmitka: Kotyuka HDL MoKe BnKOpncToByBaTncbBpeKmPiNCTpuraHHa TpaBn.
Pekm BnpBHOBaHHKpaO ra3ohy (MaJ. J)
ДяВиринованнka Краю ra30Hy roJiBka TprImepy NOBHHa 6yTN BCTaHOBNeHa y NOnOxKeHH, NOKa-3aHe Ha Man. J.Якpo ue He TaK:
Biinycitibikcatop HanaWtYBaHHB Bucotn (16).
ΠOBepHITb Tpy6ky (7) 3a rOdunHHNKoBOIO cTpiI-KOIO.
KoninroinBka BCTaHOBHeHaY BiPHe NOIOKeHHa, 3akpInTe ikCaTOp HanaSTyBaHHa BucOTn (16).
Pnmitka: Tpy6ka MoKe NOBepTaTncr Nnwe B OndHy CTOpOHy.
BMUKaHH Ta BMUKaHH
Дя ВимКненя iHcTpymeHTy haTnCHiTb nepeMkau BBimKHeHO/BIMKHeHO (1).
BidnyctiTb nepemkaq, 06 BnMKHyTu iHctpymeHT.
NonepeXeHH! He HamaraiTecb 3a6JIOkyBaTu NepemKau y BKJIIOyeHOMy NOJIOKeHHI.
BcTaHOBJIeHnHOBoI noTyXHoI pixyOoi BOJocHi (MaI. O i P)
3anachi komnnektu 10 notyknx pixyunx BONOCINb MOXHa npu6aTu y dunepiB KOMnaHII Black & Decker (KaT. No A6489). Uo6 BCtahOBHTu HOBy pixyuy BOJocihB, BIKOHaTe HAcTyHi dii.
BIDKJIIOHbIHCTpymeHT BiIMepexi KINBHeHHa.
HaTnchItb HaΦikcaTopu (17)i3Himitb Kpnukky KOTywn (9) 3 Kopnycy (12).
BuaJIb6pyd Ta TpaBy 3 KpIuKn HDL (9) Ta Kopnycy.
BntarHtB BnKOpNCTaHy BoNocIHb 3-niD KpUkHn HDL (9).
Iponyctitb HOby BOJocihb (20) uepe3 OTbip (27) 3 6ox 6okIB KpuuHDL.
BcTaHOBIb CEHTpaJIbHy BTyIky (28) y Bka3aHe noJoxeHHa (MaI.P).
BctahOBiB KpNkHy HDHa MicCe.
PonepeJxH! BnKOpNCTOByTe Nnue BiDnOBiDHy pixyu BOLOciHB KOMnaHII Black & Decker.
3amHa shhpa kNBHeHn (TinbKn dJa BeNko6pntaHii Ta IpnaHdi)
KIO HOI WHypn XNBHeHH MaOTb 6yTu npnaTobAHi:
3HimItb CTapy BNkTy aYtNiI3yNeTe II, DToPnMyOuNcB npaBnTexHki6e3neKn.
PnEHaTe KOpuHBeBn npoBIDnK Do aKTNB HOrO BnXOdy HOBOI BNJKN.
Пи endhaite 6laakTHn npoBIDHK do Hei-tpaIbHorO BuxOy.
PonepeJxH! XoJeH npOBIHNK He NOBHeH 6ytn nIKNoeHn Do KIemn 3a3EmJIeHH. DToPMyNTecb IHCTpyKcui Odo HanaWtYBaHH, 0o NocTABNIOTBc3 RaICHMn BUNkAmn. PnaBKn 3anobixHnk, opeKOMeHdyETbc:5A.
UcyHeHH HeCnpaBHOCTe
KaBam 3daetbcra, 0BaW iHCTpyMeHT npaOe HeBipHO, BnKoHaTe iHCTpyKci, 0o HABoAraTbcn HnKue. KaBam He BdaNoC BnpiuNTn pO6Nemy, 6yNb lacka, 3BepHITbcra B periohaIbHn cepBicHH n ceHTp Black & Decker.
NonepexeHn!peD BkoHaHHm onepaui, BiEhnaTe IHcTpMeHT BiMepexi KInBleHH.
Ihctpymeh npaioe nobilbho
IpeBipTe, 10 KOpNc KOTyMKn MoKe BInbHo o6epTaTncr. Pn Heo6xHocTi o6epExHo npOuHCTiB Horo.
PikyuBa BOJocHb He NOBHHa 6ytu BiIMOTaHa 6iNbwe HIX 11 cm BID KOpNcy KOTyUKN. O6piktTe ii npn Heo6XiHOcti, uO6 BOHa DoXoDInna do ne3a.
yKPAIHcBKA
He npauoec mexaHizm aBtOMaTHuHOi noaHi BOnocini
Ytpmyte fikcaTopn HATNCHEHMM Ta BnTARHITb KpUWKy KOtyuKN 3 Kopnycy.
BidmoTaIe pixyuy BOnocInb Ha 11 cm BiKopnycy. KIO KOtyuKa Mae MAno BOJocHi, BCTaHOBIb HOBy KOTyUky 3 pIXyOIO BONOCIHHO,IK ONICAHO Bnue.
BupiBnIe fikcatopn Ha Kopnyci KOTywn BiHocHO BnCTynIB Kopnycy.
HaTnchItbHa KpnuKy, 0o6 BOHa BCTana Ha CBOe Micce Ha Kopnyci.
RaKo pixyau BOnocinb BuCTynae 3a ne3o, o6piKe iTak, uO6 BOHa TiNbKn DoXoDnla do HboRo.
KuO MexaHImABTOMaTHHOI NOaI BOJociH BCE K He npauohe a6o kOtUka He npokpyyeTbcra, cnpo6ynte HactynHe:
O6epexHo npoHcTiB KpnKy i Kopnyc KoTyu-Kn.
BntarHitbKotyuky i nepekoHaTecb, 0o BaXkijb pyxacTbc BInbHO.
BntarHtB kOtUkkyipozMotaTe pikyuy BoNocihb, a Notim HAMOTaTe II 3HOB peTeNbHO, KOnncAo Bnue. BCTABTe kOtUkky Ha Micye y BiINOBiIDHOCTI do IHCTpyKciu.
3axnCT HaBkoJnHbOro cepeobua

Okpeme 36npaHH. L'epnoyKT He MoXHa BKNDaTn pa30m 3i 3BnuaHUM no6yTOBUM CMITTM.
Kaio kocb Bn BnipiWte, 0o BaW Bnpi6 fipmN Black & Decker Ma 6ytn 3amineHo, a6o Bin Bam 6ilbwe He Notpi6Hn, He BnKnDaTne NOro Ha CMITHNK NObyTOBOrO CmTTra. 3po6Itb uei Bnpi6 DOCTyNHM dJa CneuaIbHoro 3bnpaHH.

Okpemn 36ip BkOpncTahnx Bnpoib Ta ynaKOBKn Do3BONJe NOBtOHO nepepo6JrTa BkOpncTOByBatu MaTepiAn. Pepeo6Ka NOBtOHO BkOpncTOByBaHx MaTepiAniB Donomarae nonepdntu 3a-6pydHenHn HabKoNshbOro cepedOBuua ta 3MeHwE Notpe6y BCnPobHi.
Miccebi 3aKoHodabuyi akTn moKyt b nepe6bauatn Okpemni 36ip eJektpnHoro o6JaHaHHB MyHi- cunpaIbHnx Micx dnn 360py cmTTa a6o npOaBcA Mnpn NOKyNci HOBOr O6NaHaHH.
Kompania Black & Decker Mae MojnlBicbIg 360py Ta nepepo6kn npodyktB bnacHoro Bnpo6HnTBA nicra 3aikHeHH ixhboro TepmiHy cnyXbN.
Uo6 ckopnctatnc zieio nocnyroio, nobephiB BVpi6 kompanii B ophiuiHn cepbcHn ceHTp, kki 36npaOTb BiDnpaCbObaHI npOdykTn 3a Haaw paxyHok.
Bn MoKeTe 3HaHTu MlCue3HaxOJxHHeHHaHbNkQyOro Do Bac cepBicHoro ceHTpy, 3B'3aBUnCb 3 MicueBIM ophiom Komnaii Black & Decker 3a aDpecoIO, Bka3aHOU Bux IHCTpyKciJx. KpIM TOrO, cncoc ophiuiHnx cepBicHnx ceHTpiB KomnaHII Black & Decker 3 ycima noDpo6nucm Hauoro nicnnpoJaXHoro 06cnyroByBaHH Ta KOHTAKTHOO iOpmaieo MiCTntbcra B lHTepHeTi 3a aDpecoIO: www.2helpU.com.
TexhiHidaiHi
2000/14/EC, Tpimep dIra3oHIB, L ≤ 50 cm, Do-daTOK VIII
KEMA Quality B.V., Utrechtseweg 310, 6802 ED Arnhem, Hidepnandu
IdeHTnΦiKauiHn N ynoBHOBaXeHOro opraHy: 0344
Pibeh 3BykoBoi notyXHocti BiIOBIDHO do 2000/14/EC
(CTaTTA 12,doataK III, L ≤ 50 cm):
LWA(BmipraHa3BykoBaNoTyXHicTb)94D5(A)
noxu6ka (K) = 2 nB(A)
yKPAIHcBKA
LwA (rapaHToBaHa 3ByKOba nOryxHicTb) 96 d5(A) nox6ka (K) = 2 d5(A)
Li npodykTu TakoB Biinobiaotb NipeKtnBi 2004/108/EC i 2011/65/EU.
IЯ OTpmaHnro doaTkoBoi iHopmaci,6yIb nacka,3BepHtbcra Do komnaii Black & Decker 3a HactynHO aDpecoo abo npouHTae iHOpmaio Ha 3BOPOTHi cTOPO HiO KepiBnCTBa. HxKyeiDncaHn Hece BiINOBaIaNbHicTB 3a ynpAkyBaHHaPny TexHvHnx xapakTepcntk Ta poBntb 3aBy BiKOMnaii Black & Decker.

KebiH XbOiT (Kevin Hewitt) Biue-npe3ndeHT
3 rno6aJIbHnX po3pOboK Black & Decker Europe, 210 Bath Road, Slough, Berkshire, SL1 3YD BeJnKo6pTuTahir 17-10-2012
do Bac cepbichoro uehtpy, 38'3aBwnscb 3MiueBm opicom Komnaii Black & Decker 3a aDpecoIO, Bka3aHOu BOx INCTpyKux. Kpim TORO, cncock ophiuiHnx cepbichnx ceHTpiB Komnaii Black & Decker 3 ycima noDpo6nma Haworo nicnpoJaxHoro 06cnyroByaHHra KaOHtAKTHOIO IHOpMaIeO MICTNTbcR B IInTepHeTi 3a aDpecoU: www.2helpU.com.
BybI naKa, BiDbiAaTe Haaw caT
www.blackanddecker.co.uk, 0o6
3apectpyBatn CbiHOBn npOdyKT
Black & Decker Ta OTPmByatn iHΦopMaciIO
npo HOBI npOdyKtn Ta cneiaJIbHi npOno3uII.
ДЯ OTPmaHHdoTaKoboi iHΦopMaciI npo
ToproBv Mapky Black & Decker Ta Hawi npOdyKtn
BiDbiAaTe Haaw caT 3a aDpecoIO
www.blackanddecker.co.uk.
TapaHria
Komnaii Black & Decker BneBHeHa B kocTi cBoei npodykui Ta nponohye uyoBi yMOBN rapaTii. Li rapaHTiHi yMOBn E doaTKOBmN Ta B kkiCb mipi niTBePdKyOyB Bawi 3akOHn npaba. Lra rapaTia e DiinCHOHa TepuToPi KpaH-ueHIB Cbponec bKoro Co03y Ta B CbponeecbKi 3oHi BinbHOI topribni.
Kaio npOyKT Black & Decker cTae HecnpabHIM uee3 HeKici MATEPIAn, KOHcTpkyIO a6o HeBidiNobiIdHicTB BmOram npOTaROM 24 MicraI 3DnA nokyn, Komnaih Black & Decker rapaHTye 3amiHy HecnpabHnx Detaneu, pEmOH npOdyKTIB, 0o NiDaIIncs 3Hocy, a6o 3amHy TaKx npOdyKTIB dnn 3a6e3neHHeMiaJIbHnx He3pyHOCTeI DnA CNOKBaiv, 3a BNHTKOM BnNaDKIB, KOnI:
BnpiBnKOpNCToByBaBCa B KOMepuiHnx, npo-peciHnx iJnx Ta 06'emax;
PpOdyKT BnKOpNCTOByBaBCr He 3a npu3Ha-ueHHa m a6o He o6cnyroByBaBCr;
IpoDyKT 3a3Hab MexaHiuHnX NoIkoJKeHb, BKNKHaHX 3OBHiUHIMn PpeMeTaMn, peO-BHAmn a6o IHsMn BnNtBOM;
IpoDyKT HamaraJinca BiDpeMOHTyBaTn Oco6n, Aki He c npaicBHKamu ophiHoro cepBICHORO ceHTpy a6o nepcoHajom 3 pmoHTy kOMnahII Black & Decker.
Uo6 OtpmAtn rapaHtIne 06cnyroByBaHHaBAM Heo6xIDHO HaDaTn DOKa3 NOKyNknpOaBceBi a6o areHTy 3 pemOH TY. Bn MoKeTe3HaHTN Micue3HaXODKeHHaHbNkQHOrO
yKPAIHcBKA
БЛЕКЕДДЕKKEP
rapahtiinyMOBn
LshoBn nokynlq!
- BitaeMo Bac 3 NOKyNkoHO BUCOKoKICHOrO BInpo6y KOMnAHII Black & Decker Ta BucNoBnIOeMo Bam CBOU BDAHcHtB 3a BaWu Bn6ip.
1.1. HadiHa pO6oTa cboTo BnO6y Ha npot3i BcBoTo TepmiH yekCnnyatauii e npedMeTOM oc6bNBOI Typ60Tu HAux cepBichnx Cnyk6.Y BnnaKBy BnHKHeHH 6yDb-kynx np6bnm B npoceci ekCnnyatauui BnO6y Mn peKomeHnyeMo Bam 3Beptatncr Nlue Do ABTOHOBAHx cepBichnx opraHiaui, aDpecn Ta TeNefoHn kNx Bu 3MOKeTe 3HaHTB rapaHTiHOMy TaHO Hi a6o Di3HaTNC B MaRa3Hi.
Haichi cepbici hentpu- ce He tibk Kbaiicikobahn peMOHT,ane u wipokn Bn6ip 3anuactn Ta akcecyapib.
1.2. Ipn kynibn Bnp6y Bumaraute nepeBipkn Ioro KOMNNEKTHOCTi Ta cnpabHocTi 3a Bawoi npcyTHOCTi, HABHOCti IHcTpykii 3 ekcnnyatai ta 3anOBHeHOro TapaHTiHoro TanoHy Ha ykpaIHcbki MoBi. 3a yMOBn BiDcyTHOCTi y Bac npabunbHO 3anOBHeHOro TapaHTiHoro TanoHy M6ydeMoBmyeHi BidxInnTu BAwi npTeH3ii zoDo RaKoCTi boro Bnp6y.
1.3. 06 yHnKHyTn Bcix HenopOzMInh HanoJenNBO npocMo Bac nepeI NOaTkOM pO6OTn 3 BnPo6OM yBaXHO O3HaNoMUTncb 3 IHCTpyKJIeIO UoO Joro ekCnnyatauii.
1.4. 3BepTaemMo BaUy yBaru Ha BnKlIouHo no6yToBe npn3HaueHHa boro Bnpo6y.
2. PpaBOIO OCHOBOIO DaHINx rapaHTiHINx yMOB eDIOye 3aKHOJABCTBO Ta,3OKpema,3aKOH"Ppo 3axnCT npab CNOXNBaivb
3. TapaHTiHn TepmiH Ha daHn Bnpi6 cKnadae 24 mciu ta nounhaetbcra 3 nH npOaKy uepe3 po3dp6Hy toProBy MEPexy. Y BunAky yCyHeHH HeOnikB Bnpo6y rapaHTiHn TepmH noDobKvETbcHa nepio, npotrrom koro Bnpi6 He BNkOpNCTOBYaBCra.
4. Tepmin Cnyx6n Bnpo6y - 5 pokiB (MimambHni, BCTaHOBneHm y BiINOBiHocti do 3aKOHy "Ipo 3axnct npab cnoXnBaiv).
5. Haji rapahtihi 306ob'ra3aHH nouupHOTbcTinbKn Ha HecnpaBHOCTi, BnBnEHI npToTROM rapaHTiHoro TepmiHy Ta o6ymOBnHi Bnpo6HuMn Ta KOHCTpyKTHBHMn fakTopamn.
6. TapaHTiHi 306OB'raHH He NoIwpiIOJbC:
6.1. Ha HecnpaBHOCTI Bnpo6y, 0o BuHnKnn B pe3ynbTati:
6.1.1. HeDToPmAmHH KOpNCTyBaUeM BkazIbOKiHcTpyKuII 3 ekCnIyatauiBipO6y.
6.1.2. MexahiHnX N0UkOJKeHb, BnKlNkAHHx 3OBHIuHIM yadPHM a6o IHWM BnJIINBOM.
6.1.3. BnKOpNCtAHH BnPO6y B npOpeciuHx cInax Ta 06'Emax, B KOMepuiHnx cInax.
6.1.4. 3actocybaHHBnpo6y He 3a npn3HaueHHaM.
6.1.5.Cntxihoro Jnxa.
6.1.6. HecnpnraTnBOMy atmoccpepHOMy Ta iHux 3OBHIwHix BnIbax Ha Bupi6, TAKHX kdou, CHIR, nIDBnueHa BONorictb, HarpiB, arpecnbHic cepeOBNua, HeBiIOBIDHicTB napametpiB eNeKtpomepexi npaMeTpam, Bka3aHMM Ha IHcTpymenti.
6.1.7. BnKOpNCtAHHnA KcCcyApIB, BnTpAtpHX MaTepiAniB Ta 3aNactHn, aKi He peKOMeHDoBaHi a6o He CXBaJIeHi Bnpo6HNIkOM.
6.1.8. IpoHnKHeHHBCEpeDHy IHCTpymEtY CTOpOHHX npedMetIIB, KOMax, MaTepiAniB a6o peOvBN, 0 He E BiXoDAMn, kci CynpoBOJxOyOTb BnKOpNCtAHHr IHCTpymEtY 3a npn3HaueHHaM, HApNKnA, CTpykN, OnNkn TaIH.
6.2. Ha iHCTpymEnT, 60 6yNn BiKpnTi, nIiDaHI peMoHTy a6o MoNiΦikaui No3a yNoBHOBaXeHIM cepBicHUM ueHTpOM.
6.3.Ha npnHaIeKHOCTi, 3anuactHn, 10 BnU3 NaDy BHacniIDOK HOpMaJIbHorO 3HocY, Ta BnTpAHTHi MaTePiAn, Taki JK, npNBoDi Hi peMeHi, ByrIbHi iTKn, HOKi, Ta IH.
6.4.Ha HecnpabHocTi,aki BnHKnB pe3yntari nepeBaHTaxeHHI hCTpyMeHTy,IO npn3Beno Do BnXOy 3 NaSy eNEKtpoDBHyHa a60 IHnx By3JIb Ta Detanei. Do 6e3ymOBHX O3HaK nepeBaHTaxeHHBnPo6y HanExKaTb,3OKpeMa: NOraBa KOJIbOpIB MInHnBOcTi,deOpmaiz I abo ONnABNeHHI DeTanei Ta By3JIb BnPo6y, NotemHHA 606ByrNIOBAHHI 3OJIAii DpOTIB eNEKtpoDBHyHa NiD BNNBOM BnCOKoi TEMepatypu.

Бнк eнД Дekep Г6X,
Бнк eнД Дekep Wtpacce, 40,
65510 IdTuH, HimeyuHa.
03 YepBn 1999 p.
TÜRKÇE
Kullanim amaci
210 Bath Road, Slough,
Berkshire, SL1 3YD
Ingilterere
17-10-2012
Garanti


- Safety instructions
- Using your appliance
- Safety of others
- Residual risks.
- After use
- Inspection and repairs
- ENGLISH
- Using an extension cable
- Additional safety instructions for grass trimmers
- Labels on appliance
- Electrical safety
- Features
- Assembly
- Fitting the guard (fig. A & B)
- Attaching the secondary handle (fi g. C)
- Adjusting the position of the secondary handle (fig. D)
- Adjusting the height of the tool (fig. E & F)
- Releasing the cutting line
- Storing the spool not in use (fi g. G)
- Connecting the tool to the mains (fi g. H)
- Use
- Setting the tool to trimming or edging mode (fi g. I & J)
- Trimming mode (fi g.1)
- Edging mode (fi g. J)
- Switching on and off
- Hints for optimum use
- General
- Trimming
- Edging
- Fitting a new spool of cutting line (fi g. M & N)
- Fitting a new piece of heavy duty cutting line (fi g. O & P)
- Mains plug replacement (U.K. & Ireland only)
- Troubleshooting
- Tool runs slowly
- Automatic line feed does not work
- Protecting the environment
- Level of sound pressure:
- Vibration total values (triax vector sum) according to EN 786:
- EC declaration of conformity
- GL7033/GL8033/GL9035
- Guarantee
- DEUTSCH
- Mode talle (figure 1)
- Garantie
- Zaruka
- POLSKI
- Zastosowanie zgodne
- z przyeznaczeniem
- Black & Decker
- WARUNKI GWARANCJI:
- NcNoJIb3OBaHHeMHCTpyMeHTa
- B30nacHOCTb NOcTOPOHnX Iu
- OcTaToUHbIe pNCKn
- PYCCKNЯ3bIK
- Pocne nCNoB3OBaHnA
- Ocmotp nppeMOHT
- IcnoJb3ObaHne ydnnHtTeJbHoro ka6eJra
- IOnoJIHnTeJbHbIe npaBnla 6e3onacHOCTn npu pa6Ote ra3OHokocnKamn
- MapKnpoBka HNCTpyMeHTa
- 3NeKtpo6e30nacHocTb
- CocTabHbIe yactn
- C6opka
- YcTaHOBka 3aunTHoro kOxyxa (Pnc. A n B)
- YcTaHOBka DOnOJIHnTeJbHoI pyKoAaTKu (Pnc.C)
- PerynpoBka noJoxeHn DOONHHTeJbHou pyKoTKn (Pnc. D)
- PerynpoBaHne BbICOTbI HcTpymeHa (Pnc.E n F)
- Pndrotobka pexyuee neckn
- XpaHHe He nCnoJb3yEmoK KaTyuKn (Pnc.G)
- IopKnIOueHHe HNCTpyMeHTa K3JeKtpoCeTn (Pnc.H)
- 3Kcnpnyatauia
- HacTpoiKa ra3OHOKocNkHa cKaaUNBaHne Hn NOppaBHNBaHne KpOMok (Pnc.IuJ)
- PeknM ckaunBaHnA (Pnc.1)
- Pekn m noDpaBnBaHnKpOMok (Pnc. J)
- BkIIOueHne N BbIKIOueHne
- PekomeHdaunnoonTmahlHomy nCNoJb3OBAHIO
- 06uine Tpe6oBaHn
- CkaunBaHne TpaBbI
- IoppaBnBaHne kPOMOK
- YcTaHOBka HOBOI KaTyuIKn CpeKyuIe IeCKo (Pnc.MnN)
- YcTaHOBka HOBOrO MOTKa CBepxnpoHOn peKyuSei neckn (Pnc. O n P)
- Bo3moXhble HencnpaBHOCTn n cno6bI nx yctpaHenna
- Ta30Hokocnka pa6oTaet MeJneHNO
- He pa6oTaet aBtOMaTnuecka noDaHa peKyu- neckn
- 3aunTa OkpykaOuSei cpebl
- PYCCKN J3bIK
- БЛЗК энд ДЕКKEP
- 06naCTb 3acTocyBaHHa
- IHCtpyku3 TeXhik6e3neKu
- BukopncTAnHn npucptpo
- Be3neKa cTOpOHHX IIODeI
- 3aIIuIkoBipn3nKn.
- NicjBnKOpncTaHH
- yKPAIHcBKA
- IpebeBipka Ta peMOHT
- BnKopncTaHnnoDobKyuOyoro shypa
- Iodatkobi iHCTpykuii 3Texhikn 6e3neKn dJa MOTOKocapkn
- MapkyBaHHa npncTpoi
- EnektpnHa 6e3neka
- Dertani
- 36npaHH
- BcTaHOBJIeHHaXnCHOro Koxyxa (MaI.AiB)
- BcTaHOBJIeHHIdoaTKOBoI pyuKn (MaI.C)
- HaJauStyBaHHNoIOXeHHaOaTkoBoi pyuKn (MaN.D)
- HanaatyBaHHBnCOTn iHcTpymEnTy (MaI.EiF)
- Pirotobka pixyoi BOJocini do po6oTH
- 36epirahnKaToyukn, 0He BnKOpNCTOBYcTBcra (MaI.G)
- IiKJIIOUeHHIHCtpymEnTy Do MepeXIKINBHeHHa (MaJ.H)
- BukopncTahn
- HaiaawTyBaHH iHcTpymeHTy IJn iDCTpuraHH TpaBn i BnpiBHOBaHH KpaIO (MaI. I J)
- Pekn m nidctpuraHn TpaBn (MaI.1)
- Pekm BnpBHOBaHHKpaO ra3ohy (MaJ. J)
- BMUKaHH Ta BMUKaHH
- BcTaHOBJIeHnHOBoI noTyXHoI pixyOoi BOJocHi (MaI. O i P)
- 3amHa shhpa kNBHeHn (TinbKn dJa BeNko6pntaHii Ta IpnaHdi)
- UcyHeHH HeCnpaBHOCTe
- Ihctpymeh npaioe nobilbho
- He npauoec mexaHizm aBtOMaTHuHOi noaHi BOnocini
- 3axnCT HaBkoJnHbOro cepeobua
- TapaHria
- БЛЕКЕДДЕKKEP
- TÜRKÇE
- Kullanim amaci
- Garanti
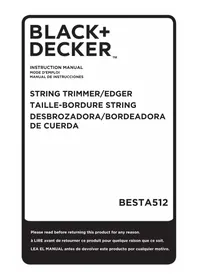
Brand : BLACK & DECKER
Model : GL7033
Category : Brush cutter