Norelco StyleShaver QS6141 - Shaver PHILIPS - Free user manual and instructions

Find the device manual for free Norelco StyleShaver QS6141 PHILIPS in PDF.

Page 6
Manual assistant
Powered by ChatGPT
Waiting for your message
Product information

Brand : PHILIPS

Model : Norelco StyleShaver QS6141

Category : Shaver

Download the instructions for your Shaver in PDF format for free! Find your manual Norelco StyleShaver QS6141 - PHILIPS and take your electronic device back in hand. On this page are published all the documents necessary for the use of your device. Norelco StyleShaver QS6141 by PHILIPS.

USER MANUAL Norelco StyleShaver QS6141 PHILIPS

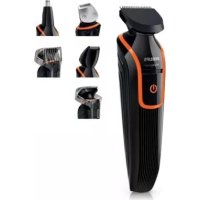
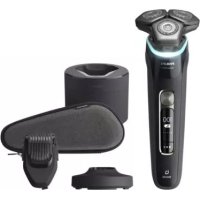
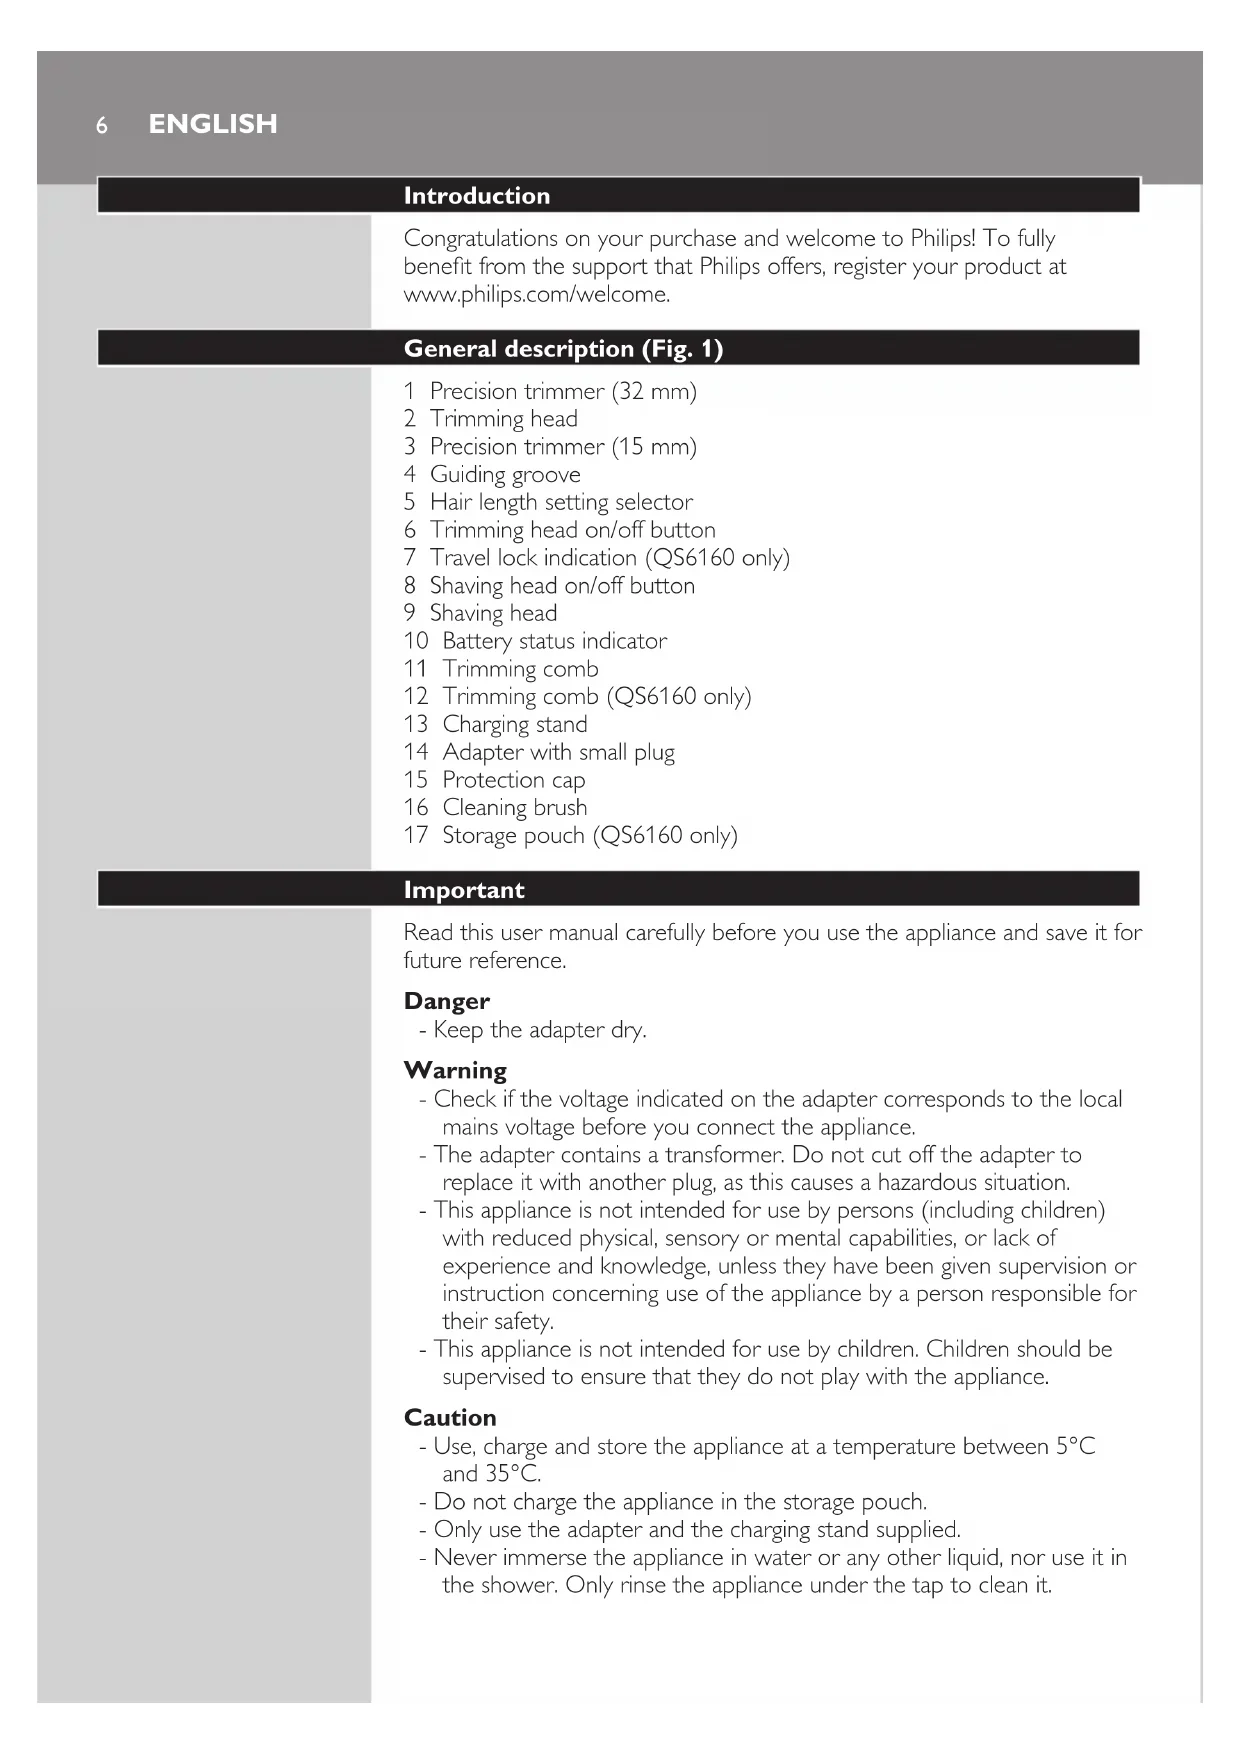
Register your product and get support at

Congratulations on your purchase and welcome to Philips! To fully

benet from the support that Philips offers, register your product at

www.philips.com/welcome.

5 Hair length setting selector

6 Trimming head on/off button

7 Travel lock indication (QS6160 only)

8 Shaving head on/off button

10 Battery status indicator

12 Trimming comb (QS6160 only)

14 Adapter with small plug

Read this user manual carefully before you use the appliance and save it for

- Keep the adapter dry.

- Check if the voltage indicated on the adapter corresponds to the local

mains voltage before you connect the appliance.

- The adapter contains a transformer. Do not cut off the adapter to

replace it with another plug, as this causes a hazardous situation.

- This appliance is not intended for use by persons (including children)

with reduced physical, sensory or mental capabilities, or lack of

experience and knowledge, unless they have been given supervision or

instruction concerning use of the appliance by a person responsible for

- This appliance is not intended for use by children. Children should be

supervised to ensure that they do not play with the appliance.

- Use, charge and store the appliance at a temperature between 5°C

- Do not charge the appliance in the storage pouch.

- Only use the adapter and the charging stand supplied.

- Never immerse the appliance in water or any other liquid, nor use it in

the shower. Only rinse the appliance under the tap to clean it.

ENGLISH- If the appliance is subjected to a major change in temperature, pressure

or humidity, let the appliance acclimatise for 30 minutes before you use

- If the adapter or the charging stand is damaged, always have it replaced

with one of the original types in order to avoid a hazard.

- Do not use the appliance if the shaving head or one of the trimming

combs is damaged or broken, as this may cause injury.

- This appliance is only intended for trimming and dry shaving facial hair

(beard, moustache and sideburns).

- The appliance complies with the internationally approved IEC safety

regulations and can be safely cleaned under the tap.

Compliance with standards

This Philips appliance complies with all standards regarding electromagnetic

elds (EMF). If handled according to the instructions in this user manual, the

appliance is safe to use based on scientic evidence available today.

QS6160 only: Charging normally takes approx. 1 hour.

QS6140 only: Charging normally takes approx. 4 hours.

When the appliance is fully charged, it has an operating time of 50 minutes.

Battery status indicator:

- When the battery status indicator ashes white, the battery is being

- When the battery status indicator lights up white continuously, the

battery is fully charged. This indication is shown for 30 minutes and

then the battery status indicator goes out.

- When the battery status indicator ashes orange, the battery is almost

empty (approx. 10 minutes of operating time left).

- When the battery status indicator ashes orange quickly, the battery

is empty and you have to charge the appliance before you can use it

Note: The appliance can only be charged in the charging stand.

1 Insert the small plug into the charging stand.

Note: The small plug is easiest to insert when the charging stand is folded.

2 Unfold the charging stand (‘click’).

3 Put the adapter in the wall socket.

ENGLISH 74 Put the appliance in the charging stand.

, The battery status indicator starts to ash white to indicate that the

appliance is charging.

, When the battery is fully charged, the battery status indicator lights

up white continuously.

You can use the appliance to trim or dry shave facial hair (beard,

moustache and sideburns). This appliance is not intended for shaving or

trimming lower body parts.

Tip: Take your time when you rst start to shave. You have to acquire practice

with the appliance. Your skin also needs some time to adjust to the procedure.

The trimming combs allow you to trim to different lengths.

Start at the highest setting to acquire practice with this appliance.

See the table below for an overview of the hair length settings and the

corresponding hair lengths.

Setting Hair length after trimming

. 1.5 mm - 1/16 inch

. 2.5 mm - 3/32 inch

ENGLISH8Setting Hair length after trimming

10 10 mm - 13/32 inch

* no comb = 0.5mm - 1/32 inch

1 Hold the appliance in the trimming position, with the trimming head

pointing upwards and the shaving head pointing downwards.

2 Slide the comb into guiding groove of the appliance (‘click’).

3 Press the hair length setting selector and then move it from left to

right or right to left to select a setting.

- The line above the hair length setting selector shows which setting you

EngliSh 94 Press the trimming head on/off button once to switch on the

, QS6160 only: The on/off button lights up to indicate that the

trimming head is operating.

5 To trim the hair, move the trimming comb through the hair slowly.

- Always make sure that the tip of the trimming comb points in the

direction in which you move the appliance.

- Make sure that the at part of the trimming comb is always in full

contact with the skin to obtain an even hair length result.

- Since hair grows in different directions, you need to move the appliance

in different directions as well (upward, downward or across).

- You can switch on the trimming head while the shaving head is

operating. If you do this, the shaving head is switched off immediately.

- Trimming is easier when the skin and hair are dry.

6 When you are nished, press the trimming head on/off button again

to switch off the trimming head.

Trimming without comb

The comb keeps the trimming head at a set distance from your head. You

can use the trimming head without comb.If you use the trimming head

without comb, your hair is cut off close to the skin (approx. 0.5 mm).

1 To remove the comb, pull it off the appliance.

Never pull at the exible top of the comb. Always pull at the bottom part.

2 Press the trimming head on/off button to switch on the trimming

3 Hold the appliance with the trimming head pointing upwards and

make downward strokes with the broad side of the trimming head.

ENGLISH10Using the precision trimmer

The precision trimmer is only half as wide as the broad side of the

trimming head. It therefore allows more precise styling of the area around

the ears, the sideburns and also around the mouth and under the nose.

1 To use the precision trimmer, simply turn the cutting unit until the

precision trimmer points towards the front of the appliance.

2 Press the trimming head on/off button to switch on the trimming

3 Hold the appliance with the trimming head pointing upwards and

make downward strokes with the precision trimmer.

Before you use the shaving head, always check it for damage or wear. If

the shaving head is damaged or worn, do not use it, as injury may occur.

Replace a damaged shaving head before you use it again (see chapter

1 Hold the appliance in the shaving position, with the shaving head

pointing upwards and the trimming head pointing downwards.

2 Press the shaving head on/off button once to switch on the shaving

, QS6160 only: The on/off button lights up to indicate that the shaving

3 Place the shaving head on the skin and move the appliance against

the direction of hair growth while you press it lightly.

- Make sure that the shaving head is in full contact with the skin.

- You can switch on the shaving head while the trimming head is

operating. If you do this, the trimming head is switched off immediately.

ENGLISH 114 To switch off the shaving head after use, press the shaving head on/off

If you press the trimming head or shaving head too hard onto your skin or

if its cutting element gets blocked (e.g. by clothes etc.), the on/off button of

the blocked trimming head or shaving head ashes quickly (QS6160 only)

and the appliance switches off automatically. Remove whatever is blocking

the cutting elements before you use the appliance again.

Cleaning and maintenance

Clean the appliance after every use.

Never use compressed air, scouring pads, abrasive cleaning agents or

aggressive liquids such as petrol or acetone to clean the appliance.

Only clean the appliance and the adapter with the cleaning brush

Note: The trimming head and shaving head do not need any lubrication.

Cleaning the trimming head

1 Switch off the appliance.

2 Pull the comb off the trimming head.

3 Clean the trimming head under the tap.

Cleaning the trimming head connector

Note: Make sure you clean the trimming head connector at least once every

1 Switch off the appliance.

ENGLISH122 Gently pull the trimming head off the appliance.

3 Remove the hairs from the inside of the trimming head connector

with the cleaning brush.

4 Clean the inside of the trimming head with the cleaning brush.

5 After cleaning, put the trimming head back onto the appliance.

Cleaning the shaving head

1 Switch off the appliance.

ENGLISH 132 Pull the shaving head off the appliance.

Note: The shaving head is very delicate. Handle it carefully. Replace the shaving

head if it is damaged.

3 Rinse the shaving head with lukewarm water.

Do not clean the shaving head with the cleaning brush, as this may cause

4 Remove hairs from the cutters with the cleaning brush.

5 After cleaning, snap the shaving head back onto the appliance (‘click’).

In case of frequent use, replace the shaving foil and the cutters every year.

1 Pull the shaving head off the appliance.

2 Remove the old shaving foil from the shaving head.

3 Snap the new shaving foil into the shaving head (‘click’).

1 Pull the shaving head off the appliance.

2 Remove the cutters.

3 Snap the new cutters onto the appliance (‘click’).

You can fold the charger for easy travelling or storage.

1 To fold the charger: fold the base of the charger against the appliance

2 Put the protection cap on the shaving unit.

Travel lock (QS6160 only)

The appliance has an integrated travel lock which prevents the appliance

from accidentally being switched on during travel.

1 To activate the travel lock, press and hold the trimming head on/off

button, the shaving head on/off button or both for at least 4 seconds

while the travel lock indication ashes 3 times.

, The travel lock is only activated when the indication lights up

2 To deactivate the travel lock, press and hold the trimming head on/

off button, the shaving head on/off button or both for at least

4 seconds while the travel lock indication ashes 4 times.

, The travel lock is now deactivated and the appliance switches on.

Note: The travel lock can also be deactivated by charging the appliance.

Ordering accessories

To purchase accessories for this appliance, please visit our online shop at

www.shop.philips.com/service. If the online shop is not available in

your country, go to your Philips dealer or a Philips service centre. If you

have any difculties obtaining accessories for your appliance, please contact

the Philips Consumer Care Centre in your country. You nd its contact

details in the worldwide guarantee leaet.

ENGLISH 15Environment

- Do not throw away the appliance with the normal household waste

at the end of its life, but hand it in at an ofcial collection point for

recycling. By doing this, you help to preserve the environment.

- The built-in rechargeable battery contains substances that may pollute

the environment. Always remove the battery before you discard and

hand in the appliance at an ofcial collection point. Dispose of the

battery at an ofcial collection point for batteries. If you have trouble

removing the battery, you can also take the appliance to a Philips

service centre. The staff of this centre will remove the battery for you

and will dispose of it in an environmentally safe way.

Removing the rechargeable battery

Only remove the rechargeable battery if it is completely empty.

1 Disconnect the appliance from the mains and let the appliance run

until the motor stops.

2 Remove the shaving head and the cutters from the appliance.

3 Undo the four screws of the top cover with a screwdriver.

5 Insert a screwdriver under the back panel and remove the panel.

6 Insert the screwdriver under the cover of the basic body and

, Now you see a printed-circuit board.

7 Break the battery from the printed-circuit board.

Be careful, the battery strips are very sharp.

Guarantee and service

If you need service or information or if you have a problem, please visit

the Philips website at www.philips.com/support or contact the Philips

Consumer Care Centre in your country. You nd its phone number in the

worldwide guarantee leaet. If there is no Consumer Care Centre in your

country, go to your local Philips dealer.

6 On/off-knap for trimmerhoved

7 Rejselås-indikator (kun QS6160)

8 On/off-knap for shaverhoved

Protection anti-surcharge

Kun QS6160: Ladingen tar normalt ca. 1 time.