SF800CB - Tumble drier FAGOR - Free user manual and instructions
Find the device manual for free SF800CB FAGOR in PDF.
| Product type | Condenser tumble dryer |
| Brand | Fagor |
| Model | SF800CB |
| Maximum load capacity | 8 kg |
| Power supply | 230 V, 50 Hz |
| Dimensions (W x D x H) | 60 x 60 x 85 cm (estimated) |
| Net weight | 45 kg (estimated) |
| Drying programs | Automatic with humidity sensor, timer, cotton, mixed, delicate |
| Programming options | Delayed start (up to 24h), end of cycle buzzer |
| Filter cleaning | After each cycle, by hand (do not wash with water) |
| Condenser cleaning | Every 15 days, rinse with clean water |
| Emptying the water collection tank | After each cycle |
| Direct condensation water drainage | Possible with kit (supplied or available from after-sales service) |
| Door opening direction reversal | Yes, reversible |
| Stacking on washing machine | Possible with adapter kit (available from after-sales service) |
| Drum interior light | E14 bulb, 15W/230V (replaceable) |
| Indicator lights | Filter, full tank, condenser, stop (STOP) |
| Safety | Automatic stop at end of program, locked condenser, secure door |
| Compatibility with fabric softeners | Yes, follow manufacturer's recommendations |
| Environmental protection | Recyclable materials, compliant with WEEE directive |
| After-sales service | Interventions by qualified professional, original spare parts |
Frequently Asked Questions - SF800CB FAGOR
User questions about SF800CB FAGOR
0 question about this device. Answer the ones you know or ask your own.
Ask a new question about this device
Download the instructions for your Tumble drier in PDF format for free! Find your manual SF800CB - FAGOR and take your electronic device back in hand. On this page are published all the documents necessary for the use of your device. SF800CB by FAGOR.
USER MANUAL SF800CB FAGOR
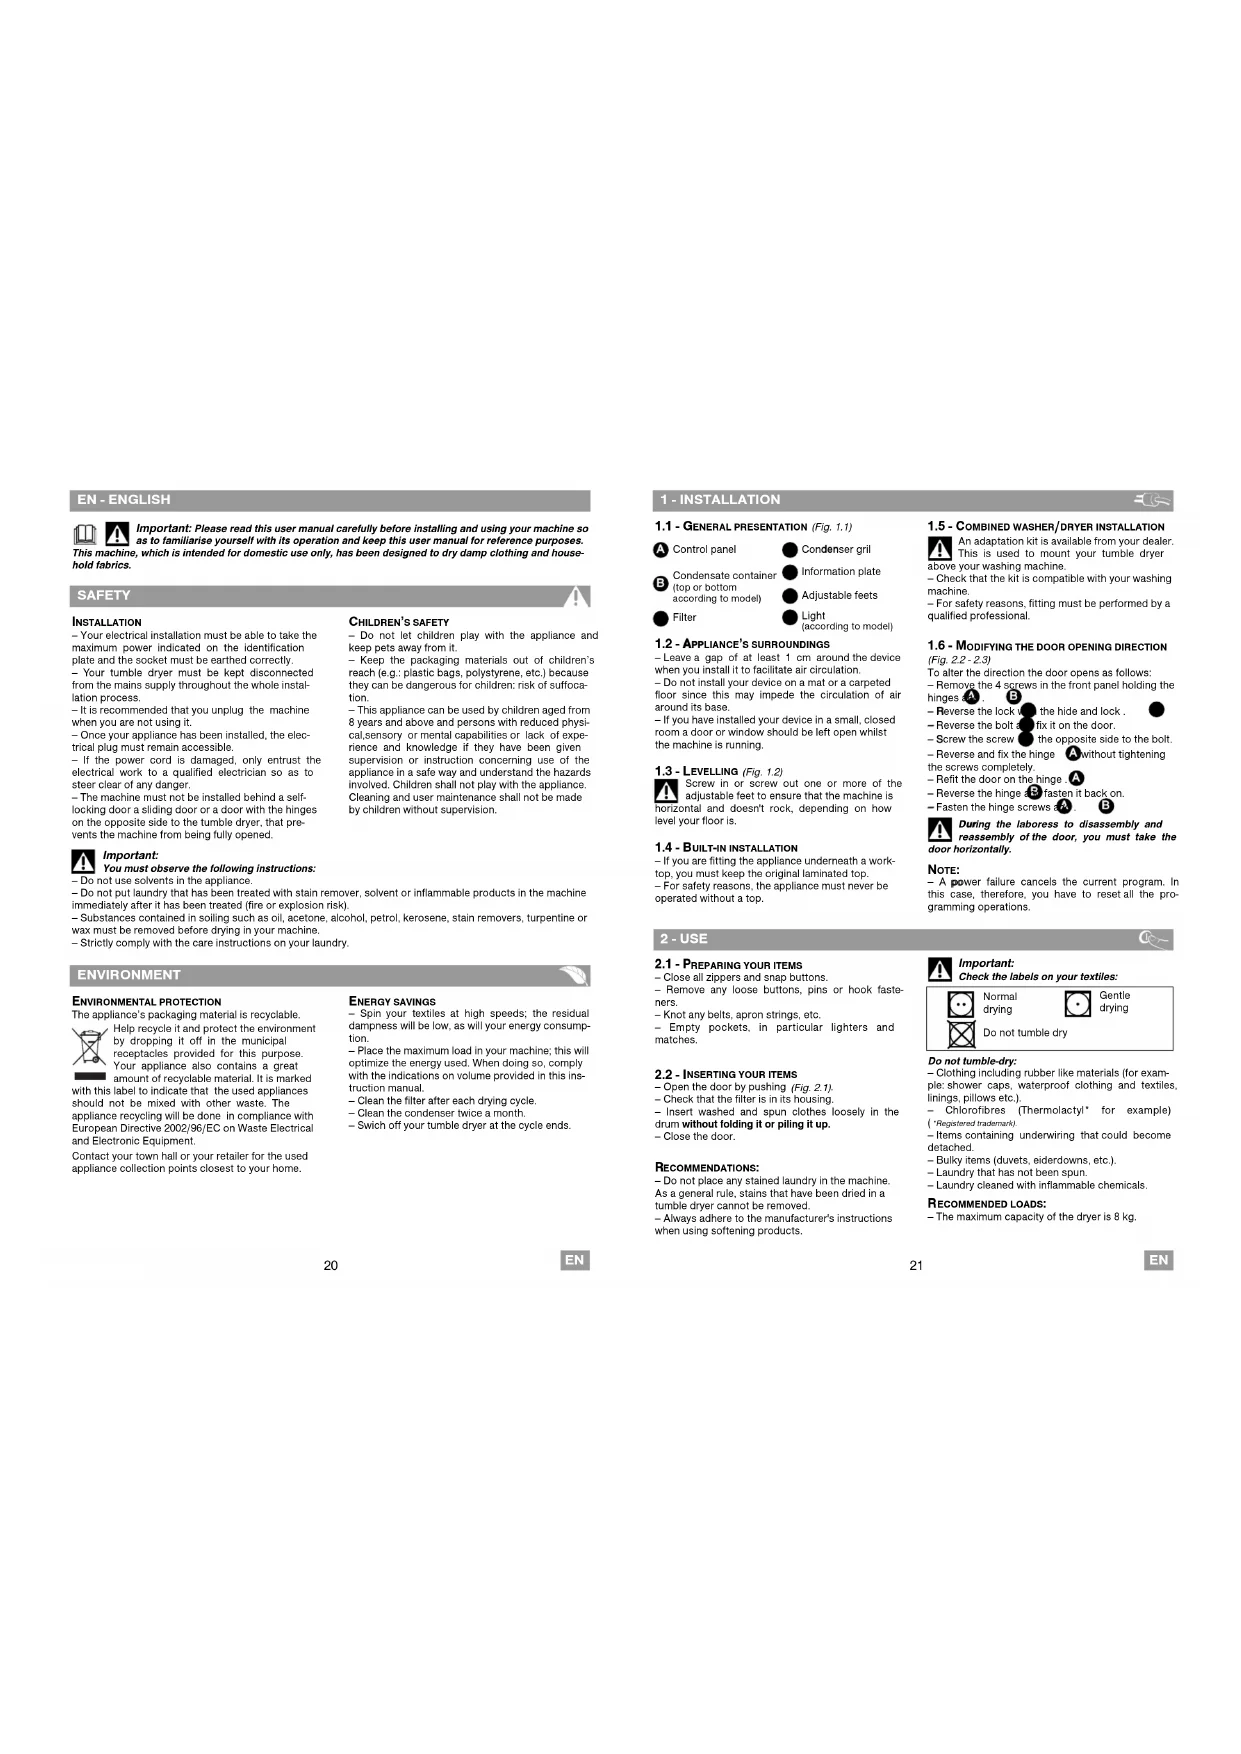
Important: Please read this user manual carefully before installing and using your machine so as to familiarise yourself with its operation and keep this user manual for reference purposes. This machine, which is intended for domestic use only, has been designed to dry damp clothing and household fabrics.
SAFETY
INSTALLATION
- Your electrical installation must be able to take the maximum power indicated on the identification plate and the socket must be earthed correctly.
- Your tumble dryer must be kept disconnected from the mains supply throughout the whole installation process.
- It is recommended that you unplug the machine when you are not using it.
- Once your appliance has been installed, the electrical plug must remain accessible.
- If the power cord is damaged, only entrust the electrical work to a qualified electrician so as to steer clear of any danger.
- The machine must not be installed behind a self-locking door a sliding door or a door with the hinges on the opposite side to the tumble dryer, that prevents the machine from being fully opened.
Important:
You must observe the following instructions:
- Do not use solvents in the appliance.
- Do not put laundry that has been treated with stain remover, solvent or inflammable products in the machine immediately after it has been treated (fire or explosion risk).
- Substances contained in soiling such as oil, acetone, alcohol, petrol, kerosene, stain removers, turpentine or wax must be removed before drying in your machine.
– Strictly comply with the care instructions on your laundry.
ENVIRONMENT
ENVIRONMENTAL PROTECTION
The appliance's packaging material is recyclable. Help recycle it and protect the environment by dropping it off in the municipal receptacles provided for this purpose. Your appliance also contains a great amount of recyclable material. It is marked with this label to indicate that the used appliances should not be mixed with other waste. The appliance recycling will be done in compliance with European Directive 2002/96/EC on Waste Electrical and Electronic Equipment.
Contact your town hall or your retailer for the used appliance collection points closest to your home.
CHILDREN'S SAFETY
- Do not let children play with the appliance and keep pets away from it.
- Keep the packaging materials out of children's reach (e.g.: plastic bags, polystyrene, etc.) because they can be dangerous for children: risk of suffocation.
- This appliance can be used by children aged from 8 years and above and persons with reduced physical, sensory or mental capabilities or lack of experience and knowledge if they have been given supervision or instruction concerning use of the appliance in a safe way and understand the hazards involved. Children shall not play with the appliance. Cleaning and user maintenance shall not be made by children without supervision.
ENERGY SAVINGS
- Spin your textiles at high speeds; the residual dampness will be low, as will your energy consumption.
- Place the maximum load in your machine; this will optimize the energy used. When doing so, comply with the indications on volume provided in this instruction manual.
– Clean the filter after each drying cycle.
– Clean the condenser twice a month. - Switch off your tumble dryer at the cycle ends.
1 - INSTALLATION
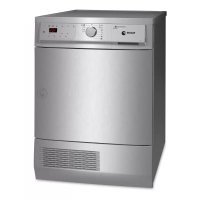
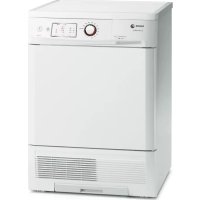
1.1 - GENERAL PRESENTATION (Fig. 1.1)
A Control panel

Condensate container (top or bottom according to model)
Filter
Condenser gril
- information plate
● Adjustable feet
● Light (according to model)
1.2 - APPLIANCE'S SURROUNDINGS
- Leave a gap of at least 1 cm around the device when you install it to facilitate air circulation.
- Do not install your device on a mat or a carpeted floor since this may impede the circulation of air around its base.
- If you have installed your device in a small, closed room a door or window should be left open whilst the machine is running.
1.3 - LEVELLING (Fig. 1.2)
Screw in or screw out one or more of the adjustable feet to ensure that the machine is horizontal and doesn't rock, depending on how level your floor is.
1.4-BUILT-IN INSTALLATION
- If you are fitting the appliance underneath a work-top, you must keep the original laminated top.
- For safety reasons, the appliance must never be operated without a top.
2 - USE
2.1 - PREPARING YOUR ITEMS
- Close all zippers and snap buttons.
- Remove any loose buttons, pins or hook fasteners.
- Knot any belts, apron strings, etc.
- Empty pockets, in particular lighters and matches.
2.2 - INSERTING YOUR ITEMS
- Open the door by pushing (Fig. 2.1).
– Check that the filter is in its housing. - Insert washed and spun clothes loosely in the drum without folding it or piling it up.
- Close the door.
RECOMMENDATIONS:
- Do not place any stained laundry in the machine. As a general rule, stains that have been dried in a tumble dryer cannot be removed.
- Always adhere to the manufacturer's instructions when using softening products.
1.5 - COMBINED WASHER/DRYER INSTALLATION
An adaptation kit is available from your dealer. This is used to mount your tumble dryer above your washing machine.
- Check that the kit is compatible with your washing machine.
- For safety reasons, fitting must be performed by a qualified professional.
1.6 - MODIFYING THE DOOR OPENING DIRECTION
(Fig. 2.2 - 2.3)
To alter the direction the door opens as follows:
- Remove the 4 screws in the front panel holding the hinges a.
- Reverse the lock with the hide and lock.
- Reverse the bolt and fix it on the door.
- Screw the screw ● the opposite side to the bolt.
- Reverse and fix the hinge. A without tightening
the screws completely. - Refit the door on the hinge.
- Reverse the hinge and fasten it back on.
-Fasten the hinge screws a. B
During the laboress to disassembly and reassembly of the door, you must take the door horizontally.
NOTE:
- A power failure cancels the current program. In this case, therefore, you have to reset all the programming operations.


Important:
Check the labels on your textiles:
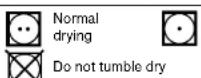

Do not tumble-dry:
– Clothing including rubber like materials (for example: shower caps, waterproof clothing and textiles, linings, pillows etc.).
- Chlorofibres (Thermolactyl* for example) ('Registered trademark).
- Items containing underwiring that could become detached.
– Bulky items (duvets, eiderdowns, etc.).
– Laundry that has not been spun.
– Laundry cleaned with inflammable chemicals.
RECOMMENDED LOADS:
– The maximum capacity of the dryer is 8 kg.

3 - PROGRAMMING

3.1 - THE CONTROL PANEL
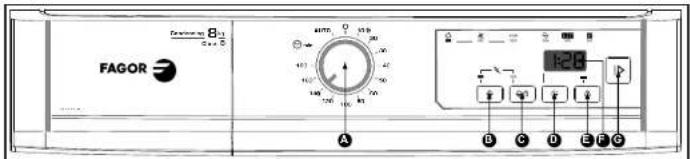
A Time selector
© Laundry choice Mixed
Buzzer
G Start/Pause
B Laundry choice Cotton
Delayed start
● Display
3.2 - PROGRAMMING A DRYING CYCLE
Your dryer is equipped with a sensor which automatically detects the moment when your laundry is dry.
- You access the automatic dryness detection programs by turning the Time selector A to AUTO
- If you wish to adjust the time for the cycle yourself (so that laundry is slightly damp for immediate ironing, for example, or for extra drying or to dry just a few pieces of laundry) use timed programs with set drying times.
STARTING THE APPLIANCE
- Check that the power cable is plugged in, and if the door is properly closed.
3.2 - PROGRAMMING A DRYING CYCLE
PROGRAMS AUTO
- Turn the Time selector A to the AUTO position. An « - A - » (for Automatic mode) is then shown on the display ● (Fig. 3.2.1)
- Choose your laundry by pressing the Laundry choice: B/or : C
COTTON - ♀ : Laundry choice button B: For loads consisting of household linen, terry towelling and cotton clothes and underclothes.
MIXED - 📋 : Laundry choice button Ⓗ: For loads consisting of items of different types (cotton and hard-wearing synthetic articles) or made from mixed fibres.
DELICATES - : Laundry choice buttons B and C (simultaneous key press): For laundry that are particularly temperature-sensitive (e.g. made from acrylic fibres).
The drying temperature is regulated to suit the type of textile selected.
- Press the "Start/Pause" button to start your program.
The two segments situated either side of the « A » flash alternately (Fig. 3.2.1)
About 20 minutes before the end of the cycle, the display shows you how much time is left.
COOLING CYCLE
All programs finish with a cooling cycle that lasts for a few minutes to allow the washing to cool gra-

Do not stop your dryer before this cycle has finished.
TIMER DRYING PROGRAMS
- Select the drying time by turning the Time selector A. He desired drying time.
- Choose your laundry by pressing the Laundry choice 📄/or button (Fig. 3.2.1).
- Press the "Start/Pause" button to start your program.
The display this you the time remaining.
DELAYING A PROGRAM'S START (Fig. 3.2.2)
- Choose either an automatic dryness detection program, or a timed drying program, by turning the Time selector A.
- Choose your laundry by pressing the Laundry choice 📄/or butto
- Press the "Delayed Start" button to delay the start of your program from hour to hour until you reach the desired delay time (max 24 hours).
Confirm by pressing the 'Start/Pause' button
The display ● shows you how much time remains before your program starts. The last hour is decreased in minutes.
Once the time delay has expired, the program actually starts. The display tells you the time remaining, which becomes more precise as the drying cycle progresses.
BUZZER OPTION
- Press the "Buzzer" button 📂. At the end of drying, three beeps will sound every minute for one hour until the door is opened or the appliance is stopped (Fig. 3.2.4).
3 - PROGRAMMING
(continued)
ADDING OR REMOVING AN ITEM DURING DRYING
- Press the "Start/Pause" button ▶ G to interrupt drying or open the door.
The Laundry choice indicators and the display flash (Fig. 3.2.3).
- Insert or remove the item or items and close the door.
- Press the "Start/Pause" button to resume drying.
ALTERING PROGRAMMING OR DRYING DURING OPERATION
- Press the "Start/Pause" button ▶ G to interrupt drying.
The Laundry choice indicators and the display flash (Fig. 3.2.3).
- Select another program.
- Press the 'Start/Pause' button ID G to resume drying.
CLEAN CONDENSER WARNING
The "Condenser warning" light will flash from time to time to remind you that you should clean the condenser (Fig. 3.2.5).
Do not forget to do this as soon as possible, since the warning will disappear when the next program starts.
4 - REGULAR MAINTENANCE
4.1 - CLEANING THE FILTER
This is located in the lower part of your dryer. Clean it as follows:
- Remove it from its housing by pulling it upwards (Fig. 4.1.1).
- Open the filter and clean it by removing the thin coating of fluff covering it (Fig. 4.1.2).
- Re-insert it in its housing, pushing it well in.
The filter must be cleaned after every drying. Do not wash it with water (Fig. 4.1.3).
4.2 - EMPTYING THE CONDENSATE CONTAINER
This is located at the top or bottom of your appliance (according to model), and it recovers the water extracted from your items during drying.
- To empty it, release it from its housing by pulling it towards you (Fig. 4.2.1).
The condensate container must be emptied after each drying cycle (Fig. 4.2.2).
— Empty the condensate container if there is a risk of frost, or if you wish to move or tilt your appliance.
图中
STOPPING THE APPLIANCE
At the end of the program, the "STOP" light flash and the display shows "0:00" (Fig. 3.2.6).
The "Filter" and "Tank Full" lights flash to remind you that you must clean the filter and empty the water collection tank after every drying cycle:
- Turn the Time selector Ⓐ to the "Off" position ⏻.
- Empty your dryer.
- Clean the filter and empty the condensate container (see the "REGULAR MAINTENANCE" section).
TANK FULL WARNING DURING CYCLE
If the tank is full before the end of the drying cycle, the machine shuts off.
The "Tank Full" light ↩, the Laundry choice Ⓑ and/or Ⓞ buttons and the time remaining will start to flash (Fig. 3.2.7).
- Proceed to empty your condensate container (see the "REGULAR MAINTENANCE" section).
- Press the 'Start/Pause' button to result your program.
NOTE:
- The "Buzzer" option remains selected from one program to the next. Just press the button once to deselect the option.

4.3 - CLEANING THE CONDENSER
The condenser must be cleaned twice a month.
- Unplug the power cable from the socket before cleaning the condenser.
Clean it as follows:
- Open the grill at the front of the appliance.
- Release the condenser and remove it carefully (Fig. 4.3.1).
- Remove any fluff from the condenser. Clean it with water only under the tap (Fig. 4.3.2).
- After cleaning, ensure that none of the tubes are "blocked" and that the fins are clean.
- Rub it superficially.
- Re-insert the condenser and lock it in place. Close the grill.
When refitting the condenser, ensure that it is pushed in firmly right to the back of its housing when locking it in.


4 - REGULAR MAINTENANCE (continued)

4.4 - CLEANING THE APPLIANCE
To clean the control panel, the access to the drum and the casing, use only a sponge or a damp cloth and some soapy water.
- Ensure that there is no fluff accumulating round the dryer.
– Clean the door seal with a damp cloth and the filter housing with your vacuum cleaner once a year.
— You should not use, under any circumstances, the abrasive powders, the metal or plastic sponges and the alcohol-based products (Fig. 4.4).
4.6 - CHANGING THE BULB (according to model) You can replace the light bulb (type E14-15W/230V) yourself (Fig. 1.1).
To do this:
- Unscrew the glass cover located at the top, inside the appliance.
- Unscrew the extinguished bulb Ⓖ and replace it. - Screw on the glass cover tightly.
Important: Unplug the power cord before changing the bulb. The bulb must be replaced when the appliance is cooled down.
4.5 - DIRECT EVACUATION OF WATER CONDEN-
SER (Top condensate container models only)
To avoid having to empty the collection tank every time you use the appliance, you have a kit (*) for removing the water from the condenser directly into the drain (hose and deflector). To fit this:
- Take off the existing pipe A and push it inside the appliance (Fig. 4.5.1).
- Clip the deflector B with the top of the pump (Fig. 4.5.1)
- Connect the hose C from the kit to the end connector D on the appliancl (Fig. 4.5.2).
You can connect the other end of the hose either: - To a ventilated trap (Fig. 4.5.3).
- Or a sink trap (Fig. 4.5.4).
When connecting to a trap, you must remove the filler plug. Then press home the rubber tip. If necessary, add a clamp connection (Fig. 4.5.4).
— (*) This kit is provided with the appliance or is available near your After-sales service (according to model).
— The deflector must necessarily be positioned before the drain hose connection.
5.A - DRYING TIME

The drying times below are given to you as an indication, because they are function:
– The desired result: dry, damp, etc.
- The ambient temperature (these values correspond to an ambient temperature of 20^ ).
– The quality of the prior spin-drying.
| Type of items Load | For items spun at ... Drying cycle time | |
| COTTON - 🌐 | 8 kg 1200 rpm 100 to 120 minutes | |
| 5 kg 1200 rpm 60 to 80 minutes | ||
| 3,5 kg 1200 rpm 50 to 60 minutes | ||
| MIXED - 🔒 | 5 kg 850 rpm 80 to 100 minutes | |
| 2,5 kg 850 rpm 50 to 60 minutes | ||
| DELICATES - 🔒 | 3 kg 500 rpm 60 to 80 minutes | |
| 1,5 kg 500 rpm 40 to 50 minutes |
For lower spin speeds, the times will be relatively longer.
(For example, for 5kg of normal laundry spun at 500 rpm: 120 to 160 minutes).
5.B - STANDARDIZED PROGRAMS

RECOMMENDED PROGRAMS FOR TESTS TO EN 61121 - DIRECTIVE 95/13/EEC
| Load I | "Dry cotton" | 8 kg .... select | "Cotton" - 160 min |
| Load II | "Ready to iron cotton" | 8 kg .... select | "Cotton" - 120 min |
| Load III | "Easy care textiles" | 4 kg .... select | "Delicates" - 70 min |

6 - TROUBLESHOOTING

Some incidents may arise when you are using your dryer. Here are the points you should check:
| Fault: Check whether: | |
| The dryer does not start: | - the plug is in the socket.- the door is properly closed.- the condenser is correctly locked in place.- the “Start” key was pressed (if the appliance was not in pause). |
| The drying times are too long: | - the filter in the drum is clogged with fluff.- the laundry has been spun enough beforehand (500rpm minimum, but spinning at 850rpm provides better drying times).- the room temperature is not too high, particularly if the room is small: if necessary, open the door or window.- the condenser is not clogged.- the air inlets and outlets are unobstructed enough to ensure correct air circulation.- the laudry choice selected matches the type of items in the drum. |
| The laundry is too damp: | - the filter in the drum is clogged with fluff.- the type of laundry has been selected correctly or if the drying time is good enough.- the condenser is not blocked by fluff. |
| The laundry is too dry, too creased: | - the drying time selected is too long: the drying time is better to be too short than too long: this avoids the laundry becoming too dry and difficult to iron. |
| The items are unevenly dried: | - the types of textiles in the load are too different (e.g. sheets together with jeans).- the laundry has been laid correctly ‘unfolded’ in the dryer.- the drum is not overloaded. |
| The synthetic items are loaded with static electricity: | - the laundry has been dried too much.- you have used softener during washing. By using this product, you can reduce most of the problems with static electricity. |
| The “Tank Full” indicator light is lit: | - the condensate container is full: once you have emptied it, re-insert it correctly, pushing it completely into its housing. |
| The “Tank Full” indicator light illuminates although the tank is empty: | - the container has been properly inserted: push it in completely.- the condenser is tightly locked on the two sides. |
7 - INTERVENTIONS

Any work on your appliance must be performed by a Brand-approved qualified professional. When you call, mention your appliance's full reference (model, type, serial number). These details are shown on the manufacturer's information plate (Fig. 1.1).
ORIGINAL PARTS
During any maintenance work, ask that only certified original replacement parts be used.

DE - DEUTSCH
WÄSCHESTÜCKS WÄHREND DES
TROCKNUNGSGANGS
1.2 - OMGEVING HET APPARAAT
4.5 - RECHTSTREEKSE AFVOER VAN HET
CONDENSVOCHT (Lade top modellen)
1.2 - OMGEVING HET APPARAAT
4.5 - RECHTSTREEKSE AFVOER VAN HET
CONDENSVOCHT (Lade top modellen)

Voliča času

Vol'ba textilu Bavina