GW12708 - Alarm clock radio Gewiss - Free user manual and instructions
Find the device manual for free GW12708 Gewiss in PDF.

User questions about GW12708 Gewiss
0 question about this device. Answer the ones you know or ask your own.
Ask a new question about this device
Download the instructions for your Alarm clock radio in PDF format for free! Find your manual GW12708 - Gewiss and take your electronic device back in hand. On this page are published all the documents necessary for the use of your device. GW12708 by Gewiss.
USER MANUAL GW12708 Gewiss
Temperatura operativa: -5 °C ÷ +45 °C Temperatura misurata: 0 °C ÷ +45 °C Sonda di temperatura: NTC, 100kΩ a 25 °C Accuratezza della misura: ±0.5°C a 20°C Numero di sveglie giornaliere 2 Unità di misura: °C o °F Alimentazione: rete (230V ac) – funzionamento normale batteria ricaricabile (ML1220) - assenza rete Dimensioni: 2 moduli ChorusClock / Alarm / Thermometer ENGLISH18 Warning ! The safety of this appliance is only guaranteed if all the instructions given here are followed scrupulously. These should be read thoroughly and kept in a safe place. Chorus product series can be installed in compliance with the requirements of HD 384 / IEC364 standards covering equipment for domestic and similar uses in a dust-free environment and where no special protection against the penetration of water is required. The GEWISS sales organization is ready to provide full explanations and technical data on request. Attention - ImportantINDEX
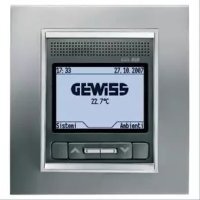
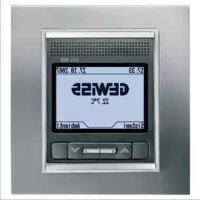
General description The alarm clock-thermometer is fitted with a backlighted LCD visual display unit (VDU) and four control buttons. MODE ab c d
SET/PROG: Set programs/Programming SET/PROG VDU SIGNALS
The SET/PROG key is pressed once to set the parameters. The message SET is displayed on the VDU and the day of week indicator starts to blink at the same time. At this point the following can be modified, in sequence: - The day of the week - The date - The hour format (12/24 h) - The hour - The minutes - The temperature measurement unit The value of each parameter is confirmed by pressing the MODE key. The setting phase is exited by pressing the SET/PROG key again or, in automatic mode, 30 seconds after the last key entry. Setting the day of the week When the day of week bar is blinking, select the current day using the keys. The modification is confirmed by pressing the MODE key within 30 seconds. Setting the day (date) When the day (in the date) is blinking, select the current day using the keys. The modification is confirmed by pressing the MODE key within 30 seconds. Setting parametersUSER INSTRUCTIONS
Setting the month (date) When the month (in the date) is blinking, select the cur- rent month using the keys. The modification is confirmed by pressing the MODE key within 30 seconds. Setting the year (date) When the year (in the date) is blinking, select the cur- rent year using the keys. The modification is confirmed by pressing the MODE key within 30 seconds. Setting the hour format When the message 12:h or 24:4 is blinking on the VDU, select the hour format using the keys. The selection is confirmed by pressing the MODE key within 30 seconds. Setting the hour When the current hour indication is blinking it can be set by pressing the keys. The selection is confirmed by pressing the MODE key within 30 seconds. Setting parametersUSER INSTRUCTIONS
Setting the minutes When the minutes indication is blinking they can be set by pressing the keys. The selection is confirmed by pressing the MODE key within 30 seconds. Setting the temperature measurement unit When the °C or °F indication is blinking the tempera- ture measurement unit can be set by pressing the keys. The selection is confirmed by pressing the MODE key within 30 seconds. Setting parametersUSER INSTRUCTIONS
Up to 2 daily alarms can be programmed. The SET/PROG key is pressed twice to perform the programming. The PROG message is displayed on the VDU and symbol starts to blink. The keys are used to select which of the alarms ( or ) to set. The selection is confirmed by pressing the MODE key within 30 seconds. Symbol or and the indication of the hour start blinking on the VDU. The keys are pressed to set the hour required. The MODE key must be pressed within 30 seconds to continue with setting the minutes. The modifications made are confirmed by prolonged pressure on the MODE key within 30 seconds. Symbol or and the indication of the minutes start blinking on the VDU. The keys are pressed to set the minutes. The MODE key is pressed within 30 seconds to return to setting the hours. The modifications made are confirmed by prolonged pressure on the MODE key within 30 seconds. Following prolonged pressure on the MODE key it is possible to set the other alarm (point
1) or exit from programming mode (by pressing the SET/PROG key).
The alarm clock can be activated/deactivated at this point. Setting the alarm clock alarmsUSER INSTRUCTIONS
Alarm clock activation and deactivation is done by pressing the keys. Key is used to cyclically activate/deactivate alarm 1. Actual activation is signalled by symbol and the activation time being displayed on the VDU. Key is used to cyclically activate/deactivate alarm 2. Actual activation is signalled by symbol and the activation time being displayed on the VDU. Should both alarms be active, the VDU alternately dis- plays symbols and next to their respec- tive actuation times. If the selected time format is [12:h], the day fraction (AM/PM) to which the alarm refers can be ascertained by keeping the MODE key pressed: instead of the current time, the alarm actuation time and the indication of the corresponding day fraction are displayed on the VDU. Alarm clock activation/deactivationUSER INSTRUCTIONS
Snooze function – temporary silencing The alarm clock can be silenced for 5 minutes by pressing any of the front keys. Silencing The alarm clock can be deactivated until the next day by pressing the keys simul- taneously. The LCD visual display unit is provided with backlighting which is active for 5 secs whenever a key is pressed. In SET or PROG mode the backlighting remains active during parameter setting and pro- gramming. It is deactivated on exit from these modes. The device is fitted with a backup battery that guarantees retention of the time, day of the week and alarms set in case of blackout. When power is supplied by the battery alone there is an autonomy of 48 hours in the fol- lowing conditions: - time display active - date display active - backlighting inactive - temperature display inactive - front keys inactive (except when all 4 keys are pressed simultaneously) - alarm clock inactive Silencing the alarm clock Visual display unit Operating in case of blackoutUSER INSTRUCTIONS
In the absence of power, simultaneously pressing all four front keys causes disconnec- tion of the backup battery inside the device. This operation involves the loss of all the data (date, time and alarms) and is used to preserve the efficiency of the battery when the device is not used for a long period. The battery is connected again automatically once the device has been connected to the power mains. Day Monday 2 January 2006 Time 00:00 Alarm 1 00:00 Alarm 2 00:00 Battery disconnection Preset parametersINSTALLATION INSTRUCTIONS
Cabling terminals Power supply L - Phase N - Neutral Terminal decription
Battery removal In case of necessity (e.g. having to dispose of the device, as laid down by the WEEE standards), the alarm clock- thermometer’s battery is accessible by removing the cover as shown in figure A. The use of a small screwdriver is recommended for extracting the battery as shown in figure B. This appliance requires a battery to function properly. If the battery is replaced, make sure the old battery is disposed of according to the waste regulations foreseen by your local authorities.