
Domino NK 6430 N - Barbecue NEFF - Free user manual and instructions
Find the device manual for free Domino NK 6430 N NEFF in PDF.
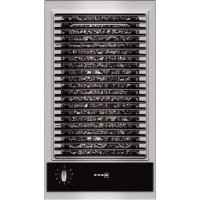



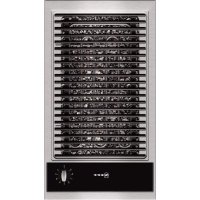
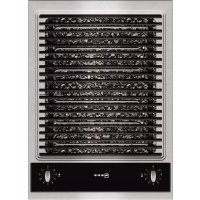
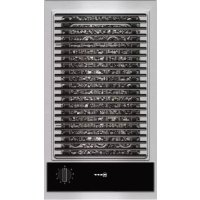
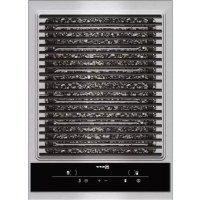
| Product type | Electric lava stone barbecue |
| Brand | Neff |
| Model | Domino NK 6430 N |
| Category | Barbecue |
| Installation type | Domino (built-in) |
| Power supply | 230 V, 50 Hz (estimated) |
| Power | Approx. 2000 W (estimated) |
| Cooking modes | Grilling on lava stones or in water bath |
| Power adjustment | Continuous via rotary switch |
| Preheating | 8 to 12 minutes at maximum power |
| Lava stone tray capacity | 700 ml water + lava stones |
| Water bath capacity | 2.5 litres |
| Thermal protection | Automatic overheating protection |
| Lid material | Glass ceramic |
| Grid material | Enamelled |
| Care and cleaning | Manual cleaning; not dishwasher or high-pressure cleaner safe |
| Spare parts available | Lava stones, tray, grid, lid |
| After-sales service | Neff, E and FD numbers on the rating plate |
| Dimensions (W x D x H) approx. | 30 x 52 x 15 cm |
| Weight approx. | Approximately 10 kg |
Frequently Asked Questions - Domino NK 6430 N NEFF
User questions about Domino NK 6430 N NEFF
0 question about this device. Answer the ones you know or ask your own.
Ask a new question about this device
Download the instructions for your Barbecue in PDF format for free! Find your manual Domino NK 6430 N - NEFF and take your electronic device back in hand. On this page are published all the documents necessary for the use of your device. Domino NK 6430 N by NEFF.
USER MANUAL Domino NK 6430 N NEFF
Operating instructions
Operating instructions
Operating instructions
Before installation 18
Safety instructions 19
How to avoid damage 20
Before first use 20
Your new appliance 21
This is your new lava stone grill 21
Control and indicator light 22
Grill heating element 22
Lava stone container 22
Water bath 22
Setting the grill 23
Grilling over the lava stones 23
Grilling over the water bath 25
Safety switch-off 26
Tables and tips 27
Grilling table 27
Tips for grilling 28
Care and cleaning 29
After-sales service 31
Important information
Read these instructions carefully. Only after reading these will you be able to operate the appliance safely and correctly.
Please keep the operating and installation instructions in a safe place. If the appliance is passed to another person, please enclose the instructions.
Before installation
Environmental protection: Remove the packaging from the appliance and dispose of the packaging in an environmentally-friendly way.
This appliance is labelled in accordance with the European Directive 2002/96/EG concerning used electrical and electronic appliances (waste electrical and electronic equipment - WEEE). The guideline determines the framework for the return and recycling of used appliances as applicable.
Transport damage: Check the appliance after removing the packaging. If it has suffered any damage during transport, do not connect the appliance.
Electrical connection: The connecting lead must be replaced if it has been damaged. This can only be carried out by one of our after-sales service technicians, in order to guarantee the safety.
Installation and connection Please refer to the installation instructions.

Safety instructions
This appliance should only be used for domestic cooking.
Do not use charcoal or similar fuels for this grill!
Safe operation Do not let adults or children operate the appliance unsupervised:
- if they are mentally or physically unable to use the appliance safely and correctly
- if they don't have the knowledge and experience to use the appliance safely and correctly.
Never allow children to play with the appliance.
Overheated oil and fat Caution, fire risk! Overheated oil and fat can ignite easily. Do not leave hot oil and fat unattended. Never attempt to extinguish burning oil and fat with water. Use a lid to smother flames. Switch off the appliance.
Hot grill Caution, risk of burns! The appliance heats up during operation. Keep children away!
Caution, fire risk! Do not store any combustible objects in drawers or shelves under the appliance (for example cleaners, aerosols).
Risk of short circuits! The connecting cables of electric appliances must not come into contact with the hot appliance. The cable insulation can be damaged.
Glass ceramic cover Wait until the appliance has cooled down completely before placing the glass ceramic cover on the appliance. Do not switch on the grill with the glass ceramic cover placed on it. Do not use the glass ceramic cover as a surface for placing objects or for keeping things warm.
Cleaning Switch off the grill after use. Clean the grill after every use when it has cooled down. Greasy soiling can ignite.
Repairs Incorrect repairs are dangerous. Risk of electric
Shock! Repairs must be carried out by one of our experienced after-sales engineers.
If the appliance is damaged, switch off the corresponding household fuse. Call after-sales service.
How to avoid damage
Hard or pointed objects Hard or pointed objects may cause damage if they fall onto the glass ceramic panel or the glass ceramic cover.
Glass ceramic cover Wait until the appliance has cooled down completely before placing the glass ceramic cover on the appliance. Do not switch on the grill with the glass ceramic cover placed on it. Do not use the glass ceramic cover as a surface for placing objects or for keeping things warm.
Before first use
Lava stones Before using the appliance for the first time, take the
lava stones out of the plastic bag and pour them into the lava stone container.
Heat up grill Thoroughly clean the appliance and accessories
before using them for the first time. Then heat up the appliance without any food placed on it at the highest level for a few minutes. This will eliminate any 'newness' smells.
There might be smoke when heating the grill for the first time. This is normal.
Your new appliance
Your new appliance and its accessories are described in this section.
This is your new lava stone grill
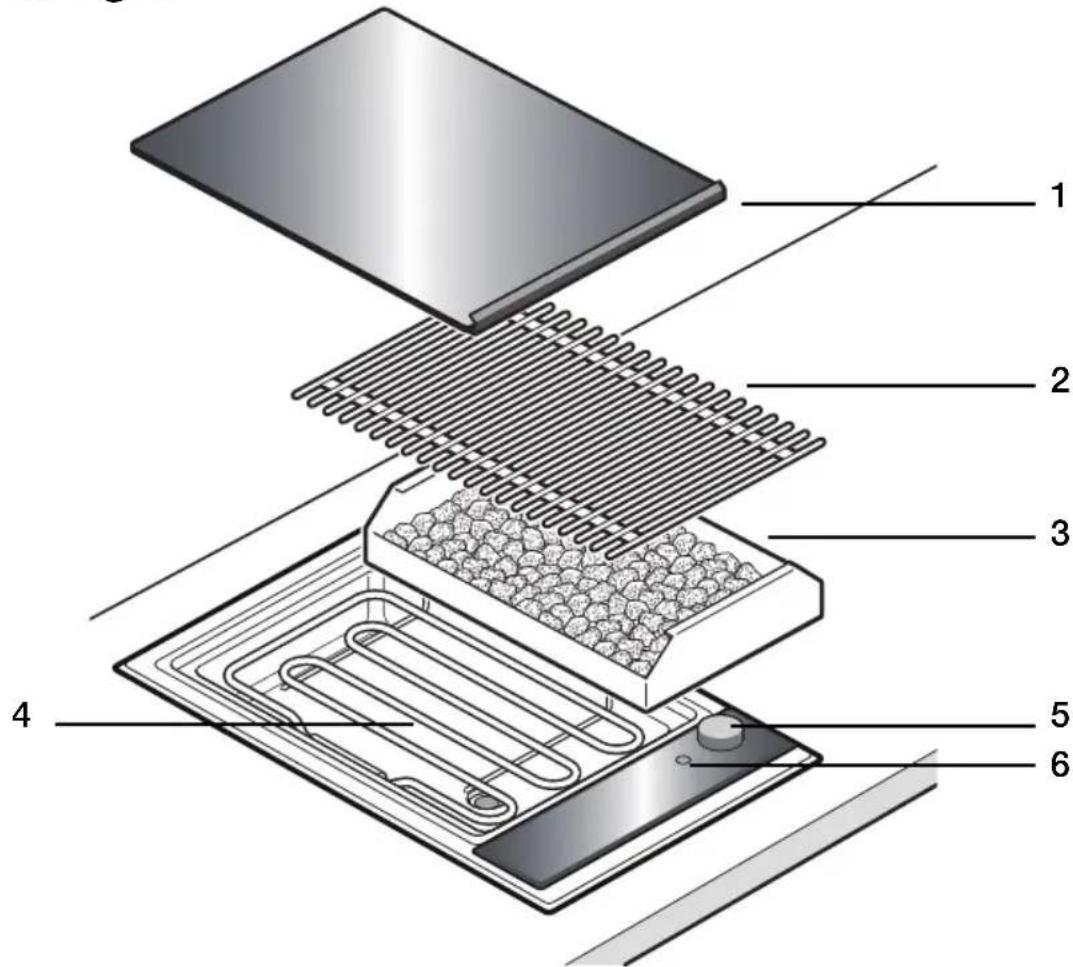
1 Glass ceramic cover 2 Grid iron 3 Lava stone container 4 Grill heating element 5 Control 6 Indicator light
Control and indicator light
Turn the control to choose the heat setting of the grill. The heat setting is infinitely variable. To switch off the grill, turn the control to 0 after grilling.
The indicator light goes on when the grill is switched on and warns that the appliance is hot.
Grill heating element

Caution, risk of burns! The grill heating element heats up during operation. Wait until the appliance has cooled down before touching the grid iron or the grill heating element.
You might notice that the grill heating element switches on and off automatically during the grilling time. This is normal.
You can tilt up the heating element after taking off the grid iron. For safety reasons, tilting up the heating element will result in the heating element being switched off, even if the control is switched on.
Lava stone container
Before using the appliance for the first time, take the lava stones out of the plastic bag and pour them into the lava stone container.
Water bath

Always fill the grill trough with water before each use. The amount of water depends on whether you wish to grill with or without lava stones.
Caution, risk of scalding! If water splashes onto the hot grid iron or grill heating element when adding more water to the trough, this will result in hot steam being given off.
Setting the grill
With your new grill you can grill over the lava stones or over the water bath.
The lava stones accumulate the heat from the grill heating element and radiate an intense and even heat.
When grilling over the water bath, the rising steam will keep grilled meat juicy and tender.
Grilling over the lava stones
- Remove the grid iron and tilt up the grill heating element. Remove the lava stone container.
- Pour in approx. 0.7 litres of water up to the lower marking.
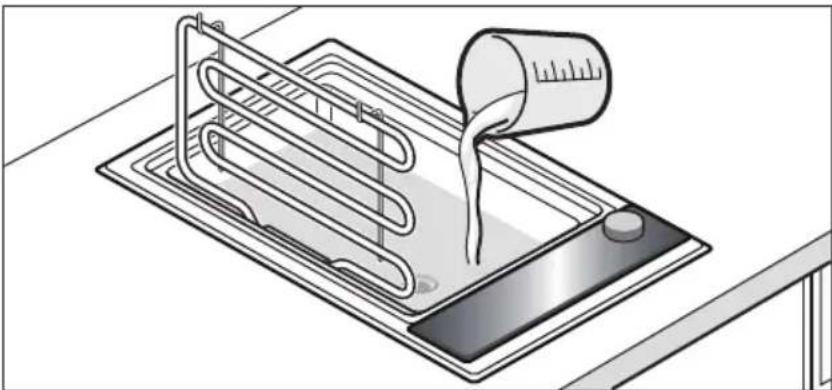
- Remove the lava stones from their packaging and pour them into the lava stone container. Insert the lava stone container into the appliance.
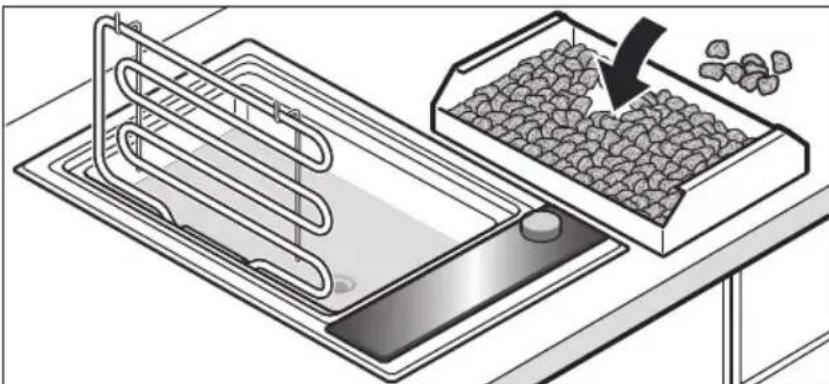
- Tilt down the grill heating element and put on the grid iron.
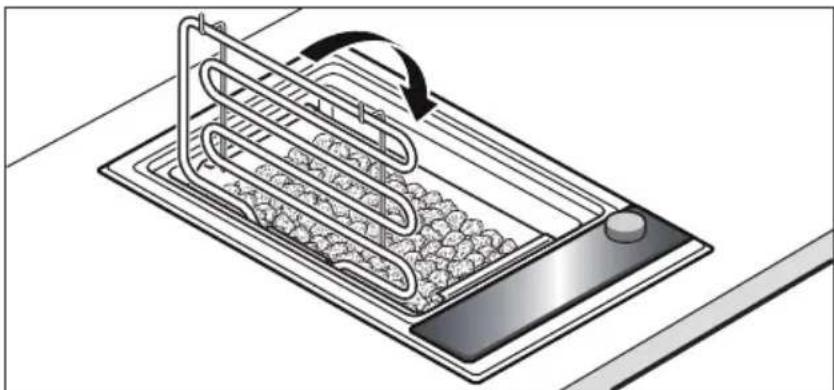
- Preheat the grill for approx. 8-12 minutes on the highest setting. Then you can put on the food to be grilled. Select the heat setting according to the settings table.
Note: preheat the empty appliance for a maximum of 8-12 minutes. If the appliance is preheated for too long, it might switch off (overheating protection). Switch off the appliance and leave to cool down before switching on again.
Fat dripping onto the grill heating element and the hot lava stones will produce smoke. Dripping fat may flare up briefly.
Water level: When grilling, always monitor the water level in the
grill trough and, if required, add more water up to the lower marking.

Caution, risk of scalding! If water splashes onto the hot grid iron or grill heating element when adding more water to the trough, this will result in hot steam being given off.
Draining the water: In the event that the water is still hot when drained, add some cold water to the container to cool it!
To drain the water, place a heat-resistant container beneath the drain valve. Open the drain tap by turning the lever down by 90°. Then close the tap by turning the lever fully up.
Changing the lava stones: The lava stones absorb any fat which drips from the grill. When the stones become dark, this means that they are saturated and must then be replaced. You can obtain suitable lava stones from your specialist dealer or our after-sales service.
Grilling over the water bath
- Remove the grid iron and tilt up the grill heating element. Remove the lava stone container.
- Pour in approx. 2.5 litres of water up to the upper marking.
- Tilt down the grill heating element and put on the grid iron.
- Preheat the grill for approx. 8-12 minutes on the highest setting. Then you can put on the food to be grilled. Select the heat setting according to the settings table.
Note: preheat the empty appliance for a maximum of 8-12 minutes. If the appliance is preheated for too long, it might switch off (overheating protection). Switch off the appliance and leave to cool down before switching on again.
Water level When grilling, always monitor the water level in the
grill trough and, if required, add more water up to the upper marking.

Caution, risk of scalding! If water splashes onto the hot grid iron or grill heating element when adding more water to the trough, this will result in hot steam being given off.
Draining the water In the event that the water is still hot when drained,
add some cold water to the container to cool it!
To drain the water, place a heat-resistant container beneath the drain valve. Open the drain tap by turning the lever down by 90° . Then close the tap by turning the lever fully up.
Safety switch-off
The safety switch-off function switches off the grill heating element when overheating. When the grill has cooled down sufficiently the grill heating element automatically switches on again.
Tables and tips
Grilling table
These values are to be regarded as guidelines only.
The grilling times apply to a preheated grill and will depend on the quality and the amount of the food.
The heat setting is infinitely variable. It is possible that the optimum setting for your food is between two control settings!
Turn the food at least once.
Food Preheating Control setting Control setting Grilling time on level 9 Grilling over Grilling over in minutes in minutes the lava stones the water bath
| Beef steak, medium, 2-3 cm 12 8 - 9 8 - 9 8 - 10 | ||||
| T-Bone-Steak, pink, 3 cm | 10 7 - 8 8 - 9 10 - 15 | |||
| Pork collar steak, without bone | 10 8 - 9 8 - 9 12 - 16 | |||
| Pork cutlets*, 2 cm | 8 | 7 - 8 | 8 - 9 | 15 - 20 |
| Lamb cutlets, pink, 2 cm | 10 | 7 - 8 | 8 - 9 | 8 - 12 |
| Chicken breast, 2 cm | 10 7 - 8 | 8 - 9 15 - 20 | ||
| Chicken wings, 100 g each | 10 7 - 8 | 8 - 9 15 - 20 | ||
| Turkey steak, plain, 2 cm | 10 7 - 8 | 8 - 9 12 - 15 | ||
| Salmon steak**, 3 cm | 8 | 7 - 8 | 8 - 9 | 20 - 25 |
| Tuna steak**, 2 cm | 8 | 7 - 8 | 8 - 9 | 10 - 15 |
| Trout***, whole, 200 g | 10 7 - 8 | 8 - 9 12 - 15 | ||
| King prawns, 30 g each | 10 7 - 8 8 - 9 12 - 15 | |||
| Hamburgers, 1 cm | 10 7 - 8 | 8 - 9 12 - 17 | ||
| Shish kebab****, 100 g each | 8 | 7 - 8 | 8 - 9 | 17 - 25 |
| Sausages, 100 g each | 10 7 - 8 | 8 - 9 10 - 20 | ||
| Vegetables**** | 8 | 7 - 8 | 8 - 9 | 8 - 12 |
- cut along the bone ** oil the grid iron *** oil skin well, then oil again before turning **** turn frequently **** for example aubergine, courgette in slices 1 cm thick, pepper (quartered)
Tips for grilling
Quality of the meat The grilled result depends on the nature and quality of the meat and on your personal taste. As far as possible, grilled pieces should be equally thick. In this way, they will brown evenly and they will stay nice and juicy.
Preheating the grill Always preheat the grill. In this way, the intensive heat radiation will seal the surface of the grilled food and juice cannot leak out.
Preparing the food To avoid drying out the surface and to improve the taste, lightly brush the food before grilling with heat-resistant oil (e.g. peanut oil). Make sure you do not use too much oil as otherwise there will be a risk of fire.
Always grill steaks unsalted. Otherwise, water and soluble nutrients might leak and be lost.
Do not remove the fatty layer (e.g. on a cutlet) until after grilling as otherwise the meat will lose juice and aroma.
Placing the food on the grill Place grilled pieces directly on the grid iron. If there is only one piece for grilling, place it in the middle of the grid iron for best results.
Turning the food Turn the meat when small fluid drops can be seen on the surface of the meat.
Turn grilled pieces over as soon as they can be removed easily from the grid iron. If the meat is sticking to the grid iron, its texture will be destroyed and juice will leak out.
Tips for grilling: Do not pierce the meat while grilling it. It may lose its juice.
Meat is medium if juice appears on the surface of a steak (pink inside and crispy brown on the outside).
Serve grilled food hot. Grilled food will go tough if you keep it warm.
Dripping Fat: Fat dripping onto the grill heating element may flare up briefly and will produce smoke. To reduce flaring up, grill fatty food over the water bath.
Care and cleaning
Do not use high-pressure or steam jet cleaning devices.

Caution, risk of burns! Wait until the grill has cooled down completely before cleaning it.
Clean the grill after every use. Burnt-in residues may be difficult to remove.
Wash new sponge cloths thoroughly before use.
Draining the water: In the event that the water is still hot when drained, add some cold water to the container to cool it!
To drain the water, place a heat-resistant container beneath the drain valve. Open the drain tap by turning the lever down by 90°. Then close the tap by turning the lever fully up.
Cleaning the metal parts: Wipe clean the metal surfaces using warm soapy water. Polish with a clean, dry cloth.
Avoid scratching or scrubbing as this could cause permanent scratches. Remove stubborn soiling with a soft brush or soak with a small amount of soapy water.
Cleaning the grid iron: The grid iron can be cleaned by hand by adding a
Add mild detergent to the cleaning water. Do not apply acidic substances (lemon juice, vinegar, etc.) to the enamel surface.
Do not scrape away burnt-in residues; instead, soak them with a small amount of soapy water.
Lava stones: It is advisable to dry very damp lava stones occasionally in the oven at 200°C. This will prevent the formation of mildew.
Glass ceramic panel and cover: Remove light soiling using a damp cloth, or with warm soapy water.
Rinse any left-over detergent with cold water and dry the surface well.
Unsuitable cleaning agents: Do not use an abrasive sponge or a scouring agent.
Nor should any chemically aggressive cleaners such as oven sprays or stain removers be used.
Do not clean the grid iron, the lava stone container, and the glass ceramic cover in a dishwasher.
After-sales service
Our after-sales service is there for you if your appliance should need to be repaired. You will find the address and telephone number of your nearest after-sales service centre in the phone book. The after-sales service centres listed will also be happy to inform you of a service point in your local area.
E-number and FD-number: Please quote the E number (product number) and the FD number (production number) of your appliance when contacting the after-sales service. The nameplate containing these numbers can be found on the appliance. For future reference you can note these numbers here:
E-Nr.FD
Sommaire
Remarques importantes 33
Beveiling against overhitting
Safety instructions for use .109
Before first use 110
Before first use 110
Device description 111
Control elements on the cooking surface .111
Switch and indicator light 112
Heating element of the grill 112
Container 112
Water bath 112
Grill settings 113
Preparing the grill on the cooking surface .113
Preparing the grill in the water bath 115
Protection against overheating .116
Tables and useful tips 117
Grill table 117
CobetbI no npiroTOBneHIO rpnra 118
UxoIIOuNCTKa 119
Cnyk6a cepBnca 120
Ha chTo hUxHNo o6paaatb BnImaHne
Read the instruction manual carefully. Only after this will you be able to operate the device safely and correctly.
Keep the instruction manual and installation instructions in a safe place. If you pass the device on to someone else, please enclose these instructions.
Before installation
Disposal in compliance with environmental regulations. Dispose of the device and packaging in accordance with environmental requirements.
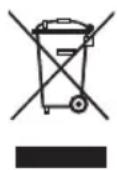
This device is marked in accordance with European Directive 2002/96/EC on waste electrical and electronic equipment (WEEE). This directive establishes the framework for the return and recycling of old devices, valid throughout Europe.
Preparing the grill Water filling
- Remove the grill grate and lift the heating element upwards. Remove the water container from the device.
- Pour 2.5 liters of water into the reservoir up to the upper mark.
- Lower the heating element of the grill, place the grill grate.
- Preheat the grill for 8-12 minutes at the highest power level. After that, you can place the food to be cooked on the grill. Set the grill level according to the table provided. Note: An empty grill should not be preheated for more than 8-12 minutes. Longer heating may cause the device to switch off (overheating protection). Switch off the device and let it cool down before switching it on again.
Adding water during grilling must be done carefully.
At the water level in the reservoir, the required level should be adjusted by adding water up to the upper mark.

Caution, danger of scalding! If, when adding water, it splashes onto the hot grid or the heating element of the grill, steam will be generated.
Draining water: If the water is still sufficiently
hot, let it cool down before draining!
To drain the water, place a heat-resistant container under the drain tap. Open the tap by turning the lever 90° downwards. After that, close the tap by turning the lever upwards to the stop.
Overheating protection
The overheating protection switches off the heating of the grill in case of danger of overheating. After the grill has cooled down sufficiently, the heating of the grill is switched on again automatically.
Tables and useful tips
Grill table
The data in these tables should be considered as
orientation values, which
are valid for a preheated grill. These values may
vary depending on the type and weight of the grill product.
You can adjust the power continuously. It may be that the optimal power for your application lies between two levels!
Turn the grill product over once halfway through the cooking time.
The quality of the meat results depend on the type and quality of the meat, and on your personal taste. The pieces for grilling should be as uniform in thickness as possible. This way they cook evenly and retain their juiciness.
Always preheat the grill thoroughly before grilling. Preheating the grill in this way, thanks to the intense heat radiation, a crispy crust can form on the surface of the product, which prevents the juice from escaping.
Preparation of the product: To avoid surface drying and to improve the taste of the grilled food, lightly brush the product with heat-resistant oil using a brush. Make sure there is not too much oil, as there is a risk of fire!
Always grill without using salt. Otherwise, water and soluble nutrients will be released and lost.
The fat layer (e.g., on cutlets) should only be removed from the finished grilled food, otherwise the meat loses juice and aroma.
Placing the product: Place the pieces of meat on the grill grate directly on the grate. In case of
one grill basket, place it on the grates as centrally as possible. This way the grill will succeed best.
Turning: Turn the meat when small drops of juice appear on the surface of the product.
Place the meat pieces directly on the grill. In case of...
Remove the grate from the oven when possible. This will allow the heat to circulate better.
Transformation occurs when small droplets of juice appear on the surface of the product during transformation.
The mushrooms should be turned when they easily detach from the grid. When gripping the meat and the product, the fibers are destroyed and juice is released from the meat.
Advice: Do not pierce the meat when preparing the grill. This causes loss of juice.
If juice appears on the surface of the meat, it means that the meat has reached medium doneness (inside is pink, outside is covered with a crispy crust).
Add the finished grill to the hot dish. Do not reheat the finished grill, as the meat becomes tough.
Dripping fat may ignite on the heating element and cause brief flame and smoke. To reduce this effect, products with high fat content should be cooked on the grill or in a water bath.
Care and cleaning
Do not use high-pressure cleaners or steam cleaners.

Caution, risk of burns! Before cleaning, the grill must be completely cooled.
After each use of the grill, clean it. Burnt residues are difficult to remove. Before using new grill cloths, they should be washed well.
Draining water: If the water is still sufficiently
hot, add cold water to cool it down!
For draining water, place a heat-resistant container under the drain tap. Open the tap by turning the lever 90° downwards. Then close the tap by turning the lever upwards to the stop.
Cleaning metal parts: Clean metal parts with warm soapy water and wipe them dry.
Avoid abrasive cleaning agents, as they may cause scratches on the surface. Stubborn dirt should be removed with a soft brush or soaked beforehand.
Cleaning the grill grid: Clean the grill grid by hand with a mild cleaning agent. For cleaning the enamelled grill grid, do not use acid-containing liquids (citric acid, vinegar, etc.). Burnt residues should not be scraped off, but soaked in soapy water.
Small dirty spots on the leaves can be
dried with a hairdryer at 200 °C. This way
you can avoid the formation of sediment.
Glass-ceramic hob
Glass-ceramic
The lid can be cleaned with a damp
cloth and warm soapy water.
Residues of the cleaning agent should be rinsed off
with cold water, then dry
the surface.
Unsuitable cleaning agents
For cleaning, never use
scouring pads or abrasive cleaning agents.
Do not use aggressive chemical
cleaners such as aerosols
The service department can also advise you.
Also in the specified service centers.
E-number
FD-number When contacting the service department, please provide
the E-number and FD-number of the device. You will find these numbers
on the rating plate of the device. This way,
in case of a malfunction, you won't have to
search for them; you can enter the data of your device here right away.
E-number FD-number
Index
Index
- YOUR NEW APPLIANCE
- SETTING THE GRILL
- TABLES AND TIPS
- IMPORTANT INFORMATION
- BEFORE INSTALLATION
- SAFETY INSTRUCTIONS
- HOW TO AVOID DAMAGE
- BEFORE FIRST USE
- THIS IS YOUR NEW LAVA STONE GRILL
- CONTROL AND INDICATOR LIGHT
- GRILL HEATING ELEMENT
- LAVA STONE CONTAINER
- WATER BATH
- GRILLING OVER THE LAVA STONES
- GRILLING OVER THE WATER BATH
- SAFETY SWITCH-OFF
- GRILLING TABLE
- TIPS FOR GRILLING
- CARE AND CLEANING
- AFTER-SALES SERVICE
- SOMMAIRE
- REMARQUES IMPORTANTES
- BEVEILING AGAINST OVERHITTING
- DEVICE DESCRIPTION
- GRILL SETTINGS
- TABLES AND USEFUL TIPS
- HA CHTO HUXHNO O6PAAATB BNIMAHNE
- PREPARING THE GRILL WATER FILLING
- OVERHEATING PROTECTION
- GRILL TABLE
- INDEX
Brand : NEFF
Model : Domino NK 6430 N
Category : Barbecue