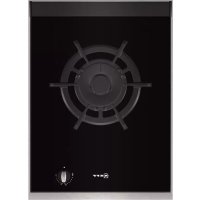
ND 5440 N - Cooker NEFF - Free user manual and instructions
Find the device manual for free ND 5440 N NEFF in PDF.
Download the instructions for your Cooker in PDF format for free! Find your manual ND 5440 N - NEFF and take your electronic device back in hand. On this page are published all the documents necessary for the use of your device. ND 5440 N by NEFF.
USER MANUAL ND 5440 N NEFF
geräte (waste electrical and electronic equipment -
Environmental protection 13
Environmentally-friendly disposal13
Getting to know the appliance 14
Your new Teppan Yaki14
The control panel 14
Residual heat indicator15
Before using for the first time 15
Heating the Teppan Yaki 15
Setting the Teppan Yaki 15
Switching the teppanyaki on and off 15
Setting the temperature 15
Selecting the warming setting 15
Selecting the cleaning level 15
Switching Wipe protection on and off15
Switching off the rear heating zone16
Switching the childproof lock on and off17
Correcting the timer 17
Changing the basic settings 18
Care and cleaning 18
Cleaning the appliance18
Do not use these cleaners19
Resolving malfunctions 19
After-sales service 20
Additional information on products, accessories, replacement
parts and services can be found at
www.neff-international.com and in the online shop
: Important safety information
Read these instructions carefully. Only then
will you be able to operate your appliance
safely and correctly. Retain the instruction
manual and installation instructions for
future use or for subsequent owners.
Check the appliance for damage after
unpacking it. Do not connect the appliance
if it has been damaged in transport.
Only a licensed professional may connect
appliances without plugs. Damage caused
by incorrect connection is not covered
This appliance is intended for domestic use
only. The appliance must only be used for
the preparation of food and drink. The
appliance must be supervised during
operation. Only use this appliance indoors.
This appliance is not intended for operation
with an external clock timer or a remote
This appliance may be used by children
over the age of 8 years old and by persons
with reduced physical, sensory or mental
capabilities or by persons with a lack of
experience or knowledge if they are
supervised or are instructed by a person
responsible for their safety how to use the
appliance safely and have understood the
Children must not play with, on, or around
the appliance. Children must not clean the
appliance or carry out general maintenance
unless they are at least 8 years old and are
Keep children below the age of 8 years old
at a safe distance from the appliance and
Hot oil and fat can ignite very quickly.
Never leave hot fat or oil unattended.
Never use water to put out burning oil or
fat. Switch off the hotplate. Extinguish
flames carefully using a lid, fire blanket or
something similar. Risk of fire! ■
The appliance becomes very hot and
flammable materials could catch fire.
Never store or use flammable
objects (e.g. spray cans, cleaning agents)
under the appliance or in its immediate
vicinity. Never place flammable items on
or in the appliance.
The accessible parts become very hot
when in operation. Never touch hot parts.
Keep children at a safe distance. Risk of burns! ■
When the appliance cover is closed, heat
will accumulate. Only close the appliance
cover when the appliance has cooled
down. Never switch the appliance on with
the appliance cover closed. Do not rest
food on the appliance cover or use it to
Risk of electric shock!
Incorrect repairs are dangerous. Repairs
may only be carried out by one of our
trained after-sales engineers. If the
appliance is faulty, unplug the mains plug
or switch off the fuse in the fuse box.
Contact the after-sales service. Risk of electric shock and serious injury! ■
The cable insulation on electrical
appliances may melt when touching hot
parts of the appliance. Never bring
electrical appliance cables into contact
with hot parts of the appliance. Risk of electric shock! ■
Do not use any high-pressure cleaners or
steam cleaners, which can result in an
electric shock. Risk of electric shock! ■
A defective appliance may cause electric
shock. Never switch on a defective
appliance. Unplug the appliance from the
mains or switch off the circuit breaker in
the fuse box. Contact the after-sales
The stainless steel grilling surface is sturdy and smooth, but,
like any good pan, will show signs of use over time. These do
not impair the product use. A slight yellowing of the stainless
steel grilling surface is normal.
Caution! ■ Scratches or scores on the grilling surface: Never use a knife to cut on the grilling surface. Turn food using the spatula
provided. Do not hit the grilling surface with the spatula. ■ If hard or sharp objects fall on the glass ceramic panel or the glass ceramic cover, damage could occur. ■ Glass ceramic cover: Only close the glass ceramic cover after the appliance has cooled down completely. Never
switch the appliance on with the cover closed. Do not use the
cover as a cooker surface or warming zone.
Environmental protection
Environmentally-friendly disposal
Dispose of packaging in an environmentally-friendly manner.
This appliance is labelled in accordance with
European Directive 2012/19/EU concerning used
electrical and electronic appliances (waste electrical
and electronic equipment - WEEE). The guideline
determines the framework for the return and recycling
of used appliances as applicable throughout the EU.14
Getting to know the appliance
Here you can gain an overview of your new appliance's
components and control panel.
Your new Teppan Yaki
1 Glass ceramic cover
Rear heating zone off
Temperature/duration
When you touch a symbol, the respective function is activated.
Notes ■ The settings will remain unchanged if you touch several symbols at once. This allows you to wipe up spills on the
control panel. ■ Always keep the controls dry. Moisture reduces their effectiveness.
Residual heat indicator
The Teppan Yaki has a two-stage residual heat indicator.
• appears in the display, the Teppan Yaki is still hot. When
the Teppan Yaki cools down further, the display switches to
The indicator goes out when the Teppan Yaki has cooled down
Before using for the first time
In this section, you can find out what you must do before using
your Teppan Yaki to prepare food for the first time. Read the
Safety information section beforehand.
Clean the Teppan Yaki thoroughly with lukewarm soapy water
Heating the Teppan Yaki
To get rid of the new cooker smell, heat up the empty Teppan
Yaki. 30 minutes at 240 °C is ideal.
Setting the Teppan Yaki
In this section, you can find out how to set the Teppan Yaki.The
table shows temperatures and cooking times for various meals.
Switching the teppanyaki on and off
The main switch is used to switch the teppanyaki on and off.
To switch on: Touch the
# symbol. A signal sounds. The
display above the main switch lights up. The teppanyaki is
To switch off: Touch the
# symbol until the display above the
main switch goes out. The teppanyaki has been switched off.
The residual heat display remains lit until the teppanyaki has
cooled down sufficiently.
Note: The teppanyaki switches off automatically when the
temperature setting remains at 0 for more than approx. 15
Setting the temperature
1. Switch on the teppanyaki using the main switch.
‹‹‹ and the °C symbol light up in the temperature display.
2. Set the required temperature on the settings range using the
3. Touch the @ symbol.
The temperature is set to 240 °C.
The temperature is set to 170 °C.
} heating symbol lights up.
Once the set temperature has been reached, a signal sounds
} heating symbol goes out. Now you can place the
food onto the teppanyaki.
Note: The teppanyaki temperature is regulated by the heat
switching on and off. The heat may be switched on and off even
at the highest setting.
Selecting the warming setting
At the – warming setting, the appliance heats to 70 °C.
1. Switch on the teppanyaki.
2. Touch the – symbol.
– symbol lights up in the temperature display.
Note: Do not attempt to keep excessively large quantities of
food warm. All food which is to be kept warm should be in
contact with the frying surface, otherwise it will cool down. Do
not keep food warm for too long, otherwise it will become dry.
Selecting the cleaning level
At the ¢ cleaning level, the appliance heats to 40 °C. This
enables you to leave the dirt to soak once you have poured a
little water and added a drop of washing-up liquid on the frying
surface (1 hour maximum). You can begin cleaning once the
dirt has begun to soften.
Switching Wipe protection on and off
When the appliance is in use, you can activate the key lock for
approx. 30 seconds using the Wipe protection function in order
to clean the control panel.
1. Touch the " symbol to switch Wipe protection on.
Note: When Wipe protection is switched on, all symbols are
locked, except for the
" Wipe protection symbol and the
# symbol for switching off the appliance.
The displays above the
" symbol and above the # symbol
2. Clean the control panel with water and washing-up liquid.
3. Touch the " symbol to switch off Wipe protection.16
Switching off the rear heating zone
If you are preparing small amounts of food, you can also just
use the front zone. You can use the rear zone for keeping food
The teppanyaki must be switched on.
Ò symbol. The display above the symbol lights up.
The rear heating zone is now switched off.
When you next switch on the appliance, both heating zones are
switched on. You can change this behaviour in the basic
settings; see Basic settings.
The details given in the tables are guidelines and apply to a
preheated appliance. The values may vary depending on the
type and amount of food to be grilled.
Only add the food when the preheating time has elapsed.
Food to be grilled Temperature Cooking time Quantity/thickness
Beef steak, medium* Sear at 230 - 240 °C 2 - 3 min. on each side approx. 2 cm
Continue grilling at 180 °C 5 - 7 mins
Pork neck steak, boned 210 - 220 °C 15 - 20 mins approx. 2 cm
Minced meat 230 - 240 °C 9 - 11 mins approx. 600 g
Hamburgers 180 - 190 °C 13 - 16 mins max. 1 cm
* e.g. entrecôte, fillet steak, rump steak. The steak is medium if meat juices escape.
** Press firmly on the plate, turn several times.
*** Use sufficient oil to prevent the breading from drying out and burning.
**** Distribute the meat/poultry strips well, they should not touch each other.
Food to be grilled Temperature Cooking time Quantity/thickness
Fish fillet* 190 - 200 °C 7 - 10 mins approx. 2 cm
Prawns 210 - 220 °C 8 - 10 mins 30 g each
* Use suitable fish types for grilling, e.g. salmon, tuna, monkfish, perch, pike-perch. To prevent the fish fillets from sticking, you can
toss them in flour before grilling. Start grilling skin side down and turn them only once, if possible.
Food to be grilled Temperature Cooking time Quantity/thickness
Carrots, julienne 190 - 200 °C 6 - 8 mins approx. 500 g
* Before grilling, salt aubergines, leave to stand for 30 minutes and pat dry.17
The appliance has a childproof lock to prevent children
operating it accidentally.
Switching the childproof lock on and off
The teppanyaki must be switched off.
To switch on: Touch the
– symbol for at least 3 seconds. The
‚ symbol lights up for approx. 10 seconds. The control panel
To switch off: Touch the
– symbol for at least 3 seconds. The
‚ symbol lights up briefly. The lock is released.
Note: When the childproof lock is switched on, the symbol for
3 timer is not locked.
Automatic childproof lock
This function automatically activates the childproof lock every
time you switch the teppanyaki off.
Switching on and off
You can find out how to switch the automatic childproof lock on
and off in the Basic settings section.
Automatic time limit
If the appliance is in use for a prolonged period without the
setting being changed, the automatic time limit is activated.
Depending on the temperature set, the appliance may be
operated for between 2 and 4 hours before the automatic time
The heat is interrupted. ” and ‰ flash alternately in the display.
The display goes out when you touch any control. You can
reset the temperature.
Tips and tricks ■ When the heating up light goes off, place the food on the appliance. This also applies when raising the temperature to
fry a second item which requires a higher setting. ■ Press the pieces of meat, poultry or fish flat onto the frying surface using the spatula. Only turn the meat, when it comes
away from the surface easily, in order to protect the structure
of the meat. Damaging the structure can cause juices to
escape and results in the meat drying out. ■ Keep the pieces of meat, poultry or fish apart so that they do not draw any liquid. ■ Avoid pricking or cutting meat before or during frying, in order to retain meat juices. ■ Do not salt the food before frying, to prevent liquid and soluble nutrients from escaping. ■ Turn fish fillets in flour before frying. The fish will be easier to turn. ■ Turn fish fillets only once if possible. Place fish onto the appliance with the skin facing downward. ■ Use oil and fat that is suitable for frying, for example plant oil or concentrated butter.
The timer can be used as a kitchen timer. The timer does not
switch the Teppan Yaki on or off.
With the timer, you can set a time up to 99 minutes. You can
also use the timer when the Teppan Yaki is switched off.
1. Touch the 3 symbol until S and ‹‹ light up in the timer
2. Set the required time on the settings range using the @ and
‚‹ lights up in the timer display.
4. Touch the @ symbol.
The timer display is increased in increments of 1 minute.
5. Touch the A symbol.
The timer display is decreased in increments of 1 minute.
A signal sounds once the time has elapsed.
timer display and the
S symbol flashes. The signal and the
display switch off after approx. 1 minute.
You can change the duration of the signal in the basic settings;
see section Basic settings.
Correcting the timer
1. Touch the 3 symbol.
2. Set the required time on the settings range using the @ and
Your appliance has various basic settings. You can adapt these
settings to suit your own needs.
Changing the basic settings
The teppanyaki must be switched off. 1. Switch on the teppanyaki.2. Within the next 10 seconds, touch the 7 symbol for 4 seconds.
™ and ‚ flash alternately in the right-hand display; ‹ lights up
in the left-hand display. 3. Touch the 7 symbol repeatedly until the required display flashes on the right-hand display.
4. Set the required value on the settings range using the @ and
A symbols. 5. Touch the 7 symbol for at least 3 seconds. The setting has been saved.
Switching off without saving
To exit the basic setting, switch the Teppan Yaki off with the
main switch. Changes are not saved.
In this chapter you will find tips on how to maintain and clean
your appliance correctly.
: Risk of electric shock!
Do not use high pressure washers or steam cleaners to clean
The appliance becomes hot during operation. Allow the
appliance to cool down before cleaning.
When you add water or ice cubes to the hot grilling surface, it
will spit and steam will form. Do not bend over the appliance.
Keep a safe distance away.
Cleaning the appliance
Clean the appliance after each use once it has cooled down.
Burnt-on residues can only be removed with difficulty.
Remove large clumps of residue using a spatula.
Ice cubes are better suited to cleaning the hot appliance than
water as they cause less splashing and steam.
Carefully remove cleaner residues before next using the
Cleaning the hot appliance 1. Switch off the appliance. Leave the appliance to cool down for at least 15 minutes. 2. Pour ice cubes or water onto the frying surface. Add a few drops of washing-up liquid. Leave the dirt to soak. 3. Do not start cleaning until the residual heat display has changed from
Cleaning the cooled appliance 1. Pour a little water and add a drop of washing-up liquid on the frying surface so that it is just covered.
2. Switch on the appliance. Set the ¢ cleaning level. Leave the
dirt to soak (max. 1 hour). 3. Begin cleaning once the dirt has begun to soften. Display Function
‹ The confirmation signal and operating error
signal are switched off.
‚ Only the operating error signal is switched on.
ƒ The confirmation signal and operating error
signal are switched on.*
Duration of the timer end signal
Switching off the rear heating zones
‹ When the appliance is switched on, both
heating zones are on.*
‚ When the appliance is switched on, only the
front heating zone is on.
ƒ When the appliance is switched on, the
previous setting is retained.
Resetting to the basic setting
‹ All changed settings are saved.
‚ All settings are reset to the basic settings.
Cleaning between uses
1. Switch off the appliance.
2. Use a spatula to push 4 – 5 ice cubes over the hot frying
3. Use a spatula to remove dirt which has begun to soften.
4. Switch on the appliance again. Wait until the appliance has
reached the set temperature again to place food on the frying
Do not use these cleaners ■ Scouring or chemically aggressive cleaners■ Don't allow acidic cleaners (e.g. vinegar, citric acid, etc.) to get on the frame or panel. ■ Cleaners containing chlorine or with a high content of alcohol■ Oven cleaner■ Hard and scratchy sponges, brushes or scouring pads■ Thoroughly wash out new sponge cloths before using them. Resolving malfunctions
Malfunctions often have simple explanations. Please read the
following notes and tips before calling the after-sales service.
Recommended cleaning
Frying surface Use washing-up liquid to remove
Depending on what has been cooked,
whitish stains may remain on the frying
surface. Remove these with lemon
juice or vinegar. Then thoroughly wipe
the frying surface with a wet cloth.
Lemon juice and vinegar must not be
allowed to come into contact with the
Apply our grill cleaner gel (order no.
463582) to stubborn dirt once the
appliance has cooled down and let it
work for at least 2 hours, or overnight
for heavy soiling. Then rinse off
thoroughly and dry. Follow the instruc-
tions on the cleaner's packaging.
Clean using a soft, damp cloth and
some washing-up liquid.
For heavy soiling, use our
stainless-steel cleaner (order no.
00311499). This gives dull stainless
steel its shine back.
Control panel Clean using a soft, damp cloth and
some washing-up liquid; the cloth must
not be too wet. Dry with a soft cloth.
Display Fault Measure
None The power supply has been discon-
Check the household fuse for the appliance. Check whether there is a
power cut by trying other electronic appliances.
The controls are damp or an object is
Dry the controls or remove the object. Then touch any control.
Appliance fault Switch off the appliance for at least 15 seconds. Switch the appliance
back on. Contact customer service if this display appears again.
The electronics have overheated and
have switched off the appliance.
Wait until the electronics have cooled down sufficiently. Then touch any
The appliance was in operation for too
long and has switched itself off.
You can switch the appliance back on again immediately.20
Our after-sales service is there for you if your appliance should
need to be repaired. We are committed fo find the best solution
also in order to avoid an unnecessary call-out.
E number and FD number:
Please quote the E number (product number) and the FD
number (production number) of your appliance when
contacting the after-sales service. The rating plate bearing
these numbers can be found on the appliance certificate.
Please note that a visit from an after-sales service engineer is
not free of charge, even during the warranty period.
Please find the contact data of all countries in the enclosed
customer service list.
To book an engineer visit and product advice
Rely on the professionalism of the manufacturer. You can
therefore be sure that the repair is carried out by trained service
technicians who carry original spare parts for your appliances.
Calls from a BT landline will be charged at up to
3 pence per minute. A call set-up fee of up to 6 pence
and electronic equipment - WEEE).
and electronic equipment - WEEE).
Interruptor principal