SF 2206 - Vacuum Cleaner ALPINA - Free user manual and instructions
Find the device manual for free SF 2206 ALPINA in PDF.
| Product type | Upright stick vacuum convertible to handheld vacuum |
| Brand | Alpina |
| Model | SF 2206 |
| Power supply voltage | 220-240 V ~ 50/60 Hz |
| Cable type | With automatic cord rewind |
| Dust container capacity | Not specified (transparent container) |
| Filter type | Washable filter with warm water |
| Included accessories | Dusting brush, crevice tool, arm strap, hose |
| Manual suction function | Yes, with hose and accessories |
| ON/OFF switch | Two positions (on/off) |
| Warranty | 2 years |
| Intended use | Household |
| Maintenance | Regular emptying of the container and washing the filter |
| Safety | Unplug before cleaning; do not use near heat sources |
| User manual | Available as PDF download (81 pages) |
Frequently Asked Questions - SF 2206 ALPINA
User questions about SF 2206 ALPINA
0 question about this device. Answer the ones you know or ask your own.
Ask a new question about this device
Download the instructions for your Vacuum Cleaner in PDF format for free! Find your manual SF 2206 - ALPINA and take your electronic device back in hand. On this page are published all the documents necessary for the use of your device. SF 2206 by ALPINA.
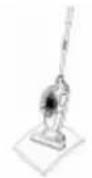
USER MANUAL SF 2206 ALPINA
EN: For your own safety read these instructions carefully before using the appliances.
- Handle
- ON/OFF power switch
3.Hose - Hose connector
- Dust cup
- Crevicetool
- Retractable handle
- Handle joint
- Main body
- Power plug
- Floor brush
- Dusting brush
- Shoulder strap
DE
Thank you for choosing Alpina home appliance. You have chosen the best appliances that offer 2 years/24 months warranty and years of service. We stand for quality, dependability and friendship forever. We hope you will choose Alpina again and make ALPINA your first choice in home appliances.
IMPORTANT SAFEGUARDS
When using electrical appliances, basic safety precautions should always be followed, including the following:
- Read all instructions carefully.
- This appliance may only be connected to the same main voltage as shown on the rating plate.
- To protect against risk of electrical shock, do not immerse or rinse housing, cord or plug in water or other liquid.
- Close supervision is necessary when any appliance is used near children.
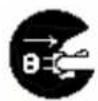
- Unplug from outlet when not in use, before putting on or taking off parts and before cleaning.
- Do not contact any moving parts while the appliance is operating.
- If the supply cord is damaged, it must be replaced by the manufacturer or its authorized service agent or a similarly qualified person in order to avoid hazard & damage to the unit.
- The use of attachment or accessories which are not supplied with the appliance are not recommended. This could result in electrical shock or injury or permanent damage to the appliance.
- Do not let cord hang over edge of table or counter or touch hot surface.
- Do not use the appliance for other than intended household use.
- Switch off the appliance before changing accessories or approaching parts, which move in use.
- The appliance is not intended for use by young children or infirm persons without supervision. Young children should be supervised to ensure that they do not play with the appliance.
This appliance is for household use and may be plugged into any AC electrical outlet (ordinary household current). Do not use any other electrical outlet.
PRECAUTIONARY MEASURES

If the opening that sucks in air, the suction pipe or the telescopic metal pipe becomes blocked, switch off the vacuum cleaner immediately. First clear the blocked substance before attempting to start the appliance again.
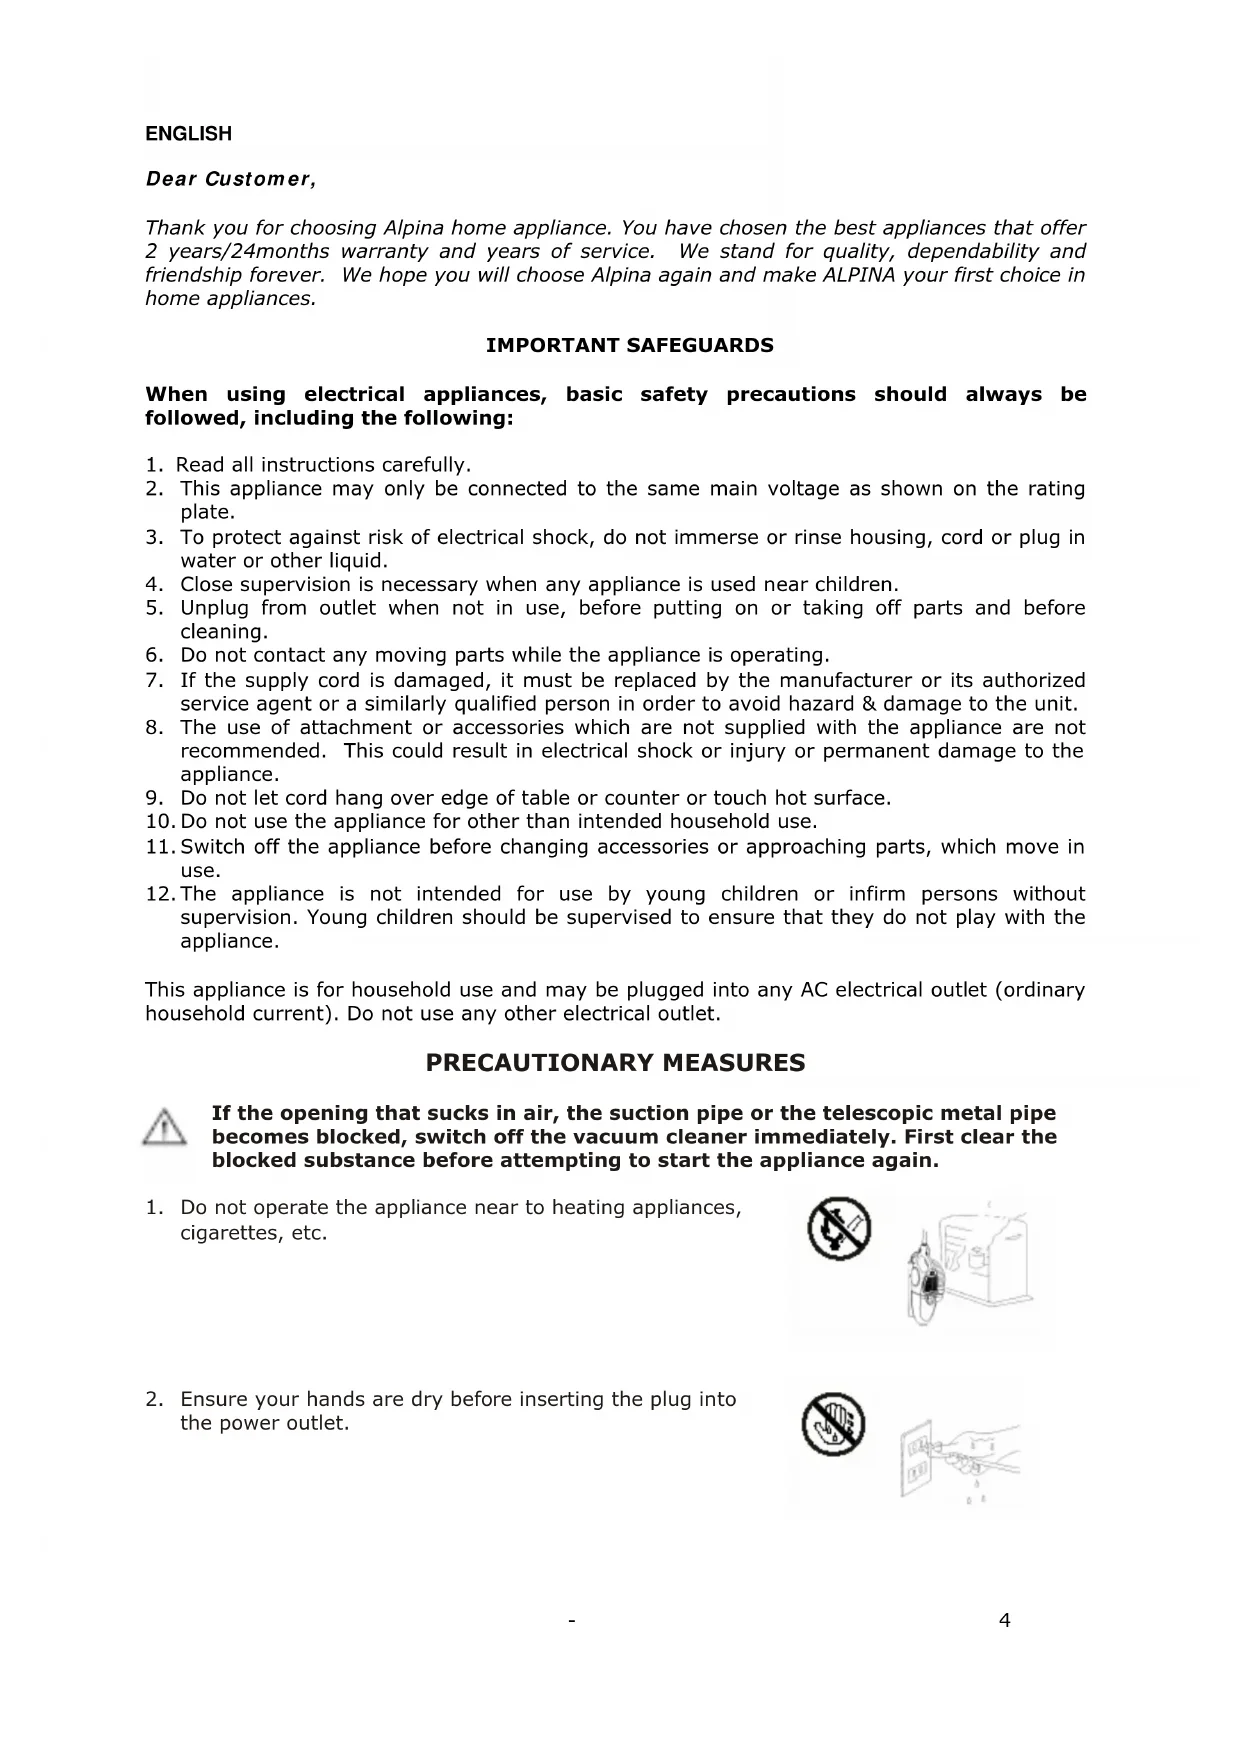
- Do not operate the appliance near to heating appliances, cigarettes, etc.

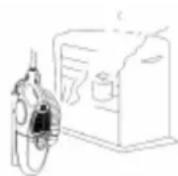
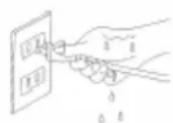
- Ensure your hands are dry before inserting the plug into the power outlet.

- Remove all large or sharp objects from the floor in order to prevent the filter being damaged.

- Do not pull the plug out of the power outlet by means of the cord. Always remove the plug directly from the power outlet.
This vacuum cleaner is equipped with a plug and cord that roll up automatically.
If any part of the appliance is damaged, the plug and the cord must be repaired by an authorized repairman or electrician.
ASSEMBLING AND USING YOUR VACUUM CLEANER
Remove all packaging from the unit, hose and other attachments; ensure that you have removed all of the attachments before discarding the packaging.

Always remove the plug from the power outlet before fitting or removing accessories!
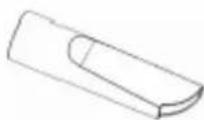
1. EXTENDING THE METAL HANDLE
Push the plastic knob forward and pull the small tube outward.
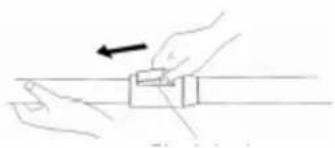
Plastic knob
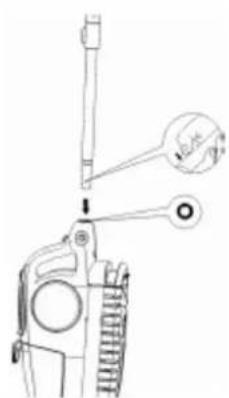
2. INSERTING THE METAL HANDLE INTO THE MAIN BODY
Push in the pin at the end of the metal handle (see illustration)
Insert the metal handle into the hole next to the handle. Make sure that the handle fits into the slot correctly in the opening. (See illustration.)
When inserted correctly, the pin should rest in the hole.
ENGLISH
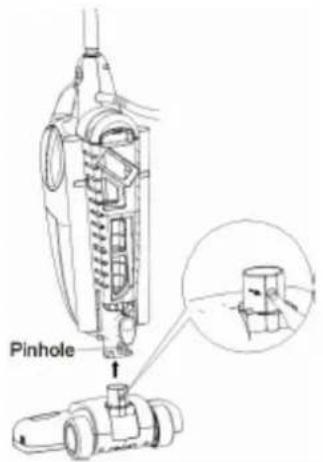
3. ATTACHING THE FLOOR BRUSH TO THE MAIN BODY
Push in the pin of the floor attachment as shown in the illustration at the right.
Insert the floor brush into position in the direction of the arrow.
When inserted correctly, the pin will be visible in the pinhole.
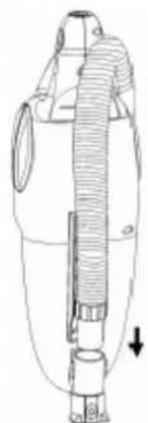
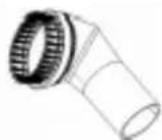
4. ATTACHING THE HOSE TO THE MAIN BODY
Hold the end of the hose (see illustration).
Insert the hose into position (see arrow in illustration).
USING THE VACUUM CLEANER
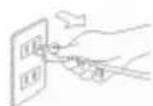
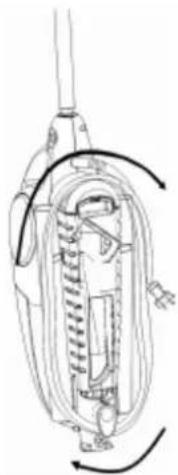
1. WINDING AND UNWINDING THE POWER CORD
a. To wind the cord after using, follow the illustration at the right.
b. To unwind the power cord, follow the illustration at the right but in the opposite direction.
c. When using the vacuum, attach the cord to the cord holder so that the cord is out of the way when you are vacuuming. (See below.)
Top of the retractable handle
d
2. POWER SWITCH (TWO POSITIONS)
a. The power switch has two different positions.
b. Push on the TWO LINES (II) side for ON suction power
c. Push on the ONE LINE (I) side for OFF suction power.
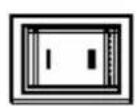
ON OFF
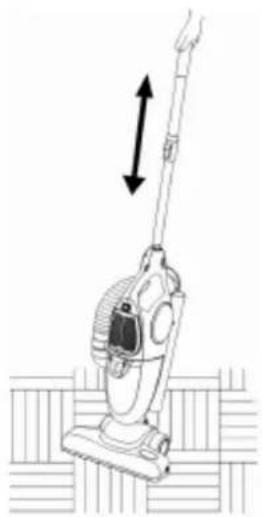
3. USING THE UNIT AS AN UPRIGHT
a. Unwind the power cord and plug into a 220-240V outlet.
b. Push down in the direction of the arrow to obtain the best results on carpets or on hard wood floors.
NOTE: When vacuuming deep pile carpets or other hard to vacuum carpets, lower the angle of the telescopic handle (see illustration at the right) for easier maneuverability.
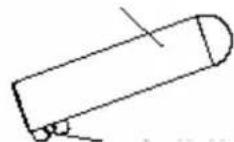
4. USING THE UNIT AS A HAND VACUUM
a. Disconnect the metal handle.
b. Disconnect the floor brush.
c. Attach the hose.
d. Attach the crevice tool or the dusting brush.
e. Attach the shoulder strap.
Crevice tool
For radiators, crevices, corners, baseboards and between cushions
Dusting Brush
The dusting brush is used for the furniture, venetian blinds, books, lamp shades, and shelves.
MAINTENANCE
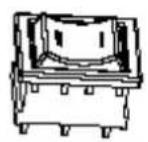
1. Emptying the dust cup
Always turn off the power switch and unplug the electrical cord before emptying the dust cup.
a.Pull the hose off.
ENGLISH
b. Press the lock and turn it slowly until it moves down.
c. Holding the dust cup in your hand, remove the dust cup filter.
d. Empty the dust cup.
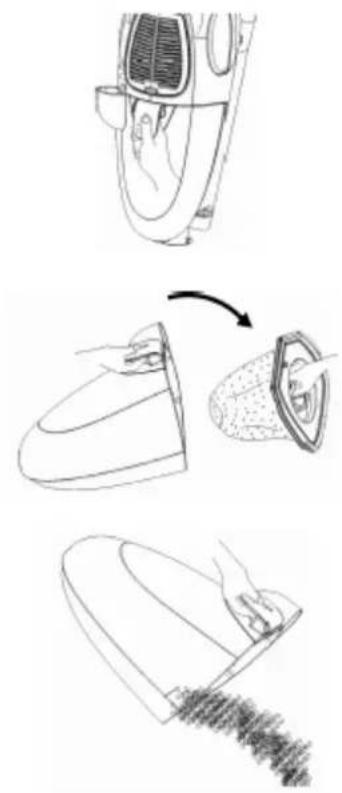
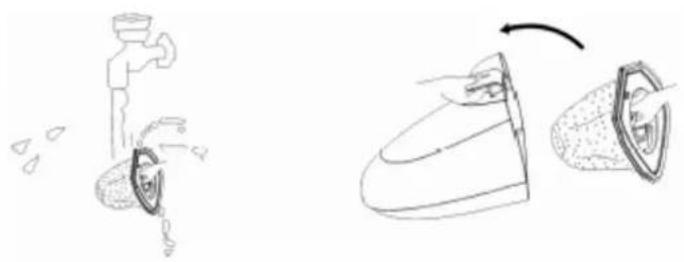
2. Cleaning the filter
- Remove the dust cup filter.
- Wash the dust cup filter in lukewarm water, using a mild detergent and a soft brush.
- Dry the dust cup filter completely before reinserting in the dust cup.
- Replace the dust cup filter into the dust cup.

Warning: Always empty the dust cup and clean the dust cup filter before each use and during prolonged usage.
Never overfill the dust cup remove dirt and clean the dust cup filter after prolonged usage, or you may risk motor damage.
Make sure that the dust cup filter is completely dry before inserting back in the vacuum
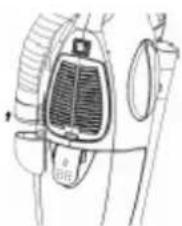
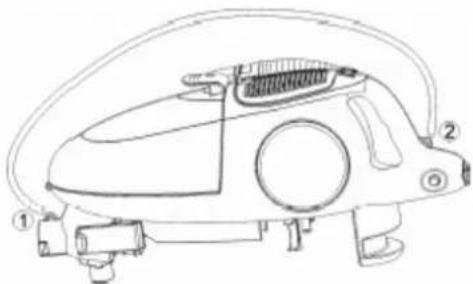
Attaching the Shoulder Strap
NOTE: If you want to shoulder the vacuum cleaner, take out the accessories and then extract the hose.
Use the hooks to attach the shoulder strap to the vacuum cleaner (Points no. 1 and no. 2 in the drawing.).
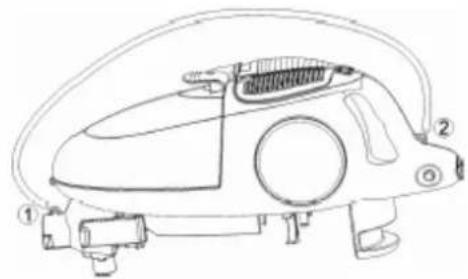

Warning: After extended use, the body of the vacuum cleaner may become hot.
When using the unit with the shoulder strap, the unit will touch the body of the user. Therefore, make sure to use the vacuum cleaner with the strap only when the unit is cool. If it gets too warm, allow it to cool before continuing use.
GUARANTEE
This product is guaranteed for a period of 2 years from the date of purchase against defects in materials and workmanship. Under this guarantee the manufacturer undertakes to repair or replace any parts found to be defective, providing the product is brought back to the purchase address. This guarantee is only valid if the appliance has been used in accordance with the instructions, and provided that it has not been modified, repaired or interfered with by any unauthorised person, or damaged through misuse.
This guarantee naturally does not cover wear and tear, nor breakables such as ceramic items, bulbs etc. If the product fails to operate and needs to be returned, pack it carefully, enclosing your name and address and the reason for return and bring it to the address of purchase. If within the guarantee period, please also provide the guarantee card and proof of purchase.
DEUTSCH
Lieber Kunde,
Bolzenloch sightbar.
4. BEFESTIGUNG DER TEPPICHBURSTE AM STAUBSAUGER-RUMPF
BELANGRIJKE VEILIGHEIDSWAARSCHUWINGEN
VOORZORGSGMAATREGELEN

PoiocoeHHeHne IJeeboJIAmKn
PnmeaHne: Ecn B0 BpMa pa6oTb 6yTe nepeHocntb nbIeCoc Ha nneue, To cIeDyET BbHyTb KOHTeHep dJa HacaDok.
Pn nmoos KpoukOB npKpeHte PneueByIO JAMKy K nbIeoccy, a mEHHo K TocKaM 1 n 2 Ha pucyHke.

BHHMaHHe: B cIyuae dIInTeIbHO pa60tI nbIeCoc Haunet HaraepBaTbc. Ecnn 6ydeTe nepenocntb nbIeCoc Ha nneue, To nobepxhoctb nbIeCocca 6ydet npKacatbcn K Baewemy Tey. Ecnn Bbl XOTnte Hocntb nbIeCoc Ha nneue, Chauana y6eINTecb B Tom, ecnn erO nobepxHOCTb XoJOnHa. Ecnn B npoucece pa60tI nbIeCoc Haunet HaraepBaTbcn, npeKpaNTte pa60ty dJa TOR, 4TO6bl nbIeCOC OCTbl.
TAPAHINHbIE O63ATEJIbCTBA
Ha daHhoe n3dene npedocTabn eTc 2-letnra rapaHTna O TaBtI npoJaxn, KOtopa paonpOCTpaHareTc H deΦeKtbl MaTePnala N HeoCTaTKn PnN 3rTOBLeHH. B pamkax HaCToaei rapaHTn N3rOToBntelb 063yETcN OTpeMOHTnpOBaTB nn 3ameHnTb IIO6yIO Detalb, KOTOPa 6bIa npn3HaHa HeNCnPabHO, PnN yCNoBn OTnpABKn N3dEINB aApcec npodBaua. Hactoaa rapaHTn npn3Haetc LnB b Tom Clyae, ecnn n3dEne npimHeJIoCb B COOTBeTCTBN C daHNO IHCTpyKuNe, B Hero He 6bln BHeceHb N3MeHeHna, OHO He peMOHTnpOBaIocb N He pa3bnpalocb nepcoHaON 6e3 Heo6xOIMOn KBaIINFkaUIn, INn He 6blno NOBpeKdeHO B pe3yIbTaTe HeNPabNJbHoro 6paueHn C HmM.
EcTeCTBeHNO, YTO daHHa rapaHTnHa He pacnpoctpaHareTc Ha n3HaunBaHne, a TaKKe Ha xpyKnke npedMeTbI, KaK HapnPmep KepamUeCKNe KOMNoHEtbl, JaMnoChu T.I. PpN OTKa3e n3dennr H pN Heo6xOAnMoCTn erO OTnpabKn Ha3ad, yNaKyTe erO co Bcemn Heo6xOAnMbIMn Mepamn PpeOcToPOXHOCTn, npUOnkte cOpOBDoNTeJbHoe NcBMO C yka3aHHeM BaWero ImHen, adPecA u npuHb I BO3BpaSeHn, n OTnpaBBte npOdaBu, y KoToporo Bbl erO npno6pEn. Ppr Bo3BpaSeHn n3dennr B paMKax rapaHTnHorO cPoka npINOxHTe rapaHTnHbI TaJOh N KBHTaHcUO O NOKynKe.
MAGYAR
Kedves Vásárló!
VAZNE SIGURNOSNE UPUTE
Kod uporabe elektricnih urea morate se pridravati propisanih sigurnosnih mjera ukljuucuci slijedce:
- Pozorno pročitajte cijele upute za uporabu.
- Urej moze bitu ukljucen samo u propisanu elektricnu mrezu koja je navedena na ploci urejaja.
- Glede sprečavanja opasnosti od udara elektrčne struje, kučiste, kabel ili utikač ne uranjaite i ne vlažite vodom ili drugom tekuciinom.
- Ako se uredaj koristi u blizini djece, potreban je nadzor.
- Urej isključite iz mreže ako ga ne koristite, takoder odvijte dijelove prje njegová Čišćenja.
- Dok uredaj radi, ne dirajtePokretne dijelove.
- Ne koristite uredaj ako mu je ostecen kabel ili utikač, ako ne radi ispravno, ako je pao ili je na drugi nacin ostecen. Pregled, popravak, elektricno ili mehaničko podesavanje povjeriteismo autoriziranom servisu.
- Ako je kabel za napajanje oštećen, zamijenite ga kod proizvodača ili ovlaštenog servisa ili slično kvalificirane osobe da izbjegnete opasnost i oštećenje urežaja.
- Ne preporucjemo koristiti dopune ili dodatne ureade jkoji nisu u kompletu s proizvodom. Moze nastupiti udar elektriche struje ili doci do ozljede.
- Kabel nemojte polagati preko ruba stola ili računala ili njime doticiati tople povrsine.
- Ure'daj nemojte koristiti u druge svrhe osim u domacinstvu.
- Prije zamjene opreme iliPokretnih dijelova uredj isključite.
- Urejne smiju koristiti mala djeca ili hendikepirane osobe bez nadzora. Ne dopustite djeci da se igaju s uredajem.
SIGURNOSNE MJERE