
SRP 4342 - Cd player/recorder AEG - Free user manual and instructions
Find the device manual for free SRP 4342 AEG in PDF.
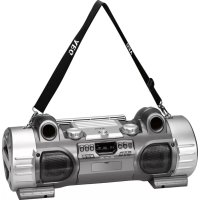


| Product type | CD player/recorder |
| Brand | AEG |
| Model | SRP 4342 |
| Power supply | DC 12V, 3A mains adapter (AC input 100-240V~50/60Hz) or 10 UM1/R20 1.5V batteries |
| Battery operation | Automatically disabled when mains is connected |
| Output power | 400 W PMPO |
| Net weight | 5.60 kg |
| FM radio | VHF/FM range 87.5 – 108.0 MHz |
| Supported formats | Audio CD, CD-R, CD-RW, MP3 |
| Playback functions | Play/pause, stop, forward/backward search, repeat (1, all, album, intro), random playback, programming |
| Equalizer | Presets: CLASSIC, ROCK, POP, JAZZ, FLAT |
| Display | LCD with backlight |
| Connections | AUX IN socket (3.5 mm), USB port, SD/MMC memory card slot, telescopic antenna |
| Remote control | Infrared, range up to 5 m, CR2032 battery |
| Laser safety | Class 1 laser, safety switches |
| Cleaning | Soft slightly damp cloth, unplug before |
Frequently Asked Questions - SRP 4342 AEG
User questions about SRP 4342 AEG
0 question about this device. Answer the ones you know or ask your own.
Ask a new question about this device
Download the instructions for your Cd player/recorder in PDF format for free! Find your manual SRP 4342 - AEG and take your electronic device back in hand. On this page are published all the documents necessary for the use of your device. SRP 4342 by AEG.
USER MANUAL SRP 4342 AEG
Elimination. Page 25
Spanish
Contents
Location of Controls. Page 3
User manual. Page 40
Technical Specifications. Page 46
Disposal. Page 46
Polish
Table of contents
Location of controls. Page 3
User manual. Page 62
Technical specifications. Page 68
Russian
Contents
Location of controls. Page 3
Location of Controls
Power supply: DC 12 V
Battery operation: 10x 1.5 V type UM1/R20
Installation/Introduction
Thank you for choosing our product. We hope you will enjoy using the appliance.
Symbols in this user manual
Important notes for your safety are marked distinctively. Pay absolute attention to them to avoid accidents and damage to the device:

WARNING:
Warns of dangers for your health and indicates potential risks of injury.

CAUTION:
Indicates potential dangers for the device or other objects.

NOTE:
Highlights tips and information for you.
General Safety Guidelines
Before using this device, carefully read this user manual and keep it together with the Warranty Certificate, cashier receipt and if possible, the original package inclusive its interior packing. If you hand on the device to any third person, include the user manual as well.
- To avoid the risk of fire or electric shock, you should not expose the device to rain or humidity. Do not use the device near water (e.g. bathroom, swimming pool, humid cellars).
- The unit is designed solely for private use and its intended purpose. This unit is not designed for commercial use.
- Make sure that the power cable is not bent, pinched, or comes into contact with heat sources. Make sure that the power cable is not a tripping hazard. The AC adapter is only suitable for use in dry rooms.
- Connect the AC adapter only to a properly installed outlet. Be sure the device voltage corresponds to the grid voltage. Also check that the output current and the polarity of the power supply match the information on the connected device.
- Do not touch the AC adapter with wet hands! Always install batteries in the correct direction.
- Avoid covering the device's vent openings.
- Never open the device's case. Improper repairs can cause severe danger to the user. If the device or particularly the power cord is damaged, don't use the device any further and have it repaired by a qualified specialist. Check the power cord regularly for damages.
- To avoid any danger, a damaged power cord must be replaced only by the producer, its customer service or a similarly qualified person with an equal cord.
- If the device won't be used over an extended period of time, disconnect the power cord and remove the batteries.
These symbols may be found on the device and are intended as warnings:
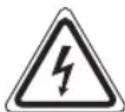
The lightning flash is intended to alert the user to the presence of dangerous voltage within the device.

The exclamation mark is intended to alert the user to the presence of important operating and maintenance instructions accompanying this device.
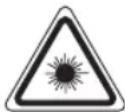
Products with this symbol operate with a "Class 1 Laser" for scanning the CD. The built-in safety switches are intended to prevent the user from being exposed to the dangerous laser beam not visible to the eye when opening the CD compartment.
These safety switches must not be bypassed or altered; otherwise there is a risk of being exposed to the laser beam.
Children and disabled persons
- For the safety of your children, keep any packing parts (plastic bags, cardboard, Styrofoam, etc.) out of their reach.

WARNING!
Don't let small children play with foils for danger of suffocation!
- This device is not intended for use by persons (including children) with reduced physical, sensory or mental capabilities, or lack of experience and/or knowledge unless they have been given supervision or instructions concerning the use of the device by a person responsible for their safety. Supervise children to ensure they do not play with the device.
Special safety guidelines
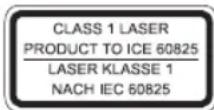
This device operates with a Class 1 laser.
WARNING!
This appliance shall not be exposed to dripping or splashing water and that no object filled with liquids such as vases shall be placed on apparatus.
CAUTION:
Do not touch the speaker membranes (A) with your hands or with objects. This may damage the membranes.
Overview of the components
1 CD compartment 2 CD tray lock (OPEN/LOCK) 3 VOLUME control (volume) 4 LCD display 5 IR sensor for the remote control 6 REPEAT button 7 button (Stop) 8 II button (play/pause) 9 / buttons (search forward/backwards) 10 PROG button (Memory) 11 Memory card slot 12 AUX IN jack 13 USB connection 14 FOLDER+ button (folder upward) 15 MUTE button 16 FOLDER- button (folder downward) 17 STANDBY/ON button (standby/power) 18 EQ button (Equalizer) 19 MODE function switch 20 BASS control 21 Nylon handle mounting 22 Telescopic antenna
A Speaker
Rear view (not shown)
POWER ON/OFF switch
DCIN 12V Power supply connection
Battery compartment
Remote control
1 STANDBY button 2 FM button (radio) 3 AUX IN button 4 PROG button (Memory) 5 PRESET button (radio memory) 6 ID3 button 7 EQ button 8 SKIP/TUNING UP button (search forward) SKIP/TUNING DOWN button (search backwards) 9 STOP / FM MONO/ST button 10 VOLUME + / - (volume) button 11 PLAY/PAUSE button 12 RANDOM button (random playback) 13 REPEAT button 14 FOLDER +/- buttons (Album selection) 15 MUTE button 16 CD/USB/SD button
Installation/Introduction
- Read the manual thoroughly before operating the device!
- Select a suitable location for the device. Suitable locations are dry, even and anti-slip surfaces on which you may operate the device easily.
- Make sure there is proper ventilation for the device!
- Remove, if necessary, the protection sheet from the display.
WARNING:
Turning up the volume too high may damage your hearing.
Power supply
- Insert the grid plug into a properly installed three-prong socket with 230 V, 50 Hz. Connect the device with the plug connector by inserting its plug into the IN 12 V jack of the device.
- Make sure the grid voltage corresponds to the figures on the rating plate.
CAUTION:
The included AC adapter may only be used with this device. Do not use it for other devices. - Use only an AC adapter with 12 V (⊕ 一). A different AC adapter may damage the unit. The mains plug shall remain readily operable. - The direct plug-in adapter is used as the disconnect device, the disconnect device shall remain readily operable.
NOTE:
- Disconnect from mains power supply during longer periods of non-use.
- The preset time and station is lost as soon as the power supply has been interrupted.
Battery Operation (Batteries not supplied)
- Open the lid of the battery compartment on the rear side.
- Insert the 10 batteries type UM1/R20 1.5 V. Observe the correct polarity (see bottom of battery compartment)!
- Close the battery compartment.
Should the device not be used for long periods, remove the batteries to prevent any "leakage".
NOTE:
If a mains cable is connected, the batteries are automatically switched off. The preset time station is lost as soon as you remove the batteries.
42 English
CAUTION:
- Different battery types or new and used batteries must not be used together.
- Do not dispose of batteries with your household trash. Please hand over at authorized collection points or return to your dealer.
WARNING:
The batteries shall not be exposed to excessive heat such as sunshine, fire or the like. Danger of explosion!
Insert/Replace Battery in Remote Control
NOTE:
The lithium cell in the battery compartment of the remote control may have been safeguarded for transport with a piece of foil. This extends the life of the battery. Please remove this foil before the first use to make the remote control ready for operation.
- Open the battery compartment on the underside of the remote.
- Replace the cell by a battery of the same type (CR 2032). Check that the polarity is correct (see battery compartment).
- Close the battery compartment.
If the remote is not in use for a lengthy period of time, please remove the battery to prevent the battery acid from "leaking".
WARNING:
The battery shall not be exposed to excessive heat such as sunshine, fire or the like. Danger of explosion! - Keep batteries out of the reach of children. They are not toys. Do not force batteries open. - Avoid contact with metallic objects. Rings, nails, screws etc.) Danger of short circuits! - Short circuits may overheat or even ignite batteries. This may lead to combustion. - When transporting the batteries, cover the terminals for your safety with an adhesive strip. If a battery leaks, do not rub the fluid into the eyes or the skin. If acid comes into contact with the eyes, rinse with purified water and seek medical advice if symptoms persist.
CAUTION:
Batteries must not be disposed of in the garbage. Please bring used batteries to competent collection centers or back to the dealer.
Transport securing device of CD compartment
- Open the CD tray (1) by rotating the lock (2) to the left in the OPEN direction.
- Remove, if present, the transport securing device from the CD player before starting operation.
- Close the CD compartment again. Rotate the lock (2) to the right in the LOCK direction.
Turning the device on/ off
- Turn the device on by setting the POWER ON/OFF switch to the "ON" position on the rear side of the device. To turn off the device, set the POWER ON/OFF switch to the "OFF" position. Then, disconnect the device from the mains.
Setting the clock (during standby mode)
- Briefly hold down the PROG button (10/4). The display will show "24 HOUR".
- Use the button (9/8) to select between 24-hour and 12-hour display setting. Confirm with PROG.
NOTE: The 12-hour setting will result in the following display AM = morning, PM = afternoon.
- Use the buttons to set the hours. Confirm with PROG.
- Use buttons to set the minutes.
- Press PROG again to save the time settings.
General operation
NOTE:
Some buttons are found on both the device and the remote control. Buttons with the same name have the same functions.
STANDBY (17/1)
Press the STANDBY button to switch the device into standby mode. Press this button again to turn on the device.
Volume (3/10)
Adjust to your preferred volume level. The display will show "VOL" and a number. This corresponds to the set volume of "VOL MAX" or "VOL MIN".
BASS control (20)
Use this control to adjust the bass individually. The display will show "BASS" and a number.
Infrared remote control
Wireless operation from a distance of up to 5 meters. If this range decreases, please change the battery. Make sure there are no obstacles between the remote control and the sensor (5) on the device during operation.
AUX IN jack (12)
Connect analogue playback devices. When connecting to this jack, you can also listen to the audio of other devices, such as MP3 or CD players, via the speakers.
English
- Flip the cover downwards.
- Please connect the external device via 3.5mm plug jack to the AUX IN jack.
- Now select AUX mode with the MODE button (19 on the device) or with the AUX IN button (3 on the remote).
- You will hear the sound playback through the speakers. You can adjust the volume with the VOLUME control (3) or the VOLUME +/- buttons (10 on the remote). The CD buttons are not active.
- For further functions please refer to the user manual of the external audio device.
NOTE:
Set the volume of the external device to a proper audible level.
Always keep the cover closed when not in use.
USB port (13)
This device has been developed in line with the latest technical advances in the USB field. The wide range of different USB storage devices of all types which are currently on the market, unfortunately do not allow us to guarantee full compatibility with all USB storage devices. For this reason, in rare cases there may be problems in playing back files from USB storage devices. This is not a malfunction of the device.
- Flip open the cover.
- Press the MODE button (19 on the device) or the CD/USB/SD button (17 on the remote) until "USB" appears in the display.
- Directly connect a USB storage medium to the respective port. READING appears on the display. After a few seconds, the total number of folders and the title will be shown for a short time. Playback then begins. The current folder (e.g. 01), the current song (e.g. 005), and the elapsed play time will be shown in the display.
NOTE:
Always directly connect a USB storage medium to the USB port to prevent any malfunctions.
For the operation, please follow the section "Play CDs/MP3". Always keep the cover closed when not using it.
CAUTION:
Before you remove the USB memory medium, switch the device to Radio operation.
Memory card slot (11)
- Flip open the cover.
- Press the MODE button (19 on the device) or the CD/USB/SD button (17 on the remote) until "CARD" shows in the display.
- Insert the memory card into the intended opening until it audibly locks in with a "click". Thereby the contacts need to point downward. READING appears on the display.
After a few seconds, the total number of folders and titles will be shown for a short time. Playback then begins. The current folder (e.g. 01), the current song (e.g. 005), and the elapsed play time are shown in the display.
For operation, please refer to the section "Play CDs/MP3". Always keep the cover closed when not using it.
CAUTION:
Before you remove the memory card, switch the device to Radio operation.
Press on the end of the memory card to remove it again.
Listening to the radio
Searching for stations
- Repeatedly press MODE button (19 on the device) until the display shows "TUNER". Or press the FM button (2) on the remote control.
- Use the buttons (9/8) to tune in the desired station.
- The FM.ST control lamp ((ST)) (in the display) will light up when the selected station is received with stereo quality. If reception is too poor and the station experiences static, the control lamp will flicker. Try to improve the reception by changing the position of the telescopic antenna. For FM stations you may use STOP / FM MONO/ST button (9 on the remote) to switch between MONO and STEREO reception. In case of poor reception we recommend switching to MONO mode.
Saving/Selecting Stations
- When you have found the desired station, press the PROG button (10/4). MEMORY will light up in the display and the memory position will flash.
- To select the programming channel, press the PRESET button (5 on the remote).
- Press PROG to save the settings.
To choose a stored channel, press the PRESET button (5 on the remote).
Playing CDs/MP3
This is how to play a CD
- Repeatedly press MODE button (19 on the device) until the display shows "CD". Or press the CD button (16) on the remote control.
- Open the CD tray (1) by rotating the lock (2) to the left in the OPEN direction.
- Insert the audio CD onto the conical spindle with the label facing upwards, so that it snaps into place mechanically. Then close the CD compartment cover again. Rotate the lock (2) to the right in the LOCK direction.
4.AUDIO CD:
"READING" briefly appears on the display, then "Cd", the number of titles and total playback time. The playback starts from the first title on the CD. The current song, the elapsed playback time and the "Cd" symbol are displayed.
CD in MP3 format:
"READING" briefly appears on the display. The number of folders (F) and the titles will then appear briefly. The playback starts from the first track and from the first folder. The current folder (e.g. 01), the current song (e.g. 005), and the elapsed playing time will be shown in the display. Use the FOLDER+ or FOLDER- buttons (14/16/14) to select the individual folders.
- To remove a CD press the STOP button (7/9), open the CD compartment and carefully take out the CD.
Always keep the CD door closed.
NOTE:
- When playing CD in MP3 format containing folders, the display will show 001 for the first track of the new folder when switching to another folder. If a disc is not properly or not at all inserted, "READING" will light up and the display will show "NO DISC".
- Playback of CDs created by the user cannot be guaranteed due to the variety of available software and CD media equipments.
Description of the Operating Buttons
PLAY/PAUSE (8/11)
You may temporarily stop playback and start again. The elapsed playing time will flash on the display. Pressing the button again will continue playback from the same position.
>SKIP/TUNING UP/DOWN (9/8)
During playback:
With the button you may skip to the next or next but one track, etc. Press and hold this button to quickly search music (sound will be muted).
You may operate the button as followed:
Press 1 × = Starts current track again from the beginning.
Press 2x = Skips back to previous track.
Press 3x = Plays track prior to that, etc. Press and hold this button to quickly search music (sound will be muted).
During radio mode:
Tune the desired radio station.
STOP (7/10)
The CD or the song stops.
MUTE (15/16)
Quickly turn off the sound. "MUTE" will flash in the display. To cancel this function, press MUTE again.
EQ (18/7)
(Preset equalizer function). There are different sound modes available (CLASSIC, ROCK, POP, JAZZ, FLAT).
STOP / FM MONO/ST (9 on the remote)
During FM radio mode:
Switch between STEREO and MONO.
REPEAT (6/13)
Press 1x: (REPEAT lights up) The current track will be repeated entirely.
Press 2x: (REPEAT ALL lights up) The complete CD will be repeated entirely.
Press 3x: (INTRO lights up) Each title of the CD will be played for 10 seconds.
Press 4x: All functions will be canceled. Normal playback will be continued.
Only for CDs in MP3 format:
Press 1x: The current track will be repeated continuously (The display will show REPEAT).
Press 2x: The selected folder of the MP3 CD will be repeated continuously (the display will show REPEAT ALBUM). Use FOLDER+/- buttons (14/16/14) to select the individual folders.
Press 3x: The entire CD will be repeated continuously (REPEAT ALL is displayed).
Press 4x: Each title of the CD will be played for 10 seconds each (INTRO will appear on the display).
Press 5x: The function will be deactivated and the CD will be played in normal mode.
RANDOM (12 on the remote)
The display will show "RANDOM" and the number of the track that will be played first. All tracks will be played consecutively in random order.
FOLDER + / - (14/16/14)
CD in MP3 format:
Press these buttons during playback to switch one folder up or down. The display shortly shows a message, e.g. ALBUM 02, Then the system automatically starts playback of the MP3 CD. When pressing the buttons during stop mode, the message will also shortly be shown in the display. Then press
Press PLAY/PAUSE to start playback.
PRESET (5 on the remote)
During radio mode:
Select a stored radio station.
ID3 (6 on the remote)
In case of a CD or file in the MP3 format:
Press the button to turn on the function. "ID3 ON" will show in the display for a short time. If ID3 tag information is stored, it will appear in the display as a continuous band.
Press the button again to deactivate the function. "ID3 OFF" will show in the display for a short time.
PROG (10/4)
To save stations and set programmed playback.
Program Playback
Program playback in desired sequence.
- Press STOP button (7/9).
- Press PROG button (10/4). The display will show "--- PR:01" ("track" PR: "memory position") and MEMORY. Use the buttons (9/8) to select the desired track and press PROG again. The display will change to memory position P02.
- Use the M buttons to select the next track and press PROG again. Repeat the steps until you have selected all tracks.
Note:
If the memory capacity of the programmable title is reached, "FULL" will be displayed.
- Press the PLAY/PAUSE button (8/11). Playback starts. The display will show the first selected track number.
- Press TOP button once to stop playback. The memory will be kept.
- For repeated playback of the programmes, press the PLAY/PAUSE button.
- To delete memory, press STOP button twice. MEMORY will no longer be displayed.
The device will stop automatically after all stored tracks have been played. The program sequence will be kept in the memory until you switch to another mode, remove the CD from the compartment or switch off the device.
It is possible to combine program playback with the REPEAT function. After programming and starting playback, press REPEAT button (6/13) up to three times; the functions can be applied as described under "REPEAT".
Playback of music files in MP3 format
This device allows the playback of music files in MP3 format. The device furthermore supports the common CD types: CD, CD-RW, and CD-R.
Your device can play MP3 CDs. These are compressed CDs that can store up to 200 tracks. Your device automatically recognizes MP3 discs (the display will show total number of tracks and folders). Please refer to chapter "Playing CD/MP3" for playback of such CDs. You may program tracks as already described under "Program playback".
Please note:
There are many burning and compressing methods, as well as differences in quality of CDs and burnt CDs.
Furthermore, the music industry does not apply fixed standards (copy protection).
For that reason there might, in rare cases, occur problems when playing CDs and MP3 discs. That is not a malfunction of this device.
Cleaning and maintenance
- Disconnect the mains plug before cleaning.
- You may wipe off external stains using a slightly damp cloth without any additives.
Troubleshooting
| Symptoms Course Solution | ||
| CD can not be played back. | CD is not inserted or inserted incorrectly. | Ensure that the disc is inserted with the label facing upwards. |
| Batteries too weak. Insert new batteries or operate the device with the mains lead. | ||
| CD jumps dur ing playback. | Check the disc for fingerprints, dirt or scratches. | Check the disc for fingerprints, dirt or scratches. |
| The unit does not work. | The unit is blocked and “hangs”. | Disconnect the mains plug for approximately 5 seconds. Then switch the unit back on. |
| Volume (3) and basses (20) cannot be adjusted on the device. | The PROG but- ton (10/4) was held pressed down until the time display appeared. Then one of the controls was pressed while the time was displayed. | Press any button to release the lock of the control. |
English
Technical Specifications
Model: SRP 4342
Voltage supply: DC 12 V-O-C+ Battery operation: 10x 1.5 V Type UM1/R20 Output power: 400 W PMPO Power consumption: 36 W Net weight: 5.60 kg Radio: Frequency ranges: .UKW/FM 87.5 ~ 108.0 MHz
AC adapter
Protection class: Input: AC 100-240 V~50/60 Hz Output: DC 12V, 3A Polarity:
Technical modifications reserved!
This device has been tested according to all relevant current CE guidelines, such as electromagnetic compatibility and low voltage directives, and has been constructed in accordance with the latest safety regulations.
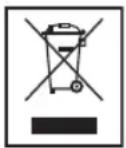
Disposal
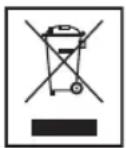
Meaning of the "Wheelie Bin" Symbol
Take care of our environment, do not dispose of electrical appliances via the household waste.
Dispose of obsolete or defective electrical appliances via municipal collection points.
Please help to avoid potential environmental and health impacts through improper waste disposal.
You contribute to recycling and other forms of utilization of old electric and electronic appliances.
Your municipality provides you with information about collecting points.
CTC Clatronic Sp. z o.o
ul. Opolska 1, Karczów
49-120 Dąbrowa
Removal
9 Button STOP / FM MONO/ST
10 Button VOLUME +/- (volume control) 11 Button PLAY/PAUSE (play/pause) 12 Button RANDOM (random playback) 13 Button REPEAT (repeat) 14 Button FOLDER +/- (album selection) 15 Button MUTE (mute sound) 16 Button CD/USB/SD
Installation
- Please read the instructions carefully before using the device. Choose a suitable location for the device. Place it on a dry, easily accessible, level, and non-slip surface.
- Make sure the device is installed in a place with adequate ventilation. If necessary, remove the protective film from the screen.
Maintenance.
High volume levels can damage your hearing.
Plug the power adapter into a 230 V, 50 Hz AC outlet. Plug the connector of the adapter into the DC IN 12 V socket on the device. Make sure that the mains voltage matches the value indicated in the technical data table.
ATTENTION.
The AC adapter supplied can only be used with this device. Do not use it with other devices. Use the AC adapter only with 12 V (DC). Using the AC adapter with other devices may damage the device.
NOTE.
Disconnect the device from the mains if you do not intend to use it for a long period of time. This will prevent damage from power surges.
Battery operation (batteries not included)
On the bottom of the device, open the battery compartment cover. Insert batteries of type UM1/R20, 1.5 V. Observe the correct polarity (the positive terminal should be inserted first). Close the battery compartment cover.
If the device is not used for a long time, remove the batteries to prevent them from leaking.
Ukrainian
NOTE.
If the battery is low, the battery indicator will flash. When the batteries are exhausted, the device will turn off.
YBARA.
He BnKOpNCToByTe OJHOaCHO baTapei pi3Hnx TnIB a6o HOI Ta CTapi BaTapei. He ytni3ynte 6aTapei pa3om i3 no6yTOBm CMITTM. BidaTe ix y cneuaJIbHn IyHK T npIMMaHH a6o nobepHiNb npOabUIO.
A
NONIEPEDKEHHA.
He 3aHuaTe 6ataei y cneKoTHomy MiCi a6o nipnMM COHauHM npOMHHM. HikoN He KndaTe 6ataei y BOrOb. IChyec He6e3neKa Bn6yxy!
BcTaHOBnEHHa/3aMHeHHb6aTapei B nylbTi dncTaHui-Horo KepyBaHHa
i
PIPIMITKA.
JIitieBa 6aTape Ta5neTKOBORO Tny y BiDCiKy DnB 6aTapei nIbTa DaCTaHuiHoro KepyBaHH MoKe 6ytN 3akpinHeHa dIIN TpaHCnOpTyBaHH UMaTkom fOnBy. Lc npoDBKyE tepMn npdaTHocTi 6aTapei. Iepw HIX BnKOpNCtOByBaTN npicTpinyepwe, 3HIMtB fOnBy, uO6 NiDrTOyBaTN npblT do pobotn.
BiiKpNIte BiDcIK dIa6BaTapeH y HxNHi cactnHi PylbTa. 3amHITb 6atapeHO ha 6atapeo TaKoro X TnIy (CR 2032). IpeBipTe npabunbHiCTb noJIaRhoCTi (Cxemy npuBeJeHO y BiDcIKy). 3akpiTe BiCik DnB 6Taapei.
KILIO NylbT He BIKOPNCTOByBaTMETbCA NPTOROM TpIBaIoro Yacy, BIMMITb BaTapeIO, LIOB YHINKHYTN "BNTIKAHH" KNCLOTNI BaTapeI.
A
NONIEPEDKEHHA.
He 3aHuaTe 6atapei y cneKOthomy Micu a6o nip nprammcoHHM npomHHM. HikOn He KndaTe 6atapei y BORHO. IcHye He6e3neKa Bu6xy! TpmaTe 6aapei no3a Mekamn docxHocti iTeu. He irpaikn. HeBIDkpBaIte6bapeicnIO. YHKaTe ix KOHTaKtY 3 MeTaJIeBIMn IpeJMeTAMn (raIKaMn, LbAXaMn, RbHrTaMn Ta IH.).IChyec He6e3neKa KopoTkoro 3AMKHaHH! KopOTKe 3aMKaHHoMKe npu3BecTu do nepepibaH H6baTapei abo BOHMOKyTb 3aropitncb. Lc moKe cPnHHTN NOKExy. PiJac TpaHcnpTyBaHHa 6aTapee 3 MeTOIO 6e3neKn 3aKJeTe II KOHTAKTN KNeIKOIO CTPIKIO. - RaKuo 6aTapee noTeKna, cnIkyuIte, uOb piinHa He noTpapanla B oHi abo Ha uKipy. RaKuo KncIoTa noTpapanla BOi, npOMnTE iX uCTOIO BOHO I, RaKuo CmIMToMnHe 3HnKHytB, BiPa3y 3BepHItcAo NikapA.
#
YBARA.
Use batteries according to the device's instructions. When using batteries, follow the instructions in the manual or return them to the service center.
Protective cover for compact discs during transport
Open the CD tray (1), turn the lock (2) in the direction of the OPEN mark. Remove the protective cover during transport if it is present, from the compact disc program before using it. Close the compact disc tray again. Turn the lock (2) in the opposite direction to the LOCK mark.
TURNING ON THE DEVICE
To turn on the device, set the ON/OFF switch on the side of the device to the "ON" position. To turn off the device, set the ON/OFF switch to the "OFF" position. Then disconnect the device from the power supply.
Setting the clock (time setting)
- Briefly press the PROG button (10/4). The display will show "24 HOUR".
- Using the buttons (9/8), select the 24-hour or 12-hour display mode. Confirm the selection with the PROG button.

NOTE. If the 12-hour mode is set, the display will show: AM = before noon, PM = after noon.
- Using the buttons, set the hours. Confirm the selection with the PROG button.
- Using the buttons, set the minutes.
- Press the PROG button again to save the clock setting.
General information about the device operation

NOTE.
The device is set to standby mode. All buttons with the same names perform the same functions.
STANDBY (17/1)
Press the STANDBY button to switch the device to standby mode. To turn on the device, press it again.
Volume (3/10)
You can set the desired volume level. The "VOL" indicator and a number will be displayed on the screen. This indicates that the volume is set within the range from "VOL MAX" to "VOL MIN".
BASS control (20)
Use this control to adjust the low frequencies according to your preference. The "BASS" indicator and a number will be displayed on the screen.
Remote control
Operate with the wireless connection at a distance of up to 5 meters. If the distance starts to decrease, replace the batteries. Make sure that there is no obstacle between the remote control and the sensor (5) on the device.
AUX IN jack (12)
This is an analog input. Using this jack, you can listen to sound from other devices, for example, MP3 players or CD players, through the headphones.
- Open the cover. 2. Connect the external audio source via the 3.5 mm jack to the AUX IN jack.
- Select AUX mode using the MODE button (19 on the device) or the AUX IN button (3 on the remote control).
- The sound will be played through the headphones. The volume level can be adjusted using the VOLUME control (3) and the VOLUME +/- buttons (10 on the remote control). The CD player buttons are disabled. 5. For more functions, see the user manual for the external audio device.
NOTE.
Set the external device to the appropriate level.
If the device is not in use, close the cover.
USB port (13)
The device is designed with the latest advances in USB technology. We can guarantee compatibility with USB flash drives of any capacity and various types. Some flash drives may have problems with the content of the USB drive. This is not a device malfunction.
- Open the cover.
- Press the MODE button (19 on the device) or the CD/USB/SD button (17 on the remote control) until the "USB" indicator appears.
- Connect the USB flash drive directly to the appropriate port. The "READING" indicator will appear on the screen. After a few seconds, the total number of folders and titles will appear. Playback will begin. The screen will show information about the current track (number, 01), the next track (number, 005), and the elapsed time.
NOTE.
To avoid possible malfunctions, connect the USB flash drive directly to the USB port.
For operating information, read the section "Playback from CD/MP3 discs".
If the device is not in use, close the cover.
WARNING.
Before removing the USB flash drive, switch the device to radio mode.
Memory card slot (11)
- Insert the card.
- Press the MODE button (19 on the device) or CD/USB/SD (17 on the remote control) until the "CARD" indicator appears.
- Insert the memory card into the appropriate slot. The contacts must be facing down. The "READING" indicator will appear on the screen. After a few seconds, the total number of tracks and titles will appear. Playback will begin. The screen will display information about the current folder (e.g., 01), the current track (e.g., 005), and the elapsed time.
Read the operating instructions in the "Playing MP3 CDs" section.
If the device is not in use, close the cover.
ATTENTION.
Before removing the memory card, switch the device to radio mode.
To remove the memory card, press on its edge.
Listening to the radio
Station search
- Press the MODE button (19 on the device) several times until the "TUNER" indicator appears on the screen. Or press the FM button (2) on the remote control.
- Tune to the desired station using the buttons.
Ukrainian
- The FM.ST (ST) indicator (on the screen) lights up if the selected station is received in stereo. If the signal is weak and the station is received with interference, the indicator will blink. Try to improve the signal reception by changing the position of the telescopic antenna. For FM stations, you can use the STOP / FM MONO/ST button (9 on the remote control) to switch between MONO and STEREO modes. In case of weak signal reception, we recommend switching to MONO mode.
36epexeHHn6ip padioctanui
- When the desired station is found, press the PROG button (10/4). The MEMORY indicator will appear on the screen and the position number will flash.
- To select a programming channel, press the PRESET button (5 on the remote control).
- To save the setting, press the PROG button. To select a saved channel, press the PRESET button (5 on the remote control).
Playback from CD/MP3
About playback from CDs
- Press the MODE button (19 on the unit) several times until the "CD" indicator appears on the screen. Or press the CD button (16) on the remote control.
- Open the CD compartment (1), turn the holder (2) in the direction indicated by OPEN.
- Insert the audio CD properly into the tray with the label side facing up. Close the CD compartment. Turn the holder (2) in the direction indicated by LOCK. 4. Audio CD. Briefly, the display will show "READING", then "CD", the number of tracks and the total playing time. Playback starts from the first track of the CD. Information about the current melody, playing time elapsed, and the "CD" symbol will be displayed.
CD in MP3 format
Briefly, the display will show "READING". Then, briefly, the number of folders (F) and their number will be displayed. Playback starts from the first track and the first file. The following data will be displayed on the screen: current folder (e.g., 01), current file (e.g., 005), and playing time. You can select a track using the FOLDER+ or FOLDER- buttons (14/16/14).
5. To remove the CD, press the STOP button (7/9), open the CD compartment, and carefully remove the CD.
Always keep the CD compartment closed.
Note.
When playing a CD in MP3 format that has several folders, the display will show "001" for the first track of the new folder during the transition to that folder. - If the disc is not inserted properly or not inserted at all, the "READING" indicator will light up and the display will show "NO DISC" (disc absent). Playback of a CD created by the user is not guaranteed to be compatible with the availability of various software for CD recording.
ONIC KHONOK control
II PLAY/PAUSE (8/11)
Allows you to pause playback temporarily. The display will show the elapsed time. Pressing the button again will resume playback from the same point.
>SKIP/TUNING UP/DOWN (9/8)
During playback
Using the button, you can skip to the next track or skip to the next track. Press and hold this button for fast forward search (sound will be muted).
Using the button, you can also do the following:
1 press = starts playback of the current track from the beginning. 2 presses = skips to the previous track. 3 presses = repeats the current track. Press and hold this button for fast reverse search (sound will be muted).
Radio mode
Tuning to the desired radio station.
STOP (7/10)
The compact disc stops playing.
MUTE (15/16)
Turns off the sound. The display will show the indicator "MUTE". To cancel this function, press the MUTE button again.
EQ (18/7)
(Nonepedhe hanaTyaHnry fynkui eKbanaI3epa).DocTyni pi3hi pexm3Byky (CLASSIC,ROCK,POP,JAZZ,FLAT).
STOP / FM MONO/ST (9 Na nyIbTi dIcTaHciHOro KepyBaHH)
Pexim FM-paio
Доьвлгп поемкати mix peжимamMSTEREOiMONO.
REPEAT (6/13)
1HaTnCHeHHr: (3acBITnbcRA REPEAT) nOToHv DOpixky 6yDe BiITbOpeHO NOBtOpHO NOBHCIO. 2HaTnCHHeHH: (3acBITnbcRA REPEAT ALL) 6yDe NOBTOPOH BIDTBOpEHO Becb BMICT KOMNaKT-DnCKa. 3HaTncheHH: (3'Rbntbca iHnkaiaI INTRO) KoxHy npipkky Ha KomnaKT-dncky 6yde BiTbopeHO BnpoDobx 10 cekyH. 4HaTnCHHeHH: yci cyHKui 6yde cKacoBaHo. Bye npoBxKeHO 3BnuaiHe BiDtBopeHH.
TINBKN DnA KOMNAKT-DNCKIB y MP3-foPMaTI
1 HaTnucHeHHa: 6e3nepepeBHO 6yIe NOBTOPiOBaTncb NToOHa Iopixka (Ha ekpani 6yIe BiIO6paXaTncnA no3NaUka REPEAT). 2HaTnCHHeHHa:6e3nepePBHO 6yIe NOBTOIpOBaTncb Bn6paHa nanka Ha KOMNAKT-dNCKy MP3 (ha ekpani 6yIe BiIO6paXaTncb iNDnKauJin REPEAT ALBUM).Bn6paTu neBHy nanky moxHa 3a donomorOIO KHOIOK FOLDER+/- (14/16/14). 3HaTnCHeHHa:6yIe BnKoHaHO 6e3nepeBHe BiITBOpEHHBAcbOro BMICTy DmCKa (BiIO6paKaεTbCa iDnkaJr REPEAT ALL). 4HaTnCHHeHHa:KoXHyDopixkhyKaOMnAaT-DnCKy6ydeBIDTBOpEHO BnpoD0x10cekyHn(HaDnCnnei3'ABNTbca iNnkaJr INTRO). 5HaTnUCHeHHa: yHKJIO 6yJe BUMKHeHO i BMiCT KOMNaKT- dmCKa 6yJe BiTbOPIOBaTncb y 3BnauHOMy peXmI.
RANDOM (12 Ha nyIbTi dIcTaHuiHoro KepyBaHHa)
Ha ekpani BiD6pa3nTbCnNo3HauKa "RANDOM" i Homep dopiKn, kA 6yde BiTbOPIOBaTncB nepso. Bci dopiKn 6byTb BiTbOPIOBaTncB y DOBInhI NOcIIOBHOCTi.
FOLDER + / - (14/16/14)
Komnakt-Dicky MP3-0pomat
HaTnCSHeHHI KHOHOK NID Yac BiITBOpEHHIO3OBJHnepeHTN HA ONDY NAPKY BROPY ABO BHIN3. Ha ekpaHI HA DEKNIc 3'ABITBC NOBIOMLeHH, HApNKJaAL ALBUM 02. ToiCNCTeMa ABTomATNUHO PO3NOUHE BiITBOpEHH3 KOMNAKTDAcka MP3. NobIDOMLeHH TAKOX 3'ABITbCn HA KOPOTKNIc HA ekpaHI, IKAUO HAtNCHyTH KNOHKN B pexMMI 3ynHNKToI HAITNCHTB KONKy▶PLAY/PAUSE, 106 po3noaHTBOpEHHIA
PRESET (5 Ha nyIbTi dIctaHuiHoro KepyBaHHa)
Pexmm pao
Moxha Bn6paTn 36epexeHny paJioctaHjio.
ID3 (6 Na lybti dntaHuiHoro KepyBaHH)
YactoTHn diana3OH: VHF/FM 87,5\~108,0 M
AadTep 3MinHoro CTpyMy
Klac 6e3neKn:
XINBHeHHHa BxOdi: ... 3MiHHn CTpym 100-240 B ~ 50/60 T
XINBHeHnHa BxOdi: noCTiHm CTpyM 12B,3A
PonpaHicTB: -C-
Texhi 3miHMOKe 6TuBHeCHeNo 6e3 nonepaKeHHa!
LcienpncptiBIDNOBIDAeBCIMIOOHN DnpeKtBam PaN CBpON,3OKPemaUoEneKTpOMaHITHOcymiOCTI i DnpeKtNBi UoDn Hn3bKOHa npytn,Ta Bnpo6JeHn BiNOBiHO NO OCTaHHIX BmOR 6e3NeKn.
PykoBoDcTBO no 3KcnIyatauIN
Cnacnbo 3a BbIbOp HaWero npOyKta. Haneemcra, OH Bam noHpabNTca.
CMMBOJIbI B DaHHOM ykoBODCTBe Nolb3ObaTeN
BaxkHbIe yka3aHnA, kacaioUmeCBAwei 6eOtonacHocTn, OTMeueHbIOcObo.Bo n36exKaHne HeCuaCThix ClyuaeB INOBpeXJeHnYyCTpoiCTBa OpaauTe Ha HIX ocoOoe BHNMaHne:
IPEyUPTKDEHNE:
This symbol indicates a potential hazard that could cause damage.
WARNING:
Potential hazard to the device or other objects.
NOTE:
Tips and information for you.
General safety rules
Before using the device, carefully read this manual. Keep it, as well as the warranty card, cash receipt, and, if possible, the original packaging, including its internal elements. In case of transferring the device, the manual must be attached to it.
To prevent electric shock, do not expose the device to rain or moisture. Do not use the device near water (e.g., in a bathroom, pool, or wet floor). Use the device only for its intended purpose. The device is not intended for commercial use. Ensure that the power cord is not twisted, damaged, or in contact with heat sources. Ensure that the power cord is securely connected. The power adapter is intended for indoor use only. Plug the power adapter into a properly installed wall outlet. Verify that the device's supply voltage matches the mains voltage. Also check that the output current and polarity of the power source match the information on the specification label of the device. Do not touch the power adapter with wet hands! When installing batteries, observe polarity. Do not block the ventilation openings of the device.
Do not open the device casing. Improper repair can lead to serious danger to the user. If the device or its power cord is damaged (in particular), stop using the device and have it repaired by a qualified specialist. Regularly check the power cord for damage. To eliminate any danger, a damaged power cord must be replaced by the manufacturer, its service department, or a similarly qualified person with an identical power cord. If the device will not be used for an extended period, disconnect the power cord and remove the batteries.
The following symbols may be indicated on the device and are intended for warnings:
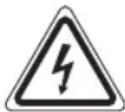
The lightning flash is intended to warn the user of the presence of dangerous voltage in the device.

The exclamation mark is intended to warn the user of important instructions regarding operation and maintenance that accompany the device.
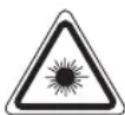
Products with this symbol operate with a "Class 1 laser" for CD scanning. Built-in protective switches are designed to prevent the user from being exposed to invisible laser radiation when opening the CD compartment.
These protective switches must not be bypassed or modified; otherwise, there is a risk of exposure to laser radiation.
Persons with limited capabilities
- For safety reasons, keep all packaging elements (plastic bags, cardboard, and insulating materials, etc.) out of reach of children.
WARNINGS
Do not allow small children to play with the film. Choking hazard!
This device should not be used by persons (including children) with reduced physical, sensory, or mental capabilities, or lack of experience and knowledge, unless they are supervised or instructed in the use of the device by a person responsible for their safety. Supervise children to ensure they do not play with the device.
70 Russian
Special safety instructions
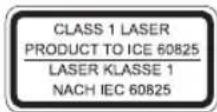
This device operates with a Class 1 laser.
CAUTION:
Do not touch the membranes (A) with your hands or objects. This may damage the membranes.
Layout of elements
1 CD compartment 2 CD door lock (OPEN/LOCK) 3 VOLUME control 4 Display 5 Remote sensor 6 REPEAT button 7 Stop button 8 Play/Pause button 9 Skip forward/backward buttons 10 PROG button (programming tracks) 11 Memory card slot 12 AUX IN jack (auxiliary input) 13 USB connector 14 FOLDER+ button (up a folder) 15 MUTE button (mute volume) 16 FOLDER- button (down a folder) 17 STANDBY/ON button (standby/power) 18 EQ button 19 MODE function selector 20 BASS control 21 Mounting bracket 22 Telescopic antenna
A Speaker
Insert (not shown)
POWER ON/OFF switch (power on/off)
DC IN 12 V power input (DC input)
OTeCek 6aTaapeek
DuctaHIOHOHoe ynpabIeHne
1 KhoKa STANDBY 2 KhoKKa FM (paHIO) 3KHonkaAUXIN(DOn.BXoD) 4 KhoNka PROG (nporpaMMPOBaHne nAMrTn) 5 KhoNka PRESET (namTb paIIO) 6 KhoNka ID3 (tern) 7 KhoKa EQ. 8 Khonka /SKIP/TUNING UP (nepemotka Bnepei) Khonka /SKIP/TUNING DOWN (nepemotka Ha3ad) 9 KhoNka STOP / FM MONO/ST 10 Khonka VOLUME +/- (rpoMkoctb) 11 KhoNka PAAY/PAUSE (Bocnpon3BeDene/Hay3a)
12 Khonka RANDOM (Bocnpoun3BeDeHne B CnyaHOM npaKe)
13 Khonka REPEAT (noBtop) 14 KhoNka FOLDER + / - (Bb6op aIb60ma) 15 KhoNka MUTE (OTKJIOUeHne 3ByKa) 16 KhoKa CD/USB/SD
YcTaHOBka/BVeJeHne
- PpOHTIe HNCTpyKLMIO NOJIHOCTbIO NpeE, INCNOJb3OBaHNEM yCTpoICTBa! BbIePte Iy yCTPOcTBa POxOJaee MeTo. POnXoJauee MeTO-3TO CyXa pOBHAR IN HECKoJIb3KaI NOBepXHOCTb, Ha KOTOpON Bbl 6e3 IpO6JIem CMOKeTe NCIOJIb3OBAbT yCTPOcTBO. PpOBepeTe, YTO6bI npoCXoDnla npaBnBHaB BeHTnnaLya yCTpoCTBa!
- Pn Heo6xOIMOCTN CHIMITE 3aHTHyIO pHeKy C DmCnn.
IPIEyIpyKJEHNE:
CINUKOM BbICOKN yPoBeHb rPOMKoCTn OAnceH dIa CInyxa.
3neKtpMTaHHe
BCTaBbTe ceTeByIO BnIKy B npaBnIbHO yCTaHOJIeHHyIO TpexPONIO CHyO ceTeByIO po3eTky 230 B,50T. POnCOeINHTe Ka6eJIb NITAHN K CeTeBOMy aAnTepy. BKnIOuHrTe ceTeBoi aanTep B rHe3do DC IN 12 V c3aynycTroIcTBa. Y6eIITecB COOTBeTCTBm CcTeBOH HApJxKeHnBEINuHe Ha Ta6nUKe HOMHaJIbHbIX XapaKTepNCtIK.
BHIMAHNE:
PpinaeMbI cTeBOaIantep MOKeT NcNoJIb3OBAbTaCra TOnbKO C 3TmU yCTPOINCTBOM.He nCnOJIb3yIte ero cDpyrIMN yCTPOINCTBAMN. BkIouaTe cTeBOaIaTep ToIbKO B rHe3do 12 B (O-0). IIOKIOueHne npyRTO cTeBOrO aIaTepa MoKeT npuBeCTn K nobpeXeHIno yCTpoNCTBa.
I I P N I M E Y A H N I:
- Disconnect the device from the mains power supply if it is not planned to be used for a long period.
- The set time will be lost when the power supply is interrupted.
Operation from batteries (batteries are not included)
- Open the battery compartment cover on the rear side. Insert 2 batteries of type UM1/R20, 1.5 V. When inserting the batteries, observe the correct polarity (see the markings on the bottom of the battery compartment)! Close the battery compartment.
If the device is not used for a long time, remove the batteries from it, as they may start to leak.
NOTE:
- When connecting to the mains power supply, battery power is automatically disconnected. The set time will be lost when the batteries are removed.
CAUTION:
Do not mix different types of batteries or old and new batteries. Do not dispose of used batteries in household waste. Please return them to an authorized collection point or give them to your dealer.
WARNING:
Do not expose batteries to heat or direct sunlight. Never throw batteries into fire. Danger of explosion!
Inserting/replacing the battery in the remote control
NOTE:
The battery element in the battery compartment may be protected by a piece of film. This is done to extend the service life of the element. Before first use, remove this piece of film.
- Open the battery compartment on the rear part of the remote control (RC). To replace the element, use the same type of battery (CR 2032). Check the correct polarity (see the battery compartment). Close the battery compartment.
If you do not intend to use the device for a long time, please remove the batteries to prevent acid leakage.
WARNING:
Do not expose batteries to intense heat or direct sunlight. Do not throw batteries into fire. Danger of explosion! Keep batteries out of reach of children. Batteries are not toys. Do not attempt to open a battery. Do not allow contact with metal objects (rings, nails, screws, etc.). Danger of short circuit! - A short circuit may cause overheating or ignition of batteries. This could lead to an explosion. - When transporting, only use the original packaging or tape the battery terminals to ensure safety. - If battery acid leaks, do not allow it to come into contact with eyes or skin. If acid contacts eyes, rinse with clean water and seek medical help if symptoms of injury occur.
CAUTION:
Do not dispose of batteries with household waste. Please take used batteries to a collection center or return them to the retailer.
Transportation protection device for your CD compartment
- Open the CD tray (1) by turning the lock (2) to the left in the OPEN direction. Remove the transportation protection device from the CD player, if present, before using the device.
- Close the compartment for compact discs again. Turn the lock (2) to the right in the LOCK direction.
Turning the device on/off
Turn on the device by setting the POWER ON/OFF switch on the rear side of the device to the "ON" position. - To turn off the device, set the POWER ON/OFF switch to the "OFF" position. Then disconnect the device from the mains power supply.
Setting the clock (standby time)
- Press the PROG button (10/4). "24 HOUR" appears on the display. 2. Use the buttons (10/8) to switch between 24-hour and 12-hour time modes. Confirm with PROG.
NOTE: In 12-hour mode, time will be displayed as follows: AM = morning, PM = afternoon.
3. Use the hour setting buttons. Confirm with PROG. 4. Use the minute setting buttons. 5. Press PROG again to save the time setting parameters.
General operating instructions
Some controls are located both on the device itself and on the remote control. Controls with the same name have the same functions.
STANDBY (17/1)
Press the STANDBY button to switch the device to standby mode. Press this button again to switch the device on.
Volume (3/10)
Adjust the volume to the desired level. The display will show "VOL" and a number. It corresponds to the set volume in the range from "VOL MAX" to "VOL MIN".
BASS control (20)
You can use this control to individually adjust the bass. The display will show "BASS" and a number.
Infrared remote control
Wireless operation from a distance of up to 5 meters. If this distance decreases, please replace the batteries. Make sure there are no obstacles between the remote control and the sensor (5) on the device during operation of the device.
AUX IN jack (12)
Connect analog devices for playback. When connected to this jack, you can also listen to audio from other devices, such as MP3 or CD players, etc., through the speakers.
- Turn the cover downwards.
- Please connect an external device via the 3.5 mm jack to the AUX IN jack.
- Then press the AUX button on the device and the AUX IN button on the remote control.
- Sound reproduction will be limited in dynamics. You can adjust the volume with the VOLUME control (3) and the VOLUME +/- buttons (10 on the remote control). The CD button is inactive. For information on other functions, please refer to the manual of the external audio device.
NOTE:
Set the volume of the external device to the desired level.
Keep the lid closed when the device is not in use.
USB port (13)
The device implements the latest technical achievements in USB interface. Unfortunately, the wide range of various USB storage devices of all types available on the market does not allow us to guarantee full compatibility with any USB storage device. Therefore, in some rare cases, problems may occur when playing files from USB storage devices. This is not a malfunction of the device.
- Open the lid.
- Press the MODE button (19 on the device) and the CD/USB/SD button (17 on the remote control) until "USB" appears on the display.
- Insert the USB drive directly into the corresponding port. The display will show READING. After a few seconds, the total number of folders and names will be briefly displayed. Playback will start. The display will show the current folder (e.g., 01), the current track (e.g., 005), and the playback time.
NOTE:
Always connect the USB storage device directly (without extension cables) to the USB port to prevent incorrect operation.
About this operation. In the section "Playing CD/MP3 discs".
Keep the lid closed if the device is not in use.
CAUTION:
When using a USB memory device, switch the device to playback mode.
Inserting a memory card (11)
- Open the cover.
- Press the MODE button (19 on the device) or the CD/USB/SD button (17 on the remote control) repeatedly until "CARD" appears on the display.
- Insert the memory card into the designated slot until it clicks into place. The contacts should be facing down. "READING" will appear on the display. After a few seconds, the total number of tracks and titles will be shown briefly. Playback will start. The current track (e.g., 01), current track time (e.g., 005), and playback time will be displayed.
For this operation, please refer to the section "Playing CD/MP3 discs".
Keep the cover closed if the device is not in use.
CAUTION:
When using a memory card, switch the device to radio mode.
Press the edge of the memory card to eject it.
Radio operation
Searching for stations
- Press the MODE button (19 on the device) several times until "TUNER" appears on the display. Alternatively, press the FM button (2) on the remote control. 2. Use the tuning buttons (8) to tune to the desired station.
- The FM ST (ST) indicator on the display will light up when the selected station is being received in stereo. If the reception quality is poor and there is interference, the FM ST indicator will blink. Try to improve reception by adjusting the position of the telescopic antenna. For FM stations, you can also use the STOP/FM MONO/ST button (9 on the remote control) to switch between MONO and STEREO modes. In case of weak reception, we recommend switching to MONO mode.
Saving/Selecting radio stations
- To turn on the unit, press the PROG button (10/4). The display will show MEMORY and the position in memory.
- To select a programmable channel, press the PRESET button (5 on the remote).
- Press PROG to save the parameters.
To close the saved channel, press the PRESET button (5 on the remote).
CD/MP3 Playback
How to Play a CD
- Press the MODE button (19 on the unit) several times until "CD" appears on the display. Or press the CD button (16) on the remote control (RC).
- Open the CD compartment (1) by turning the lock (2) to the left in the OPEN direction.
- Place the audio CD on the conical spindle with the label facing up, so that it clicks into place. Then close the CD compartment. Turn the lock (2) to the right in the LOCK direction.
4. Audio CD:
The display will briefly show "READING", then the word "CD", the number of tracks, and the total playing time. Playback starts from the first track on the CD. The display will show the current track, time, and the symbol "CD" during playback.
CD in MP3 format:
The display will briefly show "READING". The number of folders (F) and titles will be shown briefly. Playback starts from the first track and the first folder. The display will show the current folder (e.g., 01), the current track (e.g., 005), and the elapsed playing time. Use the FOLDER+ and FOLDER- buttons (14/16/14) to select specific folders.
- To remove the compact disc from the unit, press the STOP button (7/9), open the CD compartment, and carefully take out the disc.
Always keep the CD door closed.
IMPORTANT:
- Playback of CDs in MP3 format, containing folders, the display will show 001 on the first track of the new folder when switching to another folder.
- If the disc is inserted incorrectly or not inserted at all, "READING" will flash and "NO DISC" will be shown on the display. Playback of user-created CDs cannot be guaranteed due to the variety of software and media equipment available on the market.
Button description
PLAY/PAUSE (8/11)
Press to temporarily stop playback or start it again. The display will show the elapsed playback time. When the button is pressed again, playback will continue from the same point.
SKIP/TUNING UP/DOWN (9/8)
During playback:
With this button you can skip to the next track or previous track, etc. Press and hold this button for fast search of music (sound will be muted).
You can control the button in the following way:
Press 1 time = playback of the current track starts from the beginning.
Press 2 times = skip to the previous track.
Press 3 times = playback of the track located before the previous one, etc. Press and hold this button for fast search of music (sound will be muted).
In radio mode:
Tune to the desired radio station.
74
Russian
STOP (7/10)
Stops disc playback.
MUTE (15/16)
Quickly mutes the sound. "MUTE" will flash on the display. To cancel this function, press MUTE again.
EQ (18/7)
(Press the equalizer function). Different sound modes are available (CLASSIC, ROCK, POP, JAZZ, FLAT).
STOP / FM MONO/ST (9 on the remote control)
During FM radio playback: switches between STEREO and MONO.
REPEAT (6/13)
Press once: (REPEAT lights up) The current track will be repeated in full. Press twice: (REPEAT ALL lights up) The entire CD will be repeated in full. Press three times: (INTRO lights up) Each track on the CD will be played for up to 10 seconds. Press four times: All functions will be turned off. The standard playback mode will be restored.
Only for MP3 format:
Press once: The current track will be repeated sequentially (the REPEAT indicator will be shown on the display). Press twice: The selected MP3 CD folder will be repeated sequentially (REPEAT ALBUM will be shown on the display). Use the FOLDER+/- buttons (14/16/14) to select individual folders. Press three times: The entire disc will be repeated all the time (REPEAT ALL will be displayed). Press four times: Each track on the CD will be played for 10 seconds (INTRO will appear on the display). Press five times: The function will be turned off and CD playback will return to normal mode.
RANDOM (12 on the)
Press the "RANDOM" button on the remote control, which will reproduce the tracks. All tracks will be reproduced one after another in random order.
FOLDER + / - (14/16/14)
CD in MP3 format:
Press these buttons in playback mode to move one folder up or down. A message, for example, ALBUM02, will appear briefly. Then the system will automatically start playback of the MP3 CD. When pressing the button in stop mode, the message will also appear briefly. Then press PLAY/PAUSE to start playback.
PRESET (5 on y)
During radio mode: select a preset radio station.
ID3 (6 on y)
For MP3 CD: Press the button to enable this function. On the display, "ID3 ON" will be shown briefly. If ID-3 information is saved, it will be displayed continuously on the display. Press the button again to cancel the function. On the display, "ID3 OFF" will be shown briefly.
PROG (10/4)
For storing in memory the selected radio stations and setting programmed playback.
Programmed playback
Programmed playback is a desired sequence.
- Press the STOP button (7/9).
- Press the PROG button (10/4). On the display, "PR:01" ("track" PR:"method in memory") and MEMORY will appear. Use the buttons (9/8) to select the desired track and press PROG again. On the display, the method in memory will change to P02. 3. Use the buttons to select the next track and press PROG again. Repeat steps until you have selected all tracks.
NOTES:
The memory indicator lights up "FULL".
- Press the PLAY/PAUSE button (8/11). Playback will begin. The display will show the number of the first selected track. Also use this button to temporarily pause playback.
- Press the TOP button once to stop playback. The memory will be preserved.
- To play back the programmed sequence again, press the PLAY/PAUSE button.
- To delete the memory, press the STOP button twice. The word MOREY will disappear from the display.
The device will stop automatically after all the tracks entered in memory have finished playing. The program sequence will be kept in memory until you switch to another mode, remove the CD from the disc tray, or turn off the device.
It is possible to combine the playback program with the REPEAT function. After programming the playback sequence, please press the REPEAT button (6/13) up to three times; the functions can be applied as described in the "REPEAT" section.
Playing MP3 music files
The device allows you to play music files in MP3 format. The device also supports common CD types: CD-RW and CD-R. Your device can play MP3 CDs. These are compressed CDs that can contain up to 200 tracks. Your device automatically recognizes MP3 discs (the display will show the total number of tracks and folders). Please refer to the chapter "Playing CD/MP3" for playing such CDs. You can program the tracks as described above in the "Playback Program" section.
Please note:
There are many methods of recording and different qualities of recorded CDs.
Moreover, the music industry does not use consistent standards (copy protection).
Due to this, in some cases problems may occur with playing CD and MP3 discs. This is not a malfunction of the device.
Maintenance and service
- Turn off the device. Remove external stains using a slightly damp cloth without any cleaning agents.
Troubleshooting
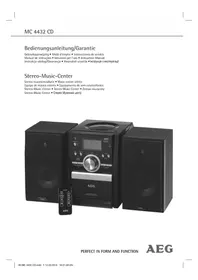
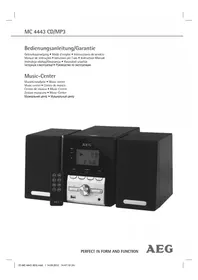
- SPANISH
- CONTENTS
- POLISH
- TABLE OF CONTENTS
- RUSSIAN
- INSTALLATION/INTRODUCTION
- SYMBOLS IN THIS USER MANUAL
- WARNING
- CAUTION
- NOTE
- GENERAL SAFETY GUIDELINES
- CHILDREN AND DISABLED PERSONS
- SPECIAL SAFETY GUIDELINES
- OVERVIEW OF THE COMPONENTS
- REMOTE CONTROL
- POWER SUPPLY
- BATTERY OPERATION (BATTERIES NOT SUPPLIED)
- ENGLISH
- INSERT/REPLACE BATTERY IN REMOTE CONTROL
- TRANSPORT SECURING DEVICE OF CD COMPARTMENT
- TURNING THE DEVICE ON/ OFF
- SETTING THE CLOCK (DURING STANDBY MODE)
- GENERAL OPERATION
- STANDBY (17/1)
- VOLUME (3/10)
- BASS CONTROL (20)
- INFRARED REMOTE CONTROL
- AUX IN JACK (12)
- USB PORT (13)
- MEMORY CARD SLOT (11)
- LISTENING TO THE RADIO
- SEARCHING FOR STATIONS
- SAVING/SELECTING STATIONS
- PLAYING CDS/MP
- THIS IS HOW TO PLAY A CD
- AUDIO CD
- CD IN MP3 FORMAT
- DESCRIPTION OF THE OPERATING BUTTONS
- PLAY/PAUSE (8/11)
- SKIP/TUNING UP/DOWN (9/8)
- STOP (7/10)
- MUTE (15/16)
- EQ (18/7)
- STOP / FM MONO/ST (9 ON THE REMOTE)
- REPEAT (6/13)
- RANDOM (12 ON THE REMOTE)
- FOLDER + / - (14/16/14)
- PRESET (5 ON THE REMOTE)
- ID3 (6 ON THE REMOTE)
- PROG (10/4)
- PROGRAM PLAYBACK
- PLAYBACK OF MUSIC FILES IN MP3 FORMAT
- PLEASE NOTE
- CLEANING AND MAINTENANCE
- TECHNICAL SPECIFICATIONS
- AC ADAPTER
- DISPOSAL
- MEANING OF THE "WHEELIE BIN" SYMBOL
- REMOVAL
- INSTALLATION
- MAINTENANCE
- ATTENTION
- BATTERY OPERATION (BATTERIES NOT INCLUDED)
- UKRAINIAN
- YBARA
- A
- NONIEPEDKEHHA
- BCTAHOBNEHHA/3AMHEHHB6ATAPEI B NYLBTI DNCTAHUI-HORO KEPYBAHHA
- I
- PIPIMITKA
- PROTECTIVE COVER FOR COMPACT DISCS DURING TRANSPORT
- TURNING ON THE DEVICE
- SETTING THE CLOCK (TIME SETTING)
- GENERAL INFORMATION ABOUT THE DEVICE OPERATION
- STATION SEARCH
- EPEXEHHN6IP PADIOCTANUI
- PLAYBACK FROM CD/MP
- ABOUT PLAYBACK FROM CDS
- ONIC KHONOK CONTROL
- II PLAY/PAUSE (8/11)
- STOP / FM MONO/ST (9 NA NYIBTI DICTAHCIHORO KEPYBAHH)
- RANDOM (12 HA NYIBTI DICTAHUIHORO KEPYBAHHA)
- PRESET (5 HA NYIBTI DICTAHUIHORO KEPYBAHHA)
- ID3 (6 NA LYBTI DNTAHUIHORO KEPYBAHH)
- AADTEP 3MINHORO CTPYMY
- PYKOBODCTBO NO 3KCNIYATAUIN
- CMMBOJIBI B DAHHOM YKOBODCTBE NOLB3OBATEN
- IPEYUPTKDEHNE
- GENERAL SAFETY RULES
- PERSONS WITH LIMITED CAPABILITIES
- WARNINGS
- SPECIAL SAFETY INSTRUCTIONS
- LAYOUT OF ELEMENTS
- DUCTAHIOHOHOE YNPABIEHNE
- YCTAHOBKA/BVEJEHNE
- IPIEYIPYKJEHNE
- NEKTPMTAHHE
- BHIMAHNE
- I I P N I M E Y A H N I
- OPERATION FROM BATTERIES (BATTERIES ARE NOT INCLUDED)
- INSERTING/REPLACING THE BATTERY IN THE REMOTE CONTROL
- TRANSPORTATION PROTECTION DEVICE FOR YOUR CD COMPARTMENT
- TURNING THE DEVICE ON/OFF
- SETTING THE CLOCK (STANDBY TIME)
- GENERAL OPERATING INSTRUCTIONS
- INSERTING A MEMORY CARD (11)
- RADIO OPERATION
- SAVING/SELECTING RADIO STATIONS
- CD/MP3 PLAYBACK
- HOW TO PLAY A CD
- IMPORTANT
- BUTTON DESCRIPTION
- STOP / FM MONO/ST (9 ON THE REMOTE CONTROL)
- RANDOM (12 ON THE)
- PRESET (5 ON Y)
- ID3 (6 ON Y)
- PROGRAMMED PLAYBACK
- NOTES
- PLAYING MP3 MUSIC FILES
- MAINTENANCE AND SERVICE
Brand : AEG
Model : SRP 4342
Category : Cd player/recorder