
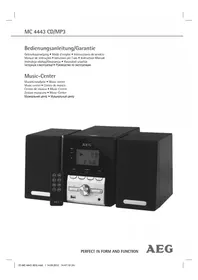
KRC 4355 CD - Cd player/recorder AEG - Free user manual and instructions
Find the device manual for free KRC 4355 CD AEG in PDF.

| Product type | CD player/recorder with FM radio |
| Brand | AEG |
| Model | KRC 4355 CD |
| Power supply | 230 V~, 50 Hz |
| Power consumption | 12 W |
| Protection class | II |
| Backup batteries | 2 x 1.5 V type AAA/R03 |
| Net weight | approx. 1.28 kg |
| Radio frequency range | FM 87.5 – 108 MHz |
| Number of radio presets | 20 |
| Supported CD formats | Audio CD (no MP3 playback) |
| CD playback functions | Play, pause, stop, skip forward/backward, repeat, program |
| Radio | Manual and automatic scanning, presets |
| Alarm | Dual alarm with wake-up by beep, radio or CD |
| Sleep timer | Yes, adjustable 120, 90, 60, 45, 30, 15 min |
| Auxiliary input | AUX IN (2 x RCA) |
| Remote control | Supplied |
| Mounting | Under cabinet (template, screws and spacers supplied) |
| Display | LCD |
| Care and cleaning | Clean with a soft, slightly damp cloth, without detergent |
| Safety | Do not open the casing; do not expose to water or moisture |
| Spare parts and repairability | Repair by the manufacturer or an approved specialist |
| General information | Automatic shutdown after 11 min in CD pause mode; emergency stop unplug for 5 seconds |
Frequently Asked Questions - KRC 4355 CD AEG
User questions about KRC 4355 CD AEG
0 question about this device. Answer the ones you know or ask your own.
Ask a new question about this device
Download the instructions for your Cd player/recorder in PDF format for free! Find your manual KRC 4355 CD - AEG and take your electronic device back in hand. On this page are published all the documents necessary for the use of your device. KRC 4355 CD by AEG.
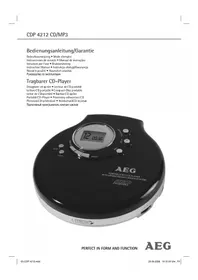
USER MANUAL KRC 4355 CD AEG
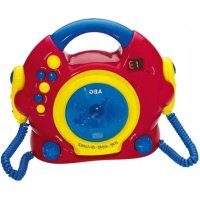
GB Stereo kitchen radio with CD
PL Radio kuchenne stereo z CD
H Stereo kitchen radio with CD
RUS Stereo kitchen radio with CD
Overview of the Components
26 Bouton OPEN/CLOSE
27 Bouton FUNCTION
28 Bouton SLEEP
29 Bouton SNOOZE
30 Bouton TIME SET
31 Bouton M
32 Bouton M+
33 (segmenter le volume)
- (diminuer le volume)
(Piles non fournies)
F.FWD▶/◀ REW ▶/▶/◀/◀ (6/7/33)
F.FWD▶/◀ REW ▶/▶/◀/◀ (6/7/33)
Thank you for selecting our product. We hope that you will enjoy use of the appliance.
Symbols in these Instructions for Use
Important information for your safety is specially marked. It is essential to comply with these instructions in order to avoid accidents and prevent damage to the machine

WARNING:
This warns you of dangers to your health and indicates possible injury risks.

CAUTION:
This refers to possible hazards to the machine or other objects.

NOTE:
This highlights tips and information.
General Safety Instructions
Read the operating instructions carefully before putting the appliance into operation and keep the instructions including the warranty, the receipt and, if possible, the box with the internal packing. If you give this device to other people, please also pass on the operating instructions.
- To avoid the risk of fire or an electric shock, you should not expose the device to rain or moisture. Consequently, do not use the device in the immediate vicinity of water - for example near a bath tub, a swimming pool or in a damp cellar.
- Do not use the device in extremely hot, cold, dusty or damp places.
- Only use the device for private use and the intended purpose. This device is not intended for commercial use.
- Ensure that the power cord is not kinked, trapped or brought into contact with heat sources.
- Ensure that the power cord does not present a tripping hazard.
- Never touch the power plug or the cable with wet hands.
- Only connect the device at a properly installed plug socket. Pay attention that the specified voltage corresponds to the voltage of the plug socket.
- The power cord must always be easily accessible.
• Always insert the batteries correctly.
- Do not cover up any ventilation openings with objects such as newspapers, tablecloths, curtains, etc.
- This appliance shall not be exposed to dripping or splashing water and that no object filled with liquids such as vases shall be placed on apparatus.
- Exposed ignition sources such as burning candles may not be placed onto the device.
- Never open the housing of the device. Incorrect repairs can constitute a considerable risk for the user. Should the
English
35
device become damaged, in particular the mains supply cable, do not operate the device any longer, but rather have it repaired by an expert. Check the mains supply cable regularly for damage.
- For safety reasons a broken or damaged mains lead may only be replaced by an equivalent lead from the manufacturer, our customer service department or a similar qualified person.
- If the device is not used for a longer period, remove the plug connector from the plug socket or take out the batteries.
These symbols may be found on the machine and are intended to indicate the following:

The lightning symbol should advise the user of parts in the inside of the device which carry dangerously high voltage levels.

The symbol with an exclamation mark should advise the user of important operation or maintenance instructions in the accompanying documentation.

Devices bearing this symbol work with a "class 1 laser" for tracing the CD. The built-in safety switches should prevent the user being exposed to dangerous laser light, which is invisible to the human eye, when the CD compartment is opened.
These safety switches must not be bypassed or altered; otherwise there is a risk of being exposed to the laser beam.
Children and Frail Individuals
- In order to ensure your children's safety, please keep all packaging (plastic bags, boxes, polystyrene etc.) out of their reach.

WARNING!
Caution! Do not allow small children to play with the foil as there is a danger of suffocation!
- This device is not intended to be used by individuals (including children) who have restricted physical, sensory or mental abilities and/or insufficient knowledge and/or experience, unless they are supervised by an individual who is responsible for their safety or have received instructions on how to use the device.
- Children should be supervised at all times in order to ensure that they do not play with the device.
Overview of the Components
1 VOLUME control (volume)
2 IR Infrared sensor (REMOTE SENSOR)
3 CD tray
4 MEM/PROG button (memory)
5 REP button (repeat)
REW button (scan backwards)
36 English
7 F.FWD ▶ button (scan forwards)
8 STOP button (stop)
9 OPEN/CLOSE button (open/ close CD tray)
10 PLAY/PAUSE button (play/pause)
11 TUNING control
12 STANDBY/AL.OFF button (on/standby / alarm off)
13 FUNCTION button (function)
14 MUTE button (mute)
15 ALARM SET button (set alarm)
16 TIME SET button (set time)
17 SLEEP/SNOOZE button (sleep timer/ snooze)
18 M+button (memory upwards)
19 M-button (memory downwards)
20 LCD display
Rear side (not shown)
Power cord
Wire antenna
AUX IN jack (2xRCA)
Bottom side (not shown)
Battery compartment
Remote control
21 MEM/PROG button
22 button
23 REPEAT button
24 button
25 AL.SET button
26 OPEN/CLOSE button
27 FUNCTION button
28 SLEEP button
29 SNOOZE button
30 TIME SET button
31 M-button
32 M+button
33 (increase volume)
- (decrease volume)
▶/▶I (scan forward/ next song)
▶/◀(scan backwards/ previous song)
34 button
35 Button
Sub-structure assembly instructions
If you don't want to use the device as a standalone appliance, then please assemble it as follows:
- Remove all objects from the cupboard and anything which is fragile in the adjacent cupboards.
- For the installation the cupboard must fulfil the following conditions:
Thickness of the cupboard floor between 16 mm and 20 mm.
- The wall mounting of the cupboard must be stable and anchored firmly in the wall with at least 2 screws.
- Important! Do not install the device above a cooker!
- When installing the device it must be ensured that there is a power socket within reach.
- The mains socket must be within easy reach, so that the plug can be quickly removed in an emergency.
- Important! Do not connect the device to the mains power supply until after installation!
- The device cannot be installed under cupboards under which there is a lighting strip.
- For mounting, you may need the following supplies: Reamer or nail, screwdriver, measuring tape, adhesive tape, scissors, safety goggles.
Supplied mounting accessories
1 Drilling template
3x 3 screws (different lengths)
3x 3 spacers (different sizes)
WARNING:
Screws that are driven in too far (screws that are too long) can damage the device or can result in danger to life.
CAUTION:
- Please adhere to the dimensions stated in the installation instructions.
- You should use only the installation accessories supplied.
Installation
- Tape the template into the cabinet with adhesive tape. With the help of a gimlet or nail pierce the crosses at the attachment points and use it to mark the holes.
- Remove the template and drill the holes into the wall-mounted cabinet.
- Stick the spacers into the provided mounting brackets on the device.
i NOTE:
Adequate ventilation is only guaranteed with spacers.
-
Countersink the screws into the holes in the cabinet.
-
Select the screws according to the spacers used. Fasten the kitchen radio to the bottom of the cabinet with the 3 screws and the spacers.
Tighten the screws finger tight with a screwdriver.
CAUTION:
Use a screwdriver and not a cordless screwdriver.
^9 Start-up of the device / Introduction
i NOTE:
You will find some buttons on both the device and the remote control. Identical buttons fulfil the same function.
English 37
-
Read the operating instructions thoroughly before the start-up!
• If applicable, remove the protective film from the display. -
You may now select the settings for the hours, minutes, and the display format (24H or 12H) one by one.
NOTE: "PM" will show for afternoons in the 12 hour display.
Inserting the power reserve batteries
(Batteries not included)
In case of a power failure or if the power plug of the device is disconnected from the outlet, then the settings will be retained if the power reserve batteries have been inserted.
- Open the battery compartment on the bottom.
- Insert 2 AAA/R03 1.5 V type batteries. Pay attention to the correct polarity (see bottom of battery compartment)!
- Close the battery compartment again.
- If the device is not used for a long period of time, then remove the batteries from the device to prevent the battery acid from leaking.
Volume adjusting
The desired volume can be sent using the VOLUME regulator (1). To adjust the volume with the remote control, press the - / buttons (33).
^ne Listening to the radio
NOTE:
The preset stations will be lost if the power is interrupted.

WARNING:
The batteries shall not be exposed to excessive heat such as sunshine, fire or the like. Danger of explosion!

CAUTION:
- Different battery types or new and used batteries may not be used together.
• Batteries do not belong in the household waste.
Dispose of spent batteries at the designated collectic points or at the dealer.
Scanning stations
- Tune into the desired station with the TUNING control (11). The display will show the respective frequency.
- If there is interference on the received station, try to improve the reception by rotating, winding or unwinding the wire antenna.
Presetting radio stations
The device can preset up to 20 radio stations. To preset a station, follow the steps below:
- Search for a station as described in "Scanning stations".
- Press the MEM/PROG button (4/21). The storage space wer will start to flash on the display.
Use the M+ (18/32) and M- (19/31) buttons to choose the preset location for the corresponding station. - Press the MEM/PROG button again. The station will be preset. The frequency of the preset radio station will be displayed.
Power supply
- Insert the plug into a properly installed 230 V, 50 Hz power socket. Please ensure that the mains voltage corresponds to the information on the type plate.
- If you have not inserted any power reserve batteries, the ^4 . preset time and radio stations are lost as soon as the power supply has been interrupted.
Recalling preset radio stations
/1. Choose the preset location with the M(18/32) and M(19/31) buttons.
Switching the Device on/off (12/35)
Switch the device to the standby mode with the STANDBY/AL.OFF button (the time is displayed). If this button is pressed once more, the device switches on again.

NOTE: In CD mode
To keep the power consumption to a minimum, the device has an automatic switch-off. If the device is in stop mode, for example after the playback of a CD has been stopped, the device will automatically shut off after about 11 minutes.
Automatic station scan
When holding down the MEM/PROG button (4/21) for ap-prox. 3 seconds, the device will start the automatic station scan searching the entire frequency range automatically for stations. The stations found will be stored on the preset loca-tions 1-20 in ascending order.
Setting of the Clock (in Standby Mode)
- You must select the settings with the REW/F.FWD buttons (6/7), or with the ▶I/◀/l◀ buttons (33).
- Always confirm your settings with the TIME SET button (16/30).

NOTE:
-
The scan will only stop after all 20 preset locations have been filled.
• The order cannot be changed once set. -
Keep the TIME SET pressed down for approx. 3 seconds. The second display will start to flash.
38 English
Playing CDs
i NOTE:
Observe the following operation for the replay of CD's in the MP3 format! The device is not MP3 capable. The CD will however start to turn, but the sound cannot be reproduced.
This is how you play a CD
- Select the CD mode with the FUNCTION button (13/27) The following will appear in the display “--”.
- Press the OPEN/CLOSE button (9/26) to open the CD tray.
- Place the CD into the CD tray with the label side up. Press the OPEN/CLOSE button once more to close the CD tray again.
- After a few seconds the total number of songs/tracks is shown in the display.
- Press the PLAY/PAUSE(II) button (10/24). The CD will play from the first title. The current title number and the notification ▶" are shown on the display.
- In order to remove a CD, please press the STOP (button (8/34), open the CD compartment and lift the CD out carefully.
Always keep the CD tray closed.
i NOTE:
- If a disc is inserted the wrong way around, respectively if no disc is inserted, then the message "-" will blink and "NO" appears on the display.
- Playback of CDs produced by the user cannot be guaranteed due to the large variety of software and CD media available.
- Please note:
There are many burning and compression methods, as well as quality differences between CDs and burned CDs.
The music industry furthermore does not observe any fixed standards (copyright protection).
For these reasons, in rare cases there may be problems when playing CDs. This is not a malfunction of the device.
Description of the CD buttons
PLAY/PAUSE(Ⅱ)(10/24)
You can briefly interrupt and resume playback using this button. The symbol▶" will flash on the display. Pressing again 7 continues playback.
F.FWD▶/ |◀ REW (▶/▶|/◀/|◀) (6/7/33)
With F.FWD▶/▶/▶/▶/▶/▶/▶/▶/▶/▶/▶/▶/▶/▶/▶/▶/▶/▶/▶/▶/▶/▶/▶/▶/▶/▶/▶/▶/▶/▶/▶/▶/▶/▶/▶/▶/▶/▶/▶/▶/▶/▶/▶/▶/▶/▶/▶/▶/▶/▶/▶
- If the button is kept pressed down, the machine starts to search through the tracks.
The ◀ REW ◀/◄) button can be used as follows:
Press once = This starts the current track again from the beginning.
Press twice = This jumps back to the previous track.
Press three times = This plays the song before etc. If the button is kept pressed down, the machine starts to search through the tracks.
STOP (8/34)
The CD stops.
REPEAT (5/23)
With a CD currently playing:
Press once = (the ☐ emits a fixed light) the current track is repeated continuously.
Press twice = (the ALL emits a fixed light) the whole CD is played continuously.
Press three times = all functions are cancelled. The normal play mode is resumed.
Programmed Play
This can be used to program any desired sequence of tracks.
- Press the STOP button (8/34).
- Press the MEM/PROG button (4/21). The memory location "01" and the notification "PROG" will blink in the display. Use the F.FWD/ REM/1/1 buttons (6/7/33) to select the desired track and then press the MEM/PROG button again. The display changes to memory slot 02.
- Select the next track with the F.FWD ▶/□□ REW (▶/▶/□) buttons and press the MEM/PROG button again. Repeat the procedure until all the desired tracks are selected.
i NOTE:
If the storage capacity of the titles to be programmed has been reached, all the programmed titles will be shown in sequence.
- Press the PLAY/PAUSB(II) button (10/24). The playback starts. The current title number, the notification " " and "PROG" will be shown in the display.
- Press once the STOP() button to stop the playback while retaining the program.
- To play the programme back again, press the PLAY/ut- PAUSE▶ button.
- To delete the program, press the STOP() button twice. The PROG control lamp goes out.
The device stops automatically after all programmed titles have been played. The indication PROG goes out and the programmed sequence is deleted from the memory.
Alarm function (in standby mode)
Setting of the Alarm
You can set two alarm times. Proceed as follows:
- Switch the device into standby mode with the STANDBY AL.OFF button (12/35).
- Keep the AL SET button pressed for ca. 3 seconds. The hours of the currently set alarm time start to flash.
- Use the buttons F.FWD and REW (6/7/33) for setting.
- Press the AL SET button for confirmation. The minutes start to flash.
- Use the buttons//F.FWD and/REW for setting.
- Press the AL SET button to confirm. Then select how you want to be awakened. Select from:
• (Buzzer):
A buzzer sounds when the alarm time is reached. The buzzer interval increases from slow to fast. The volume cannot be adjusted.
• JFM:
As soon as your set alarm time is shown, the radio switches on. The last set station is played.
• JCD:
As soon as your specified alarm time has been reached, the device will start in CD mode. The inserted CD will be played starting with the first title.
- Finally, press the AL SET button again. You will reach the setting of the second alarm time. To set it, proceed as described above.
i NOTE:
If you only want to set the first alarm time, press the ALM SET button until the time is displayed again.
Activating alarm time
You may activate the first or the second alarm time, or both.
- Briefly press the AL SET button (15/25). "AL 1" and the symbol of the selected alarm mode will appear in the display.
- Press the AL SET button again. "AL 2" and the symbol of the selected alarm mode will appear in the display.
- Press the AL SET button one more time to activate both alarm times.
Snooze function
The automatic alarm can be switched off using the SLEEP/SNOOZE button (17/29) for approx. 9 minutes. The symbol "Zz" will appear in the display.
Switch off the buzzer
In order to switch off the alarm until the following day please press the STANDBY/AL.OFFY button.
Disabling the alarm
To deactivate the alarm, press the AL SET button (15/25) until the alarm symbol is no longer shown in the display.
Delayed Shut-Off (SLEEP)
The unit is switched off automatically when the selected time is reached.
- Select the time after which the unit is switched off by repeatedly pressing the SLEEP/SNOOZE button (17/28). The following selections can be made: 120, 90, 60, 45, 30, and 15 minutes. The notification "SLEEP" will appear in the display.
This function can be cancelled with the STANDBY/AL.OFF button (12/35).
AUX IN socket
To connect analogue replay devices. Via this socket you can also hear the sound of other playback devices such as MP3 players, CD players etc. through the loudspeakers.
- Connect an external device to the AUX IN jacks (2x RCA) on the back of the device. Use a suitable adapter cable (not supplied).
- Turn on the device with the STANDBY/AL.OEF button (12/35).
- Use the FUNCTION button (13/27) to select the AUX mode. "AV" will appear on the display.
- Through the loudspeakers you can hear the playback of the sound from the external device; with the VOLUME control (1) you can change the volume. The CD buttons are not functional.
- For the remaining procedure please see the operating instructions of the external sound source.
i NOTE:
Adjust the volume of the external device to a comfortable level.
Cleaning
CAUTION:
- Do not dip the appliance in water.
- Do not use a wire brush or other abrasive objects.
- Do not use any caustic or abrasive cleaning agents.
- Remove the plug before cleaning.
- Clean the appliance with a slightly humid cloth without any additives.
40 English Troubleshooting
| Symptoms Cause Solution | ||
| The unit cannot be operated. | The unit is blocked and "hangs". | Pull the mains plug for approximately 5 second Then connect the unit again. |
| CD cannot be played back. | CD is not inserted or is not inserted correctly. | Ensure that the CD is inserted with the label side up. |
| This is a CD in MP3 format. | The device is not MP3-capable. Insert an audio CD. | |
| CD skips during playing. | Check the CD for fingerprints, dirt, or scratches. | Clean it with a soft cloth starting from the center. |
Disposal
Meaning of the "Dustbin" Symbol
Protect our environment: do not dispose of electrical equipment in the domestic waste.
Please return any electrical equipment that you will no longer use to the collection points provided for their disposal.
This helps avoid the potential effects of incorrect disposal on the environment and human health.
This will contribute to the recycling and other forms of reutilisation of electrical and electronic equipment.
Information concerning where the equipment can be disposed of can be obtained from your local authority.
Technical Data
Model: KRC 4355 CD
Power supply: 230 V\~, 50 Hz
Power consumption:....12 W
Protection class:....II
Battery Power reserve: 2x 1.5 V, Type AAA, R03
Net weight: ....approx. 1.28 kg
Radio section
Frequency ranges: FM 87.5 \~ 108 MHz
We reserve the right to make technical and design changes in the course of our ongoing product development.
This device has been tested according to all relevant current CE guidelines, such as electromagnetic compatibility and low voltage directives, and has been constructed in accordance with the latest safety regulations.
Instrukcje obsługi
21 Przycisk MEM/PROG
22 Przycisl
23 Przycisk REPEAT
24 Przycisk
25 Przycisk AL.SET
26 Przycisk OPEN/CLOSE
27 Przycisk FUNCTION
28 Przycisk SLEEP
29 Przycisk SNOOZE
30 Przycisk TIME SET
31 Przycisk M
32 Przycisk M+
CTC Clatronic Sp. z o.o

- F.FWD▶/◀ REW ▶/▶/◀/◀ (6/7/33)
- Symbols in these Instructions for Use
- WARNING:
- CAUTION:
- NOTE:
- General Safety Instructions
- English
- 35
- Children and Frail Individuals
- WARNING!
- Overview of the Components
- English
- Rear side (not shown)
- Bottom side (not shown)
- Remote control
- Sub-structure assembly instructions
- Supplied mounting accessories
- Installation
- i NOTE:
- Start-up of the device / Introduction
- English 37
- Inserting the power reserve batteries
- Volume adjusting
- ne Listening to the radio
- Scanning stations
- Presetting radio stations
- Power supply
- Recalling preset radio stations
- Switching the Device on/off (12/35)
- NOTE: In CD mode
- Automatic station scan
- Setting of the Clock (in Standby Mode)
- English
- Playing CDs
- This is how you play a CD
- - Please note:
- Description of the CD buttons
- PLAY/PAUSE(Ⅱ)(10/24)
- F.FWD▶/ |◀ REW (▶/▶|/◀/|◀) (6/7/33)
- STOP (8/34)
- REPEAT (5/23)
- Programmed Play
- Alarm function (in standby mode)
- Setting of the Alarm
- Activating alarm time
- Snooze function
- Switch off the buzzer
- Disabling the alarm
- Delayed Shut-Off (SLEEP)
- AUX IN socket
- Cleaning
- English Troubleshooting
- Disposal
- Meaning of the "Dustbin" Symbol
- Technical Data
- Instrukcje obsługi
Brand : AEG
Model : KRC 4355 CD
Category : Cd player/recorder