
ISB 3102 BK - Induction hob CATA - Free user manual and instructions
Find the device manual for free ISB 3102 BK CATA in PDF.
| Product type | Induction hob |
| Brand | CATA |
| Model | ISB 3102 BK |
| Number of cooking zones | 4 zones |
| Control type | Touch controls |
| Boost function | Yes, temporary maximum power |
| Timer | Yes, adjustable from 1 to 99 minutes with automatic zone shutdown |
| Child safety | Yes, control lock |
| Automatic safety shut-off | Yes, according to power level (90 to 240 min) |
| Pan detection | Yes, stops if pan unsuitable or absent |
| Overheat protection | Yes, built-in sensor |
| Small object detection | Yes, automatic standby |
| Residual heat indicator | Yes, "H" display |
| Power supply | 220-240 V, 50/60 Hz |
| Maximum power | 7200 W (estimate) |
| Surface material | Vitroceramic |
| Maintenance and cleaning | Use a scraper, mild products, avoid abrasive sponges |
| Safety | Automatic shut-off, lock, overheat detection |
| Installation | Built-in, requires ventilation, connection by professional |
| General information | Indoor use only, compliant with EU directives |
Frequently Asked Questions - ISB 3102 BK CATA
User questions about ISB 3102 BK CATA
0 question about this device. Answer the ones you know or ask your own.
Ask a new question about this device
Download the instructions for your Induction hob in PDF format for free! Find your manual ISB 3102 BK - CATA and take your electronic device back in hand. On this page are published all the documents necessary for the use of your device. ISB 3102 BK by CATA.
USER MANUAL ISB 3102 BK CATA
THIS APPLIANCE IS CONCEIVED FOR DOMESTIC USE ONLY. THE MANUFACTURER SHALL NOT IN ANY WAY BE HELD RESPONSIBLE FOR WHATEVER INJURIES OR DAMAGES ARE CAUSED BY INCORRECT INSTALLATION OR BY UNSUITABLE, WRONG OR ABSURD USE.
The manufacturer declares that this product meets all the essential requirements for low voltage electrical material set out in European directive 2014/35/EU and for electromagnetic compatibility as required by European directive 2014/30/EU.
PRECAUTIONS
- When the hob is in use keep all magnetizable objects away (credit cards, floppy disks, calculators and so on).
- Do not use any alluminium foil or place any foodstuffs wrapped in alluminium foil directly on the hob - do not place any metal objects such as knives, forks, spoons and lids on the hob surface as they will heat up.
- When cooking in a non-stick pan without seasoning, do not exceed 1-2 minutes' pre-heating time.
- When cooking food that may easily stick, start at a low power output level and then slowly increase while regularly stirring.
-
After cooking is finished, switch off using the control provided (turn down to "0"), and do not rely on the pan sensor.
-
If the surface of the hob is damaged, immediately disconnect the appliance from the mains to prevent the possibility of electric shock.
- Never use a steam cleaner to clean the hob.
- The appliance and accessible parts may be hot during operation.
- Take care to avoid touching the heating elements.
- Children less than 8 years of age should be kept at a safe distance unless continuously supervised.
- This appliance may be used by children aged 8 or over and by persons with reduced physical, sensory or mental capabilities or lack of experience and knowledge, if they are supervised and have received suitable instructions on safe use of the appliance and understand the dangers involved. Children must not play with the appliance. User maintenance and cleaning should not be carried out by children except under constant supervision.
- Cooking with grease or oil may be dangerous and cause a fire if left unattended. NEVER try to extinguish a fire with water. Rather, disconnect the appliance and then cover the flames with a cover or sheet, for example.
- Fire hazard: do not store elements on cooking surfaces.
-
Only counter top protectors designed for use with the cooking appliance and listed in the manufacturer's instructions should be used as suitable protection for the counter top incorporated in the appliance. Use of unsuitable protectors may cause accidents.
-
WARNING: Accessible parts will become hot when in use. To avoid burns and scalds children should be kept away.
Insert in the fixed wiring a mean for disconnection from the supply mains having a contact separation in all poles that provide full disconnection under overvoltage category III conditions, in accordance with the wiring rules. The plug or omnipolar switch must be easily reached on the installed equipment.
This appliance is not intended to be used via an external timer or a remote control system.
The manufacturers decline any responsibility in the event of non-compliance with what is described above and the accident prevention norms not being respected and followed.
To avoid all risk, if the power cable becomes damaged, it must only be replaced by the manufacturer, by an authorised service centre, or by a qualified electrician.
OPERATING PRINCIPLE (Fig. 1)
It exploits the electromagnetic properties of most cooking vessels.
The coil (inductor) which produces the electromagnetic field is operated and controlled by the electronic circuit.
The heat is transmitted to food by the cooking vessel itself.
The cooking process takes place as described below.
- loss of heat is minimum (high efficiency)
- the system stops automatically when the vessel is removed or even just lifted from the hob
- the electronic circuit guarantees maximum flexibility and fine adjustments.
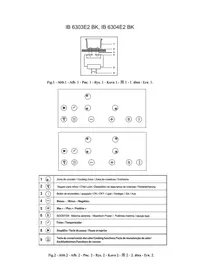
(Fig. 1)
1 Vessel
2 Induced current
3 Magnetic field
4 Inductor
5 Electronic circuit
6 Power supply
| Reference | Description |
| A | Zone select key |
| B | Child lock key |
| C | ON/OFF key |
| D Power/Timer slider regulating key | |
| E | Boost control key |
| F | Timer key |
Installation
All operations relative to installation (electric connection) should be carried out by skilled personnel in conformity with the rules in force. As for the specific instructions see part pertaining to installer.
Using your Induction Hob To
start cooking
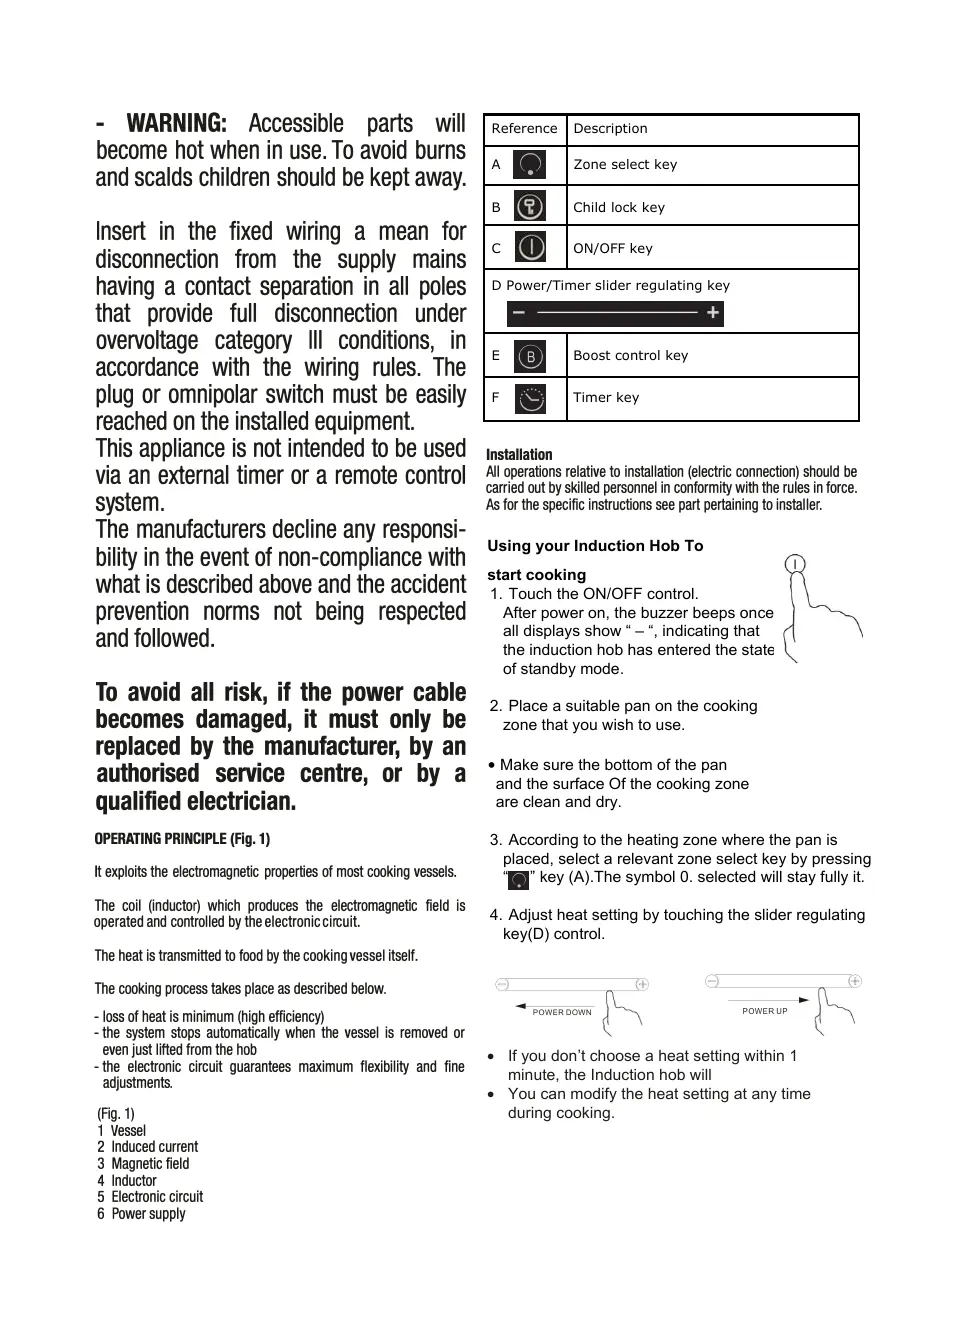
- Touch the ON/OFF control. After power on, the buzzer beeps once all displays show " - ", indicating that the induction hob has entered the state of standby mode.
- Place a suitable pan on the cooking zone that you wish to use.
- Make sure the bottom of the pan and the surface Of the cooking zone are clean and dry.
- According to the heating zone where the pan is placed, select a relevant zone select key by pressing " "key (A). The symbol 0. selected will stay fully it.
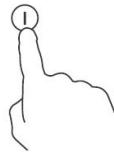
- Adjust heat setting by touching the slider regulating key(D) control.

- If you don't choose a heat setting within 1 minute, the Induction hob will
- You can modify the heat setting at any time during cooking.
If the display flashes ≥ ≤ alternately with heat setting
This means that:
- you have not placed a pan on the correct cooking zone or.
- the pan you're using is not suitable for induction cooking or.
- the pan is too small or not properly centred on the cooking zone. No heating takes place unless there is a suitable pan on the cooking zone. The display will automatically turn off after 1 minutes if no suitable pan is placed on it.
When you have finished cooking
- Touching the relevant zone select key(A) that you wish to switch off.
- Press the slider regulating key(D) control to "0" level,
- Beware of hot surfaces "H" will show which cooking zone is hot to touch. It will disappear when the surface has cooled down to a safe temperature. It can also be used as an energy saving function if you want to heat further pans, use the hotplate that is still hot.
Using the Boost function Activated the boost function
- Select the heating zone by touching the zone select key (A).
- Touching the boost control key(E) zone B, the indicator show "P." and the power reach Max.
Cancel the Boost function
- Touching the relevant zone select key(A) that you wish to cancel.
- Touching the slider regulating key(D) to cancel the Boost function, then the cooking zone will revert to level 9.
- The function can work in any cooking zone.
- The cooking zone returns to level 9 after 5 minutes.
Using Child Lock Function
- You can lock the controls to prevent unintended use (for example children accidentally turning the cooking zones on).
- When the controls are locked, all the controls except the OFF control are disabled.
To lock the controls
Touch the keylock control for 3 seconds. The timer indicator will show "Lo"
To unlock the controls
1.Make sure the Induction hob is turned on.
- Touch and hold the keylock control for a while
- You can now start using your Induction hob.
When the hob is in the lock mode, all the controls are disable except OFF, you can always turn the hob off with the OFF control in an emergency, but you shall unlock the hob first in the next operation.
Over-Temperature Protection
A temperature sensor equipped can monitor the temperature inside the Induction hob. When an excessive temperature is monitored, the Induction hob will stop operation automatically.
Detection of Small Articles
When an unsuitable size or non-magnetic pan (e.g. aluminium), or some other small item (e.g. knife, fork, key) has been left on the hob, the hob automatically go on to standby in 1 minute. The fan will keep cooking down the induction hob for a further 1 minute.
Auto Shutdown Protection
Auto shut down is a safety protection function for your induction hob. It shut down automatically if ever you forget to turn off your cooking. The default working times for various power levels are shown in the below table:
| Power level | 1~3 | 4~6 | 7~8 | 9 |
| Default working timer (min) | 240 | 180 | 120 | 90 |
When the pot is removed, the induction hob can stop heating immediately and the hob automatically switch off after 2 minute.

People with a heart pace maker should consult with their doctor before using this unit.
Using the Timer
You can use the timer in two different ways:
- You can use it as a minute minder. In this case, the timer will not turn any cooking zone off when the set time is up.
- You can set it to turn one cooking zone off after the set time is up.
- You can set the timer for up to 99 minutes.
Using the Timer as a Minute Minder If you are not selecting any cooking zone
1.Make sure the cooktop is turned on.
Note: you can use the minute minder even if you're not selecting any cooking zone.
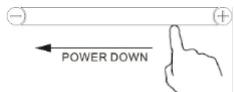
- Touch the Timer key(F). The minder indicator will start flashing "10", and you can set the timer at this point.

3.Using the "+" or "-" buttons, you can realize the setting of timing from 1 to 99 minutes. Hint: Touch the "-or+" control of the timer once to decrease or increase by 1 minute. Touch and hold the "-or+" control of the timer to decrease or increase by 10 minutes. Touching the "-and+" together, the timer is cancelled, and the timer indicator will turn off.
4. When the time is set, it will begin to count down immediately. The display will show the remaining time.
5.Buzzer will bips for 30 seconds and the timer indicator will turn off when the setting time finished. Note: minute minder only work at normal model.
Setting the timer to turn one or more cooking zones off
If the timer is set on one zone:
- Select the relevant cooking zone which is working by touching the zone select key (A).
- Press the Timer key(F), the minder indicator will start flashing "10", and you can set the timer at this point.

3.Using the ^ 十 + ^ 一 or - buttons, you can realize the setting of timing from 1 to 99 minutes. Hint: Touch the "· " or ^ 一 + ^ 一 control of the timer once to decrease or increase by 1 minute. Touch and hold the "· " or ^ 一 + ^ 一 control of the timer to decrease or increase by 10 minutes. Touching the "· " and ^ 一 + ^ 一 together, the timer is cancelled, and the. timer indicator will turn off.
4. When the time is set, it will begin to count down immediately. The display will show the remaining time and the timer indicator flash for 5 seconds. NOTE: The red dot next to power level indicator will illuminate indicating that zone is selected.

5.When cooking timer expires, the corresponding cooking zone will be switch off automatically. Other cooking zone will keep operating if they are turned on previously.
6. when using "the timer as an alarm" and "the timer to swith off the zones" together, the display will show the remaining time of alarm as first priority. Press cooking zone to show the remaining time of switch off timer.
Cooking vessels (Fig. 3)
- a magnet-attracting vessel may be a suitable vessel for induction cooking
- prefer vessels which are especially declared to be suitable for induction cooking
- flat- and thickbottomed vessels
- a vessel with the same diameter as zones ensures the maximum exploitation of power
- a smaller vessel reduces power exploitation, but does not cause any energy loss We would anyhow not recommend the use of vessels with diameters smaller than 10cm
- stainless-steel vessels with multi-layer or ferritic stainless-steel bottoms when specifically suited for induction cooking
- cast-iron preferably enamel-bottomed vessels to avoid scratching the pyroceram surface
- we do not recommend the use of any glass, ceramic, earthenware, aluminium, copper or non-magnetic (austinitic) stainlesssteel vessels
Maintenance (Fig. 4)
By means of a scraper immediately remove any alluminium foil bits, food spills, grease splashes, sugar marks and other high sugarcontent food from the surface in order to avoid damaging the hob.
Subsequently clean the surface with some towel and appropriate product, rinse with water and dry by means of a clean cloth. Under no circumstance should sponges or abrasive cloths be used; also avoid using aggressive chemical detergents such as oven sprays and spot removers.
Installer's Instructions
Installation
These Instructions are for the qualified technician, as a guide to installation, adjustment and maintenance, according to the laws and standards in force. These operations must always be carried out when the appliance has been disconnected from the electric system
Positioning (Fig. 5)
The fixture is especially designed for fitting into a work-top as shown in the corresponding figure.
Place the supplied sealing agent along the hob perimeter.
Do not install the hob over an oven; in case you do, make sure of the following:
the oven is equipped with an appropriate cooling system there is no warm-air leakage from the oven towards the hob suitable air-inlets are provided as shown in the figure.
Electrical connection (Fig. 6)
Prior to carrying out the electrical connection, please ensure that: the plant characteristics are such as to follow what is indicated on the matrix plate placed at the bottom of the working area; that the plant is fitted with an efficient earth connection, following the standards and law provisions in force.
The earth connection is compulsory in terms of the law. Should there be no cable and/or plug on the equipment, use suitable absorption material for the working temperature as well, as indicated on the matrix plate. Under no circumstance must the cable reach a temperature above 50^ of the ambient temperature.
QUESTO PRODOTTO E STATO CONCEPITO PER UN IMPIEGO DI TIPO DOMESTICO. IL COSTRUTTO RECLINA OGNI RESPONSABILITA NEL CASO DI EVENTUALI DANNI A COSE O PERSONE DERIVANTI DA UNA NON CORRETTA INSTALLAZIONE O DA USO IMPROPrio, ERRONEO OD ASSURDO.
VOORZORGSGMAATREGELEN
MEPbI IPEDOCTOPOXHOCTN
-Bo Bpempa60tby HNDyKUHOHNOI PNTbI CneJeY TepXaTb OT Hee Ha pacCTOHaHN BCE MaTePnaJIbI, KOToPbIE MOrYT HAmaHHTNbCra, TaKHe KAc: KpeDnTHbIE KapTOChN, DNCKN, KaIbKyJrAToPbI N.T.D.- HIKoRJa HE NoJIb3ObaTbCra aHOMmHHeBov O foJIbRoH N He KNaCTb IPOdYkTbI, 3aBePhyTbIE B foJIbBy, pIpaMO Ha naHeIb.
-Bo n36eKaHne HarpEbaHn, 3aIpeUaETcK NaCTb MetaJIInueCKNe IpeDMeTbI, TaKe, KaK HOxN, BnIKN, IooKn IN KpbIuKn Ha NOBepXHOCTb NaHeJI.
-ПИИСПОЛБ3OBAHIN HePnIropaEMO NOCyIbIДЯ
ROTOBKN, 6e3 Добавленья Ппрпав, ORpaHnHTb
ВРЕМ ПеДВарITeMbHOrO HarpeBaHIN NO OJHOn
ИПИ DBYX MInHyT.
-Bapka npodkytoB CO KJIOHNOCTbO K pnilnnaHIO
Ko DHy KaCTpHOn DoJXHa HaunHaTbCra Ha MNHMaJIbHOu MOUHOCTN Pn DaJIbHeIWeem ee yBEnueHN, n Pn YactOM NOMEuBaHN.
-Посл eOKOHaHЯ nCIOJIb3OBAHЯ, BByIKIQUHTe C NOMOUI COOTBETCTBYUSei KJIaBVIIu (ymeHbIeHme Do "0"), n He IOBeprIte DeTEKTOpy KaCTPIOJIb.
-При разлOME NOBepxHOCTN ПЛNTы, сеДуET HemeДLEHNO OTKINCHT b annapaT OT CETN ПИТаня BO ИЗБжанe 3ЛЕКТРИЧECKOШoka. -Зanpeшаetc ИСпОьЗOBaT b napOBbIe annapatbl Дд OУСТКИ NOBepxHOCTN ПЛNTы.
-Пибори erо часту могут harpeBaTbCЯ BO Bpemra pa6oTbl.
-CobIIOdaIteOCTOPOXHOCTB,HTo6bIHeKacatbCnHarpeBaTeNbHbIXJNEMeHToB.
-Дети младие 8лгп Дднжнл рпблкатьс к ппбору be3 постогн Horо ппсмOTpaВЗрсыX.
-Даннь ппбор рашается Ирлбзовать detam CTapwe 8 leT, a TakoKe Iицam C OрразчehнblIMn ΦИЗЧECKIMN, CЕHCOPHbIMN INI yMCTBeHHbIMN BO3MOXHOCTaM NIT OTCYTCTBnEM ONbITA n 3HaHn TOLbKO B TOM Cnyuae, ecn OOn HaxOJrTcN POD KOHTPOJIe M INI ecIn OHI npOUsN COOTBETCTBYUoIIN INHCTpyKTAX B OTHOseHn 6e3ONaCHO R cNoJIb3OBAHnnp6bopa n NOHMaKOT CBZaHHbIE C 3TmO NaCHocTN. He DoNYckaTe, YTObI DeTn InpapanC ppr6bopom. DeTn 6e3 npncMoTpa He DoJNXbI BbINOJIHrTb ONUCTky IN TexHnueckoe obcnykBaHne np6bopa.
-Опасно OTXODINь OT npибopa BO Время приrostoblenя ПИСИ C ИСПОЛБЗOBАнEM КИра Или Масл, NOTOMY YTO cyцeCTbByET BepoRTHOCTB BO3HKNKHOBEHnЯ NOXapa. HNKOrДA He nbIaTIteCb NOTuShnTb OROhB BOdO. B TAKOM cIyuae cIeDyET OTKJIIOUHTb Пибop OT NCTOCHNka PITAHnA, a 3aTeM NaKpbITb Плам, HanpIMep, KpbIshKoI INI NOKpbIBaJOM.
- Ipouec roTOBKn DOJIKeH 6bIbK KOHTPOINpyeM. Ipouec 6bICTPOrO pniROTOBHeHn DOJIKeH npOXoINTB BcERda NOd Ha6JIIODeHnEM.
-ΓOTOBKa C JxnpOM mIM MacJOM MOKeT 6bITb ONaCHA nPpOBoUnpoBaT noXap.
-ОпаСНOCТБ BOЗнКHOВЕнЯ NOЖара: He OCTaBЛЯТe ПпeДмeТы! Ha BapOчHbIX NOВЕРхHOCТЯX.
- IcnoIb3yIte ToJIbKO TaKHe CpeIcTBA 3aUHTbl CTOneUHnUbl, KOToPbIe pa3pa6OtaHbl npOn3BOuNTeIeM npi6Opa DnIg PniroTOBJIeHnI INI yKa3aHbI pOn3BOuNTeIeM B NHCtpyKUHX IO pPrimeHEnHIO, LNoCpeIcTBA 3aUHTbl CTOneUHnUbl, KOTOpbIE BXoJrT B KOMJIeKT NOCTabKn pN6Opa. IcNoIb3ObaHne HEnoIXoJMyX CpeIcTB 3aUHTbl MOxET npInBeCTN K BO3HNIKHOBEHnIO HeCCHACTHBIX ClyuAeB.
BbIOpHInTe POnKJIuOHeHne K CtaUHOapHOn npOBdKe C yYeTOM TORO, YTO OTKJIuOHeHne OT nITaUoSei CETn DOJXHo OCyUeCTBnTbcS C 3a3Opam MExdy BCEMN KOHTaKTAMn, oBeCneuBaIOUzMM NOpHbI pa3pbI U cENPi nppeHaepJxKeHN, B COOTBETCTBN C Tpe6oBaHnAIM Kateropn III n npabuAmn npoklaKn. Po3EtKa IIN MHOrOPOJIOCHbI nepeKlOuateJIb DoJKNbI 6bITb IpocTbI n DOCTyHbI DnI POnKJIuOHeHna YcTaHOBJeHHOro annapaTa.
Hnctpyknsno 3KcIpyataaun (Pnc.2)
IcnoB3OBAHne HndyKUONHOHNOITbI
B hauane roTObKn
- HaxMMTe KhONky BKJ/BbIKJ.
Iocne BkIOUcHnnaPpO3ByuHT 3BkyOBo CMnHaN Ia BCEx DNlIeX NPOBITC3 3AouK",KOTOpbI O3HaCaET,YTO INDyKUMOHNHaaPiTa HxOJNTCB ApeXIME OXkDaHnBa.

2.Пoctabte nOxdoaIyoo nOcyuHa bArpoHyO 3OHy, KOTOpUy xOTnTe nCNoMb3OBaTb.
Y6eDITcB, YTO DHO NOCybl NOBEPXHOCTb BAPOHHO 30Hb I CYXHE.

3.B 2aBNCIMOCTH OT BAPOHOH 30HbI, HA KOTOPOH HAXODITcNPOcyda, Bb6epHTe COoTBETCTBYOUYIO BAPOHHy 30HY Na DnCINNEe, HAKAB KHONKY (A).PraOM C Bb6pAHHO BAPOHOH 30HOH NORBITcN CMBON 0.
4. BbIbepeTe yOboBeHMoUHOCTn CmOuOJIbIOcAaIepa (D).

Ecnu ypoBbH MOUHcTn He 6ydt BbIbpaN B TeueHne 1 MNHytbl, HNDUcHNNA HNTa BbIIOHcTaN ABOMATYeCKn. IPOceC C6ydt Heo6XdMIMO Hauhata Chahana c 1 uara.
- YPOBEHb MOUHOCTn MOXHO MEHrT b IIObOIM MOMENT BpEmHb INPOUCCE roTOBKN.
EcnH pnn Bb6pe ypoBn MaOHOCTNa DmCnPE NOBnRE TcR MrrAooie H3o6paXeHne CNMBOA ≥ ≤ 303OHaAHET,
- UTO Nocya He 6bIJa NOMEUeHa B npaBnIbHyIO BapOCHyIO 3OH, INI
TOIcNpOJIb3yEma NocUda He NpOXoUIT DnA INHdYKUHOHOr PInTbI, JINI - YTO NOCUda CINuKOM MaJIeHbKa IIN He BbICTaBHe Na OIeHTpy BAPoHuO 30HbI.
Harpe He nauhctcdo tex nop, noka B bapocho 30he he 6ydet Noxdoauei noocdyb. Ecnn Ha nnity He 6ydet noctabIeHa noxdoaiaa nocya, dinne OTKIOUChTcABOTMaTHeckn cep3 1 MNHTy.
IIO OKOHaHHI FOTOBKN
- HaxMMTe KhoNkY BapOCHH 30HbI (A), KOTopyo XOTME BblKIOHHTb.
- BepHnTe cnaIdep (D) Na ypoBeBb «O».
- OcteperaIaTeCb ropuHx NOBepxHOCTeI.
3HaKOM 《H》O603HaAOTcRopnye DnI npNKoCHOBENHARBPOVAHbIe 3ObIb.3OT3HaOK McE3HET, KOrDa NOBePxAHOCTbObHTet Do 6e3OpaCHOI TEMpePATybl. TaKke 3Tm MOKHO BOCIOJIb3OBACTb B CEJXkOHOMN 3HePTM: eCIN Bbl XOTITEpOdoJXnHbHarpeB Nocdy, ee MOKHO NOCTABNT Ha eue NOKaROPAHYBOAPUHYO 3OHy.
IcnoJIb3ObaHneФyHKmMrHOBeHHoroHarpeBa BkIIOueHneФyHKmMrHOBeHHoroHarpeBa
- BbIbepnte BaOpHyIO 3OHy, HaxaB KhoNkY BbIbopa 3OnbI (A).
2.Пи Нжати КнОКИ МНOBЕНHorO HARpeBa (E) 6 INДИКATOp 30HbI NOKAZbIaBt«P.》,aMOUHOCTb DOCTrIaTeMAKCMMyMa.
OtklnoueHne yHKmMrHOBeHHoro HarpeBa
1.HaKmIte KhoNky BapOChH 30hbl (A),DnI KOtOpOH HyKHOOTKlIOHTbФyHKLMO MTHOBeHHOro HaRpeBa.
2. Haxmite cnaep (D), YTObI OTMeHnTb FyHKUmo MHOBeHHoro Harpeba u ypoBeH bMOuHcN T BApOHyo 30Hb BEpHTcRa Ha ypoBeHb 9.
- DAnHnAФункцЯ pa6oTaet nIЯ lo6oB BapOCHo 3Ohbl.
Yepe3 5 MmHyI yPoBeHb MoUHOCTn BApOuHOI 3OHb BepHETcR K 3HaueHHIO 9.
IcnoIb3OBAHne yHKUIN 6IOKnPOBKN OT DeTei
MxHNO 3ab0nKIOpOBaTb 3neMHTb UynpaAeHIna, YTObI pIpeDTBpATNTb Mo HnpEduHAMEPeHHo NcOJIb3ObaAHne (HAnpIMep, CUYauHoe BKNIOQEHMe BApOHNb3OH DetBM).
Korda 3neMeHTbI ynpaBHeHnna6JNOkpObaHbI, MoXHO BocnoJIb3oBaTcToIbKO KhoNkoBblKn
YtO6bI 3a6nOKIpOBaTb 3IeMeHbI ynpaBHeHHa
UyepKINBaIte KHOIIky 6nOKIpOBkB TeueHne 3 cekyH. Ha HnIDNKaTope TaIMMePA NOBITcRA NaDnncb «Lo».
YtO6bIpa36JIOKINPOBaTb 3JIeMeHTbI ynpaBNeHn
1.Y6eDITcB,HTO INHdyKUHOHHa PIIHTa BkJIIOueHa.
2.HaxMMte u ydepXMBaTe KhoNky 6nokpOBKn B TeueHne HEKOTOPOro BpeMeHN.
3.Индукшонная пл'tа ratobka pafoTe.

Korda nHydkuHnHa nnTa 3abKnipObaHa, n3 Bcex
zEMeHtOB ynpaBHeNpa60aTeT noKho KhONka BBkI. B
3KCTpeHHOM CnyAe BceTa MoKHO BbKlNoHTb nnTy, HkBaB
ha 3Tu KHNOy, No tOTo bCHOBa HauaTb Nplo3oBaTc PnIOi,
hyKHO 6yDet npedBaupTeBHo ee pa3bKnipObaTb.
3aunta oT neperpeBa
BCTpoenHbI datyHK Tempepatrybl KoTHpOpipyet TempepatypBy BHTPI INdKyUIOHOH NnTbI. EcNI TEMpepatpa NOHMaTeCBAIIE YCTAOHBNeHHoINy INdyKUIOHHa PnITa ABtOMaTuCeckn OTKnOHaeTcA.
06hapxkeHne he6oJIbuxn npedmetOB
EcHn Ha BapOCHN pAneIN octaINCB npEmdTeB HEnoDxOJaero
pAmepe Mnn HEMarHTHNA NOcya (HanPIMEP, AINOMHHNEBA) INI
dpyTne He6oJIbWNe npEmdTeB (HApIMEP, HOK, BNIIKA, KIOUH),
HNyDkuONHAA PnITa nepeJdT B pexm OXnDAHnyepe3 1MnHTy.
BeHTINrTAP npOdoJXNT OxLnXdJeHMe INyDuKsIOHOH NPiTb EeB TEueHHe 1MnHTb.
ABTomatnueckoe BbIKNIOeHne
ABTomatueckoe BbKIOUeHne -3TO 3auHTna FyHKUg HnDykuONHO nnTbI. NHykUOHNa NNtA BblKHOaETcA abTomatueckm, daxe cIeN ee 3abJIINBbIKIOuHTb NOCE roTOBKM. UcTaHOBeHHoe Bpempa60bI dIra pa3hIx yOBHeM MoUHOCY kya3AO H TaJbnie HKe:
| Урочь моцноTN | 1~3 | 4~6 | 7~8 | 9 |
| В做什么 по улочаю (MinH) | 240 | 180 | 120 | 90 |
Pn Chrtnn Nocdyb HapreB HEmeJeHNo Pnekpaaetcny INHycknoHHa nnTA abTOMATueCkN BbIKIOuAeTc Chepe3 2 MmHytBJ.

JIuaC KApDIOCTMMyIaTOpOM DIOJXHbI POKOHcyIbTIpObaTbSc C BpaOH piepe IcNOJIb3OBAHnEM 3TOrO UCTPOICTBa.
IcnoB3OBaHne TaHMepa
Taimep MoXHO NcIOnb3ObaT bDyMpa3HbIMn CnOco6aMn:
Ero moXHO HcNOB3ObaT bKak Taimep o6pAHorO 0CTeHa. B 3tOM Cnyae TaHMeR 6bYet BbIKIOuHb TaBPOHy 3OHy NO NCTeEHIN YCTaHOBNEHORO BPEMHN.
Takke MOxHO 3aIpOgPamMPOBaT TaIeMep Ha OTKIOUeHHe BApOHy 30HbI NO IcTeUeHN YcTaHOBJIeHNO BpeMeHn.
-99 MInHyT.
NcnoJIb3OBAHne TaIMepa DnI OpaPthOrO OTCyeta Ecn He Bb6pHaKoKnpeTHaBapOuHa 30Ha
1.Y6eIntecb,yTO INHdyKUHOHHa NJIHTa BKJIOueHa.
PpHmuehne: yHKUIO o6paTHOrO OTCeTa TaMepa MOxHO
IcnoJIb3OaBt TaKe 6e3 BbIbOpa BapOuHoi 30HbI.
2.HaKMTe KHOky TaMepa (F). FyHKUma obpaTHoro OTcHeta HauHHeT MIRatb, a Ha INdMKaTope IOnBtCra Ucnpa 10. Tenepb MoKHO yCTaHOBtB XeNaEMO Bpemr paBoTb TaMepa.
3.IcnoIb3yKHOJIKNK 四 + 四 IINI 四 - 四 1MOXHO yCTaHOBtB BpEMBa DnanaOHe oT 1do 99 MMHyT.
IIOck3ka: npn KpaTcKm HkaTm Ha KHONK «+» NII «-» Bbl npmbablaete nIN OTHMAeTe no 1 MInyTe.
Pn Haxatm N ydepkaHmN KhoKKn + INI - Bbl npnbAaBJeTe INI OTHMaTe No 10 MInyT.
PnOJHOBpeMeHOM HaxaTIN HA KHNKIN + IN - YCTAHOBJIeHHOE BpMc 6pbacbIaBcTcN INHdIKaTOp TaIImepa BBkIIOuayTcN.
4.Послелусатанови Времен�образнь OТСЕТ haunhaetcno He3aMeIДЛТeльно.Ha dinCnPee OTOбражаetcnoctablleecr Bpemr.
5. Послес Okончима образного отсета звукови сгнан pa60taetВ teунно 36ekyndи Инdkatop OTKlnucaetcra.
PnmeHne: yHKnna o6paTHoro OTCeta pa60aet TOnbKO B CTaHapTHO MoJeN.
HactpoKa TaMepa DnBbIKIOUeHnOdHOH NIN HeCKoJIbKHX BApOCHbIX 3OH
BkIIOueHHe TaMepa dIa OJHO 3OHBI
1.Bb6epTe HnyHyo pa6Ouyo BapOHy0 3OHy,Haxab KhoNky Bbl6opa 3OHbI (A)
2.ФИКИЗ МбрathorO OTOCHETA NaHcHT MMATb, a Ha INdIKaTOpE NOBHTCZ UMPpa «10》. Tenerpb MOKHO yctaHOBVt JeknaEMoe Bvpe paobToI TaTmePA.

3.IcnoIb3yKHOJIKNK 四 + 四 IINI 四 - 四 1MOXHO yCTaHOBtB BpEMBaDnIaNoHe oT 1do 99 MmHT.
ПлдсаЗкa: пи КраТКOM Нжати Ha KНОПКИ «+» Ип «-» Вbl
прибавлгете Ип OTHIMАЕ со NO MнHyte.
Pn HaxaTmN uDeepKaHmN KHOKN + mN - Bbl npi6abJareTe mN OTHMaete no 10 MInyT.
PnOJHOBpeMeHOM HaxaTIN HA KHNKII + IN - YCTAHOBJIeHHe BpMc 6paCbIbAeTcN INHdIKaTOp TaImepa BbIKIOUaTcN.
4.Поссу cztahobkm bpeMHn obaTbHOn TcHET HauHHeTcA HeMaTeJInTeBHo.Ha DnCIIeTo OTo6pa3ITcOCTabUHeeCb BpeMn HnDnKATOp Taimepa 6ydet MnrBtB TceHMeIe5 C6YkH.
PIMEUYAHNE:CBETAaJcRA Kpachra ToKa PAnOM CINdkaTOpOM yOBHr MoOHOCTn NOKa3bIaBet BbIbpahHyBapOHy 3OHy.
6
5.По Источим 3аданногу Вретени COOTВETCTBYUOДА варочая 3OAбудET abTomatuheckи OTKЛЮЧЕHA.
Ecnn 6bln BkIIOueHbI n Dpyrne BApOChIe 30hJI,TO OHN
npoonjatpa60ty.
6.Пи OndOBpeMeHOM IcNtIb3ObaHmN ObeHxФyHKuTn TaHMepea -Kak ObpaTHORO OTCHTA,TAK N OTKNIOUeHHa BApOHybXn PAnHeJIe H aNcPiIeE OTObpaKaTeCn OCTabWeecr BpEM, NOCKoJIbKy FyHKuD ObpaTHORO OTCHTA RJIaJIeTcR npOpriTeHoi. HaxMnTe Ha INdIKatOP BApOHOH PAnHeI, YTObSI NcMOTppeBpEm, OCTabWeecr DO OTKNIOUeHHa
Iocya (Pnc. 3)
- Ecnn MaHnT npnnnaet KO nHy kactpOJI npn npnbIeHNn KO nHy, 3a KaCTPJIa rONTC TnB BAPKn HA nHyckUOnHOI pNIte. - NOKyNAITE KACTpOJI, CNEuNaIbHO paccHTaHHbHe Na HnYdUKNHO BAPKy.
- KACTPHOJI N C IIOCKIM IN TOJCTbIM DHOM.
- KACTPNOI,ДИАМETРДИКOTOBIXTOUHOOCOOTBETCTBYETДИАМETPY KOHOPKINДПЯМAKCIMAMJIbHOROICNIOJIb3OBAHINMOUHOCN.
- KACTPION MHeBbIhX p3aMEpOB CHNkaET MOUHocb, HO He npIBoNTK notepe 3heprn. H bIObOc hcyae he peKoMeHdyetcTc IcnIpOBoZbAHne NoocbU c DnaMETPOM Meehe 10 cm.
- NOCya I3 HEPKABEIOUeI CTaII CMHOROcPOHbIM HOM OM INI NOCyDA I3 HEPKABeIKn C feppITOM, eINn Ha NDE NocyDbI Yka3AHO: IINYHdKYMOHNbIX NNIT.
- B CNYAe IcNpIb3OBAHnIyUHyHHoNocSybl, LyuHHe, YTO6bI IN DHO bIIO 3MaJIeBOe, BO n36EkaHne IpoaBHeHncaPAnHHHa cTeKNe KepAMINHECKNOAHEn.
- cIeNyUOJIaoc Nocya De npRIOdHA nJn MCNPOB3oBaHnJ: CTeKJIO, KepAMika, o60XKeHHaA TIIHa, nocya n3 anIOMMHnJ, MeIN IIN He HAMarHnYBaHOuCEcCTAn (ayCTEHINTHO).
YxOa(Pnc.4)
Octatok aIOMMHNEBOO foBbN, ocTaTkn NnueBbIX npOdyKTOB, XKbHpe NTTHa 6b3bN, caxap, npOdyKbTi C 60JIbUmm CODepkHAHMcaxapa - Bce 3TO cneDyET HEMeJNEHO CCHNTC B cApoHNOH naHeINcN o NOMoBtIO cneuAIBHO NOnATKn - Ua6eBa, BO m36EkaHIne NOBHeINa capanIH Na NoBepXHOCTN. Cpazy nocLe 3TOr HOaehnctc NeuaJIbHb I npOdyKT INCNoJIb3OBA Tb Dn ONUCTKn naHeINb yMaBXKhIE NpONTeHua. 3aTe m npOmbITb BOdI IN BcICuHTNb YcToI TpAnOpKo. 3AnpeaetcNIOJIb3OBAHnne ABpa3INbHXY6OB INI MoUaJOk, A tAKGE arpeCCNBbIX XIMMuecknx CpeCTDb IN CpeCTB dIra ydaJIeHnRAIteH.
INCTpykunn Dn MOHTaKnka
MOHTAX
HactoIyue HNCTpyKUIM npEHa3nAeHbI dIy IcIOJb3OBAHNB B nepNOMO MONTAKA uI DMI MOHTAKHKA, 3TO PYKOBODCTBO dIy MONTAKA, perYINPOBKNu yXOda 3a NNTOB COOTBECTBNE C cyUeCTByOUzIMN HOPMATNBAMG. He 3a6BIAITE O TOM, YTo HeEOxOdMIMO OTKIOUChytB pNNIT dy BInONHeHNA KAKHX-TNBO OIEpaui.
YctahOBka(Pnc.5)
Дя усановки ппты на плockи NOBepxHocTN OобатNTecь K COOTBETCTBYUCEMy PmCyHky.
IJIraepMeTn3aun Bcero nepimmetpa nIIbTyI NOJb3yTeCb 3aONINHTeM, BXOIAUIM B COCTAB NocTAbKN.
HpeKOMeHdyem yCTaHaBnBaTb PnITy Ha DyXOBKe, INM, B CnYae TAKORo PoJa YCTAHOBKn, Y6eJntEtcB B TOM, UTO:
-Духова ообopyдова на сстемо oxlaж demя,
-ToprHuN Bo3DyX N3 DxyOBkN He MoKET IONACTb NO KaHany B O6nactb INDyKUHOHNO PAHeJI,
-прдуCMOTpeb BO3duHbIe KaHaJIb I B COOTBeTCTBIM C yka3aHHbIM Ha PncyHke.
3Jektpnueckne noKJIuOeHn (Pnc.6)
Ipepe nnoknIOUeHMeK cTei nITaHnYbEduTeCb B TOM, YTO:
-XapakTePcRbTmK yctaHOBK cOBnAaIOT C xapaKTePcRbTkAMM, npBHeDHeHbIMN Ha 3aBoccko TabnUeKe, haxOJaueCeHa Dne BApovHn paHEni:
-Дя установкиnpусмтөн досятэн мошоне заэмлүүпс, в COOTBETCTBIM C HOPMATBAMM И TrpeбоганяМд ДэйctБУОJOЕЗAKOHOДATEЛьстВ. 3aэмлүүпnpусмтөн B yctahOBJIENHbIX HOPMATBAX.
B Tom cnyuae, ecn nI pynp6opa He npedycmotpen shyhp n/ nI mpo3kka BkIIOUeHnA, Heo6XODIMO IcNoIb3OBatb MATEpuaN, pnpOHDhbl nI 3NaueHnI 3JeKTPuCeCKTO TOKa, npBVEeHHbIX Ha yctahOBHOH nPaTInHe C xapakTePncCTMkAMn, nI dAnDaHHo paBOOey TMpepaTybl. 3AnpeuaeTcN cNoIb3ObaT b Shyp B cnyuae ernopepeBaHnpi npBeBluEHN 50^ TempepaTybl OkpykaIooue cpebl.
PL
PRODUKT TEN ZAPROJEKTOWANY
ZOSTAL DO UZYTKU W
GOSPODARSTWIE DOMOWYM.
PRODUCENT NIE PONOSI ZADNEJ
ODPOWIEDZIALNOŚCI ZA
EWENTUALNE SZKODY RZECZOWE
I OSOBOWE POWSTALE WSKUTEK
JEGO NIEPRAWIDŁOWEJ INSTALACJI
ORAZ NIEWLAŚCIWEGO, BŁEDNEGOLUB NIEUZASADNIONEGO
UZYTKOWANIA.

- PRECAUTIONS
- OPERATING PRINCIPLE (Fig. 1)
- Installation
- Using your Induction Hob To
- start cooking
- If the display flashes ≥ U ≤ alternately with heat setting
- When you have finished cooking
- Using the Boost function Activated the boost function
- Cancel the Boost function
- Using Child Lock Function
- To lock the controls
- To unlock the controls
- Over-Temperature Protection
- Detection of Small Articles
- Auto Shutdown Protection
- Using the Timer
- Using the Timer as a Minute Minder If you are not selecting any cooking zone
- Setting the timer to turn one or more cooking zones off
- If the timer is set on one zone:
- Cooking vessels (Fig. 3)
- Maintenance (Fig. 4)
- Installer's Instructions
- Positioning (Fig. 5)
- Electrical connection (Fig. 6)
- QUESTO PRODOTTO E STATO CONCEPITO PER UN IMPIEGO DI TIPO DOMESTICO. IL COSTRUTTO RECLINA OGNI RESPONSABILITA NEL CASO DI EVENTUALI DANNI A COSE O PERSONE DERIVANTI DA UNA NON CORRETTA INSTALLAZIONE O DA USO IMPROPrio, ERRONEO OD ASSURDO.
- VOORZORGSGMAATREGELEN
- MEPbI IPEDOCTOPOXHOCTN
- IcnoB3OBAHne HndyKUONHOHNOITbI
- B hauane roTObKn
- EcnH pnn Bb6pe ypoBn MaOHOCTNa DmCnPE NOBnRE TcR MrrAooie H3o6paXeHne CNMBOA ≥ ≤ 303OHaAHET,
- IIO OKOHaHHI FOTOBKN
- IcnoJIb3ObaHneФyHKmMrHOBeHHoroHarpeBa BkIIOueHneФyHKmMrHOBeHHoroHarpeBa
- OtklnoueHne yHKmMrHOBeHHoro HarpeBa
- IcnoIb3OBAHne yHKUIN 6IOKnPOBKN OT DeTei
- YtO6bI 3a6nOKIpOBaTb 3IeMeHbI ynpaBHeHHa
- YtO6bIpa36JIOKINPOBaTb 3JIeMeHTbI ynpaBNeHn
- 3aunta oT neperpeBa
- 06hapxkeHne he6oJIbuxn npedmetOB
- ABTomatnueckoe BbIKNIOeHne
- IcnoB3OBaHne TaHMepa
- NcnoJIb3OBAHne TaIMepa DnI OpaPthOrO OTCyeta Ecn He Bb6pHaKoKnpeTHaBapOuHa 30Ha
- HactpoKa TaMepa DnBbIKIOUeHnOdHOH NIN HeCKoJIbKHX BApOCHbIX 3OH
- BkIIOueHHe TaMepa dIa OJHO 3OHBI
- Iocya (Pnc. 3)
- YxOa(Pnc.4)
- INCTpykunn Dn MOHTaKnka
- MOHTAX
- YctahOBka(Pnc.5)
- 3Jektpnueckne noKJIuOeHn (Pnc.6)
- PL
Brand : CATA
Model : ISB 3102 BK
Category : Induction hob