
QA4101B1 - Food Processor MOULINEX - Free user manual and instructions
Find the device manual for free QA4101B1 MOULINEX in PDF.
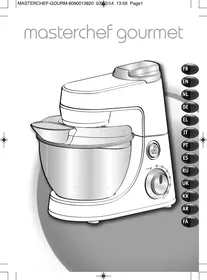

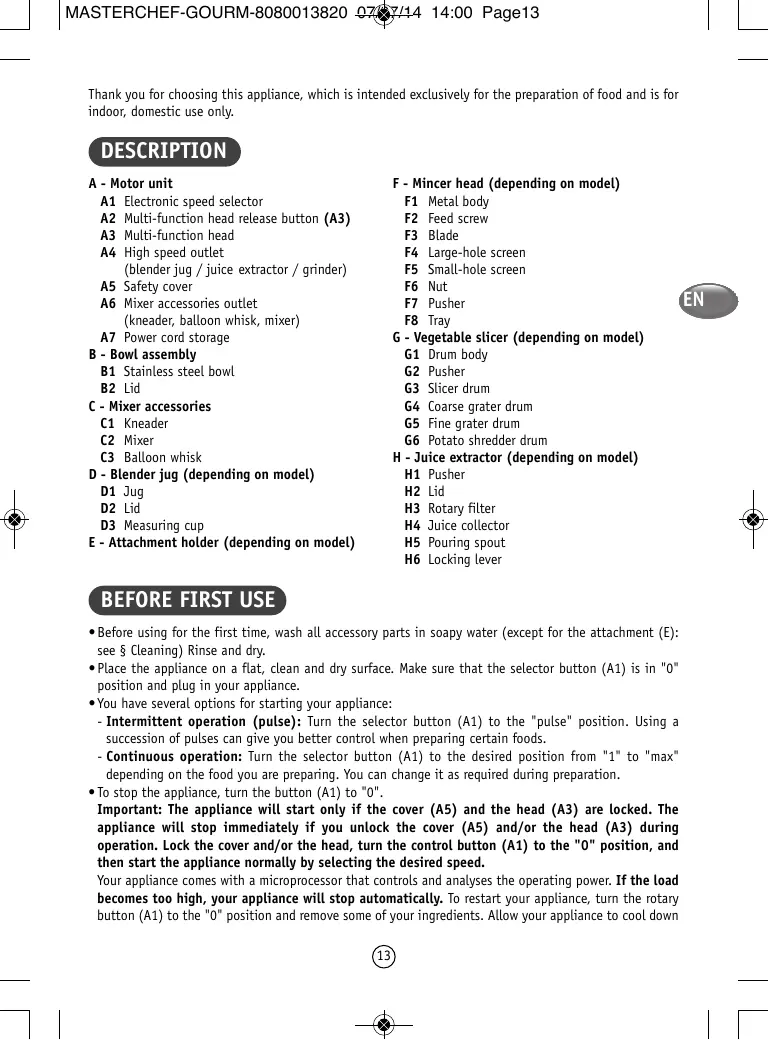


| Product type | Multifunction food processor |
| Brand | Moulinex |
| Model | QA4101B1 |
| Power supply | 220-240 V, 50/60 Hz |
| Speeds | Electronic speed control from 1 to max + Pulse position |
| Stainless steel bowl capacity | Up to 1.8 kg of light dough |
| Blender bowl capacity | 1.5 L (thick mixtures) / 1.25 L (liquids) |
| Grinder capacity | Up to 3 kg of meat |
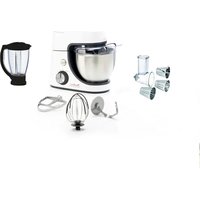
| Included accessories | Stainless steel bowl with lid, dough hook, kneader, multi-wire whisk, blender bowl, grinder head (body, screw, knife, discs, nut, pusher, tray), vegetable cutter with 4 cones, juicer, adapter |
| Main functions | Mixing, kneading, beating, emulsifying, whisking, blending, grinding, slicing, grating, juicing |
| Safety | Overload protection microprocessor, automatic shut-off in case of excessive load, safety lock on lid and head |
| Cleaning | Stainless steel bowl, blender bowl and accessories dishwasher-safe (except metal parts of the grinder head). Motor unit and adapter wipe with a damp cloth |
| Storage | Cord wrap (A7) |
| Country of origin | Not specified |
| Warranty | Not specified |
Frequently Asked Questions - QA4101B1 MOULINEX
User questions about QA4101B1 MOULINEX
0 question about this device. Answer the ones you know or ask your own.
Ask a new question about this device
Download the instructions for your Food Processor in PDF format for free! Find your manual QA4101B1 - MOULINEX and take your electronic device back in hand. On this page are published all the documents necessary for the use of your device. QA4101B1 by MOULINEX.
USER MANUAL QA4101B1 MOULINEX
Thank you for choosing this appliance, which is intended exclusively for the preparation of food and is for indoor, domestic use only.
DESCRIPTION
A - Motor unit
A1 Electronic speed selector A2 Multi-function head release button (A3) A3 Multi-function head A4 High speed outlet (blender jug /juice extractor /grinder) A5 Safety cover A6 Mixer accessories outlet (kneader, balloon whisk, mixer) A7 Power cord storage
B-Bowl assembly
B1 Stainless steel bowl B2 Lid
C-Mixer accessories
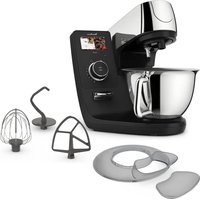
C1 Kneader C2 Mixer C3 Balloon whisk
D - Blender jug (depending on model)
D1 Jug D2 Lid D3 Measuring cup
E - Attachment holder (depending on model)
F - Mincer head (depending on model)
F1 Metal body F2 Feed screw F3 Blade F4 Large-hole screen F5 Small-hole screen F6 Nut F7 Pusher F8 Tray
G - Vegetable slicer (depending on model)
G1 Drum body G2 Pusher G3 Slicer drum G4 Coarse grater drum G5 Fine grater drum G6 Potato shredder drum
H - Juice extractor (depending on model)
H1 Pusher H2 Lid H3 Rotary filter H4 Juice collector H5 Pouring spout H6 Locking lever
BEFORE FIRST USE
- Before using for the first time, wash all accessory parts in soapy water (except for the attachment (E): see § Cleaning) Rinse and dry.
- Place the appliance on a flat, clean and dry surface. Make sure that the selector button (A1) is in "0" position and plug in your appliance.
- You have several options for starting your appliance:
- Intermittent operation (pulse): Turn the selector button (A1) to the "pulse" position. Using a succession of pulses can give you better control when preparing certain foods.
- Continuous operation: Turn the selector button (A1) to the desired position from "1" to "max" depending on the food you are preparing. You can change it as required during preparation.
- To stop the appliance, turn the button (A1) to "0".
Important: The appliance will start only if the cover (A5) and the head (A3) are locked. The appliance will stop immediately if you unlock the cover (A5) and/or the head (A3) during operation. Lock the cover and/or the head, turn the control button (A1) to the "0" position, and then start the appliance normally by selecting the desired speed.
Your appliance comes with a microprocessor that controls and analyses the operating power. If the load becomes too high, your appliance will stop automatically. To restart your appliance, turn the rotary button (A1) to the "0" position and remove some of your ingredients. Allow your appliance to cool down
1 - MIXING / KNEADING / BEATING / EMULSIFYING / WHISKING
You can prepare up to 1.8 kg light dough and heavy dough made with up to 500 g flour using the stainless bowl (B1) and its lid (B2) depending on the food.
ACCESSORIES USED:
- Stainless steel bowl (B1). -Lid (B2)
- Kneader (C1) or mixer (C2) or balloon whisk (C3)
1.1 - ASSEMBLING THE ACCESSORIES
- Press the button (A2) to release the multi-function head (A3) and raise it until it locks in place.
- Lock the stainless steel bowl (B1) (clockwise) on the appliance and put in the ingredients.
- Insert the desired accessory (C1, C2 or C3) on the outlet (A6), push and rotate it anti-clockwise a quarter turn to lock the accessory in its housing.
- Place the multi-function head (A3) to the horizontal position: press the button (A2) and manually lower the multi-function head (A3) until it locks (the button (A2) returns to its initial position).
- Slide the lid (B2) over the stainless steel bowl (B1).
Note: It is not essential to use the lid but it prevents splashing.
- Make sure that the cover (A5) is locked correctly (clockwise) on the high-speed outlet (A4).
1.2 - USAGE
Start by turning the selector button (A1) to the desired position according to the recipe.
- The appliance starts running immediately.
You can add food through the hole in the lid (B2) during preparation.
- To stop the appliance, turn the button (A1) to "0".
Tips:
- Kneading
- Use the kneader accessory (C1) at speed "1". You can knead up to 500 g of flour (e.g. white bread, grain bread, short crust pastry, etc.). Maximum time of use: 13 minutes.
- Mixing
- Use the mixer (C2) at speed "1" to "max".
- You can mix up to 1.8 kg of light dough (light cake mixture, sponge cake, biscuit or cookie dough). Maximum time of use: 13 minutes.
- Never use the mixer (C2) to knead heavy dough.
- Beating / emulsifying / whisking
- Use the balloon whisk (c3) at speed "1" to "max".
- You can prepare: mayonnaise, aioli, sauces, whisked egg whites (up to 8 egg whites), whipped cream (up to 500 ml), meringues, etc. Maximum time of use: 10 minutes.
- Never use the balloon whisk (C3) to knead heavy dough or mix light dough.
1.3 - DISMANTLING THE ACCESSORIES
- Wait for the appliance to come to a complete stop.
- Remove the lid (B2).
- Using the button (A2), release the multi-function head (A3) and raise it to the upper position.
- Release the accessory (C1), (C2) or (C3) from the multi-function head by pushing the accessory into the head and rotating it clockwise a quarter turn.
- Remove the stainless steel bowl.
2-BLENDING/MIXING (DEPENDING ON MODEL)
Depending on the nature of the food, you can use the blender (D) to prepare up to 1.5 L of thick mixtures and 1.25 L of liquid mixtures.
ACCESSORIES USED:
- Blender jug (D).
2.1 - ASSEMBLING THE ACCESSORIES
- Place the multi-function head (A3) in the horizontal position: press the button (A2) and manually lower the multi-function head (A3) until it locks (the button (A2) returns to its initial position).
- Unlock the safety cover (A5) from the high-speed outlet (A4) by rotating it anti-clockwise and then remove it.
- Make sure that the appliance is switched off before locking the blender (D).
- Lock the blender jug (D) on the outlet (A4) by rotating it clockwise.
- Place the food in the blender jug, and lock the lid (D2) fitted with the measuring cap (D3), by rotating it anti-clockwise.
2.2 - USAGE
- Start by turning the selector button (A1) to the desired position (from speed 4 to Max or pulse) according to the recipe.
Use the "Pulse" position for better mixing control and for a better blending of your preparation.
You can add food through the hole in the measuring cap (D3) during preparation.
- To stop the appliance, turn the button (A1) to "0".
Maximum time of use: 3 minutes.
Tips:
You can prepare:
- finely blended soups, cream soups, stewed fruit, milkshakes and cocktails.
- liquid batter (pancake, fritters, Yorkshire pudding, waffles, clafoutis and custard flans).
If ingredients stick to the sides of the bowl when mixing, stop the appliance and wait until the blades have stopped completely. Remove the blender and push the food down onto the blades using a spatula, and put your blender back on the appliance to continue processing.
- Never fill the blender jug with boiling liquid.
- Never run the blender jug empty. Always use the blender jug with its lid.
- Never remove the lid before the blades have stopped completely.
- Always pour liquid ingredients into the blender jug first before adding solid ingredients.
2.3 - DISMANTLING THE ACCESSORY
- Wait for the appliance to come to a complete stop before removing the blender by unlocking it in the anti-clockwise direction and put back the cover (A5) by locking it on the outlet (A4) (clockwise).
3 - MINCING (DEPENDING ON MODEL)
ACCESSORIES USED:
- Attachment holder (E)
- Assembled mincer head (F)
3.1 - FITTING THE MINCER ATTACHMENT
- Press the button (A2) to release the multi-function head (A3) and raise it until it locks in place.
- Place the attachment (E) and lock it in the anti-clockwise direction such that the outlet is in alignment with the appliance.
- Place the multi-function head (A3) in the horizontal position by pressing the button (a2) once again.
3.2 - ASSEMBLING THE MINCER HEAD
- Hold the body (F1) by the feed tube, with the wider opening uppermost.
- Insert the feed screw (F2) (long shaft first) into the body (F1).
- Fit the blade (F3) onto the short shaft protruding from the feed screw (F2) with the cutting edges facing outwards.
- Fit the chosen screen (F4 or F5) on the blade (F3), aligning the two lugs with the two notches in the body (F1).
- Screw the nut (F6) home on the body (F1) in the clockwise direction, without locking it.
- Check the assembly. The shaft should have no play, neither should it be able to turn on its own. Otherwise, repeat the assembly procedure.
3.3 - FITTING THE MINCER HEAD ON THE APPLIANCE
- Facing the attachment outlet (E), insert the assembled mincer head (F) inclined to the right, aligning the two bayonets in the mincer head with the two notches in the attachment. Push the mincer head home into the attachment and turn the mincer head anti-clockwise until it latches with the feed tube in the vertical position.
- Place the removable tray (F8) on the feed tube.
3.4 - USAGE, TIPS AND DISMANTLING
- Make sure that the safety cover (A5) is locked correctly (clockwise) on the high-speed outlet (a4).
- Place a container to collect the preparation in front of the appliance.
- Run the appliance by turning the selector (A1) to speed "3" or "4".
- Push the meat, piece by piece, down the feed tube, using the pusher (F7). Never push the ingredients down the feed tube with your fingers or any other utensil.
- You can chop up to 3 kg of meat (gristle, bone and sinew removed).
Maximum time of use: 10 minutes.
- Leave your appliance to cool down completely before using again.
- To stop the appliance, turn the selector to "0" speed and wait for the appliance to come to a complete stop.
- Unlock the mincer head in the reverse order of the assembly.
Tips:
- Prepare all of the foodstuffs to be minced (for meat, remove the bones, gristle and tendons and cut it into pieces of approximately 2 x 2 cm).
- Make sure that frozen meat is thoroughly thawed.
- At the end of the operation, you can feed a few small pieces of bread into the feed tube to clear any meat remaining in the machine.
4 - GRATING / SLICING (DEPENDING ON MODEL)
ACCESSORIES USED :
- Attachment holder (E)
- Assembled vegetable slicer (G)
- Drums (depending on model)
4.1 - ASSEMBLING THE ACCESSORIES
- Press the button (A2) to release the multi-function head (A3) and raise it until it locks in place.
- Place the attachment (E) and lock it in the anti-clockwise direction such that the outlet is in alignment with the appliance.
- Place the multi-function head (A3) in the horizontal position by pressing the button (A2) once again.
- Make sure that the safety cover (A5) is locked correctly (clockwise) on the high-speed outlet (A4).
- Facing the attachment (E) outlet, insert the drum body (G1) inclined to the right, aligning the two bayonets in the drum body with the two notches in the attachment. Push the drum body home and turn the drum body anti-clockwise until it latches with the feed tube in the vertical position.
- Insert the chosen drum into the body, and make sure that it is fully engaged in the body.
4.2 - USAGE AND TIPS
- Place a container to collect the preparation in front of the appliance.
- Run the appliance by turning the selector (A1) to speed "3" to slice and to speed "4" to grate.
- Place the food in the feed tube on the body and press down with the pusher (G2). Never push the ingredients with your fingers or any other utensil.
- You can prepare up to 2 kg of food.
- Maximum time of use: 10 minutes.
- To stop the appliance, turn the selector to "0" speed and wait for the appliance to come to a complete stop.
- Unlock the drum body in the reverse order of the assembly.
- Use the drums to:
- Grate coarsely (G4) / grate finely (G5): carrots, celery, potatoes, cheese, etc.
- Slice thickly (G3): potatoes, carrots, cucumbers, apples, beetroot, etc.
- Potato shredder (G6): potatoes, parmesan, etc.
5 - EXTRACTING JUICE FROM FRUITS AND VEGETABLES (DEPENDING ON MODEL)
ACCESSORIES USED:
- Assembled juice extractor (H).
5.1 - ASSEMBLING THE JUICE EXTRACTOR
- Place the filter (H3) in the middle of the juice collector (H4).
- Lock the lid: turn it anti-clockwise and lock the lid (H2) on the juice collector (H4) (closed padlock position).
- General locking: push the locking lever (H6) to closed padlock position.
5.2 - FITTING THE JUICE EXTRACTOR ON THE APPLIANCE
- Place the multi-function head (A3) in the horizontal position: press the button (A2) and manually lower the multi-function head (A3) until it locks (the button (A2) returns to its initial position).
- Unlock and remove the cover (A5) from the outlet (A4) by turning it anti-clockwise.
- Make sure that the appliance is switched off before locking the juice extractor (H).
- Lock the assembled juice extractor on the outlet (A4) by turning it clockwise, so as to have the outlet for the pouring spout aligned with the appliance.
- Fit the pouring spout (H5) on the collector (H4).
- Check that the pouring spout (H5) is fully open.
5.3 - USAGE AND TIPS
- Place a large glass under the pouring spout (H5).
- Run the appliance by turning the selector (A1) to speed "3".
- Cut the fruits and/or vegetables into pieces.
- Insert them down the feed tube in the lid (H2) push them slowly using the pusher (H1). Never push the ingredients with your fingers or any other utensil.
- Do not process 500g of food more than 5 times continuously, without allowing your appliance to cool down completely. Maximum time of use: 10 minutes.
- For best results, clean the filter after every 300g of ingredients.
- Important : When the pulp collector is full, stop the appliance and empty the collector.
- To stop the appliance, turn the selector to "0" speed and wait for the appliance to come to a complete stop.
- Wait until the rotary filter comes to a complete stop before removing the assembly from the appliance.
- To remove the juice extractor, unlock it by turning it anti-clockwise.
- Place the locking lever (H6) in the open padlock position. Open the lid (open padlock position). You can then remove the filter (H3) to clean it and empty the collector (H4).
Tips:
- You can make juice from: carrots, tomatoes, apples, grapes, raspberries, etc.
- Peel fruits with thick skins; remove stones and the core of pineapples.
- It is not possible to extract juice from certain fruits and vegetables: bananas, avocado pears, blackberries, some varieties of apples, etc...
- You can prepare juices with different fruits and vegetables without having to clean the juice extractor every time, the flavours will not be mixed. Just run the extractor with a little water to rinse it between two different juices.
- Drink the juices immediately after preparation, and add lemon juice to keep them in the fridge for a few hours.
6 - ADJUSTING THE CORD LENGTH
For more comfortable use or for storage, you can reduce the cord length by pushing it inside the motor unit (A) via the opening on the rear (A7).
7 - FINELY CHOPPING SMALL QUANTITIES (DEPENDING MODEL)
ACCESSORY USED:
- Assembled grinder.
You can use the grinder to:
- Chop in a few seconds by pulsing: dried figs, dried apricots, etc.
Quantity / max time: 100g / 5s
This grinder is not designed for hard products like coffee beans or hard spices.
CLEANING
- Unplug the appliance.
- Do not immerse the motor unit (A) or the attachment (E) in water or under running water. Wipe them with a dry or slightly damp cloth.
- For easier cleaning, rinse the accessories quickly after use. Dismantle the mincer head assembly fully. Handle the blades with care to prevent injury.
- Wash, rinse and dry the accessories: they are dishwasher-safe, except for all the metal components in the mincer head: body (F1), feed screw (F2), blade (F3), screens (F4 and F5), nut (F6).
- The screens (F4) and (F5) as well as the blade (F3) must remain greased. Coat them with cooking oil.
Tips:
- In the event any of your accessories are coloured by food (carrots, oranges, etc.), rub with a cloth soaked in cooking oil and then clean them as usual.
- Blender jug (D): pour some hot water containing a few drops of washing up liquid into the blender. Close the lid. Place it on the appliance and pulse a few times. After removing it, rinse the bowl in running water and allow to dry (bowl upside down).
STORAGE
Do not store your appliance in a humid environment.
WHAT TO DO IF YOUR APPLIANCE DOES NOT WORK
If your appliance does not work, check:
- that it is plugged in correctly.
- that the accessories are correctly locked.
- The position of the electronic speed selector (A1): put it back to the "0" position, then select the desired speed again.
Your appliance comes with a microprocessor that controls and analyses the operating power. If the load becomes too high, your appliance will stop automatically. To restart your appliance, turn the rotary button (A1) to the "0" position and remove some of your ingredients. Allow your appliance to cool down for a few minutes. You can then select the desired speed to complete your preparation.
Your appliance still does not work? Contact an authorised service centre (see the list in the service booklet).
DISPOSAL OF PACKAGING AND THE APPLIANCE

The packaging is comprised exclusively of materials that present no danger for the environment and which may therefore be disposed of in accordance with the recycling measures in force in your area.
For disposing of the appliance itself, please contact the appropriate service of your local authority.
ACCESSORIES
You can customise your appliance and obtain the following accessories from your usual retailer or an authorised service centre:
- Stainless steel bowl
- Stainless steel bowl lid
- Kneader
- Mixer
- Balloon whisk
- Blender jug
- Juice extractor - Grinder Mincer head
- Attachment holder
- Vegetable slicer:
- Slicer
- Coarse grating
- Fine grating
- Potato shredder
- Pasta kit Coulis attachment
- Pasta rolling mill
Caution: This booklet contains instructions for additional accessories. Please keep safe for future reference. Please contact Tefal Customer Relations for further information on how to purchase accessories.

5- JUICE EXTRACTION FROM FRUITS AND VEGETABLES (DEPENDING ON MODEL)
ACCESSORIES USED:
3.1 - ATTACHING THE ACCESSORY HEAD
- Press the button (A2) to release the multifunction head (A3) and lift it up. Position the accessory (E) and secure it by turning it clockwise until the slot engages in the housing.
- Raise the multifunction head (A3) to the horizontal position by pressing the button (A2).
3.4 - STARTING, TIPS AND DISASSEMBLY
4.2 - STARTING TIPS
5.3 - STARTING TIPS
- Install the removable chute (F8) onto the feed tube.
3.4 - USE, TIPS AND DISASSEMBLY PROCEDURE
4.1 - ASSEMBLY PROCEDURE FOR ACCESSORIES
Press the button (A2) to release the multifunction head (A3), and lift the head so that it is locked in place. - Install the accessory (E) and secure it by turning it counterclockwise so that the outlet of the grinder is aligned with the appliance. - Set the multifunction head (A3) to the horizontal position, pressing the button (A2) again. - Make sure that the protective cover (A5) is correctly locked (by turning clockwise) on the high-speed outlet (A4). In the outlet on the accessory block (E), insert the housing for the blades (G1), tilt it to the right to align the bayonet connections of the blade housing with the two pins in the accessory block. Insert the blade housing into the block, turning it clockwise until it locks. When the feed tube is in the vertical position, insert the blade cylinder into the housing and make sure it is firmly seated in the housing.
4.2 - USE AND TIPS
- For stability, the collection container should be placed on a flat surface. Start the appliance by selecting speed "3" for normal use or "4" for hard foods.
- Place the food into the feed tube and push it down using the pusher (G2). Never push the ingredients with your fingers or any other objects.
- You can prepare up to 2 kg of food.
To stop the appliance, turn the switch to the "0" position and wait for it to come to a complete stop. - Disconnect the housing by pulling straight back, in reverse order of assembly. - Purpose of the attachments:
- Coarse grater (G4) / Fine grater (G5): carrots, beets, potatoes, cheese, etc.
- Shredder (G3): potatoes, carrots, cucumbers, apples, beets, etc. - Potato grater (G6): potatoes, parmesan, etc.
5- EXTRACTING JUICE FROM FRUITS AND VEGETABLES (DEPENDING ON MODEL)
Attachments used:
- Juicer attachment (H) in the set.
5.1- INSTALLING THE JUICER ATTACHMENT
- Install the filter (H3) into the middle container for collecting juice (H4). Secure it: turn the lid (H2) counterclockwise on the juice container (H4) (closed latch position).
- Secure the pusher (H6) in the closed latch position.
5.2- INSTALLING THE JUICER ATTACHMENT ON THE APPLIANCE
• Set the multifunctional bowl (A3) to the horizontal position: press the button (A2) and manually lower the multifunctional bowl (A3) to the locking position (the button (A2) returns to its original position). - Remove the protective cover (A5) from the outlet (A4), turning it counterclockwise and removing it. - Attach the juicer attachment (A), making sure it is properly connected. Secure the juicer attachment onto the outlet (A4), turning it clockwise so that the spout is aligned with the appliance. - Place the spout (A5) on the juice container (A4).
Do not store the appliance in a damp place.
WHAT TO DO IF THE APPLIANCE DOES NOT WORK
If the appliance does not work, check that:
- Plug the device into a power outlet;
- The nozzles must be properly secured;
- Position of the control knob (A1): turn it to "0", then select the desired speed.
The control knob is equipped with a microprocessor that analyzes and controls the operation of the device. If the load is too high, the device will stop automatically. To restart, turn the rotary switch (A1) to position "0", wait a few seconds, then select the desired speed and resume operation.
The device still does not work? Contact an authorized service center (see the list in the service booklet).
DISPOSAL OF THE APPLIANCE
RU

The packaging consists exclusively of environmentally friendly materials; it can be disposed of in accordance with applicable regulations.
Thank you for choosing our device, which is designed for preparing food and should be used only for this purpose.
DESCRIPTION
A - Control unit
A1 Electronic speed control A2 Button for releasing the multifunctional head (A3) A3 Multifunctional head A4 High-speed shaft (for attaching the mixer / blender / whisk) A5 Protective cover A6 Attachment holder for mixer accessories (whisk, blender, mixer) A7 Storage / winding
B - Bowl
B1 Stainless steel bowl B2 Lid
C - Mixer accessories
Before using the device, read the instructions carefully.
- Pulse mode: reduced pulse frequency, reduced number of pulses.
Quantity/Maximum processing time: 100g/5s
The device is not intended for processing solid products in large quantities.
__SUPPIMER__
Disconnect the device from the power supply. Do not immerse the motor block (A) or the attachment (E) in water and do not place them under running water. Wipe them with a dry or slightly damp cloth. To clean the device, rinse the accessories immediately after use. Thoroughly disassemble the chopper head. To avoid injury, handle the blades carefully. - Remember: you can wash the accessories in the dishwasher, except for the metal components of the chopper head: housing (F1), pusher (F2), blades (F3), grates (F4 and F5), and bowl (F6). - The grates (F4) and (F5), as well as the blades (F3), need to be lubricated with vegetable oil.
Advice:
- If the accessories have been stained (e.g., with carrots, vegetable oil), wipe them with a cloth soaked in vegetable oil, then wash them with the usual detergent. For the blender jar (D): pour a small amount of warm water with a few drops of dishwashing liquid into the jar. Close the lid. Place the jar on the device and run it in pulse mode.
After finishing, rinse the contents under running water and dry (turning the jar upside down).
STORAGE
Do not store the device in a damp place.
IF THE DEVICE DOES NOT WORK
If the device does not work, check that:
- It is properly connected to the power supply; - The accessories are correctly attached; - The switch (A1) is in the "0" position, then select the desired speed.
The device is controlled by a microprocessor, which manages the processing of the flow. When the device is turned on, it automatically turns off. To restart the device, set the rotary switch (a1) to the «0» position and press the power button. Leave the device for a few minutes to cool down. After this time, the device will be ready for use again.
The device still doesn't work? Contact the authorized service center (see the list in the service booklet).
DISPOSAL OF PACKAGING AND DEVICE

The packaging is made of environmentally friendly materials. Therefore, it can be disposed of in accordance with the recycling regulations in your region. For the disposal of the device itself, contact the appropriate service.
ACCESSORIES
The device can be supplemented with the following accessories, which can be purchased from a dealer or at an authorized service center:
- Bowl with a grinding function for chopping or a bowl with a non-stick coating for the mixer
·Whisk - bowl for the blender - measuring cup - lid - meat grinder attachment
Overview:
- Slicing - coarse grating - fine grating - potato grater for fries
- Set for preparing fresh juice
Attachment for making tomato juice and attachment for making berry juice
Warning: When using any accessory, always keep the instructions for the device or the device itself at hand.
SPECIFICATIONS
A-Kofantkyi biology
A1 Electric shock hazard A2 Functional grounding (protective earth) A3 Functional switch A4 Household use (mixer / whisk / blender) A5 Cord A6 Mixer (with whisks, dough hooks, blender attachment) Sanitary processing A7 Corrective maintenance
B-Intended use
B1 Safety requirements for use B2 Cord
C-Mixer attachments
C1 Whisk C2 Blender attachment C3 Dough hooks
D-Controls (operating elements)
D1 Switch D2 Cord D3 Speed selector
E-Accessories for processing (operating elements)
F - Lid (operating elements)
F1 Metal lid F2 Gasket F3 Blade F4 Large openings F5 Small openings F6 Bowl F7 Shaft F8 Blade
BEFORE FIRST USE
Before first use, all parts (see block (E) and "Cleaning") must be washed. Dry them thoroughly and reassemble. Place the cord in the storage compartment (A1) "0" position, then insert the plug. For further use, proceed as follows:
- Continuous operation (pulse mode): Press the switch (A1) to "Pulse" position ("Pulse mode"). For continuous operation, hold the switch.
- Intermittent operation: Press the switch (A1) and hold it in the "1" to "max" position. Operation stops when the switch is released. To stop, press (A1) to "0" position.
Caution! The cord can only be used with the cord (A5) and the lid (A3) properly installed. During operation, if the cord (A5) and/or the lid become loose, stop immediately. Do not operate the cord (A5) and/or the lid without the switch (A1) in the "0" position, then insert the plug and continue operation.
Remove the protective film from the display before use. If the film is not removed, the display may be damaged. Remove the film by pulling the tab (A1) "Remove the film". Remove the film slowly.
1-REMOVE / FILM / TAB / DISPLAY / SCREEN
The cap (B2) must be installed on the container (B1) before use. The container must be filled with 1.8 kg of the product before installation.
REQUIRED TOOLS:
- Container (B1) - Cap (B2) - Screwdriver (C1), wrench (C2), and hex key set (C3)
1.1- TOOLS AND PARTS
- To open the functional cover (A3), press the button (A2) and lift the cover. Install the container (B1) by aligning it with the opening (arrow) and secure it with the locking clips.
- Insert the tube (A6) into the container (C1, C2, or C3) and secure it in place. The functional cover (A3) should be installed as follows: press the button (A2) and lift the functional cover (A3) to the open position (as shown in the figure). Install the cap (B2) on the container (B1) and tighten it.
Note: The cap may be tight, but it can be removed by turning it counterclockwise. The tube (A5) should be inserted into the opening (A4) of the cover (as shown in the figure).
1.2- OPERATION
Press the button (A1) to release the locking mechanism.
Start the mixing operation. During operation, the cap (B2) should be turned counterclockwise to open. To stop the operation, press the button (A1) to the "0" position.
Maintenance:
- Clean
- Replace the filter (C1) after 50 hours of use. Use only original filters (or equivalent). - Maximum operating time: 13 minutes.
- The activator (C2) "1" to "max" (highest) is used for the day. - 1.8 kg of day for the day is used for the day (for example, for the day, etc.) is used. - The duration of use is: 13 minutes. - The activator (C2) is used for the day.
- The /3mylbraunay/6xNfay
- The conditioner (C3) "1" to "max" (highest) is used for the day. - You can use: oils, conditioners, rinses, and other products (up to 8 products), and other things (up to 500 ml) and so on. - The duration of use is: 10 minutes. - The conditioner (C3) is used for the day and for the night.
1.3- REQUIRED ACCESSORIES SET
The device is fully charged. Take the cap (B2). - Remove the protective cap (A2) from the functional head (A3) and place it in a safe place.
- The conditioner (C1, C2 or C3) is placed on the head and is attached to the functional head (A3) by pressing it onto the head.
- Remove the protective cap from the device.
2- ACTIVATOR (FOR THE DAY)
The device is filled with the product (D) up to 1.5 liters of liquid or 1.25 liters of powder.
USED PRODUCTS:
- The product (D).
2.1- REQUIRED ACCESSORIES SET
The functional head (A3) is prepared: remove the cap (A2) and attach the functional head (A3) to the device (the cap (A2) is placed on the head). The protective cap (A5) is placed on the head. - The product (D) is poured into the container. - The product (D) is attached to the head. - The product (D) is placed on the head and the cap is closed.
2.2- USED
The device is intended for use by adults (A1) with a pulse mode (V4-Vmax mode) for the treatment of bronchial asthma. The device is equipped with a pulse mode for the treatment of bronchial asthma.
The number of pulses (D3) is set by the user before starting the procedure.
To turn off the device (A1), press the "0" button.
Timer:
- The timer is set for 3 minutes.
Timer:
The following are contraindications:
- Acute infectious diseases, fever, purulent processes, and other conditions. - Patients with implanted pacemakers (cardiac pacemakers, defibrillators, neurostimulators, and other implanted electronic devices). - Do not use the device on the chest area if there is a wound or skin damage. If the skin is damaged, do not use the device. If the device is used, consult a doctor before use. - Do not use the device on the head or neck area. If the device is used, consult a doctor. - Do not use the device on the abdomen during pregnancy. - Do not use the device on the chest area if there is a pacemaker. If the device is used, consult a doctor.
2.3- DEVICE OPERATION
Turn the device on by pressing the power button (A4) and set the timer (A4) to the desired time.
3- DEVICE OPERATION (FOR ADULTS)
DEVICE COMPONENTS:
- Electrodes (E)
- Electrode cables (F)
3.1 - ELECTRODE PLACEMENT
The functional block (A3) is installed on the main unit (A2) using the functional block (A3) from the original equipment manufacturer.
The functional block (E) is installed on the main unit and the control panel of the device is connected to the main unit via a cable. The main unit (A2) is connected to the functional block (A3) using the connector on the main unit.
3.2 - INSTALLING THE FUNCTIONAL BLOCK
4.2 - CONNECTING THE CONTAINER
Remove the container from the packaging. Using the adjusting screw (A1), turn the knob to position "3" or "4" to adjust the pressure. Connect the hose to the inlet and secure it with the clamp (G2). The hose should be connected to the water supply or any other source.
- Place the device on a flat surface.
- Operating time: 10 minutes.
To stop the device, turn the adjusting screw to position "0" and wait for the device to stop completely. Turn the knob in the opposite direction to close the valve. - To drain the device:
- For liquid products (G4) / viscous products (G5): water, fish, carton, cream, etc.
- For solid products (G3): potatoes, beets, onions, apples, carrots, etc. - For carton products (G6): carton, parmesan, etc.
5 - CLEANING AND MAINTENANCE OF THE DEVICE (FOR THE USER)
OPERATING INSTRUCTIONS:
- Remove the filter (H).
5.1 - Cold water connection
- Connect the cold water supply (H3) to the inlet fitting (H4) of the appliance. Use the supplied hose (H4) as a connection between the tap and the appliance. - For connection: use the supplied hose (H6) to connect to the water supply.
5.2 - Hot water connection
Connect the hot water supply (A3) to the inlet fitting: connect the hose (2) to the hot water inlet (A3) and secure it with a clamp. The other end (A5) should be connected to the hot water tap using a suitable adapter (A4) and tightened. - The hot water supply (A) must be turned off before installation. To ensure proper operation, connect the hot water supply to the appliance using the appropriate adapter. The supplied hose (H5) is for the hot water connection (H4). The supplied hose (H5) must be used for this purpose.
5.3 - Cold water drain
Place the supplied hose (H5) into a sink or drain. Connect the drain hose (A1) to the "3" position on the valve. Tighten the connection. - For models with or without a drain pump, connect the drain hose (H1) to the pump outlet (h2) and secure it with a clamp. Ensure all connections are leak-free. The drain hose should be positioned so that water flows freely without kinks, and the end should be at least 500 mm above the floor.
60 liters.
- Drain time: 10 minutes.
- For models with a 300g pump, the water supply must be turned off. When the water level reaches the maximum, stop the pump and turn off the water supply. The drain pump should be set to "O" position and the pump stopped.
- The water supply must be turned off when the water level reaches the maximum.
- To drain the water, turn off the water supply and open the drain valve. The supplied hose (H6) should be connected to the drain outlet. Then turn off the water supply and open the drain to empty the water.
Accessories:
C6i3dH, TOMaTah, aMaHaJ, Ky3imHeN, KyIbHaJdaH Xe He T.6. 6bpyH daBHydAyfa 60laDbI. Ka6bIbI KaIbIH JeMicTepei Ka6bIbIHan Ta3aJaHb3; CyIeKTepeH, aHaHaCTAH OpTaBH aBIn TaTahb3. KeB6ip KeMicTepe MeH KeKHeHcTepe 8bpy H cyf yuH JapamaiDbl: 6yN 6aHaH, aBoKaado, kapa 6yNipReH, aImaHbH KeB6ip Cybntapbl XeH T.6. 們日日日日 小田田田山田田山田田山田田山田田山田田山田田山田田山田田山田田山田田山田田山田田山田田山田田山田田山田田山田田山田田山田田山田田山田田山田田山田田山田田山田田山田田山田田山田田山田田山田田山田田山田田山田田山 XaHa cblfnanbIbHapdbl 6ipdeH iHj3, an erep onapbl 6ipHewe cafAtka ToHa3bTkBkA canaTbH 60lanh3, onapFa limoH nbpbHn KocbHb3.
6-BAYCBIMHbIH Y3bIHDbIFbIH PETTEY
Kyaanbl KojdahydbH Hemece caTaybH KojalnbFby yuH baycMbH JapTbCbH apTkbl 6nikteri (A7) caHbnaay apkbl KozfantkbH 6nOriHe cany apkbl y3bIhdbIh a3aIyfa 6oana.
7- ΘHIMДЕРДИн A3 FAHA MÖJIÜEPIH YÇAKTAY (YЛГΙΕ BÄNJAHblCTbl)
KOIДАнБИЛАТБИН CANTAMA:
- XnHaFaH yCaKaTbIi.
YcakTaB1WbH apHaJybl:
- BiPHeWe cekyHd iwiHde cepnilicri peximde: kentipinre HIXiK, kentipinre opiKTeP JxHe T.6. yCaKtayFa 6oIaIbI.
BapbHwa y3aK konlaHy aykbItb: 100 r / 5 c
OcbYcaKaTaBfI KoFe CnAaKbI KaTbI OHHimDeyiw aHaJMaFaH.
TA3AJIAY
KypbIbnfbiHbI 3JneKtp JeicinieH ankblpaTbHbI3. Ko3fantkblh6norih (A) Hemece xanfaTbH 6nokti (E) cyfa 6aBtbpMaHb3 xhe aFbIn tyfah cy actbHa caMaHb3. Kpandbi Kpyfak Hemece xapTbna bIbn faybepekene Cyptni3. Erepke-KapakTapdb kondaHnBonFaHnH KeiH BiPeH JxCa, KpybunFbHb Ta3anay JeHinipeK 60aDb. Et tapTkbltbGactnerToTbnFmeh GbeWKeTH3. KapakTapdb an dbn any uin bnaKapdBi caTbKnien naidanaHbIb3.
Kepek-kaPakapTbblxynbH3,uaBbH3XnheKENTiPi3:etTapTkblh6actneRiHH 6apNbK,metanl 6bnikTepeH:TypkDaH(F1),nipnikTeF(2),mwaKaTHAN(F3),ToplanAHF(4)EHE5),comBHaH(F6)BaCa Ka kepek-kaPakapTbblxNbICyathbMaMinaHadaXyyf6BoaJa). - Topnap (F4) xəhe (F5), cohImen kaTap nbIaK (F3) maJIaHyb kepek. Onapdb ecimik MaBImen MaJNaHbI3.
Kehectep:
KepeK-kaapKaTpabH KaHdai da 6biyei 6oanfAan (ca6i36eH, anelbcMHmeh Xane T.6.) XaTdaIa, onapdbocimik Maibmeh MaiahAnF any6epeKnene CypTih3 Xane aetterieJe KyybHb3.
Before use (D): wash the curd with cold boiled water. Cut into pieces. Before storing, keep it in the refrigerator (refrigerator and freezer).
ATTENTION
The curd is intended for direct consumption.
IF THE CURD IS NOT USED, DO NOT USE IT
If the curd is not used, follow these steps:
- Connect the plug to the socket;
- Check the device and the switch; - Press the reset button (A1): set to "0" position, then press again to restart.
The curd is controlled by a microprocessor installed on the board. If the curd is not working, check the power supply. In the curd, for each use, the indicator light (A1) "J" should be on. The curd must be turned on for the first minute. Then press the restart button again.
If the curd is not used, contact the service center (with the service book).
STORAGE AND USE OF THE CURD

The curd is made only from safe materials for food contact; it can be used for storage of food products.
Before using the curd, consult with a specialist.
CHARACTERISTICS
To purchase the curd or to contact the service center, you can consult with a specialist:
The curd is intended for storage of food products. The curd is made of safe materials for food contact.
AnrelekeKocicetiiH cantama -5nEHeDep TocTaFaHbI - WbipbH cbkKbll ¥CaKaTaBll - Et tapTkblbTbH,6actneri Cantamnapfaapanfaheng KeikTki
Kekhic keckii: TypaFbll - ipinen yry YCaKtan Yry - KapToT dpaHnKTepi - Паганду манндаурахлар finkhak
Xemic e36ecin
DaHbIHdA)
apHaJI-faH caTtAmA
- Yu kecenecin
aaihnyfa
aphanFaH canTaMa
A6aB 60bHb3! KaHdA da 6ip cantamaHb catbIn any yWih ci3ne KypanDb naaany Hxckaynapb 6ap KITana Hemece KypanDbn 03i 60by Kepek.
pablll 1 (F3) sdsdlk(F5),(F4) dlal
#
aaiy aaii.(..gll,JIJIJIJIJIJIJIJIJIJIJIJIJIJIJIJIJIJIJIJIJIJIJIJIJIJIJIJIJIJIJIJIJIJIJIJIJIJIJIJIJIJIJIJIJIJIJIJIJIJIJIJIJIJIJIJIJIJIJIJIJIJIJIJIJIJIJIJIJIJIJIJIJIJIJIJIJ
a a a a a a a a a a a a a a a a a a a a a a a a a a
#
aal aal alal alal alal alal alal alal alal alal
100
a,b,c,
x 1y 1 = 0
.
... (G5) / (G4) -
(E) dol -
(F) _ i = 1 ^ n _ j = 1 ^ m _ l = 1 ^ n ω_ ij -
2 0. 2 0 all gall all all all all all all all all all all all a - 3. 1

15 15
(A4)
g / ylaai / yj / jc / b1-1
plabllg(B2) 11b6(B1) Jusuulilal.1eJusuuiyiaaiill aaiall jol 1A iiali
: aalaaall
(B1)
(2B) un = un - 1
(C3) (C2)
j-1.1
A3) 12(A2)
.
ai + 1 = 1/2 ( ai - b) 2 + b2
F1
F2
F3
F4
F5
F6
F7
F8
(jugall) juaaiae- G
G1
G2
aiaiaiaia G3
g4
a glw a cLi y G5
jssg G6
(jugall) Cuiusds Juc-H
H1
H2
JH3
H4
H5
JdJH6
A1
j (a3) a2A2
A3
(jaall/aaell/cjalllcg) jia 4
JLSW.LBc A5
(b) (j) (j) (j) (j) (j) (j) A6
A7
sglgjj-B
D1
ubc D2
bIaIcIaIcIaIcIaIcIaIcIaIcIaIcIaIcIaIcIaIcIaIcIaIcIaIc
C1
bly C2
jlll C3
D1
ubc D2
JdLcD3
(jgall) aagai F
yjdyjll Jaauiy jss
a.0gall (A1) jj gj, wll g/ lalal Jai (A3) g/g (A5)
okw gdi duyd yds cldy
Therefore, the distance between the partial derivatives with respect to x and y is zero.
Therefore, S.
Therefore, the limit as x approaches negative infinity of (log base 10 of x) divided by (log base 20 of 1) equals (log base 10 of x) divided by (log base 20 of 1).
(E)
(J)
all 4.1
100
A(A3) 0S (A2)
A45)
G1 (E)
Lg4.2
J (H4) 10000000000000000000000000000000000000
(A2)
L(F1) 458 yds yds yds yds yds yds yds yds yds yds yds yds yds yds yds yds yds yds yds yds yds yds yds yds yds yds yds yds yds yds yds yds yds yds yds yds yds yds yds yds yds yds yds
J 1
∴ S ΔACD = S ΔCOD + S ΔBDO - S ΔCDO
1.45455,4.55450,0.550,0.55455,4.55455,4.55455,4.55455
(A1) 2008-03-03
- 1.
0 0 0 0 0 0 0 0 0 0 0 0 0 0 0 0 0 0 0

- DESCRIPTION
- A - MOTOR UNIT
- B-BOWL ASSEMBLY
- C-MIXER ACCESSORIES
- D - BLENDER JUG (DEPENDING ON MODEL)
- E - ATTACHMENT HOLDER (DEPENDING ON MODEL)
- F - MINCER HEAD (DEPENDING ON MODEL)
- G - VEGETABLE SLICER (DEPENDING ON MODEL)
- H - JUICE EXTRACTOR (DEPENDING ON MODEL)
- BEFORE FIRST USE
- MIXING / KNEADING / BEATING / EMULSIFYING / WHISKING
- ACCESSORIES USED
- ASSEMBLING THE ACCESSORIES
- USAGE
- TIPS
- DISMANTLING THE ACCESSORIES
- BLENDING/MIXING (DEPENDING ON MODEL)
- DISMANTLING THE ACCESSORY
- MINCING (DEPENDING ON MODEL)
- FITTING THE MINCER ATTACHMENT
- ASSEMBLING THE MINCER HEAD
- FITTING THE MINCER HEAD ON THE APPLIANCE
- USAGE, TIPS AND DISMANTLING
- GRATING / SLICING (DEPENDING ON MODEL)
- USAGE AND TIPS
- EXTRACTING JUICE FROM FRUITS AND VEGETABLES (DEPENDING ON MODEL)
- ASSEMBLING THE JUICE EXTRACTOR
- FITTING THE JUICE EXTRACTOR ON THE APPLIANCE
- ADJUSTING THE CORD LENGTH
- FINELY CHOPPING SMALL QUANTITIES (DEPENDING MODEL)
- ACCESSORY USED
- YOU CAN USE THE GRINDER TO
- CLEANING
- STORAGE
- WHAT TO DO IF YOUR APPLIANCE DOES NOT WORK
- DISPOSAL OF PACKAGING AND THE APPLIANCE
- ACCESSORIES
- JUICE EXTRACTION FROM FRUITS AND VEGETABLES (DEPENDING ON MODEL)
- ATTACHING THE ACCESSORY HEAD
- STARTING, TIPS AND DISASSEMBLY
- STARTING TIPS
- USE, TIPS AND DISASSEMBLY PROCEDURE
- ASSEMBLY PROCEDURE FOR ACCESSORIES
- USE AND TIPS
- ATTACHMENTS USED
- INSTALLING THE JUICER ATTACHMENT
- INSTALLING THE JUICER ATTACHMENT ON THE APPLIANCE
- WHAT TO DO IF THE APPLIANCE DOES NOT WORK
- DISPOSAL OF THE APPLIANCE
- A - CONTROL UNIT
- B - BOWL
- C - MIXER ACCESSORIES
- BEFORE USING THE DEVICE, READ THE INSTRUCTIONS CAREFULLY
- SUPPIMER
- ADVICE
- IF THE DEVICE DOES NOT WORK
- DISPOSAL OF PACKAGING AND DEVICE
- SET FOR PREPARING FRESH JUICE
- SPECIFICATIONS
- A-KOFANTKYI BIOLOGY
- B-INTENDED USE
- C-MIXER ATTACHMENTS
- D-CONTROLS (OPERATING ELEMENTS)
- E-ACCESSORIES FOR PROCESSING (OPERATING ELEMENTS)
- F - LID (OPERATING ELEMENTS)
- REMOVE / FILM / TAB / DISPLAY / SCREEN
- REQUIRED TOOLS
- TOOLS AND PARTS
- OPERATION
- MAINTENANCE
- CLEAN
- THE /3MYLBRAUNAY/6XNFAY
- REQUIRED ACCESSORIES SET
- ACTIVATOR (FOR THE DAY)
- USED PRODUCTS
- USED
- TIMER
- DEVICE OPERATION
- DEVICE OPERATION (FOR ADULTS)
- DEVICE COMPONENTS
- ELECTRODE PLACEMENT
- INSTALLING THE FUNCTIONAL BLOCK
- CONNECTING THE CONTAINER
- CLEANING AND MAINTENANCE OF THE DEVICE (FOR THE USER)
- COLD WATER CONNECTION
- HOT WATER CONNECTION
- COLD WATER DRAIN
- BAYCBIMHBIH Y3BIHDBIFBIH PETTEY
- ΘHIMДЕРДИН A3 FAHA MÖJIÜEPIH YÇAKTAY (YЛГΙΕ BÄNJAHBLCTBL)
- TA3AJIAY
- KEHECTEP
- ATTENTION
- IF THE CURD IS NOT USED, DO NOT USE IT
- STORAGE AND USE OF THE CURD
- CHARACTERISTICS
- G / YLAAI / YJ / JC / B
- AI + 1 = 1/2 ( AI - B) 2 + B
- YJDYJLL JAAUIY JSS
Brand : MOULINEX
Model : QA4101B1
Category : Food Processor