
HGF95AMX - Cooker HOTPOINT - Free user manual and instructions
Find the device manual for free HGF95AMX HOTPOINT in PDF.
| Product type | Cooker hood (extractor or recirculation) |
| Reference | HGF95AMX |
| Brand | Hotpoint |
| Height | 61 - 82 cm (telescopic) |
| Width | 90 cm |
| Depth | 50 cm |
| Extraction duct diameter | 15 cm (reducible to 12 cm) |
| Supply voltage | 230 V ~ 50 Hz |
| Total absorbed power | 150 - 290 W depending on model |
| Lighting | 2 halogen bulbs 40 W or LED |
| Number of speeds | 3 speeds + booster (intensive) |
| Timer | Yes, up to 59 minutes |
| Grease filter | Metal, washable (dishwasher safe) |
| Charcoal filter (recirculation) | Optional, to be replaced every 20 months |
| Filter maintenance | Clean grease filter at least once a month |
| Safety distance (gas) | 65 cm minimum between the hood and the hob |
| Safety distance (electric) | 55 cm minimum |
| Protection class | Class II (double insulation) |
| Electrical connection | Accessible mains socket or bipolar switch |
| Installation type | Wall-mounted or recirculation (kit not provided) |
| Repairability | Bulbs and filters replaceable by the user |
Frequently Asked Questions - HGF95AMX HOTPOINT
User questions about HGF95AMX HOTPOINT
0 question about this device. Answer the ones you know or ask your own.
Ask a new question about this device
Download the instructions for your Cooker in PDF format for free! Find your manual HGF95AMX - HOTPOINT and take your electronic device back in hand. On this page are published all the documents necessary for the use of your device. HGF95AMX by HOTPOINT.
USER MANUAL HGF95AMX HOTPOINT
HGF 9.5S AB X/HA
HGA 9.5S AB X/HA
HGA 6.5S AB X/HA
HGF 9.8 AD X/HA
HGA 9.8 AD X/HA
HGA 6.8 ADI X/HA
HGF 6.8 AD X/HA
HGA 9.5 AM X/HA
HGF 9.5 AM X/HA
HGA 6.5 AM X/HA
HGF 6.5 AM X/HA
FR
Français
Mode d'emploi
HOTTE DE CUISINE
Sommaire
Mode d'emploi,1
Avertissements,11
Assistance,28
Installation,39
Commandes GLASS,40
Operating Instructions
COOKER HOOD
Contents
Operating Instructions,1
Warnings, 10
Assistance,28
Installation,35
GLASS controls,36
Maintenance and care,37
Troubleshooting,38
ES
Espanol
HeicnpaBHOCTn MeToDbI INx yCTpaHEnH,66
UA
YkpaIHcbKOHO
! Keep this manual for reference. If you sell, transfer or move the unit to another location, make sure to keep the manual with the product.
! Read the instructions carefully - they contain important installation, user and safety information.
! Do not tamper with the electrical or mechanical equipment of the product or its exhaust ducts.
General safety information
- The distance between the cookware support surface on top of the cooking appliance and the lowest part of the cooker hood must be at least:
65 cm if the hood is installed over a gas cooktop
55 cm if the hood is installed over an electric cooktop.
If the installation instruction manual for the gas cooking appliance specifies a greater distance, this measurement should be taken into account.
- The cooker hood comes with anchor plugs which are suitable for use with most walls/ceilings.
However, you must contact a qualified technician to check the suitability of the materials in relation to the type of wall/ ceiling, which must be strong enough to support the weight of the unit. -
Caution! Do not hook the unit up to its electrical power supply until the installation has been completed.
-
Before cleaning or servicing the unit, disconnect it from the mains by pulling the power plug or disconnecting the main circuit breaker.
- Always wear work gloves when installing and servicing the unit.
- It is not intended for use by children or persons with sensory or mental disability and lack of experience or familiarity, except under the supervision or instruction of a person responsible for their safety.
- Make sure children do not play with the unit.
- Never operate the unit without its grease filter installed!
- NEVER use the hood as a support, unless expressly instructed to do so.
- The room must be adequately ventilated if the hood is used at the same time with other equipment burning gas or other fuels.
- Extracted air must not be conveyed into a duct used for exhausting combustion fumes from gas or other fuel-fired equipment.
- Observe all regulations in relation to air extraction.
- NEVER cook food with an open flame under the hood; open flames will damage the filters and may cause fires. Never do this.
-
Always supervise frying to make sure the heated oil does not catch fire.
-
Strictly observe all local regulations in relation to the technical and safety measures to be employed in fumes extraction.
- Clean the product frequently, inside and out (AT LEAST ONCE A MONTH, and in observance of the maintenance instruction given in this manual).
- Failure to observe the hood cleaning and filter cleaning/replacement instructions can result in fires.
- Never use the hood without its bulbs properly installed - electrocution hazard.
- The manufacturer is not liable for any inconvenience, damage or fire caused by the unit as a result of failure to observe the instructions given in this manual.
- Caution! The unit's accessible parts can get very hot when used with cooking equipment.
FR
Avertissements
He Do3B0JIe IITaM rpaTnC8 3 npuJaOM.
Hi B ykomy pa3i He BnKOpncToBvIte Bnpi6 6e3 npaBnJIbHO BCTaHOBJeHOrO fIbtpy-xxnpoyNoBnOBaHa!
HIKOJIHHe BxNBaIte BNTJKBy BAKOCTi OipHOIT NOBepXHi,3a BNHTKOM BnnaDkiB,KOIHaZe HeDbBO3HaUHO Bka3yETbcra.
-Примишина маec 6утп доста THьОВЕТИльованIM,якso ВNTЯЖКа npaцюс pa3OM 3 iHшIMпprладамн Ha ra3i a60 ha iHшOMу пalbHOMy.
-
Bсмokтувае поитray He maecnpromOByBaTnCS y TpybOpBoiD,якni 3actocobyEcTbcSДЯ BiDVeDeHNeBIDnpaCbOBAHnx ra3iB BiD npuJaDIBaKi npaIouToB Ha ra3i Chn iHsOMy naIbHOMy.
-
ДотримуйТecь BCix праBNЛ BiДноCHO BИВЕДEHЯ дIMy.
Cybopo 3abopohεtbcra rotybaTn iJy Ha BIDKpntOMy nolym'piD BVTRJKOIO; BiKpIte nolym'yuKoJxye φiNbTpni I MOKe BnKlnKaTn noJexy. Tomy Noro cpiD yHnkatN y 6yd-akomy pa3i.
- PekomeHnyeTbcra Tpimatn iD noCTiHnM KOHTPOJem npocec roTyBaHHaIXi 7IaxOM cMaJxehn, 3aNo6irTu HnepnemHM BnpaKam, KOnn 3aImaetbcra OIIy.
- Κою texhiuHx Ta 3anobixhnx po3mipib,яki MaOTb 3actOCOByBaTnCSЯ ДяТуб BiDBeDeHnЯДIMy,жорстКОдотрИмуI TeCb po3npaJxKeHb MicceBHX KOMPteHTHnx OprahIB.
Bntjka Maecuacto OunuBaTnCra JK BCEpeDeHi, TaK i 3OBHi (LIOHAIMEHU PA3 HAICRAb, DToPmMyOuHcB uTKnX BkazIBOK 3TexHOrO o6CnyROvBAHNr, KaHaOTbcR B cBOMy KepiBnCTBi).
HeDOTpIMaHHn npabn 3 OunuHnBNTJxKn Ta 3 3amInn Ta OUnuEHnNfIbTpiv MoKe npn3BecTn Do nOjExKi.
He KopnctuTecBntjKoH 6e3 HaneJHO BCTaHOBJIeHIX JAMNOyOK, TOMy 00 1e He6e3neuHo uepe3 MOxNIBICTb ypaXeHHra eJeKTPnUHm CTrpymOM.
Bixnjaetbcy 6ydb-ka BIDNOBIaIbHicTb y 3B'z3ky 3 MOxJIINBMN NOpUWeHNrMn Bpo6OTi npuJa, 36ntkamn a6o noJexAmn BHaCNIIDOK HeDToPMaHHiaHCTpyKci, HabeDeHnx BcBomy KepiBnucTbi.
- YBara!Частини 3 Вдкрптум Достуном можуть HarpiВатися Do Високих TemпepаТур, якso BOHи ВИКОРИСТОВУНТБСЯ рaЗOM 3 Кухонимп ПЛИТами.
CZ
Upozorněné
ASSISTENZA -RICAMBI, ACCESSORI
199.199.199
NUMERO UNICO
! Never use the services of an unauthorised technician.
Please have the following information to hand:
The type of problem encountered.
The appliance model (Mod.).
The serial number (S/N).
The latter two pieces of information can be found on the data plate located on the appliance.
FR
Assistance
! HnKOrIa He o6paIaTecb K HeyNoJHOMOeHHbIM TEXHnKam.
Pn o6paueHm B LcHtp TexHnueckoro ObcIyKnBaHn Hno6xOaMo COo6uNTb:
TnHEnCnpaBHOCTn;
MoIeIb nI3IeIIa (MoI.)
Homep tex. nacnpota (cepuiHbI Ng)
3Tn daHbIe Bbl haIeTe Ha nacnpTHo T6nUKe, paCNOJIOXeHHoH Ha 3denn.
UA
Дономora
!3BepTaITeC8 BnKIIIOUHO Do yIPOBBOBaXeHINxΦaxiBzIB.
CπiD nobiOmHTn:
Tin HecnpaBHOCTi;
- MoD'enb npuanay (Mod.)
CepiHnH Homep (S/N)
!PyKcaTbIJKOKaIaMHBiH KbI3MeTI HeUkaHaH Ka6blIaMaHaB13.
"Low voltage" Directive 2006/95/EC (12-12-2006)
EMC" Directive 2004/108/EC (15-12-2004)
HGA 9.5 AM X/HA - HGF 9.5 AM X/HA
HGA 6.5 AM X/HA - HGF 6.5 AM X/HA
T1 Reset motore
HGF 9.5S AB X/HA - HGA 9.5S AB X/HA - HGA 6.5S AB X/HA
T1 Reset motore
HGF 9.8 AD X/HA - HGA 9.8 AD X/HA
HGA 6.8 AD X/HA - HGF 6.8 AD X/HA

T1

T2

T3

T3

T4

T5

T6
T1 ON/OFF motore
The installation procedure is illustrated in the first pages of this manual.
The installation must be done by a qualified technician.
Electrical hook up
The mains voltage must match that given on the ratings label inside the hood itself. If the hood has a power plug, connect the hood to an easily accessible regulatory power socket. If it does not (direct connection to the mains), or the socket is not easily accessible, install a two-pole regulatory switch to enable total disconnection from the mains in case of category III overvoltage, as required by the installation regulations.
Caution! Always check that the mains cable is hooked up properly and check that it operates correctly before reconnecting the hood to the mains.
Air exhaust (for ducted units)
Connect the hood to a duct and wall exhaust hole of a diameter equal to that of the air outlet flange. Using a smaller diameter tube and exhaust hole reduces the extraction capacity of the hood and also increases its running noise. The manufacturer is not liable for any consequences of doing so.
! Use the shortest duct required to achieve the purpose.
! Use a duct with as few bends as possible
! Avoid suddenly changing the diameter of the duct.
! The duct must have as smooth an inner surface as possible.
! The duct must be made of regulatory material.
! Do not connect the hood to flues carrying combustion fumes from other equipment (boilers, GLASSs, stoves, etc.).
! Observe the instructions of the competent authorities in relation to the air exhaust. The air being exhausted may not be exhausted into a wall cavity unless the cavity in question is specifically intended for this purpose.
! Equip the room with air intakes to prevent the hood creating suction pressure in the interior (this must not exceed 0.04 mbar).
! The manufacturer is not liable for any consequences of failure to observe these instructions.
Filter or ducted?
! Your hood is supplied as a ducted unit.
If you wish to use it as a filter unit, you must install the proper ACCESSORY KIT.
Note: If supplied with the hood, the accessory active charcoal filter unit may already be installed.
Instructions for transforming the hood from the ducted to the filter version are given in this manual (see "Filter version").

Ducted version
GB
The hood purifies the air and expels it outdoors via an exhaust duct (dia. 150 ~mm ) connected to its outlet flange. The diameter of the exhaust tube must be equal to that of the outlet flange.
Caution! The exhaust duct is not supplied and must be purchased separately.
When routed horizontally, the tube must be angled slightly upwards (around 10^ ) to enable the air to be conveyed outdoors more easily. If the hood is fitted with charcoal filters, they must first be removed.

Filter version
The hood purifies the air and returns it to the room. This version of the hood requires installation of an accessory active charcoal filter unit.
This version requires an air deflector, a reduction adapter and the charcoal filter/s. The top tube must have its air outlet slots uppermost.
Technical data
| Model | Height (cm) | Width (cm) | Depth (cm) | dia. of exhaust tube (cm) |
| GLASS 60cm | 61-82 | 59.8 | 50 | 15/12 |
| GLASS 90cm | 61-82 | 89.9 | 50 | 15/12 |
| Model code | Bulb (V) | Bulb draw (W) | Total draw (W) |
| HGF 9.5S AB X/HA | |||
| HGA 9.5S AB X/HA | Halogen | 2 x 40 | 185 |
| HGA 6.5S AB X/HA |
| Model code | Bulb (V) | Bulb draw (W) | Total draw (W) |
| HGF 9.8 AD X/HA | |||
| HGA 9.8 AD X/HA | Halogen | 2 x 40 | 290 |
| HGA 6.8 AD I X/HA | |||
| HGF 6.8 AD X/HA |
| Model code | Bulb (V) | Bulb draw (W) | Total draw (W) |
| HGA 9.5 AM X/HA | |||
| HGF 9.5 AM X/HA | Halogen | 2 x 40 | 150 |
| HGA 6.5 AM X/HA | |||
| HGF 6.5 AM X/HA |
| Power | Voltage | Cap | Dimensions | |
| Halogen 25 W | 2 x 25 W | 230 V | G9 | L40xØ14 |
| Halogen 20 W | 2 x 20 W | 12 V | G4 | L30xØ10 |
LED*
Risk Group 1 according to Standard EN 62471

The hoods are conforming to the following EC Directives:
"Low voltage" Directive 2006/95/EC (12-12-2006)
EMC" Directive 2004/108/EC (15-12-2004)
- Only available in certain models
GLASS controls
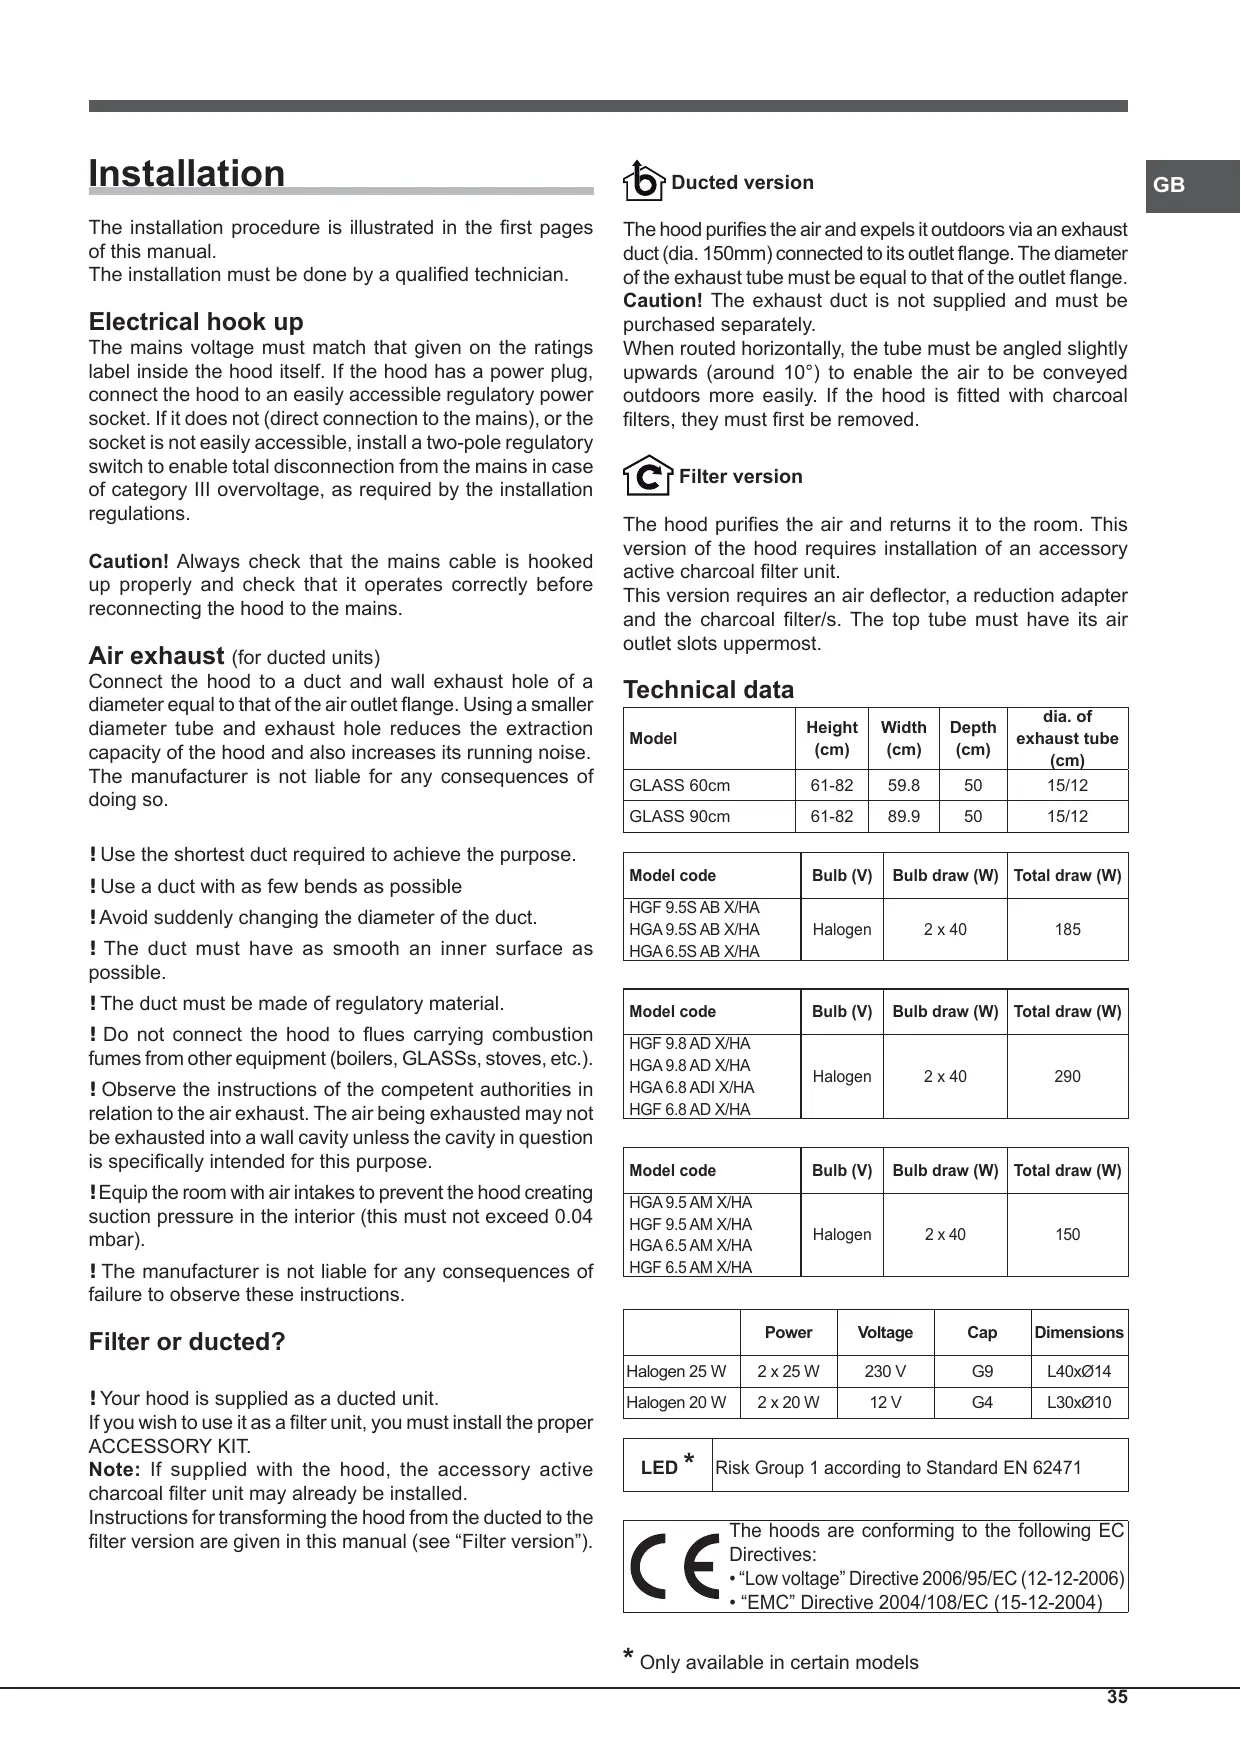
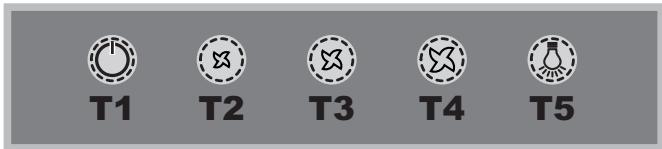
Models with mechanical keypad
HGA 9.5 AM X/HA - HGF 9.5 AM X/HA
HGA 6.5 AM X/HA - HGF 6.5 AM X/HA

T1 Motor reset
Pressing the button while the hood is in operation turns it OFF.
T2 Speed 1
Pressing the button sets the hood to speed 1.
T3 Speed 2
Pressing the button sets the hood to speed 2.
T4 Speed 3
Pressing the button sets the hood to speed 3.
T5 Lights ON/OFF
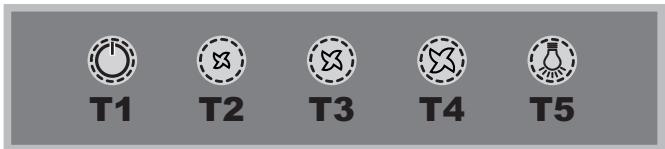
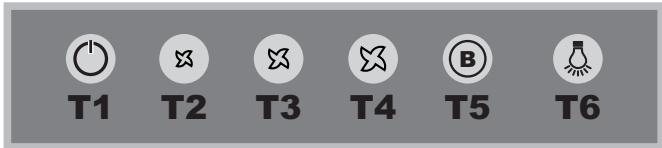
Models with soft button keypad
HGF 9.5S AB X/HA - HGA 9.5S AB X/HA
HGA 6.5S AB X/HA
T1 Motor reset
Press the button with the hood off to set speed 1. Pressing the button while the hood is in operation turns it OFF.
T2 Speed 1
Pressing the button sets the hood to speed 1.
T3 Speed 2
Pressing the button sets the hood to speed 2.
T4 Speed 3
Pressing the button sets the hood to speed 3.
T5 Booster
Pressing the button sets the hood to high speed. After 5 minutes, the hood returns to the previous speed; pressing a speed button (T2, T3 or T4) quits booster mode and sets the selected speed.
T6 Lights ON/OFF
Grease/odour filter warnings
The T2 icon flashes to indicate that the grease filter is saturated, while T3 flashes to indicate that the odour filter is saturated, and if both are flashing then both filters are saturated. You must then clean/replace the grease filter (A) or odour filter (B) or both, accordingly (see "Maintenance and care").
To reset the filter counter:
Hold down T5 for three seconds while the hood is on.
The warning led flashes three times, then returns to its normal mode. If both filter warnings are active at the same time, you must reset each separately.
The first sequence resets the grease filter, while the second sequence resets the odour filter.
Hood configuration:
To set the operating mode of the hood, hold down T5 for 6 seconds while the product is off. Icons T2 or T3 will light up to show the type of installation: T2 ventilation, T3 filtering. You can change the type of installation by pressing T4 cyclically.
To save the new configuration press T1 individually.
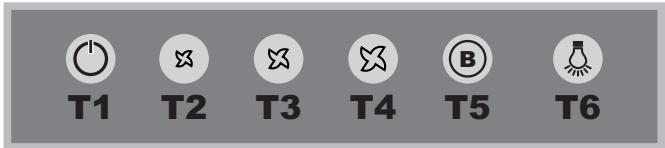
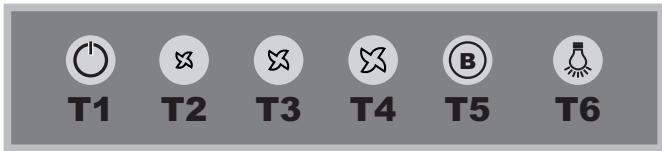
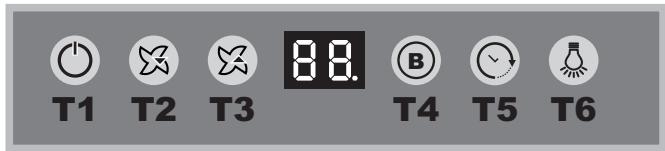
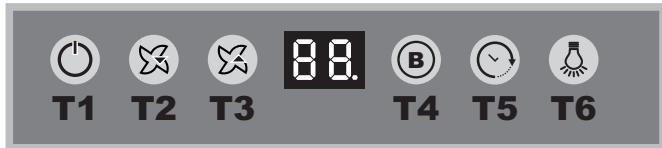
Models with soft button keypad and display
HGF 9.8 AD X/HA - HGA 9.8 AD X/HA
HGA 6.8 ADI X/HA - HGF 6.8 AD X/HA

T1

T2

T3

T3

T4

T5

T6
1 Motor ON/OFF
Press the button with the hood off to set speed 1. Pressing the button while the hood is in operation turns it OFF.
T2 Speed -
Pressing the button returns the hood to the previous speed.
T3 Speed +
Pressing the button returns the hood to the next speed.
T4 Booster
Pressing this button sets the hood to high speed; the letter "b" flashes slowly on the display. After 5 minutes, the hood returns to its previous speed; this can also be done while booster mode is on by pressing either speed button (T2 or T3).
T5 Timer
Pressing this button delays the hood turning off automatically by 5 minutes. The timer counts down on the display in minutes. The timer can only be set for manual speeds, not for booster mode.
T6 Lights ON/OFF
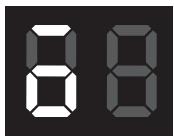
Grease/odour filter warnings
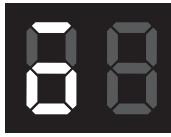
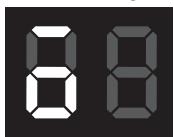
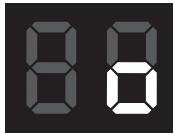
The bar at the top left flashes to indicate that the grease filter is saturated.
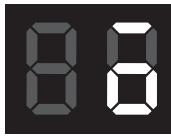
The bar at the top right flashes to indicate that the odour filter is saturated.

If both bars are flashing, then both filters are saturated.
You must then clean/replace the grease filter (A) or odour filter (B) or both, accordingly (see "Maintenance and care"). The latter only applies to the filter version.
To reset the filter counter:
Hold down T4 for three seconds while the hood is on. If both filter warnings are active at the same time, you must reset each separately. The first sequence resets the grease filter, while the second sequence resets the odour filter.
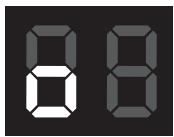
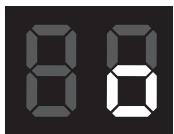
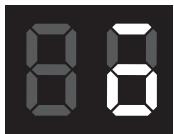
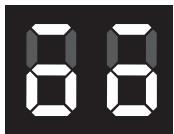
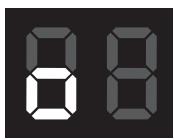
Configuring the hood
To set the operating mode of the hood, hold down T4 for 6 seconds, while the product is off. After a long beep, the type of installation displays:
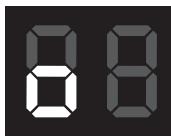
Ducted
(square at bottom left flashing).
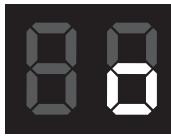
Filter
(square at bottom right flashing).
You can change the type of installation by pressing T4. To quit configuration mode, press T1 once; this switches the unit off and saves the last displayed setting.
Maintenance and care
Caution! Before cleaning or servicing the unit, disconnect it from the mains by pulling the power plug or disconnecting the main circuit breaker.
First cleaning
- Remove the protective film
- Clean with a damp sponge and a little neutral soap
- Rinse off with a damp cloth
- Dry with a soft cloth; if the hood is stainless steel, dry along the metal's grain
Periodic cleaning
The hood must be cleaned frequently (at least as often as you service the grease filter), inside and out. Use a damp cloth and a neutral liquid detergent with lukewarm water. Do not use abrasive or corrosive products.
Warning: Failure to observe the hood cleaning and filter cleaning/replacement instructions can result in fires. Follow the instructions carefully. The manufacturer is not liable for any damage to the motor or fires caused by incorrect care or failure to follow the above instructions.
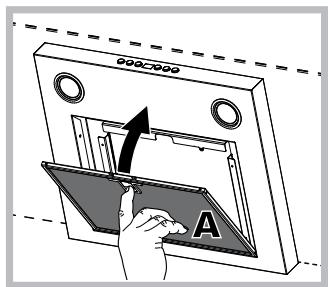
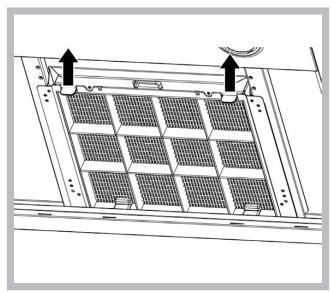
Servicing the grease filter (A)
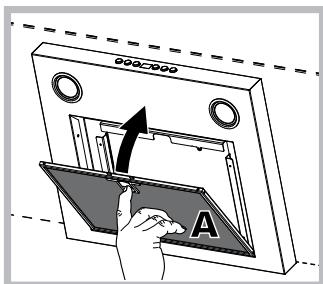
The grease filter retains the particles of grease produced during cooking; it must be cleaned at least once a month with a non-aggressive detergent, either by hand or with a low temperature, short dishwasher cycle.
To extract the grease filter, pull the spring loaded handle.
If washed in a dishwasher, the metal filter may change colour, but this does not affect its performance.
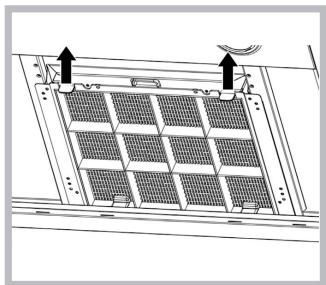
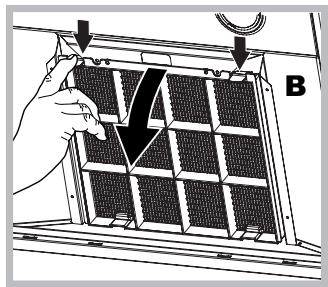
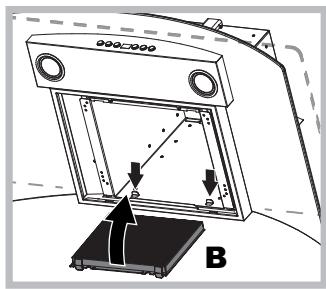
Servicing the charcoal filter (B)
The charcoal filter retains unpleasant cooking odours. The filter saturates after a variable time, depending on the type of cooking and how often the grease filter is cleaned. The cartridge must be replaced at least once every twenty months.
This filter can NOT be washed or regenerated

Disassembly: Remove the activated-carbon filter by pressing the two front levers which secure it to the hood.
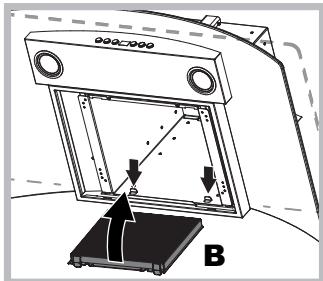
Assembly: Secure the activated-carbon filter first in the back using the hood's metal tabs and then in the front by pressing the two levers.
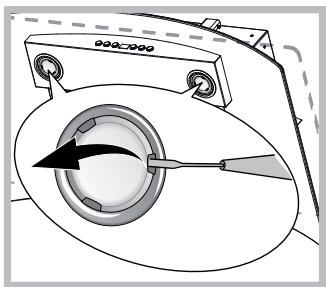
Replacing the bulbs
Disconnect the unit from the mains and remove the grease filter.
Caution! Make sure the bulbs are cool before touching them.
- Extract the guard by prising it out with a small flat head screwdriver or something similar.
- Replace the faulty bulb. Use only bulbs of the same type (for details, see the technical data in the following manual).
- Refit the guard (push it in).
Replacing the lights LED *
The hood is fitted with a lighting system based on LED technology. The LEDs ensure optimal lighting, longer life and lower consumption compared with traditional lights. To replace them please contact the assistance service.
Electrical cable
If the power cable is damaged, it can be replaced by the manufacturer or his technical service, to prevent any attendant risks.
SCRAPPING
The unit is marked for conformity with European Directive 2012/19/EC, Waste Electrical and Electronic Equipment (WEEE). By ensuring that the unit is scrapped properly, the user contributes to safeguarding the environment and public health.
The symbol on the product or on its accompanying documents indicates that the product may not be treated as domestic waste but must be handed over to a sorting centre for electrical and electronic waste. Dispose of it in accordance with local waste disposal regulations. For further information on the handling, recovery and recycling of this product, contact the local authority, domestic waste disposal service or the reseller from whom you purchased it
Troubleshooting
If something does not work, make the following simple checks before contacting Technical Service:
If the hood does not operate:
Check that:
the unit is powered up.
- a speed has been set.
If the hood is not working effectively:
Check that:
- the selected motor speed is sufficient to handle the amount of smoke and steam being produced.
- the kitchen is adequately ventilated for the unit to take air in.
- the charcoal filter is not exhausted (filter version).
If the hood turns off during normal operation:
Check that:
the unit is powered up.
- the circuit breaker has not tripped.
In case of faulty operation, before contacting Technical service, first disconnect the machine from the mains for at least 5 seconds by pulling its plug, then reconnect it. If the fault persist, contact Technical Service.
Installation
HGA 9.5 AM X/HA - HGF 9.5 AM X/HA
HGA 6.5 AM X/HA - HGF 6.5 AM X/HA

HGF 9.5S AB X/HA - HGA 9.5S AB X/HA - HGA 6.5S AB X/HA
HGE 9.8 AD X/HA - HGA 9.8 AD X/HA
HGA 6.8 AD X/HA - HGF 6.8 AD X/HA

T1

T2

T3


T4

T5

T6
HGA 9.5 AM X/HA - HGF 9.5 AM X/HA
HGA 6.5 AM X/HA - HGF 6.5 AM X/HA

T1

T2

T3

T4

T5
T1 Reset motor
HGF 9.5S AB X/HA - HGA 9.5S AB X/HA - HGA 6.5S AB X/HA

T1

T2

T3

T4

T5

T6
T1 Reset motor
HGF 9.8 AD X/HA - HGA 9.8 AD X/HA
HGA 6.8 ADI X/HA - HGF 6.8 AD X/HA

T1

T2

T3

T3

T4

T5

T6
T1 ON/OFF motor
HGA 9.5 AM X/HA - HGF 9.5 AM X/HA
HGA 6.5 AM X/HA - HGF 6.5 AM X/HA

T1

T2

T3

T4

T5
T1 Reset motor
HGF 9.5S AB X/HA - HGA 9.5S AB X/HA - HGA 6.5S AB X/HA

T1

T2

T3

T4

T5

T6
T1 Reset motor
HGF 9.8 AD X/HA - HGA 9.8 AD X/HA
HGA 6.8 ADI X/HA - HGF 6.8 AD X/HA

T1

T2

T3


T4

T5

T6
1 ON/OFF motor
"Low voltage" Directive 2006/95/EC (12-12-2006)
EMC" Directive 2004/108/EC (15-12-2004)
HGA 9.5 AM X/HA - HGF 9.5 AM X/HA
HGA 6.5 AM X/HA - HGF 6.5 AM X/HA

T1

T2

T3

T4

T5
T1 Reset motor
HGF 9.5S AB X/HA - HGA 9.5S AB X/HA - HGA 6.5S AB X/HA

T1

T2

T3

T4

T5

T6
T1 Reset motor
HGF 9.8 AD X/HA - HGA 9.8 AD X/HA
HGA 6.8 ADI X/HA - HGF 6.8 AD X/HA

T1

T2

T3


T4

T5

T6
T1 ON/OFF motor
"Low voltage" Directive 2006/95/EC (12-12-2006)
EMC" Directive 2004/108/EC (15-12-2004)
HGA 9.5 AM X/HA - HGF 9.5 AM X/HA
HGA 6.5 AM X/HA - HGF 6.5 AM X/HA

T1

T2

T3

T4

T5
T1 Reset silnika
HGF 9.5S AB X/HA - HGA 9.5S AB X/HA - HGA 6.5S AB X/HA

T1

T2

T3

T4

T5

T6
T1 Reset silnika
HGF 9.8 AD X/HA - HGA 9.8 AD X/HA
HGA 6.8 ADI X/HA - HGF 6.8 AD X/HA
T1 ON/OFF silnika
HGA 9.5 AM X/HA - HGF 9.5 AM X/HA
HGA 6.5 AM X/HA - HGF 6.5 AM X/HA
T1 Motor sifirlama
Davlumbaz calisiyyorken duğmeye basilinca unite kapanir (OFF).
T2 Hiz 1
HGF 9.5S AB X/HA - HGA 9.5S AB X/HA
HGA 6.5S AB X/HA

T1

T2

T3

T4

T5

T6
T1 Motor sifirlama
HGF 9.8 AD X/HA - HGA 9.8 AD X/HA
HGA 6.8 AD X/HA - HGF 6.8 AD X/HA

T1

T2

T3


T4

T5

T6
1 Motor AÇI K/KAPALI
HGA 9.5 AM X/HA - HGF 9.5 AM X/HA
HGA 6.5 AM X/HA - HGF 6.5 AM X/HA

T1

T2

T3

T4

T5
T1 OctaHOBka DnIraTeJra
HGF 9.5S AB X/HA - HGA 9.5S AB X/HA - HGA 6.5S AB X/HA

T1

T2

T3

T4

T5

T6
T1 OctaHOBka DnIraTeJia
Pn Haxatnn 3toi KhoKn Ha BbIKHoueHHo BbITJxKc 3adaetc nepBaerckopoctb. Pn Haxatnn KhoKn B npoece paobtBbTjKa nepeKluoyaetc B pekmBblKJI.
T2 CkopocTb 1
Pn Haxatnn KHOPIK N BbITaKKa nepeKJIIOucaetc Ha 3-bIO CKOPoCTb.
T3 BoIbToO6aBoHoe ycTpoCTBO
Прин haжати КНОКИ ВьтЯка ripekeлочаetс HaMaKcIMaJIbHyO cKOpocTb. Yepe3 5 MInyT BvITJxKa IpekeIIOchAetcHa paHee 3aDaHHYIO cKOpocTb; Пri n Haxatni KHOJOK cKOpocTn (T2, T3 IIN T4) BOJbTOIDobAOchBiy PexMM OTKIIIOchAETc, BvITJxKa IpekeIIOchAetcHa 3aDaHHOcCKOpocTn.
T6 BKN./BbIKN. ocBeueHnra
CnHn3aun 3acopeHnJnpoBopro n cop6uOHoro qnIbTpOB
MirauOuIcN CnMBoN nepBOB CKOpocTn T2 CnHaJIIN3npyET 3acopEnHJXnPOBOrO fInbTpra. MirauOuIcN CnMBoN nepBOB CKOpocTn T3 CnHaJIIN3npyET 3acopEnHJCOP6UOnHOrO fInbTpra. Oba MirauOuIcN CnMBoJIb T2 n T3 CnHaJIIN3npyIOT 3acopEnHJe obONx fInbTpOB. Heo6xoJIMo npOuNCtNTb/ 3aMeHITb JnPBoO BfNbTp "A" n/uJIu Cp6UOnHHbI "B" (cm."Tex.ObcnyKJBaHne n yXoD").
HGF 9.8 AD X/HA - HGA 9.8 AD X/HA
HGA 6.8 ADI X/HA - HGF 6.8 AD X/HA

T1

T2

T3


T4

T5

T6
T1 BkJI./BbIKI.Дви ratЯ
Pn Haxatnn 3toN KHOKN Ha BbIKHoueHHo BbITJxKc 3aadaTc npBba cKopocTb. Pn Haxatnn KHOKN B npOecce paobtbl BbITJXknapeeknIooaetcBpekmBblKn.
T2 CkopocTB -
Pn HaxKATN KHOKN BbITXKa nepeKIOaETcHa npdeIyUO CKOpOCTb.
T3CKopoctb+
Pn Haxkntu KhoNkBbITJkKa nepeKIOaETcHa cNeyUOyU CKOpocTb
T4 BoIbToIO6aBOuHoe ycTpoIcTBo
Пи Нжати 3TOI KHONK BbITJXKa NepeKJIouaETcHa MaKcIMaJIbHyU CKOpOCTb; HaДИСПЛeepeKIO MnraeT bYkBa "b".Чepe3 5 MInHT BbITJXKa BHOBb NepeKJIouHTcRHa paHee 3aJaHHyU CKOpOCTb, YTO MOxHTo TAKKe CdJeTaT b BOJIbTOIo6aBOuHOM peXIMe Пп NOMOUI KHONK CKOpOCTN (T2 nII T3).
T5 Taɪmep
Pn KaKdom HaxKaTIN 3ToN KHOJKN aBtOMaTnueCeKoe OTKnHoueHne BbITJAKK NOTKNaDbIbAeTCra Ha 5 MInHyT. O6paTHbI OTCuET MNHyT TaMepa NOKa3bIbAeTCra Ha
Ecnn BbItjXkHa He pa6oTaeT:
Поверпь:
HaJIINUe 3JNEKTPoPNTaHnA
- 6bila JI 3aJHa cKOpocTb.
Pn Hn3KoN 3ΦΦeKTHBHOCTN BbITJXKN:
Поверпь:
- UTo6bI 3aJaHHa KcOpOCTb DnBraTeJIa 6bIla DoCTaTOHoi IJRAOBbema NcnapeHNI Ndbima.
-Чтобиnomeшени Кухни Имени DooctaTochnyo BeHTnIaunIO ДЯ BO3dYxO3a6opa.
He n3HOweH Jn yroJIbHbIy fUJbTp (fUJIbTpuyOuzaB BepCnRA BbITaKKn).
Ecn BBITXKa BbIKNoaetcB IpOcece pa60tbl:
PpOBepuTb:
HaJIynchue 3JIeKTpO\PuTahnIa
He cpa6oTaJI MHOrONOJIIOCHbIX pa3beINHITeJIb.
B clyuae BO3MOxHbIX HeNCpabHocTe nepeTem, kak o6paTntbcra B CepBnC, OTcoeHNHTe BblTjKky npImepHo Ha 5 cek.OT cTeBOrO pNTaHnR, BblHyB lTeNcEJIbHyU BnIKy n3 cTeBOi PO3ETKn, 3aTEM BHObNoCDoeHNHe. Ecn HncPpABHOCTb He yctpaHareTcra, o6paTntecb B CepBnC.
BcMoKtYuOHa MoNΦikaJia
Bntjckka Ounzae NOBITpr i BnWTOBxye Ioro Ha3OBHiepe3 BiDNOBIDHn Tpy6oNPOBID (iAmetpom 150 MM), knn 3akpinIeHn Do 3'edHyBaIbHO rO Phanu. Diametrtpybn Ira BIDBeEHn BIDnpaCboBAHO rO NobITPMAEbytn EKBIBaJIeHTHMd iAmeTpY 3'EDHyBaIbHO rKlbzur.
YBara! Tpy6a DnB BiDBeHnB BiDnpaCboBaHO NOBITpRe He BXoNTb Do KOMPJIeKTy NocTayAHN I MaE KynyBaTnCS Okpem. Ha rOpN3OHTaBHi NdiHaNci Tpy6a NOBHHa MaTN HeBEniKn HaxnI Bropy (Pnp6n3Ho 10^ ),IcnpraE BiDBeEHNO NobITpRa NaOBHI. Jkso BuTjKka ObnadHaHa ByrIbHMnΦIbTpamN,ObOB'3KOBO 3hIMiTb IX.

Φilbtpyua Mondpikaia
Bntjka ouucae nobitpr i nobeptae noro do kimhaTn. Uo6 BnKopncTOByBaTn BnTjKy B ciM moNcikaui, Heo6xIDHO BCTaHOBtN DOaTKOBy CnCTEmy fInbTpauiHa OCHOBi AKTINBOBaHOrO ByrInn. Lz MoNcikauiz noTppe6ye DeΦJNEkTOP nobITpr, peDyKTop i ByrInbHni/ ifinbTp/n. Y BepXhi Tpybi Ma e 6ytN npeE6aueHi npopi3n dJa BnPyCKY nobITpr, po3TaUOBaHI y BepXhi qacTHNI.
TexhiHi daHi
HGA 9.5 AM X/HA - HGF 9.5 AM X/HA
HGA 6.5 AM X/HA - HGF 6.5 AM X/HA

T1

T2

T3

T4

T5
T1 Ipe3anyck dBnyHa
HaTnckaHnHa nIcKHOKNpy niI qac po6oTu npu3BeDe do BmKHeHHBtJxKn.
T2 Wbndkictb 1
HGF 9.5S AB X/HA - HGA 9.5S AB X/HA - HGA 6.5S AB X/HA

T1

T2

T3

T4

T5

T6
T1 Ipe3anyck dBnyHa
HaTnCKaHnHa nIcIO KHOIpKy Ha BVIMKHeHIn BVITJXuI npN3BeDe Ido 3aBdAHHn nepsoi WbUdkoctI. HATnCKaHn Ha cIO KHOIpKny pIid Yac po60tN npN3BeDe IO BVIMKHeHH BITJxKn.
T2 トウ庁県ctb1
Пи Натиckaанни цій КнОпКВИТЯЖКа поейду стан, поЕр德新шВиДкоcti 1.
T3 トト広KICTb 2
Pn HatackaHHi ciie KhoKn BntjKa nepeJe y cTaH, nonepedni Wbndkocti 2.
T4 1IbIcktB 3
Pn HatackanHi ciKHOKN BNTJKKa nepeJe y cTaH, nonepedni WbNdkocti 3.
T5 Bystep
При натусян сци сьноки витяжka посядзпогу STану на InteHcINbHy wBnDkiCTb.Черс 5xbuInn BvTjKka NOberpnetbca Do wBnDkocti,Якбулал nopepeHbO 3aDAha;При натусян си на кноку wBnDkocti(T2,T3aboT4)3a6e3neHuYeTBcR Bxivd 3ФyHKciB cytepy i3 BCTahOBlenHm obaHOI wBnDkocti.
T6 YbIMKHeHHBnMkHeHHOcBiTJeHH
CunHai3auiiΦilbtpy-xynpoyNoBIOBaua i HnprncMHnx 3anaxiB
Блиманя ikOKи, BiД nobiДо до nepшо i WbИdkocTi T2,Вka3ye Ha 3a6pydHnЯ φiNbtpy-жроунobnOBuBaay, 6лиманя ikOKи, BiД nobiDHOI do pyrooi WbUdkocTi T3, Bka3ye Ha 3a6pydHnЯ ByrInbHorO φiNbtpy,Блиманя obox iKoHok T2 i T3 Bka3ye Ha 3a6pydHnЯ obox φiNbtpiB. Tomy Heo6xiDNo BvkoHaTu OunSeHHa/3amHy φiNbtpiB-жроунobnOBuBaiv “A” i/a60 ByrInbHnx φiNbtpiB npOTn HENpHmHx 3anaxib “B” (DNB. “Доглд i Texthiche obcnyrobyBaHHa").
Ioo6 o6hnyltn liuynbHK fInbtpy:
Ha yBIMKHeHn BNTJxGi HATNCHyTn i npntpumatn Tpr CekyHn KNONky T5.CnrHaNbHn CBiTNOIOd 6NImaTMe Tpui, nCnI yO NOBepHeTbcS DO BiOobpaXeHHa HOpMaJIbHOI PObotn. B pa3i OndohocHOcNRHaI3aui oBX φINbTpIB Heo6XiHO BVKOHaTN ObHyInHH. Nep7a npoueDypa cKnJaE φINbTp-JKnpOyOBnHOBaU, dpyra -ByrInbHn φINbTp npOTn HENPnEMHNx 3anaxIB.
KoHphiirypaui BnTjXKn:
IooB hanaTbyBatn dIy BNTJxKb 6axHn po6OuH peXHM, HATNCiTb y BVMKHeHomy cTaHi T5 i npITpMaIte II 6 ceKyHd. IOKHN T2 a6o T3 cnaIaxyoTb, IooB bKa3aTN Ha TIN MoNphiikaII: T2 BCMOkyTBaIbHn, T3 pfIbTppyBaJIbHn. MoXHa 3miHnTm MoNphiikaIO, HATNCKaOuH nocPiIOBHO ha KhoNkY T5.
Uo6 36epeTn HOBy KOHphiIpyauiO, Heo6xIDHO HATNCHTN Ha KhoNkTy T1.
MoJIc KHONKOBOI naHeJIIO Soft Button +IucJIeEM
HGF 9.8 AD X/HA - HGA 9.8 AD X/HA
HGA 6.8 AD X/HA - HGF 6.8 AD X/HA

T1

T2

T3


T4

T5

T6
T1 YbIMKHeHHBbIMKHeHHaBnryHa
HaTnCKaHnHa 10 KONKy Ha BmKHeHn BtJxKu np3BeDe Do 3aBdAHHn nepoio WbNdkocti. HATnCKaHn Ha 10 KONky Ni d Yac pO60TN pIn3BeDe DO BmKHeHH BtJxKn.
T2 WbndKicTb -
Pn HataNcKaHHi Ha 10 KHOkKy BHTJgKka nepexoNTb Do nonepeDhboI WBNikOCTi.
T3 WbNdkicTb+
Pn HataNcKaHHi Ha 10 KhoNky BHTJkka nepexoNTb Do HactynHOI WBNKoCTi
T4 BycTeP
ПиНатиckаннI Na КнОКИУВИТЯЖКAppeхoДNTь 3 ПОпeрEDьОо CTAnHy Na IHTeHcNBIHy WbUdKICtB; NaДиСпЛeI ПОьЛьно 6blmAc 6byKBa "b".Чepe3 5xbuINH BITЯЖКa ПОверстбя Na WbUdKICtB,Яka 6уla ПОпepeДнБо 3aВдаHa, ЦeJж pe3yNbTаT MOnKHа OТРIMaTN pID Yac pOБOTn bCytepy, ЯкsoНATиCHуТи Na KHONky WbUdKocTi (T2 a60 T3).
T5 Taɪmep
KoJHoro pa3y npn HataNcKaHHi ciEi KhoIKN aBtOMaTHUHe BIMKHeHHa BITJXKKu BiIDbYBaCTbcra 3aTpIMKOHO y 5 XbUNIH. 3BOpOTHI BIDlIK XBUNIH 3a TaMepom BiO6pa3ntbcra Ha dncPne.i. TaMep 3aJaEcTBcra Imwe dIra WbUNKocTe pyHoro hanaawTyBaHHa i He nepeEdaueHni dIg bCytepy.
T6 YbIMKHeHHBumKHeHHOcBiTJeHH
CnHai3aiai fJIbtpy-kupooyloBIOBaHa i ByrIbHoro fJIbtpy BID HEnpneMHnx 3anaxiB
KoHphiRypaui BnTAAKKN
Iio6 hanaTuBaTn dIy BITaKKn 6aKaHni pOboHn peXHM, HATNCiTh T4 i npITpMaIte II 6 cekYHd. (Ha BImKHeHomy npOdykTy) IicnTrpBaJorO 3ymepy Ha dncnpei 3'ABNTbcr Ti cn IHwa MoDnΦiKaIg BITaKKn:
BCMOKTyOHa
(6πnmaioy KbaiaPAT Bn3y Jibopyu).
ΦiNbTpyuOua
(6πnmaiochny Kbaapat Bn3y npabopyu).
MoXHa 3MiHHTn MoiΦikaIIO, HATNCHyBUn Ha KhoNky T4. Ⅲo6 BnHTn 3 pexkmy KOHphiIpyaui, HATNCiTb OOnn pa3 Ha KhoNky T1, Ⅲo npns3BeDe Do BmKHeHH BtJxKn i3 36epeXeHHm OCTaHHbOTo HanaSTyBaHHra.
Modely's mechanickym tlacitkovym panelem
HGA 9.5 AM X/HA - HGF 9.5 AM X/HA
HGA 6.5 AM X/HA - HGF 6.5 AM X/HA

HGF 9.5S AB X/HA - HGA 9.5S AB X/HA - HGA 6.5S AB X/HA

HGF 9.8 AD X/HA - HGA 9.8 AD X/HA
HGA 6.8 AD X/HA - HGF 6.8 AD X/HA
T1 ZAPNUti/VYPNUti motoru
HGA 9.5 AM X/HA - HGF 9.5 AM X/HA
HGA 6.5 AM X/HA - HGF 6.5 AM X/HA

T1

T2

T3

T4

T5
T1 Vynulovanie motora
Po stlaceni tohto tlaicidia pochas cinnosti sa odsavac VYPNE.
T2 Rychlost'1
HGF 9.5S AB X/HA - HGA 9.5S AB X/HA - HGA 6.5S AB X/HA

T1

T2

T3

T4

T5

T6
T1 Vynulovanie motora
Po stlaceni tohto tlacidia pri vypnutom odsavaci dojde k.
nastaveniu prvej rychlosti. Po stlaceni tohto tlacidia pochas cinnosti sa odsavac VYPNE.
T2 Rychlost'1
HGF 9.8 AD X/HA - HGA 9.8 AD X/HA
HGA 6.8 ADI X/HA - HGF 6.8 AD X/HA

T1

T2

T3


T4

T5

T6
T1 ZAPNUTIE/VYPNUTIE motora
HGA 9.5 AM X/HA - HGF 9.5 AM X/HA
HGA 6.5 AM X/HA - HGF 6.5 AM X/HA

T1

T2

T3

T4

T5
T1 MoTopDbI TOKTaTy
Copfblx kymbic icTe n TypfaHda bacbIca, on ΘUeJI
T2 KblДamdbk1
TуIMe 6acblfHaHda copfb1w 1-ksbldAmdbIka opHaTbIaIbI.
T3 KbldAmdbk2
TуIMe 6acbIiFaHda copfblu 2-ЖblIaMdIbIka opHaTbIaIbI.
T4 KblДamdbiK 3
TуIME 6acblfHaHda copFbIi3-ЖblДamMbIka opHaTbIaIbI.
T5 Shamapdbi KOCY/0uHIPY
Cehcopnbik naHeIbMeH xa6dbkTaIHaH MoDeJIbDep
HGF 9.5S AB X/HA - HGA 9.5S AB X/HA HGA 6.5S AB X/HA

T1

T2

T3

T4

T5

T6
T1 MoTopDbI TOKTaTy
Copfbiw ewiin Typran Ke3ne, TyImeHi 6acbln, 1-xblJaMdbkTbOpHaTbHb3. Copfbiw JyMbic icTeN TyprAnDa 6acblnca, on ΘWEJI.
T2 Xbɪnʌmʌbɪk 1
TуIMe 6acblfHaHda copfb1w 1-ksbldAmdbIka opHaTbIaIbI.
T3 KblДamdbiK 2
TуIMe 6acbIiFaHda copfblu2-ЖblIaMdIbIka opHaTbIaIbI.
T4 KblJaamdbik 3
TуIME 6acblfHaHda copFbIi3-ЖblДamMbIka opHaTbIaIbI.
T5 KyseuTekiu
Tуиme bacblfraHda copfbIw KxorapbI XblIaMblkKa opHaTbIaIbI. 5 MInHyTTaH KeiH, copfbIw aIbIHbI JxblIaMblkKa opaIaIbI; XblIaMblk TyImeci bacblnca (T2, T3 Hemece T4), copfbIw KUWeHTKIw pexKmIHeH sbIFbI, TaHdaIFaH XblIaMblkTbI opHaTaIbI.
T6 ⅢamapdbI KOCY/ΘUIPY
Ma/niic cy3rJIepiHin eckepTuJIepi
T2 6enriweci kblbIbIKtaca, demek Ma cy3ric KaHbIKKaH, an T3 6enriweci kblbIbIKtaca, on nic cy3ricinH KaHbIKKaHbIH 6ilipei, an ekeyi de kblbIbIKtaca, demek eki cy3ri De KaHbIKKaH. Ohdai JkaJda, MaJ cy3rici (A) a nic cy3rici (B) Hemece ekeyi De Ta3anay/aybcTbpy KaKet («TexnkaJIbIK Kbl3Met Kepcety XaHe KYTIM Kepcety» 6eimih KapaHbI3).
Cy3ri caHaBbIbH KaIbHa KeItripy:
Copfbl Kocbln Tpyfah Ke3e, T5 TyImeci6acbl, yUcKyHd YCTan Typblb3.
EckepTy dnobl yw pet XbInbIbIKTaIdbI da, KaIbIITbIpexIMre opanaDbI.
Bip yaKbIITa cy3ri eckepTynepiH ekeyi De Kocblica, onapdbIH apKaaicbIcbH 6eNEK KaIIbHa KeNTipy KepeK.
AndbimEn MaI cy3rici, OaH KeiH nic cy3rici KaIIbHa KeIipiJIeI.
CopfbiI KoHgurpaunacbI:
Copfbltih kymbic peximin opHaTy ysiin eHIM euiin TyprAh Ke3de T4 tymecin 6acbin, 6 cekyHn yctan typbHbI3. Ophaty TypiH Kepcety ysiin T2 He T3 6enriweenerip xanaIbI: T2 -KeIeTeY, T3-csy3y.
T4 Tymecin Kaia-Ta-Kaia Ta 6acbIn, opHaTy TypiH e3repTyre 6oanaBl.
KaHa KOHpUpaunHbI caTay yuH T1 TuMecIH XeKe 6aCbHb3.
CehcOpIbIK nAHeJIbMeH XaHe DnCpIeMHe Xa6DbIKTaJFaH MoDeJIbDep
HGF 9.8 AD X/HA - HGA 9.8 AD X/HA
HGA 6.8 ADI X/HA - HGF 6.8 AD X/HA

T1

T2

T3


T4

T5

T6
1 MoTOpIbI KOCy/ΘUIPY
Copfblw eun TpyraH Ke3e, TyMeHi 6acbln, 1-KbIaMdbkTbOpHaTbHb3. Copfblw JxMbic icTeN TpyraHa 6acblna, on ΘUJEJI.
T2 XbIJaamdbIk -
Tyme 6acblfahda copfbla andbihfbj XbIJaMdbIKKa opanabl.
T3 KblДamdbiK+
Tynme 6acbIraHda copfbiw KeNeci XblnDaMdkKa eTeDi.
T4 KyseewrKiw
Tуиme bacblfahda copbIw kOfarby kbldAmdkka opHaTbIaIbI;ДиСпл徳e «b» apri bay kblbIbIKTaIbI. 5 MInHyTTaH KeiH, copbIw aIdbIhbl KbldAmdkka opanaIbI; KyWeITkiIpeKIM KocblbIN TyprHaKe3 KeIReH kbldAmdk TuyMecIH (T2 HeMece T3) bacy apkblbI da anDbHfbj kbldAmdkka opanyfa 6oIaIbI.
T5 Taɪmep
Bny Tynme 6acblca, copfblwbln abtomaTbI Tpyde eWyi 5 MNHyTkKa KeiHRe KaIdbipblaIaIbI. TaMep DncPJIeJe MInHyTTapblk KepCetin, apTKa caHaIbI. TaMepdi Tek KOJMeH OPhAblNaTbIH XblIaMDbIKTap yIiH OPhATyfa 6OJaIbI, KyweTIkiIpeKIMi yIiH 6yN MyMKiH emc.
T6 甲amapdbi KOCY/0UHPY
Ma#/nic cy3rJIepiHIn eckepTyJIepi
KorapfbcONKaTafbIXOJaXkbIbIbIKTaI, MaCy3rici KaHbIKKaHbIH 6iJipeJI.
Kofapfbl OH KaKaTaBfbl KOnaKbInbJbIKTan, nic cy3rici KaHbIKKaHbIH biJipei.
Eki Konak Ta KbinbIbIKtan Typca, demek eki cy3ri de KaHbIKKaH.
Ondai KaIdaIa, MaCy3riciH (A) anic cy3riciH (B) Hemece ekeyin de TaIaIay/aybICTbipy kaxKeT («TexnkaIbIK Kbl3MeT KepcTey XHe KYtIM KepcTeY» 6JIImIH kaPaHbI3). CoHfbl MJIIMET Tek cy3y HycKacbHa KaTbICTbl.
Cy3ri caHaBbIbH KaIINbHa KeJItipy:
Copfbl KocblbT pyran Ke3e, T4 TYmecin 6acbln, yw cekyHd YCTan TypbHbI3.
Bip yaKbITTa cy3ri eckepTynepiH ekeyi De Kocblnca, OnapdbH apKaaiCbIcbH 6eNeK KaIIbHa KeNTipy KepeK.
AnbimEn MaCy3rici, OaH KeiH iC cy3rici KaIbHa KeTIpinei.
CopfbIbTbI 6eimdey
CopfbltbHjymbcpeKIMiOpHaTy yuiH eHim euiTtpFaH Ke3e T4 tyImeCih 6acBn,6cekyHd yCTan TypbHbI3..Y3aK cnHahdAn KeHHOpAty Typi Kepcetinei:
Tyrikke KaIFaHaTbH HycKa
(Temehri coJ kakTaftbI wapbI XblbIbIKTaHDbI).
Cy3y Hycacbl
(TEmehri OH XaKTabbl WapbI XblbJIbIKTaNdbI).
T4 Tymecin bacsin, opnaty typiin 3reptyre 60ana. Beimdey peximineh ysiH T1 Tymecin bip pet bacsih3; OHb backan Ke3ne Kpyblfbi Owiin, COHfbl 60bnkpcetitiren napametpdi caKaTaiDbI.
TexHnKaJIbIk Kbl3MeT KOpCeTy JxHe KyTim KOpCeTy
A6aB 60JIbIbI3! KypblfblHbTa3aJamaC Hemece orah Kbl3MeT KepcETnec 6ypbIH, KyaT aibpbIH aftTy a Heri3ri aibpbl KockblWTbI aXkbipaTy apKblbIOhbl TOKTaH aftTy KepeK.
Anfawkblta3anay
Koprafbiuynipdiweein anbHb3
A3fana6eHapan ca6bIH KocBIn,dbIMKbln r6kameh Ta3aJahbI3
-ДыIMьлшубepeКпеншаиьHbI3
KymcaKy6epeKeHcypTin, KypTaBih3; copfbltOT 6acnauTBH 60JatTAH XacaJFaH 6oJca, TeKctypa60nbIMeKypTaBih3
Kyueni Ta3anay
CopfbltbiH iwi MeH cbiptbH XnI Ta3aJaan Typy KaKeT (KEM DeereHde, MaCy3riciH ayBICTBipFah Ke3depe). DblIMkbI Ny6bepeK peH beiTapan cyBik Kxyfbls 3aT KOcblfAH XblbI Cy KONdaHbIHbI3.
KbipfblHemece TOTbIKTbIPfbI3aTTapdbI naJaHa6aHbI3.
Eckepy: CopfbIITb Ta3anay Xhe cy3rinepdi ta3anay/ aybcIbpy HcckaynapbiOpbIHdaImaca,epT bIFbyMymkIn. Hcckaynapbi 6yJkbITnaiOpbIHdaHbI3. EHNdipyMi MOTopfa KeIreH 3aKbIMdapFa Hemece Dypbc Kytim Jxacamay J xOFapblAafbl HcckaynapblOpbIHdaMay caIapbHaH sbIKKaH eptKe kayantbl 60MaBbl.
MaCy3ricHe KbI3MeT KepcTeY (A)
MaCy3rici TaFAMniciprenKe3de 乌fAubH Ma6oJIWeKTeepiN yCTaIbI; OHbI KEM DeReHDe aBHa bip pet, aNCi3 KyfbI 3aTINeKONMeH HemeCe TEmH TemnepaTypaBbI KbICKa bIDc KYfbI UIKKnBImeH Ta3aIay Kepek.
Maicyricin wifapbin any ywiin cepinnei tytkahbl
TapbIbI3. bIbIc KxyfblTa Kyyblnca, MeTaN Czy3riHt Yci e3repyIMMkiH, 6ipak OHbIH KymblcbiHa HkcaH KeMeiDi.
Kemip cy3rire Kbi3MeT kepcety (B)
Kemip cy3rici kafbimcbi TaFAM nicipy niCTepih yctaIdbi. Cy3ri nicipineniTaFAM tyPiHe KHe MaI cy3ricH ta3anay kinnirire 6aIIaHaBcIbIe np TyPiNknniknien KaHbIFIn OTbpaDbI. Kaptndk KEM dereHde knbipma aia dbip pet aybictbIpiny Tnic.
Byn cy3rihi kyyfa Hemece kaJIbIHa keJItpyre 6oMaJdbI
Bennektey: Copbikka 6ekitin TypaBH aIbIHbEki nHtipeKti 6acBn, 6enCeHdipilreh Kemip cy3ricih wewin aJIbHbI3.
Kypactbipy:BeIceHdiipiren Kemip cy3ricin andbimc H copfbluTbH aptkb JkafbHda fb Me taJI TIIpeHH, Oan H KeiH anDbHfb XaFBHDAfb eKi iHTipeKtiH Kemerimeh 6ekithi3.
UamdapNbaybictbipy
KypbIfblHbTOKTaH aftlbIn, MaI cy3rici Wewin anblHb3.
A6aB60JIbIb3!YCTaMaC 6ypbH,ShaMdap caKbIHdaFaHbHaKe3 XeTki3iHi3.
- CaKaTaNDbI pFbI WbI WbIFapBn aNbIHbI3: KiKHe Teric 6aCTbI 6ypaFbIwneH Hemece oran YKcac KypaImeH WbIFapBnHbI3.
2.A Ka y Nbl Ma Mbl aybictbipbHb3. Typi 6ipdei wamdapbl rHa KaJdaHbHb3 (MnImetany yWIn,TeMeHderi HycKayn depeKti KapaHb3). - CaKaTHaBbIpBbIbTbI opHbIHbHa opHaTbIHbI3 (ntepin, opHaTbIHbI3).

UamdaapdbaybictbypLED\*
Copfblt Ta IIOJ TexHONORncaHa Heri3JeIreH JapbIKTaHdbpy Kjueci 6ap. IIOJTap eDetteri WamdpFa KaparaHda OHtaJIbI JapbIKTaHdbipy, Y3aFbpaK XyMbIC icTeyd i XHe a3bpaK Kyat naJaIaNHydbI KaMTaMaCbI3 etedi. Onapbl aybICTbpy yuiH KEmek KepceTy KbImeTHe xaBapnacbl3.
3neKtp ka6eJI
KyaT Ka6eni 3aKbIMdAnca, TsyeKeIepePiH aIdbIH aNy yuH OHbl eHdipyWIRE HeMece OHbIH TexHnKaJIbIK KbI3MeTiHe aybICTbIPTuFa 6oNaBl.
KOKbICKA TACTAY
BvI KpybInfbl Koklc 3JIeKtp XHe 3JeKTPoHdbIK Jka6DbikKa (WEEE) KaTbictbl EC/2012/19 Eyponaibk DnpeKTnBaCbHa caikec keendi den beHrlneHre. KpybInfbl KOKbICKa dYpbic TaCTaIybiH KamTaMaCbI 3 ety apKbIbn naJaIaNHywbl KOpShaFah OpTa MeH KOFaMHbIH DeHCaylbfbH Koprayfa aT caIbicaBl.

H I M I E I I Hemece OHbIH KxKaTTaMaCbIHDaFbI TaHbAcbl EHMdi TYMbICTbIK KObIC TactaJIMaybl, OHbIH OPhbHa 3NeKTP XeHe 3JeKTPoHdbIK KObICTbl CypblTay OTpAlbIfbHa Ta6bCTaLybl Tnic eKeHH bIDipei. XeprilikTi KObIC Tactay 3aHapbHa cAnkec apeket etiH3. OhimDi KOndany, KaJIbHa KeNTipy XeHe KaTa EhDey TypaBbKOcbIMwa MAnimet Any yuH In JepriKiTI Kx3bpNbI opraHapra, KObIC XInHay KbI3MeTHe Hemece EHIMdi catbIN anfah OpbIHFa xaabapnaCbIHbI3.
AkayIbIKTapdbI JxOHO
KyMbic icTeMei KaJca, TexHnKaIbIK Kbl3Met KePcety optaHbHa xa6apnaacnac 6ypbIH TeMeHderi KaapanaBIM KaFdaanapdbI Tekcepini3:
CopfbiiXyMbic icTeMece:
KeNeci KaFdaIaIapIbI TeKcepH3:
Kypblfbl KocblbnTYP.
XbIJaMDbIK OPhaTbIJaH.
Copfbiu Tnimi jxmbic icTeMece:
KeNeci KaFdaIaIapIbI TeKcepH3:
TaHdaIHaH MOTOp XbIJaMdbIbIbIbIKKaH TyTih MeH 6y KeJIemIH eHdeYre xeTKJIikTi.
KypblfbyayaaybyyushacyndeTnicBeHTnIaZna6ap.
Kemip cy3ri KaHbIKnFaHaC (Cy3y HyCKacbl).
Kymbcic icTei TpyraH Ke3de, copfbiiw ewin KaIaTbIH 6onca:
KeNeci KaFdaIaIapDbI TeKcepiH3:
Kypblfbl KocblbnTyp.
aBbIpbIn KockblILKocblIMaFaH.
AkaYbI JyMbIC icTeReH XaFdaJa,TEXHnKaIbIK KbI3MeT KepcTeTy opTaIbIFbIHa xaabapnacnac 6ypbIH, aIbIPbIH aftTy apKblbl KpyblfBbI TOkTaH KEM deReHde 5 ceKyHdka aftbIbIN, KaIta KocbIHbI3. AkaybIK WEEIWmecE,TEXHnKaIbIK KbI3MeT KepcTeTy opTaIbIFbIHa xaabapnacbIHbI3.
KZ
KZ
- Mode d'emploi
- HOTTE DE CUISINE
- Operating Instructions
- COOKER HOOD
- FR
- Avertissements
- CZ
- Upozorněné
- Assistance
- UA
- Дономora
- T1 Reset motore
- T1 ON/OFF motore
- Electrical hook up
- Air exhaust (for ducted units)
- Filter or ducted?
- Ducted version
- Filter version
- GLASS controls
- Models with mechanical keypad
- T1 Motor reset
- T2 Speed 1
- T3 Speed 2
- T4 Speed 3
- T5 Lights ON/OFF
- Models with soft button keypad
- T5 Booster
- T6 Lights ON/OFF
- Grease/odour filter warnings
- To reset the filter counter:
- Hood configuration:
- Models with soft button keypad and display
- Motor ON/OFF
- T2 Speed -
- T3 Speed +
- T4 Booster
- T5 Timer
- Configuring the hood
- Ducted
- Filter
- Maintenance and care
- First cleaning
- Periodic cleaning
- Servicing the grease filter (A)
- Servicing the charcoal filter (B)
- Replacing the bulbs
- Replacing the lights LED *
- Electrical cable
- SCRAPPING
- Troubleshooting
- If the hood does not operate:
- Check that:
- If the hood is not working effectively:
- If the hood turns off during normal operation:
- Installation
- T1 Reset motor
- T1 ON/OFF motor
- ON/OFF motor
- T1 Reset silnika
- T1 ON/OFF silnika
- T1 Motor sifirlama
- T2 Hiz 1
- Motor AÇI K/KAPALI
- T1 OctaHOBka DnIraTeJra
- T1 OctaHOBka DnIraTeJia
- T2 CkopocTb 1
- T3 BoIbToO6aBoHoe ycTpoCTBO
- T6 BKN./BbIKN. ocBeueHnra
- CnHn3aun 3acopeHnJnpoBopro n cop6uOHoro qnIbTpOB
- T1 BkJI./BbIKI.Дви ratЯ
- T2 CkopocTB -
- T3CKopoctb+
- T4 BoIbToIO6aBOuHoe ycTpoIcTBo
- T5 Taɪmep
- Ecnn BbItjXkHa He pa6oTaeT:
- Поверпь:
- Pn Hn3KoN 3ΦΦeKTHBHOCTN BbITJXKN:
- Ecn BBITXKa BbIKNoaetcB IpOcece pa60tbl:
- PpOBepuTb:
- BcMoKtYuOHa MoNΦikaJia
- Φilbtpyua Mondpikaia
- T1 Ipe3anyck dBnyHa
- T2 Wbndkictb 1
- T2 トウ庁県ctb1
- T3 トト広KICTb 2
- T4 1IbIcktB 3
- T5 Bystep
- T6 YbIMKHeHHBnMkHeHHOcBiTJeHH
- CunHai3auiiΦilbtpy-xynpoyNoBIOBaua i HnprncMHnx 3anaxiB
- Ioo6 o6hnyltn liuynbHK fInbtpy:
- KoHphiirypaui BnTjXKn:
- MoJIc KHONKOBOI naHeJIIO Soft Button +IucJIeEM
- T1 YbIMKHeHHBbIMKHeHHaBnryHa
- T2 WbndKicTb -
- T3 WbNdkicTb+
- T4 BycTeP
- T6 YbIMKHeHHBumKHeHHOcBiTJeHH
- CnHai3aiai fJIbtpy-kupooyloBIOBaHa i ByrIbHoro fJIbtpy BID HEnpneMHnx 3anaxiB
- KoHphiRypaui BnTAAKKN
- BCMOKTyOHa
- ΦiNbTpyuOua
- Modely's mechanickym tlacitkovym panelem
- T1 ZAPNUti/VYPNUti motoru
- T1 Vynulovanie motora
- T2 Rychlost'1
- T1 ZAPNUTIE/VYPNUTIE motora
- T1 MoTopDbI TOKTaTy
- T2 KblДamdbk1
- T3 KbldAmdbk2
- T4 KblДamdbiK 3
- T5 Shamapdbi KOCY/0uHIPY
- Cehcopnbik naHeIbMeH xa6dbkTaIHaH MoDeJIbDep
- T2 Xbɪnʌmʌbɪk 1
- T3 KblДamdbiK 2
- T4 KblJaamdbik 3
- T5 KyseuTekiu
- T6 ⅢamapdbI KOCY/ΘUIPY
- Ma/niic cy3rJIepiHin eckepTuJIepi
- Cy3ri caHaBbIbH KaIbHa KeItripy:
- CopfbiI KoHgurpaunacbI:
- CehcOpIbIK nAHeJIbMeH XaHe DnCpIeMHe Xa6DbIKTaJFaH MoDeJIbDep
- MoTOpIbI KOCy/ΘUIPY
- T2 XbIJaamdbIk -
- T3 KblДamdbiK+
- T4 KyseewrKiw
- T6 甲amapdbi KOCY/0UHPY
- Ma#/nic cy3rJIepiHIn eckepTyJIepi
- Cy3ri caHaBbIbH KaIINbHa KeJItipy:
- CopfbIbTbI 6eimdey
- Tyrikke KaIFaHaTbH HycKa
- Cy3y Hycacbl
- TexHnKaJIbIk Kbl3MeT KOpCeTy JxHe KyTim KOpCeTy
- Anfawkblta3anay
- Kyueni Ta3anay
- MaCy3ricHe KbI3MeT KepcTeY (A)
- Kemip cy3rire Kbi3MeT kepcety (B)
- UamdapNbaybictbipy
- UamdaapdbaybictbypLED\*
- 3neKtp ka6eJI
- KOKbICKA TACTAY
- AkayIbIKTapdbI JxOHO
- CopfbiiXyMbic icTeMece:
- Copfbiu Tnimi jxmbic icTeMece:
- Kymbcic icTei TpyraH Ke3de, copfbiiw ewin KaIaTbIH 6onca:
Brand : HOTPOINT
Model : HGF95AMX
Category : Cooker