JB7192 - Blender BRAUN - Free user manual and instructions
Find the device manual for free JB7192 BRAUN in PDF.
User questions about JB7192 BRAUN
0 question about this device. Answer the ones you know or ask your own.
Ask a new question about this device
Download the instructions for your Blender in PDF format for free! Find your manual JB7192 - BRAUN and take your electronic device back in hand. On this page are published all the documents necessary for the use of your device. JB7192 by BRAUN.
USER MANUAL JB7192 BRAUN
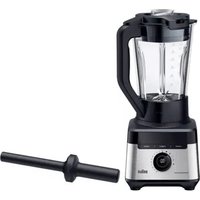
natural_image
Exterior view of a modern BBAun blender with visible design and control buttons (no text or symbols on the device itself)Type 4145
Deutsch 6
English 10
Français 15
Español 20
Português 25
Italiano 29
Nederlands 33
Dansk 37
Norsk 41
Svenska 45
Suomi 49
Polski 53
Český 58
Slovenský 62
Magyar 66
Hrvatski 70
Slovenski 74
Türkçe 78
Română (RO/MD) 82
Ελληνικά 86
Қазақ 91
Русский 96
Українська 101

De'Longhi Braun Household GmbH
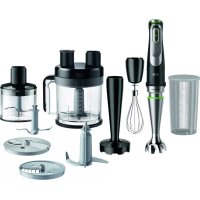
text_image
Technical diagram of a blender with labeled parts and exploded view showing water spray, filter, and cleaning steps
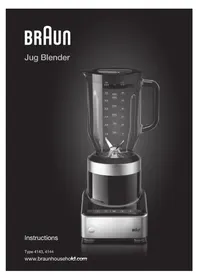
text_image
Illustration of a BRUn-branded blender with warning symbols and a hand holding a cloth, showing electrical plug connection.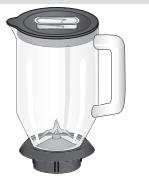 | Max | Max |  | |
| modes | Lsec. | |||
 | 1300 ml |  | 5-10x | |
 | 1000 ml |  | 40-90 s | |
 | 400 ml |  | 60-90 s | |
 | 1300 g | 1400 ml |  | 30-90 s |
 | 1400 ml |  | 60-90 s | |
 | 700 ml |  | 60-120 s | |
 | 10x |  | preset | |
 | 10x |  | 10-15x2 | |
| Max ml | modes | sec. | |
 | 350 ml |  | 20-30 s |
 | 350 ml |  | 40-60 s |
Deutsch
Our products are engineered to meet the highest standards of quality, functionality and design. We hope you thoroughly enjoy the new Braun appliance.
Before use
Please read the user instructions carefully and completely before using the appliance.
Caution
- The blades are very sharp! To avoid injuries, please handle blades with utmost care.
- Care shall be taken when handling the sharp cutting blades, emptying the bowl and during cleaning.
- This appliance can be used by persons with reduced physical, sensory or mental capabilities or lack of experience and knowledge if they have been given supervision or instruction concerning use of the appliance in a safe way and if they understand the hazards involved.
- Children shall not play with the appliance.
- This appliance shall not be used by children.
- Children shall be kept away from the appliance and its mains cord.
- If the supply cord is damaged, it must be replaced by the manufacturer, its service agent or similarly qualified persons in order to avoid a hazard.
- Always switch off and uplug the appliance when it is left unattended and before assembling, disassembling, cleaning and storing.
- Be careful if hot liquid is poured into the food processor or blender as it can be ejected out of the appliance due to a sudden steaming.
-
This appliance is designed for household use only and for processing normal household quantities.
-
Do not use any part in the microwave.
- Caution: Ensure the complete lid is placed on the jug before starting into operation.
- Do not grab into the jug while the lid is open – risk of injury by the knife.
- The appliance works only if the jug is correctly assembled on the power base.
- Before switching on, make sure the jug is properly assembled and in place on the power base with the lid (incl. measuring cap).
- Do not use the device without any load in the jug.
- Cleaning of the appliance should follow the instruction in the relevant section.
Description
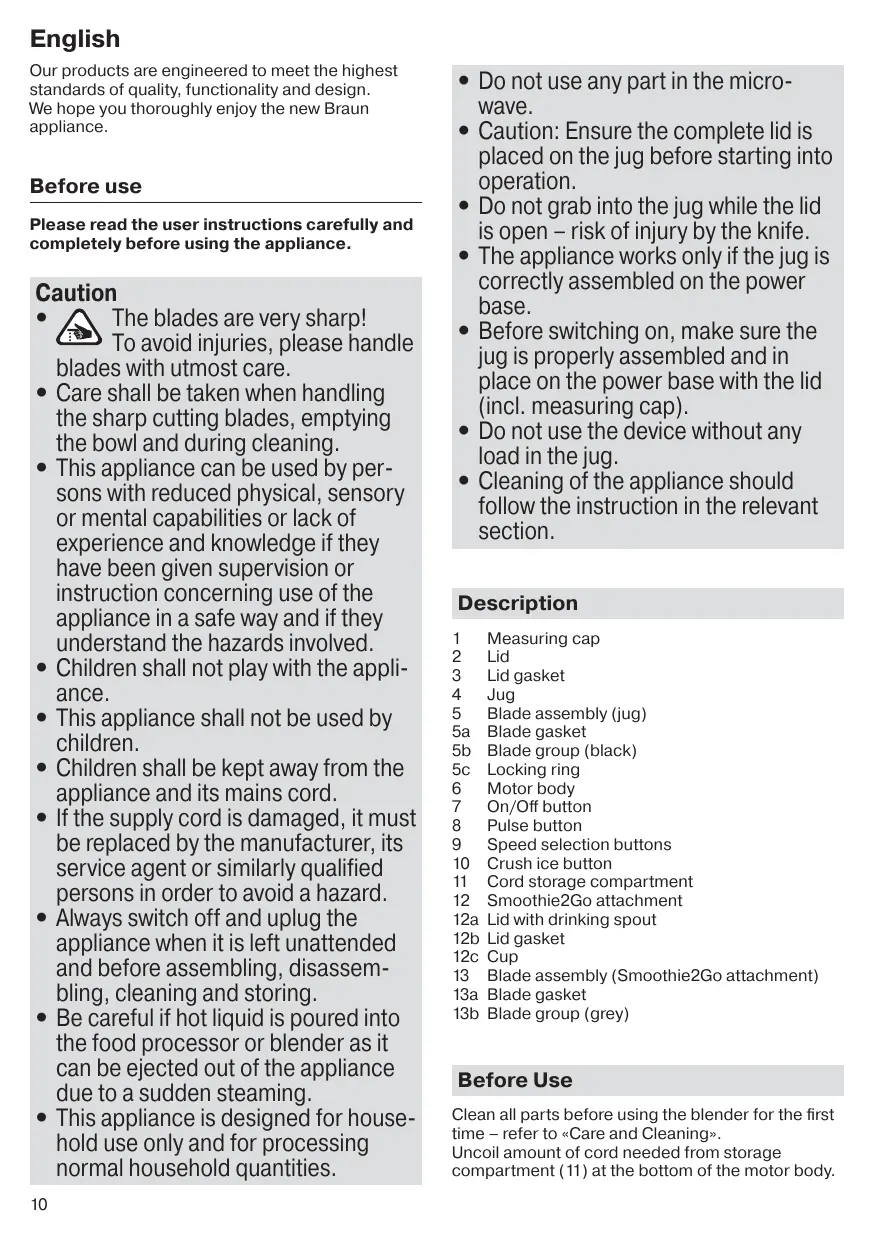
1 Measuring cap
2 Lid
3 Lid gasket
4 Jug
5 Blade assembly (jug)
5a Blade gasket
5b Blade group (black)
5c Locking ring
6 Motor body
7 On/Off button
8 Pulse button
9 Speed selection buttons
10 Crush ice button
11 Cord storage compartment
12 Smoothie2Go attachment
12a Lid with drinking spout
12b Lid gasket
12c Cup
13 Blade assembly (Smoothie2Go attachment)
13a Blade gasket
13b Blade group (grey)
Before Use
Clean all parts before using the blender for the first time – refer to «Care and Cleaning».
Uncoil amount of cord needed from storage compartment (11) at the bottom of the motor body.
(A) Jug
Assembly
- Ensure that the blade gasket (5a) is positioned on the inside rim of the blade group (5b).
- Carefully place the blade group into the locking ring (5c).
- Screw the blade assembly (5) to the jug (4) in a clockwise motion until it can go no further.
Blending with the Jug
- Make sure the appliance is turned off.
- Position the line on the locking ring (5c) in front of you and push the jug down until it is securely locked into place. The jug handle should be on the right or left side of the motor body. When properly positioned, the jug will rest completely on the motor body.
- Add liquid ingredients first, followed by solid ingredients. This will ensure all ingredients are uniformly blended and prevent unnecessary stress on the motor. Firmly place the complete lid (1,2,3) on top.
- Plug in the power cord.
- Turn the appliance on by pressing the On/Off button (7).
- The indicator lights (8,9,10) will flash. To start operation select a pre-programmed speed (refer to «Operating Instructions»).
- Always stop the blender when adding more ingredients. Ensure the complete lid including the measuring cap is replaced.
- During operation, you may add liquids through the drip hole in the measuring cap.
- When finished, press the pre-programmed speed button.
- To switch off the appliance, press the On/Off button and unplug blender before removing the jug.
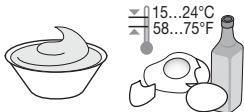
Recipe example: Vanilla-Honey-Prunes
(as a pancake stuffing or spread):
Fill the jug with 300 g pitted prunes and 200 g honey Pulse at speed 5 for 5 seconds
Add 500 ml water (vanilla-flavoured)
Blend for 8 seconds in total
(B) Smoothie2Go Attachment
NOTE: The Smoothie2Go must only be operated using its special blade group (13b) and for preparing drinks and smoothies.
Assembly
- Ensure that the blade gasket is positioned on the inside rim of the blade group (13b).
- Hold the blade group at the coupling from underneath and place it upside down in the cup.
- Screw the locking ring (5c) to the cup (12c) in a clockwise motion until it can go no further.
Blending with the Smoothie2Go Attachment
- Make sure the appliance is turned off.
- Fill the cup (12c) with ingredients. Ingredients should be added in reverse order of the regular jug – solids first, then liquids.
- Carefully place the blade group including gasket onto the cup.
- Screw the locking ring in a clockwise motion until it can go no further.
- Turn the cup upside down, position the line on the locking ring (5c) in front of you and push the cup down until it is securely locked into place.
- Plug in the power cord.
- Turn the appliance on by pressing the On/Off button (7).
- The indicator lights (8,9,10) will flash. To start operation select a pre-programmed speed (refer to «Operating Instructions»).
- When finished, press the pre-programmed speed button.
- To switch off the appliance, press the On/Off button and unplug blender before removing the Smoothie2Go attachment.
- When finished blending, pull the cup straight up to remove from the base.
- Turn the cup upright and remove the blade assembly by twisting it counterclockwise.
- To remove the blade group from the locking ring, push with both thumbs from inside the ring until it snaps out.
- To attach the lid to the cup, ensure the gasket (12b) is inside the rim of the lid (12a) and twist clockwise. Carefully close the drinking spout.
NOTE: The Smoothie2Go attachment must not be used to blend hot foods, carbonated liquids or food supplements.
When preparing protein shakes using powder and liquids only, use the jug.
Operating Instructions
NOTE: The blender will only operate when the On/Off button is pressed before selecting the desired speed or mode.
After 2 minutes of processing time the appliance stops blending automatically. The indicator lights (8,9,10) will flash. To re-start operation press a speed button again.
Speed Selection
- Start blending by pressing one of the speed buttons (9).
-
The indicator light of the selected function will glow and all other lights will turn off.
-
Change the operating speed by pressing a higher or lower speed button.
- To stop blending, press the selected speed button again.
- When finished, press the On/Off button (7) to switch off the appliance. Unplug the blender.
Pulse Mode
The pulse mode can be used to break apart larger pieces of food or to control the texture of food when chopping. It can be activated with any speed.
- Press the pulse button (8).
- The indicator light will glow and the indicator lights of each speed program will flash to signify all speeds are in pulse mode.
- Start pulsing by pressing one of the speed buttons (9). Hold the selected speed button as long as the pulse should run. You determine the duration of each pulse.
- To finish the pulse mode, press the pulse button again.
- When finished, press the On/Off button (7) to switch off the appliance. Unplug blender.
NOTE: Pulse mode will not work with the crush ice feature.
Crush Ice Mode
When selected, the blender will automatically run at staggered intervals at a preset speed.
- Press the crush ice button (10) to begin crushing.
• The indicator light will glow. - The blender will cycle through a pre-programmed time and stop automatically when finished.
- To stop the program earlier, press the crush ice button again.
- When finished, press the On/Off button (7) to switch off the appliance. Unplug blender.
RECIPE FOR THE JUG
Tropical Smoothie
210 g pineapple
140 g cored apricot or nectarine
260 g mango
250 ml orange juice
For an exotic taste add
1 passionfruit or 1-2 tbsp honey in addition
Place all ingredients into the blender, in the order listed and secure lid. Blend for 45-65 seconds on speed 5 (max. speed).
RECIPE FOR THE SMOOTHIE2GO
Energy Smoothie
50 g red grapes
60 g cored pear
60 g banana
15 g walnuts
15 g rinsed spring green
120 ml water
Place all ingredients into the blender, in the order listed and secure lid. Blend for 40-50 seconds on speed 5 (max. speed).
For Best Results
- When mixing solid ingredients, cut them up into small pieces.
- Always start by mixing solid ingredients with a small amount of liquid. Then gradually add more liquid.
- When pureeing solid ingredients, feed small portions into the jug (4) gradually rather than adding a large quantity at one time.
- If blending action stops during blending or ingredients stick to sides of the jug, there may not be enough liquid to blend efficiently.
- Use the pulse mode when mixing solid or highly viscous ingredients to avoid the blade becoming stagnant.
- For preparing small amounts of foodstuff use a low speed level.
- When preparing mayonnaise, oil can be added through the drip hole in the measuring cap.
- Do not store food or liquids in the jug.
- Avoid bumping or dropping the blender when in operation or at any time.
- We recommend keeping your hand on top of the lid when operating the blender.
- Do not fill the jug beyond 900 ml when pre-paring milk based drinks.
Blending Hot Ingredients
Blending very hot ingredients may result in hot liquid and steam being forced past the lid or measuring cap and cause severe personal injury.
- When preparing hot foods or liquids the complete lid (including the gasket and measuring cap) must be placed on the jug.
- Do not fill the jug beyond 700 ml for hot foodstuff.
- If preparing greater amounts, the ingredients must cool down to room temperature and the jug must not be filled beyond 1300 ml.
(C) Care and Cleaning
Motor body
- Disconnect power before cleaning.
- Do not immerse the motor body in water or any other liquid. Wipe motor body, control panel and power cord with a damp or dry cloth only.
- Do not use abrasive cleaners or scouring pads.
Jug and Smoothie2Go Attachments
Make sure the jug is empty before you unscrew the locking ring. Handle the blade with caution.
- All detachable parts including the smoothie2Go attachments are dishwashersafe.
- Parts may also be washed with hot, soapy water. Rinse and dry thoroughly.
- For an efficient clean of the lids and the blades, remove the gaskets (3/12b, 5a/13a).
Please do not dispose of the product in the household waste at the end of its useful life. Disposal can take place at a Braun Service Centre or at appropriate collection points provided in your country.
Materials and accessories coming into contact with food conform to EEC regulation 1935/2004.


For UK Only
Guarantee Information
All Braun Household products carry a minimum guarantee period of two years. The rights and benefits under this guarantee are additional to your statutory rights which are not affected.
Please keep your receipt as this will form the basis of your guarantee.
In the unlikely event of a breakdown you have access to professional help from our team simply by calling: 02392 392333
For service in the Republic of Ireland please call:
012475471
Braun Household undertakes within the specified period to repair or replace any part of the appliance, free of charge (with the exception of any glass or porcelain-ware incorporated in the product) found to be defective provided that;
• We are promptly informed of the defect.
- The product is used and maintained in accordance with the User Instructions.
- The appliance has not been altered in any way or subjected to misuse or repair by a person other than an authorised service agent for Braun Household.
- No rights are given under this guarantee to a person acquiring the appliance second hand or for commercial or communal use.
- Any repaired or replaced appliance will be guaranteed on these terms for the unexpired portion of the guarantee.
- The need for repair has not been caused by insufficient aftercare or cleaning: or damage caused by the chemical or electrochemical effects of water.
Under no circumstances shall the application of this guarantee give rise to the complete replacement of the appliance or entitle the consumer to damages.
Braun Household, New Lane, Havant, Hampshire PO9 2NH
www.braunhousehold.co.uk
Thank You for choosing Braun. We are confident that you will get excellent service from this product.
TO IMPROVE YOUR EXPERIENCE
Register now at www.braunhousehold.co.uk By registering we may send you from time to time details on exclusive offers, promotions, recipes and inside tips.
Troubleshooting Guide
| Problem | Potential Causes | Solution |
| Blender does not operate. | Jug is not attached properly. | Check the position of the jug.The jug handle should be on the right or left side of the motor body. |
| Jug is leaking | Gasket is loose, or even torn. | Check if gasket is mounted properly and in the right order. |
| Liquid splashing out of the jug | Jug is overfilled. | Check maximum quantity recommendation. |
| Speed selected is too high. | Check speed recommendation. |
Français
Mode pulse (impulsion)
Mode crush ice (pilage de glace)
RICETTA PER LA BROCCA
Frullato tropicale
210 g di ananas
OPSKRIFT TIL SMOOTHIE2GO
Energi smoothie
50 g røde druer
60 g afkernet pære
60 g banan
15 g valnødder
15 g skyllet havekål
120 ml vand
RECEPT FÖR SMOOTHIE2GO
Energismoothie
RETETĂ PENTRU SMOOTHIE2GO
Smoothie energizant
50 g struguri roşii