
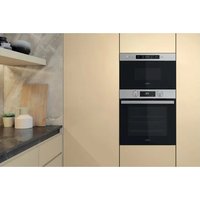
AMW848IXL - Microwave WHIRLPOOL - Free user manual and instructions
Find the device manual for free AMW848IXL WHIRLPOOL in PDF.
| Product type | Built-in microwave oven |
| Brand | Whirlpool |
| Model | AMW848IXL |
| Use | Domestic |
| Installation type | Built-in |
| Power supply | 230 V ~ 50 Hz (check rating plate) |
| Display | Digital with 24-hour clock |
| Controls | Multi-function button, keys, adjustment knob |
| Microwave function | Microwave cooking and reheating only |
| Grill function | Browning only |
| Combined grill + microwave function | Combined cooking |
| Hot air function | Hot air cooking |
| Hot air + microwave function | Hot air roasting + microwave |
| Steam function | Steam cooking (6th Sense Steam) |
| Fast defrost function | Fast defrost |
| Automatic reheating function | 6th Sense Reheat |
| Automatic crisp function | 6th Sense Crisp |
| Fast preheating | Fast heating (preheating empty oven) |
| Safety | Mandatory grounding, do not use extension cord, do not heat sealed containers or whole eggs |
| Maintenance | Clean interior with a soft damp cloth; do not remove the protective plates |
| Spare parts | Use original parts available from after-sales service; replace power cord by a specialized technician |
| Recycling | Recyclable packaging; appliance subject to WEEE directive |
| Support | Detailed manual downloadable at www.whirlpool.eu |
Frequently Asked Questions - AMW848IXL WHIRLPOOL
User questions about AMW848IXL WHIRLPOOL
0 question about this device. Answer the ones you know or ask your own.
Ask a new question about this device
Download the instructions for your Microwave in PDF format for free! Find your manual AMW848IXL - WHIRLPOOL and take your electronic device back in hand. On this page are published all the documents necessary for the use of your device. AMW848IXL by WHIRLPOOL.
USER MANUAL AMW848IXL WHIRLPOOL
SENSING THE DIFFERENCE
2
| Schweiz | Wichtig! Der anschluss für diesen gerät muss mit 230v, 16 a erfolgen. falls das gerät nicht über einen trennbaren anschluss verfügbar (z.b. stecker), muss sichergestellt werden, dass eine trennvorrichtung (z.b. steckdose, sicherung) mit mindestens 3mm kontakta-bstand vorgeschelt wird. Der anschluss muss durch einen quali-zierten elektrinstalleur durchgeführt werden. |
| Suisse | Importante! Questo appearecchio deve essere allaccia-to a 230 v, 16 a. se l'allacciamento non è staccabile (p.es. una spina) deve esseri un dispositivo di separazione (p.es. un inter-ruttore automatico) con una distanza di al-meno 3 mm fra i contatti. L'allacciamento deve essere realizazo da un installmenter elettricista qualificato. |
| Swizzera | Important! Cet appeareil doit être branché sur 230 v, 16 a. s'il ne dispose pas d'un raccordement dissociable (prise, par ex.), un dispositif de disjonction (prise, fusible, par ex.), à au moins 3 mm d'écart, doit être prévu. Le raccordement doit être effectué par un installmenter électricien qualifié. |

A
B
C
C

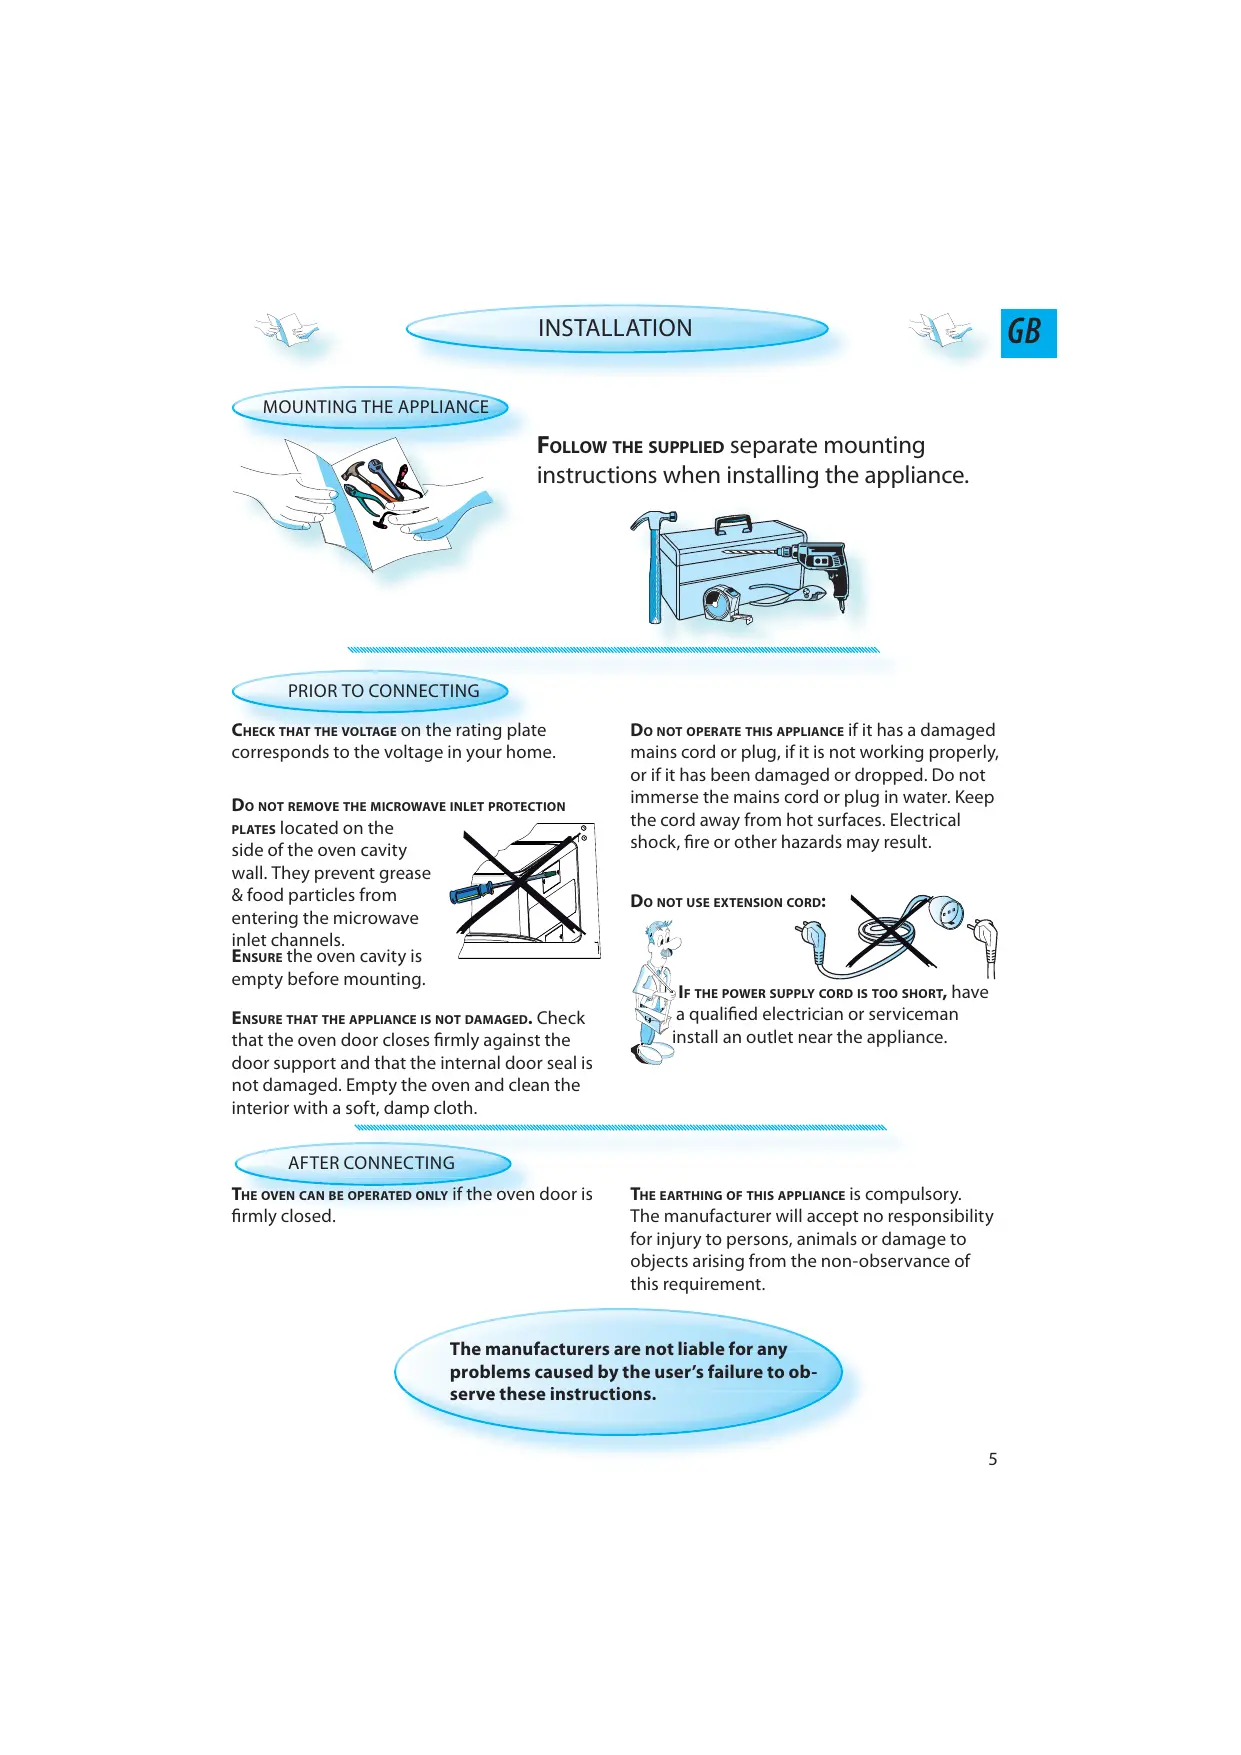
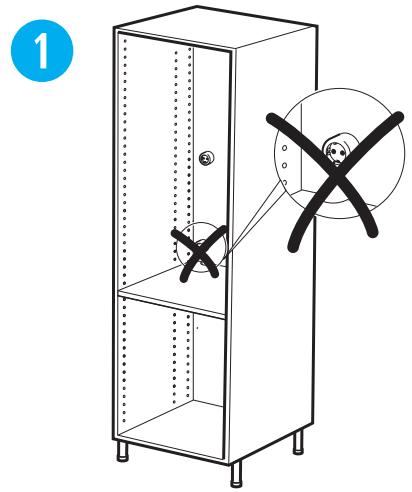
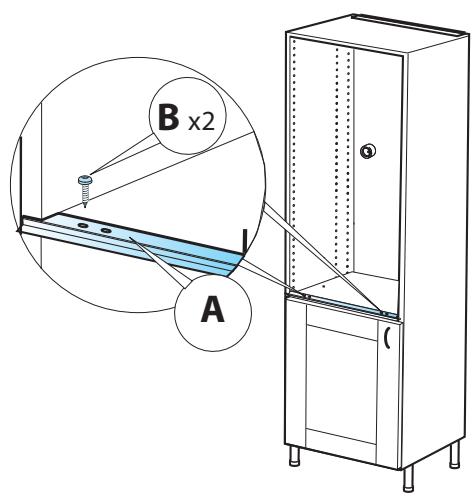
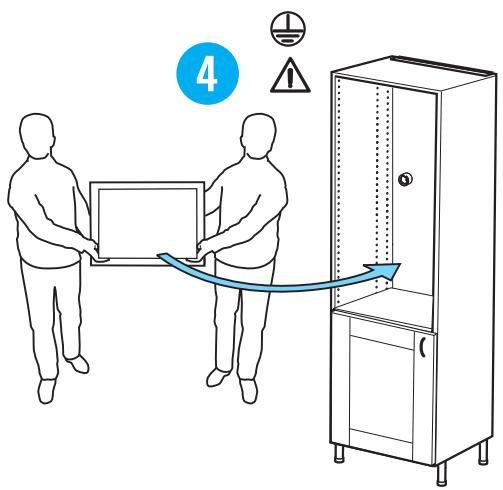
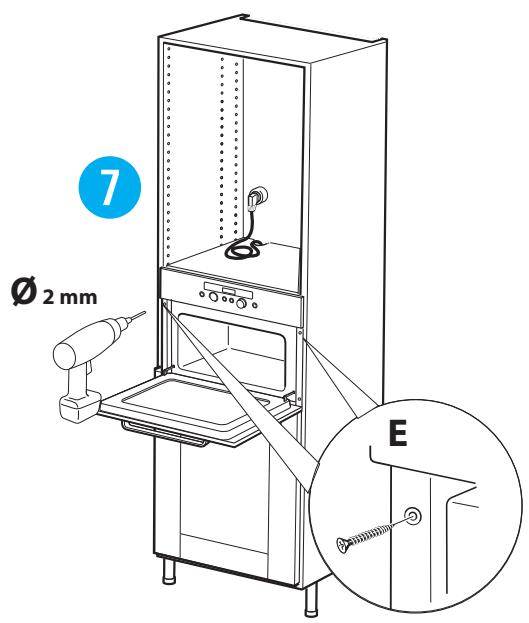
MOUNTING THE APPLIANCE
FOLLOW THE SUPPLIED separate mounting instructions when installing the appliance.
PRIOR TO CONNECTING
CHECK THAT THE VOLTAGE on the rating plate corresponds to the voltage in your home.
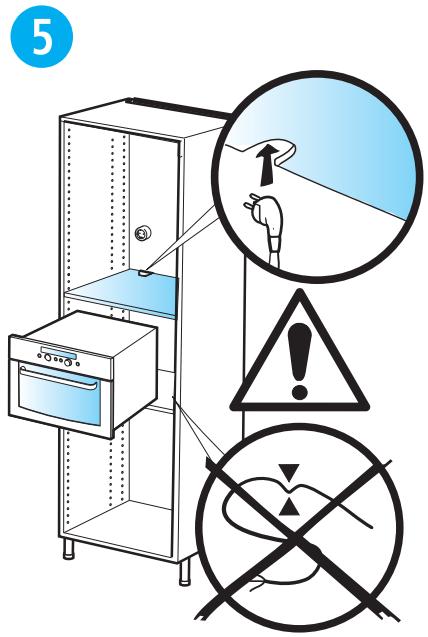
DO NOT REMOVE THE MICROWAVE INLET PROTECTION
PLATES located on the side of the oven cavity wall. They prevent grease & food particles from entering the microwave inlet channels.
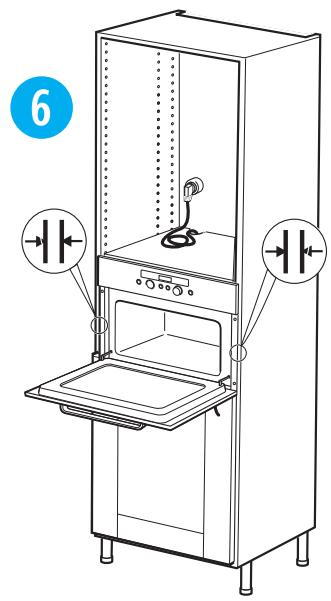
ENSURE the oven cavity is empty before mounting.
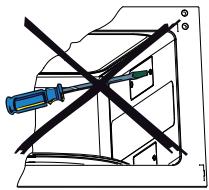
ENSURE THAT THE APPLIANCE IS NOT DAMAGED. Check that the oven door closes firmly against the door support and that the internal door seal is not damaged. Empty the oven and clean the interior with a soft, damp cloth.
DO NOT OPERATE THIS APPLIANCE if it has a damaged mains cord or plug, if it is not working properly, or if it has been damaged or dropped. Do not immerse the mains cord or plug in water. Keep the cord away from hot surfaces. Electrical shock, fire or other hazards may result.
DO NOT USE EXTENSION CORD:

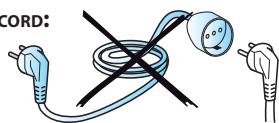
IF THE POWER SUPPLY CORD IS TOO SHORT, have a qualified electrician or serviceman install an outlet near the appliance.
AFTER CONNECTING
THE OVEN CAN BE OPERATED ONLY if the oven door is firmly closed.
THE EARTHING OF THIS APPLIANCE is compulsory.
The manufacturer will accept no responsibility for injury to persons, animals or damage to objects arising from the non-observation of this requirement.
The manufacturers are not liable for any problems caused by the user's failure to observe these instructions.
GB

IMPORTANT SAFETY INSTRUCTIONS

READ CAREFULLY AND KEEP FOR FUTURE REFERENCE
DO NOT HEAT, OR USE FLAMMABLE MATERIALS in or near the oven. Fumes can create a fire hazard or explosion.
DO NOT USE YOUR MICROWAVE oven for drying textiles, paper, spices, herbs, wood, flowers, fruit or other combustible materials. Fire could result.
IF MATERIAL INSIDE / OUTSIDE THE OVEN SHOULD IGNITE OR SMOKE IS OBSERVED, keep oven door closed and turn the oven off. Disconnect the power cord or shut off power at the fuse or circuit breaker panel.
DO NOT OVER-COOK FOOD. Fire could result.
DO NOT LEAVE THE OVEN UNATTENDED, especially when using paper, plastic or other combustible materials in the cooking process. Paper can char or burn and some plastics can melt if used when heating foods.
Do NOT use corrosive chemicals or vapors in this appliance. This type of oven is specifically designed to heat or cook food. It is not designed for industrial or laboratory use.
EGGS
DO NOT USE YOUR MICROWAVE oven for cooking or reheating whole eggs with or without shell since they may explode even after microwave heating has ended.
THIS APPLIANCE CAN BE USED by children aged from 8 years and above and persons with reduced physical, sensory or mental capabilities or lack of experience and knowledge if they have been given supervision or instruction concerning use of the appliance in a safe way and understand the hazards involved.
CHILDREN SHALL NOT PLAY WITH the appliance.
USE, CLEANING AND USER MAINTENANCE shall not be made by children unless they are aged from 8 years and above and supervised.
WARNING!
THE APPLIANCE AND ITS ACCESSIBLE PARTS MAY BECOME HOT during use.
CARE SHOULD BE TAKEN to avoid touching heating elements.
CHILDREN LESS THAN 8 YEARS OF AGE shall be kept away unless continuously supervised.
DO NOT USE YOUR MICROWAVE OVEN for heating anything in airtight sealed containers. The pressure increases and may cause damage when opening o
IF THE MAINS CORD NEEDS REPLACING it should be replaced by the original mains cord, which is available via our service organization. The mains cord may only be replaced by a trained service technician.
SERVICE ONLY TO BE CARRIED OUT BY A TRAINED SERVICE TECHNICIAN. It is hazardous for anyone other than a trained person to carry out any service or repair operation which involves the removal of any cove which gives protection against exposure microwave energy.
DO NOT REMOVE ANY COVER.
THE DOOR SEALS AND THE DOOR SEAL AREAS must be regularly inspected for damage. If these areas are damaged the appliance should not be operated until it has been repaired by a trained service technician.

GENERAL
THIS APPLIANCE IS DESIGNED FOR DOMESTIC USE ONLY!
THIS APPLIANCE IS INTENDED to be used built-in. Do not use it freestanding.
THIS APPLIANCE IS INTENDED for heating food and beverages. Drying of food or clothing and heating of warming pads, slippers, sponges, damp cloth and similar may lead to risk of injury, ignition or fire.
THE APPLIANCE SHOULD NOT BE OPERATED without food in the oven when using microwaves. Operation in this manner is likely to damage the appliance.
IF YOU PRACTICE OPERATING the oven, put a glass of water inside. The water will absorb the microwave energy and the oven will not be damaged.
DO NOT USE THE CAVITY for any storage purposes.
REMOVE WIRE TWIST-TIES from paper or plastic bags before placing bag in the oven.

DEEP-FRYING
DO NOT USE YOUR MICROWAVE oven for deep-frying, because the oil temperature cannot be controlled.

USE HOT PADS OR OVEN MITTS to prevent burns, when touching containers, oven parts, and pan after cooking.
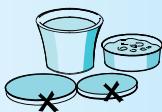
LIQUIDS
E.G. BEVERAGES OR WATER. Overheating the liquid beyond boiling point can occur
without evidence of bubbling. This could result in a sudden boil over of the hot liquid.

To prevent this possibility the following steps should be taken:
- Avoid using straight-sided containers with narrow necks.
- Stir the liquid before placing the container in the oven and let the teaspoon remain in the container.
- After heating, allow standing for a short time, stirring again before carefully removing the container from the oven.
CAREFUL
ALWAYS REFER to a microwave cookbook for details. Especially, if cooking or reheating food that contains alcohol.
AFTER HEATING BABY FOOD or liquids in a baby bottle or in a baby food jar, always stir and check the temperature before serving.

This will ensure that the heat is evenly distributed and the risk of scalding or burns can be avoided.
Ensure the Lid and the Teat is removed before heating!
THERE ARE a number of accessories available on the market. Before you buy, ensure they are suitable for microwave use.
GB

QUICK START GUIDE

A MORE DETAILED AND EXTENSIVE INSTRUCTIONS FOR USE can be downloaded from
www.whirlpool.eu
THIS QUICK START GUIDE is designed to cover a range of different models.
The number of buttons and functions may therefore differ from the specific model you have purchased.
THE PRINCIPLE OF OPERATION IS:
Choose function
Adjust setting
Press the start button
MENU OR NON MENU DISPLAY.
Menu: The operating system in these models will help and guide you thru the process.
NON MENU: The display shows only 4-5 letter words, digits and indicator lights.
PLEASE NOTE!
SOME MODELS HAVE PUSH - PUSH KNOBS
THE KNOBS OF THESE OVENS are aligned
with the buttons on the panel, at delivery. The knobs will slide out if pushed and their
various functions can be accessed.
It is not necessary to have them protruding from the panel during operation. Simply push them back
into the panel when you are
done with the setting and continue to operate the oven.
APPEARANCE
THE ACTUAL APPEARANCE of the control panel may look different than the panels shown in this guide depending on the model you have purchased.
Example panels


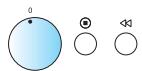
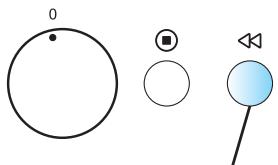
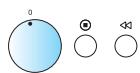
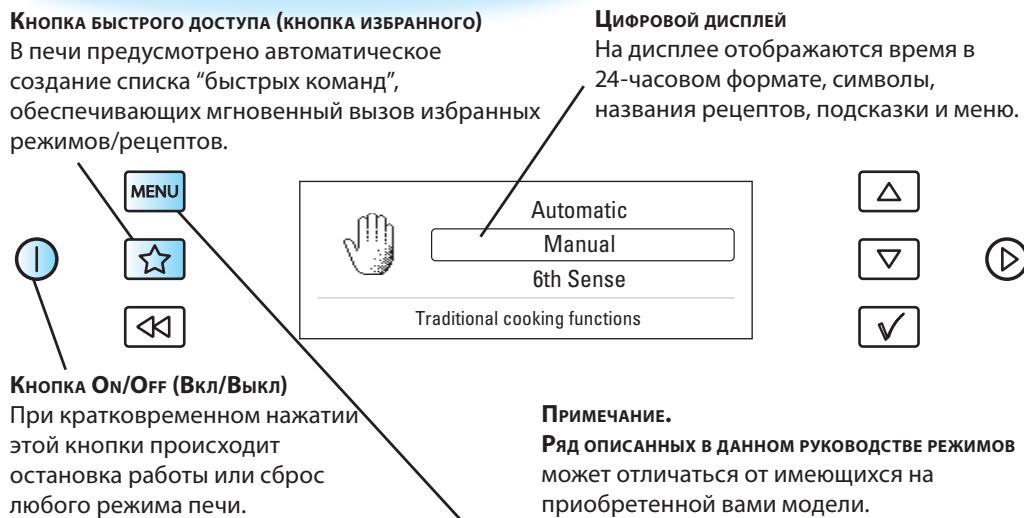
ON/OFF
THE APPLIANCE IS TURNED ON OR OFF using the
On/Off button or simply by turning the Multifunction Knob.
(1)
MENU


MENUE


MENU
INITIAL SETTINGS
WHEN THE APPLIANCE IS FIRST PLUGGED IN it will ask you to set the Language and 24 hour Clock.
LANGUAGE
1 USE THE UP / DOWN BUTTONS OR +/- KNOB to choose one of the available languages.
2 PRESS THE OK BUTTON again to confirm the change.
CLOCK
1 USE THE UP / DOWN BUTTONS OR +/- KNOB to set the 24 hour clock.
2 PRESS THE OK BUTTON again to confirm the change.
AFTER A POWER FAILURE the Clock will flash and needs to be reset.
CLOCK
1 USE THE UP / DOWN BUTTONS OR +/- KNOB to set the 24 hour clock.
2 PRESS THE OK BUTTON again to confirm the change.
NON MENU
INITIAL SETTINGS
WHEN THE APPLIANCE IS FIRST PLUGGED IN it will ask you to set the Clock.
AFTER A POWER FAILURE the Clock will flash and needs to be reset.
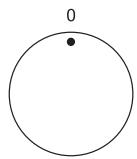
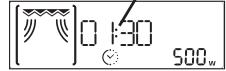
CLOCK
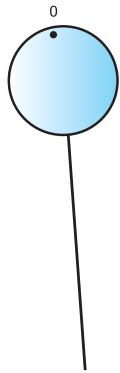
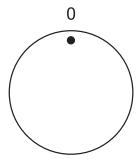
1 TURN THE ADJUST KNOB to set the hours.
2 PRESS THE OK BUTTON. (The two right hand digits (minutes) flicker).
3 TURN THE ADJUST KNOB to set the minutes.
4 PRESS THE OK BUTTON again to confirm the change.
The Clock is set and in operation.
IF YOU WISH TO REMOVE THE CLOCK from the display once it has been set, simply enter the clock setting mode again and press the On / Off button while the digits flicker.
GB

QUICK START GUIDE (MENU)

1. CHOOSE FUNCTION (BUTTON VERSIONS)
SHORTCUT BUTTON
The oven automatically compiles a list of your favorite shortcuts for you to use.
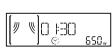
DIGITAL DISPLAY
The display includes a 24-hour Clock, Symbols, Receptions, Hints & Menus.
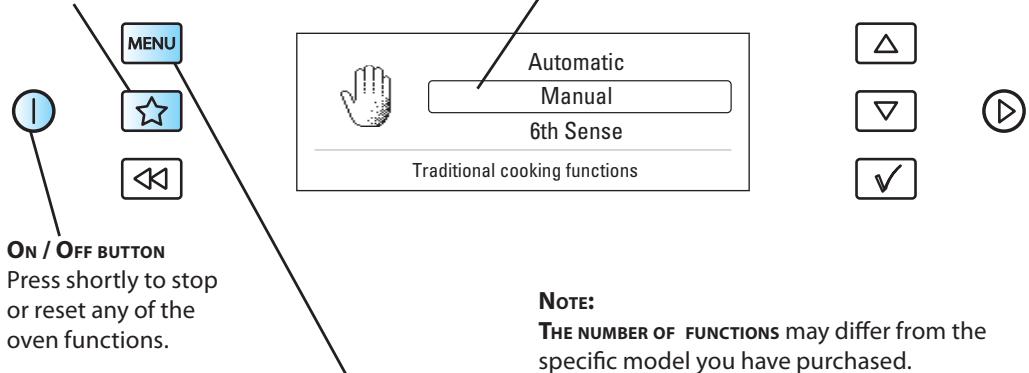
| THE MULTIFUNCTION KNOB lets you choose between various functions. | |
| FUNCTION | DESCRIPTION |
| Standby | 24 hour clock, blank display & Kitchen timer |
| Microwave | Cooking & Reheating with microwaves only |
| Crisp | Crisping dough based foods such as Pizza & Pie |
| Grill | Browning with Grill only |
| Grill + MW | Combi cooking |
| Turbogrill | Grilling |
| Turbogrill + MW | Cooking with Grill and microwaves |
| Forced Air | Baking with hot air |
| Forced Air + MW | Roasting with hot air + microwaves |
| Quick Heat | Preheating the empty oven before using Forced Air |
| 6th Sense Steam | Steam cooking |
| Jet Defrost | Defrosting quickly |
| 6th Sense Reheat | Automatic reheating |
| 6th Sense Crisp | Automatic crisping |
| Setting | Change various settings |
1. CHOOSE FUNCTION (KNOB VERSIONS)
DIGITAL DISPLAY
The display includes a 24-hour Clock, Symbols, Receptions, Hints & Menus.
| THE MULTIFUNCTION KNOB lets you choose between various functions. | |
| FUNCTION | DESCRIPTION |
| Standby | 24 hour clock, blank display & Kitchen timer |
| Microwave | Cooking & Reheating with microwaves only |
| Crisp | Crisping dough based foods such as Pizza & Pie |
| Grill | Browning with Grill only |
| Grill + MW | Combi cooking |
| Turbogrill | Grilling |
| Turbogrill + MW | Cooking with Grill and microwaves |
| Forced Air | Baking with hot air |
| Forced Air + MW | Roasting with hot air + microwaves |
| Quick Heat | Preheating the empty oven before using Forced Air |
| 6th Sense Steam | Steam cooking |
| Jet Defrost | Defrosting quickly |
| 6th Sense Reheat | Automatic reheating |
| 6th Sense Crisp | Automatic crisping |
| Setting | Change various settings |
GB

QUICK START GUIDE (NON MENU)


1. CHOOSE FUNCTION

ON/OFF BUTTON
Press shortly to stop or reset any of the oven functions.
DIGITAL DISPLAY
The display includes a 24-hour clock and indicator symbols.


NOTE:
THE NUMBER OF FUNCTIONS may differ from the specific model you have purchased.
| THE MULTIFUNCTION KNOB lets you choose between various functions. | |
| FUNCTION | DESCRIPTION |
| Standby | 24 hour clock, blank display & Kitchen timer |
| Microwave | Cooking & Reheating with microwaves only |
| Crisp | Crisping dough based foods such as Pizza & Pie |
| Grill | Browning with Grill only |
| Grill + MW | Combi cooking |
| Turbogrill | Grilling |
| Turbogrill + MW | Cooking with Grill and microwaves |
| Forced Air | Baking with hot air |
| Forced Air + MW | Roasting with hot air + microwaves |
| Quick Heat | Preheating the empty oven before using Forced Air |
| 6th Sense Steam | Steam cooking |
| Jet Defrost | Defrosting quickly |
| 6th Sense Reheat | Automatic reheating |
| 6th Sense Crisp | Automatic crisping |
| Auto Reheat | Automatic reheating |
| Auto Crisp | Automatic crisping |
| Setting | Change various settings |
GB

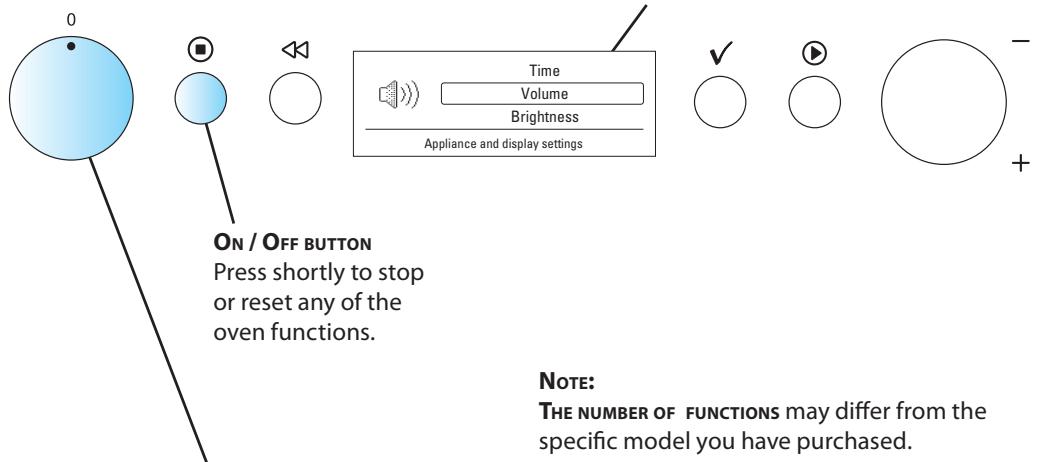
QUICK START GUIDE (MENU)

- ADJUST SETTING (KNOB VERSIONS)
3. START
JET START BUTTON
Use to start the cooking process or invoke the Jet Start function.
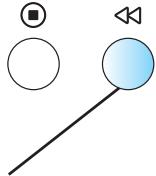
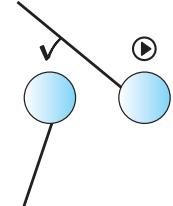
THE << BUTTON lets you return to a previous part of the setting sequence in order to alter that setting before starting the cooking procedure.
The OK button lets you confirm your selection and automatically forwards you to the next setting that needs to be accomplished before starting the cooking procedure.
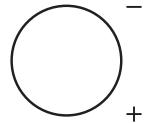
| THE ADJUST KNOB lets you adjust various settings. | |
| FUNCTION | TURN TO SET |
| Standby (zero position) | Kitchen timer |
| Microwave | Microwave power & Cooking time |
| Crisp | Cooking time |
| Grill | Cooking time & Grill power level |
| Grill + MW | Cooking time, Microwave Power & Grill power level |
| Turbogrill | Cooking time |
| Turbogrill + MW | Microwave power & Cooking time |
| Forced Air | Temperature & Cooking time |
| Forced Air + MW | Temperature, Microwave power & Cooking time |
| Quick Heat | Temperature |
| 6th Sense Steam | Steaming time |
| Jet Defrost | Food class & Weight |
| 6th Sense Reheat | Doneness |
| 6th Sense Crisp | Doneness, Food class |
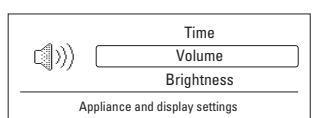
| Setting | Clock, Buzzer, ECO & Brightness |
-
ADJUST SETTING
-
START
JET START BUTTON
Use to start the cooking process or invoke the Jet Start function.
THE << BUTTON lets you return to a previous part of the setting sequence in order to alter that setting before starting the cooking procedure.
The OK button lets you confirm your selection and automatically forwards you to the next setting that needs to be accomplished before starting the cooking procedure.
| THE ADJUST KNOB lets you adjust various settings. | |
| FUNCTION | TURN TO SET |
| Standby (zero position) | Kitchen timer |
| Microwave | Microwave power & Cooking time |
| Crisp | Cooking time |
| Grill | Cooking time & Grill power level |
| Grill + MW | Cooking time, Microwave Power & Grill power level |
| Turbogrill | Cooking time |
| Turbogrill + MW | Microwave power & Cooking time |
| Forced Air | Temperature & Cooking time |
| Forced Air + MW | Temperature, Microwave power & Cooking time |
| Quick Heat | Temperature |
| 6th Sense Steam | Steaming time |
| Jet Defrost | Food class & Weight |
| 6th Sense Reheat | Doneness |
| 6th Sense Crisp | Doneness, Food class |
| Auto Reheat | Doneness, Food class & Weight |
| Auto Crisp | Food class & Weight |
| Setting | Clock, Buzzer, ECO & Brightness |
GB
ENVIRONMENTAL HINTS
THE PACKING BOX may be fully recycled as confirmed by the recycling symbol. Follow local disposal regulations. Keep potentially hazardous packaging (plastic bags, polystyrene etc.) out of the re children.

THIS APPLIANCE is marked according to the European directive 2002/96/EC on Waste Electrical and Electronic Equipment (WEEE). By ensuring this product is disposed of correctly, you will help prevent potential negative consequences for the environment and human health, which could otherwise be caused by inappropriate waste handling of this product.
THE SYMBOL on the product, or on the
documents accompanying the product, indicates that this appliance may not be treated as household waste. Instead it shall be handed over to the applicable collection point for the recycling of electrical and electronic equipment.
DISPOSAL must be carried out in accordance with local environmental regulations for waste dis

FOR MORE DETAILED INFORMATION about treatment, recovery and recycling of this product, please contact your local city office, your household waste disposal service or the shop where you purchased the product.
BEFORE SCRAPPING, cut off the mains cord so that the appliance cannot be connected to the mains.

INSTALLATION DE L'APPAREL

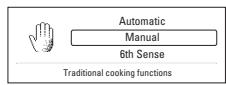
Automatic
Manual
6th Sense
Traditional cooking functions


NOTA:
HET APPARAAT MONTEREN

WANNEER HET APPARAAT VOOR HET EERST WORDT
WANNEER HET APPARAAT VOOR HET EERST WORDT
Traditional cooking functions


OPMERKING:
Traditional cooking functions


NOTA:
A QUANTIDADE DE FUNÇOs pode diferir da existente no Modelo específico que acabou de adquirir.
INNAN MIKROVAGSGUNEN ANSLUTS
INSTALLATION AF APPARATET

Traditional cooking functions


MERK:
ANTALLETFUNKSJONERkanvariereiforholdtilden modellenduharanskaffet.
NO
Traditional cooking functions


PRZYCISK ZAL./WYL.
Traditional cooking functions


Przycisk, OK" umozliwia
Przycisk, OK" umozliwia
He PEPEDPJKBAIte IPOJyKtBI B NcH.3TO MOKeT PnIBeCTN K BO3rOpaHnIO.
HE OCTABJIIE TNEyB3 PIPNCMTPA,OCO6eHHO, ecnB IPOUCECE PnIROTOBHeHnI NIIu INCNoJIb3yOTc8 ByMaRa,IIaCTMaCCa INIPOUHe rOpUChne MaTePnaJIb. ByMaRa MoKet OByrInTbcNIN 3aRopeTcB,a HeKOTOpbie BIVdbI IIaCTMaCC PnIH HArpeBaHn IINuMOryt paCnlaBuNTbcra.
He NOMEUATE B neyb XIMMueckne BeuiceTba n napbl, Bbl3bIbAIOUne Koppo3nIO. DaHHbI np6Op npedHa3NaueH dny PoDorpeBaHnI npriroTOBLeHnPiu. Pnp6Op He npedHa3NaueH dny IpomblNeHHoro IJI na6opatOPHO npimHeHnI.
RAUCA
He nCIOJIb3yIe MNUKPOBOJHOBYU neYb IJIa PnIroTOBJIeHnI NLI NOIOrpeBa cIeJIbIX aNc, OUYIeHHbIX NII B CCKPJIyNe, TaK KaK OHN MOrYT JONHyTb, B TOM YIcIe, yXke IocIe NpeKpAL MNUKPOBOJHOBOr HoIgPeBa.

NcnoIb3OBAHNE daHHOro npn6Opa DeTbMn B Bo3paCTe 8 let n CTapWe n NiusaMn CO CHNXeHHbIMn fN3NueCKMn, CeHCOPHbIMn NIn yMCTBeHHbIMn CnOCo6HOCTaMn NIn He O6JaDaIOUmm Heo6XoDmMbIMn ONbITOM n HaBbIKaMn, DOnyCKaETc TOnbKO pRn O6ecneueHmnpNCMOptpa 3a HmMn NIn NOcNe TOrO, KaK Im 6bln pa3bYcHehbl PpaBnla ero 6e3oNaCHOJ KcPiyaTaun n CyuEcTBvIoUune ONaCHOCTn.
HeIb3a PA3PEWATb TEETM IIRPATb C pnp6Opom.
BbIOpJIHeHne DpyrMNIuCaAMn texHnueCKOrO o6cnyKINBaHmN nn peMOHTbIX pa60t CO CHaTnEM 3aUHTbIX orpaxJeHn, npdeoxpaHIOxN OT BO3eCTBnMnKpOBONHOBOrN3JyueHn, npedCTaBJIeT ONaCHOCTb.
3ANPEUAECTCHIMATbKAKNE-JINBO KpbIUKN.
HEo6XoJIMPO PEGYJIARPHO IPOBEPATb YIINOTHEHIN
DBEPRbI yUACTKN BOKPYR HNX Ha HAIyue
NOBpeKdEnH. EcNt uYactKn
IOBpeKdEnb, He CNeDyET NOpb3OBA TbC8
neybu, POKA OHa He 6yDet OTpeMOHTnPOBaHa
KBaHnΦuNpOBaHHbIM CNEuaNlCTOM
cepBnCHOH cnyk6bl.

BAXHbIE MEPblI PPEIOCTOPOXHOCTN

OBUJAR INHΦOPMAUJIY
AANHbI IINBOP INPEHa3HAueH TOJIbKO JJIa BbITOBOIO PNIMEHEHnI!
DAHHBII INPUBOP INPEHHA3HAUYEN JIJI NCIOJIb3OBAHINBO BCTPOeHNOM BnDE.He IcNOJIb3yIteeroB KaueCTBe OTdJIbHO cTOnJIeO np6Opa.
DAHbI IINBOP INPENHA3HauEH IaHaRpeBa npOyKTOB nITaNnI HaNTKOB.CuSKa NIIeBbIX npOyKTOB nIi HaRpeB rpeNOK, TaOnueK, r60K, BIAJhbIX TpIPOK nT.I.MoYr CO3daTb ONaCHOCTb TpaBMbl. BO3rOpAHnI INI NOxapa.
He BKJIIOUaIte MUKPOBOJHOBOE MJIyueHne, ECLN B neu hem npodykmoB. B npomueHOM clyuae neyb MOKem bImu u3 cmpoJ.
B NEPNOO OBOYENI POJIb3OBAHIO NeybIO CTaBBTe BNYTpN Hee CTAkAH BOJbl.Boa nOrIIOuaet MKNPOBOJHOBy IOHEpRIOu,TeM CaMbIM, IpeoXpaHReT NeybOT NOBpeKDeHn.
HeNoJIb3yIteCb KAMEPOI Neu IJIA XpaHEnHa KaKINX 6blTO HN 6blIO npEaMeTOB.
NEPEDTEM KAK NOMEUATB INeYbBMAXHBIE UINI NACTUKOBIE NAKETbl,CHUMUme C HUX 3aXumbl dna ux3aKpbiaHua.

JAKEPHe BOΦPHTIOPE
HE NOLb3yUTEcB
MKNPOBOJHOBOI NebyIOДЯ XapeHbBy BOфpNTIOpe, TAK Kak ПпгИЗТOM HeBO3MOxH0 KOHTPOJIINPOBaTb TemNepaT

Ib3yTECb CNEUHbHbIMN PNXBATKAMN HADBAITE PYKABNUbl, YTObI He O6KeYbcra O Nocdy INI yacTNI neu NO OKOHaHIN PNIOROTOBHeHNAI.
JNIOKOCTN
BO BPEM IIOIOPREBA JNIOKCTEHNAPIMEP, HANITKOB NIN BObl, B
MnKpOBoJHOBoN Neu MoKeT npOn3OHTn Nx NpePerB BbIe TOUKN KInPeHn863 YBHO

O6pa3OBaHnI py3bIpKOB. 3TO MoKcET Bbl3BaTbHeoXuDaHHbI NpePENB TOpAyeJxNdkOCTn.
YTO6bI NCKJIQUHTB BepoTHOCTb TaKOrO co6bTIa,co6JIIOaJIte CneJyUOuNe npaBuNa:
- He nolb3yntecb emKoCTaMn c npraMbIMn CTeHKaMn y3kMm rOpbliWKOM.
- Pa3meuBaIte JxNkoCTb nepeTEm, KaC CTaBnTb EMKoCTb B NeCb, N OCTaBJIaTe B Hei qaiHyIOJIoKky.
- Посце награва OCTавлай Te КИДКОCTb HeHaДОЛг罗Впeчи,еши раз ВыПОЛнЯТe ee pa3MeшиBaHne,посце чero OCTOPOKHO BbIHIMaHTe EMKOCTb.
bYbTE OTOPOXHbl
3A BOJIEE IOIOPOBHBIMC CBEDEHINMBCERDAOBPAUAITECB K C6OpHNKy peCEENTOBДЯMNKPOBOJHOBOI neu. BybTe OC6eHNOBHIMaTeIbHbI pRi PnIRTOBLeHIN NIIpa3OrpeBe CnIPrTOCoDEpKaUxN NIISeBbIXnpOdyKTOB.
IocJI IOODORPEBA DETCKOIO IITAHIN UUN numb8 6ymblouque Chauana oB3ameIbHo pa3Meuawme codejxumoe u npoepebme

e2o memnepampy. 3ma mepa o6ecneuabaem paBHomepHoe pacnpedeHue menla u npedombaaem onacnoemb ownapubua Hua OXO208.
Y6eumecb B mom, ymo nepeh Haapebom C 6ymblouku cHmblk Pkbiuka u cocka!
B PPODAJXE IMeETc8 60JIbWoB BbI6Op KUINHApHBIX pINHaIeXHoCTe.IpN NOKyPKe IPOBepRte INx pInrOJDHOCTb DnI NCNoIb3OBaHnB V MNIKPOBOJHOBOI neu.
RU
BOIEE IOIOBHeI INCHPTyKUIN IO KCNJYATAUN MOXHO 3aRpy3ntb CcaTa
www.whirlpool.eu
DAHHOE KPATKOE CIPABOCHOE PYKOBOCTBO OTHOCNTC Cp3y K HECKOJIbKIMMOJeIaM. POrTOMy prd ONcaHHbIX B HEM KHONOK IN pexIMOB MOKeTOTnUaTbcr OT IMeHOUsXcRa HpNIO6peTeHHoB BamMoJeIi.
NOCJIeIOBATEIbHOCTb PABOTb C IeYbIO:
BbI6epuTepexum
3aДайтЕнжныпамETрbl
HaxMnte KhoNky nyca (Start)
DUCJIEN C MEHIO NIN BE3 MEHIO
MeHIO:BCTpoEHHaB B3TN MoDEJI CNCTema NOIePJKN O6JIeRyaeT BbIOnHeHne BCex Oepaui.
B3 MEHIO:Ha INcPiEe OTo6paXaIOTc TOnbKO CNoBa n3 4-5 6yKb, YnCnA n CBETOBbl HNdkaTopbl.
BHIMAHINE!
B HEKOTOPbIX MOdEJIaX PNEyCMOTPEHbl
YTAPINIBAEMbIE PUYKIN
PNUIOCTABKE PUYKIN DAHHOI MUKPOBOJHOBOI NEU
HaXoJrTcHaOJHOM
ypoBHe C KHONkAmn Ha NaHeN ynpaBLeHn.ДЯ TOrO yTo6bl BOCNoIb3OBaTbCryKaMn, IOCTaTOUHOHaDaBNTb Ha HnX, yTO6bI OHN BbIDBuHynCb n3 nepeDHe NAnHeN; nocne
3TOGO MOKHO NOLb3OBAtBcRA 3TUMn pykamn dIpekeKnUoyehnA yHKcu/ pexmOB. B npocce CeNoJb3OBAHnA neybIO HET Heo6xoNIMOCTN B TOM, UTo6blpykn HaxoDInncB BTKaTOM COCToRHN. Pocne 3aJaHnH NjXhblx NapaMeTpOB DoCTaTOuHO yToPiNb tyKn B nHeJI, n MoKHO npoDoJIkAtb NOLb3OBAtBc PAeBu.

BKJIIOUeyHNE/BbIKJIIOUeyHNE
BkJIOUHHe N BbIKJIOUHHe IINBOPA BblONJIHReTc HAXATHE M KHONKn ON/OFF (BkJI/BbIKJ) nJIn
IPOCTbIM IOBOPOTOM MHOrOfoHKUHOHaJIbHOI pyuKn MHOrOfoYHKUHOHaJIbHOI pyuKn.
BHEHNI BND
BHeuHn BnI NaHeN ynpaBHeHnHa npNo6peTeHHo Bam MoJeN MoKeT OTnUaTbC8 OT BnDa nHaHeJ, pPbBeDeHHbIX B HactOJIeM pyKOBoDCTBe.
PpimepbnaheenuynpaBneHua


BKJIIOUeyHNE/BbIKJIIOUeyHNE
BkIIOUHHE N BbIKIOUHHE INPUBOPA BblIOJIHRETCAHXATHEM KHOITK ON/OFF (BkJI/BbIK) IJIN
npoCTbIM NOBOPOTOM MHOrOfoyHKUHOHaJIbHOI pyuKn MHOrOfoyHKUHOHaJIbHOI pyuKn.
MEHIO
IIEPBOHAUJIbHbIE HACTPOIKI
PNI INEPBOM BKJIIOUeHIN NENHa DNcNJIeE
PONBNTcYyKa3aHHe O Heo6xOIMOCtN BbI6pa 3bIka N 3aDaHnTeKyuIeRO BpeMeHn.
R3blK
1 NcnoJIb3yIe KHOJIKo CO CTPEJKAMN BBEPX/ BHIN3 INI PyKU +/- Bbl6epnTe OINH n3 DOCTYINHbIX Ra3bIKOB.
EUE PA3 HAXMITE KHONKY OK, YTO6bl NOITBEPDNTb BbIIOJIHeHHbIe N3MeHeHnA.
YACbl
1 NcnoJIb3yIe KHOJIKo CO CTPEJKAMN BBEPX/ BHN3 INI PyKu +/- 3aJaTe TeKyuuee BpemB 24-ycaOBOM fOpMaTe.
EUE PA3 HAXMITE KHONKY OK, YTO6bl NOITBEPDNTb BbIIOJIHeHHbIe N3MeHeHnA.
B CNYAe OTKJIIOUHEnI 3JNEKTPO3HEPITN YaCbI HauHHaOT MIRaTb; INX NOTpe6yEtcY yCTAHOBNTb 3aHOBO.
yAcbl
1 IcnoIb3yIe KHOJIKNo CTOPEJIKAMN BEBPx/ BHIN3 INI IN PUYKU + / - 3aJaIte TeKyuIee BpemB 24-ycaOBOM fOpMaTe.
EUEPA3HAXMNTEKHONKUOK,HTO6bl IOITBepdntb BbIIOJIHeHHbIe N3MeHeHn.
6E3 MEHIO
IIEPBOHAUJIbHbIE HACTPOIKN
PINI PEPBOM IIOKJIIOUCHENI NCUH K 3JEKTPNUECKOIN
CETnHaIINCIJIeIIOBHTcOo6UeHHe O Heo6xOIMOCtN yCTaHOBt b Yacbl (Tekyuee Bpem).
B CNYA EOTKJIIOUHENI 3JNEKTPO3HEPITN YaCbI NaHHaIOT MnraTb; INX NOTpe6yETcY yCTAHOBNTb 3aHOBO.
YACbI
1 IOBOPAChIBa RpyKv HACTPOkN, 3aJaITe 3HaueHne YacOB.
HAXMITE KHONKY OK (HaCyHT MNaTaTb DBe CuΦpbI CπpaBa (MnHyTb)).
3 IOBOPAUBAR PUYKU HACTPOIKU,3aJaIte 3HaueHHe MInHT.
4 EUE PA3 HAXMITE KHONKY OK, YTO6bl NOITBepdntb BbIIOJIHeHHbIe N3MeHeHnA.
Tenepb yacbI hAcTpoEhbl HaxOjTcB pa6ooyem pexnme.
ECINI NOCNE YCTAHOBKN TEKUYEERO BPEMEHN Bbl XOTNTE YBPATb OTOBPAXHEHNE BPEMEHN Ha DCNJIeee, CHOBA BOJINTE B pexm UCTAHOBKN TEKUYeERO BPEMEHN, HAKMITE Ha KHOJky "CToN" IN DePKNTe ee HaxkatoJ Do Tex nop, POKa CnΦpbI He NaHYT MInaTb.
RU
1.BbIbEPNTPEXKIM (McnoJItheHHe C KHOITKAMM)
PAnONCAHbIX BDAHHOM PYKOBOCTBE PEXIMOB
MOKeT OTINuAusbcT O T MHeUOxxCHa npNo6peTeHHoBAMN MoDenI.
KPATKOE CNPABOCHOE PYKOBOCTBO (INCPIENI B3 MEHIO)

1.BbIbEPNTPEKIM

UHPOBOOINDCNJIeI
Ha nncnlee OTo6paKaIoTc qacbl B 24-ycobbIM fOpMaTOM ppeDCTaBHeHnBpeMeHN u CmBOJIb INHdNkATOPOB.


KHONKA ON/OFF (BkJI/BbIKJI)
PnKpaTkoBpeMeHHOM
Hakatm3ToK HONKN
npOncxOaNT OCTaHOVBKa
pa6OtbI NIN C6poc IIO6oRo
peXIma Neu.
ПОНМЕЧАНЕ.
PdФyHKmMOKeT OTNnUaTBcR OT NMeOuNXcHa npno6peTeHHo Bam MoJeH.
Traditional cooking functions


KhoNka < < ( ^ Ha_3a^ ) Да eT noIb3OBATeIIO BO3MOxHOCtB BepHyTbC K npeIbIyUzIM WaIaRm HAcTpOnk N n3MeHnTb COOTBeTCTByIOuI npaMeTp nepeD BKJIQUeHHeM pexiMa npuROTOBLeHn.
Khonka OK no3e0Jem IOdTBepDnTb Bb6Op npaMeTpA nObeCneuNbaeT aBTOMaTnueckn nepexoK CJeNyUoIeMy npaMeTpY hAcTroIKn, KOTopB Tpe6yETc yCTaHOBtB nepeB BKJIQUeHHeM pexIMa nprirotobHeHna.
IcnoIb3yeTcIyIaIyccaIpoUeIpybl npiroTOBJIeHnI IuIi NII INI BKIOUeHnpeXIMa Jet Start (bIcItpbI cIapT).
KhoIIKA < < "Ha3aJ" Jaet NOpb3OBAteJIIO BO3MOxHOCtB BepHyTbCRA K PpeIbIyUzIM MaRaAM HAcTPOkN IN3MeHnTB COOTBeTCTByUoI npaMeTp NepeD BKJIIOUeHnEM pexkMa npriROTOBLeHna.
KA HACTPOIKNIO3BOJIETN3MeHJrTb3HaueHnpa3JIuHbIXnapaMeTpOB.
TENTO SPOTREBIC JE URÇENY IBA NA POUZITIE V DOMACNOSTI!

Autor
Manual
6th Sense
Traditional cooking functions


© Whirlpool Sweden AB 2012. All rights reserved. Made in Sweden.

- PRIOR TO CONNECTING
- AFTER CONNECTING
- GB
- IMPORTANT SAFETY INSTRUCTIONS
- EGGS
- WARNING!
- GENERAL
- LIQUIDS
- CAREFUL
- QUICK START GUIDE
- PLEASE NOTE!
- MENU
- INITIAL SETTINGS
- LANGUAGE
- CLOCK
- NON MENU
- The Clock is set and in operation.
- QUICK START GUIDE (MENU)
- CHOOSE FUNCTION (BUTTON VERSIONS)
- SHORTCUT BUTTON
- DIGITAL DISPLAY
- CHOOSE FUNCTION (KNOB VERSIONS)
- QUICK START GUIDE (NON MENU)
- NOTE:
- START
- JET START BUTTON
- ENVIRONMENTAL HINTS
- NOTA:
- HET APPARAAT MONTEREN
- WANNEER HET APPARAAT VOOR HET EERST WORDT
- OPMERKING:
- INNAN MIKROVAGSGUNEN ANSLUTS
- INSTALLATION AF APPARATET
- MERK:
- NO
- PRZYCISK ZAL./WYL.
- Przycisk, OK" umozliwia
- RAUCA
- BAXHbIE MEPblI PPEIOCTOPOXHOCTN
- OBUJAR INHΦOPMAUJIY
- JAKEPHe BOΦPHTIOPE
- JNIOKOCTN
- bYbTE OTOPOXHbl
- BHIMAHINE!
- MEHIO
- IIEPBOHAUJIbHbIE HACTPOIKI
- R3blK
- YACbl
- 6E3 MEHIO
- IIEPBOHAUJIbHbIE HACTPOIKN
- YACbI
- Tenepb yacbI hAcTpoEhbl HaxOjTcB pa6ooyem pexnme.
- 1.BbIbEPNTPEXKIM (McnoJItheHHe C KHOITKAMM)
- KPATKOE CNPABOCHOE PYKOBOCTBO (INCPIENI B3 MEHIO)
- 1.BbIbEPNTPEKIM
- UHPOBOOINDCNJIeI
- KHONKA ON/OFF (BkJI/BbIKJI)
- ПОНМЕЧАНЕ.
Brand : WHIRLPOOL
Model : AMW848IXL
Category : Microwave