JMP800SI - Centrifuge KENWOOD - Free user manual and instructions
Find the device manual for free JMP800SI KENWOOD in PDF.
| Product type | Juice extractor |
| Model | JMP800SI |
| Brand | Kenwood |
| Power supply | 220-240 V, 50 Hz |
| Power | Not specified |
| Juice jug capacity | Approximately 1 liter |
| Pulp container capacity | Not specified |
| Materials | Plastic, stainless steel (filter) |
| Main functions | Juice extraction, sorbet accessory (depending on model) |
| Special features | Reverse function, anti-drip spout, sieve for frothy juice, reset button |
| Safety | Automatic stop in case of blockage, lockable lid, mandatory grounding |
| Maintenance and cleaning | Removable parts dishwasher safe (filter, spiral, jug, collector, sieve, sorbet accessory). Wipe motor unit with a damp cloth |
| Spare parts and repairability | Pusher, lid, spiral, filter basket, scraper holder, juice jug, pulp collector, jug, sieve, sorbet accessory |
| After-sales service | Authorized Kenwood centers, website kenwoodworld.com |
| Warranty | In accordance with legal provisions of the country of purchase |
Frequently Asked Questions - JMP800SI KENWOOD
User questions about JMP800SI KENWOOD
0 question about this device. Answer the ones you know or ask your own.
Ask a new question about this device
Download the instructions for your Centrifuge in PDF format for free! Find your manual JMP800SI - KENWOOD and take your electronic device back in hand. On this page are published all the documents necessary for the use of your device. JMP800SI by KENWOOD.
USER MANUAL JMP800SI KENWOOD
-
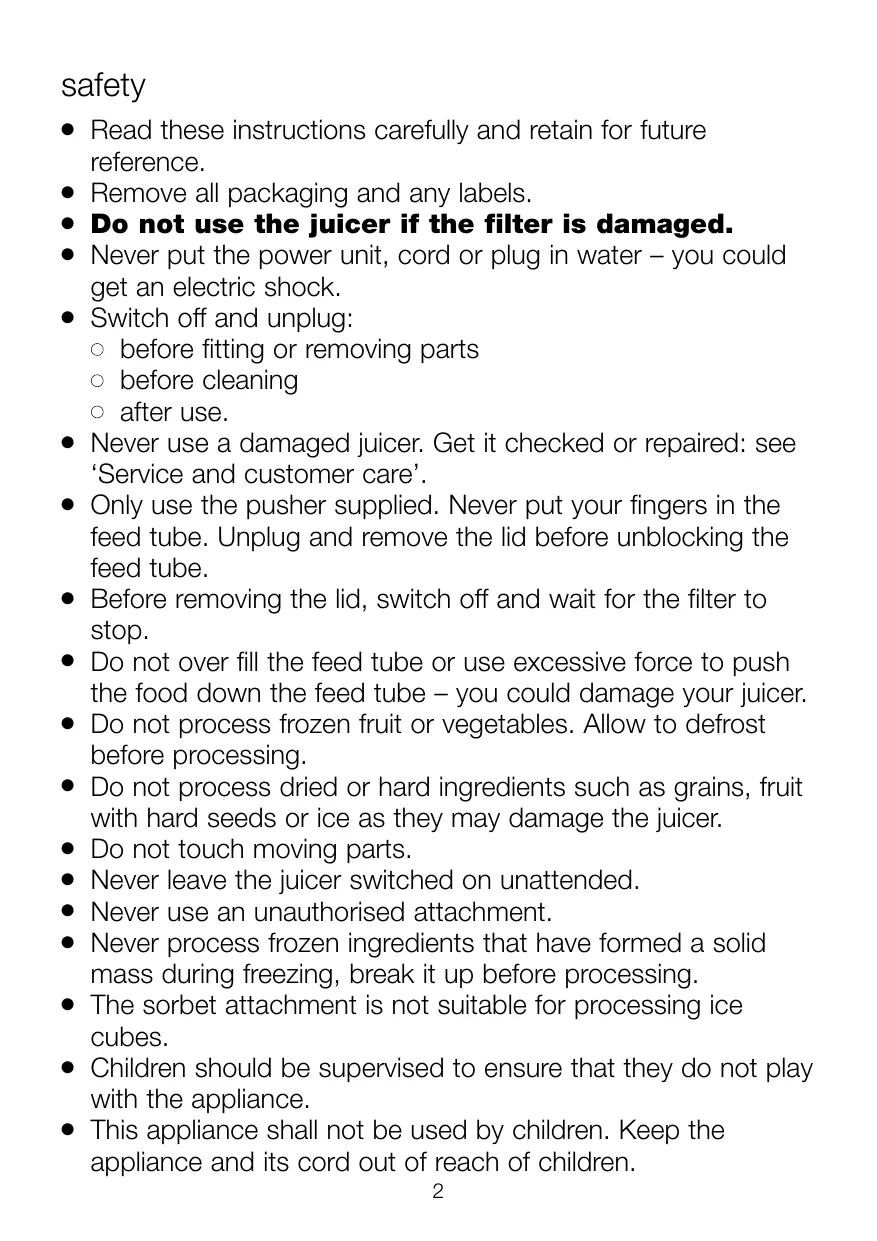
Read these instructions carefully and retain for future reference.
-
Remove all packaging and any labels.
-
Do not use the juicer if the filter is damaged.
-
Never put the power unit, cord or plug in water – you could get an electric shock.
-
Switch off and unplug:
-
before fitting or removing parts
○ before cleaning
after use. -
Never use a damaged juicer. Get it checked or repaired: see 'Service and customer care'.
- Only use the pusher supplied. Never put your fingers in the feed tube. Unplug and remove the lid before unblocking the feed tube.
- Before removing the lid, switch off and wait for the filter to stop.
- Do not over fill the feed tube or use excessive force to push the food down the feed tube – you could damage your juicer.
- Do not process frozen fruit or vegetables. Allow to defrost before processing.
- Do not process dried or hard ingredients such as grains, fruit with hard seeds or ice as they may damage the juicer.
- Do not touch moving parts.
- Never leave the juicer switched on unattended.
- Never use an unauthorised attachment.
- Never process frozen ingredients that have formed a solid mass during freezing, break it up before processing.
- The sorbet attachment is not suitable for processing ice cubes.
- Children should be supervised to ensure that they do not play with the appliance.
-
This appliance shall not be used by children. Keep the appliance and its cord out of reach of children.
-
Misuse of your appliance can result in injury.
- Do not let the cord touch hot surfaces or hang down where a child could grab it.
- Appliances can be used by persons with reduced physical, sensory or mental capabilities or lack of experience and knowledge if they have been given supervision or instruction concerning use of the appliance in a safe way and if they understand the hazards involved.
- Only use the appliance for its intended domestic use. Kenwood will not accept any liability if the appliance is subject to improper use, or failure to comply with these instructions.
before plugging in
- Make sure your electricity supply is the same as the one shown on the underside of the appliance.
- WARNING: THIS APPLIANCE MUST BE EARTHED.
- This appliance conforms to EC Regulation 1935/2004 on materials and articles intended to come into contact with food.
before using for the first time
Wash the parts: see 'care and cleaning'.
key
① pusher
② lid with hopper
③ scroll
④ filter basket
⑤ rotating wiper holder
⑥ juicing bowl
⑦ pulp spout
⑧ pulp container
⑨ power unit
10 juice spout
⑪ anti-drip stopper
⑫ reset button
13 On/Off/Reverse switch
14 juice jug
15 clip on sieve
⑥ cleaning brush
⑦ sorbet attachment (if supplied)
using your juicer
1 Fit the pulp stopper (A) into the opening on the underside of the juicing bowl ⑥ and push in until secure (B).
2 Fit the juicing bowl ⑥ to the power unit by aligning the on the side of the bowl with the on the power unit (C). To lock the bowl on turn it clockwise until the line up with the on the power unit (D).
3 Place the filter basket ④ into the wiper holder ⑤ (E).
4 Lower the wiper holder assembly into the juicing bowl and align the with the on the top of the power unit (F). Ensure that the filter basket is locked into place.
5 Place the scroll ③ into the filter basket and push down to secure (G). Note: the lid cannot be fitted if the scroll is not fully pushed down.
6 Fit the lid ② onto the unit ensuring the lines up with the on top of the power unit (H). Then turn the lid clockwise until it clicks into place and the lines up with the on top of the power unit (I). Place the food pusher ① into the feed tube.
7 Place the pulp container ⑧ under the pulp spout ⑦ and place the juice jug ④ under the juice spout ⑩ . Ensure the anti-drip stopper ⑪ is in the open position (J) before juicing.
- There is a clip on sieve provided, this can be used if a smooth juice is preferred and should be emptied when full or after every 1kg of juicing.
- Use the recommended usage chart as a guide for juicing different fruits and vegetables.
8 Switch on 13 and feed the food items down slowly using the pusher. Note: The wiper holder is designed to rotate during operation.
- To extract the maximum amount of juice, always push the food down slowly using the pusher. Do not use excessive force as the food should be pulled down by the scroll.
- If the food becomes jammed in the feed tube or on the scroll and the juicer stops operating switch to the 'O' off position. Then press and hold the 'R' reverse button down until the food becomes dislodged. Once the food is released, you can start juicing again.
9 After adding the last piece of food, allow the juicer to run to help clear the juice from the juicing bowl. The time will vary depending on the fruit type and thickness of the juice extracted.
10 Switch off and wait until the final flow of juice has reduced to a few slow drips. Then place the antidrip stopper ① in position (K) before removing the jug.
Refer to the troubleshooting section if you experience any problems with the operation of the juicer.
juicer hints and tips
- Wash all fruit and vegetable thoroughly before juicing.
To maximise juice extraction place small quantities at a time in the feed tube and push down slowly. - Hard foods are best juiced at room temperature.
- You do not have to remove thin peels or skins. Only remove thick peels that you would not eat e.g. those of oranges, pineapples, melons and uncooked beetroots.
- Use fresh fruit and vegetables as they contain more juice.
- Remove stones and hard seeds from cherries, plums etc.
- Vitamins disappear - the sooner you drink your juice, the more vitamins you will get.
- If you need to store the juice for a few hours put it in the fridge. It will keep better if you add a few drops of lemon juice.
Health Recommendations
- Do not drink more than three 230mls (8 fl.oz.) glasses of juice a day unless you are used to it.
-
Dilute juice for children with an equal amount of water.
-
Juice from dark green (broccoli, spinach etc.) or dark red (beetroot, red cabbage etc.) vegetables is extremely strong, so always dilute it.
- Fruit juice is high in Fructose (fruit sugar), so people with diabetes or low blood sugar should avoid drinking too much.
sorbet attachment (if supplied)
- Allow frozen food items to thaw for 5 to 10 minutes before processing. (The time required for thawing will depend how long ingredients have been stored in the freezer).
1 Assemble the parts as per 'using your juicer' section.
2 Fit the sorbet attachment ① instead of the wiper holder ⑤ and filter basket ④.
3 Ensure the anti-drip stopper 11 is in the open position (J) before processing.
4 After the last piece of food has been added allow the flow from the juicer to stop before switching the unit off.
sorbet attachment hints and tips
- Remove hard skins and seeds from ingredients before freezing.
- Cut whole fruits such as apples, oranges and kiwi to fit the feed tube before freezing. Freeze pieces in a single layer to prevent them from forming a solid mass.
- Ingredients that have formed a solid mass during freezing, break up before processing.
- Process cubes of frozen yoghurt with your chosen fruit to produce a creamy 'iced dessert'.
| recommended usage chart | ||
| Fruit/Vegetable | Preparation | Hints and Tips |
| Apples | Cut down to fit the feed tube. | To maximise juice extraction hard foods are best juiced when at room temperature. |
| Carrots | Cut down to fit the feed tube. | |
| Pineapple | Remove the leaves and stalks by slicing off the top and base. Cut into lengthwise pieces. | To prevent the filter from clogging clean the filter after every large pineapple. |
| Seedless Grapes | Remove stalks. | Process small handfuls at a time to maximise juice extraction. |
| Tomatoes | Cut down to fit the feed tube. | A thick pulpy juice will be produced rather than a smooth juice. |
| Mangoes | Remove tough skin and stones. | The juice produced will be very thick. |
| Melons | Remove tough skin. | - |
| Kiwi fruits | Cut down to fit the feed tube. | - |
| Soft berries-(Raspberries, Blackberries etc.) | Juice whole. | Process small handfuls at a time to maximise juice extraction. |
| Harder berries-(Cranberries etc.) | ||
| Beetroot (Raw) | Remove leaves and peel. | - |
| Leafy Vegetables- spinach, kale, wheatgrass etc. | Wrap leaves into a bunch. | - |
| Celery | Juice whole. | - |
| Cucumber | Cut down to fit the feed tube. | - |
| Citrus fruits- Oranges | Peel and remove white pith. | - |
| Fruit with stones or hard seeds (Nectarines, Plums, Cherries etc.) | Remove the stones or hard seeds before juicing. | - |
| Pomegranates | Open the fruit by scoring the outside skin and breaking apart. Submerge in a large bowl of cold water and remove the seeds from the pulp (this helps to separate the seeds as they will sink to the bottom of the bowl and the white pulp will float to the top). | - |
care and cleaning
Always switch off, unplug and take the juicer apart before cleaning.
- Some discolouration of parts may occur upon using ingredients such as carrot or leafy vegetables. Cleaning all parts immediately after each use will help to reduce stains.
- Do not clean the pulp or filter outlet with a sharp pointed object such as the end of a knife as you will damage the bowl. Use the tip of the cleaning brush handle to clean the outlets.
power unit
- Wipe with a damp cloth, then dry.
- Do not immerse in water.
filter
- To assist with removal of pulp and fibres, place the anti-drip stopper in the closed position. Switch the juicer on and pour approximately 300mls water down the feed tube. Operate the juicer for approximately 20 seconds, place the juice jug under the juice spout and open the stopper to allow the water to flow out.
Always clean the filter basket immediately after juicing. - Use the brush supplied to clean the filter. For best results, rinse under water and brush until clear.
wiper holder
- The wipers in the filter holder can be removed for cleaning (L). To assemble, Insert the upper/ lower wipers into the gap of the filter holder and secure (M). Ensure that the wipers are replaced and fitted correctly before assembling the juicer.
| The dishwasher safe parts can be washed on the top rack of your dishwasher. | |
| Item | Suitable for dishwashing |
| Food pusher | × |
| Lid | × |
| Filter | ✓ |
| Scroll | ✓ |
| Juicing bowl | × |
| Wiper holder | × |
| Juice jug | ✓ |
| Pulp collector | ✓ |
| Juice jug sieve | ✓ |
| Sorbet attachment | ✓ |
service & customer care
- If the cord is damaged it must, for safety reasons, be replaced by KENWOOD or an authorised KENWOOD repairer.
- If you experience any problems with the operation of your appliance, before requesting assistance refer to the "troubleshooting guide" section in the manual or visit www.kenwoodworld.com.
- Please note that your product is covered by a warranty, which complies with all legal provisions concerning any existing warranty and consumer rights in the country where the product was purchased.
- If your Kenwood product malfunctions or you find any defects, please send it or bring it to an authorised KENWOOD Service Centre. To find up to date details of your nearest authorised KENWOOD Service centre visit www.kenwoodworld.com or the website specific to your Country.
- Designed and engineered by Kenwood in the UK.
Made in China.
IMPORTANT INFORMATION FOR CORRECT DISPOSAL OF THE PRODUCT IN ACCORDANCE WITH THE EUROPEAN DIRECTIVE ON WASTE ELECTRICAL AND ELECTRONIC EQUIPMENT (WEEE)
At the end of its working life, the product must not be disposed of as urban waste.
It must be taken to a special local authority differentiated waste collection centre or to a dealer providing this service.
Disposing of a household appliance separately avoids possible negative consequences for the environment and health deriving from inappropriate disposal and enables the constituent materials to be recovered to obtain significant savings in energy and resources. As a reminder of the need to dispose of household appliances separately, the product is marked with a crossed-out wheeled dustbin.
troubleshooting guide
| Problem | Cause | Solution |
| The juicer will not start/does not operate. | • No power. • Juicing bowl not properly aligned on power unit or lid not locked correctly. | • Make sure the appliance is plugged in. • Check that all parts are fitted correctly. |
| The juicer has stopped during normal operation. | • Clogging in filter and scroll. • Food not cut into small enough pieces. | • Press the reverse button for 3-5 seconds. Repeat the process 2-3 times until blockage cleared. • Do not attempt to open the lid by force. • Switch off, unplug and remove the lid. Check if any clogging. Remove food if necessary and continue juicing. |
| • Juicer overloaded or overheated due to heavy load. | • Switch off, unplug and take the juicer apart. Clear and reassemble the juicer. • Plug in and press the “reset” button ⑫ and hold for 1-2 seconds and start operation as normal. | |
| Juice is leaking from underneath the bowl. | • Pulp stopper not fitted or has come loose during operation. | • Check that the pulp outlet stopper is fitted correctly. |
| Juice does not exit juicing outlet. | • Anti-drip stopper closed. | • Remove stopper and allow juice to flow into juice container. |
| Too much pulp coming out in juice. | • Filter or scroll clogging. • Very fibrous fruit/vegetable being processed. | • Cut food, especially fibrous foods, into smaller pieces to avoid the fibres wrapping around the scroll. • Use the clip on sieve provided if a smoother juice is required. Empty after processing 1kg of fruit/vegetables. |
| Wiper holder not rotating. | • Filter or scroll not located correctly. | • Check and ensure juicer assembled correctly. |
| There is a squeaking noise when juicing. | • Friction between wiper holder and bowl. | • Normal operation. • Do not operate the juicer empty. |
| Staining on juicing parts. | • Natural colouring from food. | • Rubbing with a cloth dipped in vegetable oil will help to remove discouloving. |
Nederlands
WAARSCHUWING: DIT APPARAAT MOET GEAARD ZIJN.
jglg jglg jglg jglg jglg jglg jglg
yjz jdoaal ygh
| العربية الحرفية الحرفية الحرفية الحرفية الحرفية الحرفية الحرفية الحرفية الحرفية الحرفية الحرفية الحرفية الحرفية الحرفية الحرفية الحرفية الحرفية الحرفية الحرفية الحرفية الحرفية الحرفية الحرفية الحرفية الحرفية الحرفية الح註冊 العربية الح註冊 العربية الح註冊 العربية الح註冊 العربية الح註冊 العربية الح註冊 العربية الح註冊 العربية الح註冊 العربية الح註冊 العربية الح註冊 العربية الح註冊 العربية الح註冊 العربية الح註冊 العربية الح註冊 العربية الح註冊 العربية الح註冊 العربية الح註冊 العربية الح註冊 ALOGUE ALOGUE ALOGUE ALOGUE ALOGUE ALOGUE ALOGUE ALOGUE ALOGUE ALOGUE ALOGUE ALOGUE ALOGUE ALOGUE ALOGUE ALOGUE ALOGUE ALOGUE ALOGUE ALOGUE ALOGUE ALOGUE ALOGUE ALOGUE ALOGUE ALOGue ALOGue ALOGue ALOGue ALOGue ALOGue ALOGue ALOGue ALOGue ALOGue ALOGue ALOGue ALOGue ALOGue ALOGue ALOGue ALOGue ALOGue ALOGue ALOGue ALOGue ALOGue ALOGue ALOGue ALOGue ALOGUE ALOGue ALOGue ALOGue ALOGue ALOGue ALOGue ALOGue ALOGue ALOGue ALOGue ALOGue ALOGue ALOGue ALOGue ALOGue ALOGue ALOGue ALOGue ALOGue ALOGue ALOGue ALOGue ALOGue ALOGUE ALOGUE ALOGue ALOGue ALOGue ALOGue ALOGue ALOGue ALOGue ALOGue ALOGue ALOGue ALOGue ALOGue ALOGue ALOGue ALOGue ALOGue ALOGue ALOGue ALOGue ALOGue ALOGue ALOGue ALOGUE ALOGue ALOGUE ALOGue ALOGue ALOGue ALOGue ALOGue ALOGue ALOGue ALOGue ALOGue ALOGue ALOGue ALOGue ALOGue ALOGue ALOGue ALOGue ALOGue ALOGue ALOGue ALOGue ALOGue ALOGue ALOGUE ALOGUE ALOGUE ALOGue ALOGue ALOGue ALOGue ALOGue ALOGue ALOGue ALOGue ALOGue ALOGue ALOGue ALOGue ALOGue ALOGue ALOGue ALOGue ALOGue ALOGue ALOGue ALOGue ALOGue ALOGUE ALOGue ALOGue ALOGUE ALOGue ALOGue ALOGue ALOGue ALOGue ALOGue ALOGue ALOGue ALOGue ALOGue ALOGue ALOGue ALOGue ALOGue ALOGue ALOGue ALOGue ALOGue ALOGue ALOGue ALOGue ALOGUE ALOGue ALOGUE ALOGUE ALOGue ALOGue ALOGue ALOGue ALOGue ALOGue ALOGue ALOGue ALOGue ALOGue ALOGue ALOGue ALOGue ALOGue ALOGue ALOGue ALOGue ALOGue ALOGue ALOGue ALOGue ALOGUE ALOGUE ALOGue ALOGUE ALOGue ALOGue ALOGue ALOGue ALOGue ALOGue ALOGue ALOGue ALOGue ALOGue ALOGue ALOGue ALOGue ALOGue ALOGue ALOGue ALOGue ALOGue ALOGue ALOGue ALOGue ALOGUE ALOGUE ALOGUE ALOGUE ALOGue ALOGue ALOGue ALOGue ALOGue ALOGue ALOGue ALOGue ALOGue ALOGue ALOGue ALOGue ALOGue ALOGue ALOGue ALOGue ALOGue ALOGue ALOGue ALOGue ALOGUE ALOGue ALOGue ALOGue ALOGUE ALOGue ALOGue ALOGue ALOGue ALOGue ALOGue ALOGue ALOGue ALOGue ALOGue ALOGue ALOGue ALOGue ALOGue ALOGue ALOGue ALOGue ALOGue ALOGue ALOGue ALOGUE ALOGue ALOGue ALOGUE ALOGUE ALOGue ALOGue ALOGue ALOGue ALOGue ALOGue ALOGue ALOGue ALOGue ALOGue ALOGue ALOGue ALOGue ALOGue ALOGue ALOGue ALOGue ALOGue ALOGue ALOGue ALOGUE ALOGue ALOGUE ALOGue ALOGUE ALOGue ALOGue ALOGue ALOGue ALOGue ALOGue ALOGue ALOGue ALOGue ALOGue ALOGue ALOGue ALOGue ALOGue ALOGue ALOGue ALOGue ALOGue ALOGue ALOGue ALOGUE ALOGue ALOGUE ALOGUE ALOGUE ALOGue ALOGue ALOGue ALOGue ALOGue ALOGue ALOGue ALOGue ALOGue ALOGue ALOGue ALOGue ALOGue ALOGue ALOGue ALOGue ALOGue ALOGue ALOGue ALOGue ALOGUE ALOGUE ALOGue ALOGue ALOGUE ALOGue ALOGue ALOGue ALOGue ALOGue ALOGue ALOGue ALOGue ALOGue ALOGue ALOGue ALOGue ALOGue ALOGue ALOGue ALOGue ALOGue ALOGue ALOGue ALOGue ALOGUE ALOGUE ALOGue ALOGUE ALOGUE ALOGue ALOGue ALOGue ALOGue ALOGue ALOGue ALOGue ALOGue ALOGue ALOGue ALOGue ALOGue ALOGue ALOGue ALOGue ALOGue ALOGue ALOGue ALOGue ALOGue ALOGUE ALOGUE ALOGUE ALOGue ALOGUE ALOGue ALOGue ALOGue ALOGue ALOGue ALOGue ALOGue ALOGue ALOGue ALOGue ALOGue ALOGue ALOGue ALOGue ALOGue ALOGue ALOGue ALOGue ALOGue ALOGue ALOGUE ALOGUE ALOGUE ALOGUE ALOGUE ALOGue ALOGue ALOGue ALOGue ALOGue ALOGue ALOGue ALOGue ALOGue ALOGue ALOGue ALOGue ALOGue ALOGue ALOGue ALOGue ALOGue ALOGue ALOGue ALOGUE ALOGue ALOGue ALOGue ALOGue ALOGUE ALOGue ALOGue ALOGue ALOGue ALOGue ALOGue ALOGue ALOGue ALOGue ALOGue ALOGue ALOGue ALOGue ALOGue ALOGue ALOGue ALOGue ALOGue ALOGue ALOGUE ALOGue ALOGue ALOGue ALOGUE ALOGUE ALOGue ALOGue ALOGue ALOGue ALOGue ALOGue ALOGue ALOGue ALOGue ALOGue ALOGue ALOGue ALOGue ALOGue ALOGue ALOGue ALOGue ALOGue ALOGue ALOGUE ALOGue ALOGue ALOGUE ALOGue ALOGUE ALOGue ALOGue ALOGue ALOGue ALOGue ALOGue ALOGue ALOGue ALOGue ALOGue ALOGue ALOGue ALOGue ALOGue ALOGue ALOGue ALOGue ALOGue ALOGue ALOGUE ALOGue ALOGue ALOGUE ALOGUE ALOGUE ALOGue ALOGue ALOGue ALOGue ALOGue ALOGue ALOGue ALOGue ALOGue ALOGue ALOGue ALOGue ALOGue ALOGue ALOGue ALOGue ALOGue ALOGue ALOGue ALOGUE ALOGue ALOGUE ALOGue ALOGue ALOGUE ALOGue ALOGue ALOGue ALOGue ALOGue ALOGue ALOGue ALOGue ALOGue ALOGue ALOGue ALOGue ALOGue ALOGue ALOGue ALOGue ALOGue ALOGue ALOGue ALOGUE ALOGue ALOGUE ALOGue ALOGUE ALOGUE ALOGue ALOGue ALOGue ALOGue ALOGue ALOGue ALOGue ALOGue ALOGue ALOGue ALOGue ALOGue ALOGue ALOGue ALOGue ALOGue ALOGue ALOGue ALOGue ALOGUE ALOGue ALOGUE ALOGUE ALOGue ALOGUE ALOGue ALOGue ALOGue ALOGue ALOGue ALOGue ALOGue ALOGue ALOGue ALOGue ALOGue ALOGue ALOGue ALOGue ALOGue ALOGue ALOGue ALOGue ALOGue ALOGUE ALOGue ALOGUE ALOGUE ALOGUE ALOGUE ALOGue ALOGue ALOGue ALOGue ALOGue ALOGue ALOGue ALOGue ALOGue ALOGue ALOGue ALOGue ALOGue ALOGue ALOGue ALOGue ALOGue ALOGue ALOGue ALOGUE ALOGUE ALOGue ALOGue ALOGue ALOGUE ALOGue ALOGue ALOGue ALOGue ALOGue ALOGue ALOGue ALOGue ALOGue ALOGue ALOGue ALOGue ALOGue ALOGue ALOGue ALOGue ALOGue ALOGue ALOGue ALOGUE ALOGUE ALOGue ALOGue ALOGUE ALOGUE ALOGue ALOGue ALOGue ALOGue ALOGue ALOGue ALOGue ALOGue ALOGue ALOGue ALOGue ALOGue ALOGue ALOGue ALOGue ALOGue ALOGue ALOGue ALOGue ALOGUE ALOGUE ALOGue ALOGUE ALOGue ALOGUE ALOGue ALOGue ALOGue ALOGue ALOGue ALOGue ALOGue ALOGue ALOGue ALOGue ALOGue ALOGue ALOGue ALOGue ALOGue ALOGue ALLGUE ALLGUE ALLGUE ALLGUE ALLGUE ALLGUE ALLGUE ALLGUE ALLGUE ALLGUE ALLGUE ALLGUE ALLGUE ALLGUE ALLGUE ALLGUE ALLGUE ALLGUE ALLGUE ALLGUE ALLGUE ALLGUE ALLGUE ALLGUE ALLGUE ALLGUe ALLGUE ALLGUE ALLGUE ALLGUE ALLGUE ALLGUE ALLGUE ALLGUE ALLGUE ALLGUE ALLGUE ALLGUE ALLGUE ALLGUE ALLGUE ALLGUE ALLGUE ALLGUE ALLGUE ALLGUE ALLGUE ALLGUE ALLGUE ALLGUE ALLGULE ALLGUE ALLGUE ALLGUE ALLGUE ALLGUE ALLGUE ALLGUE ALLGUE ALLGUE ALLGUE ALLGUE ALLGUE ALLGUE ALLGUE ALLGUE ALLGUE ALLGUE ALLGUE ALLGUE ALLGUE ALLGUE ALLGUE ALLGUE ALLGUE ALLGLE ALLGUE ALLGUE ALLGUE ALLGUE ALLGUE ALLGUE ALLGUE ALLGUE ALLGUE ALLGUE ALLGUE ALLGUE ALLGUE ALLGUE ALLGUE ALLGUE ALLGUE ALLGUE ALLGUE ALLGUE ALLGUE ALLGUE ALLGUE ALLGUE ALLGURE ALLGUE ALLGUE ALLGUE ALLGUE ALLGUE ALLGUE ALLGUE ALLGUE ALLGUE ALLGUE ALLGUE ALLGUE ALLGUE ALLGUE ALLGUE ALLGUE ALLGUE ALLGUE ALLGUE ALLGUE ALLGUE ALLGUE ALLGUE ALLGUE ALLGRE ALLGUE ALLGUE ALLGUE ALLGUE ALLGUE ALLGUE ALLGUE ALLGUE ALLGUE ALLGUE ALLGUE ALLGUE ALLGUE ALLGUE ALLGUE ALLGUE ALLGUE ALLGUE ALLGUE ALLGUE ALLGUE ALLGUE ALLGUE ALLGUE ALLGGE ALLGUE ALLGUE ALLGUE ALLGUE ALLGUE ALLGUE ALLGUE ALLGUE ALLGUE ALLGUE ALLGUE ALLGUE ALLGUE ALLGUE ALLGUE ALLGUE ALLGUE ALLGUE ALLGUE ALLGUE ALLGUE ALLGUE ALLGUE ALLGUE ALLGAE ALLGAE ALLGAE ALLGAE ALLGAE ALLGAE ALLGAE ALLGAE ALLGAE ALLGAE ALLGAE ALLGAE ALLGAE ALLGAE ALLGAE ALLGAE ALLGAE ALLGAE ALLGAE ALLGAE ALLGAE ALLGAE ALLGAE ALLGAE ALLGAE ALLGUE ALLGAE ALLGAE ALLGAE ALLGAE ALLGAE ALLGAE ALLGAE ALLGAE ALLGAE ALLGAE ALLGAE ALLGAE ALLGAE ALLGAE ALLGAE ALLGAE ALLGAE ALLGAE ALLGAE ALLGAE ALLGAE ALLGAE ALLGAE ALLGASE ALLGAE ALLGAE ALLGAE ALLGAE ALLGAE ALLGAE ALLGAE ALLGAE ALLGAE ALLGAE ALLGAE ALLGAE ALLGAE ALLGAE ALLGAE ALLGAE ALLGAE ALLGAE ALLGAE ALLGAE ALLGAE ALLGAE ALLGAE ALLGAE ALLGASE ALLGASE ALLGASE ALLGASE ALLGASE ALLGASE ALLGASE ALLGASE ALLGASE ALLGASE ALLGASE ALLGASE ALLGASE ALLGASE ALLGASE ALLGASE ALLGASE ALLGASE ALLGASE ALLGASE ALLGASE ALLGASE ALLGASE ALLGASE ALLGASE ALLGAE ALLGAE ALLGAE ALLGAE ALLGAE ALLGAE ALLGAE ALLGAE ALLGAE ALLGAE ALLGAE ALLGAE ALLGAE ALLGAE ALLGAE ALLGAE ALLGAE ALLGAE ALLGAE ALLGAE ALLGAE ALLGAE ALLGAE ALLGASE ALLGSE ALLGSE ALLGSE ALLGSE ALLGSE ALLGSE ALLGSE ALLGSE ALLGSE ALLGSE ALLGSE ALLGSE ALLGSE ALLGSE ALLGSE ALLGSE ALLGSE ALLGSE ALLGSE ALLGSE ALLGSE ALLGSE ALLGSE ALLGSE ALLGSE ALLGAE ALLGAE ALLGAE ALLGAE ALLGAE ALLGAE ALLGAE ALLGAE ALLGAE ALLGAE ALLGAE ALLGAE ALLGAE ALLGAE ALLGAE ALLGAE ALLGAE ALLGAE ALLGAE ALLGAE ALLGAE ALLGAE ALLGAE ALLGAE ALLGae ALLGAE ALLGAE ALLGAE ALLGAE ALLGAE ALLGAE ALLGAE ALLGAE ALLGAE ALLGAE ALLGAE ALLGAE ALLGAE ALLGAE ALLGAE ALLGAE ALLGAE ALLGAE ALLGAE ALLGAE ALLGAE ALLGAE ALLGAE ALLGAE ALLGSE ALLGAE ALLGAE ALLGAE ALLGAE ALLGAE ALLGAE ALLGAE ALLGAE ALLGAE ALLGAE ALLGAE ALLGAE ALLGAE ALLGAE ALLGAE ALLGAE ALLGAE ALLGAE ALLGAE ALLGAE ALLGAE ALLGAE ALLGAE ALLGASE |
Xoall 1
aaiia aaiiie
JENWOOD
KENWOOD
jll 100
P
Jzjg J 1
. www.kenwoodworld.com
1j 1
1JgJgJgJgJgJgJgJgJgJgJgJgJgJgJgJgJgJgJgJgJgJgJgJgJgJgJgJgJgJgJgJgJgJgJgJgJgJgJgJg
pI 111111111111111
aagaae aegaae eae 21 10000000000000000000000000000000000000000000000000000000000000000000000000000000000000000000000000
()
11 0 0 0 0 0 0 0 0 0 0 0 0 0 0 0 0 0 0 0 0 0 0 0 0 0 0 0 0 0 0 0 0 0 0 0 0 0 0 0 0 0 0 0 0 0 0 0 0 0 0 2
11
11
11
11
11
11
11
11
11
11
11
11
11
11
11
11
11
11
11
11
11
11
11
11
11
11
11
11
11
Lai jia jia jia jia jia jia jia jia jia jia jia
JlJlJlJlJlJlJlJlJl
a 2. liqoll Lue p
a
- glll 2. jLg
Laae JaaeJn JaaeJn JaaeJn JaaeJn
a
g dglal j 1j
jll l j.
Jll Jglg 1 j
aall llll
gaa aagb lgyaagd g
J 1
j 1
LdJ 104 Lg
Jgolni Lok - 1oal
joo 4y jyall kll yall
L
aiee aee eae ee eae eae eae eae eae
HEAD OFFICE: Kenwood Limited, 1-3 Kenwood Business Park, New Lane, Havant, Hampshire PO9 2NH
kenwoodworld.com