USER MANUAL SERIES 3 BRAUN
(Sharecall charged at local rates)
Deutsch
Our products are designed to meet the highest standards of quality, functionality and design. We hope you enjoy your new Braun Shaver.
Read these instructions completely, they contain safety information. Keep them for future reference.
Warnings

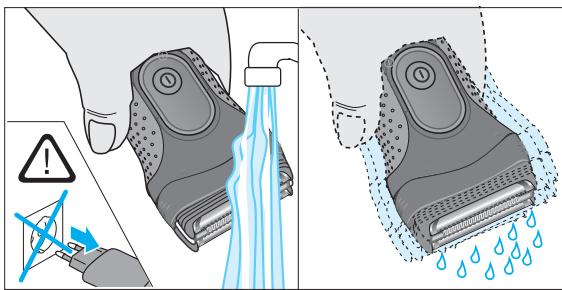
This appliance is suitable for cleaning under running tap water. Detach the appliance from the power supply before cleaning it with water.
This appliance is provided with a special cord set, which has an integrated Safety Extra Low Voltage power supply. Do not exchange or tamper with any part of it, otherwise there is risk of an electric shock.
Only use the special cord set provided with your appliance.
If the appliance is marked C 492, you can use it with any Braun power supply coded 492-XXXX.
Do not shave with a damaged foil or cord.
This appliance can be used by children aged from 8 years and above and persons with reduced physical, sensory or mental capabilities or lack of experience and knowledge if they have been given supervision or instruction concerning the safe use of the appliance and understand the hazards involved. Children should not play with the appliance. Cleaning and user maintenance should not be made by children unless they are older than 8 years and supervised.
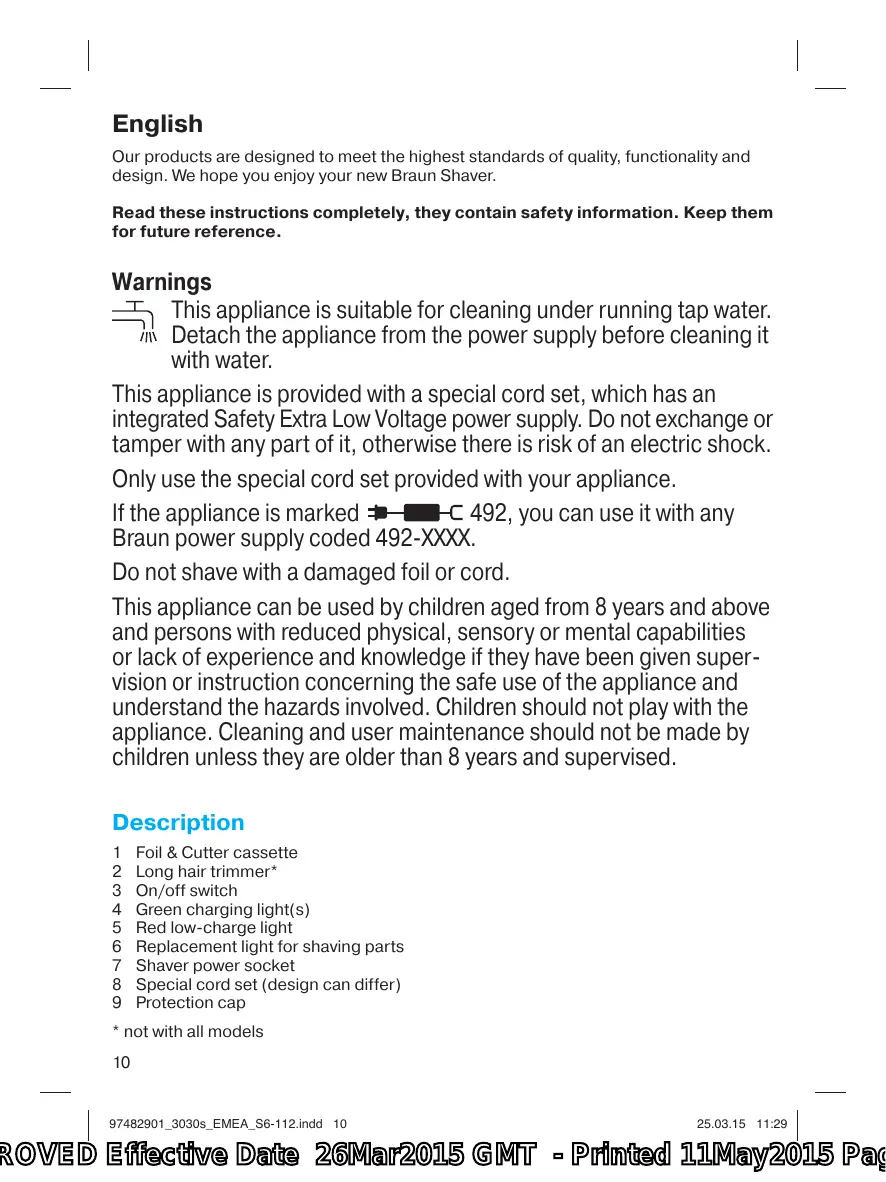
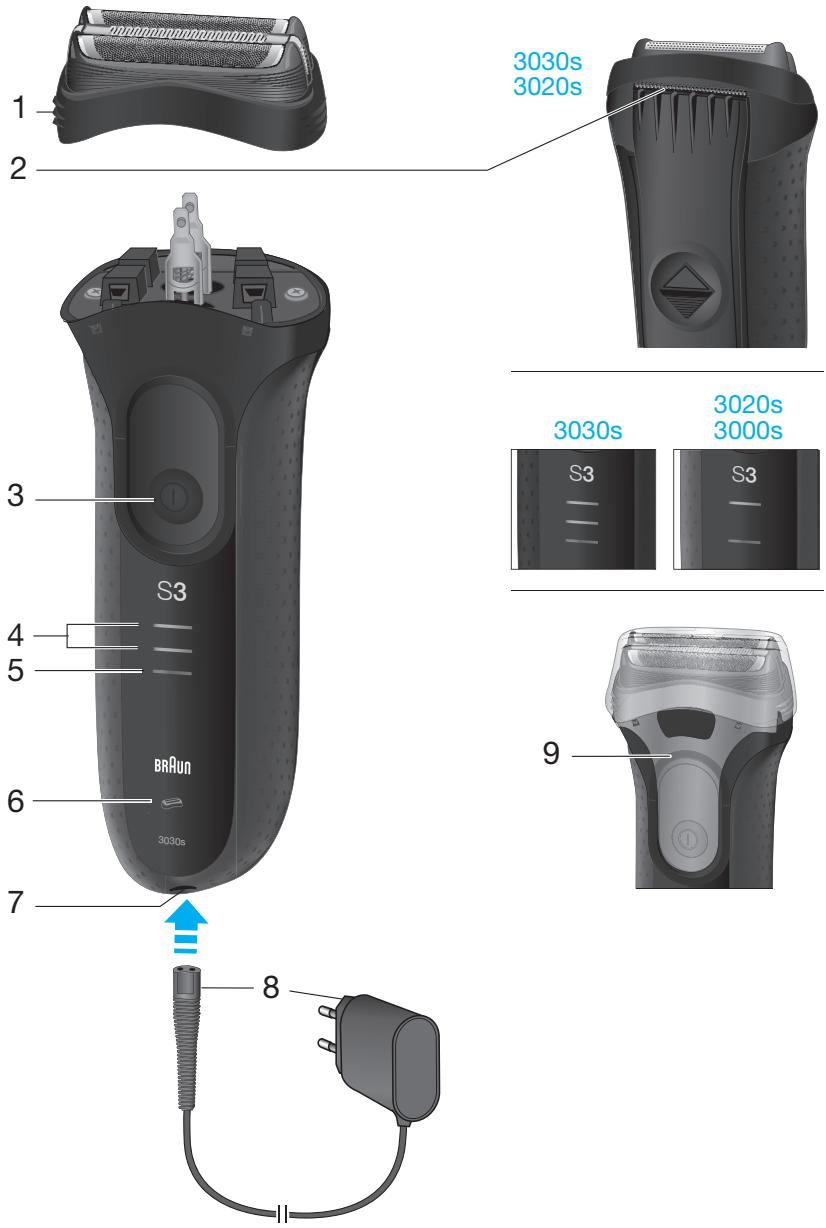
Description
1 Foil & Cutter cassette
2 Long hair trimmer*
3 On/off switch
4 Green charging light(s)
5 Red low-charge light
6 Replacement light for shaving parts
7 Shaver power socket
8 Special cord set (design can differ)
9 Protection cap
* not with all models
Charging
Recommended ambient temperature for charging is 5^ to 35^ . The battery may not charge properly or at all under extreme low or high temperatures. Recommended ambient temperature for shaving is 15^ to 35^ . Do not expose the shaver to temperatures higher than 50^ for extended periods of time.
- Using the special cord set (8), connect the shaver to an electrical outlet with the motor switched off.
- When charging for the first time or when the shaver is not used for a few months, leave the shaver to charge continuously for 4 hours.
- Once the shaver is completely charged, discharge the shaver through normal use. Then recharge to full capacity. Subsequent charges will take about 1 hour.
- A full charge provides up to 45 minutes of cordless shaving time depending on your beard growth. Maximum battery capacity will only be reached after several charging/discharging cycles.
- 5-minute quick charge is sufficient for a shave.
- If the rechargeable batteries are discharged, you may also shave by connecting the shaver to an electrical outlet via the special cord set.
Charging light(s) (4)
The green charging light shows the charge status of the batteries.
The green charging light blinks when the shaver is being charged or switched on.
When the battery is fully charged, all green charging lights shine permanently, provided the shaver is connected to an electrical outlet.
Low-charge light (5)
The red low-charge light flashes when the battery is running low. You should be able to finish your shave.
Shaving
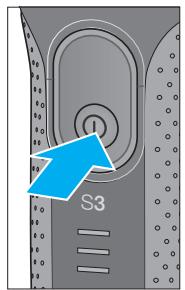
Press the on/off switch (3) to operate the shaver.
The flexible shaving foils automatically adjust to every contour of your face.
Long hair trimmer (2)
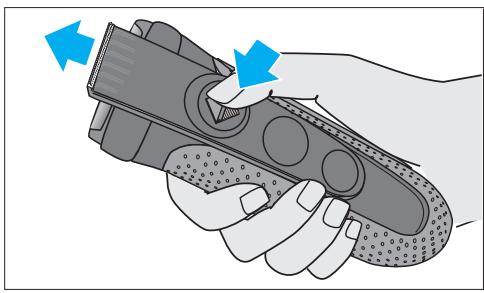
To trim sideburns, moustache or beard, slide the long hair trimmer upwards.
Tips for a perfect dry shave
For best results, Braun recommends you follow 3 simple steps:
- Always shave before washing your face.
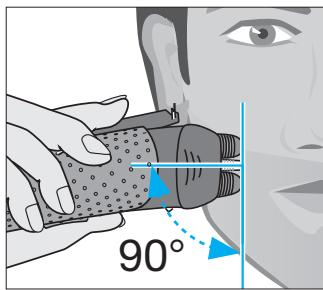
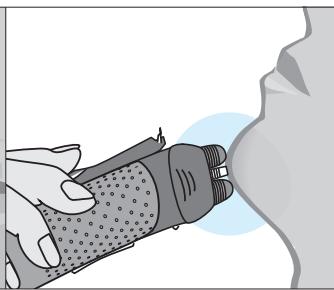
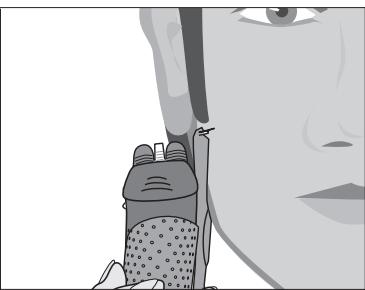
- At all times, hold the shaver at right angles (90^) to your skin.
- Stretch your skin and shave against the direction of your beard growth.
Cleaning
Regular cleaning ensures better shaving performance.
Cleaning under running water:
- Switch the shaver on (cordless) and rinse the shaver head under hot running water until all residues have been removed. You may use liquid soap without abrasive substances. Rinse off all foam and let the shaver run for a few more seconds.
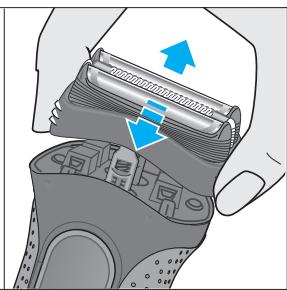
- Next, switch off the shaver, remove the Foil & Cutter cassette (1) and let it dry.
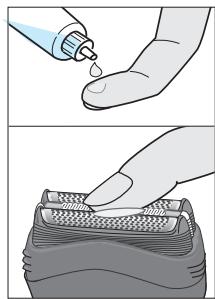
- If you regularly clean the shaver under water, then once a week apply a drop of light machine oil (not included) onto the long hair trimmer (2) and Foil & Cutter cassette (1).
Cleaning with a brush:
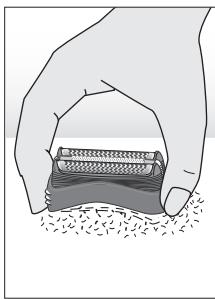
- Switch off the shaver. Remove the Foil & Cutter cassette and tap it out on a flat surface.
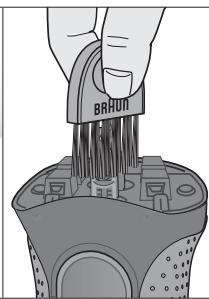
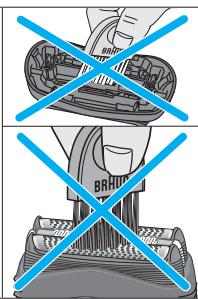
- Using a brush, clean the inner area of the shaver head. However, do not clean the Foil & Cutter cassette with a brush as this may damage it.
Keeping your shaver in top shape
Replacement light for shaving parts / Reset
To maintain 100% shaving performance, replace the Foil & Cutter cassette (1), when the replacement light for shaving parts (6) comes on after about 18 months or when worn.
Foil & Cutter cassette: 32S/32B
The replacement light will remind you during the next 7 shaves to replace the
Foil & Cutter cassette. Then the shaver will automatically reset.
After you have replaced the Foil & Cutter cassette (1), press the on/off switch (3) for at least 5 seconds to reset the counter.
While doing so, the replacement light blinks and goes off when the reset is complete.
The manual reset can be done at any time.
Preserving the batteries
In order to maintain the optimum capacity of the rechargeable batteries, the shaver has to be fully discharged by shaving every 6 months approximately. Then recharge the shaver to full capacity.
Environmental notice
Product contains batteries and/or recyclable electric waste.
For environment protection do not dispose of in household waste, but for recycling take to electric waste collection points provided in your country.
Subject to change without notice.
For electric specifications, see printing on the special cord set.

Guarantee
We grant a 2 year guarantee on the product commencing on the date of purchase. Within the guarantee period we will eliminate any defects in the appliance resulting from faults in materials or workmanship, free of charge either by repairing or replacing the complete appliance at our discretion.
This guarantee extends to every country where this appliance is supplied by Braun or its appointed distributor.
This guarantee does not cover: damage due to improper use, normal wear or use as well as defects that have a negligible effect on the value or operation of the appliance. The guarantee becomes void if repairs are undertaken by unauthorised persons and if original Braun parts are not used.
To obtain service within the guarantee period, hand in or send the complete appliance with your sales receipt to an authorised Braun Customer Service Centre (address information available online at www.service.braun.com).
For UK only:
This guarantee in no way affects your rights under statutory law.
Français
Euoue yia teAio Eupia
Tia kaUTepa anoteléouata, n Braun npoteivv a kolooueite 3 anla bnaata:
PykoBOCTBO no 3KcnIyataun
Haun n3dJIy pa3pa6oTaHb B COOTBeTCTBn C cAmBIM bICOKMn CTaHapTaMn KaueCTBa, fYHKUHOHaJIbHOCTn I dN3aHa. HaJeEMcra, YTO Bam POnHpABITcR HOBa 6pntBa Braun.
Ioxaanycta, npeed nCnoJb3ObaHnem BHnMaTeIbHO n3yUHTe pyKOBOcTBO n0 3KcnnyatauHn COeepXaUcyoB HEM INHΦOpMaunIO o6e3OnaCHOM nCNoJb-3ObaHn n3dEInna. CoxpaHnTe pyKOBoCTBO dJaIaNbHeIwero nCNOJb3ObaHnra.
Ppeynpexdien

Pnp6op npedna3nueH dIy nCTKn pOJ npOTouHO BDOJ. OTCoeDInHte shHyp OT cTe Iy BLaXHO OH ONUCTKn Pnp6opa.
Брntвсабжehа сerteьим ралтетори НИЗКОТу habяжени. He 3amehЯITEи He moДиФицуп Te HnKaKne DeTALN aДaNTepa. 3TO MOxET npuBecTи K nopaxeHIO 3JIeKTprueckIM TOKOM.
IcnoJIb3yTe ToIbKO CeTeBOI aIaITeP Hn3KOrO HaIpyKeHnI, NOCTabJIeMbl BMeCTe C npI6Opom.
EcnHa yCtpoiCTBe HmEeTcMa MapKnipOBka C 492,To erO moXHO nCnOJIb3oBaTb C IIO6bIM UHypom CeTeBOrO aAnTepa Braun,MapKnipOBaHHOM 492-XXX.
He nCnoIb3yIte 6pntBy c npBaHHO cTeKo IJIN NOBpeXdEHHbIM shypom.
Bce npyrne Tpe6oBaHn, BKJIOUa Tpe6oBaHn BO3MeIeHn y6bITKOB, NCKJIIOuAOTcra, ecnn Ha7a OTBeTCTBeHHOCTb He yCTaHOBJIeHa B 3aOKOHm NOPaKe.
Peklamauzn, Cb3aHHbIe C KOMMepueckm KOHTpaKTOM C PNOaBcOM, He NpNaIaOT nOd 3Tu rapaHTNU.
Cnyan,Ha KOToPbIe rapaHTnHe paCnpocTpaHЯETc:
-ДeфКТы,Вbl3BaHHbIeФОр-MaxOphbIMN OБСТОТЕЛСТВAMN;
- nCNoB3OBAHnE B npoΦeCCNOHaJIbHbIX ζeJx;
- HapyuheHne Tpe6oBaHn INHCTpyKcHn IIO 3KcNlyaTaUcN;
- HenpaBnBna yCTaHOBka HnpanjKeHn nTataUoSei cTeu (ecIn 3To Tpe6yetc);
-BHeceHHe TEXHnueCKNX N3MeHeHNI;
-MexaHnueckne NOBpeJdeHnra;
- NOBpeJxHnIy BnHe JXNBTbIx, rpl3yHOB n HaceKOMbIX (B TOM YNCJIe CJIyauHnaxOxHnI yBHOH n HaceKOMbIX BHyTpI np6OpOB);
-ДлЯ пибов, работаюших 06baтAPEк, - работа с неюхаяшIMи Или NGTOHbIMNьаретКами, Лобile NOВржденя, ВИЗBAHньи NGTOUeHHbIMN INI TEKушIMьбатейам (COBETyEM ПOLьзOBaTbСАТЛьКОпpeДохpaHEHbIMN OTnpOTeKaHn8батейам);
-ДябпВ -СмТаилпорваннсеTkA.
BhImaHnE! OpunHaJIbHbI ΓapaHTnHbI TaIOn NoIeXnT N3bYrTHIO npn ObpaueHn B cepBncHbI cHTp dIraPANTmHO pemOHTa. Iocne npoBeJeHnpeMOnTa FapAn TnHbIM TaIIOHM bEyTe RaJTBcA 3aONJIHeHHbOpunHaNl NcSta BblONJIHeHn peMOHTa CO tAMNOM cepBNCHOrO cHTp Hn OIOuNaCauHHbNoTopeBnTeJEM NO ONyUeHn N3dJIeN I3 pemOHTa. Tpe6yITE npocTabNeHn DaTb BO3BpATA n3 pemOHTa, Cpok rapaHTn IpOJaBeBaETcHa BpEm HaxOxKeHn I3DeJIn B cepBNCHOM cHTpe.
B clyuae BO3HKnHOBeHnCLOXHoCTe C bIIOJIHeHnEM rapaHTnHOrO nIIN IocJeRa pAnHOrO 6cnyxnbAHn npocb6a coo6uaTb 06 3Tom B INHOpMaunOHHyO Clyx6y CepBaCra Braun no Telefohy 8-800-200-20-20 (3BOHOK n3 PocCnn 6ecPNaTHbI)
YkpaIHcbKa
Procter & Gamble Manufacturing GmbH, Waldstrasse 9, D-74731 Walldürn, Germany.
3000s:
BirtoBneHo Braun Electric (Shanghai) Co Ltd. Y Shanhai, Kita: Braun Electric (Shanghai) Co Ltd., Lu Chun Road 475-495, MInghang, Shanghai 200245, P.R. of China.
Bci iHsi BmOrn, pa3OM 3 BmOrAmn BiDxKoDyBaHHra 36ntkIB, He DiiChi, RaIIO HaHa bIDIOJIaJIbHIcTB He BCTaHOBJIeHa 3aKOHHM YINOM.
BunapKn,Ha kI He po3noBcIOxJyETbcra rapaHTi:
- DeΦeKTH, BnKlnKaHi ΦOpC-MaxOpHmN O6CTaBnHaM;
- BIVKOpIcTaHHa 3 npOopeciHIO MeTOIO a60 3 MeTOIO OTpIMaHHa npb6yTky;
- nopyuwenH BnMOr IHCTpyKu3 3 ekCnnyatau;
- HeBipHe BCTaHOBJIeHHa HAppyrIMepexi KINBJIeHHa (AKIIO CE BUMaRaTebCra);
- 3ДиСЕннЯТХнIHIN 3MiH;
-MexaHHiIPOsKOJxehnHa;
-ДЯпралд, lo npaioToB ha baTapeKax -poBoTa 3 HeiIObIHNMn a60 cnpaцьованmбаТаpeКamn,6yNb-як IOsKOJxEHN, BnKJIkaHcI cnpaOBOHaHMn a6o nIDtikaOUMn batapeKamn;
- NOUKOJKeHn3 BUNH TBaPInH, rpn3yHIB Ta KOMax (B TOMy YncJI y BUNaJkax 3hAxOJxKeHn rpn3yHIB Ta KOMax ycepeNHi np6OpiB)
-ДябпгВ-ЗIM'Ятабоюрваситочka.
Ybara! rapahtiHn TaIOn n iDJIrae BnIyueHnIO B pa3i 3BepHeHHdo CepBicHOU cHTpy 3 npoxAHm npo BVkoHaHH rapaHTiHOro pemOHTy. PICIA npoBeDeHHpeMOHTy
rapaHTiHm TaIHOm 6yde BBaXaTnC3anOBHeHnOpriHaJnCTa BVKoHaHO rpeMOHTy 3i 7tAmNOM CepBICHOrO ceHTpy Ta iDnCaHn CNOXBauem npo OTPMaHHBvPo6y3 peMOHTy. IpaHTiHm CTpOK NOdBxUeTbc Ha TepMiH, kyn daHn Bpi6 3hAxODbcBcBcePbichHomy ceHTpi BpeMOHTi.
B pa3i BnHnKHeHHcKlaIHOuJIb 3 BnKOHaHHm rapaHTIHorO Ta nICJIraP aHaTIHorO
06ClyrOByBaHHn IPOxAHH 3BepTaTncsA Do iHΦOpMauiHoI CnyXbN cepBicy PpeDCTaB- Hnka KOMnaiHII BnPo6HnKa B YkpaHl.
TeleФOn rapaHoi liHi 0 800 505 000.ДзВИнкpoУКраiHi 3i cTацioHapnX TeleФОHHx HOMepiB 6e3KOuTobHmMn.ДзВИнк 3 MObIbHnx TeleФOHIB OПlaуOTbcS 3rIdHo TaruΦiB BiINOBiHOrO onepaTopa.
Takox MOxHa OTpMaTu IOnaTkoBy IHOpMaIIO Ha cepBicHOMy nOpTaI Bnpo6HnKa B iInTpHeTI www.service.braun.com
J
Jlalll llae gagaaag. aaii 111 111 111 111 111 111 111 111 111
Country of origin: Germany (Models 3030s/3020s)
Country of origin: China (Model 3000s)
Year of manufacture
To determine the year of manufacture, refer to the 3-digit production code located near the type plate. The first digit of the production code refers to the last digit of the year of manufacture. The next two digits refer to the calendar week in the year of manufacture.
Example: "427" - The product was manufactured in week 27 of 2014.
(3030s/3020s) LiLi Li:
(3000s)
y 3 j 1 1 1 1 1 1 1 1 1 1
j 427"Joo. 1000000000000000000000000000000000000000
.2014 ples 27
1 1 1 1 1 1 1 1 1 1 1 1 1 1 1 1 1 1 1 1 1 1 1
Lgai jdi J Lj
J 1
y
Lodie (1) 5blllg aaljll jll %100 ayy al
18 6) yll (6) y
32S/32B:
1 7
(1)abllg aalr lalal dall
gauu .Jall buaa 5 0d (3) / Juaai tLiio
y 1
.
a
aai jnnnnae aee nne eae aee aee aee aee
aLb y 6 J (xlll) Lola ayl

a
(2) Jglal jolll joll jolll jolll jolll lce (aee r)
.1)
$$
\dot {a} \dot {a} \dot {a} \dot {a} \dot {a} \dot {a} \dot {a} \dot {a} \dot {a} \dot {a} \dot {a}
$$
$$
\therefore \text {d e l t a} = | j _ {1} - j _ {2} |,
$$
$$
\therefore \mathrm {a d} _ {\mathrm {A}} \mathrm {a l l} \mathrm {d} \mathrm {s} \mathrm {s} = \mathrm {L} _ {\mathrm {A}} \mathrm {s} \mathrm {s} \leq \mathrm {L} _ {\mathrm {B}} \mathrm {s} \mathrm {s} \mathrm {s} \leq \mathrm {L} _ {\mathrm {B}}
$$
$$
(g _ {i j} \mathrm {d i f} _ {i} \mathrm {n o p a r a l l} _ {j} \mathrm {d i f} _ {j}) \mathrm {n o l l l l l l l l l l l l l l l l l l l l l l l l l l l l l l l l l l l l l l l l l l l l l l l l l}
$$
$$
\therefore \angle A C D = 1 8 0 ^ {\circ}
$$
$$
\therefore \Delta B D H \cong \Delta C E G \cong \Delta C F G \cong \Delta A ^ {*}
$$
J 1 J 1 J 1 J 1 J 1 J 1 J 1 J 1 J 1 J 1 J 1 J 1 J 1 J 1 J 1 J 1 J 1 J 1 J 1 J 1 J 1 J 1 J 1 J 1 J 1 J 1 J 1 J 1
45 45 45 45 45 45 45 45 45 45 45 45 45 45 45 45 45 45 45 45 45 45 45 45 45 45 45 45 45 45 45 45 45 45 1
.
.
.
.
.
.
.
.
.
.
.
(4) _a^b f(x) dx = _a^b g(x) dx
J 1
i i 1 1 1 1 1 1 1 1 1 1 1 1 1 1 1
1
Lg 10000000000000000000000000000000000000000000000
Jaiuill 14! g jy
1
J 1 1 1 1 1 1 1 1 1 1 1 1 1 1 1 1 1 1 1 1 1 1 1 1 1 1 1 1 1
J 1
j 492 -C jorll lslk
XXXX-492 JJ
Ae
J 8 Jn Jn Jn Jn Jn Jn Jn Jn Jn Jn Jn Jn Jn Jn Jn Jn Jn Jn Jn Jn Jn Jn Jn Jn Jn Jn Jn Jn Jn Jn Jn Jn Jn Jn Jn Jn Jn Jn Jn Jn Jn Jn Jn Jn Jn Jn Jn Jn Jn Jn J n J n J n J n J n J n J n J n
1
1
*Jbll 2
3
(y)y(y)y(y)4