
TS-RHTGL-R5 TERASTATION PRO II - NAS BUFFALO - Free user manual and instructions
Find the device manual for free TS-RHTGL-R5 TERASTATION PRO II BUFFALO in PDF.
| Product Type | NAS (Network Attached Storage) |
| Brand | BUFFALO |
| Model | TS-RHTGL-R5 TeraStation Pro II |
| Number of Bays | 5 (disks not included) |
| Supported Disk Type | SATA (3.5 inches) |
| Supported RAID | RAID 0, 1, 5, 10, JBOD |
| Network Interface | 1 x Gigabit Ethernet (RJ-45) |
| Processor | 1.2 GHz (estimated) |
| RAM Memory | 256 MB (estimated) |
| Power Supply | External, 100-240 V AC, 50/60 Hz |
| Power Consumption | Approximately 60 W (estimated) |
| Dimensions (W x D x H) | Approximately 170 x 230 x 200 mm (estimated) |
| Weight | Approximately 5 kg (estimated) |
| Supported Operating Systems | Windows, macOS, Linux |
| Network Protocols | SMB/CIFS, AFP, FTP, HTTP |
| Management | Web interface, Buffalo NAS Navigator |
| LED Indicators | Power, LINK/ACT, disks |
| Buttons | Power On/Off, Reset |
| Package Contents | Main unit, Ethernet cable, power cable, TeraNavigator CD, quick installation guide, warranty card |
| Operating Temperature | 5°C to 35°C (estimated) |
| Certifications | CE, FCC (estimated) |
Frequently Asked Questions - TS-RHTGL-R5 TERASTATION PRO II BUFFALO
User questions about TS-RHTGL-R5 TERASTATION PRO II BUFFALO
0 question about this device. Answer the ones you know or ask your own.
Ask a new question about this device
Download the instructions for your NAS in PDF format for free! Find your manual TS-RHTGL-R5 TERASTATION PRO II - BUFFALO and take your electronic device back in hand. On this page are published all the documents necessary for the use of your device. TS-RHTGL-R5 TERASTATION PRO II by BUFFALO.
USER MANUAL TS-RHTGL-R5 TERASTATION PRO II BUFFALO
- Main Unit (TeraStation)
- Ethernet Cable
Power Cable - TeraNavigator Installation CD
- Quick Setup Guide (this manual)
Warranty Card
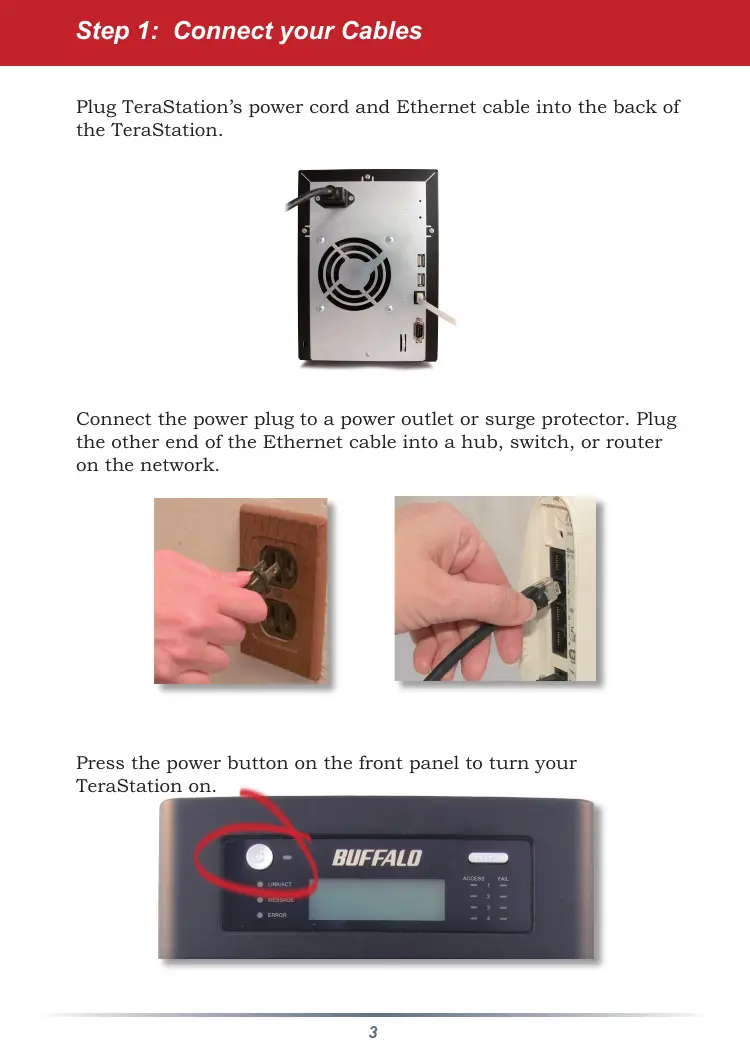
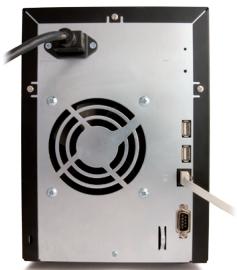
Plug TeraStation's power cord and Ethernet cable into the back of the TeraStation.
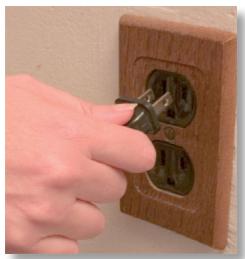
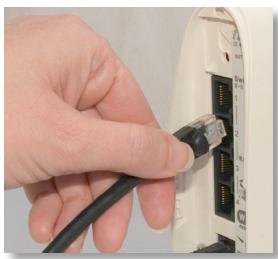
Connect the power plug to a power outlet or surge protector. Plug the other end of the Ethernet cable into a hub, switch, or router on the network.
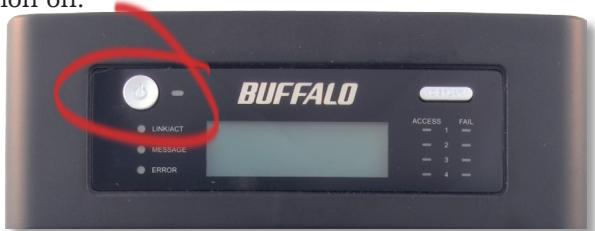
Press the power button on the front panel to turn your TeraStation on.
Check the LINK/ACT LED on the front of the TeraStation. If it's lit, then your TeraStation is connected to your network. Please turn to page 5 to continue setup.
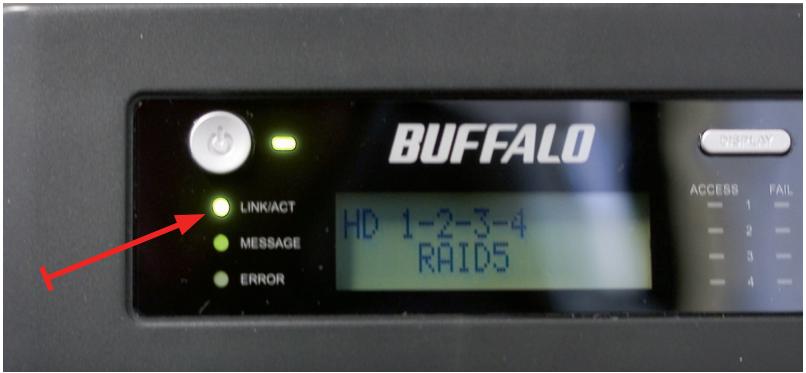
If the LINK/ACT LED on the front of TeraStation is not lit, your TeraStation is not properly connected to your network. Make sure that:
- both TeraStation and the hub, switch, or PC are powered on.
- the Ethernet cable is securely fastened to both devices.
- the Ethernet cable is not damaged. To verify, try using another Ethernet cable.
If problems persist, contact our technical support. Refer to page 9 for more details.
Insert the TeraNavigator CD into your computer's CD-ROM drive. If Setup doesn't launch automatically, you can launch it manually by clicking Start, then Run.... When the Run dialog opens, type d:\setup.exe (where "d" is the drive letter
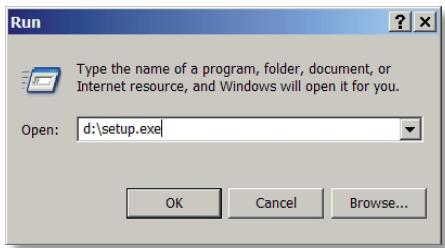
of your CD-ROM). Press OK to continue. If you are installing the software on a Mac, open the CD and click on the TeraNavigator icon to begin installation.
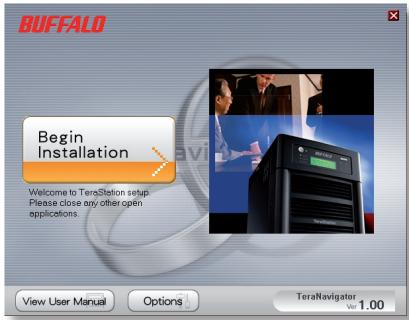
Click on Begin Installation.
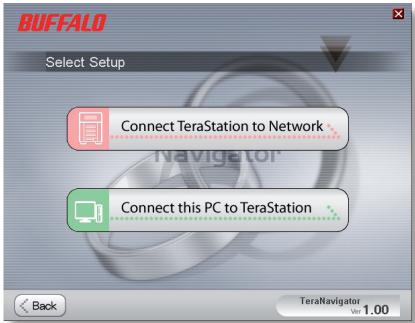
If you're installing on a Mac, skip to the next page.
If you're installing on a PC, click on Connect this PC to TeraStation (the green, lower button).
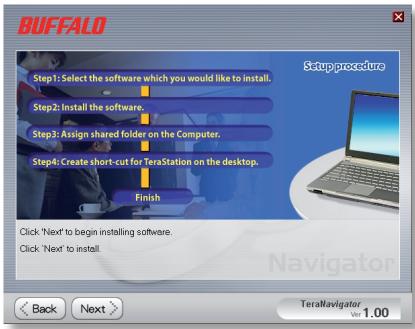
Click Next to step through the installation.
Continue pressing Next to step through the installation.
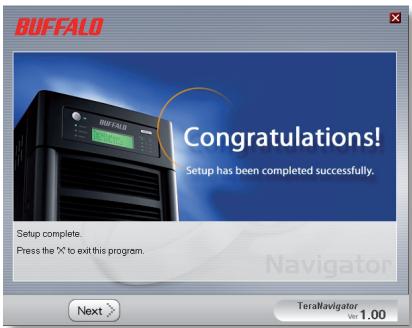
When installation is complete, you may close the installation window.
Congratulations! Your TeraStation is ready to use. Turn to page 7 for more on using your TeraStation with a PC, or page 8 for more on using your TeraStation with a Mac.
Please see the TeraStation User Manual on your TeraStation cd for more help and configuration options.
If you're using a Windows PC, two new icons will be on your desktop: Shortcut for your TeraStation and Buffalo NAS Navigator.

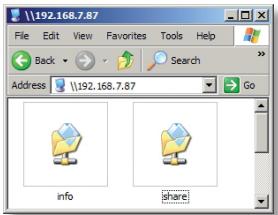
The TeraStation shortcut will open the folders on your TeraStation.
Share is the main folder that you can put files and folders in. Info contains a copy of your user manual.
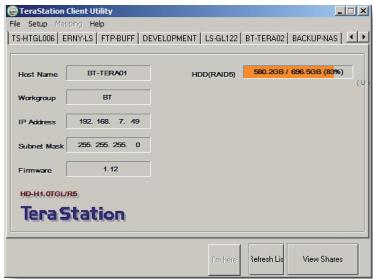
The Buffalo NAS Navigator icon opens the TeraStation's client utility. This lets you easily view system information for your TeraStation(s). If you click Setup and choose Configuration Settings, it will take you to the settings configuration GUI, where you may change your TeraStation's settings. Until you change it, the default username is "admin" and the password is "password"
Consult your user manual for more information on the Buffalo NAS Navigator and the Settings Configuration GUI.
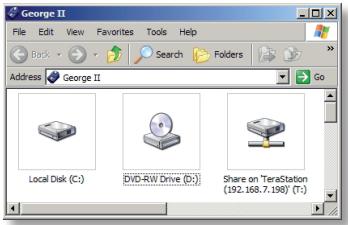
Another way to access folders and data on your TeraStation is through the mapped driveletter 'T'. When the installation program ran, it added your TeraStation's main "share" folder to your "My Computer" folder as drive 'T'. Use this virtual hard drive like any other hard drive on your computer. You may add
additional shares and mapped drive letters to your TeraStation and PC; consult your user manual for more information.
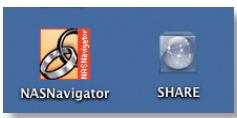
After installing the TeraNavigator software, your Mac will have two new icons on the desktop.
The Share folder is the main folder
that you can put files and folders in. NAS Navigator is the TeraStation's client utility.
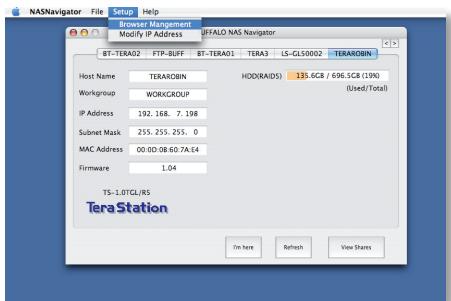
Clicking NAS Navigator opens the TeraStation's client utility. This lets you easily view system information for your TeraStation(s). If you click Setup and choose Browser Management, it will take you to the settings configuration GUI, where you may change
your TeraStation's settings. Until you change it, the GUI's username is "admin" and the password is "password". Consult your user manual for more information on the Buffalo NAS Navigator and the Settings Configuration GUI.

Clicking Share opens the main folder on the TeraStation. You may add additional shares to your TeraStation; consult your user manual for more information.
PC/Mac - The default language for the web interface is English. This can be changed by selecting the Basic screen, and then choosing your desired language from the Display Language drop down. You will also need to select the corresponding Windows Client Language. Click on Apply to implement your changes.
- The equipment that you have purchased has required the extraction and use of natural resources for its production.
- The equipment may contain hazardous substances that could impact health and the environment.
- In order to avoid the dissemination of those substances in our environment and to diminish the pressure on the natural resources, we encourage you to use the appropriate take-back systems.
- The take-back systems will reuse or recycle most of the materials of your end life equipment in a sound way.
- The crossed-out wheeled bin symbol invites you to use those systems.
- If you need more information on the collection, reuse and recycling systems, please contact your local or regional waste administration.
Technical Support
Helpdesk hours: Monday- Thursday 9.00am - 6.00pm (GMT)
Friday 9.00am - 4:30pm (GMT)
Phone: +353 61 708050
Email: helpdesk@buffalo-technology.ie
Web: www.buffalo-technology.com
Assistance technique
Heures de
O atalho para a TeraStation abide as pastas da TeraStation.