DC330KB - Jigsaw DEWALT - Free user manual and instructions
Find the device manual for free DC330KB DEWALT in PDF.
User questions about DC330KB DEWALT
0 question about this device. Answer the ones you know or ask your own.
Ask a new question about this device
Download the instructions for your Jigsaw in PDF format for free! Find your manual DC330KB - DEWALT and take your electronic device back in hand. On this page are published all the documents necessary for the use of your device. DC330KB by DEWALT.
USER MANUAL DC330KB DEWALT
DeWALT, Green Lane, Spennymoor, Co. Durham DL16 6JG England
DeWALT, Green Lane, Spennymoor,
Co. Durham DL16 6JG England
You have chosen a DeWALT tool. Years of experience, thorough product development and innovation make DeWALT one of the most reliable partners for professional power tool users.
Technical data
| DC330 | ||
| Voltage | VDC | 18 |
| Max. power output | W | 400 |
| No-load speed | min-1 | 0 - 3,000 |
| Stroke length | mm | 26 |
| Cutting depth in: | ||
| - wood | mm | 130 |
| - aluminium | mm | 25 |
| - steel | mm | 10 |
| Bevel angle adjustment (l/r) | 0 - 45° | |
| Weight (without battery pack) | kg | 2.4 |
| Battery pack | DE9096 | DE9039 | |
| Battery type | NiCd | NiMH | |
| Voltage | VDC | 18 | 18 |
| Capacity | Ah | 2.4 | 3.0 |
| Weight | kg | 1.0 | 1.0 |
| Charger | DE9116 |
| Mains voltage | VAC 230 |
| Battery type | NiCd/NiMH |
| Approx. charging time | min 60/70 |
| Weight | kg 0.4 |
| Fuses: | ||
| Europe | 230 V tools | 10 Amperes, mains |
| U.K. & Ireland | 230 V tools | 13 Amperes, in plugs |
The following symbols are used throughout this manual:

Denotes risk of personal injury, loss of life or damage to the tool in case of non-observation of the instructions in this manual.

Denotes risk of electric shock.

Fire hazard.
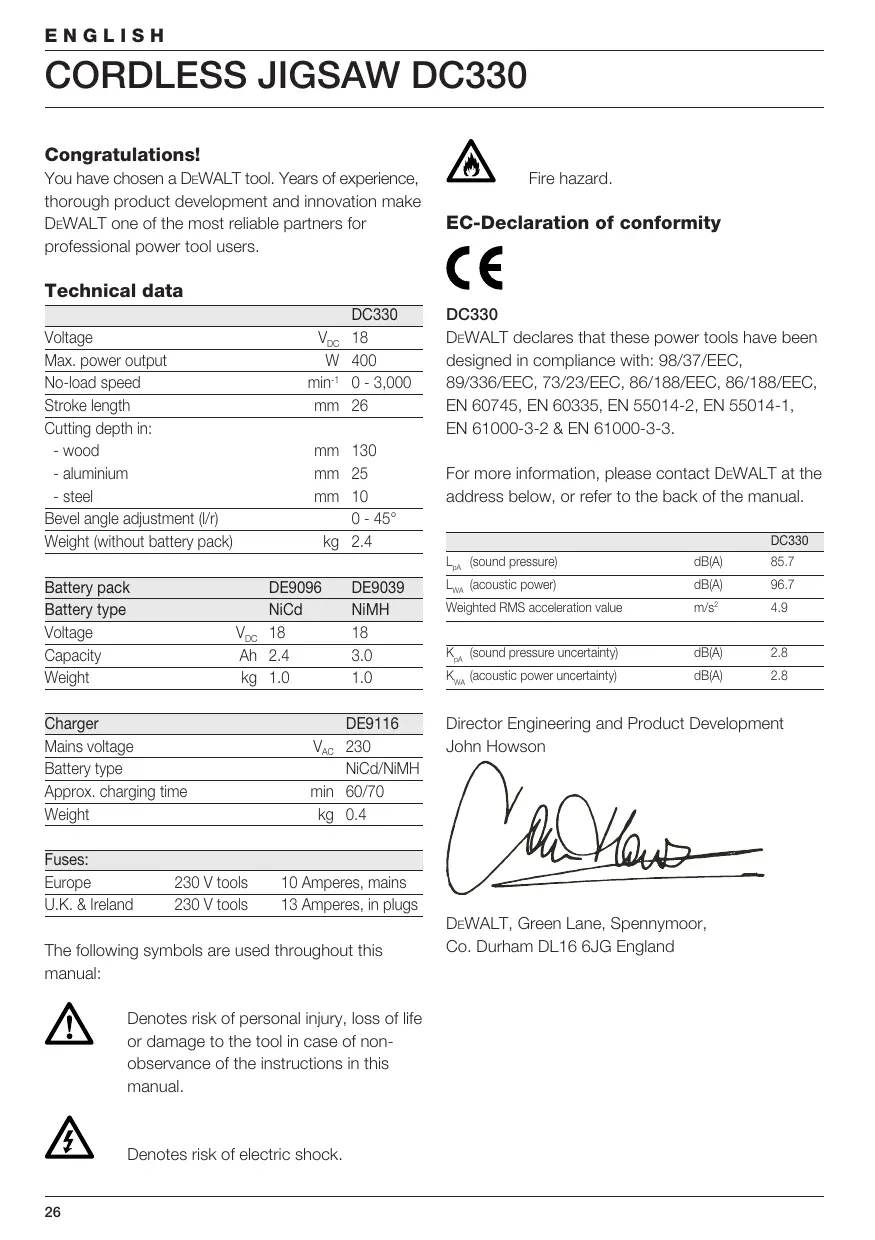
EC-Declaration of conformity

DC330
DeWALT declares that these power tools have been designed in compliance with: 98/37/EEC, 89/336/EEC, 73/23/EEC, 86/188/EEC, 86/188/EEC, EN 60745, EN 60335, EN 55014-2, EN 55014-1, EN 61000-3-2 & EN 61000-3-3.
For more information, please contact DeWALT at the address below, or refer to the back of the manual.
| DC330 | ||
| LpA (sound pressure) | dB(A) | 85.7 |
| LWA (acoustic power) | dB(A) | 96.7 |
| Weighted RMS acceleration value | m/s2 | 4.9 |
| KpA (sound pressure uncertainty) | dB(A) | 2.8 |
| KWA (acoustic power uncertainty) | dB(A) | 2.8 |
Director Engineering and Product Development John Howson

DeWALT, Green Lane, Spennymoor, Co. Durham DL16 6JG England
General safety rules
Warning! Read all instructions. Failure to follow all instructions listed below may result in electric shock, fire and/or serious injury. The term „power tool“ in all of the warnings listed below refers to your mains operated (corded) power tool or battery operated (cordless) power tool. SAVE THESE INSTRUCTIONS.
1 Work area
a Keep work area clean and well lit.
Cluttered and dark areas invite accidents.
b Do not operate power tools in explosive atmospheres, such as in the presence of flammable liquids, gases or dust. Power tools create sparks which may ignite the dust or fumes.
c Keep children and bystanders away while operating a power tool. Distractions can cause you to lose control.
2 Electrical safety
a Power tool plugs must match the outlet. Never modify the plug in any way. Do not use any adapter plugs with earthed (grounded) power tools. Unmodified plugs and matching outlets will reduce risk of electric shock.
b Avoid body contact with earthed or grounded surfaces such as pipes, radiators, ranges and refrigerators. There is an increased risk of electric shock if your body is earthed or grounded.
c Do not expose power tools to rain or wet conditions. Water entering a power tool will increase the risk of electric shock.
d Do not abuse the cord. Never use the cord for carrying, pulling or unplugging the power tool. Keep cord away from heat, oil, sharp edges or moving parts. Damaged or entangled cords increase the risk of electric shock.
e When operating a power tool outdoors, use an extension cord suitable for outdoor use. Use of a cord suitable for outdoor use reduces the risk of electric shock.
3 Personal safety
a Stay alert, watch what you are doing and use common sense when operating a power tool. Do not use a power tool while you are tired or under the influence of drugs, alcohol or medication.
A moment of inattention while operating power tools may result in serious personal injury.
b Use safety equipment. Always wear eye protection. Safety equipment such as dust mask, non-skid safety shoes, hard hat, or hearing protection used for appropriate conditions will reduce personal injuries.
c Avoid accidental starting. Ensure the switch is in the off position before plugging in.
Carrying power tools with your finger on the switch or plugging in power tools that have the switch on invites accidents.
d Remove any adjusting key or wrench before turning the power tool on. A wrench or a key left attached to a rotating part of the power tool may result in personal injury.
e Do not overreach. Keep proper footing and balance at all times. This enables better control of the power tool in unexpected situations.
f Dress properly. Do not wear loose clothing or jewellery. Keep your hair, clothing and gloves away from moving parts. Loose clothes, jewellery or long hair can be caught in moving parts.
g If devices are provided for the connection of dust extraction and collection facilities, ensure these are connected and properly used. Use of these devices can reduce dust related hazards.
4 Power tool use and care
a Do not force the power tool. Use the correct power tool for your application. The correct power tool will do the job better and safer at the rate for which it was designed.
b Do not use the power tool if the switch does not turn it on and off. Any power tool that cannot be controlled with the switch is dangerous and must be repaired.
c Disconnect the plug from the power source before making any adjustments, changing accessories, or storing power tools. Such preventive safety measures reduce the risk of starting the power tool accidentally.
d Store idle power tools out of the reach of children and do not allow persons unfamiliar with the power tool or these instructions to operate the power tool. Power tools are dangerous in the hands of untrained users.
e Maintain power tools. Check for misalignment or binding of moving parts, breakage of parts and any other condition that may affect the power tools operation. If damaged, have the power tool repaired before use. Many accidents are caused by poorly maintained power tools.
f Keep cutting tools sharp and clean. Properly maintained cutting tools with sharp cutting edges are less likely to bind and are easier to control.
g Use the power tool, accessories and tool bits etc., in accordance with these instructions and in the manner intended for the particular type of power tool, taking into account the working conditions and the work to be performed. Use of the power tool for operations different from those intended could result in a hazardous situation.
5 Battery tool use and care
a Ensure the switch is in the off position before inserting battery pack. Inserting the battery pack into power tools that have the switch on invites accidents.
b Recharge only with the charger specified by the manufacturer. A charger that is suitable for one type of battery pack may create a risk of fire when used with another battery pack.
c Use power tools only with specifically designated battery packs. Use of any other battery packs may create a risk of injury and fire.
d When battery pack is not in use, keep it away from other metal objects like paper clips, coins, keys, nails, screws, or other small metal objects that can make a connection from one terminal to another. Shorting the battery terminals together may cause burns or a fire.
e Under abusive conditions, liquid may be ejected from the battery; avoid contact. If contact accidentally occurs, flush with water. If liquid contacts eyes, additionally seek medical help. Liquid ejected from the battery may cause irritation or burns.
6 Service
a Have your power tool serviced by a qualified repair person using only identical replacement parts. This will ensure that the safety of the power tool is maintained.
Additional safety instructions for battery packs

Fire hazard! Avoid metal short circuiting the contacts of a detached battery pack. Do not store or carry the battery pack without the battery cap placed over the contacts.
- The battery fluid, a 25 - 30% solution of potassium hydroxide, can be harmful. In case of skin contact, flush immediately with water. Neutralize with a mild acid such as lemon juice or vinegar. In case of eye contact, rinse abundantly with clean water for at least 10 minutes. Consult a physician.
- Never attempt to open a battery pack for any reason.
Labels on charger and battery pack
In addition to the pictographs used in this manual, the labels on the charger and the battery pack show the following pictographs:

Battery charging

Battery charged

Battery defective

Do not probe with conductive objects

Do not charge damaged battery packs

Read instruction manual before use

Use only with DeWALT battery packs, others may burst, causing personal injury and damage

Do not expose to water

Have defective cords replaced immediately


Charge only between 4^ and 40^
Discard the battery pack with due care for the environment
Do not incinerate the battery pack

Charges NiMH and NiCd battery packs

See technical data for charging time
Package contents
The package contains:
1 Cordless jigsaw
1 Saw blade set
1 Anti-splinter shoe insert
1 Anti-scratch shoe cover
1 Dust extraction shroud
1 Dust extraction adapter
2 Battery packs, NiCd (DC330KA)
2 Battery packs, NiMH (DC330KB)
1 Charger (DC330KA/DC330KB)
1 Kitbox (DC330KA/DC330KB)
1 Instruction manual
1 Exploded drawing
-
Check for damage to the tool, parts or accessories which may have occurred during transport.
-
Take the time to thoroughly read and understand this manual prior to operation.
Description (fig. A)
Your jigsaw DC330 has been designed for professional cutting of wood, steel, aluminium, plastic and ceramic material.
1 Variable speed switch
2 Safety lock
3 Sawdust blower control
4 Blade latch
5 Finger guard
6 Blade holder
7 Guide roller
8 Shoe
9 Pendulum stroke selector
10 Shoe lever
11 Battery pack
Charger
Your charger DE9116 accepts DeWALT NiCd/NiMH battery packs ranging from 7.2 to 18V
11 Battery pack
12 Release buttons
13 Charger
14 Charging indicator (red)
Electrical safety
The electric motor has been designed for one voltage only. Always check that the battery pack voltage corresponds to the voltage on the rating plate. Also make sure that the voltage of your charger corresponds to that of your mains.

Your DeWALT charger is double insulated in accordance with EN 60335.
Mains plug replacement (U.K. & Ireland only)
- Should your mains plug need replacing and you are competent to do this, proceed as instructed below. If you are in doubt, contact an authorized DeWALT repair agent or a qualified electrician.
- Disconnect the plug from the supply.
- Cut off the plug and dispose of it safely; a plug with bared copper conductors is dangerous if engaged in a live socket outlet.
- Only fit 13 Amperes BS1363A approved plugs fitted with the correctly ratedfuse (1).
- The cable wire colours, or a letter, will be marked at the connection points of most good quality plugs. Attach the wires to their respective points in the plug (see below). Brown is for Live (L) (2) and Blue is for Neutral (N) (4).
- Before replacing the top cover of the mains plug ensure that the cable restraint (3) is holding the outer sheath of the cable firmly and that the two leads are correctly fixed at the terminal screws.


Never use a light socket.
Never connect the live (L) or neutral (N) wires to the earth pin marked E or 1一
Using an extension cable
An extension cord should not be used unless absolutely necessary. Use an approved extension cable suitable for the power input of your charger (see technical data). The minimum conductor size is 1mm^2 ; the maximum length is 30m .
Assembly and adjustment

- Prior to assembly and adjustment, always remove the battery pack.
Always switch off the tool before inserting or removing the battery pack.

Use only DEWALT battery packs and chargers.
Battery pack (fig. A & B)
Charging the battery pack (fig. A)
When charging the battery pack for the first time, or after prolonged storage, it will only accept an 80 % charge. After several charge and discharge cycles, the battery pack will attain full capacity. Always check the mains prior to charging the battery pack. If the mains is functioning but the battery pack does not charge, take your charger to an authorised DeWALT repair agent. Whilst charging, the charger and the battery pack may become warm to touch. This is a normal condition and does not indicate a problem.

Do not charge the battery pack at ambient temperatures < 4^ or >40^ . Recommended charging temperature: approx. 24^ .
- To charge the battery pack (11), insert it into the charger (13) as shown and plug in the charger. Be sure that the battery pack is fully seated in the charger. The red charging indicator (14) will blink. After approx. 1 hour, it will stop blinking and remain on. The battery pack is now fully charged. The battery pack can be removed at any time or left in the connected charger for a longer period of time (with a maximum of 14 days).
Inserting and removing the battery pack
- Insert the battery pack into the grip until it clicks in place.
- To remove the battery pack, press the two release buttons (12) simultaneously and pull the pack out of the grip.
Battery cap (fig. B)
A protective cap is supplied to cover the contacts of a detached battery pack. Without the protective cap in place, loose metal objects could short circuit the contacts, causing a fire hazard and damaging the battery pack.
- Take off the protective cap (15) before placing the battery pack (11) in the charger or tool.
- Place the protective cap over the contacts immediately after removing the battery pack from the charger or tool.

Make sure the protective cap is in place before storing or carrying a detached battery pack.
Automatic refresh

The automatic refresh mode will equalize or balance the individual cells in the battery pack at its peak capacity. Battery packs should be refreshed overnight after every 10th charge/discharge cycle or whenever the pack no longer delivers the same amount of work.
-
To refresh your battery pack, place the battery in the charger as usual. The red light will blink continuously indicating that the charge cycle has started.
-
When the 1-hour charge cycle has completed, the light will stay on continuously and will no longer blink. The pack is fully charged and can be used at this time.
- If the pack is left in the charger after the initial 1-hour charge, the charger will automatically initiate the refresh mode. This mode will continue up to 8 hours, but the battery pack can be removed at any time during the refresh mode.
Hot/Cold Pack Delay
When the charger detects a battery that is too hot or too cold, it automatically starts a Hot/Cold Pack Delay, suspending charging until the battery has reached an appropriate temperature. The charger then automatically switches to the pack charging mode. This feature ensures maximum battery life. The red indicator blinks long, then short while in the Hot/Cold Pack Delay mode.
Fitting and removing a saw blade (fig. C)
The tool-free blade exchange system ensures quick and easy changing of saw blades.
- Open the blade holder (6) by fully retracting the blade latch (4).
- Insert the saw blade into the blade holder (6) guiding the back of the blade into the groove of the guide roller (7).
- Release the blade latch (4).
- To remove the saw blade, fully retract the blade latch and pull the blade out of the holder.
Saw blades
| Blade type | Applications |
| Fine-toothed cutting blade | for smooth straight cuts |
| Coarse-toothed cutting blade | for fast straight cuts |
| Metal cutting blade | for ferrous and non-ferrous metals |
| Flush cutting blade* | for finishing off cuts up to a wall or edge. |
- Not available in all countries.
A wide variety of dedicated saw blades is available as an option.

Always select your saw blade with great care.
Setting the bevel angle (fig. D)
The adjustable shoe (8) allows cutting of LH and RH bevel angles up to 45^ . The bevel scale has preset positions at 0^ , 15^ , 30^ and 45^ .
- Release the shoe lever (10).
- Slide the shoe (8) toward the saw blade.
- Tilt the shoe and set the desired bevel angle using the scale.
- Tighten the shoe lever.
Setting the pendulum stroke (fig. A)
The adjustable pendulum stroke guarantees a perfect cutting stroke for different materials.
- Slide the selector (9) to the desired position referring to the table below. The selector can be manipulated during operation.
| Pos. | Wood | Metal | Plastics |
| 3 | Fast cuts | - | PVC |
| 2 | Thick workpieces | - | Fiberglass |
| Acrylic | |||
| 1 | Plywood | Aluminium | - |
| Chipboard | Non-ferrous | - | |
| 0 | Thin workpieces | Sheet metal | - |
| Fine cuts |
Setting the sawdust blower (fig. A)
The sawdust blower conducts an adjustable stream of air to the saw blade to keep the workpiece clear of sawdust during operation.
-
Set the sawdust blower using the lever (3).
-
Low For working with metals, when using coolants and lubricants and for use with dust extraction.
- Intermediate For working with wood and similar materials in low speed.
- High For working with wood and similar materials in high speed.
Mounting the plastic anti-scratch shoe cover (fig. E)
The anti-scratch shoe cover (16) reduces damage to the surface of (sensitive) workpieces.
- Click the cover onto the shoe as shown.
Mounting and removing the anti-splinter shoe insert (fig. F1 & F2)
The anti-splinter shoe insert (17) which fits close to the saw blade reduces splintering of the workpiece. The insert can be mounted both into the shoe and the shoe cover.
- Hold the insert (17) in the orientation as shown.
-
To mount the insert into the shoe (8):
-
Slide the edges (18) into the grooves (19).
-
Slide the insert back into position against the shoe.
-
To mount the insert into the cover (16):
-
Slide the edges (18) behind the ribs (20).
-
Push the front end of the insert towards the cover. The insert snaps into place.
-
To remove the anti-splinter shoe insert do the above process in reverse order.
Dust extraction (fig. G)
The dust extraction adaptor (21) in combination with the dust extraction shroud (22) helps extracting the dust from the workpiece surface, when connected to a suitable dust extraction system.
- Place the dust extraction shroud (22) onto the finger guard (5) until it clicks in place.
- Fit the dust extraction adaptor (21) to the tool as shown.
- Connect the hose of a suitable dust extraction system to the adaptor.

When appropriate, connect a dust extraction system designed in compliance with the applicable directives regarding dust emission.

Do not use a dust extraction system without proper spark protection when sawing metal.
Instructions for use

- Always observe the safety instructions and applicable regulations.
- Make sure your workpiece is well secured. Remove nails, screws and other fasteners that may damage the blade.
- Check that there is sufficient space for the blade underneath the workpiece.
Do not cut materials that are thicker than the maximum cutting depth.
- Use sharp saw blades only. Damaged or bent saw blades must be removed immediately.
- Do not use the tool for sawing pipes or tubes.
- Never run your tool without a saw blade.
- For optimal results, move the tool smoothly and constantly over the workpiece. Do not exert lateral pressure on the saw blade. Keep the shoe flat on the workpiece. When sawing curves, circles or other round shapes, push the tool gently forward.
- Wait until the tool has come to a standstill before removing the saw blade from the workpiece. After sawing the blade may be very hot. Do not touch.
Prior to operation:
- Make sure your battery pack is (fully) charged.
Switching on and off (fig. H)
For safety reasons your tool is equipped with a safety lock.
- To unlock the tool, release the safety lock (2).
- To run the tool, press the variable speed switch (1). The pressure exerted on the variable speed switch determines the tool speed.
- To stop the tool, release the switch.
- To lock the tool in off position, activate the safety lock.

After using the tool for an extended period on low speed settings, run it for approx. 3 minutes on maximum no-load speed.
Sawing in wood
- If necessary, draw a cutting line.
- Switch the tool on.
- Hold the tool against the workpiece and follow the line.
- For sawing parallel to the edge of your workpiece, install the parallel fence and guide your jigsaw along the workpiece a shown in figure 1.
Sawing in wood using a pilot hole
- If necessary, draw a cutting line.
- Drill a hole (ø min. 12 mm) and introduce the saw blade.
- Switch the tool on.
- Follow the line.
- For cutting perfectly round shapes, install the trammel bar and set it to the required radius (fig. J).
Sawing up to a projecting edge (fig. K)
- Using a conventional blade, cut up to the projected edge.
- Finish off the cut using a flush cutting blade.

Dust extraction (fig. G)
- When the tool is used indoor for extended periods of time, use a suitable dust extractor designed in compliance with the applicable Directives regarding dust emission.
Sawing in metal
- Mount an appropriate saw blade.
- Proceed as described above.

Use a cooling lubricant (cutting oil) to prevent overheating of the saw blade or the workpiece.
Optional accessories
Consult your dealer for further information on the appropriate accessories.
These include:
- DE3241
Parallel guide
- DE3242
Trammel bar
The following replacement blades are available:
-DT2048
Fine toothed cutting blade
-DT2075
Coarse toothed cutting blade
-DT2160
Metal cutting blade
-DT2074
Flush cutting blade*
- Not available in all countries
Maintenance
Your DEWALT power tool has been designed to operate over a long period of time with a minimum of maintenance. Continuous satisfactory operation depends upon proper tool care and regular cleaning.

Lubricating the guide roller (fig. C)
- Apply a drop of oil to the guide roller (7) at regular intervals to prevent jamming.

Cleaning
- Unplug the charger before cleaning the housing with a soft cloth.
- Remove the battery pack before cleaning your power tool.
- Keep the ventilation slots clear and regularly clean the housing with a soft cloth.
Environment

Rechargeable battery pack
This long life battery pack must be recharged when it fails to produce sufficient power on jobs which were easily done before. At the end of its technical life, discard it with due care for our environment:
- Run the battery pack down completely, then remove it from the tool.
- NiCd and NiMH cells are recyclable. Take them to your dealer or a local recycling station.
The collected battery packs will be recycled or disposed of properly.

Unwanted tools
Take your tool to an authorised DEWALT repair agent where it will be disposed of in an environmentally safe way.
GUARANTEE
30 DAY NO RISK SATISFACTION GUARANTEE
If you are not completely satisfied with the performance of your DeWALT tool, simply return it within 30 days, complete as purchased, to the point of purchase, for a full refund or exchange. Proof of purchase must be produced.
- ONE YEAR FREE SERVICE CONTRACT
If you need maintenance or service for your DeWALT tool, in the 12 months following purchase, it will be undertaken free of charge at an authorized DeWALT repair agent. Proof of purchase must be produced. Includes labour and spare parts for Power Tools. Excludes accessories.
- ONE YEAR FULL WARRANTY
If your DEWALT product becomes defective due to faulty materials or workmanship within 12 months from the date of purchase, we guarantee to replace all defective parts free of charge or, at our discretion, replace the unit free of charge provided that:
The product has not been misused.
- Repairs have not been attempted by unauthorized persons.
Proof of purchase date is produced. This guarantee is offered as an extra benefit and is additional to consumers statutory rights.
For the location of your nearest authorized DeWALT repair agent, please use the appropriate telephone number on the back of this manual. Alternatively, a list of authorized DeWALT repair agents and full details on our after-sales service are available on the Internet at www.2helpU.com
SIERRA CALADORA SIN CABLE DC330
Enhorabuena!
Director Engineering and Product Development John Howson

DeWALT, Green Lane, Spennymoor, Co. Durham DL16 6JG Inglaterra
DeWALT, Green Lane, Spennymoor, Co. Durham DL16 6JG Angleterre
Pack-batteries charge

L'emballage content:
Packs-batteries rechargeables
DeWALT, Green Lane, Spennymoor,
Co. Durham DL16 6JG England
Director Engineering and Product Development John Howson

DeWALT, Green Lane, Spennymoor, Co. Durham DL16 6JG England
Director Engineering and Product Development John Howson

DeWALT, Green Lane, Spennymoor, Co. Durham DL16 6JG England
- 1 ARS FRI VEDLIKEHOLDSERVICE
Director Engineering and Product Development John Howson

DeWALT, Green Lane, Spennymoor,
Co. Durham DL16 6JG England
Director Engineering and Product Development John Howson

DeWALT, Green Lane, Spennymoor, Co. Durham DL16 6JG Englanti
Director Engineering and Product Development John Howson

DeWALT, Green Lane, Spennymoor, Co. Durham DL16 6JG England
DEWALT, Green Lane, Spennymoor, Co. Durham DL 16 6JG Ingiltere
e Yanlş kullanim durumunda akünun dinşina sivilar sizabilir. Bu sivilara temas etmeyin. Yanlşlɪkla aküden sizan sivilara temas ederseniz, temas yerini hemen su ile yɪkayın. Eger sz konusu sɪvɒ进展情况XXXXXXXXXXXXXXXXXXXXXXXXXXXXXXXXXXXXXXXXXXXXXXXXXXXXXXXXXXXXXXXXXXXXXXXXXXXXXXXXXXXXXXXXXXXXXXXXXXXXXXXXXXXXXXXXXXXXXXXXXXXXXXXXXXXXXXXXXXXXXXXXXXXXXXXXXXXXXXXXXXXXXXXXXXXXXXXXXXXXXXXXXXXXXXXXXXXXXXXXXXXXXXXXXXXXXXXXXXXXXXXXXXXXXXXXXXXXXXXXXXXXXXXXXXXXXXXXXXXXXXXXXXXXXXXXXXXXXXXXXXXXXXXXXXXXXXXXXXXXXXXXXXXXXXXXXXXXXXXXXXXXXXXXXXXXXXXXXXXXXXXXXXXXXXXXXXXXXXXXXXXXXXXXXXXXXXXXXXXXXXXXXXXXXXXXXXXXXXXXXXXXXXXXXXXXXXXXXXXXXXXXXXXXXXXXXXXXXXXXXXXXXXXXXXXXXXXXXXXXXXXXXXXXXXXXXXXXXXXXXXXXXXXXXXXXXXXXXXXXXXXXXXXXXXXXXXXXXXXXXXXXXXXXXXXXXXXXXXXXXXXXXXXXXXXXXXXXXXXXXXXXXXXXXXXXXXXXXXXXXXXXXXXXXXXXXXXXXXXXXXXXXXXXXXXXXXXXXXXXXXXXXXXXXXXXXXXXXXXXXXXXXXXXXXXXXXXXXXXXXXXXXXXXXXXXXXXXXXXXXXXXXXXXXXXXXXXXXXXXXXXXXXXXXXXXXXXXXXXXXXXXXXXXXXXXXXXXXXXXXXXXXXXXXXXXXXXXXXXXXXXXXXXXXXXXXXXXXXXXXXXXXXXXXXXXXXXXXXXXXXXX
6 Servis
a Aletinizi sadece uzman bir elemana ve original yedek parçalar kullandirarak onartin. Böylelikle aletin güvenligini korumuş olursunuz.
DeWALT, Green Lane, Spennymoor, Co. Durham DL16 6JG England
Ievikoi kavovc aopaleiae Ipoedoinoian! AiaabaTe oLe Tc unObeEic. H m npon on oawv twv npakatw unObeEewu npopei va pokaee i nektpoanEia, npkayia n/ka o6apouoc tpaumatoouc. O xapaktniooC "nEkpio evaieo" nou xnoiopoiteiai otic npakatw npoeiodointke c unObeEic apopa n to eyaieo nou ouvdeTai otnv npica (e kaWio) n to epyaleio nou aeitoupyei e pnataipia (xwiic kaWio).
ΦYΛΑΕTE AYTEΣ TΙΣ OΔΗΓΙΕΣ.
1 Xwoc epyaiaac
a DiatnpesTe To xwpo Nou Epyazc0e Katheta Kai kala 意 .H aTaEia oTo xwpo Nou Epyazc0e Kai ta onuia xwpi ca lo mnpei va onnynsoov e atuxnata.
6 Mn xŋoɪoɪnoɪeɪte Ta nλεκTPLká εργaλεia oε περιδαλνο ὄπου unʌpχει KIVδυος ἐκρηξης, π.x. napouσia εύφλεκTaw uypw, aερiω ἡ Κόνης. Ta nλεκTPLká εργaλεia μιθείν α δημιουργησουν σπινθηρισό o onioic μιθείν va avapλέξει τοκόνη ἡτις avθυμίασεις.
Y Otav xpnaiuioieTo nAektpikoEpyaaleio, Kpatate Ta naia kai ta unoloina atoua makpiia ano To Xwpnou EpyaZeOe. Ze nepiTTwn nou aaaa atouma anoonacouv tv npoooxn oac mIoepei va xaotev Eayxo Tou uXavnuatoc.
2 Aopaa nxc npon tou nEeKtpiKo pEuMaTos
a To CTOU KAALWIOU TOU NLEKTPIKOU Epyaleiou npentv a TApiaZei OTN v avTioToiXn piz. Aev nItpenTai Kaveva TpOIO n eTaokeuTou PIG.MxnoiponoieITE npoapmuotikac 0ta YIwEVA NLEKTPiKa Epyaleia. Ta PIG NOU EEV exouu UTOOe I TPOONOeIC KAI O kataAANe cPiZeC MEiwovu Tov KivDuv o NLEKTPoINxiac.
6 Anopeuyte Tny enapn tou oawatoc aucpe yiwvecs eipaviec onwsc wahves, 8epavtka owata (kaloipep), kouicec kaipsiyia. Otav to owa macivai yiewevo, auavetal o kivduvo cektpoanEiaac.
y Mny ektheta to nIektpiko epyaiao otn 6poxnh n tv uypaia. H dioou vepou oTo nIektpko epyaiao auXavTeov kivduvo nIektponlaiac.