RCD100DP - Radio LEXIBOOK - Free user manual and instructions
Find the device manual for free RCD100DP LEXIBOOK in PDF.
| Brand | LEXIBOOK |
| Model | RCD100DP |
| Product Type | Radio with CD player |
| Power Supply | Mains adapter AD-0970-VDS, 230 V ~ 50 Hz, 12 W, output 9 V - 1 A |
| Output Power | 2 × 1 W |
| Compatible Disc Formats | Audio CD, CD single (8 cm), CD-R, CD-RW |
| CD Playback Functions | Play, pause, track skip (next/previous), fast forward/rewind, repeat one track, repeat entire disc, intro play |
| Display | LCD screen with track number and time |
| Headphone | 3.5 mm jack socket |
| Speakers | Built-in speakers (2) |
| Built-in CD Storage | Rack for 10 CDs |
| Additional Storage | 2 side drawers, 2 compartments in the chest |
| Cleaning | Soft damp cloth; unplug before cleaning |
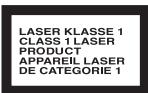
| Laser Safety | Class 1, wavelength 790 nm ± 30 nm |
| Safety Instructions | Do not open or repair yourself; avoid moisture, heat, dust; keep out of reach of children under 3 years |
| After-Sales Service | Service centre or specialised workshop |
| Recycling | Do not dispose of with household waste; inquire about recycling options |
Frequently Asked Questions - RCD100DP LEXIBOOK
User questions about RCD100DP LEXIBOOK
0 question about this device. Answer the ones you know or ask your own.
Ask a new question about this device
Download the instructions for your Radio in PDF format for free! Find your manual RCD100DP - LEXIBOOK and take your electronic device back in hand. On this page are published all the documents necessary for the use of your device. RCD100DP by LEXIBOOK.
USER MANUAL RCD100DP LEXIBOOK
Please observe the following safety instructions carefully before putting the unit into Operation. Take note of the warnings on the unit and in this manual. Always keep the instruction manual near at hand. If you seal or pass on the product, make sure to include this manual together with the unit.
8
Do not let young children use electrical devices unattended.
Swallowing batteries may be fatal. Therefore always keep batteries inaccessible to young children. If a battery has been swallowed, consult a doctor immediately.
Also keep the plastic packaging away from children. There is danger of suffocation!
Make sure that the unit is not exposed to:
- humidity or moisture;
- direct sunlight or other direct heat (e. g. from radiators or other Stereo equipment);
- constant Vibration;
- strong dust or places without Ventilation.
Ensure that the power unit is accessible
Connect the mains adapter to a power socket (230 V ~ 50 Hz) that is near to the device.
The mains adapter must be easily accessible in case the device has to be disconnected from the mains power supply quickly. To avoid tripping hazards, please avoid using an extension cable.
Do not repair the unit yourself.

In case the power supply cord or the unit is damaged, pull out the AC mains plug immediately. Under no circumstances attempt to open or repair the unit yourself. There is danger of electric shock!
Refer all servicing to our Service Center or to another qualified workshop.
CD-Player

The CD player is a Class 1 laser product. The unit is equipped with a safety System that prevents the emergence of dangerous laser beams during normal Operation. To avoid injury to the eye, do not manipulate or damage the safety System of the unit.
INSTALLATION
CONNECT THE UNIT TO THE MAINS
Only connect the mains adapter supplied to an easily accessible 230V 50Hz power socket.
HEADPHONE JACK
For private listening, connect low impedance 3.5mm (32 ohm) stereo headphones (not included) to this jack. The speakers are automatically disconnected when the headphone plug is inserted in the jack.
Note!
Before putting on headphones set the volume to minimum!

The toy is not designed for children under three years of age.
The toy may only be operated using the recommended transformer.
The transformer is not a toy.
Toys that are usually cleaned using liquids must be separated from the transformer before cleaning.
13

一
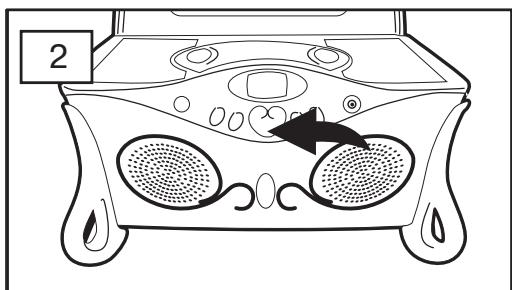
OPERATION
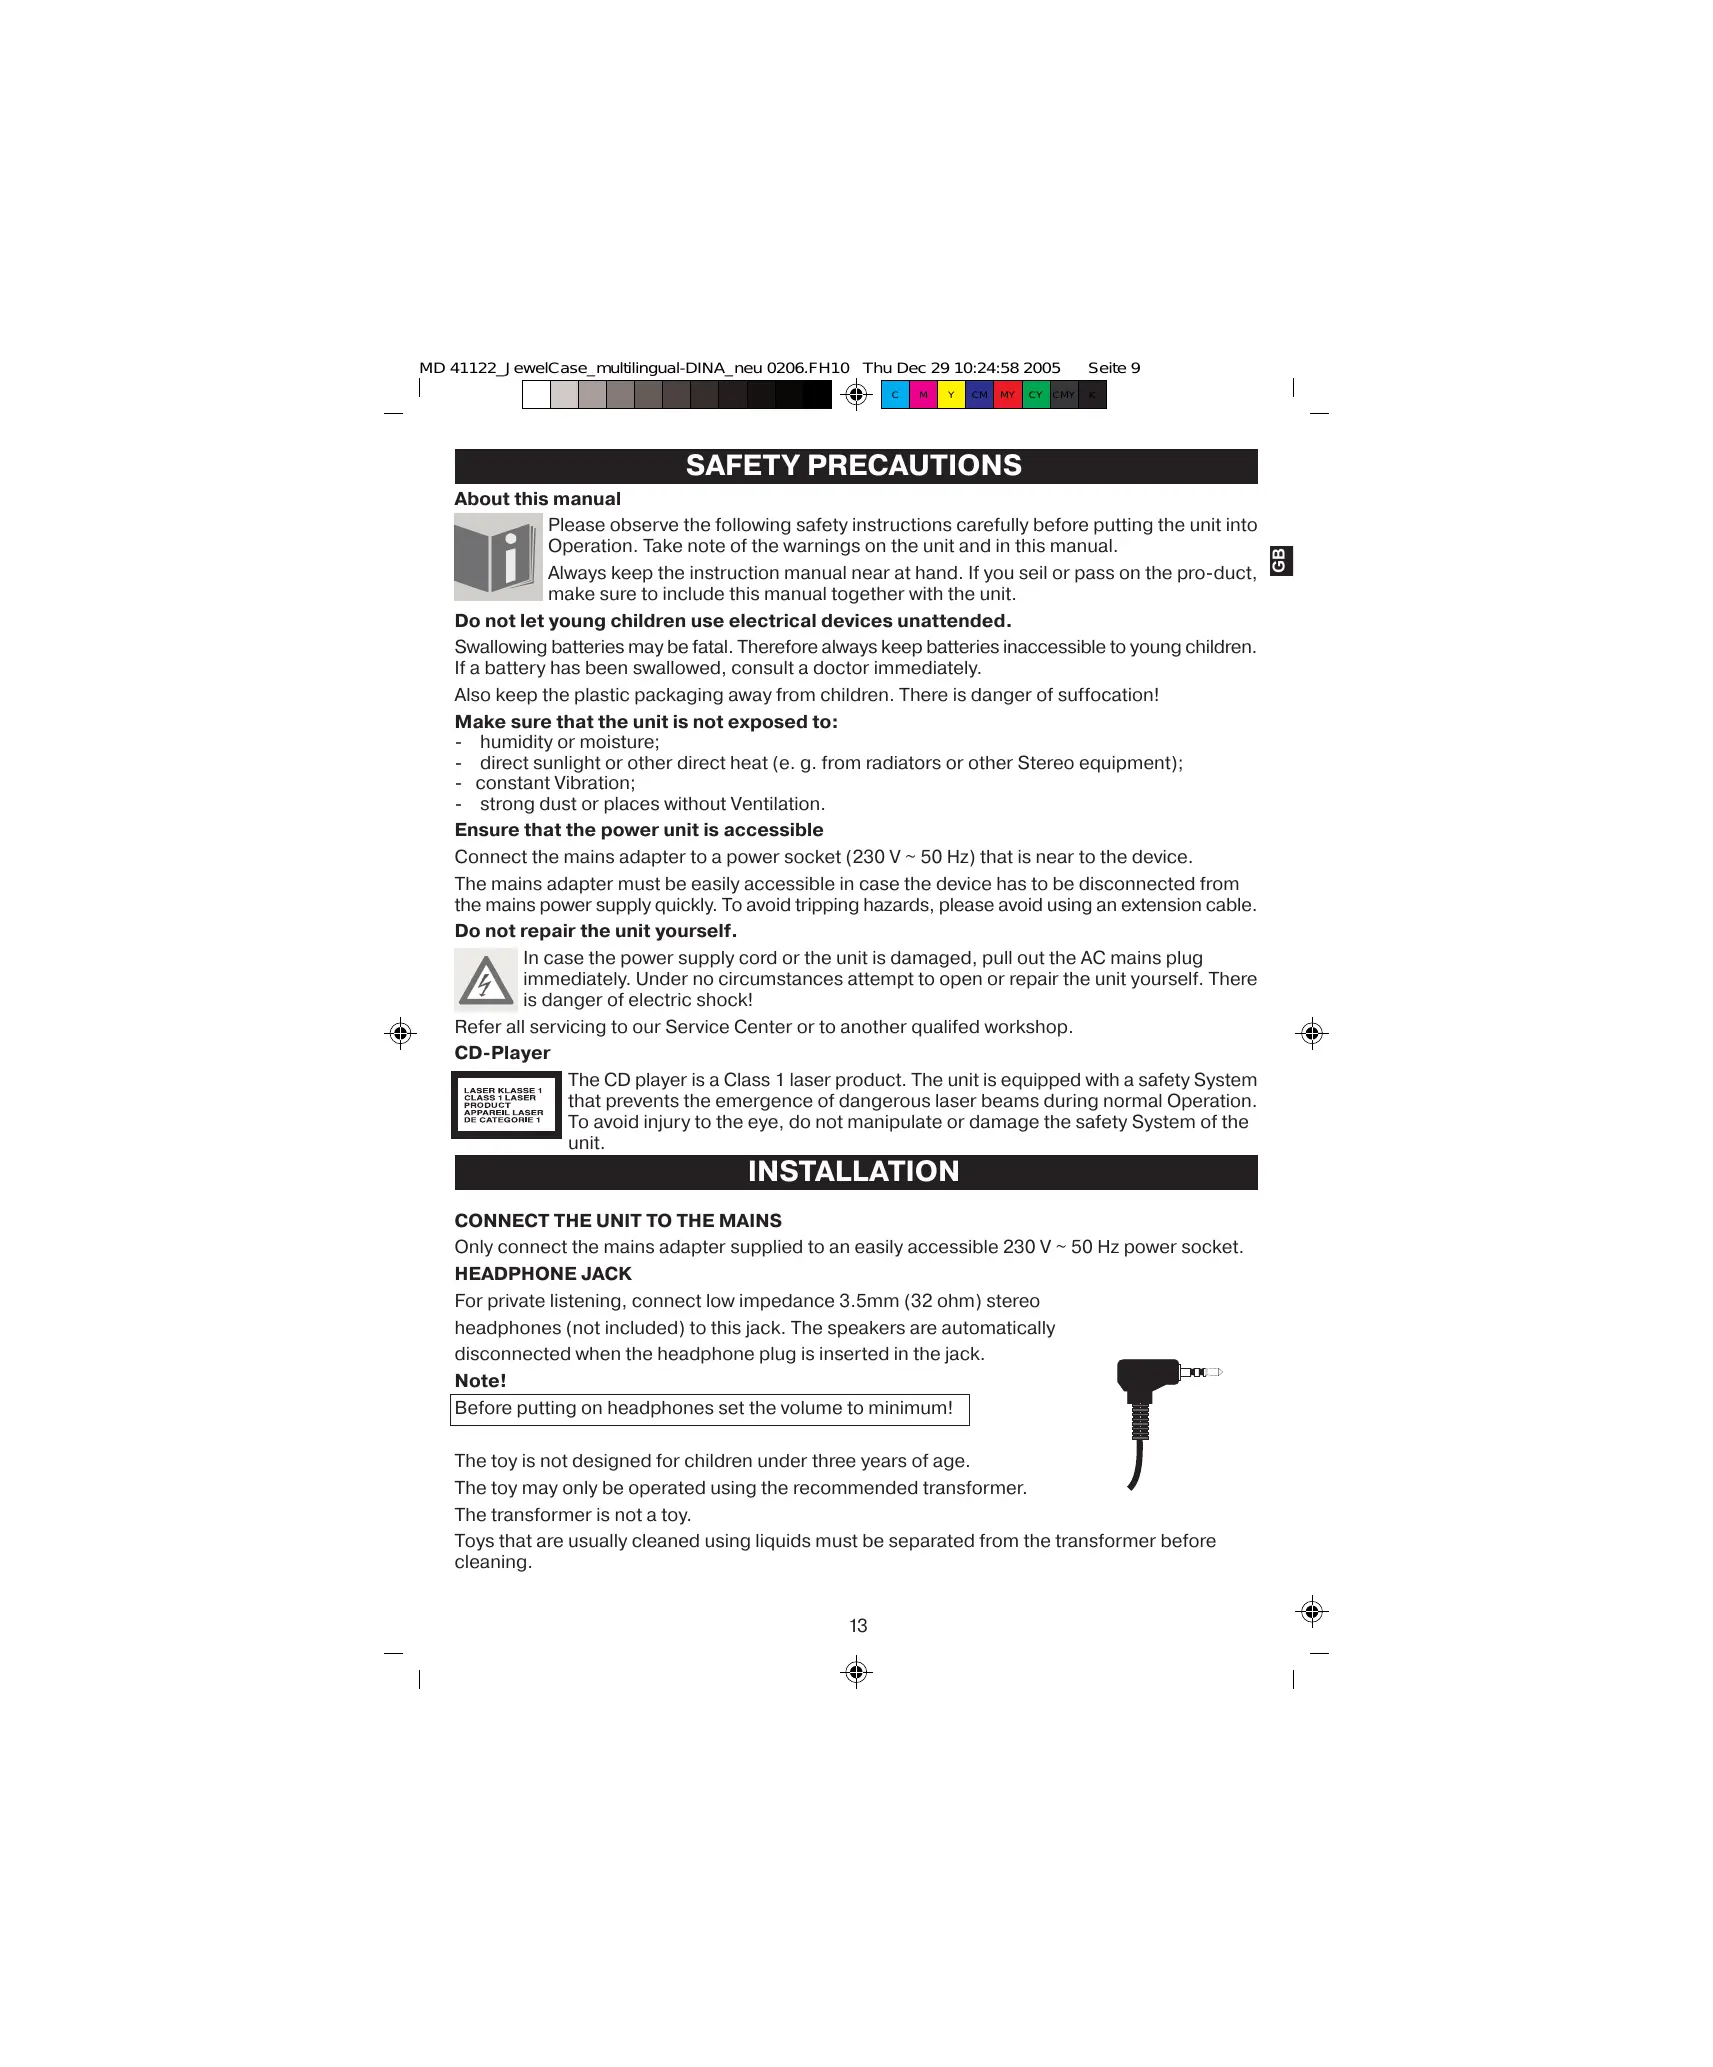
INSERTING A CD

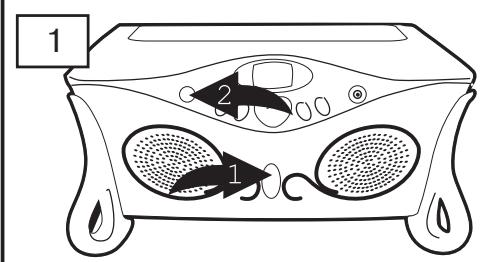
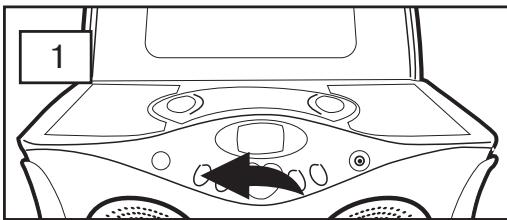
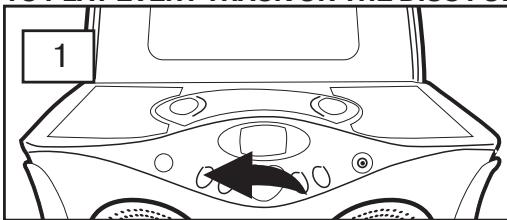
Gently rotate the Top Door Open button 1 to the right and the Top Door will open slightly. Lift open the door to reveal the CD Compartment Door. Press the POWER button 2 to turn the unit on, the POWER indicator will light.
Open the CD Compartment by pressing the CD Door Open/Close area. Place a disc on the spindle, label side up, and close the CD compartment door.
NOTE: You can use standard and single-size (3") CDs with this unit.
NOTES:
- If a disc is inserted incorrectly, dirty, damaged or not present at all, and the PLAY/PAUSE button is pressed, "Error" or "No Disc" will appear in the display.
- As each track is played, the track number is shown in the display.
- To prevent damage to the disc, never open the CD door while the disc is rotating. Wait for the disc to stop before opening the CD door. Never touch the lens when the CD compartment door is open.
COMPARTMENTS/DRAWERS:
DRAWERS: On each side of the unit is a drawer; simply pull out the drawer to store items.
COMPARTMENTS: When the Top Door is opened, there will be two compartments on either side of the CD player. Simply lift up on each compartment to store items.
CD STORAGE: When the Top Door is opened, press on the two, PRESS-TO OPEN areas to access the CD Storage Compartment. Store up to 10 CDs in these compartments.
14


OPERATION (CONTINUED)
TO PLAY A CD (STANDARD, CD-R AND CD-RW)
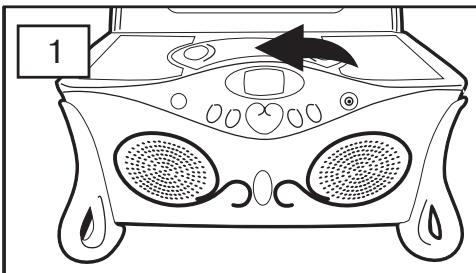
Insert a CD as described before. Press the PLAY/PAUSE button to start playback; the total number of tracks and playing time will appear briefly, then playback will begin.
Press the PLAY/PAUSE button to pause playback; the time display will blink and the Pause indicator will appear in the display. Press again to resume playback.
6
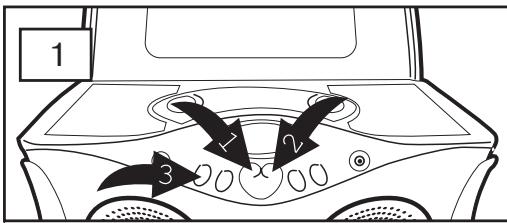
Adjust the VOLUME buttons 1 as desired. To skip forward or backward through the tracks on the disc, press the SKIP/SEARCH 2 or 3 button. To search forward or backward through the tracks on the disc, press and hold the SKIP/SEARCH 2 or 3 button.
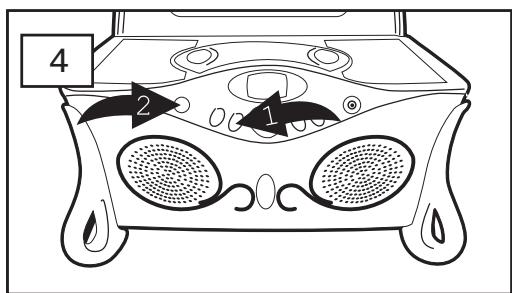
When the disc is through playing, it will stop. Press the STOP button ① to stop the disc before it is finished; the total number of tracks and playing time will appear. Press the POWER button ② to turn the unit off; the POWER indicator will go out.
15
OPERATION (CONTINUED)
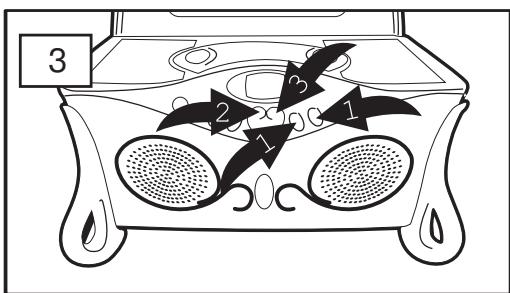
TO REPEATEDLY PLAY BACK ONE TRACK
B
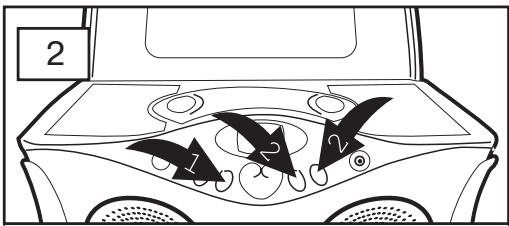
With a CD inserted and playing, select a track using the SKIP/SEARCH 1 or 2 button. Press the REPEAT/INTRO button 3 once; the Repeat 1 indicator will appear in the display.
TO REPEATEDLY PLAY BACK ALL TRACKS
With a CD inserted and playing, press the REPEAT/INTRO button twice; the Repeat ALL indicator ALL will appear in the display.
The unit will then play the same track over and over until the STOP button 1 is pressed. Adjust the VOLUME buttons 2 as desired.

The unit will then play all the tracks on the CD over and over until the STOP button 1 is pressed. Adjust the VOLUME buttons 2 as desired.
TO CANCEL OR STOP REPEAT PLAYBACK
- TO STOP REPEAT PLAYBACK, press the STOP button once.
- TO CANCEL REPEAT PLAYBACK, press the REPEAT/INTRO button until the repeat indicator disappears from the display; the unit will continue normal playback.
TO PLAY EVERY TRACK ON THE DISC FOR A SHORT TIME
During playback, press the REPEAT/INTRO button three times. The Repeat INTRO indicator appears in the display. The unit now plays the first 10 seconds of every track on the CD.

After playing all tracks for a short time, the playback stops automatical. Press the STOP button 1, to stop the playback before the INTRO play ends. Set the Volume as desired with the VOLUME+/- 2 buttons.

CLEANING
Disconnect the mains adapter before cleaning!
To clean the unit, only use a moistened, soft cloth. Do not apply chemical solvents or cleaning agents, as they may damage the surface and/or labelling of the unit.

DISPOSAL

At the end of its life, the appliance must not be disposed of in household rubbish. Enquire about the options for environmentally-friendly disposal.
SPECIFICATIONS
Power requirements
Mains adapter: AD-0970-VDS
Secondary: 230V-240V ~ 50Hz 12W
Primary: 9V---1A

CD-Player
D/A converter: 1 bit DAC, 8 times sampling rate
Gamma frequency 20~20000Hz
Laser radiation hazard: Class 1
Wave length: 790nm±30nm
Please note: These days there are many non-standard CD recording and copy protection procedures as well as various blank CD-R and CD-RW disks. Therefore in individual cases there may be read errors or delays. This does not mean the unit is mal-functioning.
Power
Power output: 2 × 1W
Subject to technical changes!


COMMANDES

MANTENGAL ENCHUFE ACCESIBLE.
Radiação laser: Class 1
Comprimentos de onda: 790nm±30nm
Conversion D/A: 1 bit DAC, x 8 oversampling
Frequenze 20~20000 Hz
Radiazione laser: Class 1
UDGANG TIL HOVEDTELEFON
REPETERA ALLA TITLAR
IKKE REPARER APPARATET SELV.