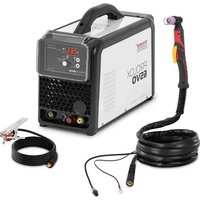
PROLOX 65VO - Welding machine Stamos - Free user manual and instructions
Find the device manual for free PROLOX 65VO Stamos in PDF.


| Product Type | Soldering and Desoldering Station |
| Brand | Stamos |
| Model | PROLOX 65VO |
| Dimensions (L x W x H) | 210 x 150 x 100 mm |
| Weight | 2.5 kg |
| Power Supply | 230 V, 50 Hz |
| Power | 65 W |
| Temperature Range | 150 °C - 450 °C |
| Temperature Stability | ±2 °C |
| Display | Digital LED Screen |
| Main Functions | Soldering, desoldering, temperature adjustment, auto standby |
| Safety | Grounding, protection fuse, insulated holder |
| Maintenance and Cleaning | Regularly clean the tip with a damp sponge |
| Available Spare Parts | Replacement tips, heating element, vacuum pump |
| Repairability | Repairable by a certified professional |
Frequently Asked Questions - PROLOX 65VO Stamos
User questions about PROLOX 65VO Stamos
0 question about this device. Answer the ones you know or ask your own.
Ask a new question about this device
Download the instructions for your Welding machine in PDF format for free! Find your manual PROLOX 65VO - Stamos and take your electronic device back in hand. On this page are published all the documents necessary for the use of your device. PROLOX 65VO by Stamos.
USER MANUAL PROLOX 65VO Stamos
This User Manual has been translated for your convenience using machine translation. Reasonable efforts have been made to provide an accurate translation; however, no automated translation is perfect nor is it intended to replace human translators. The official User Manual is the English version. Any discrepancies or differences created in the translation are not binding and have no legal effect for compliance or enforcement purposes. If any questions arise related to the accuracy of the information contained in the User Manual, please refer to the English version of those contents which is the official version.
1. Symbols

Read the operating instructions.

Recyclable product.

The product meets the requirements of relevant safety standards.

Wear protective clothing that protects the entire body

Caution! Wear protective gloves.

Wear protective glasses.

Wear protective footwear.

Caution! Hot surface can cause burns!

Caution! Risk of fire or explosion.

Caution! Harmful vapours, danger of poisoning. Gases and fumes can be hazardous to your health. Welding process gives off welding gases and fumes. Inhalation of these substances can be hazardous to health.

Use a welding mask with an appropriate filter shade.

CAUTION! Harmful radiation from the welding arc

Do not touch live parts.

CAUTION! The illustrations in this instruction manual are for reference only and may differ from the actual product in some details.
2. Technical data
| Parameter description | Parameter value |
| Product name | Plasma Cutter |
| Model | PROLOX 45VO |
| Nominal input voltage [V] / frequency [Hz]. | 400/50 |
| Cutting current [A] | 15-65 |
| Cutting current in 100% duty cycle [A] | 50 |
| Cutting current in 60% duty cycle [A] | 65 |
| Idle voltage [V]. | 275 |
| Insulation class F | |
| Compliance with standard | EN IEC 60974-1 |
| Dimensions (width x depth x height) [cm] | 510 x 230 x 400 |
| Weight [kg] | 15.5 |
3. General Description
The manual is intended to assist in safe and reliable use. The product is designed and manufactured strictly according to technical specifications using the latest technology and components and maintaining the highest quality standards.
CAREFULLY READ AND UNDERSTAND THIS MANUAL BEFORE STARTING THE WORK.
To ensure the long and reliable operation of the device, make sure to operate and maintain it properly following the guidelines in this instruction manual. The technical data and specifications in this manual are up-to-date. The manufacturer reserves the right to make changes to improve the quality. Taking the technical progress and the possibility of reducing noise into account, the unit is designed and built in such a way that risks resulting from noise emissions are reduced to the lowest possible level.
4. Safety of use

CAUTION! Read all safety warnings and instructions. Failure to follow the warnings and functions may result in electric shock, fire, and/or serious injury or death.
The term "device" or "product" in the warnings and the description of the instructions refers to: Plasma Cutter
4.1. General
a) Take care of your own safety and that of third parties by reading and following the guidelines contained in this manual.
b) Only qualified persons may be allowed to start up, operate, handle and repair the device.
c) The device must not be used for purposes other than those for which it is intended.
d) During operation, the device generates an electromagnetic field around itself, which may cause medical implants, i.e. pacemakers etc., to malfunction.
e) It is forbidden to point the welding handle towards yourself, other people and animals.
f) Take care of regular service and maintenance.
g) Disconnect the unit from the power supply before any adjustment, maintenance, nozzle replacement etc.
h) Do not use the product with the housing removed.
i) Dispose of all welding waste in accordance with local regulations.
4.2. Guidelines for securing fire hazardous work
Preparing the building and rooms for fire hazardous works consists in:
a) cleaning the rooms or places where the work will be carried out of any flammable materials and contamination;
b) move all flammable and non-flammable objects in flammable packaging to a safe distance;
c) protect materials which cannot be removed by covering them, for example, with metal sheets, gypsum boards, etc. against the effects of plasma cutting splatter;
d) checking whether materials or objects susceptible to ignition in adjacent rooms do not require local protection;
e) seal with non-flammable materials any through-holes in installation, ventilation, etc., located in the vicinity of the place of work;
f) protect against plasma cutting splatter or mechanical damage all electric, gas and installation cables with flammable insulation, provided that they are within the range of risk caused by fire hazardous works;
g) check whether any painting or other works using flammable substances were not carried out on that day.
Sparks may cause fires
Cutting sparks can cause fires, explosions and burns to unprotected skin. Wear welding gloves and protective clothing when cutting. Remove or secure all flammable materials and substances from the work area. Do not cut closed containers or tanks that have contained flammable liquids. Such containers or tanks should be flushed before cutting to remove flammable liquids. Do not cut near flammable gases, vapours or liquids. Fire fighting equipment (fire blankets and powder or snow extinguishers) should be located near the work area in a visible and easily accessible location.
Cylinders can explode
Use only approved gas cylinders and a properly functioning regulator. Cylinders should be transported, stored and positioned upright. Protect cylinders from heat, tipping and mechanical damage. Keep all parts of gas installation in good condition: cylinder, hose, fittings, regulator.
A cut can cause a fire or an explosion.
The plasma jet throws glowing metal particles or sparks outwards. Hot metal particles, sparks, a heated component or a hot torch can cause a fire. For this reason, the surroundings of the work area should be carefully checked for safety.
4.3. Preparation of the workplace for cutting
a) All combustible materials should be removed within a radius of 12 m from the burner.
b) If this is not possible, combustible materials must be covered with a suitable coating.
c) Cutting in areas where ignition of flammable materials may occur is prohibited.
d) Take precautions against sparks and glowing metal particles.
e) Care must be taken that sparks or hot metal splinters may pass through cracks or openings.
f) Pay close attention to arcing and have a fire extinguisher within close reach.
g) Be aware that cutting near the ceiling, on the floor or between compartments can cause a flame fire on the other side which is not visible.
h) Always ensure sufficient ventilation.
i) Use the appliance at an ambient temperature between -10 and 40 °C, in a room with low humidity and dust, without direct sunlight.
j) If cutting takes place in a location where there are rapid air movements, use a wind shield.
k) Assume a stable position before cutting.
I) Do not use a plasma torch to heat up frozen pipes.
m) Do not plasma cut near flammable materials/tanks. Flammable materials or tanks must be removed or thoroughly emptied.
n) Do not plasma cut in an atmosphere containing combustible particles or vapours of explosive substances.
o) Plasma cutting must not be used on pressurised tanks, pressure piping or pressure accumulators.
p) Plasma cutting station must be positioned away from flammable surfaces.
q) Get rid of flammable or explosive objects such as propane butane lighters or matches before plasma cutting.
r) Observe health and safety regulations for welding work and equip the work area with a suitable fire extinguisher. The flame and the working circuit are live as long as the electrical supply is switched on. The input circuit and the internal circuit of the unit are also live as long as the electrical supply is switched on.

Caution: cutting in the vicinity of tanks or drums with flammable substances is prohibited.

Remember! Protect children and other bystanders when working with the device.
4.4. Personal protective equipment
Caution! Arc radiation can damage the eyes or skin of the body.
a) When cutting, wear clean, oil-free protective clothing made of non-flammable and non-conductive material (leather, thick cotton), leather gloves, high boots and a protective hood.
b) Before cutting, get rid of any flammable or explosive items such as propane-butane lighters and matches.
c) Use face protection (helmet or shield) and cover the eyes with a shade matching the welder's eyesight and cutting current. The safety standards suggest a No. 13 tint for any amperage below 300 A. Lower shield tints may be used if the arc is covered by the workpiece.
d) Always use approved safety glasses with a side shield under the helmet or other shield.
e) Use workplace shields to protect others from glare or spatter.
f) Always wear earplugs or other hearing protection against excessive noise and to prevent spatter from entering your ears.
g) Bystanders should be warned against looking at electric arc.
h) The electric arc in the cutting process produces large amounts of visible and invisible radiation (ultraviolet and infrared radiation), which can damage the eyes and skin.
4.5. Protection against shock
Caution! Electric shock can be fatal.
a) Plug the power cord into the nearest outlet and route it in a practical and safe way. Avoid spreading the cable carelessly around the room on an unstudied surface, which may result in electric shock or fire.
b) Contact with electrically charged parts can cause an electric shock or severe burns.
c) The electric arc and the working area are electrically charged when the current flows.
d) The input circuit and the internal circuitry of the unit are also live when the power is on.
e) Do not touch the live components.
f) Wear dry, lint-free, insulated gloves and protective clothing.
g) Use insulating mats or other insulating coatings on the floor that are large enough to prevent contact between the body and the object or the floor.
h) Do not touch the electric arc.
i) Turn off the power supply before handling, cleaning or replacing the electrode.
j) Make sure the grounding cable is properly connected and that the plug is properly inserted into the grounded outlet. Improper grounding of the unit may result in a risk to life or health.
k) Regularly check the power cables for damage or lack of insulation. A damaged cable should be replaced. Careless repair of insulation may result in death or personal injury.
I) Turn off the device when not in use.
m) The cable must not be wrapped around the body.
n) The workpiece must be properly grounded.
o) Only accessories that are in good condition may be used.
p) Damaged parts of the device must be repaired or replaced. Use safety belts when working at heights.
q) All equipment and safety items should be stored in one place.
r) Keep the tip of the handle away from the body when the trigger is activated.
s) Attach the ground cable to the workpiece or as close to it as possible (e.g. to the workbench).
t) The work clamp must be insulated if not connected to the workpiece, to avoid contact with metal.
u) The product is designed for indoor use. However, if it has been exposed to dampness or rain, a check must be made to ensure that water droplets do not get inside, which could result in an accident.
v) Do not allow the unit to get wet.
Caution! The machine may still be live when the power cord is disconnected.
w) After turning off the unit and disconnecting the voltage cable, check the voltage on the input capacitor and make sure that the voltage value is zero, otherwise do not touch the unit components.

ATTENTION Although the appliance has been designed to be safe, with adequate safeguards, and despite the use of additional safety features for the user, there is still a slight risk of accident or injury when handling the appliance. It is advisable to exercise caution and common sense when using it.
4.6. Gases and fumes
Caution! Gas can be hazardous to health or lead to death!
a) Always keep a distance from the gas outlet.
b) When cutting, pay attention to the exchange of air, avoiding gas inhalation.
c) Remove chemical substances (greases, solvents) from the surface of the workpieces as they burn under high temperature, giving off poisonous fumes.
d) Cutting galvanized parts is allowed only with efficient extraction with filtration and a supply of clean air. Zinc vapours are very toxic, and the symptom of poisoning is the so-called zinc fever.
5. Instructions for use
5.1. General
a) The device should be used in accordance with its intended purpose, in compliance with the health and safety regulations and the restrictions resulting from the data on the rating plate (IP level, duty cycle, supply voltage, etc.).
b) Do not open the unit as this will void the warranty; also, exploding exposed parts may cause injury.
c) The manufacturer shall not be liable for technical changes of the equipment or material damage resulting from the introduction of these changes.
d) If the equipment malfunctions, contact the service centre.
e) Do not cover the ventilation slots of the device - place the cutter at a distance of 30 cm from the surrounding objects.
f) The welder must not be held under the arm or close to the body.
g) Do not install the equipment in rooms with aggressive environment, high dustiness, and near devices with high electromagnetic field emission.
h) Keep fingers, hair and clothing away from the rotating fan.
i) The appliance must be earthed during operation.
j) When the thermal overload LED illuminates during operation of the appliance, stop operation immediately and wait for the appliance to cool down.
k) When the appliance is used for a long time or with high current, switch off the power supply only after the appliance has cooled down.
I) Do not switch off the device during welding!
m) Maintain the unit regularly and clean the inside of the unit of dust.
5.2. Connecting the unit
5.2.1. Electrical connection
a) The equipment should be connected by a qualified person. In addition, a person with the necessary qualifications should check that the earthing and electrical installation including protection system complies with safety regulations and is functioning properly.
b) Position the equipment near the workplace.
c) To connect the unit, avoid cables that are too long.
d) Single-phase cutting machines should be connected to a socket equipped with a grounding pin.
e) Cutting machines powered by 3-phase mains are delivered without a plug, you should obtain such a plug on your own and have the installation performed by a qualified person:

WARNING! In order to claim a warranty or make a claim, it is necessary to provide proof of installation by a qualified electrician, together with their license number.
Examples of arrangements of contact wires (front view of socket-outlet):
- 3P + N + :
Phase wires L1, L2, L3 should be connected to the socket connectors marked as L1, L2, L3.
The protective wire should be connected to the grounding connector marked as PE. The neutral wire N should be connected to the connector marked N.

- 3P + :
Phase wires L1, L2, L3 should be connected to the socket connectors marked as L1, L2, L3. The protective wire should be connected to the grounding connector marked as PE.

CAUTION! The device may only be operated if connected to an installation with a functional fuse.
5.2.2. Gas connection
a) Place the gas cylinders away from the object to be welded and secure them against falling.
b) The gas connection of the welding machine must be connected to the gas cylinder or to the gas supply system with a suitable hose and a regulator with a gas flow control. Caution! It is not allowed to use network regulators for gas cylinders and vice versa. Such interchange may result in reducer damage and personal injury.
c) The economical use of gas extends the welding time.
6. Product overview

1 - Control panel.
2 – Ground wire connector.
3 – Torch control cable connector.
4 – Arc ignition connector on the torch.
5 – Air supply connector for the torch.
6 - The torch.
7 - Ground wire.
Rear view:

1 - ON/OFF switch.
2 – Gas inlet (from the air dryer).
3 – Gas inlet to the dryer (from the air compressor).
4-Air dryer.
5 - Air outlet from the air dryer to the cutter.
Control panel

1 – Cutting current display. 2 - 2T/4T mode switch. 3 – Airflow check button. 4 – Cutting current diode. 5 – Air discharge light after cutting. 6 – Overload indicator*. 7 – Cutting current setting diode. 8 – Light for setting the airflow after cutting. 9 – Knob/button for setting the cutting current and air discharge time after cutting. To set the air discharge time after cutting, press the knob. Pressing the knob again will return to setting the cutting current.
* The indicator lights in the following two situations:
a) If the machine has malfunctioned and cannot be operated.
b) If the cutting machine has exceeded the standard overload time, it enters safety mode and then switches off. This means that the machine, as part of its temperature and overheating control, enters rest mode. During this process, the warning light on the front panel illuminates. In this situation, it is not necessary to remove the power plug from the socket. The fan can continue to function to cool the unit. If the red light does not illuminate, this means that the appliance has cooled down to operating temperature and can be used again.
7. Connecting the wires
CAUTION! Connecting the cables to the device must be done with the power supply disconnected and the device turned off.
Plasma cutting mode
1) Ensure that the ON/OFF switch on the back of the unit is in the "OFF" position. Connect the unit to the power supply.
2) Ensure the air pressure control knob is set to minimum. Connect the compressed air supply to the air dryer and then from the air dryer to the device.
3) NOTE: Make sure that the parameters of the electricity supply and the gas pressure, are in accordance with the values in the technical data table of this document or the appliance nameplate.
4) Connect the torch wires to the control and current-gas connector.
5) Connect the ground wire to the connector taking special care that the clamp is firmly attached to the workpiece.
8. Operation of the device
8.1. Setting the plasma cutting parameters
1) Turn the power ON/OFF switch to the ON position.
2) Adjust the pressure using the knob on the filter/reduction unit (lift the knob, turn it to set the desired pressure, then push the knob to the initial position).
3) Set the appropriate cutting current according to the thickness and process requirements of the workpiece.
4) Set the appropriate air discharge time after cutting.
5) Set the 2T/4T mode switch to the appropriate position:
a. 2T - short cut. The cutting process is started by pressing the button on the torch, releasing the button ends the cutting process
b. 4T- long term cutting. Pressing the button on the torch starts the cutting process, releasing the button does not stop the cutting process. To end the cutting process it is necessary to press and release the button on the torch again.
6) Press the trigger of the plasma torch, you should hear the noise of the air escaping.
7) Note: when firing the plasma torch, always point the torch outlet to a safe place.
8) You can start cutting the material.
9) In the event of overheating, the safety device will trip. Only after the device has cooled down can it be restarted.
10) When you have finished cutting, always switch off the machine.
9. Disposal of the packaging
Please keep all packaging material (cardboard, plastic strips and polystyrene foam) to ensure that the unit is protected during shipment, should it become necessary to send it to a service centre!
10. Transport and storage
When transporting the unit, protect it from shocks and tipping over, and do not place it "upside down". Store the unit in a well-ventilated room where dry air is present and corrosive gases are not present.
11. Cleaning and maintenance
a) Pull the mains plug before each cleaning and when the unit is not in use and cool the unit completely.
b) Use only non-corrosive cleaning agents for cleaning the surfaces.
c) Do not spray the unit with a stream of water or immerse it in water.
d) Make sure that no water enters through the ventilation openings in the casing.
e) Clean the ventilation openings with a brush and compressed air.
f) After each cleaning, all the parts should be dried well before the unit is used again.
g) Store the unit in a dry and cool place protected from moisture and direct sunlight.
h) Remove dust regularly with dry and clean compressed air.
i) The machine must be protected from water and moisture.
j) The machine must not be placed on a heated surface.
k) Store the machine in a dry and clean room.
12. Regular inspection of the device
Periodic maintenance is necessary for the unit to function properly.
CAUTION: Switch off the unit and disconnect from the power supply before carrying out maintenance.
| Regular inspections | 6-month routine maintenance |
| - Replace unreadable labels- Check the operation of all switches.- Check that the fan is working properly and that air is escaping from the rear of the machine- Look out for excessive vibration, noise, smell and gas leakage during operation- Check that burner or earth wires are not burnt through- Check that any electrical connections are not burnt through- Check that the supply cable is not damaged. | - Blow out the unit with dry, clean air under pressure.- Check the electrical connections of the input/output strip to tighten loose or replace rusty screws. |

For the disposal of the device please consider and act according to the national and local rules and regulations.
CONTACT
expondo Polska sp. z o.o. sp. k.
- SYMBOLS
- TECHNICAL DATA
- GENERAL DESCRIPTION
- CAREFULLY READ AND UNDERSTAND THIS MANUAL BEFORE STARTING THE WORK
- SAFETY OF USE
- GENERAL
- GUIDELINES FOR SECURING FIRE HAZARDOUS WORK
- SPARKS MAY CAUSE FIRES
- CYLINDERS CAN EXPLODE
- A CUT CAN CAUSE A FIRE OR AN EXPLOSION
- PREPARATION OF THE WORKPLACE FOR CUTTING
- PERSONAL PROTECTIVE EQUIPMENT
- CAUTION! ARC RADIATION CAN DAMAGE THE EYES OR SKIN OF THE BODY
- PROTECTION AGAINST SHOCK
- CAUTION! ELECTRIC SHOCK CAN BE FATAL
- CAUTION! THE MACHINE MAY STILL BE LIVE WHEN THE POWER CORD IS DISCONNECTED
- GASES AND FUMES
- CAUTION! GAS CAN BE HAZARDOUS TO HEALTH OR LEAD TO DEATH
- INSTRUCTIONS FOR USE
- CONNECTING THE UNIT
- ELECTRICAL CONNECTION
- GAS CONNECTION
- PRODUCT OVERVIEW
- REAR VIEW
- CONTROL PANEL
- CONNECTING THE WIRES
- PLASMA CUTTING MODE
- OPERATION OF THE DEVICE
- SETTING THE PLASMA CUTTING PARAMETERS
- DISPOSAL OF THE PACKAGING
- TRANSPORT AND STORAGE
- CLEANING AND MAINTENANCE
- REGULAR INSPECTION OF THE DEVICE
- CONTACT
Brand : Stamos
Model : PROLOX 65VO
Category : Welding machine