
FSL 52 H - Oven FRANKE - Free user manual and instructions
Find the device manual for free FSL 52 H FRANKE in PDF.


| Product type | Built-in oven |
| Brand | Franke |
| Model | FSL 52 H |
| Dimensions (H x W x D) | 59.5 x 59.5 x 55 cm |
| Net weight | 35 kg |
| Power supply | 230 V / 50 Hz |
| Maximum power | 3000 W |
| Oven capacity | 67 litres |
| Cooking modes | Fan forced, conventional, grill, ventilated grill, defrost |
| Temperature range | 50 °C to 250 °C |
| Control type | Manual with rotary knobs |
| Display | Digital clock and indicator lights |
| Interior lighting | Halogen bulb (25 W) |
| Door material | Tempered black glass |
| Removable door | Yes, for easy cleaning |
| Cleaning | Manual cleaning with soft cloth and mild detergent |
| Child safety | Integrated control lock |
| Cooling | Integrated cooling fan |
| Spare parts | Available from Franke after-sales service |
| Repairability index | 8.4/10 (according to manufacturer data) |
Frequently Asked Questions - FSL 52 H FRANKE
User questions about FSL 52 H FRANKE
0 question about this device. Answer the ones you know or ask your own.
Ask a new question about this device
Download the instructions for your Oven in PDF format for free! Find your manual FSL 52 H - FRANKE and take your electronic device back in hand. On this page are published all the documents necessary for the use of your device. FSL 52 H by FRANKE.
USER MANUAL FSL 52 H FRANKE
FSL 52 H
EN User manual Electric Oven
CLEANING AND MAINTENANCE....9
TROUBLESHOOTING 10
SUPPORT 10
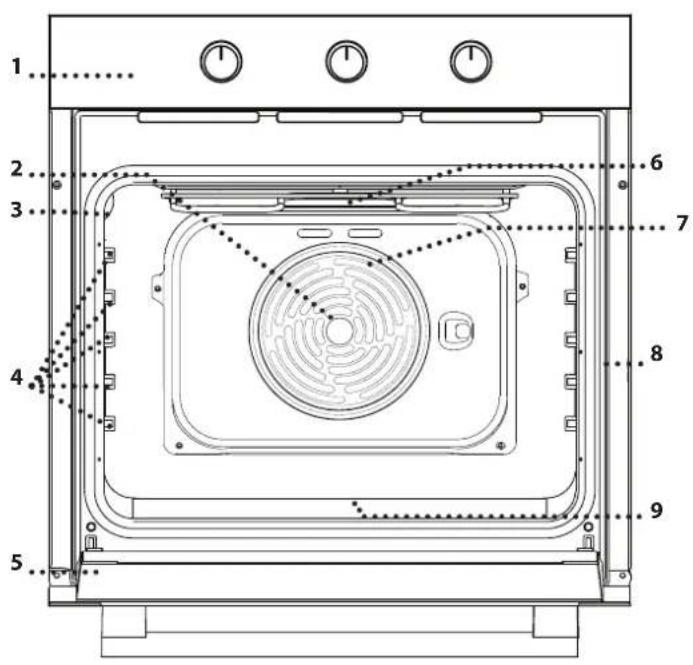
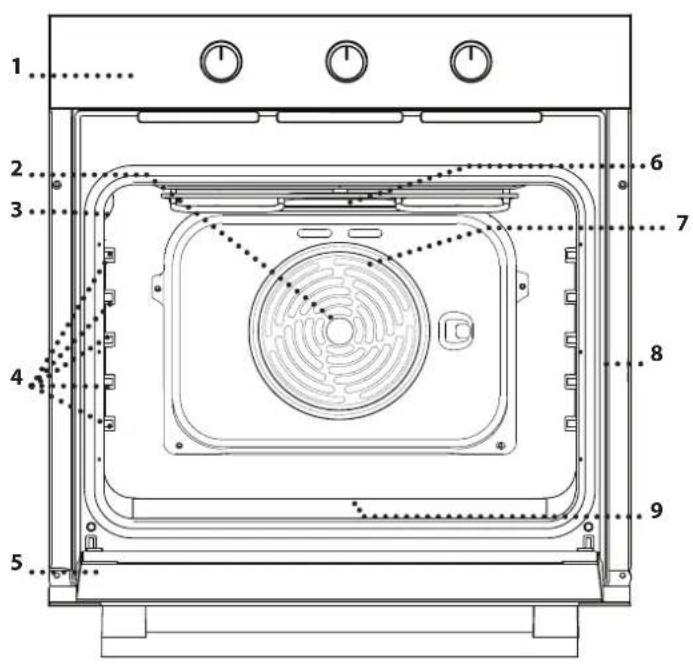
OVERVIEW
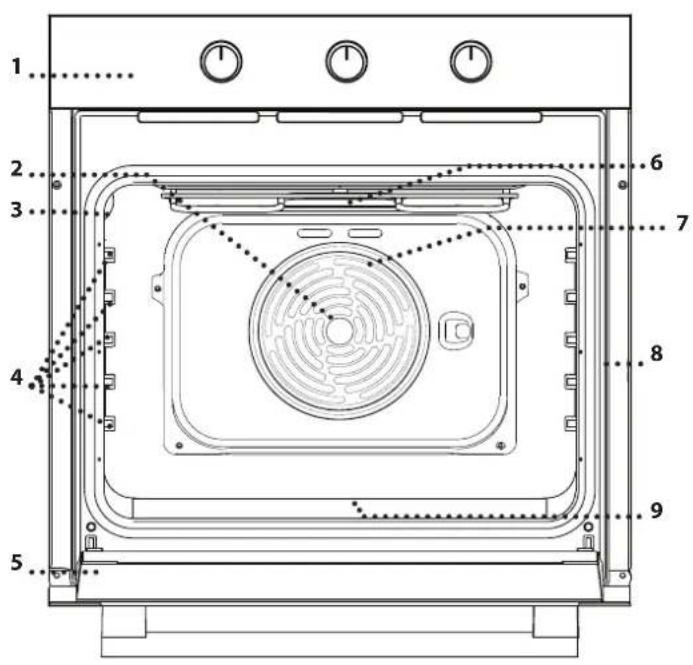
- Control panel
- Fan
- Lamp
- Shelf guides (the level is indicated on the wall of the cooking compartment)
- Door
- Upper heating element / grill
- Circular heating element (not visible)
- Identification plate (do not remove)
- Bottom heating element (not visible)
CONTROL PANEL
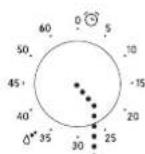
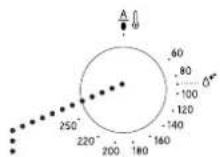

1. SELECTION KNOB
For switching the oven on by selecting a function. Turn to the 0 position to switch the oven off.
2. TIMER KNOB
Useful as a timer. Doesn't activate or interrupt cooking.
3. THERMOSTAT KNOB
Turn to select the temperature you require when activating the selected function.
4. LED THERMOSTAT / PREHEATING
Switches on during the heating process. Switches off once the desired temperature is reached.
ACCESSORIES
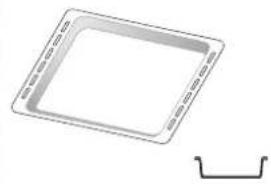
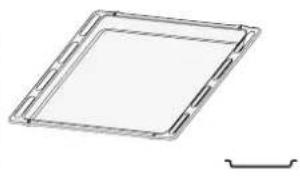
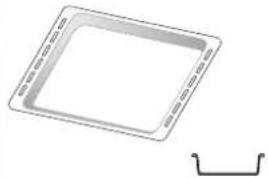
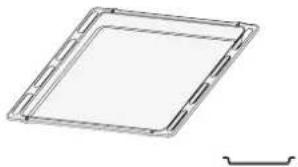
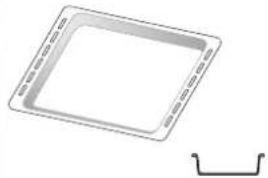
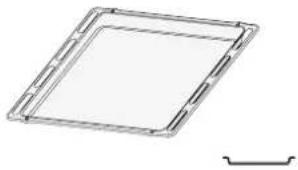
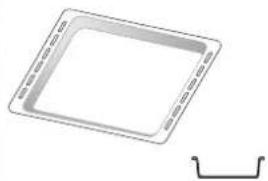
WIRE SHELF DRIP TRAY BAKING TRAY
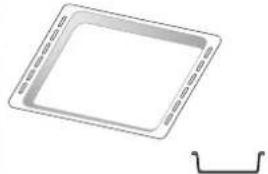
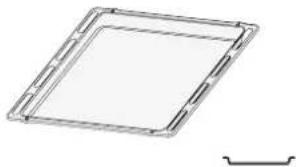
The number and type of accessories may vary depending on which model is purchased. Other accessories can be purchased separately from the After-sales Service.
INSERTING THE WIRE SHELF AND OTHER ACCESSORIES
Insert the wire shelf onto the level you require by holding it tilted slightly upwards and resting the raised rear side (pointing upwards) down first. Next, slide it horizontally along the shelf guide as far as possible.
- The other accessories, such as the baking tray, are inserted horizontally by sliding them along the shelf guides. - The shelf guides can be removed to facilitate oven cleaning: pull them to remove from their seats.
FUNCTIONS

OFF
For switching off the oven.

LIGHT
For switching on the light in the compartment.

CONVENTIONAL
For cooking any kind of dish on one shelf only. It is better to use the 2nd shelf.

STEAM CLEANING
The action of the steam released during this special low-temperature cleaning cycle allows dirt and food residues to be removed with ease. Pour 200 ml of drinking water on the bottom of the oven and use the function for 35' at 90°C. Activate the function when the oven is cold and let it cool down for 15' once the cycle ends.

CONVECTION BAKE
For baking cakes with juicy fillings on a single shelf. This function can also be used for cooking on two shelves. Switch the position of the dishes to cook food more evenly.
GRILL
For grilling steaks, kebabs and sausages, cooking vegetables au gratin or toasting bread. When grilling meat, we recommend using a drip tray to collect the cooking juices: position the pan on any of the levels below the wire shelf and add 200 ml of drinking water.
TURBO GRILL
For roasting large joints of meat (legs, roast beef, chicken). We recommend using a drip tray to collect the cooking juices: position the pan on any of the levels below the wire shelf and add 500 ml of drinking water.
* DEFROSTING
For defrosting food more quickly.
FIRST TIME USE
HEAT THE OVEN
A new oven may release odours that have been left behind during manufacturing: this is completely normal.
Before starting to cook food, we therefore recommend heating the oven with it empty in order to remove any possible odours.
Remove any protective cardboard or transparent film from the oven and remove any accessories from inside it.
Heat the oven to 250°C for about one hour, preferably using the "Convection bake" function. The oven must be empty during this time.
Follow the instructions for setting the function correctly.
Notes: It is advisable to air the room after using the appliance for the first time.
DAILY USE
1. SELECT A FUNCTION
To select a function, turn the selection knob to the symbol for the function you require.
2. ACTIVATE A FUNCTION
MANUAL
To start the function you have selected, turn the thermostat knob to set the temperature you require.
To interrupt the function at any time, switch off the oven, turn the selection knob and the thermostat knob to 0.
STEAM CLEANING
To activate the "Steam Cleaning" cleaning function, pour 200 ml of drinking water into the bottom of the oven, then turn the selection knob and the thermostat knob to the ♂ + icon.
It is best to use the function for 35'.
3. PREHEATING
Once the function has been activated, the LED thermostat will switch on signalling that the preheating process has begun.
At the end of this process, the LED thermostat switches off indicating that the oven has reached the set temperature: At this point, place the food inside and proceed with cooking.
Please note: Placing the food in the oven before preheating has finished may have an adverse effect on the final cooking result.
. SETTING THE TIMER
This option does not interrupt or activate cooking but allows you to use the minute minder both while a function is active and when the oven is off.
To activate the timer, turn the timer knob right round in an clockwise direction and then turn it back in the opposite direction to the desired length of time: an acoustic signal will warn you when the count-down is finished.
USEFUL TIPS
HOW TO READ THE COOKING TABLE
The table lists the best function, accessories and level to use to cook different types of food. Cooking times start from the moment the food is placed in the oven, excluding preheating (where required). Cooking temperatures and times are approximate and depend on the amount of food and the type of accessory used. Use the lowest recommended settings to begin with and, if the food is not cooked enough, then switch to higher settings. Use the accessories supplied and preferably dark-coloured metal cake tins and baking trays.
You can also use Pyrex or stoneware pans and accessories, but bear in mind that cooking times will be slightly longer.
COOKING DIFFERENT FOODS AT THE SAME TIME
Using the "Convection Bake" function, you can cook different foods simultaneously (for example: fish and vegetables), on different levels. Remove the food which requires a shorter cooking time and leave the food which requires a longer cooking time in the oven.
COOKING TABLE
| RECIPE FUNCTION PREHEAT | TEMPERATURE(°C) | DURATION(MIN) | LEVELAND ACCESSORIES | ||
| Leavened cakes | Yes 150 - 170 30 - 90 | 2 | |||
| Yes 150 - 170 30 - 90*** | 4 1 | ||||
| Filled cakes(cheese cake, strudel, fruit pie) | Yes 160 - 200 35 - 90 | 2 | |||
| Yes 160 - 200 35 - 90*** | 4 2 | ||||
| Biscuits / tartlets | Yes 160 - 180 15 - 35 | 2/3 | |||
| Yes 150 - 170 20 - 40 *** | 4 2 | ||||
| Choux buns | Yes 180 - 200 40 - 60 | 2 | |||
| Yes 170 - 190 35 - 50*** | 4 2 | ||||
| Meringues | Yes 90 150 - 200 | 2 | |||
| Yes 90 | 140 - 200*** | 4 2 | |||
| Pizza / Bread | Yes 220 - 250 10 - 25 | 1/2 | |||
| Yes 200 - 240 15 - 30 *** | 4 2 | ||||
| Sandwiches 80 g | Yes | 180 - 200 | 30 - 45 | 2 | |
| Bread loaf 500 g | Yes | 180 | 50 - 70 | 1/2 | |
| Bread | Yes 180 - 200 30 - 80*** | 4 2 | |||
| Frozen pizza | Yes | 250 | 10 - 20 | 2 | |
| Yes | 250 | 10 - 20*** | 4 2 | ||
| Savoury cake(vegetable pie, quiche) | Yes 180 - 200 30 - 45 | 2 | |||
| Yes 170 - 200 40 - 60*** | 4 2 | ||||
| Vol-au-vent / Puff pastry cakes | Yes 190 - 200 20 - 30 | 2 | |||
| Yes 180 - 190 15 - 40*** | 4 2 | ||||
| Lasagne / baked pasta /cannelloni / flans | Yes 190 - 200 45 - 65 | 2 | |||
| Lamb / veal / beef / pork 1 kg | Yes | 190 - 200 | 80 - 110 | 2 |
| ACCESSORIES | |||||
| Wire shelf | Baking dish or cake tin on the wire shelf | Baking tray or cake tin on wire shelf | Baking tray with 200 ml of water | Baking tray | |
| RECIPE FUNCTION PREHEAT | TEMPERATURE(°C) | DURATION(MIN) | LEVELAND ACCESSORIES | ||
| Roast pork with crackling 2 kg | Yes | 180 - 190 | 110 - 150 | 2 | |
| Chicken / rabbit / duck 1 kg | Yes | 200 - 230 | 50 - 100 | 2 | |
| Turkey / goose 3 kg | Yes | 180 - 200 | 150 - 200 | 2 | |
| Baked fish / en papillote 0.5 kg(fillet, whole) | Yes 170 - 190 30 - 45 | 2 | |||
| Stuffed vegetables(tomatoes, courgettes, aubergines) | Yes 180 - 200 50 - 70 | 2 | |||
| Toasted bread | 5' | 250 | 2 - 6 | 5 | |
| Fish fillets / slices | 5' | 250 | 15 - 30 * | 4 3 | |
| Sausages / kebabs / spare ribs /hamburgers | 5' | 250 | 15 - 30 * | 5 4 | |
| Roast chicken 1-1.3 kg | - | 200 - 220 | 60 - 80 ** | 3 1 | |
| Roast beef rare 1 kg | - | 200 | 35 - 50 ** | 3 | |
| Leg of lamb / knuckle | - | 200 | 60 - 90 ** | 3 | |
| Roast potatoes | - | 200 - 220 | 35 - 55 ** | 3 | |
| Vegetable gratin | - | 200 - 220 | 25 - 55 | 3 | |
| Lasagna and meat | Yes | 200 | 50 - 100 **** | 4 1 | |
| Meat and potatoes | Yes | 190 - 200 | 45 - 100 **** | 4 1 | |
| Fish and vegetables | Yes | 180 | 30 - 50 **** | 4 2 |
* Turn food halfway through cooking ** Turn food two-thirds of the way through cooking (if necessary). *** Estimated length of time: dishes can be removed from the oven at different times depending on personal preference.
| FUNCTIONS | —Conventional |  □Grill □Grill |  ✿Turbo Grill ✿Turbo Grill |  ✿Convection Bake ✿Convection Bake |
CLEANING AND MAINTENANCE
Do not use steam cleaning equipment.
Use protective gloves during all operations.
Carry out the required operations with the oven cold.
Disconnect the appliance from the power supply.
Do not use wire wool, abrasive scourers or abrasive/corrosive cleaning agents, as these could damage the surfaces of the appliance.
EXTERIOR SURFACES
- Clean the surfaces with a damp microfibre cloth. If they are very dirty, add a few drops of pH-neutral detergent. Finish off with a dry cloth.
- Do not use corrosive or abrasive detergents. If any of these products inadvertently comes into contact with the surfaces of the appliance, clean immediately with a damp microfibre cloth.
INTERIOR SURFACES
After every use, leave the oven to cool and then clean it, preferably while it is still warm, to remove any deposits or stains caused by food residues. To dry any condensation that has formed as a result of cooking foods with a high water content, allow the oven to cool completely and then wipe it with a cloth or sponge.
- Activate the "Steam Cleaning" function for optimum cleaning of the internal surfaces. The door can be easily removed and refitted to facilitate cleaning of the glass.
- Clean the glass in the door with a suitable liquid detergent.
- The top heating element of the grill can be lowered to clean the upper panel of the oven.
ACCESSORIES
Soak the accessories in a washing-up liquid solution after use, handling them with oven gloves if they are still hot. Food residues can be removed using a washing-up brush or a sponge.
REMOVING AND REFITTING THE DOOR
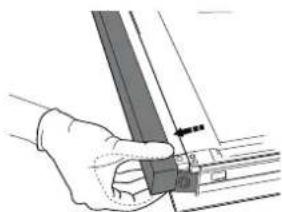
- To remove the door, open it fully and lower the catches until they are in the unlock position.
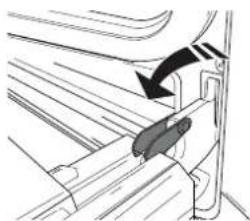
- Close the door as much as you can.
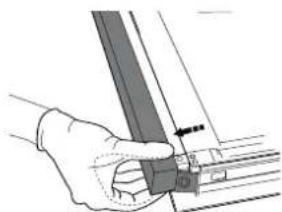
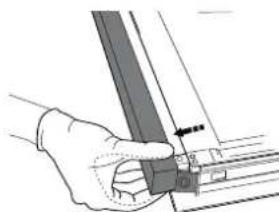
Take a firm hold of the door with both hands – do not hold it by the handle.
Simply remove the door by continuing to close it while pulling it upwards (a) at the same time until it is released from its seating (b).
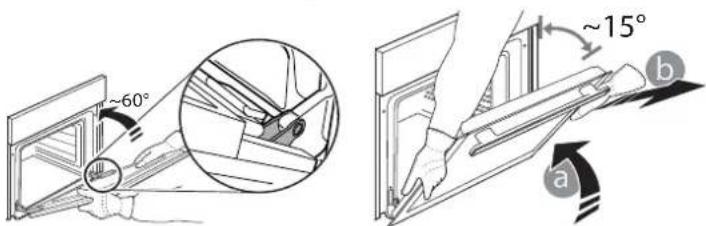
Put the door to one side, resting it on a soft surface.
- Refit the door by moving it towards the oven, aligning the hooks of the hinges with their seating and securing the upper part onto its seating.
- Lower the door and then open it fully. Lower the catches into their original position: Make sure that you lower them down completely.
- Try closing the door and check to make sure that it lines up with the control panel. If it does not, repeat the steps above.
PRESS TO CLEAN - CLEANING THE GLASS
- After removing the door and resting it on a soft surface with the handle downwards, simultaneously press the two retaining clips and remove the upper edge of the door by pulling it towards you.
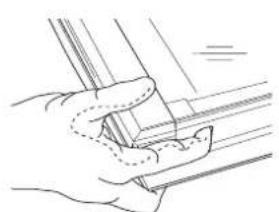
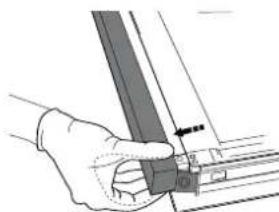
- Lift and firmly hold the inner glass with both hands, remove it and place it on a soft surface before cleaning it.
- To correctly reposition the inner glass, make sure that the "R" is visible in the left-hand corner. First insert the long side of the glass indicated by "R" into the support seats, then lower it into position.
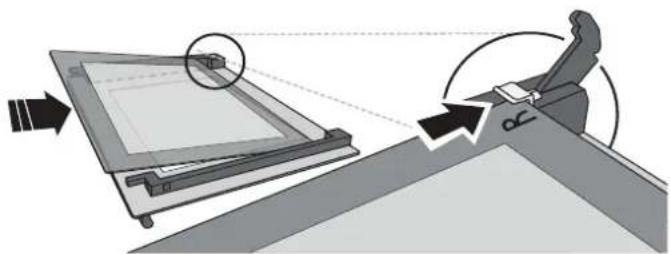
- Refit the upper edge: a click will indicate correct positioning. Make sure the seal is secure before refitting the door.
REPLACING THE LAMP
- Disconnect the oven from the power supply.
- Remove the cover from the light, replace the bulb and put the cover back on the light.
- Reconnect the oven to the power supply.
Please note: Only use 20-40 W/230 \~ V type G9, T300°C halogen bulbs. The bulb used in the product is specifically designed for domestic appliances and is not suitable for general room lighting within the home (EC Regulation 244/2009). Light bulbs are available from our After-sales Service. - If using halogen bulbs, do not handle them with your bare hands as your fingerprints could cause damage. Do not use the oven until the light cover has been refitted. This product contains a light source of energy efficiency class G.
TROUBLESHOOTING
| Problem Possible cause Solution | ||
| The oven does not work. Power cut. | Disconnection from the mains. | Check for the presence of mains electrical power and whether the oven is connected to the electricity supply.Turn off the oven and restart it to see if the fault persists. |
WWW.FRANKE.COM
© Franke Technology and Trademark Ltd, Switzerland
SUPPORT
In the event of any operation problems, contact a Franke Technical Service Centre.
Never use the services of unauthorized technicians.
Specify:
- the type of fault
- the appliance model (art./Code)
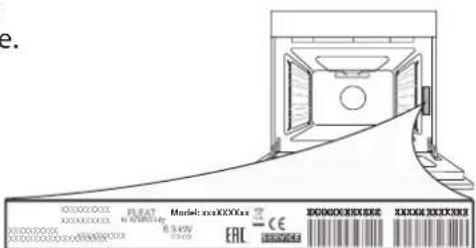
- the serial number (S.N.) on the rating plate, located on the right hand edge of the oven cavity (visible when the oven door is open).

When contacting our Service Centre, please state the codes provided on your product's identification plate.
CONTENTS
OVERVIEW....12
CONTROL PANEL 12
ACCESSORIES 13
FUNCTIONS 13
FIRST USE 14
SUPPORT
| FONCTIONS | —Traditionnel |  Gril Gril |  Turbo Gril Turbo Gril |  Convection forcée Convection forcée |
CLEANING AND MAINTENANCE

ASSISTANCE
DAILY USE....30
USEFUL TIPS....30
TROUBLESHOOTING GUIDE....34
ASSISTANCE 34
TROUBLESHOOTING GUIDE
ASSISTANCE
ASSISTANCE
INDEX
OVERVIEW....44
CONTROL PANEL 44
ACCESSORIES....45
FUNCTIONS......45
FIRST USE 46
REMOVING AND REPLACING THE DOOR
PRESS TO CLEAN - CLEANING THE GLASS

© Franke Technology and Trademark Ltd, Switzerland
SUPPORT
DRIP TRAY FOR GREASE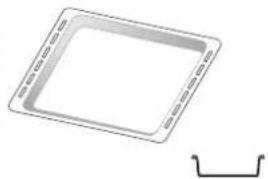
BAKING TRAY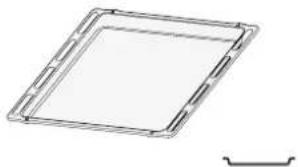
© Franke Technology and Trademark Ltd, Switzerland
TECHNICAL SUPPORT
© Franke Technology and Trademark Ltd, Switzerland
TECHNICAL SUPPORT
CONTENTS
OVERVIEW 68
CONTROL PANEL 68
ACCESSORIES....69
FUNCTIONS....69
FIRST USE 70
DAILY USE 70
USEFUL TIPS....70
COOKING TABLE....71
CLEANING AND MAINTENANCE....73
TROUBLESHOOTING....74
TECHNICAL SUPPORT....74
USER MANUAL
OVERVIEW
DRIP TRAY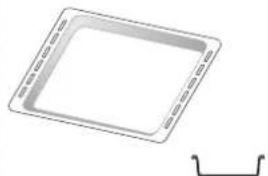
BAKING TRAY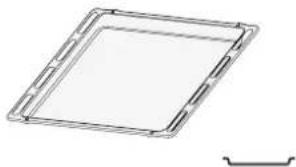
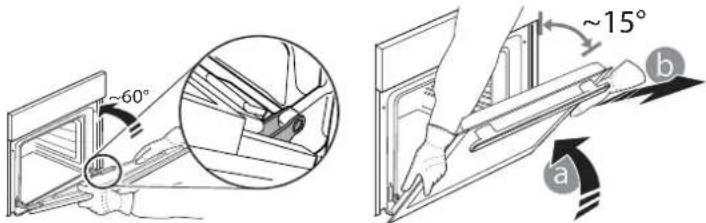
- Close the door as far as it will go.
Hold the door firmly with both hands – do not hold it by the handle.
You can simply remove the door by continuing to close it while pulling it upwards (a), until it releases from its seat (b).

© Franke Technology and Trademark Ltd, Switzerland
TECHNICAL SUPPORT

© Franke Technology and Trademark Ltd, Switzerland
SUPPORT
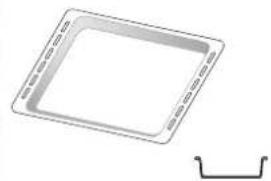
DRIP TRAY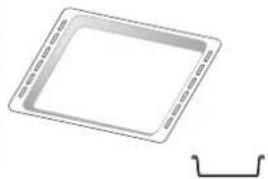
BAKING TRAY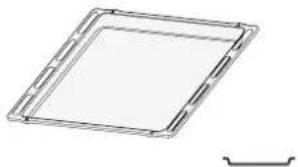
© Franke Technology and Trademark Ltd, Switzerland
ASSISTANCE
CONTENTS
OVERVIEW 92
CONTROL PANEL 92
ACCESSORIES 93
FUNCTIONS....93
FIRST USE....94
DAILY USE 94
HELPFUL TIPS....94
COOKING TABLE....95
CLEANING AND MAINTENANCE....97
TROUBLESHOOTING....98
SUPPORT....98
OVERVIEW

© Franke Technology and Trademark Ltd, Switzerland
SUPPORT
DRIP TRAY
BAKING TRAY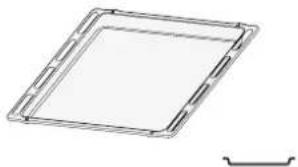
© Franke Technology and Trademark Ltd, Switzerland
HELP
TRAY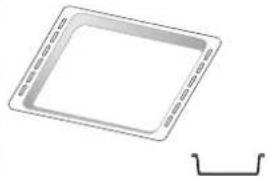
BAKING DECOR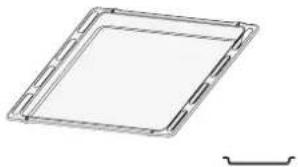
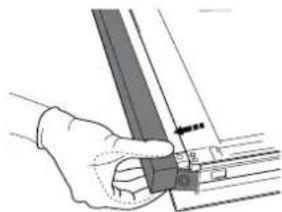
© Franke Technology and Trademark Ltd, Switzerland
SUPPORT

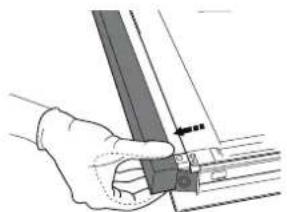
.2. طاعتك
© Franke Technology and Trademark Ltd, Switzerland
دعامة
- FSL 52 H
- OVERVIEW
- CONTROL PANEL
- SELECTION KNOB
- TIMER KNOB
- THERMOSTAT KNOB
- LED THERMOSTAT / PREHEATING
- ACCESSORIES
- INSERTING THE WIRE SHELF AND OTHER ACCESSORIES
- FUNCTIONS
- GRILL
- TURBO GRILL
- DEFROSTING
- FIRST TIME USE
- HEAT THE OVEN
- DAILY USE
- SELECT A FUNCTION
- ACTIVATE A FUNCTION
- MANUAL
- STEAM CLEANING
- PREHEATING
- SETTING THE TIMER
- USEFUL TIPS
- HOW TO READ THE COOKING TABLE
- COOKING DIFFERENT FOODS AT THE SAME TIME
- CLEANING AND MAINTENANCE
- DO NOT USE STEAM CLEANING EQUIPMENT
- CARRY OUT THE REQUIRED OPERATIONS WITH THE OVEN COLD
- DO NOT USE WIRE WOOL, ABRASIVE SCOURERS OR ABRASIVE/CORROSIVE CLEANING AGENTS, AS THESE COULD DAMAGE THE SURFACES OF THE APPLIANCE
- EXTERIOR SURFACES
- INTERIOR SURFACES
- REMOVING AND REFITTING THE DOOR
- PRESS TO CLEAN - CLEANING THE GLASS
- REPLACING THE LAMP
- SUPPORT
- SPECIFY
- CONTENTS
- ASSISTANCE
- TROUBLESHOOTING GUIDE
- INDEX
- REMOVING AND REPLACING THE DOOR
- TECHNICAL SUPPORT
- USER MANUAL
- HELP
Brand : FRANKE
Model : FSL 52 H
Category : Oven