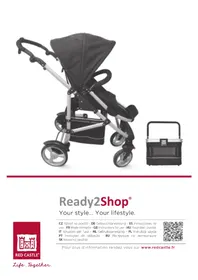
RC 2 - Baby car seat RED CASTLE - Free user manual and instructions
Find the device manual for free RC 2 RED CASTLE in PDF.
| Product type | Baby car seat Group 0 |
| Brand | RED CASTLE |
| Model | RC 2 |
| Weight group | 0 (newborn to 10 kg, approx. 9 months) |
| Safety standard | ECE R44-04, universal |
| Car installation | Rear-facing mandatory, 3-point belt or Primafix base (optional) |
| Seatback positions | 4 positions: A (reclined, up to 5 kg), B (inclined, up to 5 kg), C (semi-upright, with base only), D (upright, 5-10 kg) |
| Handle positions | 3 positions: car transport, carry handle, rocking chair/stroller |
| Harness | 2 height adjustments, 5-point, adjustable |
| Included accessories | Hood, apron, head bumper (sun protection), additional sun shade |
| Use outside car | Recliner (reclined up to 9 kg), carry handle, rocking chair |
| Approximate dimensions | 45 x 30 x 55 cm |
| Approximate weight | 3.5 kg |
| Care and cleaning | Cover washable with lukewarm soapy water, no machine wash, do not iron |
| Optional accessories | Primafix base (compatible) |
| General information | Manufacturer: RED CASTLE FRANCE. Max lifespan: 5 years. Do not use after an accident. |
Frequently Asked Questions - RC 2 RED CASTLE
User questions about RC 2 RED CASTLE
0 question about this device. Answer the ones you know or ask your own.
Ask a new question about this device
Download the instructions for your Baby car seat in PDF format for free! Find your manual RC 2 - RED CASTLE and take your electronic device back in hand. On this page are published all the documents necessary for the use of your device. RC 2 by RED CASTLE.
USER MANUAL RC 2 RED CASTLE
Uldised turvalisuse juhised
ENNE TOOTE ESMAKORDSET KASUTAMIST LOE
HOOLIKALT LABI KOIK JUHISED ARVESTADES
ANTUD SOOVITUSI. AINULT NII GARANTEERID
OMA LAPSELE MAKIMAALSE TURVALISUSE.
TAHTIS! HOIA EDASPIDISEKS ALLES.
General safety instructions
BEFORE USING YOUR CAR SEAT FOR THE FIRST TIME, READ ALL OF THE INSTRUCTIONS CAREFULLY RESPECTING THE RECOMMENDATIONS AS INDICATED IN ORDER TO GUARANTEE YOUR CHILD MAXIMUM SAFETY. IMPORTANT! KEEP FOR FUTURE REFERENCE.
The RC 2 car seat can be installed with or without the PRIMAFIX base (optional accessory).
Installing the RC 2 car seat in the car (with the car seat belts)
WARNING
- Never leave the child unsupervised.
- The RC 2 group O car seat conforms to the European safety standard ECE R-44/04. It is suitable for children from birth to less than 10kgs (around 9 months).
- The RC 2 group O car seat is classed in the «universal» category of retaining devices for children. It can be adapted on the majority of car passenger seats. It is possible to fit the device correctly in the vehicle if the manufacturer's vehicle handbook states that it will take “universal” retaining devices for children of this age group.
- The RC 2 group O car seat must always be used in the rear facing position. It must be fixed in your vehicle EXCLUSIVELY with a 3 point seat belt (static or automatic) which conforms to the ECE-16 regulation or its equivalent.
- Seat belt lengths vary from car to car. We suggest you check that this car seat can be used in your vehicle.
-
The RC 2 group O car seat must never be installed in front passenger seats equipped with a front airbag, this may prove very dangerous.
-
ALWAYS attach your baby with the safety harness even when you are not using the RC 2 car seat in the vehicle.
-
The manufacturer can only guarantee the safety of the car seat if it is used by the first time owner. We strongly suggest that you do not use a second hand car seat.
-
Do not continue to use this car seat when used as a reclined cradle once the child can sit unaided.
- It is dangerous to place this car seat on a raised surface: for example, on a table...
- Do not use the car seat for more than 5 years. Intensive use can cause deterioration not always visible.
- Never take the baby out of the car seat for any reason while the vehicle is in motion.
Always use the restraint system. - When used as a reclined cradle, this car seat is not intended for use during long periods of sleep.
WARNING: Never install the RC 2 group O car seat on the front passenger seat if the car is equipped with a front airbag. This could cause death or serious injury. If you have a front airbag use the car seat in the rear of the car. Both in the front and in the rear of the car, the car seat must always be used in a rear facing position.
- Put the handle into position 1a (fig. 18) (see chapter on «Adjusting the seat back and handle positions»).
- Buckle the car seat belt.
- Feed the lap belt of the car through the guides at the front of the car seat (located below the car shell). (fig. 1).
- Then, slip the diagonal belt around the rear of the car seat and feed it through the guide located at the back of the car seat (fig. 2). IMPORTANT: check that the car seat belt does not slip underneath the adjustment lever (fig. 3).
- Choose the seat back position best suited to your child's weight:
| 1 | Position A | up to 5kgs | (fig.13) |
| 2 | Position B | up to 5kgs | (fig.14) |
| 3 | Position C | Only to be used in the car with the Primafix base | (fig.15) |
| 4 | Position D | from 5kgs to 10kgs | (fig.16) |
- Pull firmly on the diagonal belt to take up any slack (fig. 4).
IMPORTANT: Each time the position of the car seat back is changed, the seat belt must be retightened. During travel, the handle must always be in the transport position.
WARNING: The seat belt must never be twisted.
How to adjust the safety harness
The harness must always be adjusted to fit the child's size. The harness straps must go through the slots nearest to the baby's shoulders (fig. 5).
- The RC 2 group O car seat harness can be adjusted at 2 heights allowing it to be adapted to the child as he grows.
To change the heights of the harness:
a) Locate the metal assembly buckle at the lower part of the seat back (fig. 6). Release and undo the harness shoulder straps by slipping them through the slots of the seat.
b) Put the straps back through the slots at the desired height (fig. 7) and reassemble them with the metal buckle. Check the straps are not twisted. Important! Ensure that both shoulder straps are at the same level height (fig. 5).
To open and close the buckle:
To close: assemble the 2 parts of the buckle (fig. 8.1) and insert them into the fastener (fig. 8.2) until they are secured ("click" heard) (fig. 9).
To open: push on the red button.
Adjusting the safety harness:
It is recommended that you adjust the length of the harness to fit the size of the child BEFORE installing the car seat in the car.
To tighten the straps at shoulder height: Pull on the end of the tension strap until it is tightened (fig. 10).
To untighten the safety harness:
With one hand push down on the adjustment button located at the front of the car seat, in the direction of the arrow (fig. 11.A), and with the other hand, simultaneously pull the shoulder straps toward you (fig. 11.B).
IMPORTANT: The safety harness should be tightened firmly but must not restrict the
child's movements. Check that the straps are not twisted. The harness buckle should be situated as low as possible on the child's abdomen and never on his stomach. This is to ensure adequate pelvic protection.
Installing the child in the RC 2 car seat
WARNING: NEVER leave a child unattended in his car seat.
IMPORTANT: It is recommended that you adjust the length of the harness to the child's size BEFORE installing the car seat in the car. The harness straps must go through the slots nearest to the child's shoulders.
- Put the handle in position 1a (fig. 18).
- Release the harness buckle by pressing on the red button.
- Sit your child comfortably in the car seat with his back firmly against the rear of the seat.
- Adjust the position of the seat back (see chapter «adjusting the seat back and handle positions»).
- Assemble the 2 parts of the buckle together and insert them into the fastener.
- Adjust the harness to fit your baby (see chapter on "adjusting the harness").
Head hugger (Sun shade)
The RC 2 car seat includes a 3 function head hugger - it reduces the car seat size, it cushions the baby's head, it protects from the sun.
The head hugger provides extra comfort when baby is lying down and lateral support for baby's head ad upper body. As he grows, remove the padding and use it as a simple head hugger and sun shade (unfolds and closes with the zip).
Unfolded as sun shade
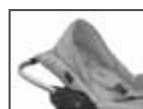
Folded back
Adjusting the seat back and handle positions
To adjust the seat back:
Lift up the lever located at the rear of the car seat and choose the position best suited to your baby's weight:
| 4 POSITIONS | |||
| 1 | Position A Lying | up to 5kg | (fig.13) |
| 2 | Position B Reclining | up to 5kg | (fig.14) |
| 3 | Position C Semi-reclining (*) | from 5kg to 10kg | (fig.15) |
| 4 | Position D Traditional | from 5kg to 10kg | (fig.16) |
NB : When not used in the car, all 4 positions are possible on the stroller up to 9kgs.
(*) IMPORTANT: the position C (semi-reclining) is not authorized in a vehicle unless the car seat is installed on the Primafix base.
Handle positions (fig. 18):
There are 3 handle positions.
To change position, release the handle position by pushing down simultaneously on the buttons at either side (fig. 17) while at the same time moving the handle forwards or backwards, to the required position ( click heard).
1a -> Position when used in the car
1b -> Position when carrying baby
1c -> Position when used as a rocking chair / on the stroller
IMPORTANT: Remain vigilant at all times! - If you carry baby in his RC 2 car seat outside of the vehicle, check that the handle is firmly clenched in position 1b.
IMPORTANT: Attach your child in all circumstances, always use the restraining system.
IMPORTANT: To change the handle position from 1b to 1c or 1c to 1b, the hood must always be unfolded (fig. 1).
Optional accessories
Attaching the Hood:
- To attach the hood: Insert the plastic attachments located either side of the hood into the side sockets of the RC 2 car seat (fig. 19).
-
Line up the openings, indicated by the blue arrows (located at the rear of the hood), with the guides for the car seat belts (fig. 20 and 21).
-
Adjust the hood as required in order to protect your baby from the sun.
- To remove the hood : push down on the plastic attachments at either side of the hood, at the same time pulling the end of the hood upwards.
Attaching the apron:
- Before attaching the apron, attach the hood (see previous chapter).
- Cover the RC 2 car seat with the apron (fig. 22).
- Match the velcro straps and the press studs of the apron and the hood with those on the car seat cover. Press them firmly to close them. (fig. 23).
- To remove the apron, detach the velcro and undo the press studs.
Do not use the RC 2 car seat apron in the vehicle. In the case of an emergency, this could impede access to the child.
Attaching the sun screen
- Position the wider part (shown at the top of fig. 24) onto the hood and attach the velcros.
- Pull the sun screen taut towards the lower part of the seat and attach the velcros (fig. 25).
IMPORTANT: The sun screen has been designed to reduce the sun's glare and limit the effect of UV rays. The use of this sun screen does not exempt you from the need to protect your child. We recommend the systematic use of a sun cream. Regularly check that the child has enough to drink.
Care and washing instructions
-
The car seat and the safety harness can be wiped clean with warm, soapy water.
To remove the seat cover: open the harness buckle (fig. 26), slip the harness straps and the buckle through the slots in the seat cover (fig. 27). First remove the front part of the seat cover then undo the press stud at the top of the seat back. (fig. 28).
To replace it, make sure that the safety harness and the edges of the cover are positioned correctly. -
Wash the cover of the car seat in warm, soapy water (do not machine wash). Rinse thoroughly and leave open to dry. Do not iron. Do not use abrasive cleaning products.

IMPORTANT SAFETY INFORMATION
- The RC 2 car seat can be installed (rear facing) on the front passenger seat after having deactivated the front airbag (not to be installed in vehicles equipped with front airbag which cannot be deactivated) or on a rear passenger seat.
- Only use the car seat with a 3 point car seat belt.
- Never leave your child unattended.
- Attach your child in all circumstances, always use the restraining system
- The original equipment of the RC 2 car seat Group 0 must not be altered.
- For your child's safety we formally advise against installing the car seat on a supermarket trolley.
- In the event of an accident, the car seat must no longer be used and must obligatorily be changed. It may have incurred damage not visible to the eye.
- When the car seat is used in the front of the vehicle (on the passenger seat), the seat on which it is installed should be as far back as possible, the car seat back should be upright and its headrest as low as possible.
- Never use the car seat on any seat equipped with an airbag which has not been deactivated.
- The car seat must always be held in place by the car seat belt, even when the car seat is not being used. Unattached, it represents a danger for the vehicle's occupants, were the vehicle to brake suddenly.
- The car seat belt and the car seat safety harness must not be twisted.
-
When parked in the sun, the temperature rises inside the vehicle. We recommend that you cover the car seat (e.g. with a piece of fabric) so that it will be more comfortable for baby when placing him into the car seat. This will also prevent metal parts from heating up and perhaps burning him. It will also prevent the textile parts from discolouring.
-
Never hold the child on your lap when in the vehicle. Unattached, in the case of an accident, he will be transformed into a "flying object". Never travel with your own 3 point set belt attached around you and the child.
- Respect the Highway Code. Make sure that all passengers in the vehicle are wearing their seat belts correctly attached.
- Do not place heavy objects on the rear window shelf. Make sure that any luggage inside the vehicle is placed in such a way that, in the event of an accident, it does not injure either the baby or any other occupants.
- Place the car seat in the vehicle with caution, making sure that it is correctly installed. Always check the wear and tear of the vehicle seat belts and the car seat safety harness. Always also check that no part of the car seat, its safety harness, or the car seat belt is caught beneath the passenger seat or in the car door.
- Never use the car seat without its original seat cover. Use only the seat cover provided by the manufacturer.
- When the car seat is combined on the stroller, NEVER lift the stroller by the car seat but ONLY by the stroller chassis.
- Keep this instruction manual close to hand at all times for future reference.
- Do not remove the sewn on labels on the car seat so as to avoid damaging the fabric.
- When used as a baby bouncer, this car seat does not replace a crib or a cot. When the child needs to sleep, he should be placed in an appropriate crib or cot.
- Do not use this car seat if any parts are broken or are missing.
- Do not use any accessories or replacement parts other than those approved by the manufacturer.
Installing the RC 2 car seat in the car with an Isofix system
Please refer to the instructions for use of the PrimaFix base compatible with the RC 2 car seat.