
SGT2400MVPRO - Iron GORENJE - Free user manual and instructions
Find the device manual for free SGT2400MVPRO GORENJE in PDF.


| Product Type | Steam Iron |
| Brand | Gorenje |
| Model | SGT2400MVPRO |
| Power Consumption | 2400 W |
| Voltage | 220-240 V |
| Frequency | 50-60 Hz |
| Soleplate Material | Ceramic |
| Water Tank Capacity | 300 ml |
| Cord Length | 2 m |
| Weight | 1.5 kg |
| Dimensions (L x W x H) | 300 x 120 x 150 mm |
| Continuous Steam Output | 45 g/min |
| Shot of Steam | 150 g/min |
| Spray Function | Yes |
| Vertical Steam | Yes |
| Anti-Drip | Yes |
| Auto Shut-Off | Yes (8 min horizontal, 30 sec vertical) |
| Self-Cleaning | Yes |
| Anti-Calc | Yes |
| Cord Swivel | 360° |
| Color | White/Blue |
| Included Accessories | Measuring cup, Storage bag |
Frequently Asked Questions - SGT2400MVPRO GORENJE
User questions about SGT2400MVPRO GORENJE
0 question about this device. Answer the ones you know or ask your own.
Ask a new question about this device
Download the instructions for your Iron in PDF format for free! Find your manual SGT2400MVPRO - GORENJE and take your electronic device back in hand. On this page are published all the documents necessary for the use of your device. SGT2400MVPRO by GORENJE.
USER MANUAL SGT2400MVPRO GORENJE
SGT 2400 MV PRO
SGT 2400 I PRO
CAUTION: Hot Surface! Figure 1: hot surface
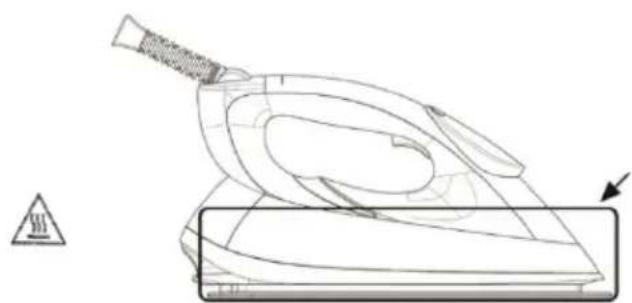
CAUTION: Hot Surface! Figure 2: hot surface
GET TO KNOW YOUR STEAM IRONING STATION

Figure 1
USING YOUR APPLIANCE
Figure 2

Figure 3

Figure 4
CARRYING LOCK
Figure 7
SAFETY SHUT-OFF
Figure 8
Figure 9

Figure 10

Figure 11
ANTI-SCALE CARTRIDGE
Figure 13
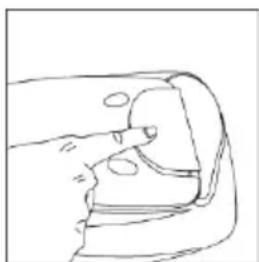
Figure 14
Figure 12

Figure 15
Figure 18
CLEANING AND MAINTENANCE
CAUTION: Hot Surface! Figure 1: hot surface

CAUTION: Hot Surface! Figure 2: hot surface
DETAILED DESCRIPTION OF YOUR NEW STEAM IRONING STATION

- Function button
- Control panel
- Anti-scale cartridge
- Carrying strap fastener
- Water fill opening cover
- Water tank
- Steam release button
- Steam supply hose
- Ironing surface
- Power cord
- Iron
- Base
CONTROL PANEL:
 |  | Pokazivač odsustva pare |
 | Pokazivač količine pare | |
 | Pokazivač stanja kasete za zaštitu od kamenca | |
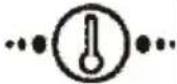
 | Podešavanje temperature | |
 | Pokazivač načina P-TEMP | |
| [25KZ] | Pokazivač automatskog isključenja | |
 | Pokazivač samo-čišćenja | |
| [7X8B] | Pokazivač ECO |
BEFORE FIRST USE
Figure 1
USING YOUR APPLIANCE
- The appliance is designed to work with ordinary tap water. Other liquids or condensates could damage the appliance.
- Connect the appliance to a suitable wall outlet.
- Start ironing only when the icons on the control panel stop flashing. This indicates that the previously selected temperature has been reached and the appliance is ready for use.
- Always unplug the appliance from the electrical outlet after use.
FILLING THE WATER TANK
- The appliance must be unplugged from the electrical outlet.
- Pull the water tank out of its compartment (Figure 2).
- Open the water filling cap and pour low-hardness water (up to 7 dH) into the tank up to the maximum level mark on the tank (Figure 3). Warning: Do not add any chemicals to the water tank, such as perfumes, vinegar, bleach, descaling agents, ironing aids, or similar. Your appliance is not designed to work with such chemical agents.
- Place the water tank back into its position and make sure it is firmly seated in the housing (Figure 4).

Figure 2

Figure 3

Figure 4
CARRYING LATCH FOR THE APPLIANCE
The appliance is equipped with a latch that allows it to be moved and carried. When the iron is attached to the base with this latch, you can move and carry the entire unit with one hand, holding only the iron's handle (Figure 5). To release the iron from the base, turn the latch to the open position, which frees the iron from the base (Figure 6).

Figure 7
SAFETY SHUT-OFF
Figure 8
Figure 9

Figure 10
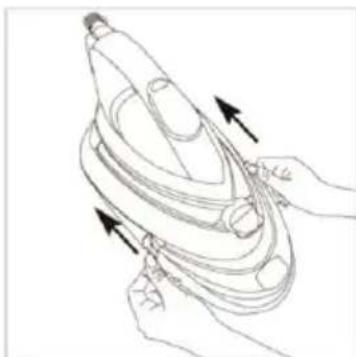
Figure 11
ANTI-SCALE CARTRIDGE
Figure 13

Figure 14

Figure 15
Note:
Figure 18
CLEANING AND MAINTENANCE
- Turn off the appliance and unplug the power cord from the electrical outlet.
- Using a damp cloth or another cleaning aid that will not scratch the surface, remove any residue from the ironing surface and the housing.
- Never use sharp or rough objects to remove residue from the ironing surface.
- Also, never use abrasive accessories or cleaning agents, vinegar, or descaling agents.
Warning!
CAUTION: Hot Surface! Figure 1: hot surface

- Function selection button
- Control panel
- Anti-scale cartridge
- Clip with latch for hanging the iron on the stand
- Water filling hole cover
- Water tank
- Steam release button
- Steam hose
- Ironing surface
- Power cord
- Iron
- Stand
CONTROL PANEL:
| | Indikator nema pare |
| Indikator količine pare | |
| Indikator stanja kasete za zaštitu od kamenca | |
 | Izbor temperature | |
| Indikator P-TEMP režima | |
| [CCB2] | Indikator automatskog isključenja | |
| Indikator auto-čišćenja | |
| [ECCK] | ECO indikator |
BEFORE FIRST USE
- Remove all protective films and stickers from the appliance.
- Unwind and straighten the power cord.
- Also remove the protective sticker from the new anti-scale cartridge (figure 1).
- For better performance, before first use, immerse the new anti-scale cartridge in water and leave it for 5 minutes (see chapter "ANTI-SCALE CARTRIDGE").
Figure 1
USING YOUR APPLIANCE
Figure 2

Figure 3

Figure 4
HANGING CLIP FOR THE APPLIANCE
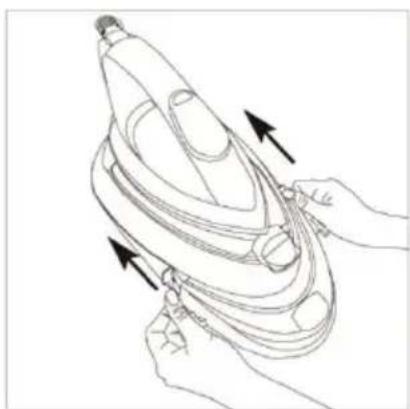
The appliance is equipped with a clip with a latch that allows you to move and carry the entire set. When the iron is attached to the base via the latch on the clip, you can move and carry the appliance as a set with one hand, holding it only by the iron's handle (figure 5). To release the iron from the base, turn the latch to the open position, which frees the iron from the base (figure 6).

Latch closed Figure 5

Latch open Figure 6
PROGRAMMED TEMPERATURE (P-Temp mode)
The appliance has a programmed, i.e., pre-selected and pre-set temperature function that allows ironing all types of fabrics suitable for ironing without the need to adjust the iron's temperature. This is the factory-assigned operating mode of this appliance.
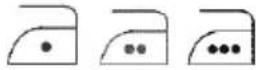 | Simbolima prikazanim na levoj slici označene su vrste tkanina koje su primerene za peglanje, na primer poliester, svila, viskoza, vuna, pamuk, i lan. |
 | Simbolom na levoj slici označene su vrste tkanina koje nisu primerene za peglanje, na primer polipropilen, elastan i akrilne tkanine. |
Figure 7
AUTO SHUT-OFF
The auto shut-off function activates automatically if you do not move the iron for 10 minutes, or if the function selection button or steam release button is not pressed during that period.
- In that case, the auto shut-off indicator flashes and the appliance emits an audible signal (beep), indicating that the appliance has automatically shut off for safety reasons.
- To reactivate the iron, simply move it or press the function selection button or steam release button. The control panel returns to the previously selected temperature setting, and the appliance starts heating up again. It may take up to 60 seconds for the iron to be ready for use again.

Figure 8
Figure 9
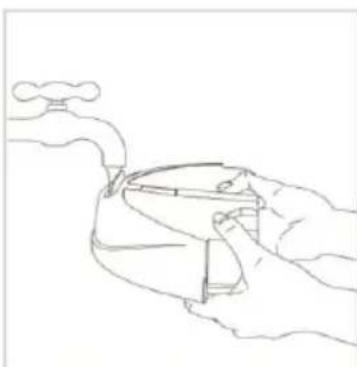
Figure 10

Figure 11
ANTI-SCALE CARTRIDGE
The appliance is equipped with a cartridge that removes limescale from the water, ensuring a longer lifespan.
- When the indicator lights up and you simultaneously hear a warning beep, it is time to replace the anti-scale cartridge (Figure 12). It is especially important to replace the anti-scale cartridge before continuing to iron.
- Remove the protective film from the new anti-scale cartridge (Figure 1).
- For optimal performance, soak the new anti-scale cartridge in water for 5 minutes before use (Figure 13).
- Press to release the cartridge from the housing (you will hear a click) and pull the cartridge out of the appliance (Figure 14).
- Caution: the cartridge may be very hot due to the heat emitted by the ironing surface. Check that the cartridge has cooled down sufficiently before pressing the button to remove it.
- Place the new anti-scale cartridge in its position in the appliance (figure 15).


Figure 13

Figure 14
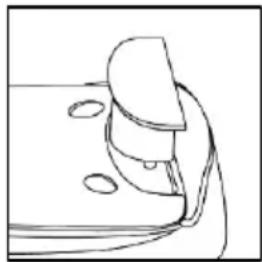
Figure 15
Note:
If the anti-scale cartridge housing is not properly positioned, the appliance will not be able to properly use the protection provided by the anti-scale cartridge, and the anti-scale cartridge indicator will blink (figure 16).
Figure 16
AUTOMATIC CLEANING OF THE APPLIANCE
Figure 18
CLEANING AND MAINTENANCE
- Turn off the appliance and unplug the power cord from the electrical outlet.
- Using a damp cloth or another cleaning aid that will not scratch the surface, remove any residue from the ironing surface and from the housing.
- Never use sharp or rough objects to remove residue from the ironing surface.
- Also, never use rough accessories or cleaning agents, vinegar, or descaling agents.
Warning!
If you live in an area with hard water (above 7 dH), limescale and other minerals will rapidly accumulate on the appliance. In that case, we recommend using distilled water for ironing. The warranty does not cover malfunctions or damage caused by limescale or mineral buildup.
DISPOSAL OF THE APPLIANCE AFTER USE
- Make sure all water has been drained from the water tank.
- Place the iron on the base (support) of the steam station.
- Turn the carrying clip to the closed position.
- When the carrying clip on the base is in the closed position, you can carry the appliance with one hand by holding the iron's handle.
IRONING TIPS
- Sort the garments you want to iron by fabric type. This way, you will need to change the temperature settings less often.
- If you start ironing at a higher temperature and then select a lower temperature, it may take up to two minutes for the soleplate to cool down to the lower setting. To speed up the cooling process, press the steam release button.
- If you are unsure about the fabric type, first do a test iron on a small, less visible area of the garment. Start ironing at a lower temperature and gradually increase it.
- Before ironing heat-sensitive fabrics, wait 2 minutes. After changing the temperature setting, the appliance needs some time to adjust to the new setting – regardless of whether the new temperature is higher or lower.
- Sensitive fabrics such as silk, wool, velvet, etc., are best ironed through an additional pressing cloth, as this will most effectively prevent shiny marks on the clothing.
TROUBLESHOOTING
If you notice that your steam station is not functioning properly, check the following points:
| Problem | Uzrok | Rešenje |
| Aparat ne radi. | Aparat se još zagreva. | Pre upotrebe pričekajte nekoliko minuta. |
| Aparat nije priključen | Priključite aparat na električnu mrežu. | |
| Dugme za uključenje/isključenje je u isključenom položaju (OFF). | Pritisnite dugme za uključenje/isključenje na aparatu. | |
| Utičnica je neispravna. | Aparat priključite na ispravnu utičnicu. | |
| Iz aparata ne izlazi para kada se pritisne taster za ispuštanje pare. | Prazan rezervoar za vodu | Napunite rezervoar za vodu |
| Aparat se još zagreva | Pričekajte da se aparat pravilno ugreje | |
| Peglanje parom nije raspoloživo | Pritisnite dugme za izbor funkcije i izaberite višu temperaturnu regulaciju. | |
| Površina za peglanje ne ugreje se dovoljno. | Nepravilan izbor regulacije za vrstu tkanine. | Pritisnite dugme za izbor funkcije i izaberite višu regulaciju temperature. |
| Oštećenje tkanine | Pregrejavanje | Pridržavajte se uputstava za peglanje odeće, ili isprobajte peglanje sa izabranim regulacijama na sakrivenom delu odeće. |
| Šumovi (buka) | Prva upotreba | To je normalno. |
| Rezervoar za vodu je prazan. | Sipajte vodu u rezervoar za vodu. |
IMPORTANT
Figure 1
Figure 2
Figure
3 4
Figure 7
Figure 8
Figure 9

Figure 10
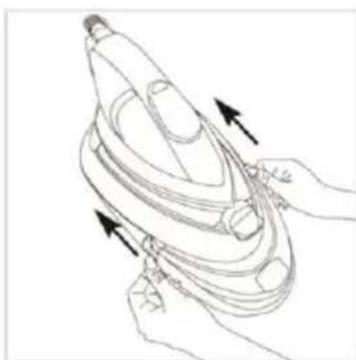
Figure 11
DESCALING FILTER
Figure 13

Figure 14

Figure 15
Figure 18
CLEANING AND MAINTENANCE
For your safety, please read the instructions carefully before using the appliance for the first time. Save the instructions for future reference.
The appliance is designed for domestic use and may only be operated in accordance with these instructions for use.
The appliance generates hot steam. Always handle with care and warn other users of potential danger.
DO'S
- Check if the mains voltage stated on the rating plate corresponds to the local electricity supply.
- Unwind and straighten the power cord and steam hose before use.
- Place the appliance on a firm and steady surface.
- The iron must be used and rested on a stable surface.
- Make sure the power cord or steam hose do not touch the soleplate.
- Insert the anti-scale cartridge before use.
- Unplug the power cord from the socket before filling the water tank with water.
- Keep the anti-scale cartridge and granules away from children at all times.
- Keep electrical appliances out of reach from children or infirm persons. Do not let them use the appliances without supervision.
- Ensure the stand is placed on a stable surface before placing iron on it.
- If the power cord or steam hose are damaged, have them replaced by the manufacturer, a service agent or a similarly qualified person, in order to avoid hazard.
- Empty the water tank after use.
- Do not allow children to play with the appliance.
- This appliance may be used by children aged 8 years and above, and by persons with reduced physical, sensory or mental capabilities or lack of experience and knowledge, if they are supervised or if they have been instructed on how to use the appliance in a safe way, and if they understand the hazards involved.
- Keep the iron and its cord out of reach of children less than 8 years of age when it is energized or cooling down.
DO NOT'S
- Do not allow children to touch the appliance when ironing.
- Do not leave the appliance unattended when it is connected to a mains supply outlet.
- Do not use an extension power cord unless a competent authority has approved it.
- Do not add perfumed water, vinegar or other chemicals into the water tank as they
can seriously damage the appliance.
- Do not immerse the appliance in water or any other liquid.
- Do not use the appliance when it is damaged or performs abnormally.
- Do not use the iron if it has been dropped, if there are visible signs of damage, or if it is leaking.
- Do not touch the iron rest during or just after ironing. It is hot!
- Do not roll the power cord or steam hose around the iron unit or base for storage until the appliance has cooled down completely.
- Do not attempt to open the cabinet or disassemble any parts from the appliance. There are no serviceable parts inside.
- Do not open the water inlet cover during use. Instructions for safe refilling of the water tank are provided in this manual.
- Do not allow children to perform cleaning and user maintenance tasks without supervision.
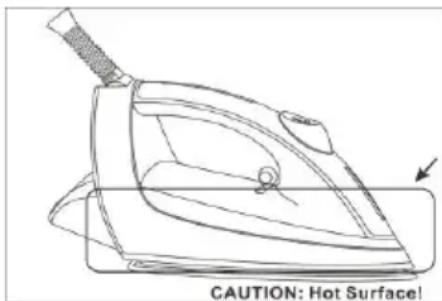
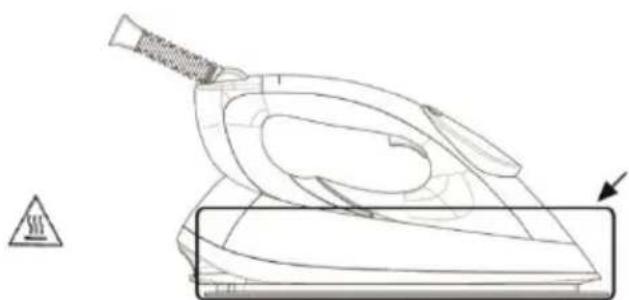
- Do not touch the surfaces marked with symbol △ during or just after ironing. They are hot! (Please refer to the Figure 1 and Figure 2 below).
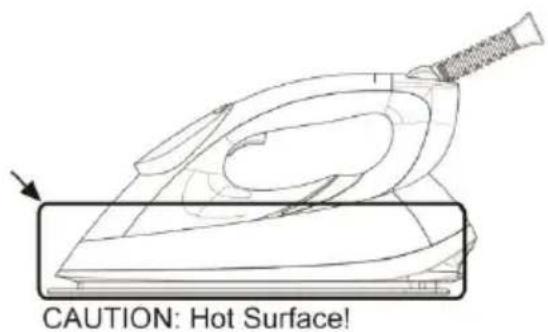
Figure 1: Left Side: hot surface

Figure 2: Right Side: hot surface
GET TO KNOW YOUR STEAM STATION

- Function Button
- Control Panel
- Anti-scale Cartridge
- Carry Lock
- Water Inlet Cover
- Water Tank
- Steam Trigger
- Steam Hose
- Soleplate
- Power Cord
- Iron Unit
- Base
CONTROL PANEL:
 |  | No Steam Indicator |
 | Steam Level Indicator | |
 | Anti-scale Cartridge Indicator | |
 | Temperature Settings | |
 | P-Temp Mode Indicator | |
 | Auto Shut Off Indicator | |
 | Self-dean Indicator | |
 | ECO Indicator |
BEFORE THE FIRST TIME USE
- Remove any protective films or stickers on the appliance.
- Unwind and straighten the power cord.
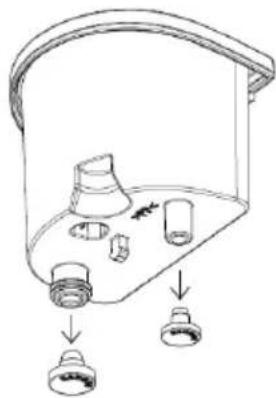
- Remove the sealing cover from the new anti-scale cartridge (Figure 1).
- Immerse a new anti-scale cartridge into water for 5 minutes before first use for better performance (see "ANTI-SCALE CARTRIDGE").
Note: When using the steam function for the first time, do not use it on your
laundry. Some residue may remain inside the appliance.
Begin the first time ironing with an old towel. Press the steam trigger to ensure the residues are completely released.
USING YOUR APPLIANCE
- This appliance is designed to use normal tap water. Other liquid or condensation water might damage the appliance.
- Connect the appliance with a suitable remains supply outlet.
- Start ironing after the icons on the display panel stop flashing which indicates the required temperature is reached and ready to use.
- Always disconnect the appliance from the main after use.
FILLING THE WATER TANK
- Disconnect the power cord from electric outlet.
- Pull the water tank out (Figure 2).
- Open the Water hlet Cover and fill water into the water tank until the max level on the water tank with low hardness water (up to 7dH).
Warning : Do not put perfume, vinegar, starch, descaling agents, ironing aids or other chemicals in the water tank, as your appliance is not designed to work with these chemicals (Figure 3).
- Put the water tank back and make sure that it is firmly positioned in place (Figure 4).
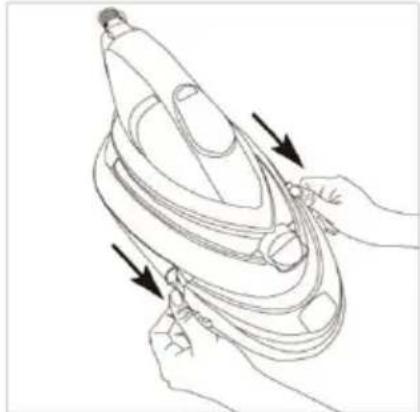
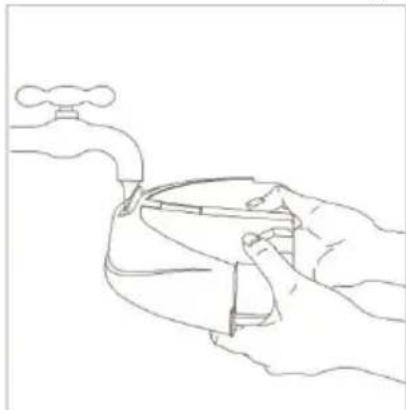
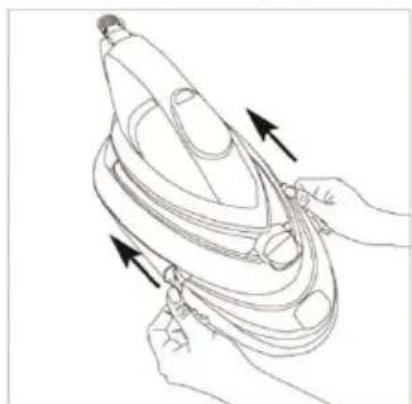
Figure 4
CARRY LOCK
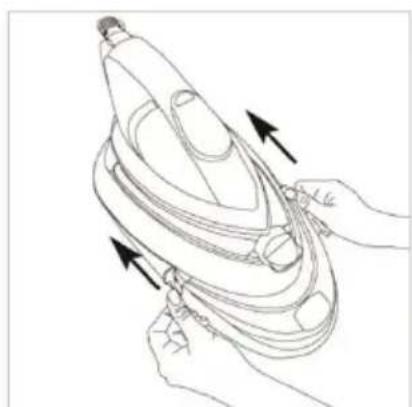
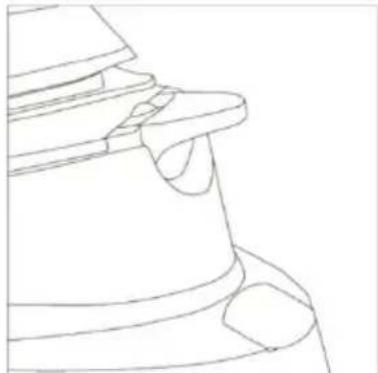
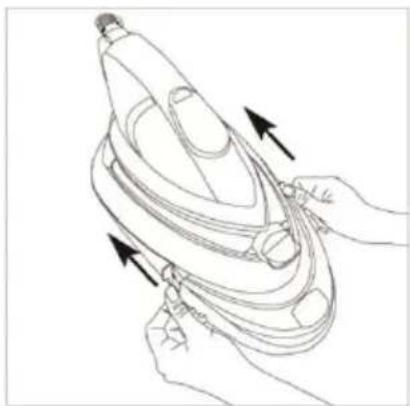
The appliance is equipped with a carry lock. You can carry the appliance with one hand by the handle of the iron unit when the iron is locked on the base (Figure 5). To release the iron unit from the base, turn the carry lock to the unlock position (Figure 6).

Lock Position Figure 5
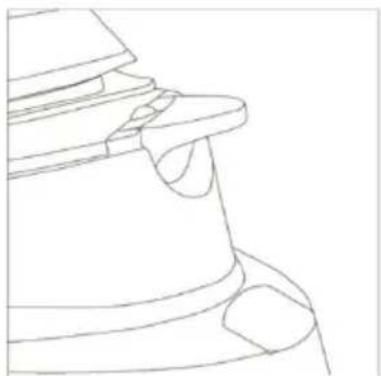
Unlock Position Figure 6
PROGRAMMED TEMPERATURE (P-Temp Mode)
The appliance is equipped with Programmed Temperature which allows the appliance to iron all ironable fabric without adjusting the temperature of the iron. It is the default mode of this appliance.
 |  |  | Fabrics with these symbols are iron able, for example, Polyester, Silk, Viscose, Wool, Cott on and Linen. |
 | Fabrics with this symbol are not ironable, for example, Polypropylene, Elastane and Acrylic Fabric. |
The ECO indicator will light up when P-temp mode indicates that the energy is saved with sufficient steam flow to do ironing.
SETTING THE TEMPERATURE
The appliance has different temperature settings to handle different kinds of fabrics. Press the function button to switch the appliance on. The appliance will start at P-temp mode. If you want to switch to other ironing temperature, press the function key and the temperature will loop with a sequence of "P-temp mode" -> "Dot 1" -> "Dot 2" -> "Dot 3" -> "Max" -> "P-temp mode" as follows:
![graph LR A["P-Temp mode"] --> B["Dot 1"] B --> C["Dot 2"] C --> D["Dot 3"] D --> E["Max"]](/content/2026/05/969618/images/ce9dc3678bd3cf213cc86cdc9ae4f6c6d450c3bab324c4559131fc32b804e262.jpg)
IMPORTANT: Before start ironing, read the garment labels and follow the manufacturer's ironing instructions that are often shown by symbols similar to the following:
| Temperature Control Setting | ||
 Acetate Elastane Polyamide Acetate Elastane Polyamide |  Polyester Silk Triacetate Viscose Wool Polyester Silk Triacetate Viscose Wool |  Cotton Linen Cotton Linen |
If you are not sure about the fabric is made of, use the P-temp mode or begin the ironing at a low temperature.
AUTO STEAM FUNCTION
The appliance will automatically adjust the steam output to the selected temperature. The function provides right amount of steam for each temperature to achieve the precise ironing result.
TO DO IRONING
| 1. Press the function button to turn on the appliance and select your desired temperature to do ironing. “Beep” sounds will be heard when the function button is being pressed |  |
| 2. Depending on which temperature setting that you have selected, the corresponding temperature symbol on the control panel will be flashing. When the iron is ready for use, the temperature symbol stops flashing and stays on steadily. | 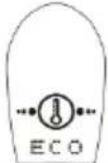 |
| 3. Steam ironing is available for all temperature setting except “Dot1”. You can press and hold the steam trigger to generate steam for steam ironing.A “beep” sound will be heard when the steam trigger is being pressed and the respective steam indicator for “P-temp”, “Dot 2”, “Dot 3” and “Max” will flash indicates it is generating steam. Release the steam trigger to stop generating steam. |  |
| 4. You can adjust the temperature setting of the appliance by pressing the function button. | 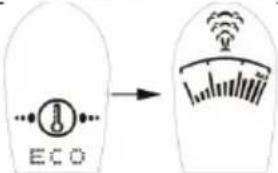 |
| 5. After use, press and hold the function button for 2 seconds to turn the appliance off. | 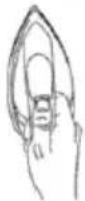 2s 2s |
| 6. After every use, follow the instructions in “Draining the water tank”. It is recommended to drain the water inside water tank after use. |
VERTICAL STEAMING
You can also remove wrinkles on delicate garments in hanging position, hanging curtains, or other hanging fabrics:
- Select your desired temperature setting with steam ironing available.
- Hold the iron in vertical position (Figure 7) 15 to 30 centimeters away from the garment.
- Press the steam trigger.
Warning: Do not apply steam on any clothes or fabrics that are being worn by human or pets. Temperature of steam is very high.

Figure 7
SAFETY AUTO SHUT-OFF FUNCTION
The safety auto shut-off function will operate automatically when the iron is left immobile or the function button/steam trigger not being pressed for 10 minutes.
- A "beep" sound will be heard with the Auto Shut off Indicator flashing (Figure 8) to indicate the appliance is under safety auto shut off function.
- To reactivate the iron, simply move it or press the function button or the steam trigger. The control panel will return to its previous temperature setting and start heating up. It may take about
60 seconds for the iron to be ready for use.

Figure 8
Note: The appliance is not switched off completely when it is in safety auto shut off function. Press and hold the function button to turn the appliance off and unplug it from the mains supply outlet.
DRAINING THE WATER TANK
Disconnect the iron from the mains supply outlet.
- Pull the water tank out (Figure 9).
- Open the Water Inlet Cover and drain the water tank with low hardness water (up to 7dH) (Figure 10).
- Put the water tank back and make sure that it is firmly positioned in place (Figure 11).
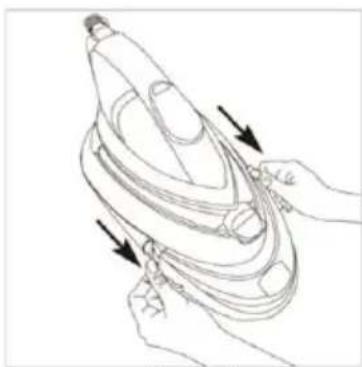
Figure 9
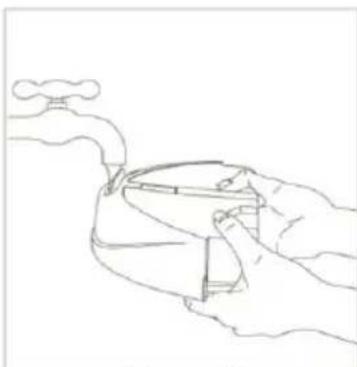
Figure 10

Figure 11
ANTI-SCALE CARTRIDGE
This appliance has an anti-scale cartridge to prolong its lifespan.
- When the Anti-scale Cartridge Indicator lights up with a "beep" sound (Figure 12), it indicates the anti-scale cartridge needs to be changed. It is very important for you to change the cartridge before continuing to do ironing.
- Remove the sealing cover from a new anti-scale cartridge. (Figure 1)
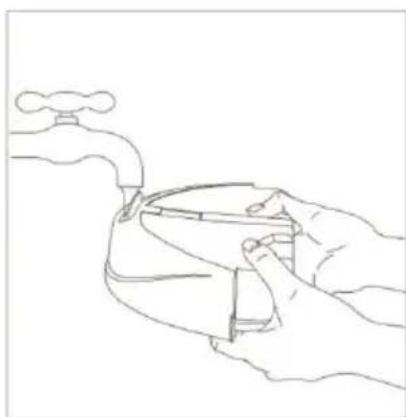
- Immerse a new anti-scale cartridge into water for 5 minutes (Figure 13) before first use for better performance.
- Press to release the cartridge from the appliance (a "beep" sound will be heard) and pull out the old cartridge from the appliance (Figure 14). (Caution: The cartridge can be very hot due to the heat of the sole plate. Make sure the cartridge is cooled down before pressing on the cartridge.)
- Insert the new anti-scale cartridge (Figure 15)
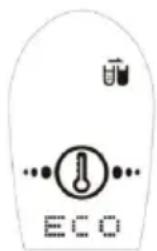
Figure 12
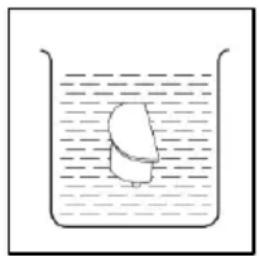
Figure 13

Figure 14

Figure 15
Note: If the anti-scale cartridge is not installed or installed improperly, the appliance will not be able to use and the Anti-scale Cartridge indicator will be flashing (Figure 16).
Figure 16
SELF-CLEANING
This function removes the scales and minerals built up in the Steam Chamber. The appliance will remain in the best condition if this function is performed at least once a month or more regularly depending on the hardness of water used.
- When the self-clean indicator lights up with a "beep" sound, it indicates that the appliance needs to undergo self-cleaning (Figure 17).
- Fill the water tank to the max level (See "FILLING THE WATER TANK") and plug in the appliance.
- Press the function button followed by the steam trigger and hold both buttons for 3 seconds. The appliance will then enter the self-cleaning mode with a "beep" sound.
- Press the function button to proceed with self-cleaning. Press the steam trigger to resume ironing. (Note: when self-cleaning is confirmed to proceed, it will not be able to terminate until the self-cleaning process is completed.)
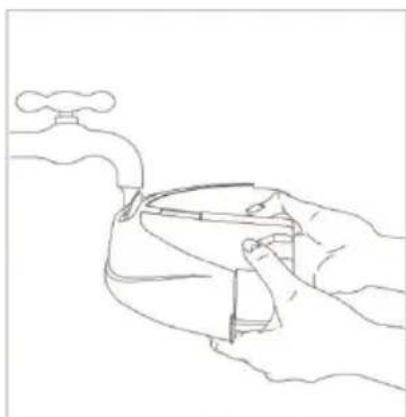
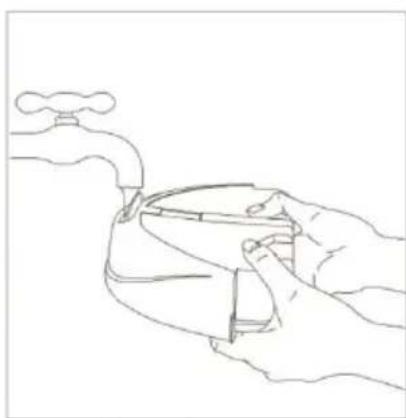
- Hold the iron about 15 centimeters above the sink in the ironing position. Loose material will come out through the steam holes of the iron together with water (Figure 18). The appliance will resume to the previous ironing setting when complete.
- Iron with a damp cloth to remove any deposits on the soleplate. Remove any water stains that may have formed on the soleplate.
- Press and hold the function button to turn the appliance off and unplug it from the mains supply outlet.
Figure 17
Figure 18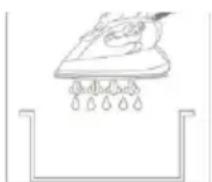
CLEANING AND MAINTENANCE
- Disconnect the power cord from the mains supply outlet.
- Use a damp cloth or non-scratching cleaner to remove the deposits on the sole plate or the cabinets.
- Never use sharp or rough objects to remove the deposit on the sole plate.
- Never use any abrasive, vinegar or descaling agents to clean the iron.
Warning
If you live in an area with hard water (over 7dH), fast scale and minerals build up will occur. It is therefore recommended to use distilled water!
Malfunctioning appliance associated with scale and minerals build up are not subject of guarantee interventions.
STORAGE
- Make sure the water is already drained out from the water tank
- Place the iron unit on the base.
- Turn the carry lock to the lock position
- You can carry the appliance with one hand by the handle of the iron unit when the iron is locked on the base.
HINT FOR IRONING
- Sort out the articles to be ironed according to the type of fabric. This will minimize the frequency of temperature adjustment for different garments.
- If you start ironing at a high temperature and then select a lower one, the soleplate may take more than two minutes to cool down. To speed up the cooling process, you may press the steam trigger.
- Test ironing a small area on the backside or inside the garment if you are unsure about the type of fabric. Start with a low temperature and increase gradually.
- Wait for 2 minutes before ironing heat sensitive fabrics. Temperature adjustment needs certain time to reach the required level, no matter it is higher or lower.
- Delicate fabrics such as silk, wool, velour, etc. are best ironed with an ironing cloth to prevent shine marks.
TROUBLE-SHOOTING
If your steam station does not work well, check the following points:
| Problem | Cause | Solution |
| The unit does not work | There is under heat up | Wait for heating up |
| It is not plugged in | Plug in | |
| The anti-scale cartridge is not installed/ installed improperly | Install the scale cartridge properly | |
| Socket does not work | Plug in other good socket | |
| No steam coming out when pressing the steam trigger | Water tank empty | Fill water tank |
| The appliance is still heating up | Wait for heating up | |
| Steam ironing is not available | Press the function button for a higher temperature setting | |
| Sole-plate doesn't heat well | Incorrect Fabric setting | Press the function button for a higher temperature setting |
| Damage textile | Over heat | Follow the garment guide or test on the inside of the hem of the garment |
| Loud noise | First time use | It is normal |
| Water tank empty | Fill water tank |

AUTOMATIC SAFETY SHUT-OFF FUNCTION
Figure 8
Figure 9

Figure 10

Figure 11
ANTI-SCALE CARTRIDGE
Figure 13
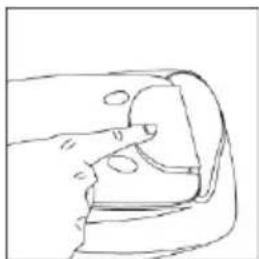
Figure 14

Figure 15
Figure 18
CLEANING AND MAINTENANCE
GETTING TO KNOW THE IRONING STATION

Figure 1
USING THE APPLIANCE
Figure 2

Figure 3

Figure 4
TRANSPORT LOCKING DEVICE
Locking position Figure 5
Unlocking position Figure 6
PROGRAMMED TEMPERATURE (P-Temp Mode)
Figure 7
AUTOMATIC SAFETY SHUT-OFF FUNCTION
Figure 8
Figure 9
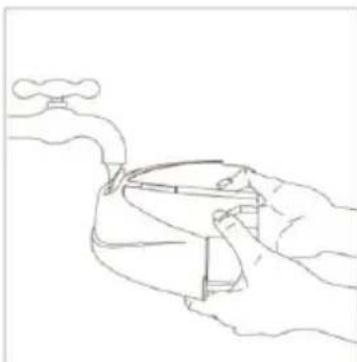
Figure 10
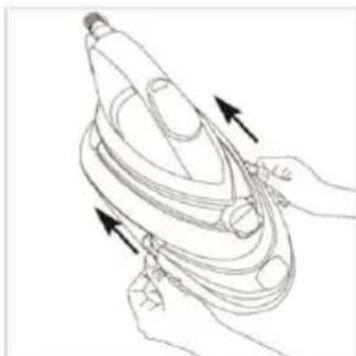
Figure 11
ANTI-SCALE CARTRIDGE
Figure 13

Figure 14
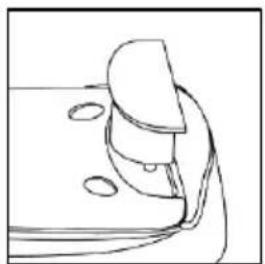
Figure 15 Figure 16
Figure 18

- Function setting button
- Control panel
- Anti-scale filter
- Carrying lock
- Water tank cover
- Water tank
- Steam control button
- Steam hose
- Soleplate
- Power cord
- Iron
- Base
CONTROL PANEL
Figure 1
USE OF THE APPLIANCE
Figure 2

Figure

3 4
CARRY LOCK SYSTEM
Figure 7
AUTOMATIC SHUT-OFF SAFETY FUNCTION
Figure 8
Figure 9
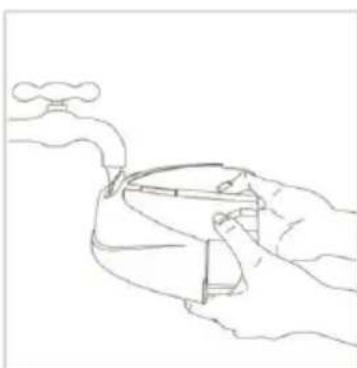
Figure 10

Figure 11
ANTI-CALC FILTER
Figure 13
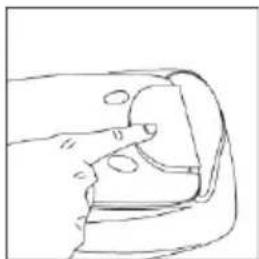
Figure 14
Figure 12

Figure 15
Figure 18
CLEANING AND MAINTENANCE
CAUTION: Hot Surface!
GET TO KNOW THE STEAM STATION!
CAUTION: Hot Surface!
GET TO KNOW YOUR STEAM STATION!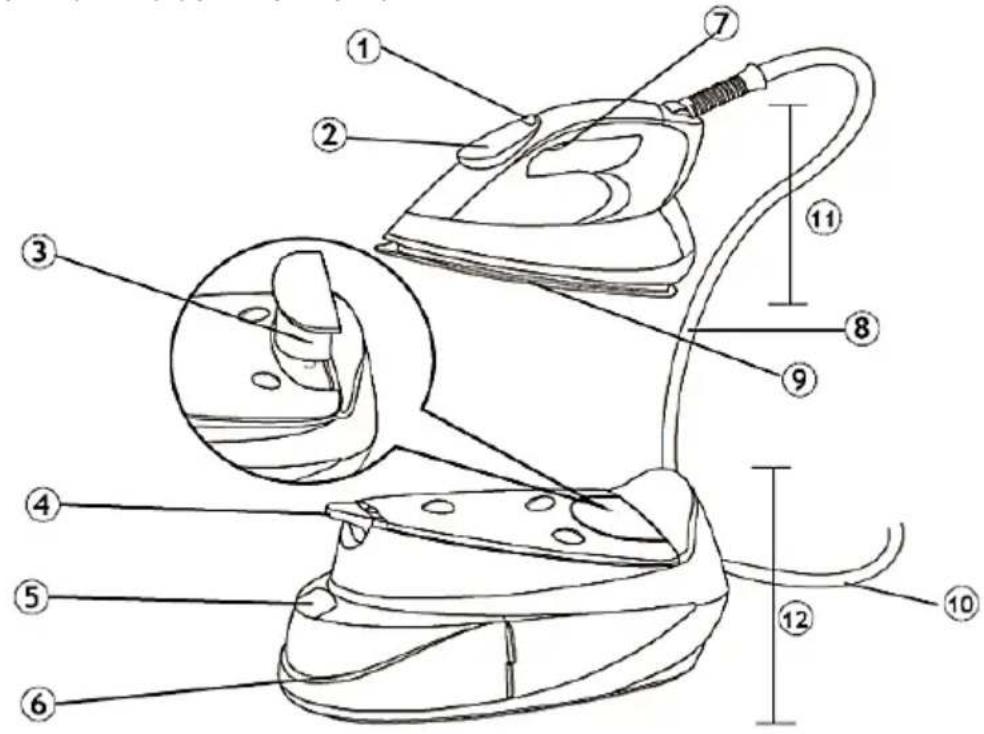
Figure 1
USING THE APPLIANCE
Figure 2

Figure
LOCKING CLASP
Closed position Figure 5
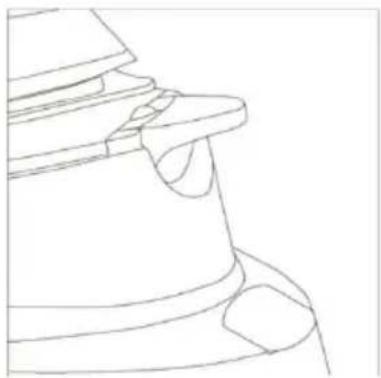
Figure 7
SAFETY AUTOMATIC SHUT-OFF FUNCTION
Figure 9
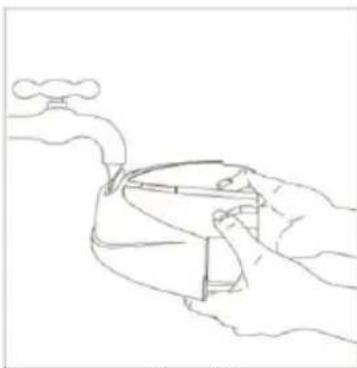
Figure 10

Figure 11
ANTI-CAL PATRON
Figure 13

Figure 14
Figure 12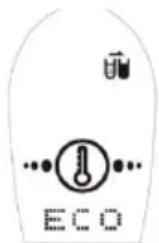
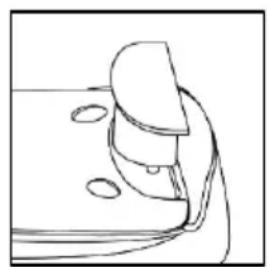
Figure 15
Figure 18
CAUTION: Hot Surface!

Figure 1
Figure 2

Figure
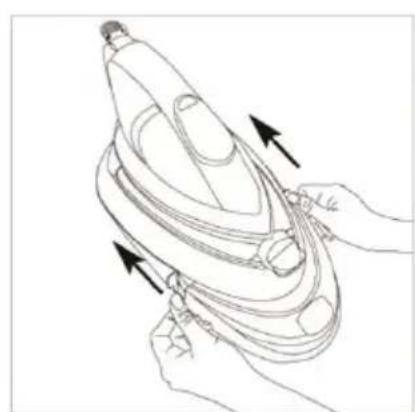
3 Figure 4
Figure 7
Figure 8
Figure 9

Figure 10

Figure 11
Figure 13

Figure 14
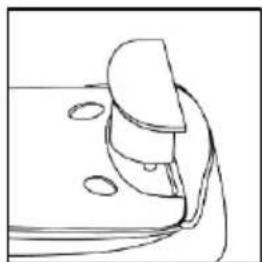
Figure 15
Figure 18
STORAGE
Fig. 1
USE OF THE DEVICE
Fig. 2
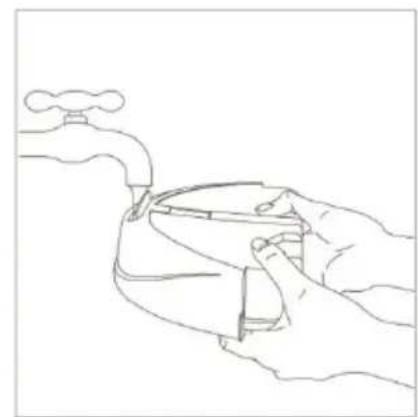
Fig.

4
Figure 7
AUTOMATIC SHUTDOWN SAFETY FUNCTION
Figure 8
Figure 9
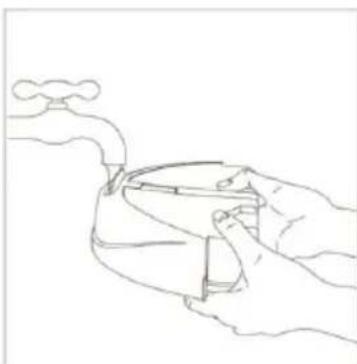
Figure 10
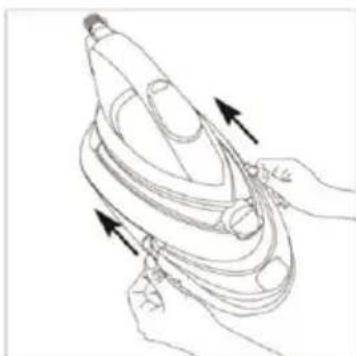
Figure 11
Figure 13
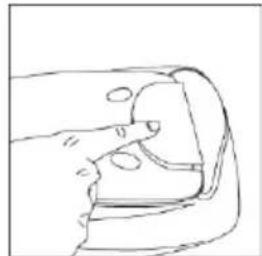
Figure 14
Figure 12

Figure 15
Figure 16
Figure 18
Fig. 1
USE
Fig. 2

The iron is fixed on the base. Fig. 5
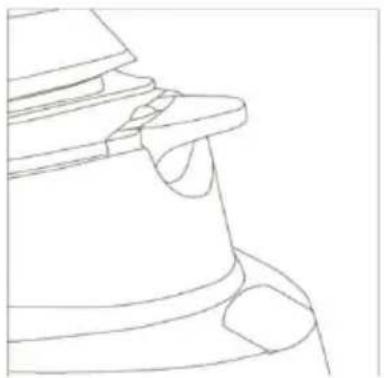
Fig. 7
Fig. 8
Fig. 9

Fig. 10

Fig. 11
Fig. 13
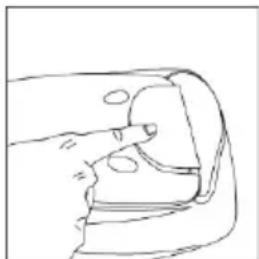
Fig. 14

Fig. 15
Fig. 18
CLEANING AND CARE
Fig. 1
HOW TO USE THE IRON
Fig. 2
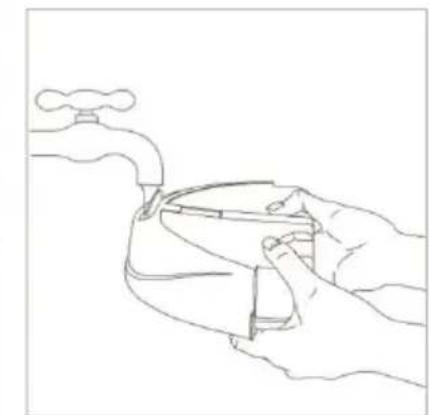
Fig.

4
TRANSPORT SAFETY
SAFETY SHUT-OFF FUNCTION
Figure 9

Figure 10

Figure 11
ANTI-SCALE FILL
Figure 13
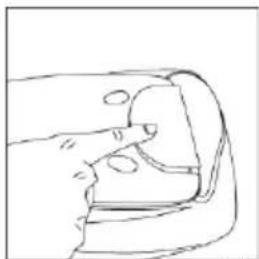
Figure 14

Figure 15
Figure 18
CLEANING AND MAINTENANCE


- GET TO KNOW YOUR STEAM IRONING STATION
- USING YOUR APPLIANCE
- CARRYING LOCK
- SAFETY SHUT-OFF
- ANTI-SCALE CARTRIDGE
- CLEANING AND MAINTENANCE
- DETAILED DESCRIPTION OF YOUR NEW STEAM IRONING STATION
- BEFORE FIRST USE
- FILLING THE WATER TANK
- CARRYING LATCH FOR THE APPLIANCE
- NOTE
- WARNING
- CONTROL PANEL
- HANGING CLIP FOR THE APPLIANCE
- PROGRAMMED TEMPERATURE (P-TEMP MODE)
- AUTO SHUT-OFF
- AUTOMATIC CLEANING OF THE APPLIANCE
- DISPOSAL OF THE APPLIANCE AFTER USE
- IRONING TIPS
- TROUBLESHOOTING
- IMPORTANT
- DESCALING FILTER
- DO'S
- DO NOT'S
- GET TO KNOW YOUR STEAM STATION
- BEFORE THE FIRST TIME USE
- CARRY LOCK
- SETTING THE TEMPERATURE
- AUTO STEAM FUNCTION
- VERTICAL STEAMING
- SAFETY AUTO SHUT-OFF FUNCTION
- DRAINING THE WATER TANK
- SELF-CLEANING
- STORAGE
- HINT FOR IRONING
- TROUBLE-SHOOTING
- AUTOMATIC SAFETY SHUT-OFF FUNCTION
- GETTING TO KNOW THE IRONING STATION
- USING THE APPLIANCE
- TRANSPORT LOCKING DEVICE
- USE OF THE APPLIANCE
- CARRY LOCK SYSTEM
- AUTOMATIC SHUT-OFF SAFETY FUNCTION
- ANTI-CALC FILTER
- LOCKING CLASP
- SAFETY AUTOMATIC SHUT-OFF FUNCTION
- ANTI-CAL PATRON
- USE OF THE DEVICE
- AUTOMATIC SHUTDOWN SAFETY FUNCTION
- USE
- CLEANING AND CARE
- HOW TO USE THE IRON
- TRANSPORT SAFETY
- SAFETY SHUT-OFF FUNCTION
- ANTI-SCALE FILL
Brand : GORENJE
Model : SGT2400MVPRO
Category : Iron