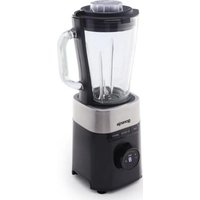
B1000DE - Blender GORENJE - Free user manual and instructions
Find the device manual for free B1000DE GORENJE in PDF.


| Brand | Gorenje |
| Model | B1000DE |
| Product type | Blender |
| Power | 1000 W |
| Voltage | 220-240 V, 50/60 Hz |
| Capacity | 1.5 L |
| Speed settings | 2 speeds + pulse |
| Jug material | Glass |
| Blade material | Stainless steel |
| Base material | Plastic |
| Dimensions (HxWxD) | 380 x 180 x 180 mm |
| Weight | 3.5 kg |
| Cord length | 1.2 m |
| Main functions | Mixing, blending, pureeing, crushing ice |
| Safety features | Non-slip feet, overheating protection, lid lock |
| Cleaning | Dishwasher safe jug (except lid) |
| Maintenance | Clean after each use; check blade tightness |
| Spare parts availability | Blade assembly, jug, lid, gasket |
| Repairability | Moderate: user-replaceable parts |
| Warranty | 2 years |
Frequently Asked Questions - B1000DE GORENJE
User questions about B1000DE GORENJE
0 question about this device. Answer the ones you know or ask your own.
Ask a new question about this device
Download the instructions for your Blender in PDF format for free! Find your manual B1000DE - GORENJE and take your electronic device back in hand. On this page are published all the documents necessary for the use of your device. B1000DE by GORENJE.
USER MANUAL B1000DE GORENJE
natural_image
Black and white photo of a Goerenje blender with handle and control buttons (no visible text or symbols on the device body)B1000DE
| Nastavni mešalnik | Navodila za uporabo | SI |
| Mikser | Upute za uporabu | BIH HR |
| Mikser | Uputstvo za upotrebu | BIH SRB MNE |
| Миксер | Упатства за употреба | MK |
| Blender | Instruction manual | GB |
| Standmixer | Gebrauchsanweisung | D |
| Миксер | Инструкции за употреба | BG |
| Mixér | Návod na použití | CZ |
| Mixér | Návod na obsluhu | SK |
| Mixer | Használati utasítás | H |
| Mixer | Instrukcja obsługi | PL |
| Mixer | Manual de utilizare | RO |
| Змішувач | ництрукція з експлуатаціїл | UA |
| Мешалка | Инструкция по эксплуатации | RUS |
| Frullatore | Istruzioni d'uso | I |
SL Navodila za uporabo ....3


natural_image
Line drawing of a blender with handle and control knob (no text or symbols)
natural_image
Illustration of hands pouring liquid from a cup into a mug (no text or symbols)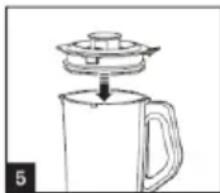
natural_image
Line drawing of a coffee maker with a lid and handle, no text or symbols present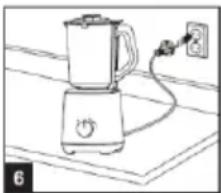
natural_image
Line drawing of a blender on a kitchen appliance with an electrical outlet (no text or symbols)
natural_image
Line drawing of a kitchen blender with handle and control knob (no text or symbols)
natural_image
Line drawing of a blender on a kitchen counter with a power outlet (no text or symbols)
natural_image
Line drawing of a kitchen blender with handle and base (no text or symbols)
natural_image
Line drawing of a steamer with lid and handle, no text or symbols present
natural_image
Simple line drawing of a container pouring liquid from a bottle into a cup (no text or symbols)
natural_image
Line drawing of a toaster on a flat surface with an electrical outlet (no text or symbols)- Pokrov otvora za dodavanje sastojaka/mjerica
- Pokrov
- Vrč sjeckalice (1,5 litra)
- Odstranjivi nož
- Kućište
- Utikač i priključni kabel
- Gumb za upravljanje
- Nožice


natural_image
Line drawing of a blender with handle and control knob (no text or symbols)
natural_image
Illustration of hands pouring liquid from a container into a mug (no text or symbols)
natural_image
Line drawing of a coffee maker with a lid and handle, no text or symbols present
natural_image
Line drawing of a blender on a kitchen counter with an electrical outlet (no text or symbols)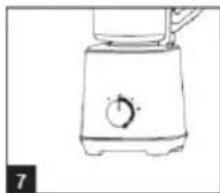
natural_image
Line drawing of a kitchen blender with handle and control knob (no text or symbols)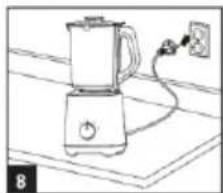
natural_image
Line drawing of a blender on a kitchen appliance with a power outlet (no text or symbols)
natural_image
Line drawing of a blender with handle and base (no text or symbols)
natural_image
Line drawing of a mug with a lid and handle, no text or symbols present
natural_image
Simple line drawing of a cup pouring liquid from a container (no text or symbols)
natural_image
Simple line drawing of a toaster on a flat surface with an electrical outlet (no text or symbols)-
Aparat postavite na vodoravnu površinu. Provjerite da aparat nije spojen na strujnu utičnicu, i da je gumb za odabir brzine rada u isključenom položaju (OFF).
-
Pripremite povrće ili voće. Želite li primjerice napraviti sok od mrkve, najprije ogulite mrkvu i narežite je na kockice približne veličine 15 mm. Uklonite mjernu čašu i poklopac vrča, i u vrč istresite mrkvu narezanu na kockice. Za što ravnomjerniji rad obično treba u aparat dodati malo čiste vode kako bi mogao nesmetano usitnjavati namirnice. Odnos između količine mrkve i vode je 2:3. Ukupna količina vode i drugih sastojaka neka ne premaši oznaku za najvišu razinu na vrču.
- Poklopac otvora za dodavanje sastojaka/merica
- Poklopac
- Vrč seckalice (1,5 litra)
- Odstranjivi nož
- Kućište
- Utikač i priključni kabl
- Dugme za upravljanje
- Plastične nožice
natural_image
Line drawing of a blender with handle and control knob (no text or symbols)
natural_image
Illustration of hands pouring liquid from a container into a mug (no text or symbols)
natural_image
Line drawing of a coffee maker with a lid and handle, no text or symbols present
natural_image
Line drawing of a blender on a kitchen appliance with an electrical outlet (no text or symbols)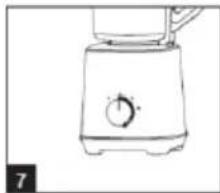
natural_image
Line drawing of a kitchen blender with handle and control knob (no text or symbols)
natural_image
Line drawing of a blender with a power outlet connected to a surface (no text or symbols)
natural_image
Line drawing of a blender with handle and base (no text or symbols)
natural_image
Line drawing of a mug with a lid and an arrow indicating upward motion (no text or symbols)
natural_image
Simple line drawing of a cup pouring liquid from a container (no text or symbols)
natural_image
Line drawing of a toaster on a wooden counter (no text or symbols)- Aparat postavite na ravnu površinu. Proverite da aparat nije spojen na strujnu utičnicu, i da je dugme za izbor brzine rada u isključenom položaju (OFF).
- Pripremite povrće ili voće. Ako na primer želite izraditi sok od šargarepe, najpre ogulite šargarepu i isecite je na kockice približne veličine 15 mm. Uklonite mernu čašu i poklopac bokala, i u bokal istresite šargarepu isečenu na kockice. Za što ravnomerniji rad obično treba u aparat dodati malo čiste vode kako bi mogao lakše da usitnjava namirnice. Odnos između količine šargarepe i vode je 2:3. Ukupna količina vode i drugih sastojaka neka ne prevaziđe oznaku za najviši nivo na bokalu.
NAPOMENA: U aparat nemojte nikada sipati vruću tečnost, i nikada nemojte pokretati rad aparata kada je prazan. - Zatvorite poklopac bokala i namestite mericu. Poklopac bokala mora čvrsto da bude zatvoren, inače nećete moći pokrenuti rad aparata.
- Bokal blendera (seckalice) namestite na postolje aparata (kućište motora). Proverite da li je bokal ispravno namešten.
- Spojite aparat na električnu mrežu.
- Dugme za izbor brzine rada obrnite u položaj između oznaka Min i Max. Zasvetleće svetlosni prsten oko dugmeta. Aparat započinje s radom. Dugme za izbor brzine rada možete da obrnete i u položaj "P" za pojačanu brzinu obrtanja sečiva za usitnjavanje.
NAPOMENA: Kada aparat radi u pojačanom režimu "P", tasteri za kašicu (Smoothie),
automatsko čišćenje (Auto Clean), i drobljenje leda (Ice Crush) neće biti aktivni.
- Kada je aparat upućen u rad, mericu možete izvaditi i dodavati sastojke u bokal kroz otvor na sredini poklopaca. Kada ste ubacili sve sastojke, vratite mericu nazad na njeno mesto. NAPOMENA: Dok aparat radi nemojte nikada skidati bokal blendera sa postolja. Ako morate da skidate bokal, molimo vas da najpre isključite rad aparata, pričekate da se u potpunosti prestane obrtati, i tek nakon toga uklonite bokal.


natural_image
Line drawing of a blender with handle and control knob (no text or symbols)
natural_image
Illustration of hands pouring liquid from a container into a mug (no text or symbols)
natural_image
Line drawing of a coffee maker with a lid and handle, no text or symbols present
natural_image
Line drawing of a blender on a cutting board with an electrical outlet (no text or symbols)
natural_image
Line drawing of a kitchen blender with a handle and control knob (no text or symbols)
natural_image
Line drawing of a blender on a stove with an electrical outlet (no text or symbols)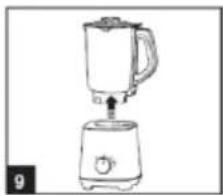
natural_image
Line drawing of a blender with handle and base (no text or symbols)
natural_image
Line drawing of a mug with a lid and an arrow indicating motion (no text or symbols)
natural_image
Simple line drawing of a container pouring liquid from a bottle into a cup (no text or symbols)
natural_image
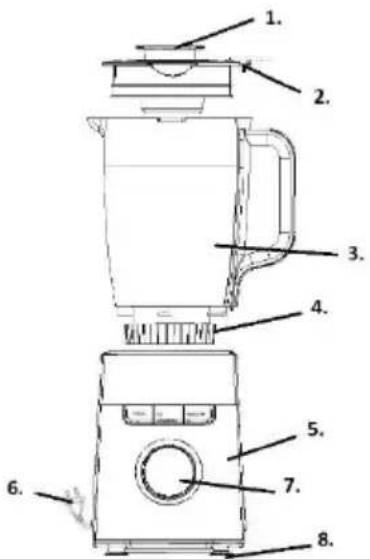
Line drawing of a toaster on a flat surface (no text or symbols)- Lid on pouring hole/measuring cup
- Lid
- Blender jug Assy(1.5 litre)
- Removable blade assembly
- Main body
- Plug & power cord
- Control knob
- Plastic feet
Voltage: 220 - 240 V
Frequency: 50 Hz.
Power: 1400 W max.
Noise level: Lc = 82 dB(A) Important
Safeguards
- Read all instructions carefully before you use the appliance.
- When using the electrical appliance, the below basic safety precautions should be followed:
- Before using check that the voltage power corresponds to the one shown on the appliance nameplate.
- Do not let cord hang over edge of table or counter.
- Do not place on or near a hot gas or electric burner, or in a heated oven.
- Do not operate any appliance with a damage cord or plug or after the appliance malfunction or has been damaged in any manner. Return the
appliance to the nearest authorized service facility for examination, repair or adjustment.
- If the supply cord is damaged, it must be replaced by the manufacturer or its service agent or a similarly qualified person in order to avoid a hazard.
- Always disconnect the blender from the supply if it is left unattended and before assembling, disassembling or cleaning.
- Switch off the appliance and disconnect from supply before changing accessories or approaching parts that move in use.
- Avoid contacting moving parts.
- Do not leave foreign objects, such as spoons, forks, knives or the measuring cup, in the jar as this will damage the blades and other components when starting the machine and may cause injury.
- Care shall be taken when handling the sharp cutting blades, emptying the bowl and during cleaning.
- The use of attachment, including jar, jar lid, not recommended or sold by manufacturer may cause fire, electric shock or injury.
- Never use hot liquids or run the appliance empty.
- To protect against risk of electrical shock do not put motor unit or power cord in water or other liquid.
-
Keep hands and utensils out of jar while blending to reduce the risk of severe injury to persons or damage to the blender.
-
If scraping is necessary, turn the power OFF, unplug from the electrical outlet, and use a rubber spatula only.
• Always operate blender with lid in place. - Never put non-food items into the jar for blending.
- Do not open the lid before the blade stops running completely to avoid hazard.
- Do not put hands or other objects into jar during working.
- Appliance can be used by persons with reduced physical, sensory or mental capabilities or lack of experience and knowledge if they have been given supervision or instruction concerning use of the appliance in a safe way and understand the hazards involved.
- This appliance shall not be used by children. Keep the appliance and its cord out of reach of children.
- Children shall not play with the appliance.
- Misuse may cause potential injury.
- Do not use outdoors.
- This appliance is intended to be used in household and similar applications such as:
- staff kitchen areas in shops, offices and other working environments;
- farm houses;
- by clients in hotels, motels and other residential type environments;
- bed and breakfast type environments.
- Be careful if hot liquid is poured into the food processor or blender as it can be ejected out of the appliance due to a sudden steaming.
- Save this instruction.
This appliance is marked according to the European directive 2002/96/EC on Waste Electrical and Electronic Equipment (WEEE). This guideline is the frame of a European-wide validity of return and recycling on Waste Electrical and Electronic Equipment.
How to Use
- Unpack the appliance and place all parts on a horizontal surface.
- Immerse the jar, jar lid and measuring cup in warm soapy water and rinse them and dry. Never immerse motor unit in water for cleaning to prevent the risk of electric shock.
CAUTION: The blade is very sharp, please handle carefully.
OPERATION
VEGETABLE/FRUIT JUICE

- Lay the appliance on a flat horizontal surface and make sure it is unplugged and the "Speed knob" turns to "OFF" position before operating.
- Prepare the vegetable/fruit well, take carrot for example. Firstly, peel the carrot and cut it into cubes with a size of 15mm*15mm*15mm, then remove the measuring cup and jar lid, after it, put the carrot cubes into the jar. Usually certain amount of purified water has to be added to facilitate the smooth running of appliance. The proportion of the carrot and water is 2:3. The
amount of mixture should not exceed the maximum level as indicated on the jar.
NOTE: Never use hot liquids or run the appliance empty.
-
Close the jar lid and measuring cup well in position. The jar lid must be closed well in position, or the appliance can not be activated.
-
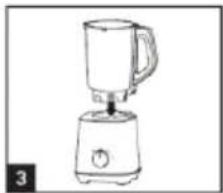
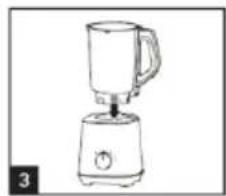
Install the jar onto jar base, make sure that the jar is installed well in position.
-
Connect the appliance with power source.
-
Turn the "Speed knob" to the speed settings ranged between "Min" and "Max" at the "Speed knob", the light ring illuminates. And then the appliance starts to work. Alternatively, you can turn the "Speed knob" to "P" position to make the appliance work under at a high speed.
NOTE: The buttons of "Smoothie", "Auto clean" and "Ice crush" are invalid when the appliance is running under the selected speed setting or "P" setting.
- During working, you can remove the measuring cup and then add ingredients into the jar through the center opening of jar cover during operation, and then replace measuring cup.
NOTE: You'd better not remove the jar from the motor unit during working process. If it is necessary to remove the jar, please firstly turn off the appliance to make it stop working and then remove it.
CAUTION: Do not operate the appliance for more than 3 minutes per time and minimum 30-minute rest time must be maintained between continuous two cycles.
-
Turn the "Speed knob" to "OFF" position once the mixture has been blended to your desired consistency.
-
Unplug the appliance and then remove the jar from the motor unit, carefully remove the jar cover, then pour and serve.
CAUTION: The appliance must be unplugged before removing the jar.
SMOOTHIE
-
Lay the appliance on a flat horizontal surface and make sure it is unplugged and the "Speed knob" turns to "OFF" position before operating.
-
Put the ingredients into the jar, make sure the amount of ingredients should not exceed the maximum level as indicated on the jar. Follow the recipe as below to operate.
NOTE: Never use hot liquids or run the appliance empty.
-
Close the jar lid and measuring cup well in position. The jar lid must be closed well in position, or the appliance can not be activated.
-
Install the jar onto jar base, make sure that the jar is installed well in position.
-
Connect the appliance with power source.
-
Turn the "Speed knob" to "ON" position, and the indicators of three buttons blink. And then press
"Smoothie" button, its corresponding indicator lights solidly, then the appliance starts to work.
NOTE: The speed can not adjusted by the "Speed knob" when the appliance is running under the "Smoothie" mode.
NOTE: During the working process of making smoothie, if you want to make the appliance stop working, you can press "Smoothie" button again or turn the "Speed knob" to "OFF" position.
- During working, you can remove the measuring cup and then add ingredients into the jar through the center opening of jar cover during operation, and then replace measuring cup.
NOTE: You'd better not remove the jar from the motor unit during working process. If it is necessary to remove the jar, please firstly turn off the appliance to make it stop working and then remove it.
CAUTION: Do not operate the appliance for more than 3 minutes per time and minimum 30-minute rest time must be maintained between continuous two cycles.
-
After finish making smoothie, the appliance will stop working automatically and the indicators of three buttons will turn to blink.
-
Unplug the appliance and then remove the jar from the motor unit, carefully remove the jar cover, then pour and serve.
CAUTION: The appliance must be unplugged before removing the jar.
ICE CRUSH
-
Lay the appliance on a flat horizontal surface and make sure it is unplugged and the "Speed knob" turns to "OFF" position before operating.
-
Make the jar be dried naturally and prepare 8 pieces of solid ice cubes with a size of 15mm*15mm*15mm, then remove the measuring cup and jar lid, after it, put the ice cubes into the jar. Usually certain amount of purified water has to be added to facilitate the smooth running of appliance. The proportion of the ice and water is 2:3. The amount of mixture should not exceed the maximum level as indicated on the jar. Follow the recipe as below to operate.
-
Close the jar lid and measuring cup well in position. The jar lid must be closed well in position, or the appliance can not be activated.
-
Install the jar onto jar base, make sure that the jar is installed well in position.
-
Connect the appliance with power source.
-
Turn the "Speed knob" to "ON" position, and the indicators of three buttons blink. And then press "Ice crush" button, its corresponding indicator lights solidly, then the appliance starts to work.
NOTE: The speed can not adjusted by the "Speed knob" when the appliance is running under the "Ice crush" mode.
NOTE: During the working process of crushing ice, if you want to make the appliance stop working, you can press "Ice crush" button again or turn the "Speed knob" to "OFF" position.
- During working, you can remove the measuring cup and then add ingredients into the jar through the center opening of jar cover during operation, and then replace measuring cup.
NOTE: You'd better not remove the jar from the motor unit during working process. If it is necessary to remove the jar, please firstly turn off the appliance to make it stop working and then remove it.
CAUTION: Do not operate the appliance for more than 3 minutes per time and minimum 30-minute rest time must be maintained between continuous two cycles.
-
After finish crushing ice, the appliance will stop working automatically and the indicators of three buttons will turn to blink.
-
Unplug the appliance and then remove the jar from the motor unit, carefully remove the jar cover, then pour and serve.
CAUTION: The appliance must be unplugged before removing the jar.
Handy Blending Hints
- A brief whirl in the blender will rescue a lumpy gravy, or an eggs-based sauce that has separated.
- Food items for blending should be cut into cubes (approximately 2-3cm), this will assist in achieving an even result.
- Never fill the blender jug above the maximum level indicated.
- To ensure efficient mixing when blending dry mixtures, it may be necessary to stop the blender and push ingredients down the sides of the jug with a spatula.
- When pureeing fruit or vegetable, cooked or raw, cut into small pieces to facilitate blending.
- When blending a variety of ingredients together, blend the liquids, first, then add dry ingredients.
- Always ensure stones are removed from fruit and bones from meat as these can harm the blades.
- Do not process hot liquids in your blender. Allows to cool before processing.
Always ventilate the blender jug when pureeing warm ingredients. This is achieved by lifting the ingredient cup out of the lid, after starting the blender.
Care and Cleaning
Quick cleaning method
- Half fill the blender with warm and a small amount of detergent.
- Press the 'Pulse' function and hold for 1-2 seconds and release. Repeat 3-4 times.
- Then remove the jug and rinse it under running water.
For thorough cleaning
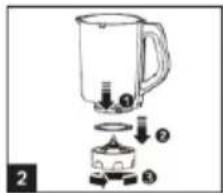
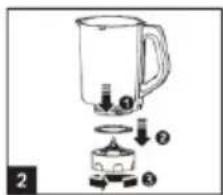
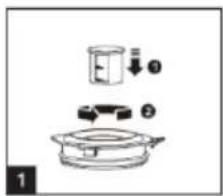
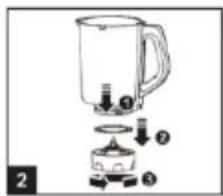
- Unscrew the blade assembly from the blender jug by turning the bottom of the blade assembly in an anti-clockwise direction.
- Remove the rubber seal from the blade assembly.
- Wash the blender lid, ingredient cup, rubber seal, blade assembly and blender jug in warm soapy water.
Caution: Take care when cleaning the blades as they are extremely sharp.
Note: Do not clean any part of the blender in the dishwasher.
To clean the motor base
Use a damp, soft sponge with detergent and wipe over the motor base.
Note: Never immerse the motor base in water.
Environment
Do not throw away the appliance with the normal household waste at the end of its life, but hand it in at an official collection point for recycling. By doing this, you help to preserve the environment.
Guarantee & service
If you need information or if you have a problem, please contact the Gorenje Customer Care Centre in your country (you find its phone number in the worldwide guarantee leaflet). If there is no Customer Care Centre in your country, go to your local Gorenje dealer or contact the Service department of Gorenje domestic appliances.
For personal use only!
GORENJE WISHES YOU A LOT OF PLEASURE WHEN USING YOUR APPLIANCE
We reserve the right to any modifications!

natural_image
Line drawing of a blender with handle and control knob (no text or symbols)
natural_image
Illustration of hands pouring liquid from a container into a mug (no text or symbols)
natural_image
Line drawing of a coffee maker with a lid and handle, no text or symbols present
natural_image
Line drawing of a blender on a kitchen appliance with a power outlet (no text or symbols)
natural_image
Line drawing of a kitchen blender with handle and control knob (no text or symbols)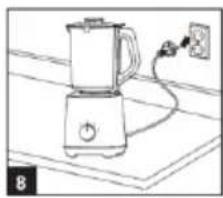
natural_image
Line drawing of a blender on a flat surface with a power outlet (no text or symbols)
natural_image
Line drawing of a blender with handle and base (no text or symbols)
natural_image
Line drawing of a mug with a lid and an arrow indicating upward motion (no text or symbols)
natural_image
Simple line drawing of a container pouring liquid from a bottle into a cup (no text or symbols)
natural_image
Simple line drawing of a kitchen appliance on a counter (no text or symbols)

natural_image
Line drawing of a blender with handle and control knob (no text or symbols)
natural_image
Illustration of hands pouring liquid from a container into a mug (no text or symbols)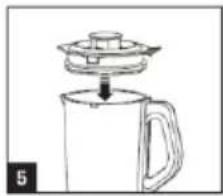
natural_image
Line drawing of a coffee maker with a lid and handle, no text or symbols present
natural_image
Line drawing of a blender on a kitchen appliance with an electrical outlet (no text or symbols)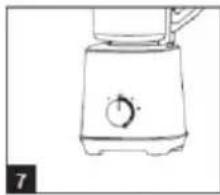
natural_image
Line drawing of a kitchen blender with a handle and control knob (no text or symbols)
natural_image
Line drawing of a blender on a kitchen appliance with a power outlet (no text or symbols)
natural_image
Line drawing of a blender with handle and base, no text or symbols present
natural_image
Line drawing of a mug with a lid and handle, no text or symbols present
natural_image
Simple line drawing of a container pouring liquid from a bottle into a cup (no text or symbols)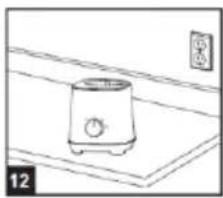
natural_image
Simple line drawing of a toaster on a tray with an electrical outlet (no text or symbols)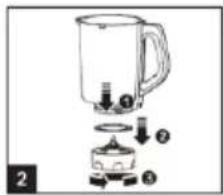

natural_image
Line drawing of a blender with handle and control knob (no text or symbols)
natural_image
Illustration of hands pouring liquid from a container into a mug (no text or symbols)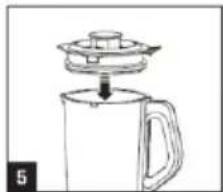
natural_image
Line drawing of a coffee maker with a lid and handle, no text or symbols present
natural_image
Line drawing of a blender on a kitchen counter with an electrical outlet (no text or symbols)
natural_image
Line drawing of a kitchen blender with a handle and control knob (no text or symbols)
natural_image
Line drawing of a blender with a power outlet connected to its side panel (no text or symbols)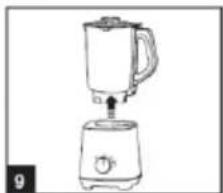
natural_image
Line drawing of a blender with handle and base (no text or symbols)
natural_image
Line drawing of a mug with a lid and handle, no text or symbols present
natural_image
Simple line drawing of a cup pouring liquid from a container (no text or symbols)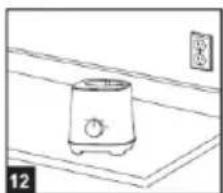
natural_image
Line drawing of a toaster on a stove with a wall-mounted power outlet (no text or symbols)SOK WARZYWNY/OWOCOWY
natural_image
Line drawing of a blender with handle and control knob (no text or symbols)
natural_image
Line drawing of hands pouring liquid from a cup into a mug (no text or symbols)
natural_image
Line drawing of a blender with a lid and handle, no text or symbols present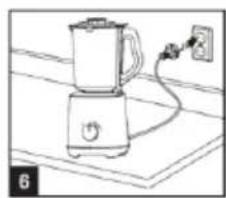
natural_image
Line drawing of a blender on a flat surface with an electrical outlet (no text or symbols)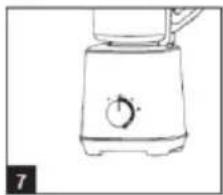
natural_image
Line drawing of a blender with a handle and control knob (no text or symbols)
natural_image
Line drawing of a blender on a kitchen appliance with a power outlet (no text or symbols)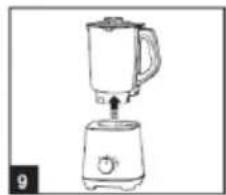
natural_image
Line drawing of a blender with handle and base (no text or symbols)
natural_image
Line drawing of a mug with a lid and an arrow indicating upward motion (no text or symbols)
natural_image
Simple line drawing of a cup pouring liquid from a container (no text or symbols)
natural_image
Line drawing of a toaster on a flat surface with a wall-mounted fixture (no text or symbols)
- B1000DE
- Safeguards
- How to Use
- OPERATION
- VEGETABLE/FRUIT JUICE
- SMOOTHIE
- ICE CRUSH
- Handy Blending Hints
- Care and Cleaning
- Quick cleaning method
- For thorough cleaning
- To clean the motor base
- Note: Never immerse the motor base in water.
- Environment
- Guarantee & service
- GORENJE WISHES YOU A LOT OF PLEASURE WHEN USING YOUR APPLIANCE
- SOK WARZYWNY/OWOCOWY
Brand : GORENJE
Model : B1000DE
Category : Blender