
Chef Titanium Patissier XL KWL90 - Food processor KENWOOD - Free user manual and instructions
Find the device manual for free Chef Titanium Patissier XL KWL90 KENWOOD in PDF.


| Product Type | Stand Mixer / Food Processor |
| Model | Chef Titanium Patissier XL KWL90 |
| Brand | Kenwood |
| Motor Power | 1200 W |
| Bowl Capacity | 6.7 L |
| Dimensions (H x W x D) | 38 x 25 x 35 cm |
| Weight | 8.5 kg |
| Construction Material | Die-cast metal body |
| Speed Settings | Variable speed with pulse function |
| Included Attachments | K-beater, dough hook, whisk, 1.5L blender, 1.5L food processor |
| Main Functions | Mixing, kneading, whipping, blending, chopping, slicing, grating |
| Bowl Material | Stainless steel |
| Lid | Transparent with feed tube |
| Safety Features | Overload protection, non-slip feet, bowl locking |
| Cleaning | Removable parts dishwasher safe |
| Warranty | 2 years |
| Spare Parts Availability | Yes, through Kenwood service centers |
| Repair | Repairable with genuine parts |
| Power Supply | 220-240 V, 50/60 Hz |
| Cord Length | 1.2 m |
Frequently Asked Questions - Chef Titanium Patissier XL KWL90 KENWOOD
User questions about Chef Titanium Patissier XL KWL90 KENWOOD
0 question about this device. Answer the ones you know or ask your own.
Ask a new question about this device
Download the instructions for your Food processor in PDF format for free! Find your manual Chef Titanium Patissier XL KWL90 - KENWOOD and take your electronic device back in hand. On this page are published all the documents necessary for the use of your device. Chef Titanium Patissier XL KWL90 by KENWOOD.
USER MANUAL Chef Titanium Patissier XL KWL90 KENWOOD
- Important Safety 3-4
- Plug and Fuse Information 5
- Care and Cleaning 5-6
- Part List 7-8
- To Set Up Your Stand Mixer 9-10
- Usage Diagrams and Usage Instructions 9-10
- To Assemble The Creaming Beater 10
- Usage Diagrams and Usage Instructions 10
- To Use Your Stand Mixer - Manual Operation (Warming Mode) 11-12
- Usage Diagrams and Usage Instructions 11-12
- To Use Your Stand Mixer - Manual Operation (Non Warming Mode) 13-14
- Usage Diagrams and Usage Instructions 13-14
- Manual Mode (Non Warming) - Usage Chart and Recipes 15-16
- Recipe 17
- To Use Your Stand Mixer (Recommended Operating Speeds and Temperatures) 17
- To Use Your Bowl Bright™ (In Bowl Illumination) 18
- To Use Your Stand Mixer Display Screen Explained 18
- Warming Levels and Speed Settings Explained 19
- To Use Your Stand Mixer - Attachments 20
- Usage Diagrams and Usage Instructions 20
- To Use the Weighing Function 21
- Usage Diagrams and Usage Instructions 21
- To Use Your Stand Mixer - Preset Programmes 22
- Usage Diagrams and Usage Instructions 22
- Preset Usage Chart 23
- Tool Adjustment 24
- Usage Diagrams and Usage Instructions 24
- Service and Customer Care Information 25
-
Troubleshooting Guide 26-28
-
Read these instructions carefully and retain for future reference.
- Remove all packaging and any labels. (The rating label on the base of the machine should not be removed).
- If the plug or cord is damaged it must, for safety reasons, be replaced by Kenwood or an authorised Kenwood repairer in order to avoid a hazard.
- Always switch off and unplug before fitting or removing tools/attachments, after use and before cleaning.
- Always keep body parts, hair, jewellery and loose clothing away from moving parts and fitted attachments.
- Never put your fingers etc., into the hinge mechanism.
● Never let the cord hang down where a child could grab it.
● Never let the power unit, cord or plug get wet.
● Never leave the Stand Mixer unattended when it is operating. - Never use a damaged appliance. Get it checked or repaired: see 'Service and Customer Care' section.
- Never operate the Stand Mixer with the head in the raised position.
- Never use an unauthorised attachment.
- Do not use more than one outlet (Bowl tool socket, High Speed Outlet or Slow Speed Outlet) at a time.
- Ensure that the bowl is always fitted when operating the appliance when using a bowl tool.
- Never exceed the maximum quantities and speeds stated in the Recommended Usage Chart.
- When using an attachment, always read and follow the safety instructions that are supplied with it.
- Always take care when lifting this appliance as it is heavy. Ensure the head is correctly latched in the down position and that the bowl, tools, outlet covers and cord are secure before lifting.
- When moving the appliance always pick up by the pedestal base and mixer head. Do not lift or carry the appliance by the bowl handle or by attachments fitted to either the slow speed outlet or high speed outlet.
- Always take care when removing bowl tools after extended use as they may get hot.
- This appliance shall not be used by children. Keep the appliance and its cord out of reach of children.
- Children should always be supervised to ensure that they do not play with the appliance.
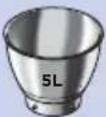
- Never use the splashguard with the 5L bowl. Splashguard only suitable for use with the 7L bowl.
- Do not fit a bowl tool to the Stand Mixer when the 5L bowl is stacked in the 7L bowl.
- For kneading bread dough, use the 7L warming bowl only.
- Do not use the whisk for heavy mixtures (e.g. creaming fat and sugar) as you could damage it.
-
The power-supply cord is used to reduce risk resulting from becoming entangled in or tripping. Extension cords may be used if care is exercised in their use. If an extension cord is used:
-
The marked electrical rating of the extension cord should be at least as great as the electrical rating of the appliance;
- The cord should be arranged so that it will not drape over the countertop or tabletop where it can be pulled on by children or tripped over unintentionally. If the appliance is of the earthed type, the extension cord should be a earthing-type 3-wire cord. The electrical rating of the appliance is listed on the bottom of the unit.
- Never insert anything through the air vents.
- When using this appliance ensure it is always positioned on a level surface away from the edge. Make sure it is at least 10cm from walls and ensure the vents are not blocked. Do not position below overhanging cupboards.
- Do not move or raise the mixer head with an attachment fitted as the Stand Mixer could become unstable.
- Do not operate your appliance near the edge or overhanging the work surface or apply force to an attachment when fitted, as this may cause the unit to become unstable and tip over, which may result in injury.
- Appliances can be used by persons with reduced physical, sensory or mental capabilities or lack of experience and knowledge if they have been given supervision or instruction concerning use of the appliance in a safe way and if they understand the hazards involved.
- Misuse of your appliance can result in injury.
- The maximum rating is based on the mini chopper/mill attachment that draws the greatest load. Other attachments may draw less power.
- Only use the appliance for its intended domestic use. Kenwood will not accept any liability if the appliance is subject to improper use, or failure to comply with these instructions.
- This appliance is not intended to be operated by means of an external timer or separate remote-control system.
Heating
● Never operate the appliance in warming mode with the bowl empty.
● Never use the bowl with any other heat source.
- The underside of the bowl will remain hot long after the heating has stopped. Always use caution when handling and use a work surface protection mat when placing the bowl on heat sensitive surfaces.
- The symbol marked on the product indicates a surface that can become hot during use.
- Use oven gloves when handling the hot bowl and hot mixing tools.
Power Consumption
- With ON/OFF Switch in "I" Position
o Automatically switches to Off Mode within 20 mins of inactivity and the display screen turns off.
o Off Mode Power: <0.3W.
- With ON/OFF Switch in "O" Position
o Automatic switching to OFF Mode: Not applicable
o Off Mode Power: <0.3W.
Before plugging in
- Make sure your electricity supply is the same as the one shown on the underside of the power unit.
Important - Plug and Fuse Information
- The wires in the cord are coloured as follows:
Blue = Neutral, Brown = Live, Green/Yellow = Earth.
THIS APPLIANCE MUST BE EARTHED
- If the plug is cut off it must be DESTROYED IMMEDIATELY. An electric shock hazard may arise if an unwanted non-rewireable plug is inadvertently inserted into a socket outlet.
- If the plug supplied with your appliance has a fuse fitted and the fuse fails it must be replaced with one of the same rating.
Note:
- For non-rewireable Plug Type G the fuse cover MUST be refitted when replacing the fuse. If the fuse cover is lost then the plug must not be used until a replacement can be obtained. The correct fuse cover is identified by colour and a replacement may be obtained from your Kenwood Authorised Repairer (see Service).
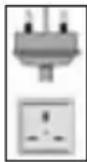
Plug Type G
- This appliance conforms to EC Regulation 1935/2004 on materials and articles intended to come into contact with food.
Care and Cleaning
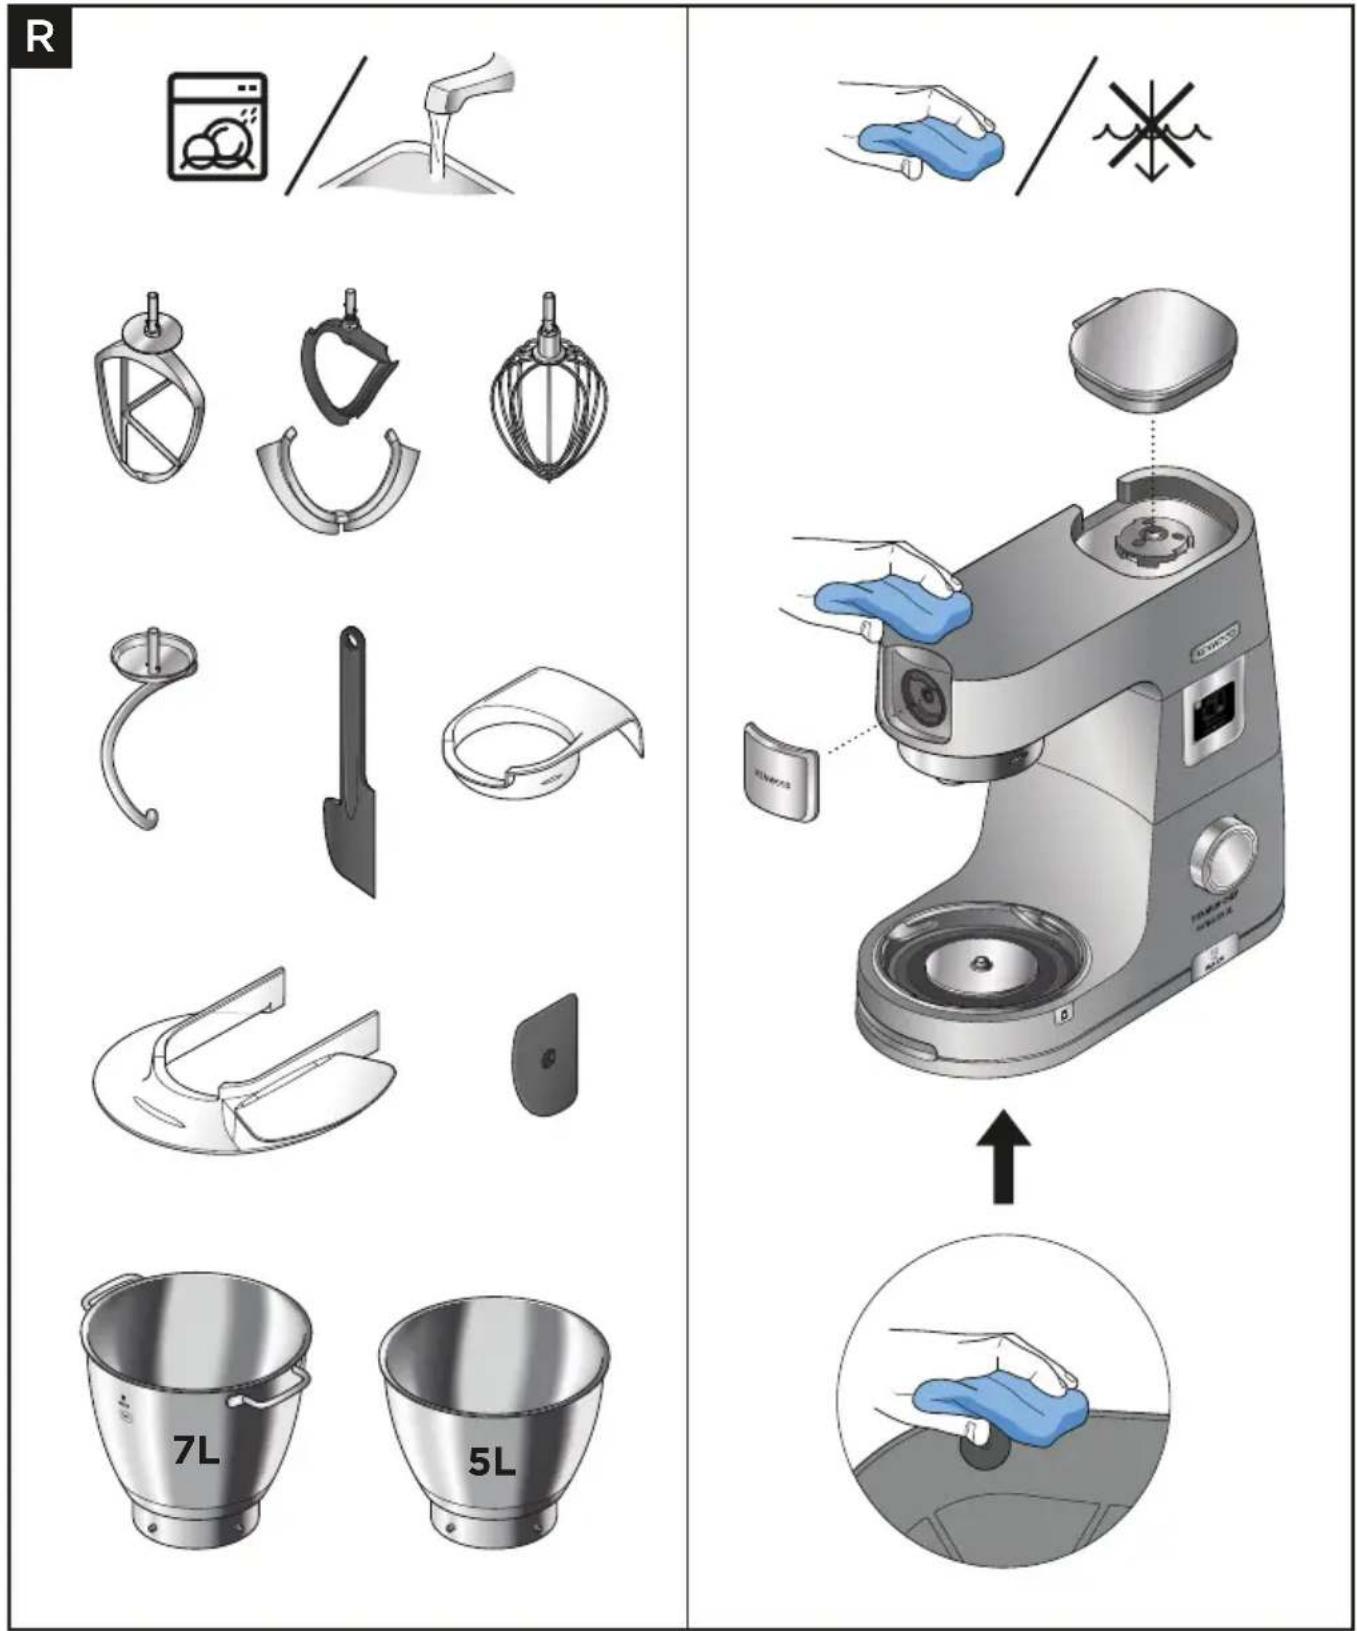
● Always switch off and unplug before cleaning.
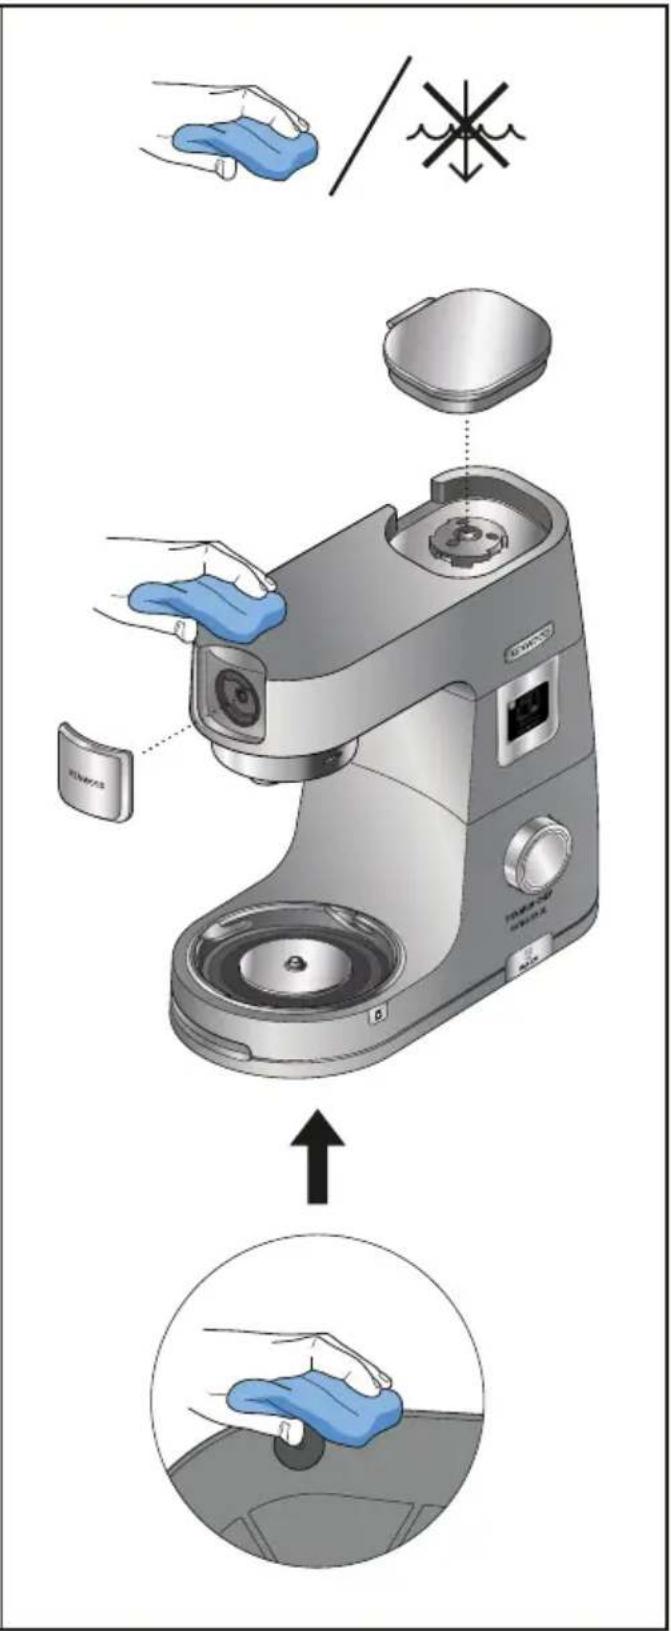
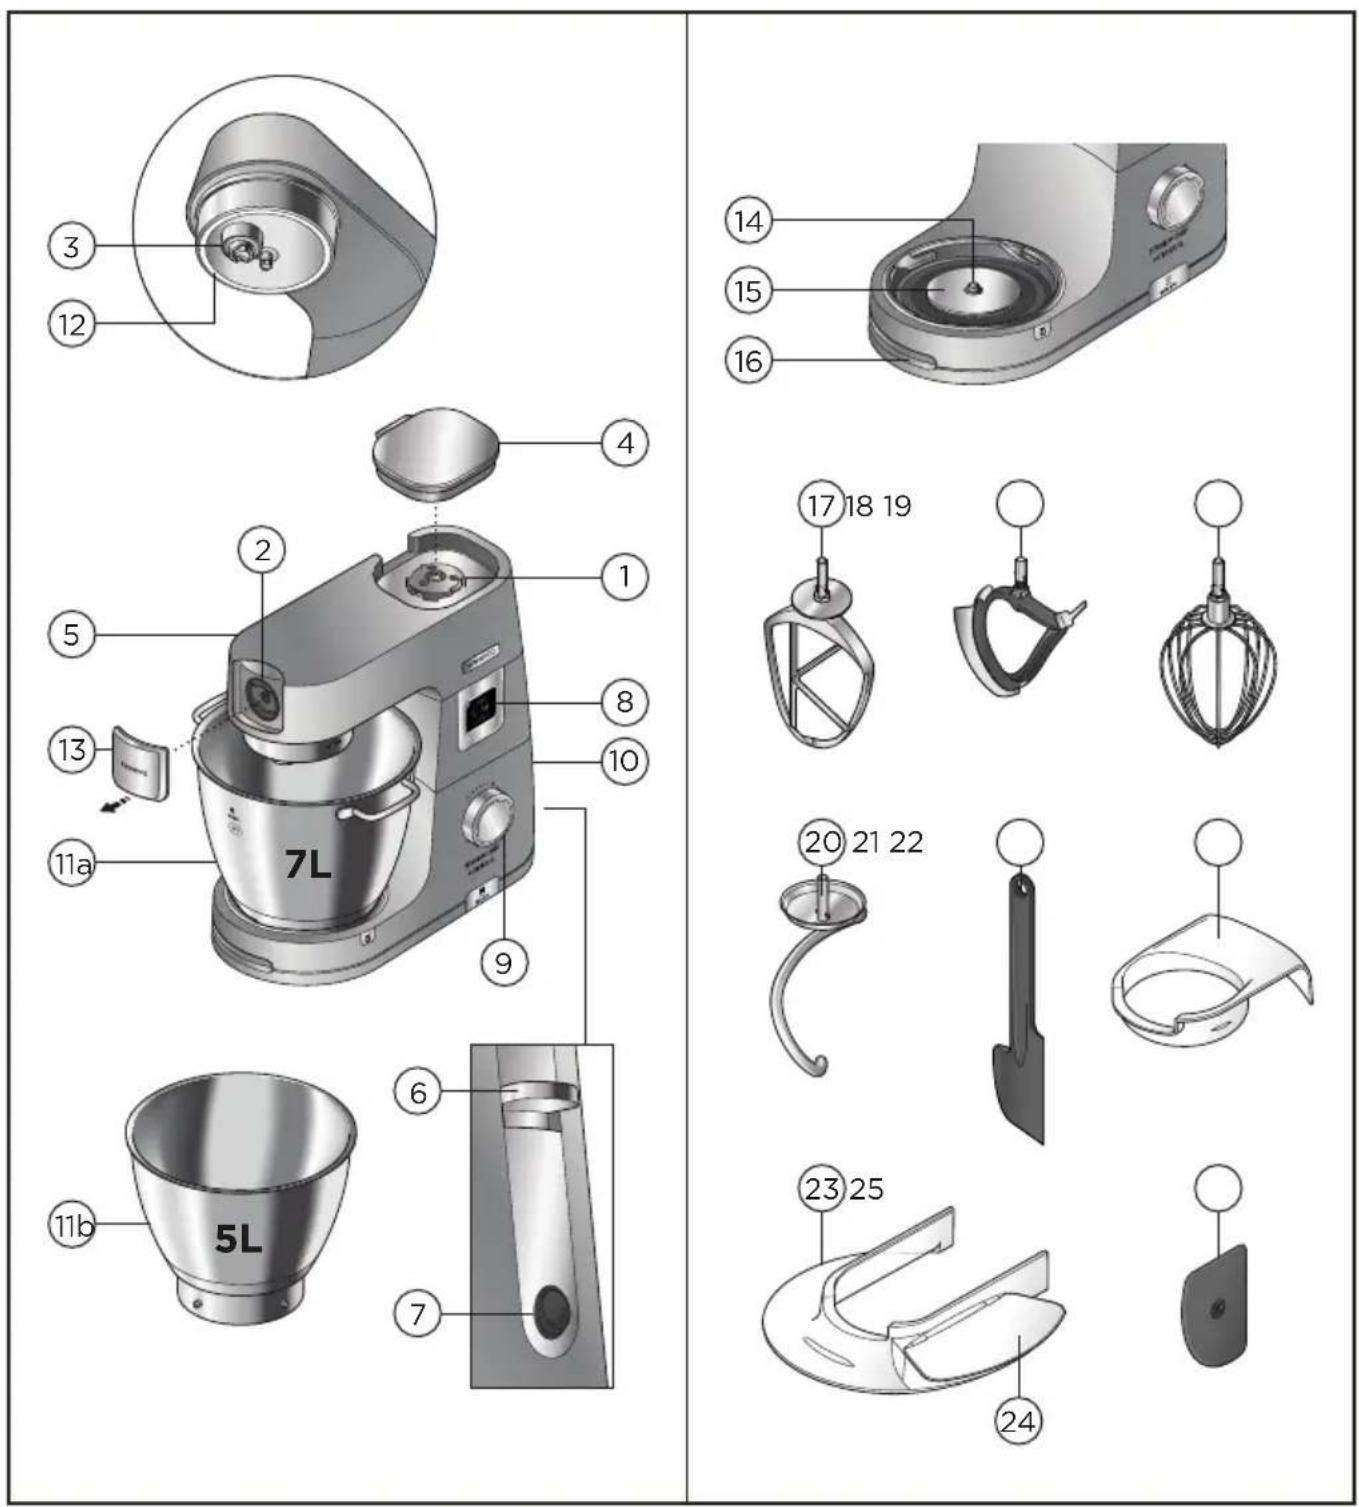
- A little grease may appear at the slow speed outlet ② when you first use it. This is normal – just wipe it off.
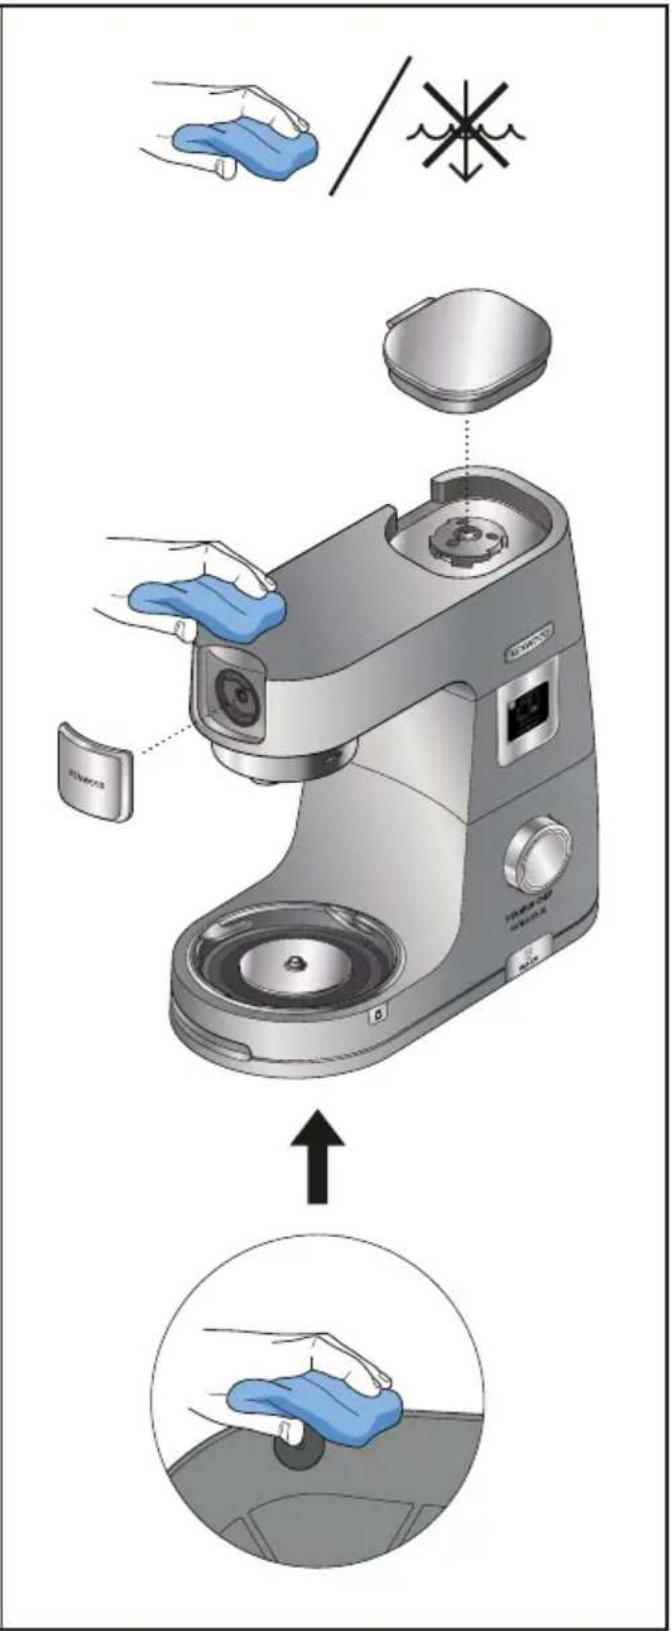
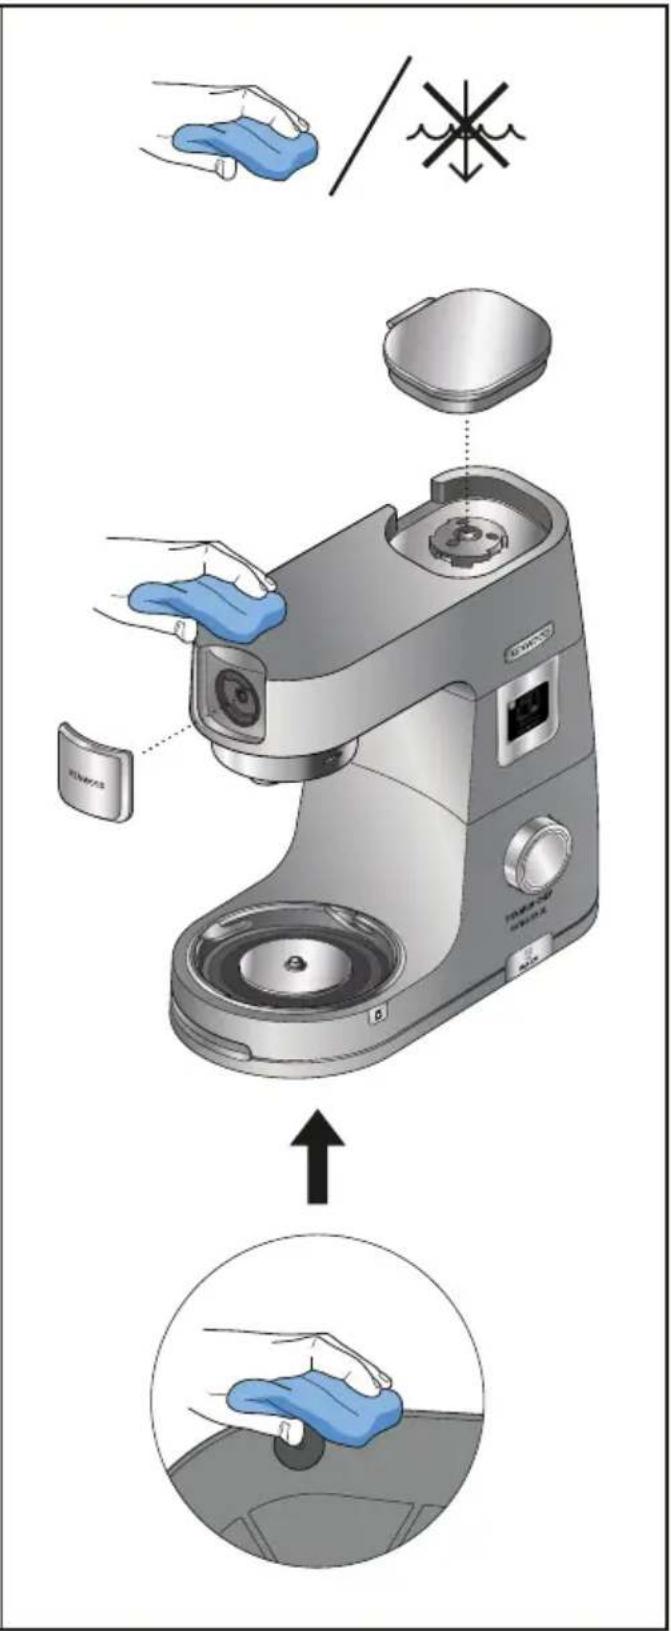
Power Unit And Outlet Covers
- Wipe with a damp cloth, then dry (Including the feet on the underside of the machine).
● Never use abrasives or immerse in water.
Bowls
● Wash by hand, then dry thoroughly or wash in the dishwasher.
- Never use a wire brush, steel wool or bleach to clean your stainless steel bowl. Use vinegar to remove limescale.
- Keep away from heat (cooker tops, ovens, microwaves).
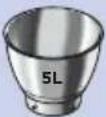
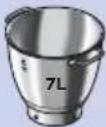
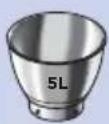
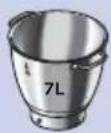
- The 5L bowl can be placed in the 7L bowl for easy storage. (Do not place tools within the 5L bowl when stacked in the 7L bowl).
Tools And Splashguard
- Wash by hand, then dry thoroughly or wash in the dishwasher.
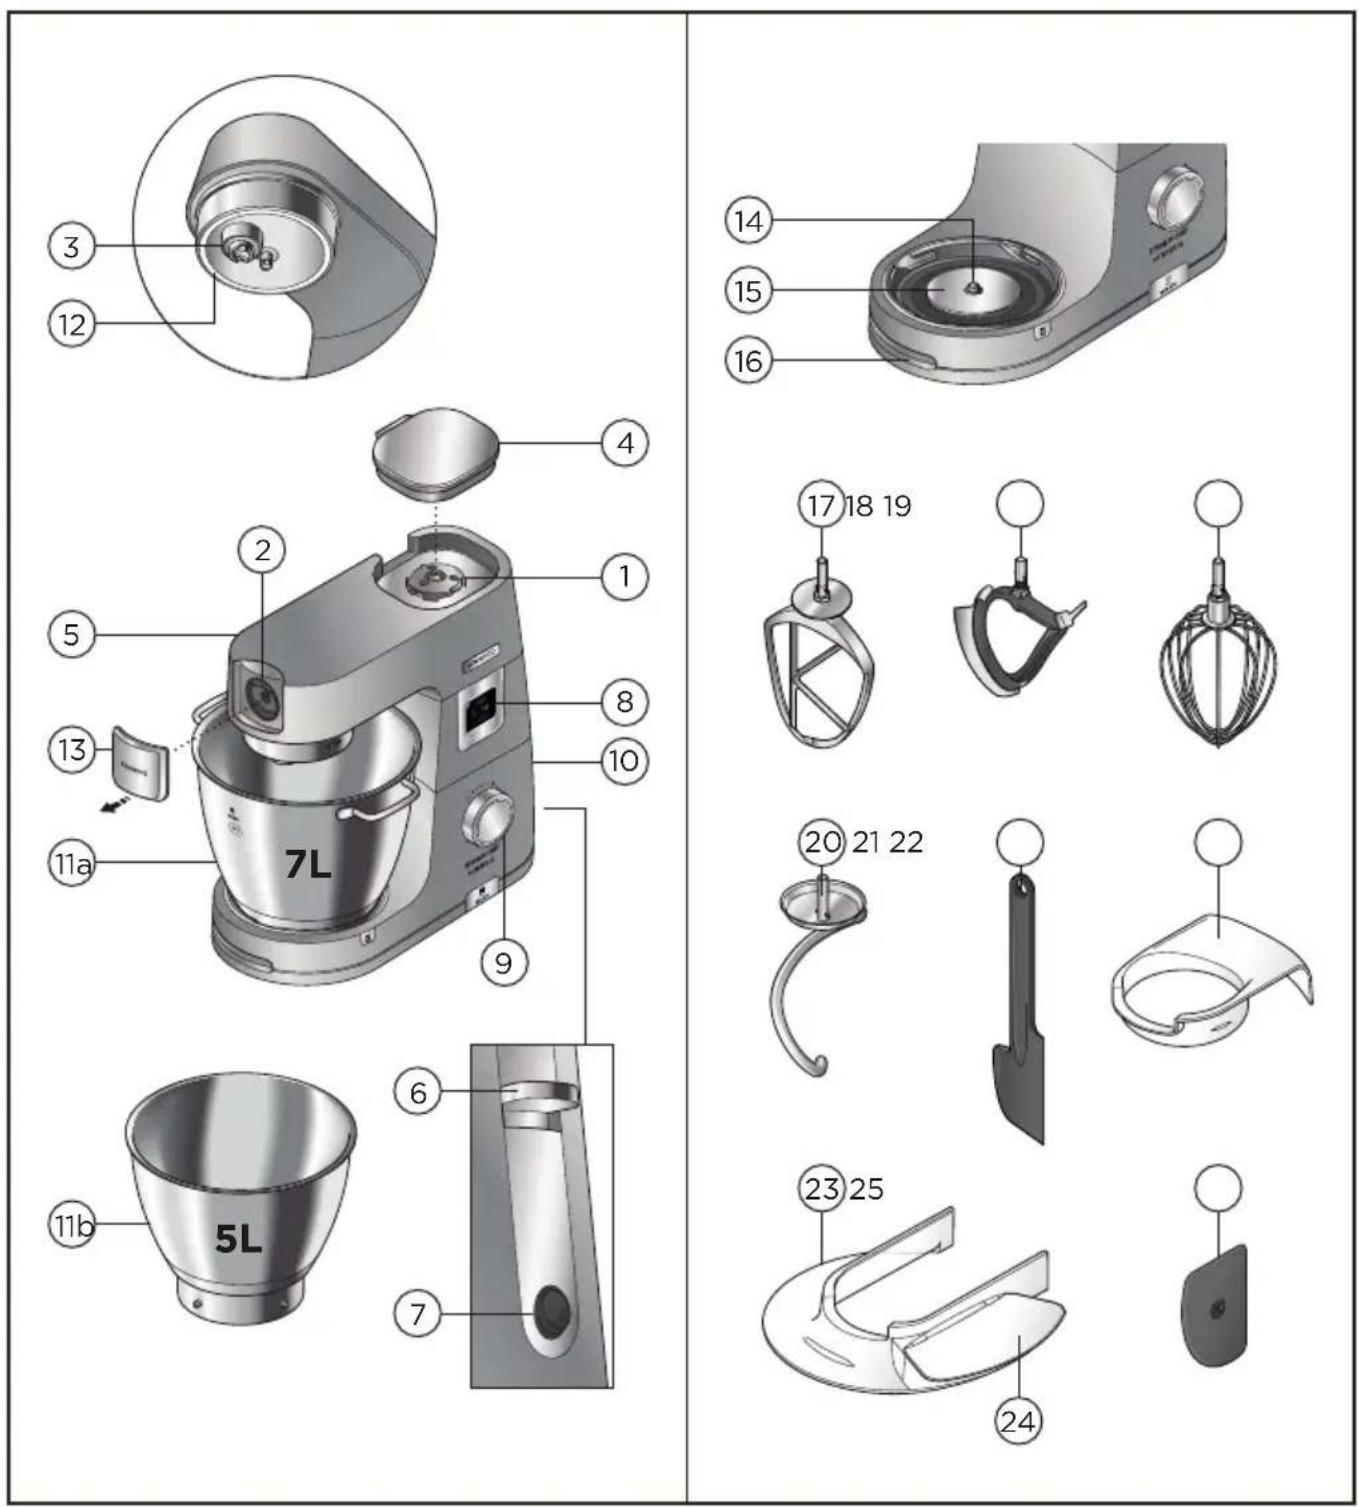
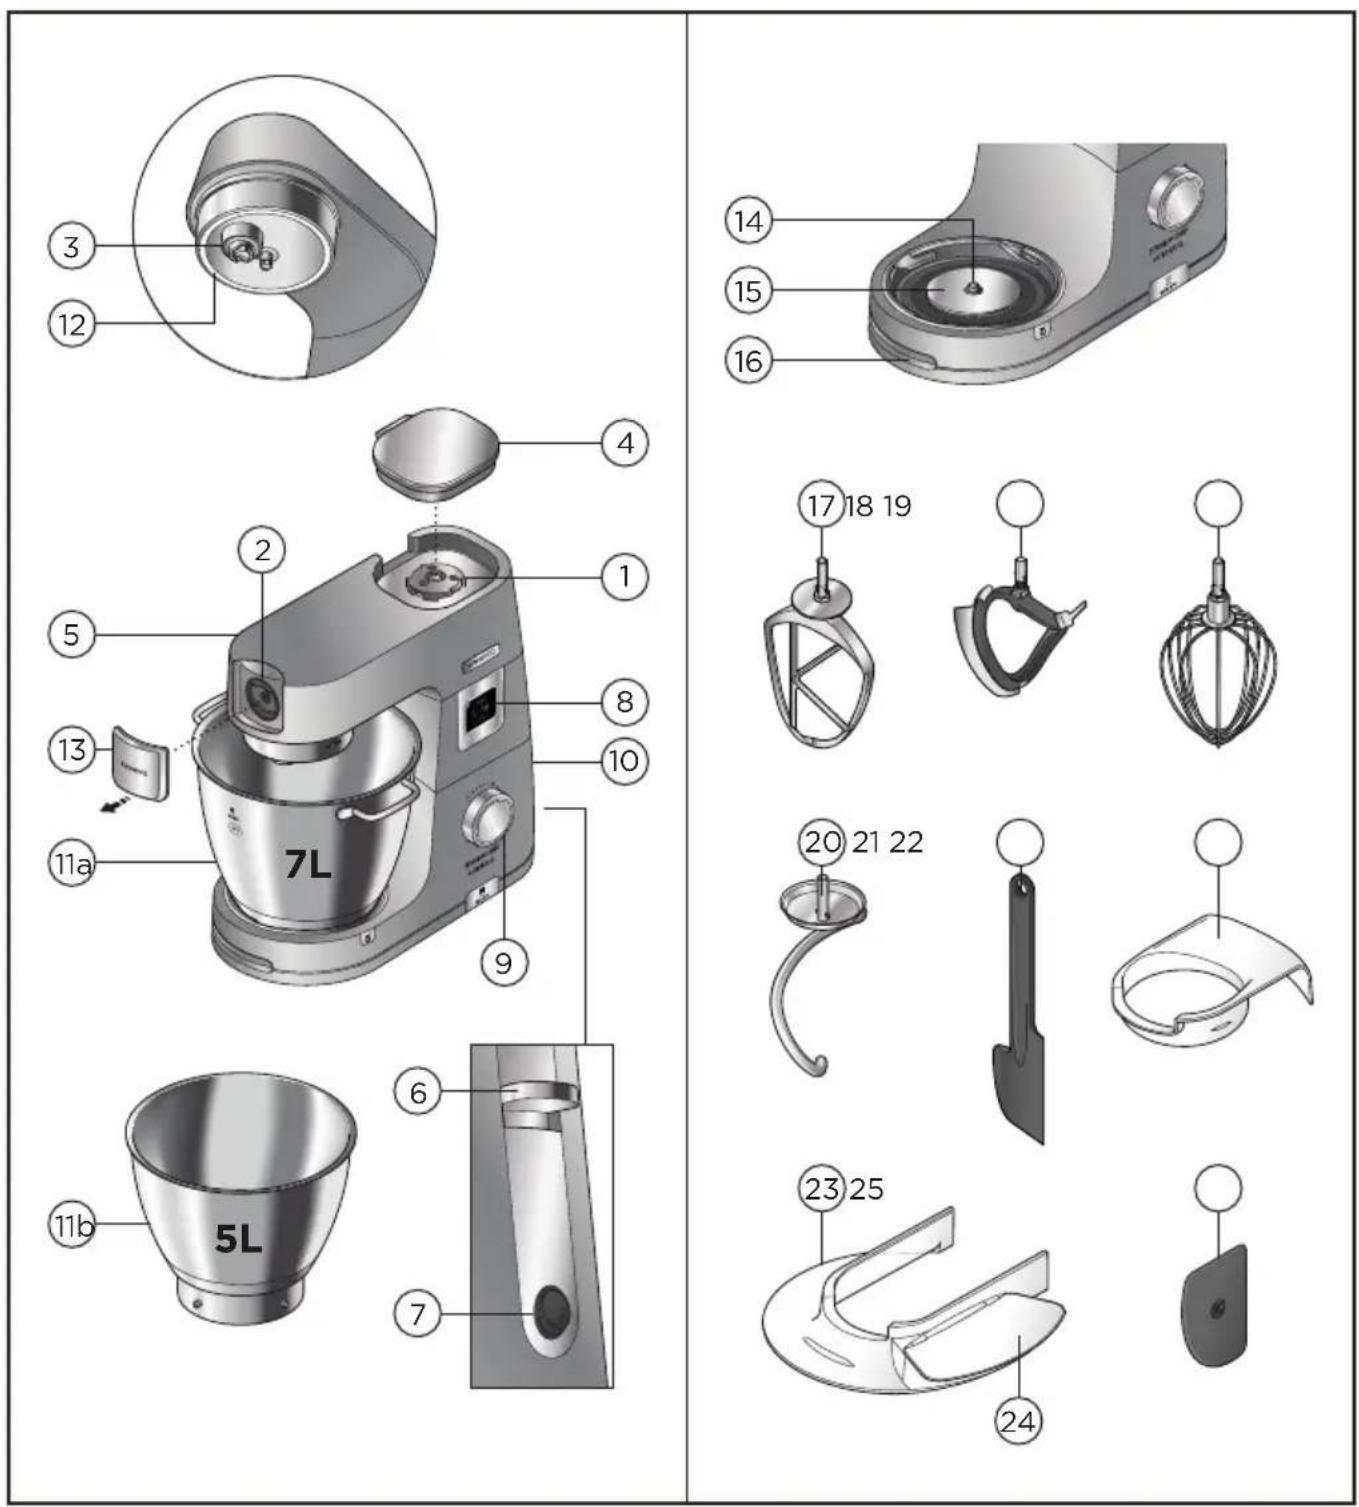
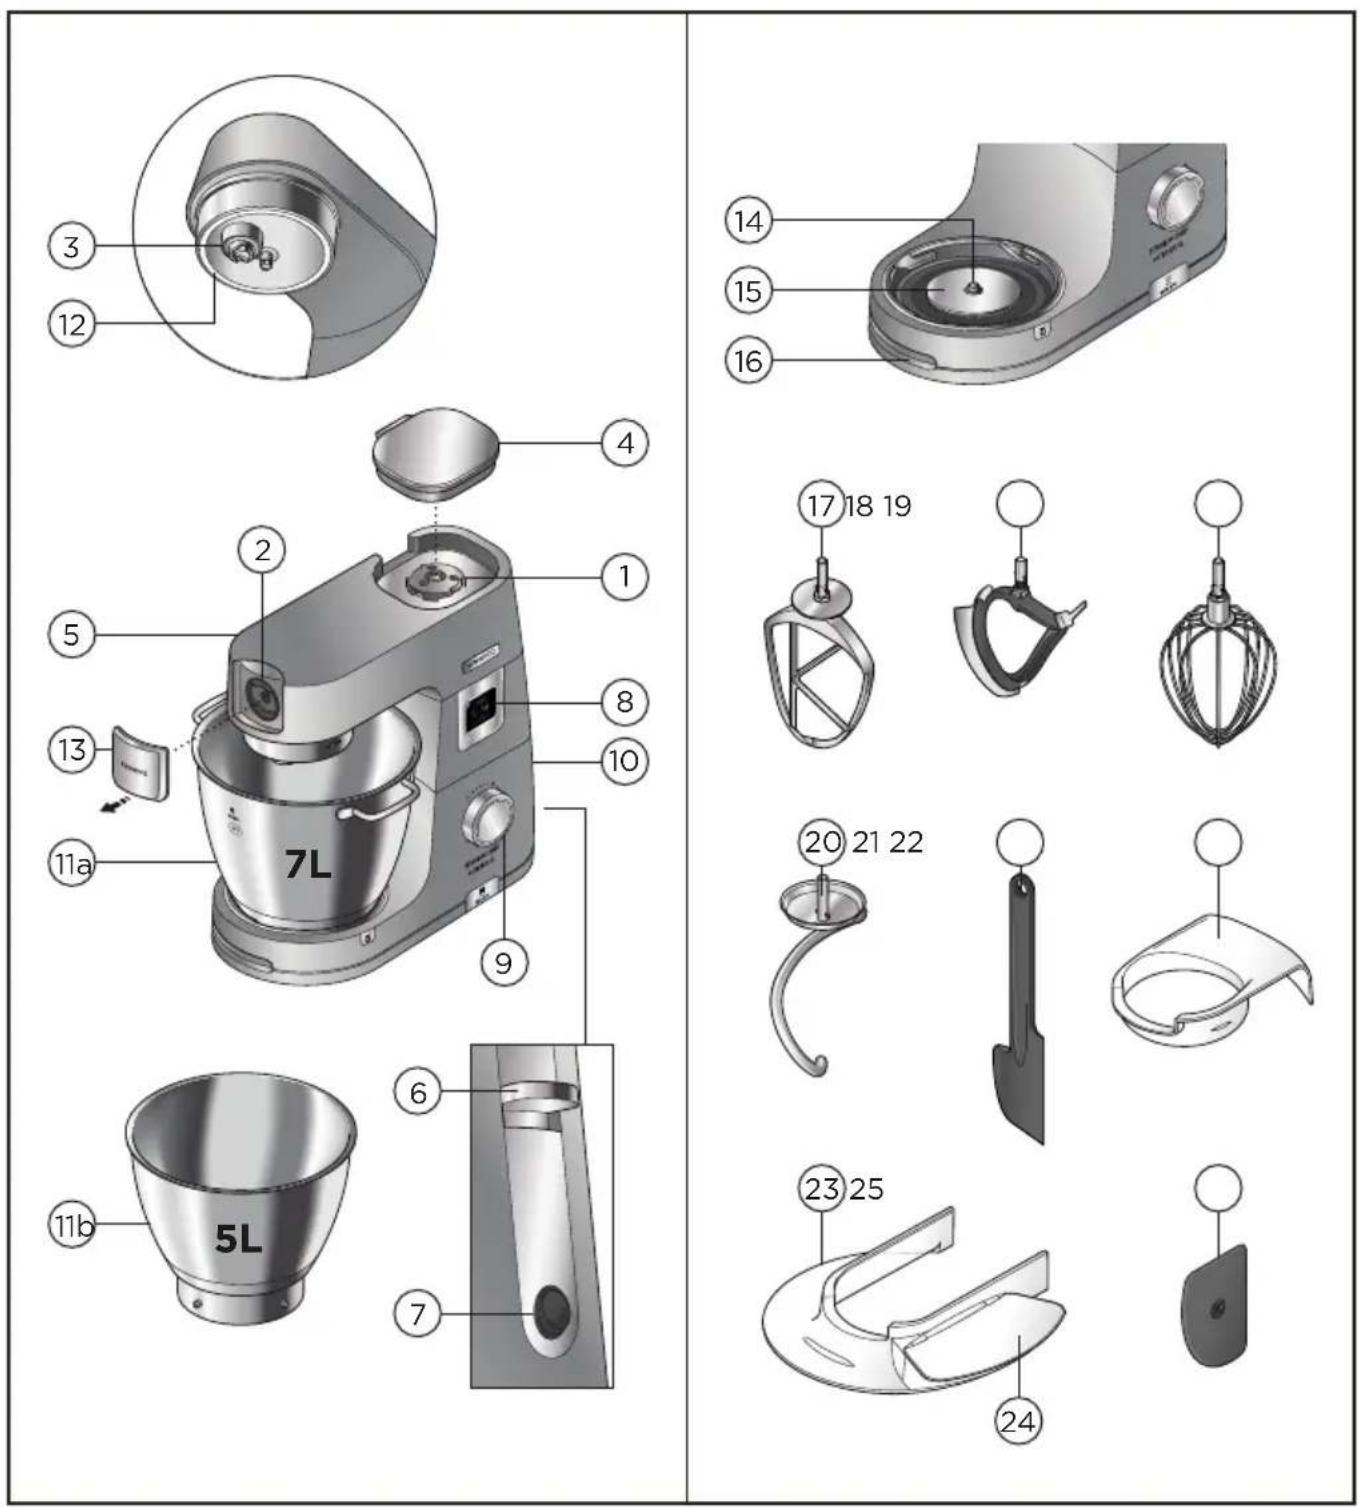
Attachment outlets
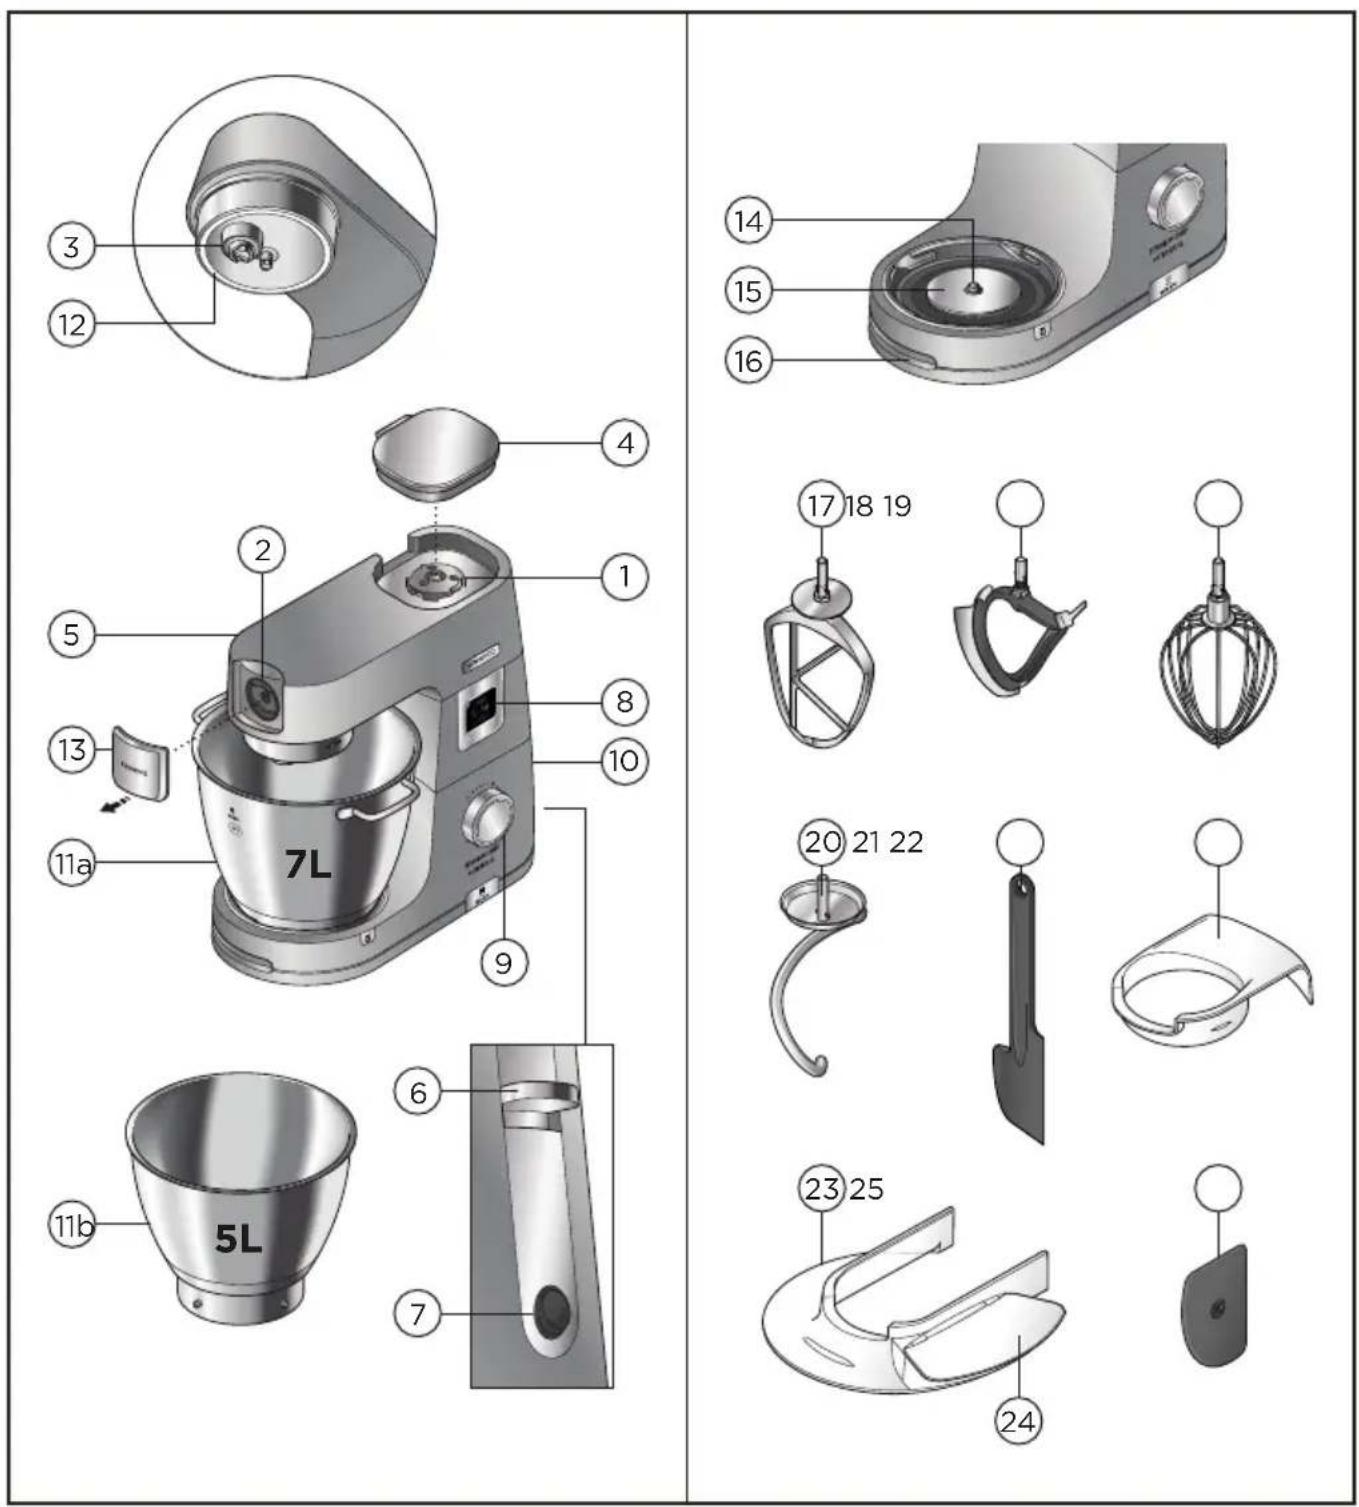
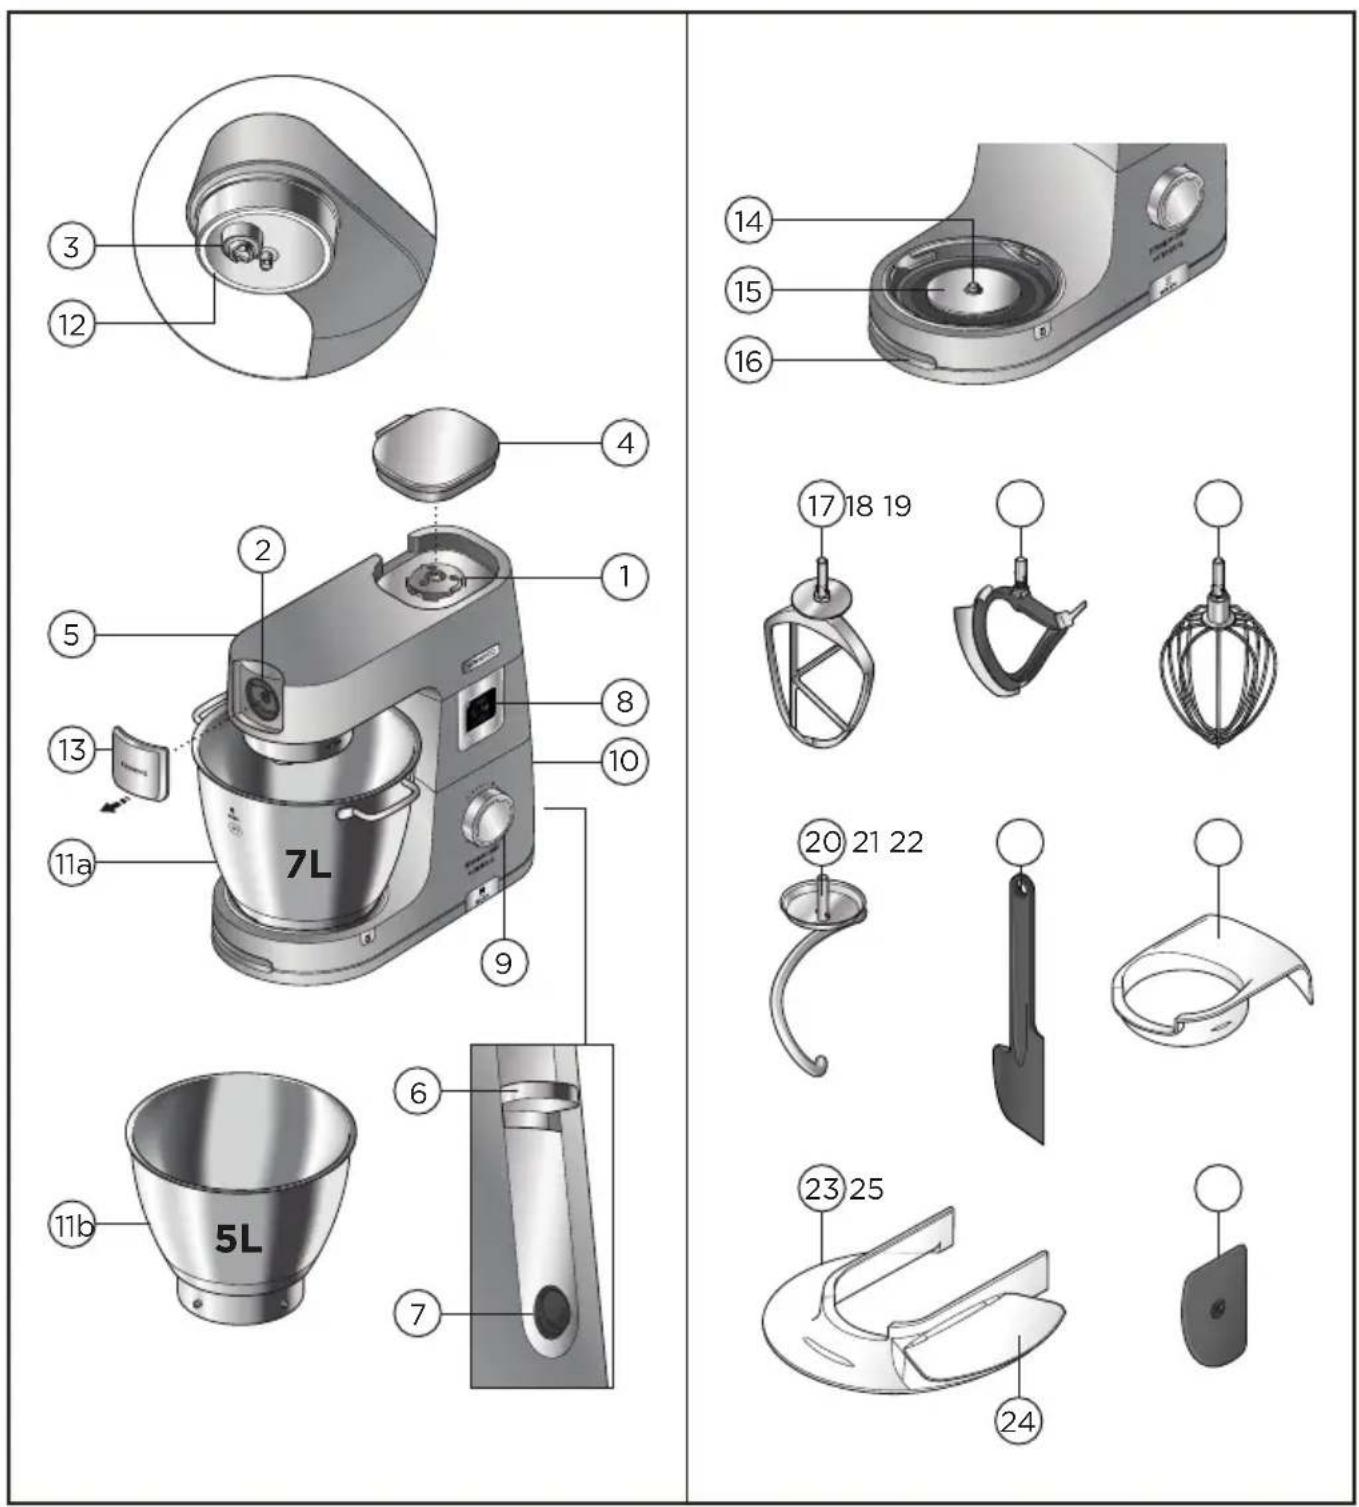
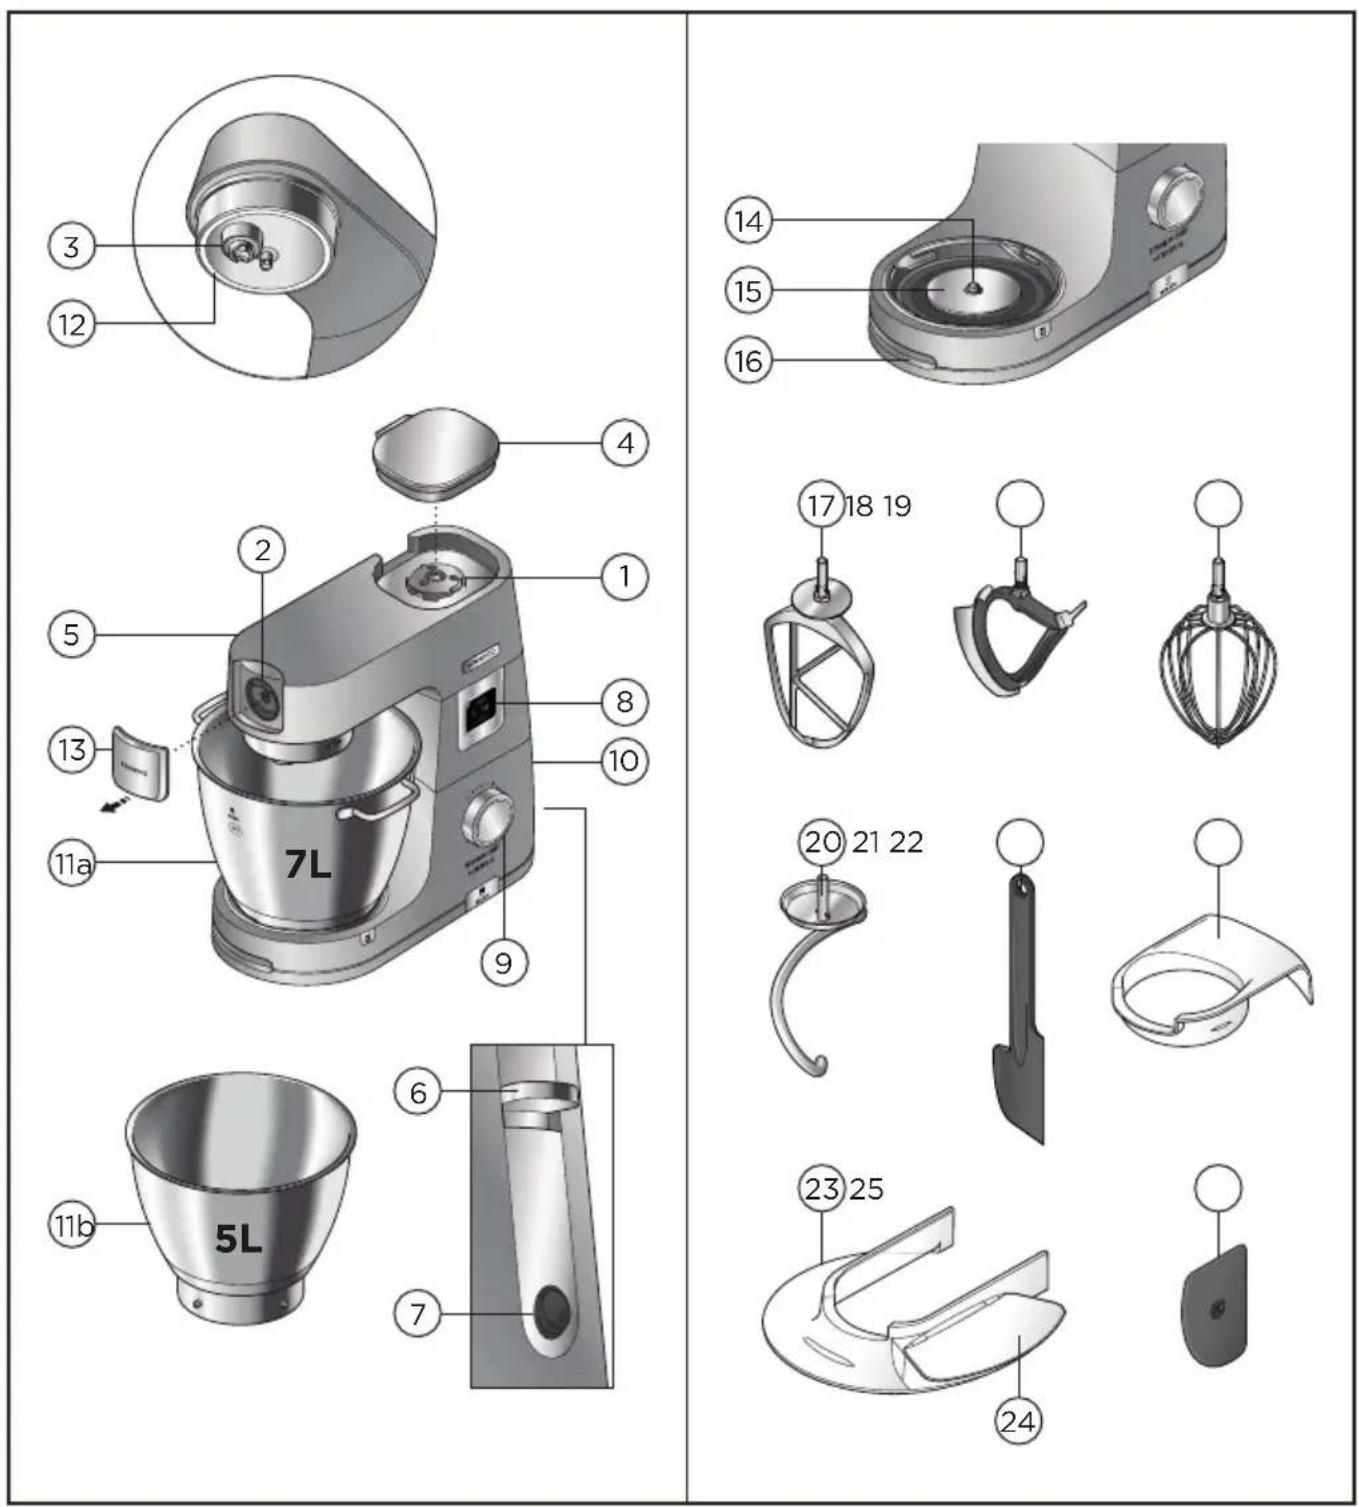
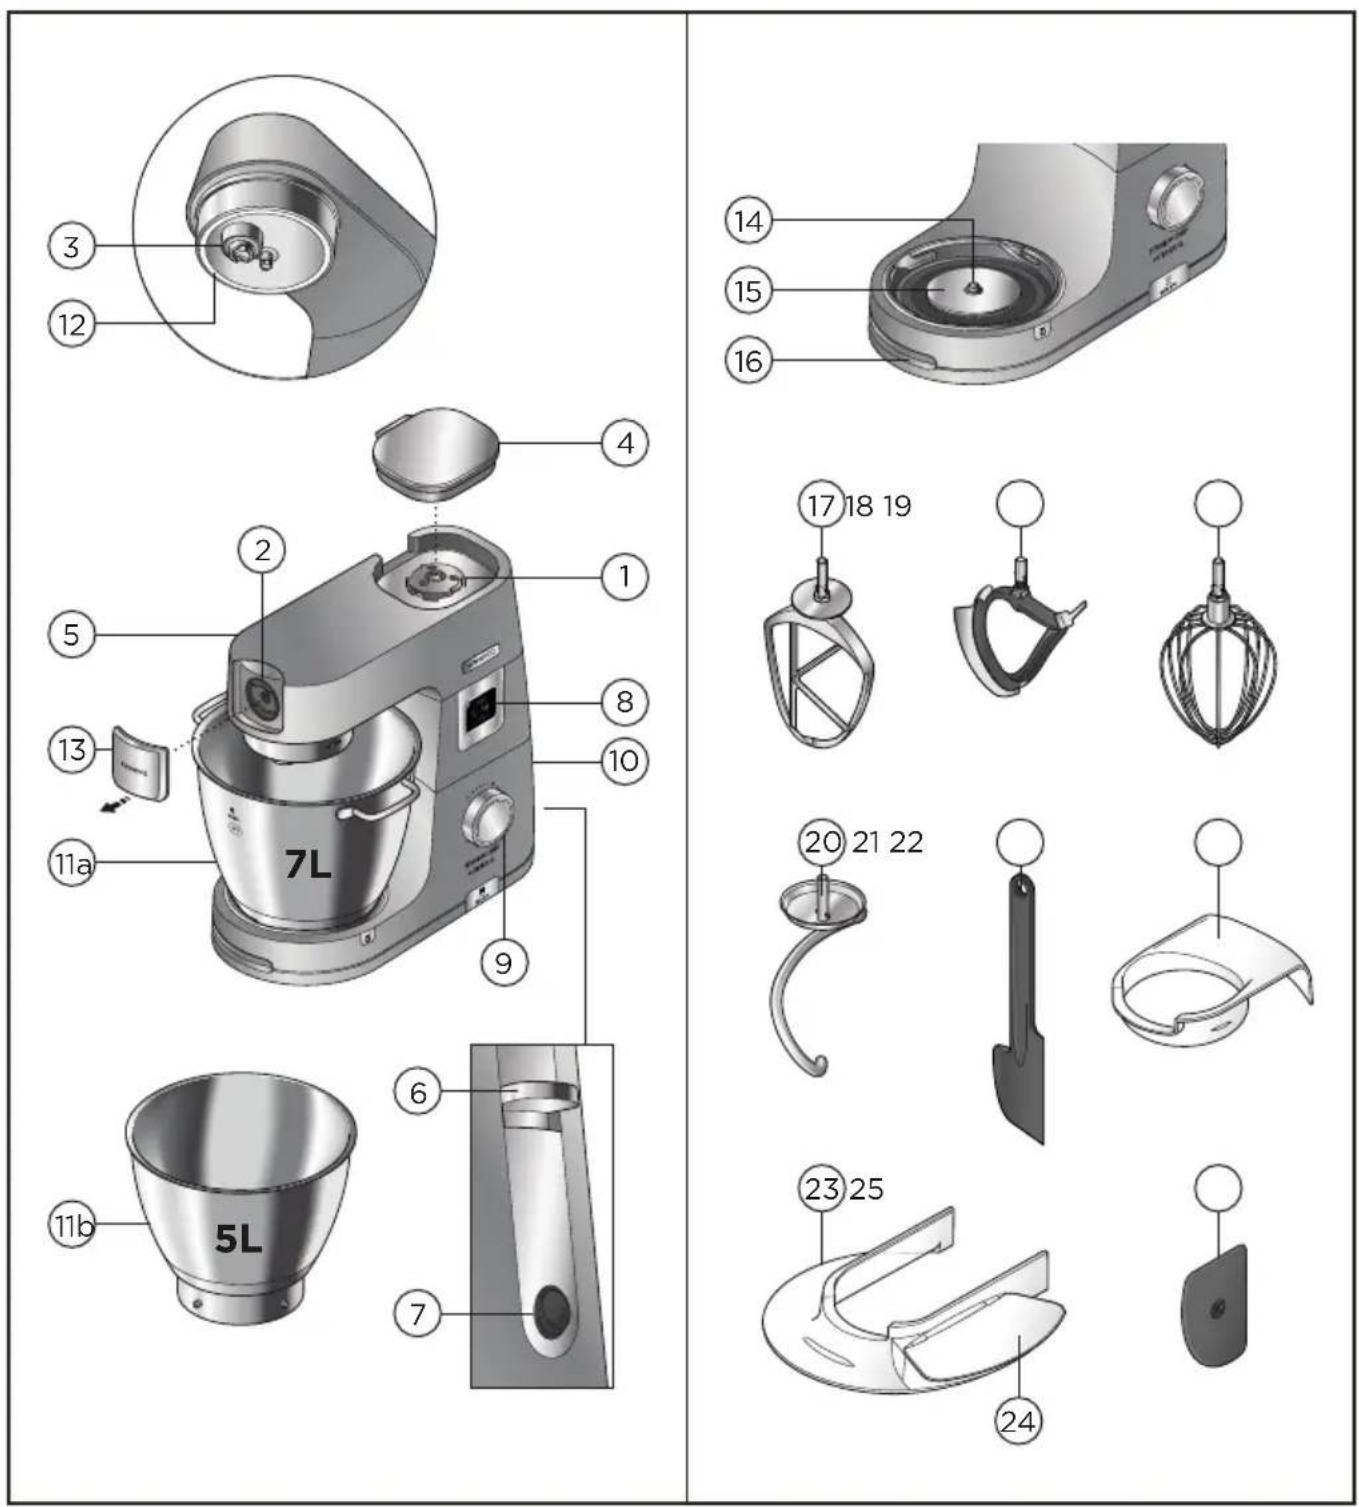
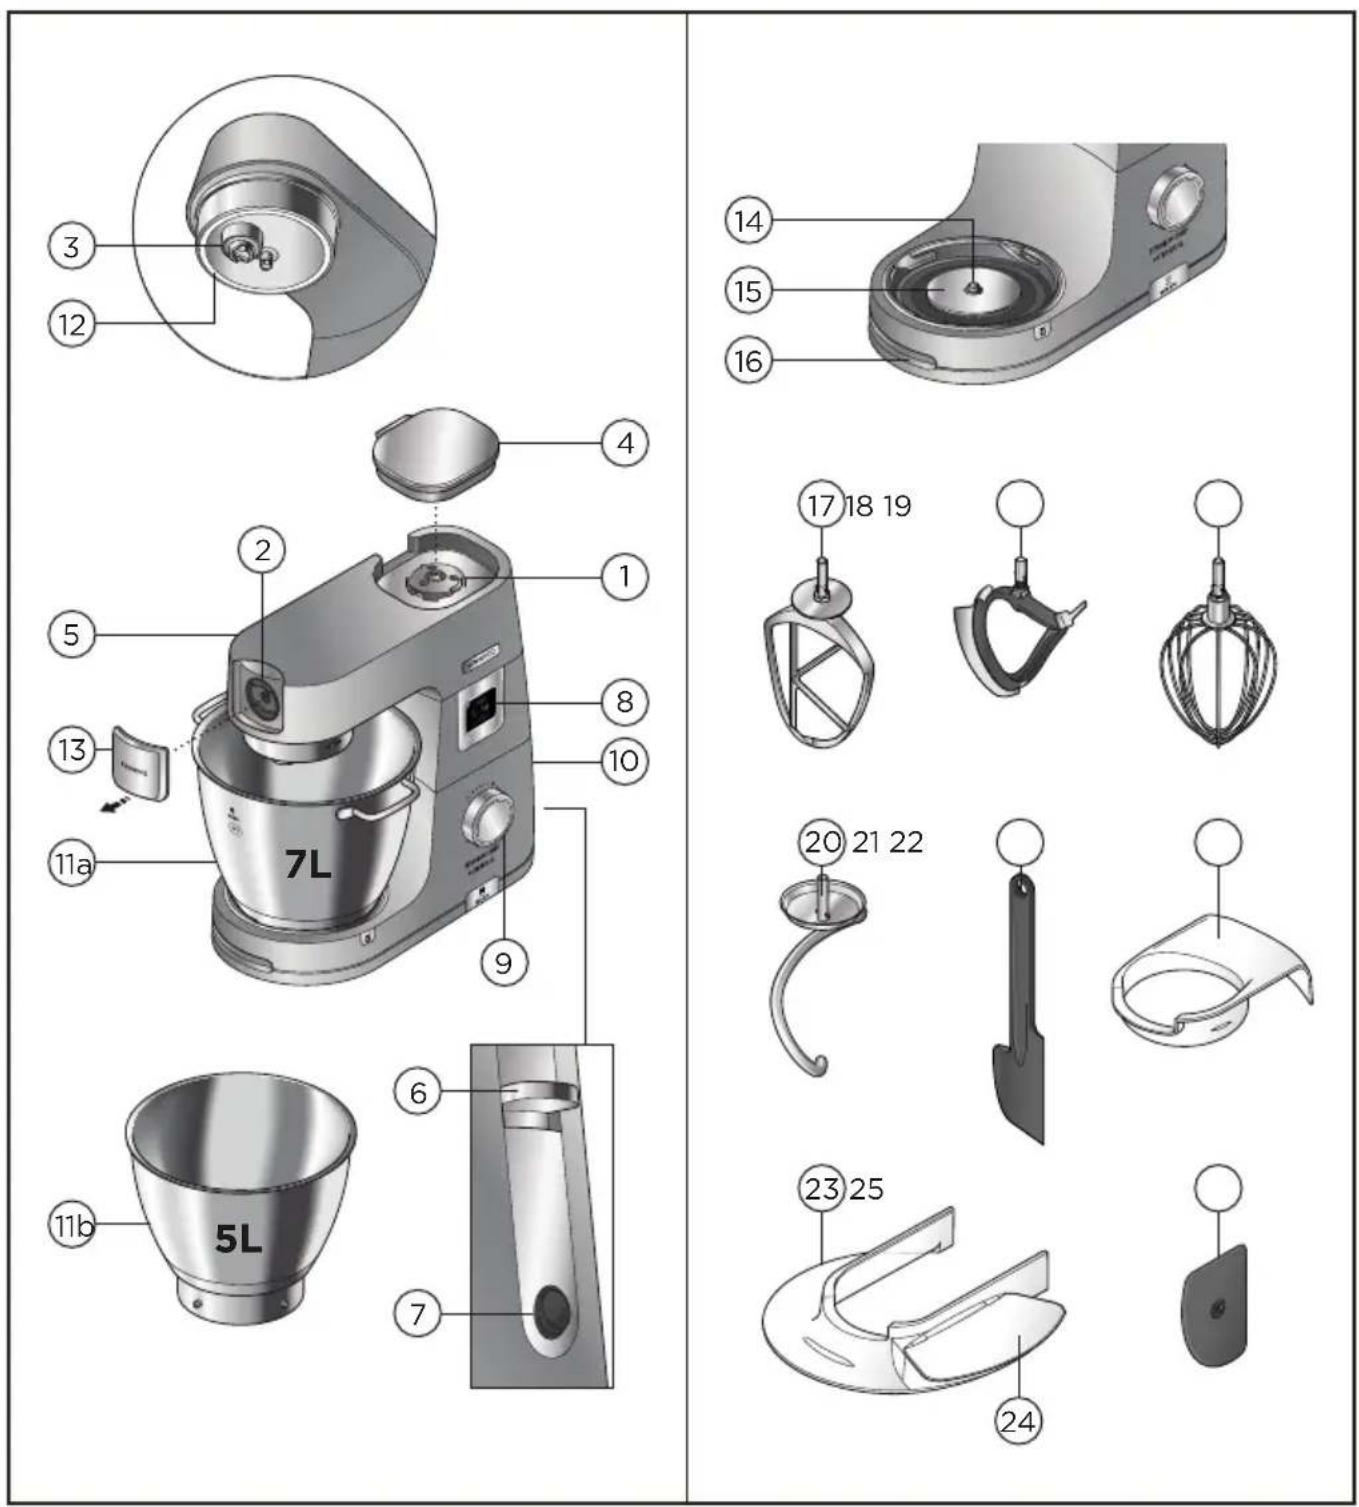
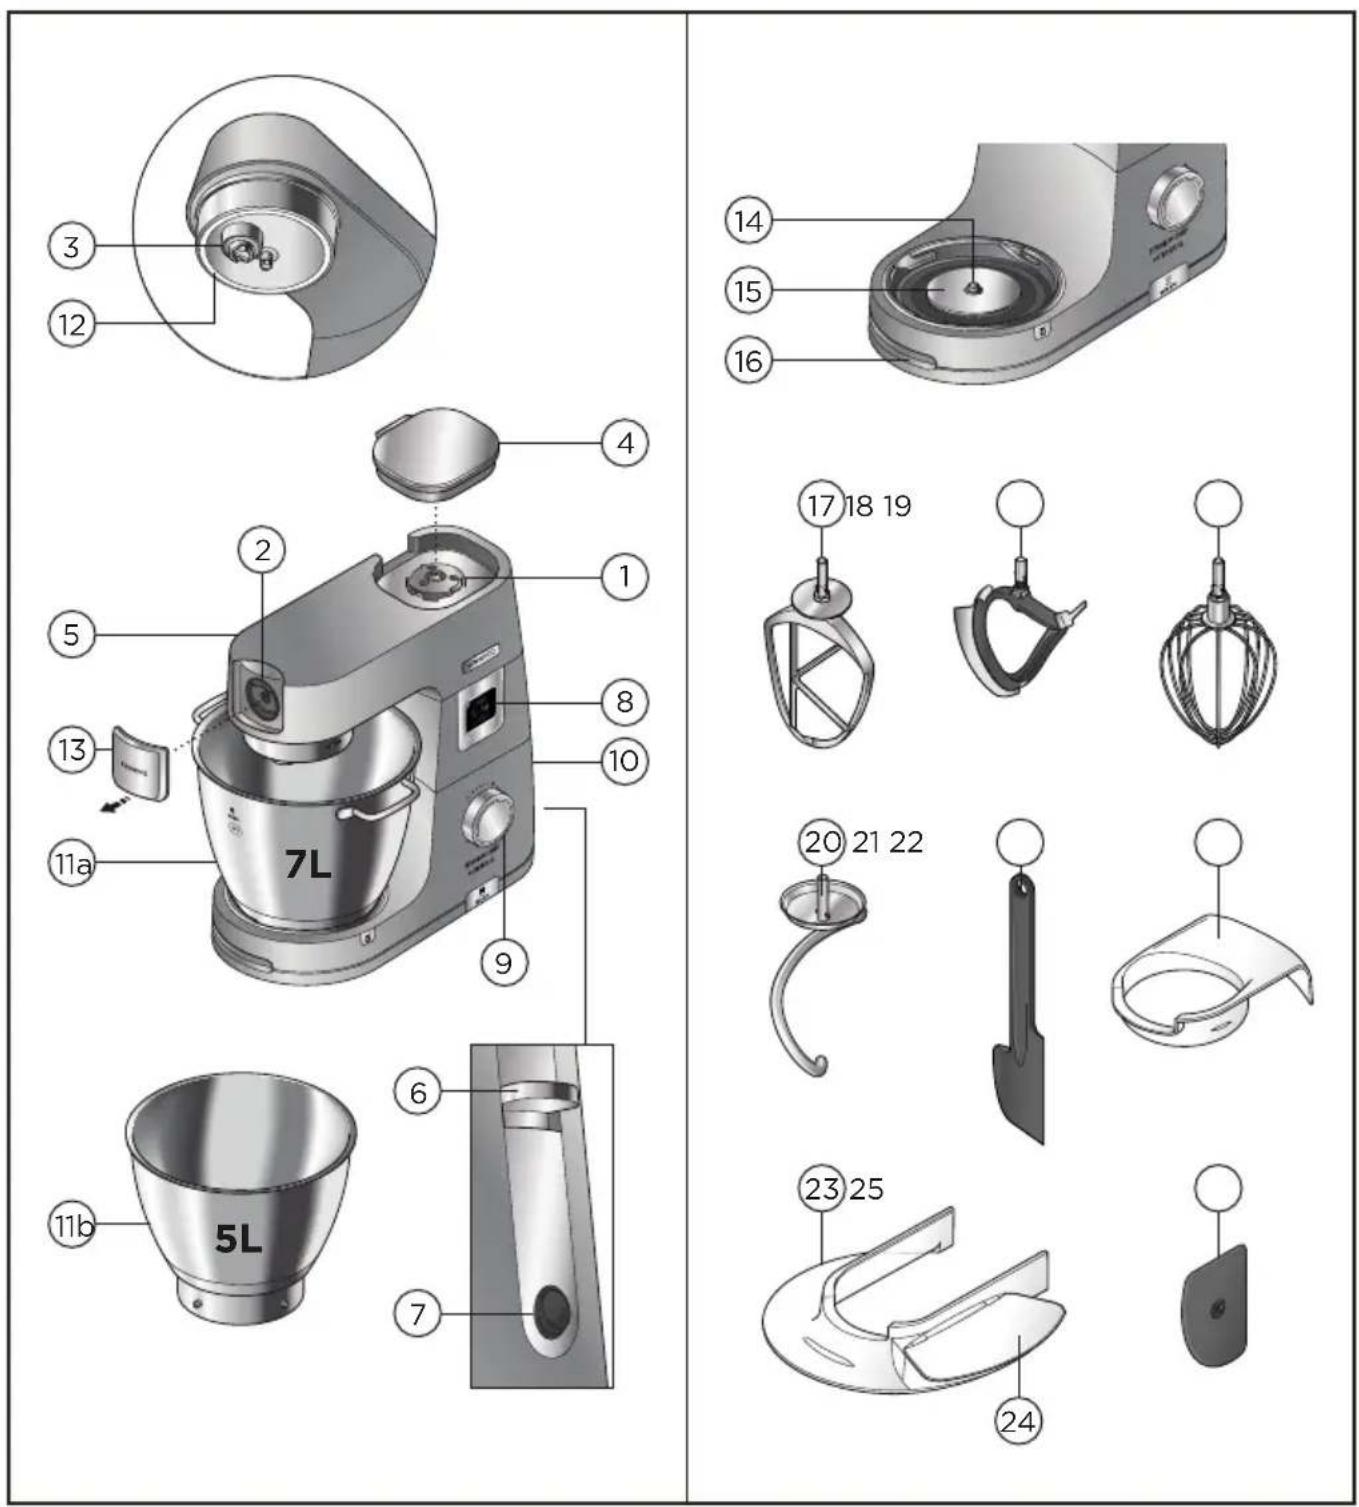
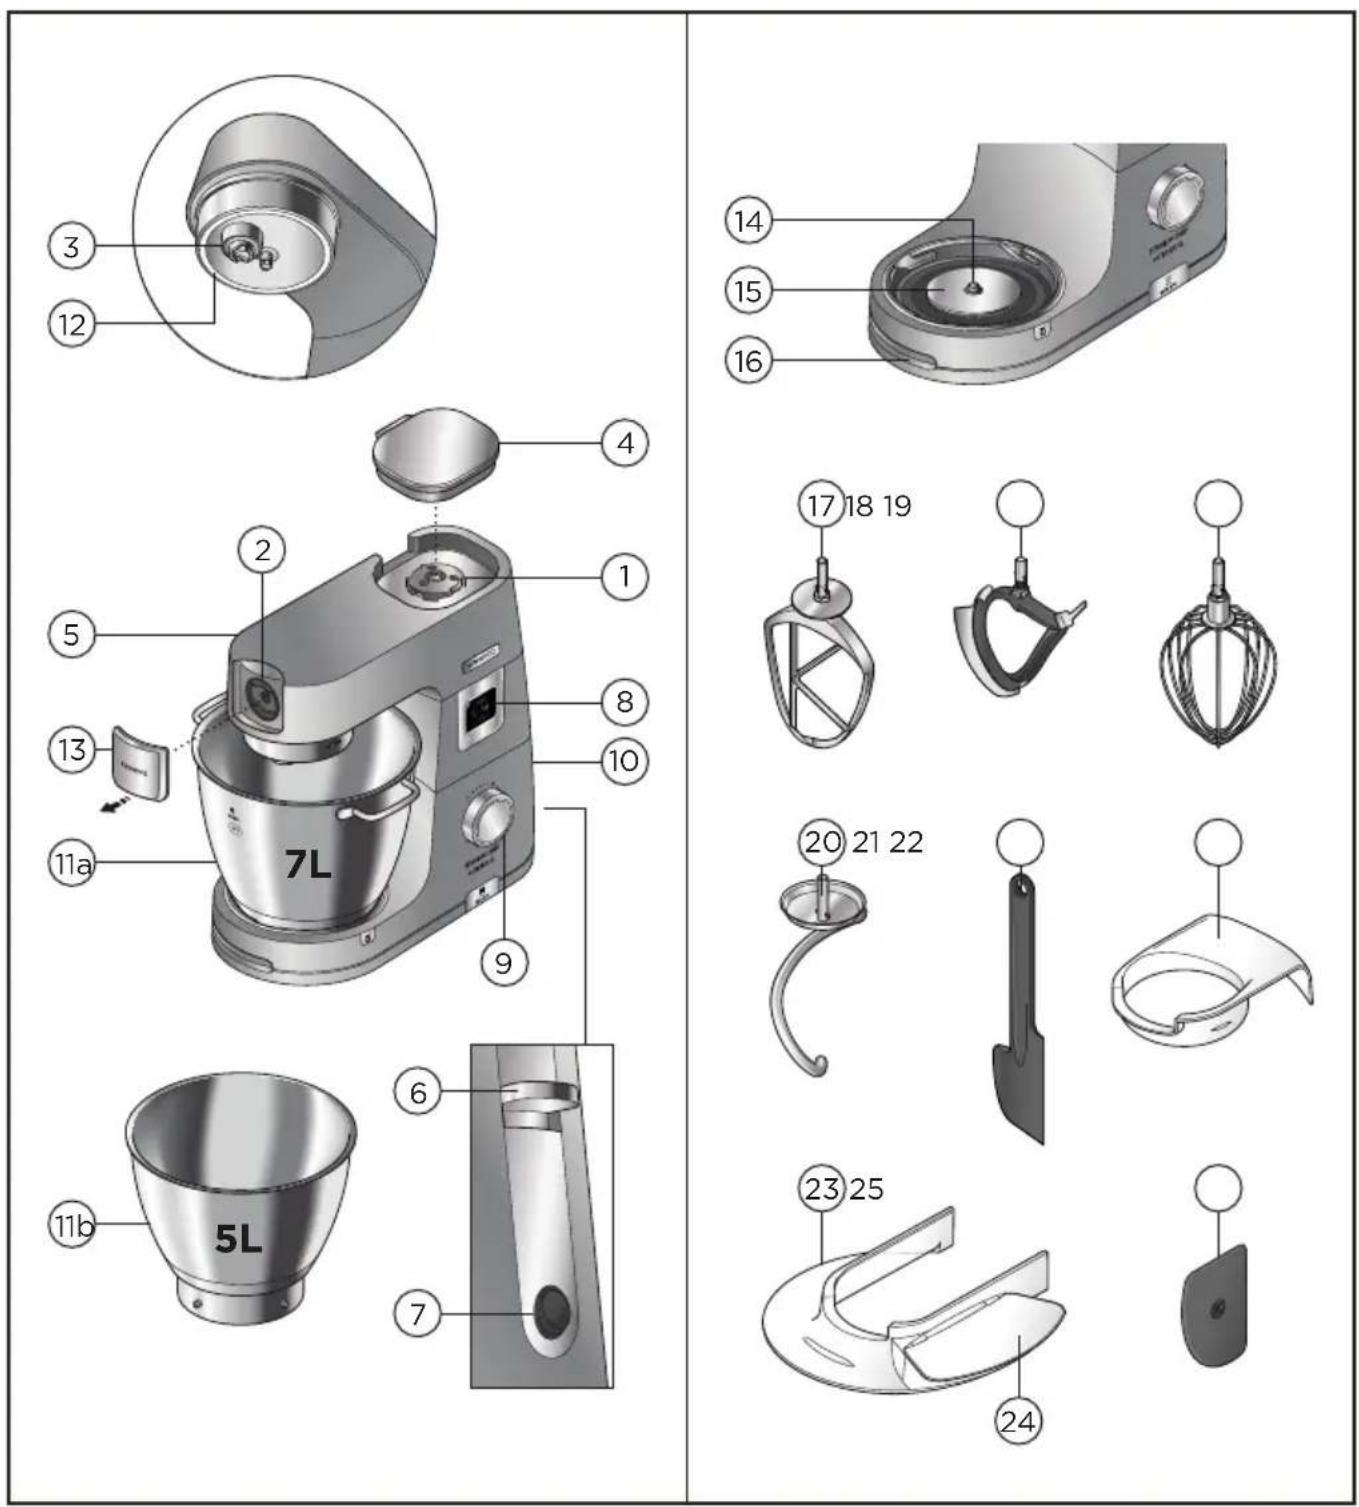
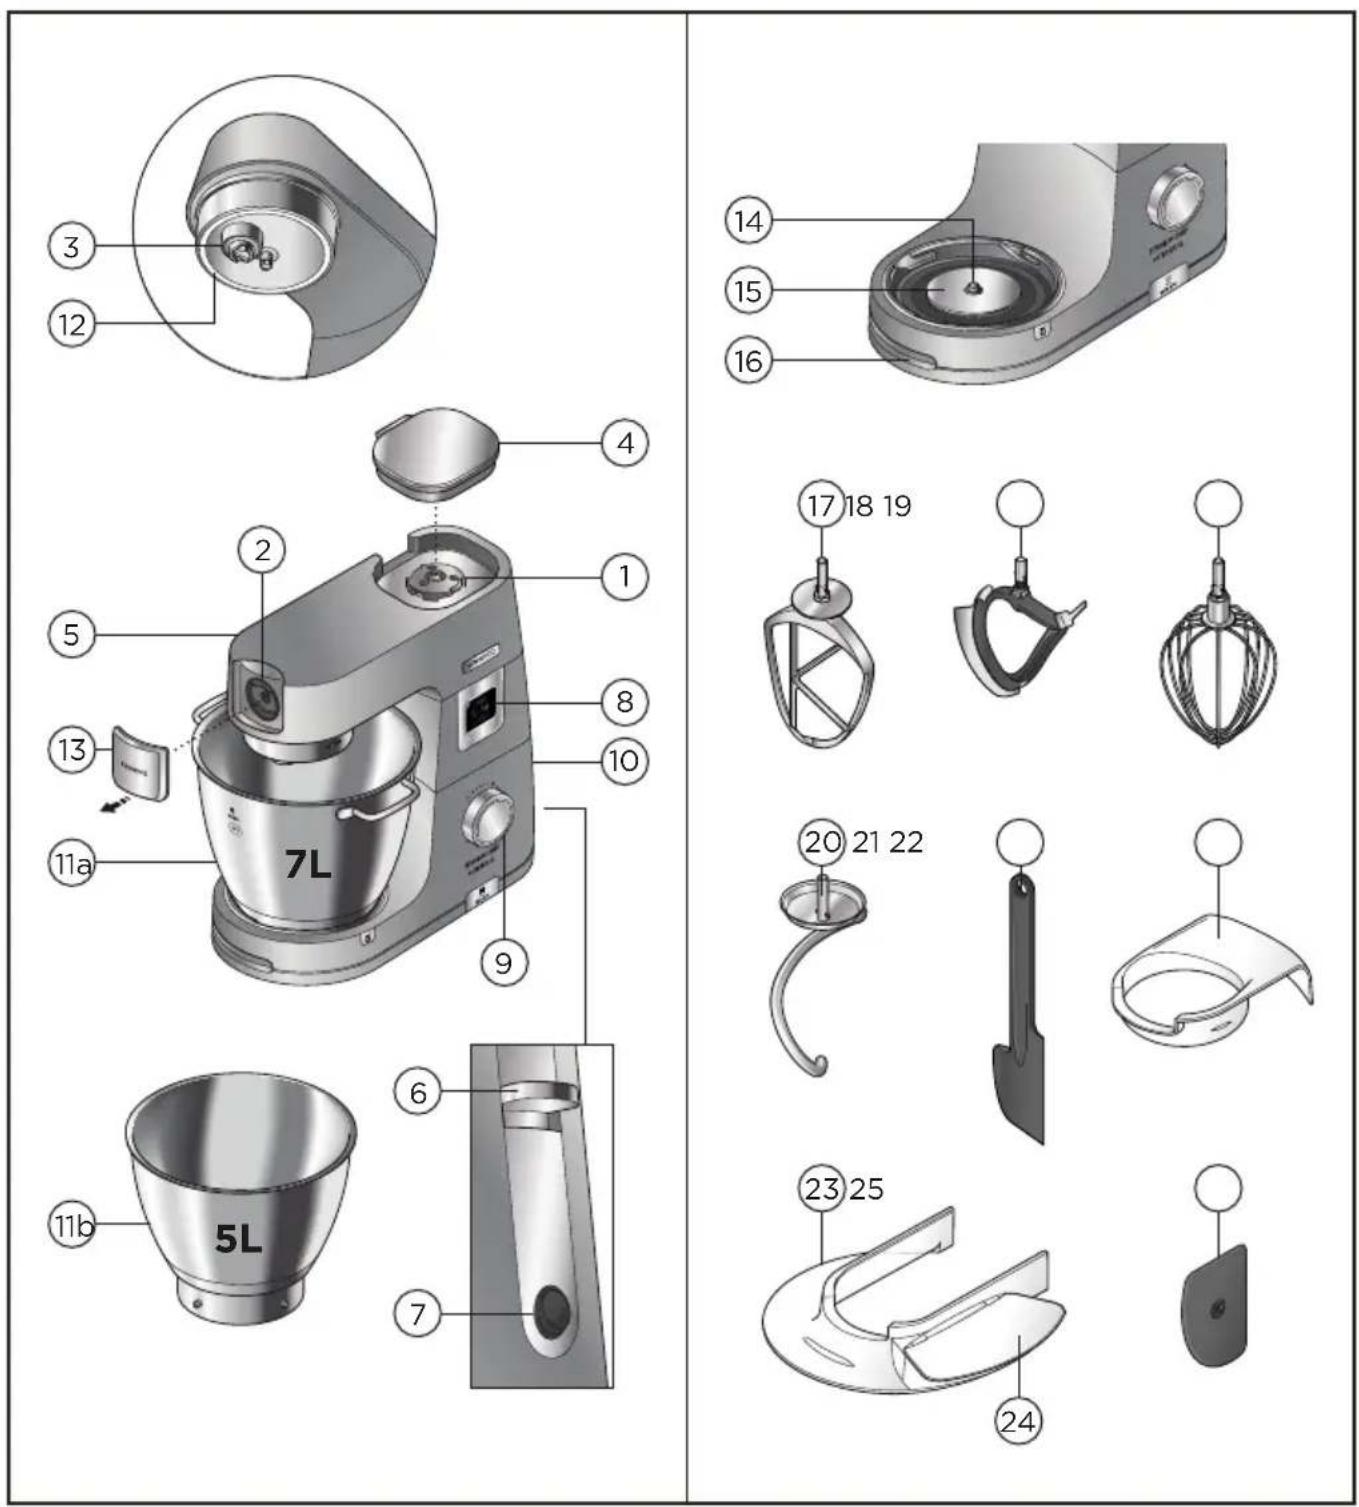
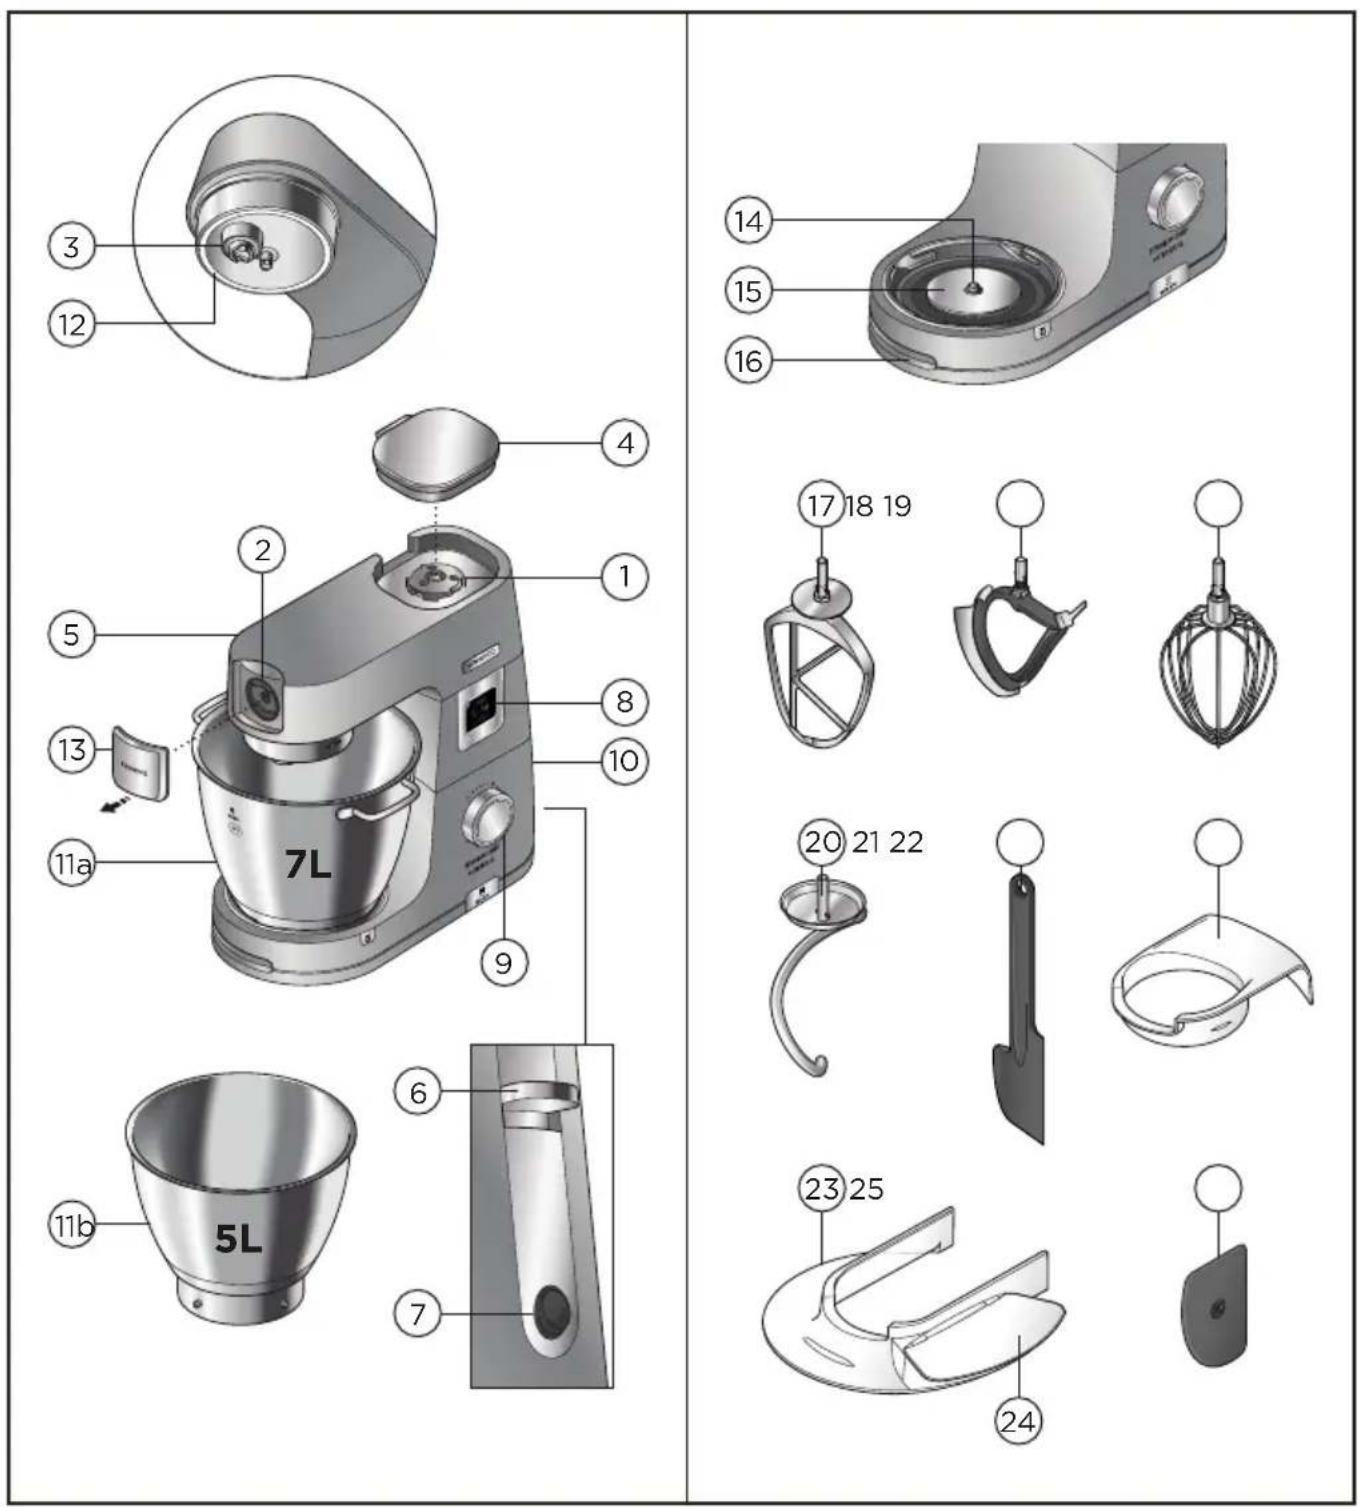
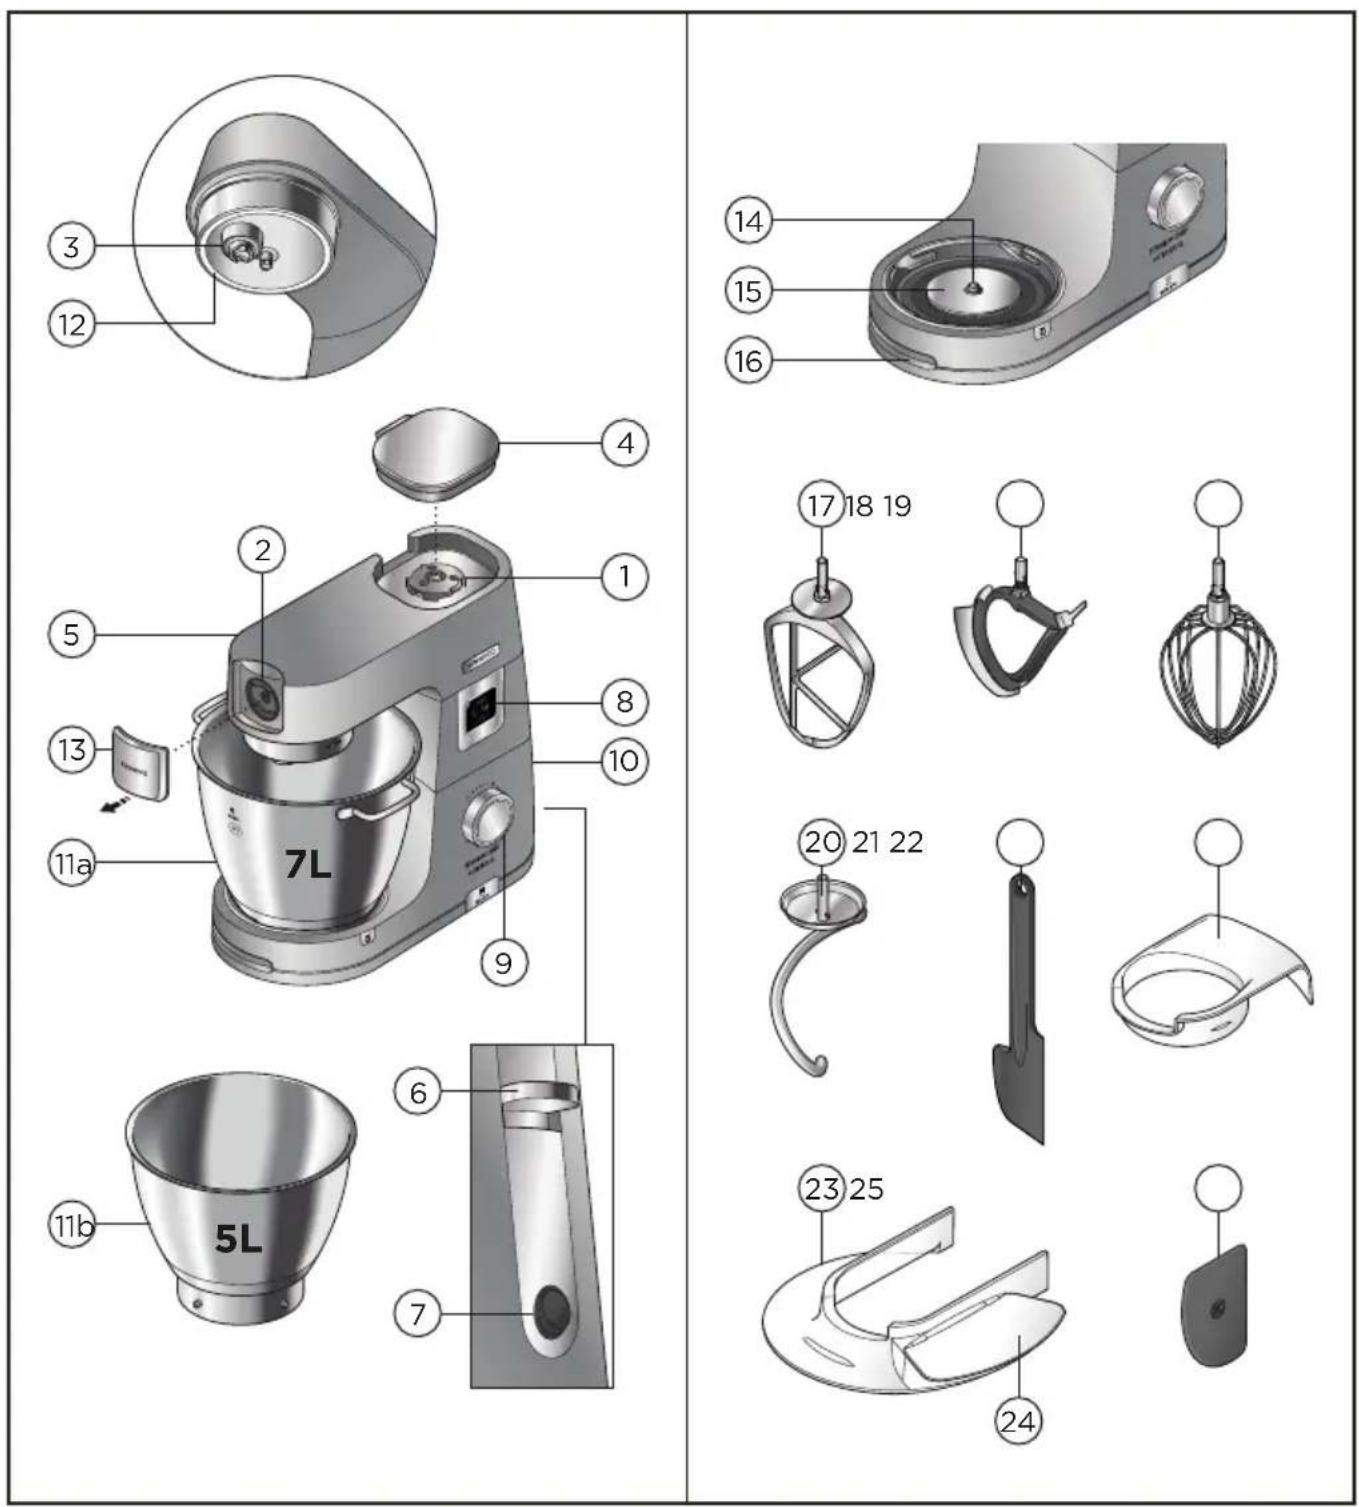
① High-speed outlet
② Slow-speed outlet
③ Bowl tool socket
Mixer
④ High speed outlet cover
⑤ Mixer head
⑥ Head release lever
⑦ On/Off switch
⑧ Display screen
⑨ Control Dial
10 Power unit
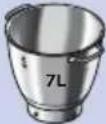
11a 7L Warming Bowl
11b 5L Bowl
⑫ In-bowl illumination 'Bowl Bright™'
⑬ Slow speed outlet cover
⑭ Temperature sensor
⑮ Warming plate
⑯ Air vent
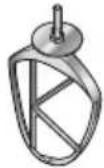
⑰ K-beater
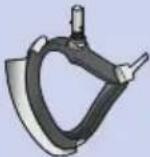
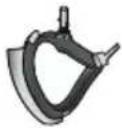
⑱ Creaming beater
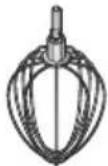
19 Whisk
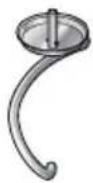
20 Dough tool
21 Spatula
22 Head shield
23 Splashguard
24 Feed chute lid
25 Dough scraper
Usage Diagram and Usage Instructions
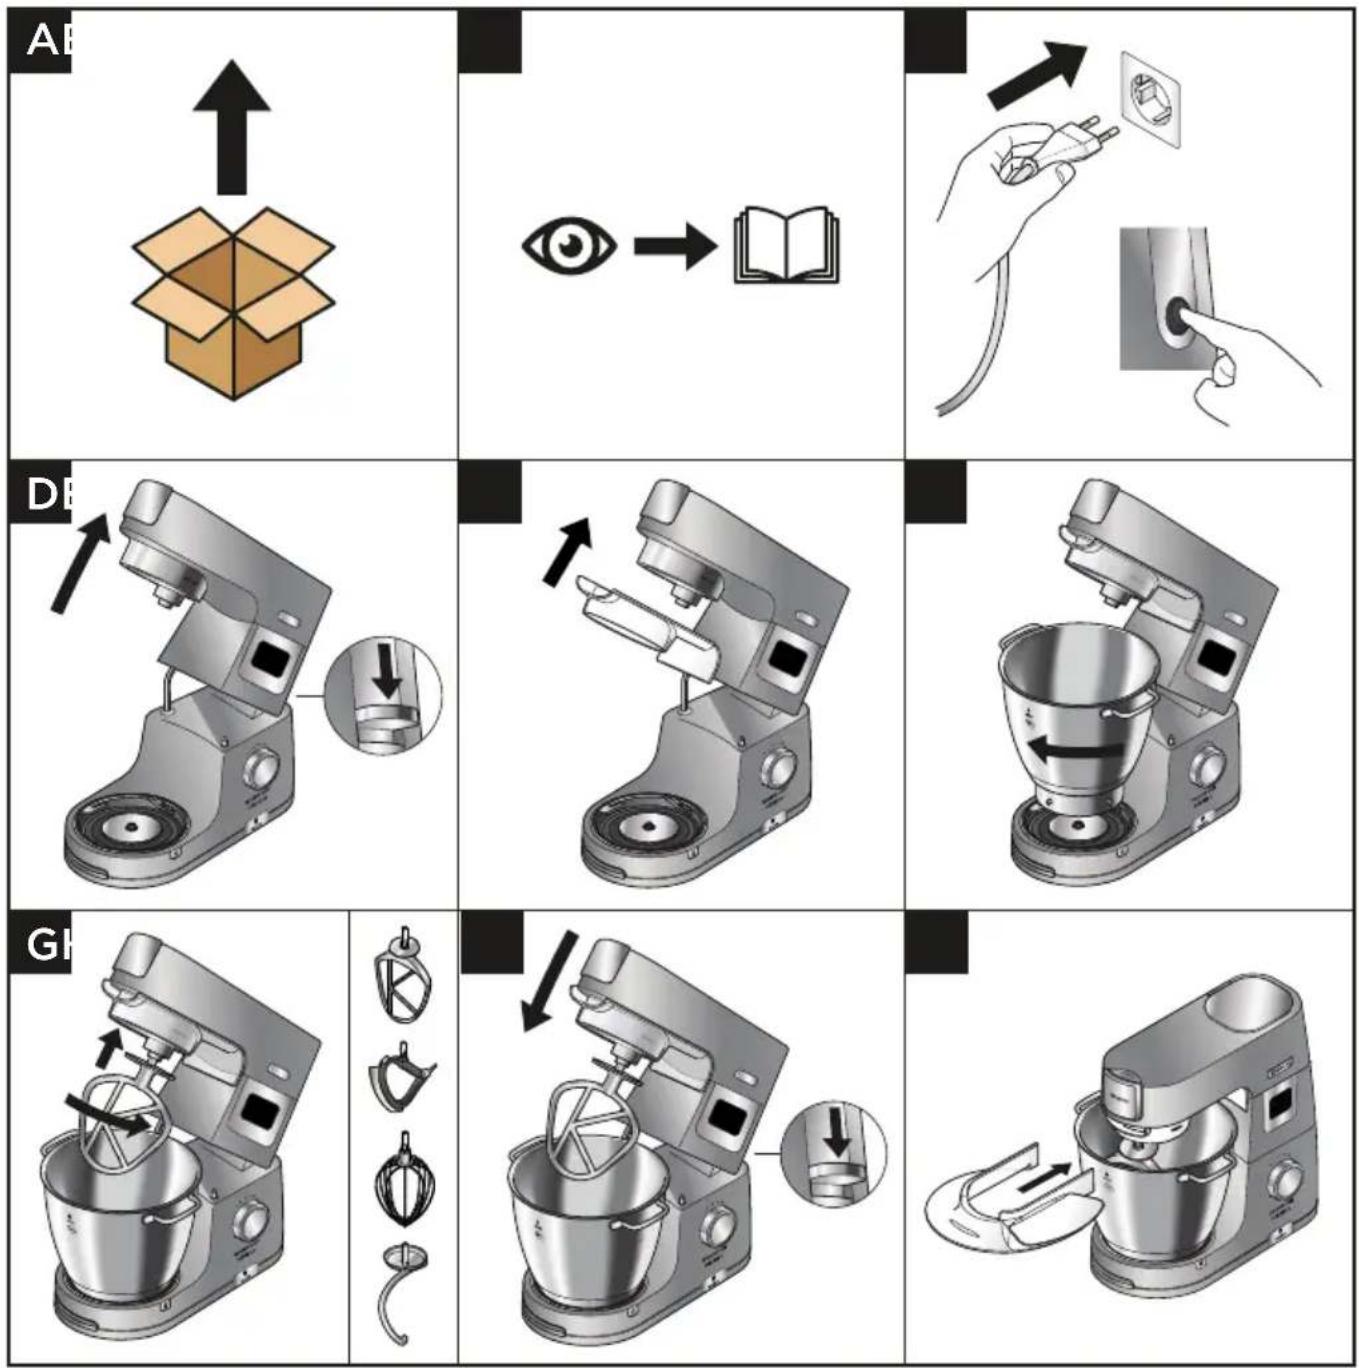
Important
- Make sure the warming plate area, temperature sensor and external surface of the bowl base are clean. Failure to do this will affect the temperature sensor, resulting in poor warming performance.
Splashguard Assembly
- The splashguard is suitable for use with the 7L bowl only.
- The splashguard assembly consists of 2 pieces: the head shield and the splashguard.
-
The splashguard cannot be fitted to the bowl unless the shield is fitted.
-
Only fit or remove the splashguard when the mixer head is in the locked position.
- We recommend that the head shield is removed regularly from the mixer head for cleaning.
1 Plug in and press the On/Off switch.
2 Push the head-lift lever down and raise the mixer head until it locks.
3 Fit the head shield, push up to secure into place.
4 Fit the bowl, turn clockwise to lock.
5 Place the required tool into the socket. Then push up and turn the tool to lock into position.
6 Lower the mixer head by pushing the head release lever down and lower the mixer head until it locks.
7 Rest the splashguard on the bowl rim and then slide forward until fully located.
- During mixing, ingredients can be added directly to the bowl via the feed chute.
8 To remove the splashguard simply slide it away from the mixer bowl.
9 To remove the head shield, raise the mixer head until it locks. Remove the tool if fitted, then pull the head shield downwards from the underside of the mixer head.
To Assemble The Creaming Beater
Usage Diagram and Usage Instructions
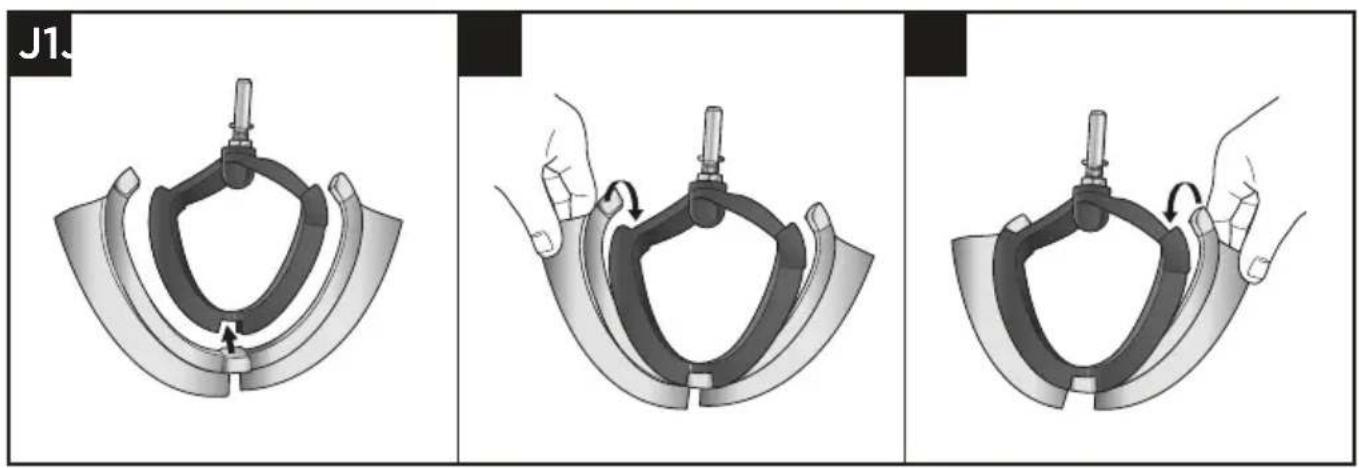
Important
- The wiper blade is supplied already fitted and should always be removed before cleaning.
1 Carefully fit the flexible wiper blade onto the tool by locating the base of the wiper blade into the slot then fit one side into the groove before gently hooking the end in place. Repeat with the other side.
To Use Your Stand Mixer - Manual Operation (Warming Mode)
Usage Diagram and Usage Instructions
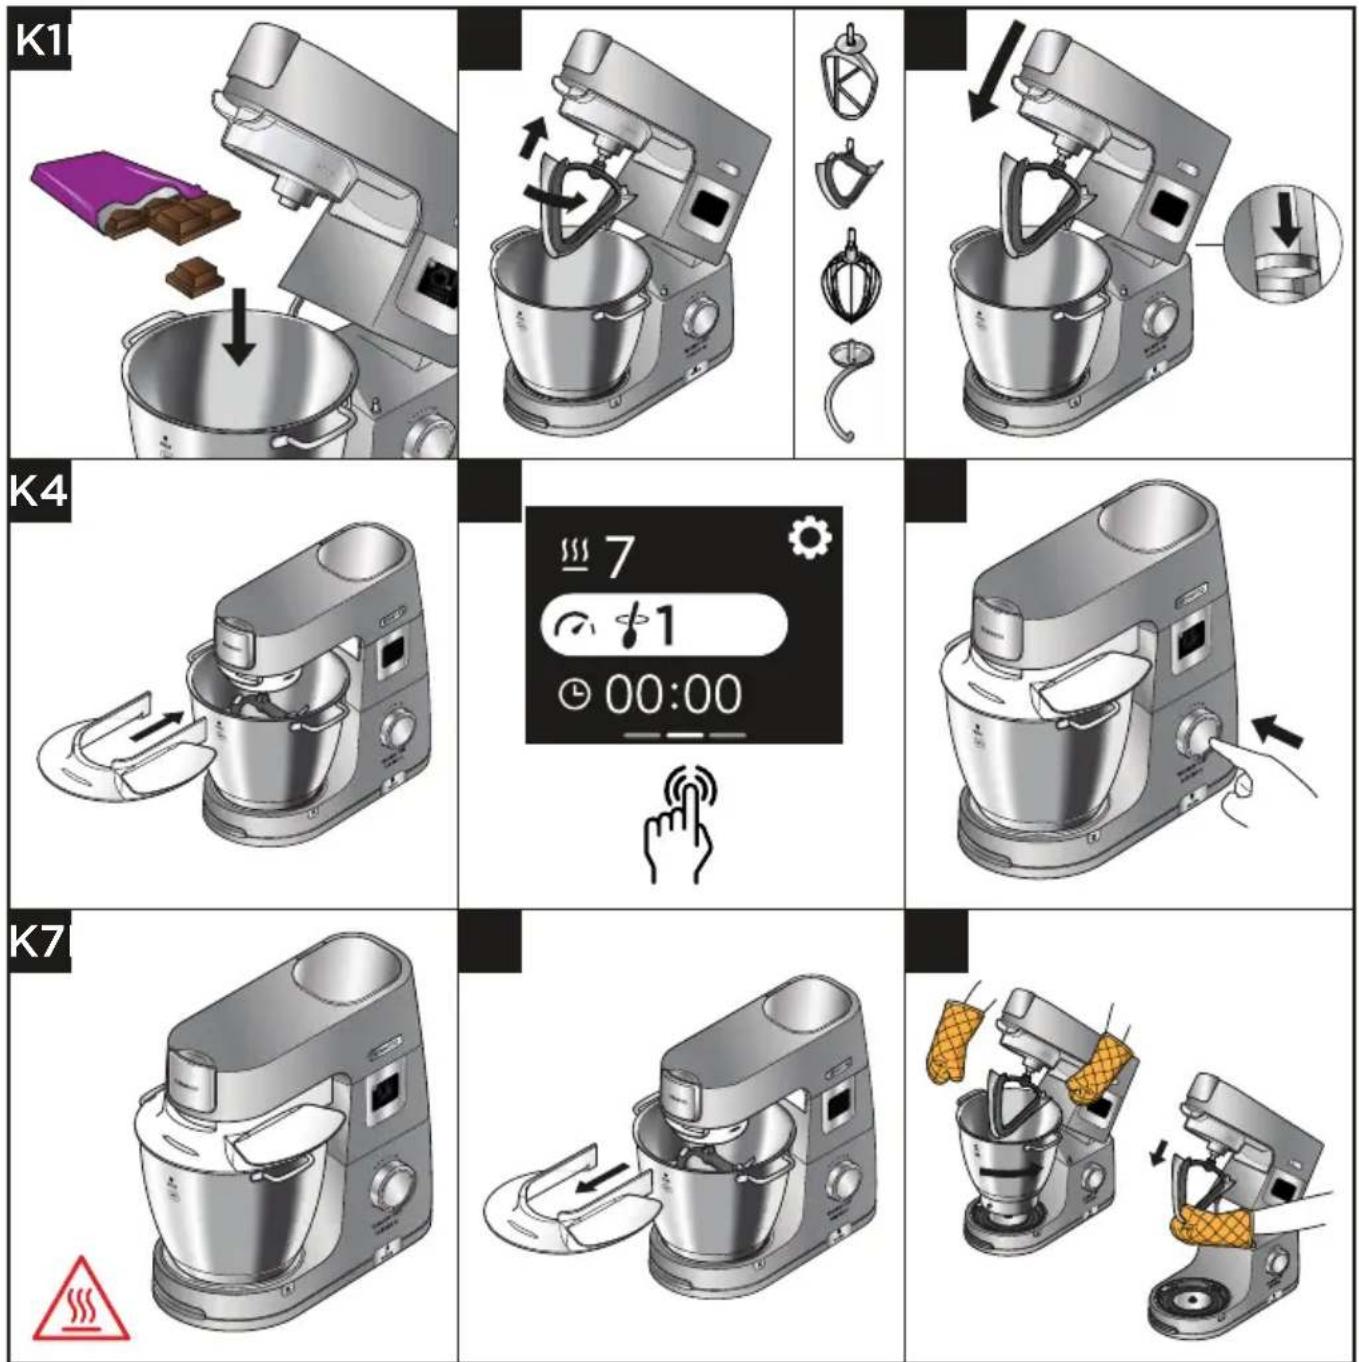
Important
- Be careful when handling or touching any part of the appliance when being used in warming mode or after warming, In particular the bowl, warming plate and tools as they will remain HOT long after the appliance has been switched off.
- Use the two side handles to remove and carry the bowl. Use oven gloves when handling the hot bowl and hot tools.
1 Add the relevant ingredients to the bowl, lower the mixer head and fit the splashguard if required.
2 Place the required tool into the socket.
3 Lower the mixer head.
4 Set the required time, speed and warming level.
- Turn the control dial clockwise to use continuous speeds.
- Turn anti-clockwise to use stir intervals and pulse (P). Press and hold the control dial to activate the pulse.
5 Press the control dial to start.
• To stop/pause the unit at any time press the control dial.
- To stop the warming process at any time, change the warming level to 'OFF'.
- If at any time the mixer head is raised during an operation, the warming process will pause and the bowl tool will stop and will not restart when the mixer head is lowered. To restart the mixer, lower the mixer head and press the control dial.
6 Once a programme has finished, the unit will beep 3 times.
To Use Your Stand Mixer- Manual Operation (Non Warming)
Usage Diagram and Usage Instructions
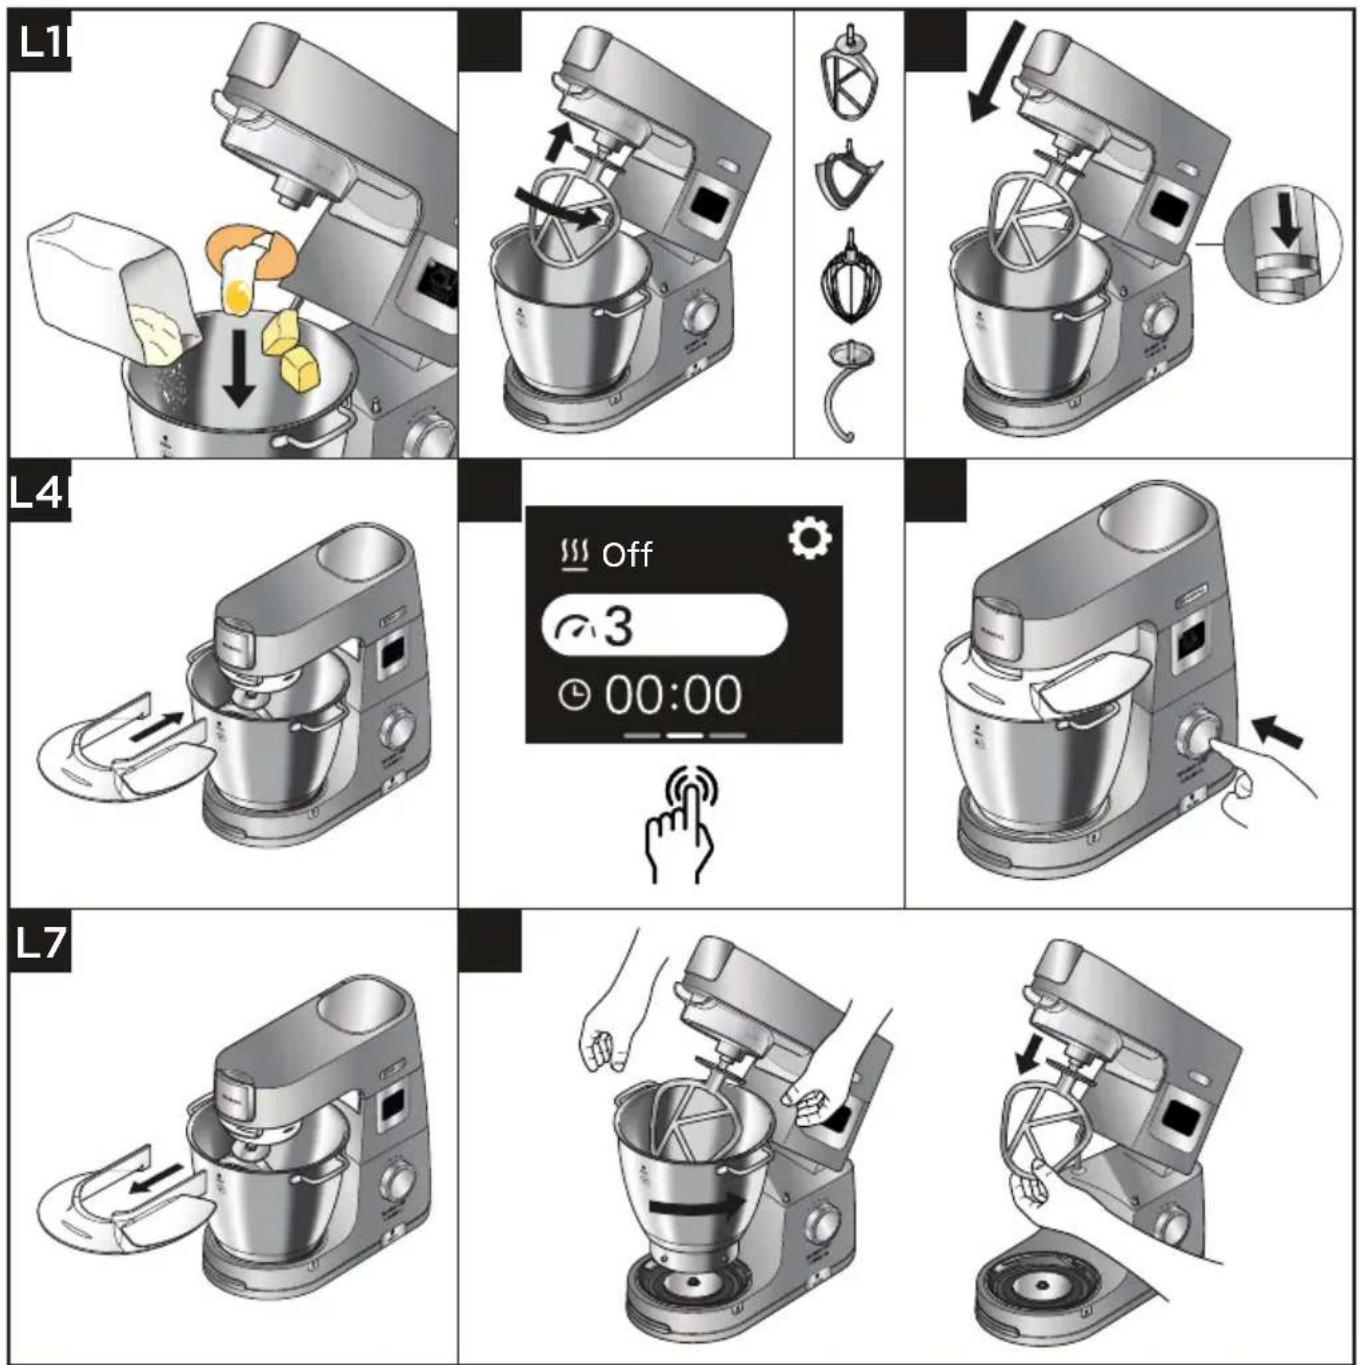
Important
- Do not use the whisk for heavy mixtures (all in one cakes and creaming fat & sugar) as you could damage it.
- Never exceed the maximum capacities and speeds stated - you may overload the machine.
- Ensure the feet on the underside of the machine and the work surface are clean and dry before using the appliance.
1 Add the relevant ingredients to the bowl.
2 Place the required tool into the socket.
3 Lower the mixerhead and fit the splashguard if required.
4 Select the required time and speed.
- Turn the control dial clockwise to use continuous speeds.
- Turn anti-clockwise to use stir intervals and pulse (P). Press and hold the control dial to activate the pulse.
5 Press the control dial to start.
- To stop/pause the unit at any time press the control dial.
- If at any time the mixer head is raised during an operation, the warming process will pause and the bowl tool will stop and will not restart when the mixer head is lowered. To restart the mixer, lower the mixer head and press the control dial.
6 Once a programme has finished, the unit will beep 3 times.
Hints and Tips
• To avoid splashing of ingredients gradually increase the speed.
- K-Beater - To fully incorporate the ingredients, stop mixing and scrape down the bowl with the spatula frequently.
- Use cold ingredients for pastry unless your recipe says otherwise.
- When creaming fat and sugar for cake mixes, always use the fat at room temperature or soften it first.
- Whisk - Before whisking egg whites, make sure there is no grease or egg yolk on the whisk or the bowl. Best results achieved when eggs are at room temperature.
Hints and Tips - Dough Tool
- Never exceed the maximum capacities and speeds stated – you may overload the machine.
- If you hear the machine labouring, switch off, remove half the dough and do each half separately.
• The ingredients mix best if you put the liquid in first. - Dried Yeast (the type that needs reconstituting): pour the warm water into the bowl. Then add the yeast and sugar and leave to stand for 10 minutes until frothy.
- Fresh yeast: crumble into the flour
- Other types of yeast: follow the manufacturer's instructions.
Manual Mode (Non Warming) - Usage Chart and Recipes
M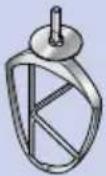 |  MAX MAX | (mins) | ||||
 |  | |||||
 |  |  |  680 g 910 g 680 g 910 g |  | 1 | 2 |
 |  | 2 kg(10 egg mix) | 4 kg(20 egg mix) | Min-Max | 1 | |
 | Min-Max2 | kg 3 kg 5-10 | ||||
 |  MAX MAX | (mins) | ||||
 |  | |||||
 |  |  | Min-Max9 | 00 g 1.5 kg 4 | ||
 |  | 2 kg(10 egg mix) | 4 kg(20 egg mix) | Min-Max 1-2 | ||
 | Min-Max2 | kg 3 kg 2-5 | ||||
M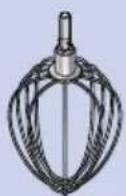 |  MAX MAX | [c84w](mins) | |||
 |  | ||||
 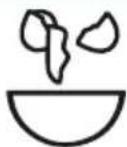 | 8(280 g) | 16(560 g) | Max | 112-2 | |
 | Min-Max0.5 L 2 L 112-3 | ||||
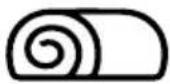 | Min620 g 930 g 4-5 | ||||
 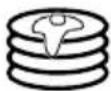 |    500 g 200 g250 g 500 g 200 g250 g | Max 10 secsMax 1-112 | |||
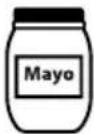 |  [DZW8]x 2 180 ml [DZW8]x 2 180 ml | Max 1-2 | |||
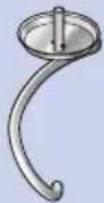 |  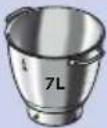 MAX MAX | (mins) | |||
| Min Max | |||||
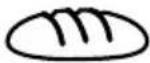 | 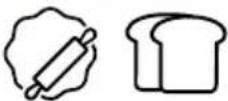  | [AW2Z] 350 g 195 g H_2O 38^ C 195 g H_2O 38^ C |  1.6 kg 1.6 kg 960 g H_2O 38^ C 960 g H_2O 38^ C | Min-1 5 | |
  |  250 g 250 g 110 g 18-22^ C [86A] 150 g 110 g 18-22^ C [86A] 150 g 30 g 30 g |  1.6 kg 1.6 kg 720 g 18-22^ C 720 g 18-22^ C  800 g 800 g 180 g 180 g | Min-1 5 | ||
Pizza Dough
500g Bread Flour
30ml Olive Oil
9g Salt
7g Dried Yeast
300g Warm Water
1 Add flour, olive oil, salt, yeast and warm water to the 7L bowl.
2 Attach the dough tool.
3 Select the dough kneading preset and press the control dial to start.
To Use Your Stand Mixer (Recommended Operating Speeds and Temperatures)
| ### | ### | |
 | 1-5 Min-Max | |
| 6-7 N/A | ||
 | 1-5 Min-Max | |
| 6-7 | #1 - #4 | |
 | 1-7 Min-Max | |
 | Off Min-2 |
To Use Your Bowl Bright™ (In-Bowl Illumination)
- Your Stand Mixer is fitted with an in-bowl illumination feature located on the underside of the mixer head.
- To turn the in bowl illumination OFF/ON, select BowlBright in the settings menu and select OFF/ON.
To Use Your Stand Mixer Display Screen Explained
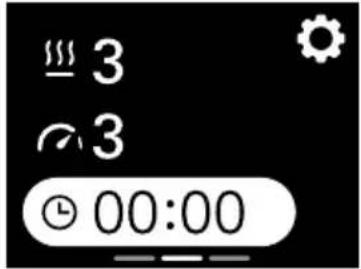 | 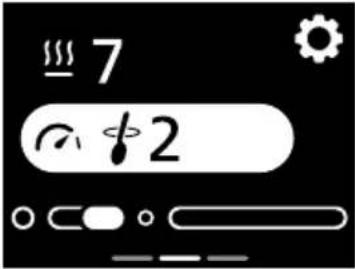 | 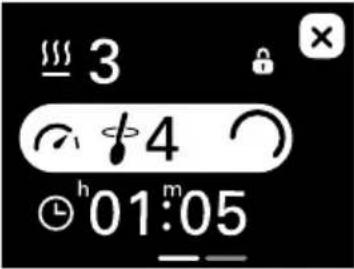 | |
 | Tap this icon to open the settings menu. | ||
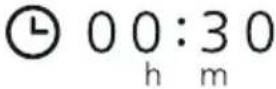 | Shows the time selected in hours (h) and minutes (m). | ||
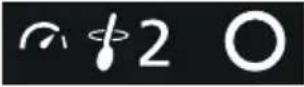 | Shows the stir interval selected.If an intermittent speed (2 → 4) is selected, the ring will progressively increase and the appliance will stir when it is full. | ||
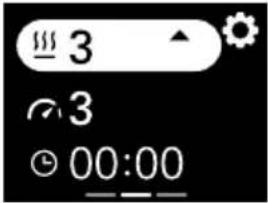 | Shows the warming level selected.A pulsing red background indicates the machine is in heating mode.A solid red background indicates the machine has reached the set warming level.A intermittent arrow pointing downwards indicates the appliance is cooling down. | ||
 | Indicates that a setting cannot be adjusted. | ||
 | Turn the control dial anti-clockwise to use intermittent stir intervals and pulse.Turn the control dial clockwise to use continuous speeds. | ||
Warming Levels and Speed Settings Explained
| Warming Hints and Tips | ||
| Warming Levels Recommended Usage | ||
| 1 Softening | ||
| 2 | Prove | |
| 3 | ||
| 4 | Swiss Meringues | |
| 5 | ||
| 6 | Chocolate Melting | |
| 7 | ||
| 8 | Sabayon | |
| 9 | ||
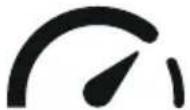 | (P) Pulse - Select for short bursts of maximum speed. Press and hold control dial in to operate pulse setting. | |
| Continuous Stir - The mixer will operate at a constant slow speed. Used for folding light ingredients into heavier mixtures, for example meringues, fruit fools and genoese sponges and to slowly incorporate flour and fruit into cake mixtures. | ||
| Stir interval 2 - Intermittent stir with short pauses. When set to this speed, intermittently operates on a slow speed every 5 seconds. | ||
| Stir interval 3 - Intermittent stir with medium pauses. When set to this speed, intermittently operates on a slow speed every 15 seconds. | ||
| Stir interval 4 - Intermittent stir with long pauses. When set to this speed, intermittently operates on a slow speed every 30 seconds. | ||
| Speed min - max | Continuous speeds gradually increasing to max | |
To Use Your Stand Mixer - Attachments
Usage Diagram and Usage Instructions
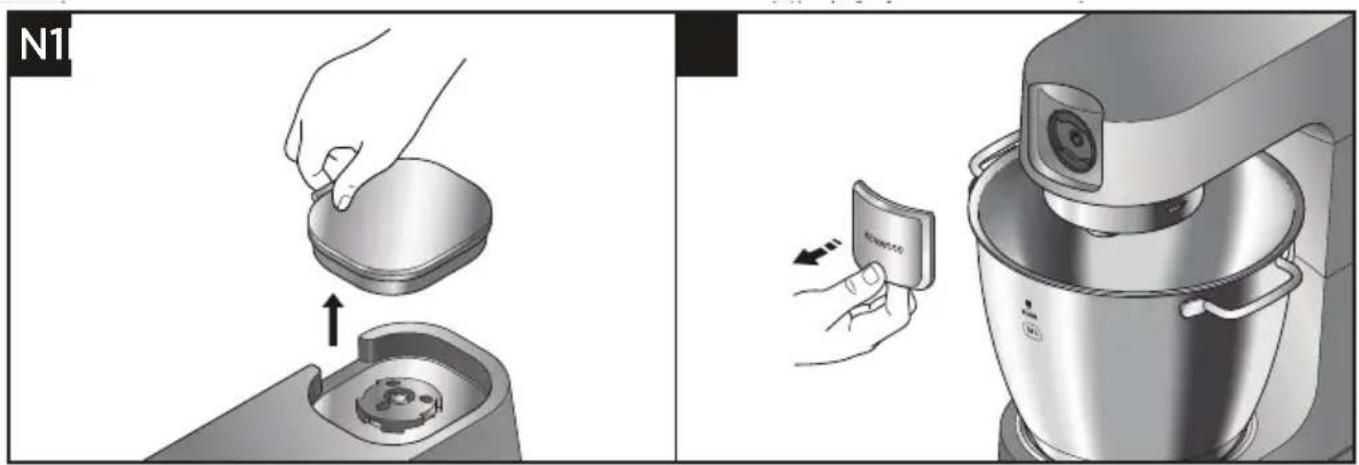
1 Remove High speed outlet/Slow Speed outlet cover (if applicable).
High-Speed Outlet Cover
- To remove the cover, use the grip and lift upwards.
- To fit, place the cover over the outlet and push downwards.
Slow-Speed Outlet Cover
- To remove the cover, use the grip on the underside and pull outwards.
- To fit, locate the catch at the top of the cover into the outlet recess and push to clip into position.
2 Fit attachment according to specific instructions supplied.
3 Set the required time and speed. Press the control dial to start.
4 To stop the unit at any time, press the control dial again.
Recipe
Prune Marinade
200g Clear Runny Honey
40g Soft Prunes
50ml Water
1 Place all ingredients into the mini chopper/mill. Refrigerate overnight.
2 Fit the attachment to the Stand mixer.
3 Switch to pulse for 5 seconds.
4 Use as required.
(Note: Mini chopper/mill attachment available to purchase separately).
Usage Diagram and Usage Instructions
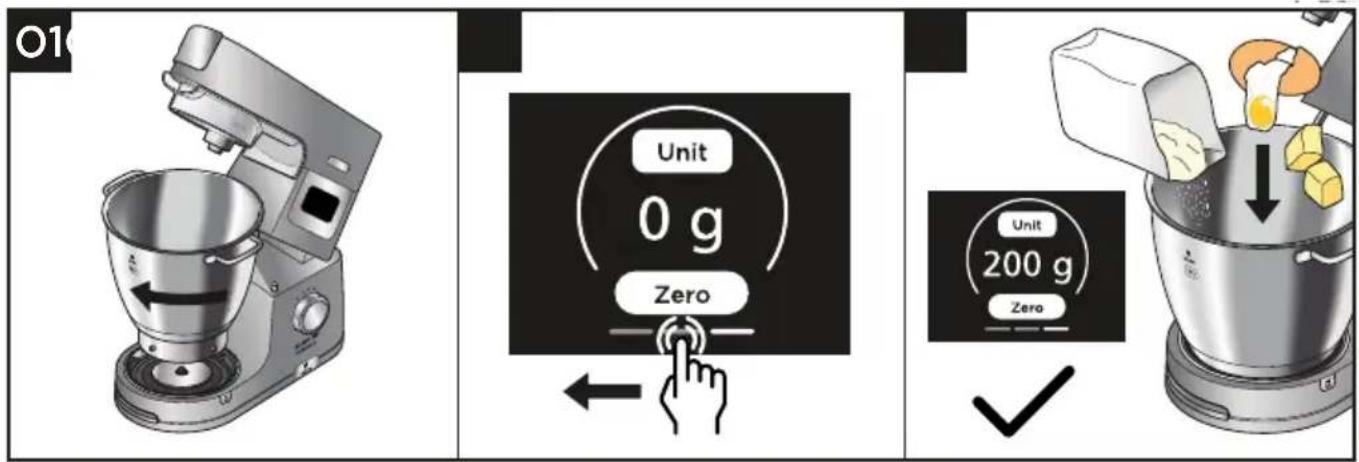
Important
● Always place the appliance on a dry, flat, stable surface prior to weighing.
- Do not apply pressure to the mixer or bowl whilst weighing as this will affect the accuracy of the scales.
- The weighing function can be used with the mixer head in either the down or up position.
• The weighing function is accurate up to 6kg.
1 Fit the bowl.
2 To select the weighing function, swipe left on the display screen until the weighing screen appears.
3 Zero the scale.
4 Weigh the ingredients.
5 To change between units tap the unit button on the weighing screen.
To Use Your Stand Mixer - Preset Programmes
Usage Diagram and Usage Instructions
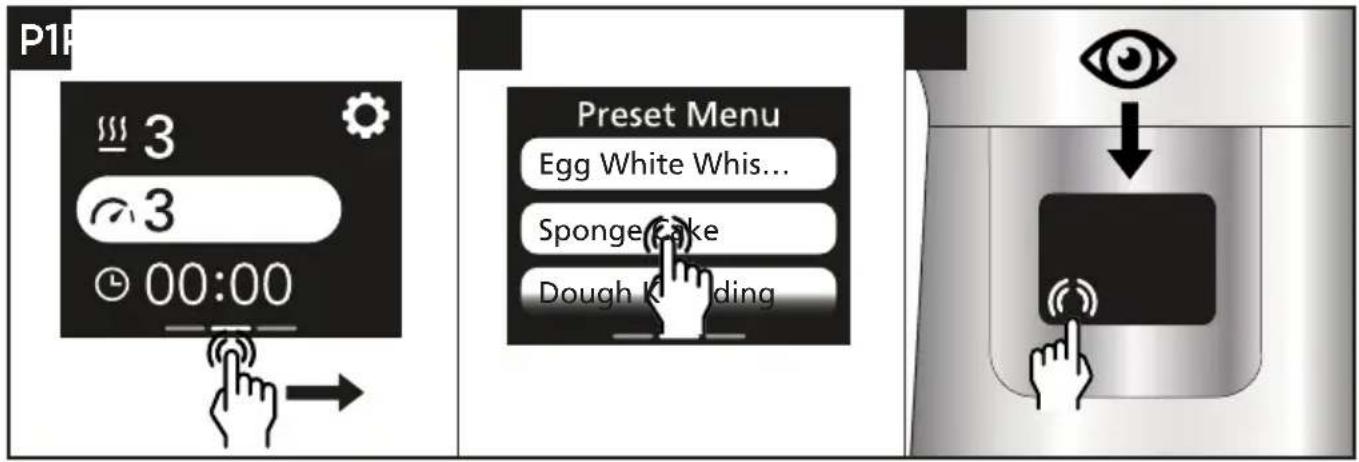
1 Swipe right to access the preset menu.
2 Choose the preset you wish to use.
3 Follow the instructions on the display screen.
4 Press the control dial to start.
5 To stop the unit at any time, press the control dial. Take care as the bowl may be hot.
| Preset Usage Chart | (Max) | ||||
| Preset Recommended Tool | Default Settings(adjustable) | Recipe Ideas / Uses | 5L 7L | ||
| Dough Proving | 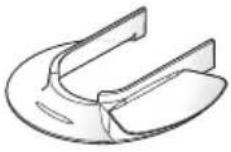 |  (5 mins - 2 hrs) (5 mins - 2 hrs)  | Proving yeasted doughs | 2.58kg Total Weight | |
| Chocolate Melting | 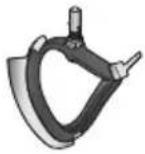 |  mins - 2 hrs) mins - 2 hrs) [IMAGE] [IMAGE] | Chocolate Mousse | 300g (cut into 2cm pieces) | |
| Swiss Meringue | 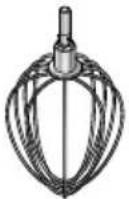 |  nin - 20 mins) nin - 20 mins) Max[IMAGE] Max[IMAGE] | Base for Buttercream frosting | 240g egg white 480g caster sugar 80g water | |
| Egg White Whisking | 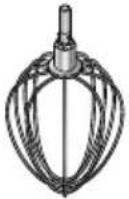 | [4mins(15 sec - 5 mins) Max[HH4YT] Max[HH4YT] OFF[IMAGE] OFF[IMAGE] | Egg whites for chocolate mousse | Refer to Recommended Usage Chart | |
| Sponge Cake | 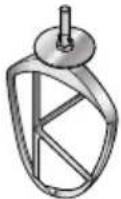 |  (30 secs - 5 mins)[TT2?]1 - Max[OHK3]OFF[IMAGE] (30 secs - 5 mins)[TT2?]1 - Max[OHK3]OFF[IMAGE] | Victoria Sponge, Cupcakes | Refer to Recommended Usage Chart | |
| Dough Kneading - Bread Dough(stiff yeasted) | 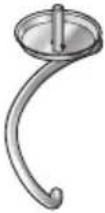 | [5mins(5 mins - 30 mins) Min to 1(min - 2) Min to 1(min - 2) OFF[IMAGE] OFF[IMAGE] | Bread Rolls, Pizza | Refer to Recommended Usage Chart | |
Usage Diagram and Usage Instructions
natural_image
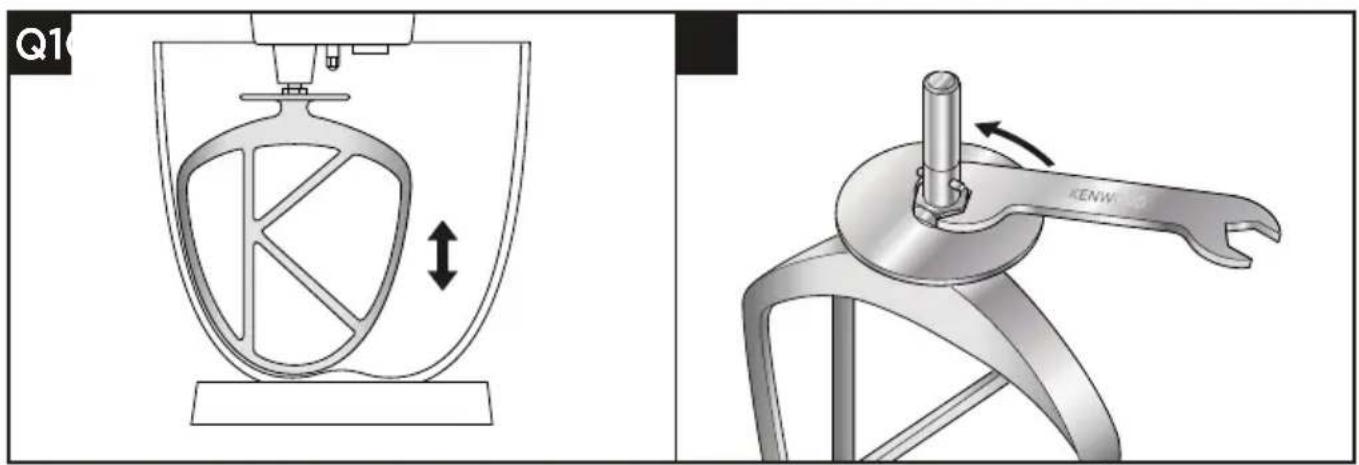
Technical illustration of a mechanical device with a rotating lever and directional arrow (no text or symbols)- The tools are set to the correct height for the bowl supplied in the factory and should not require adjustment. However, if you wish to adjust the tool use a suitable sized spanner:
TYPE KWL90 = 19mm
- Dough Tool - This tool is set at the factory and should require no adjustment.
- Whisk and K-Beater - The Whisk and K-beater should be almost touching the bottom of the bowl. If necessary adjust the height using a suitable size spanner.
- Creaming Beater - The Creaming Beater should just touch the bottom of the bowl.
1 Unplug the appliance.
2 Raise the mixer head and insert the whisk or beater.
3 Lower the mixer head. If the clearance needs to be adjusted, raise the mixer head and remove the tool. Ideally the whisk and K-beater should be almost touching the bottom of the bowl.
Creaming Beater - Ideally it should be in contact with the bowl surface so that it gently wipes the bowl during mixing.
4 Using a suitable spanner loosen the nut sufficiently to allow adjustment of the shaft. To lower the tool closer to the bottom of the bowl, turn the shaft anti-clockwise. To raise the tool away from the bottom of the bowl turn the shaft clockwise.
5 Re-tighten the nut.
6 Fit the tool to the mixer and lower the mixer head. (Check its position see points above).
7 Repeat the above steps as necessary until the tool is set correctly. Once this is achieved tighten the nut securely.
Note: Spanner shown is for illustration purpose only.
- If you experience any problems with the operation of the appliance, before calling for assistance refer to the ‘Troubleshooting Guide’ or visit www.kenwoodworld.com.
UK
If you need help with:
• using your appliance or
- servicing, spare parts or repairs (in or out of guarantee)
call Kenwood customer care on 0345 222 0458. Have your model number (e.g. TYPE KWL90) and date code (5 digit code e.g. 23T04) ready. They are on the underside of the power unit.
- Spares and Attachments
call 0844 557 3653.
Other countries
- If you experience any problems with the operation of your appliance, before requesting assistance refer to the ‘Troubleshooting Guide’ section in the manual or visit www.kenwoodworld.com.
- Please note that your product is covered by a warranty, which complies with all legal provisions concerning any existing warranty and consumer rights in the country where the product was purchased.
- If your Kenwood product malfunctions or you find any defects, please send it or bring it to an authorised KENWOOD Service Centre. To find up to date details of your nearest authorised KENWOOD Service centre visit www.kenwoodworld.com or the website specific to your Country.
- Designed and engineered by Kenwood in the UK.
- Made in China.
IMPORTANT INFORMATION FOR CORRECT DISPOSAL OF THE PRODUCT IN ACCORDANCE WITH THE EUROPEAN DIRECTIVE ON WASTE ELECTRICAL AND ELECTRONIC EQUIPMENT (WEEE)
At the end of its working life, the product must not be disposed of as urban waste. It must be taken to a special local authority differentiated waste collection centre or to a dealer providing this service.
Guarantee UK only
- If your Stand Mixer goes wrong within one year from the date you bought it, we will repair it (or replace it if necessary) free of charge provided:
- it has been used in accordance with these instructions.
• you have not misused, neglected, or damaged it; - it has not been modified (unless by KENWOOD);
- it is not second hand;
- it has not been used commercially;
• you have not fitted a plug incorrectly; and - you supply your receipt to show when you bought it.
This guarantee does not affect your statutory rights.
Troubleshooting Guide
| Problem Cause Solution | ||
| The whisk, K-beater or ceaming beater knocks against the bottom of the bowl or not reaching the ingredients in the bottom of the bowl. | Tool at the wrong height and needs adjusting. | Adjust the height using a suitable spanner - see “Tool Adjustment” section. |
| Slow speed attachment cannot be fitted. | Check your attachment is compatible for use with your model.Twist connection system required (Model KAX)  | Attachment must have the KAX twist connection system [TWIST] to fit the outlet.If you own attachments featuring the Bar Connection System [BRK] you will need to use the KAT002ME adaptor to connect these to the Twist Connection System on your Stand Mixer.For more information visit www.kenwoodworld.com/twist. |
| The Stand Mixer stops during operation.Display shows error message E27. | Overload protection or overheat system activated.Maximum capacity exceeded. | Unplug and check for obstruction or overloading.If the machine will not operate, remove some of the ingredients to reduce the load and restart.If this still does not resolve the problem, unplug and allow to stand for 45 minutes. Plug in and restart.If the machine does not restart following the above procedure contact “Customer Care” for further advice. |
| Display screen shows an alpha/numerical error code different from E:27. | Appliance not functioning properly. | Switch off the appliance, wait 30 seconds, then switch back on.If the problem persists, contact an authorised Kenwood Service Centre.To find up to date details of your nearest Kenwood Service Centre visit www.kenwoodworld.com or the website specific to your country. |
| When melting and mixing chocolate, the motor appears to be struggling. Chunks of chocolate trapped between the edge of the creaming beater and side of bowl. | Size of chocolate chunks too large or qty too much.Height of creaming beater not adjusted correctly. | Ensure pieces of chocolate are uniform in size (2cm x 2cm) and quantity does not exceed 300g. Adjust the height of the creaming beater, see 'Tool Adjustment section'. |
| Unable to adjust warming level, speed and time setting. | Selected function will time out after 10 seconds if not adjusted. | Normal operation.Press function on touch screen and adjust setting using the control dial. |
| No power to appliance /display screen not coming on. | Appliance not plugged in. On/Off switch not operated.Appliance has gone into standby mode. | Check appliance plugged in. Press the On/Off switch to the On position.Touch the display screen or rotate the control dial. |
| Appliance not operating. | Control dial not pressed. Press the control dial to start. | |
| Timer not counting down on display screen. | During the heating stage of a preset, the timer will not count down until the correct temperature is reached, or until 5 minutes have passed. | Normal operation. |
| Heavy movement or vibrations during operation. | Uneven load in bowl causing excessive vibrations.Maximum capacity exceeded.Wrong tool or speed used. | Reduce quantity or rearrange food in bowl and restart unit.Refer to the relevant programme and recommended speed charts for correct tool and speed to use. |
| Display screen shows “- -”. | The scale is zeroing. Norma | operation. |
| Display screen shows a minus reading. | Display not zeroed and either ingredients or the bowl has been removed.Ingredients or items are pressed against or underneath the appliance.Appliance is pressed against a wall. | Either zero the screen, replace the missing ingredients or refit the bowl.Ensure there are no ingredients or items pressed against or underneath the appliance.Ensure there is space between the appliance and any walls.Zero the display before weighing next ingredients. |
| Display screen not registering small quantities. | Quantity weighed too small. Use | teaspoon or tablespoon measures for very small quantities. |
| Weight changed on display screen. | Appliance moved during operation.Mixer head raised or lowered during operation. | Always place the appliance on a dry flat stable surface prior to weighing.Ensure that the power cable is not under tension.Do not move the appliance during operation of the weighing function.Zero the display before weighing next ingredients. |
| Unable to switch quickly between metric and imperial units. | Appliance is reconfiguring to display previously selected unit and measurement. | Wait 5 seconds and try again. |
| 1) Fast single beep.2) Quick double beep3) Triple Beep | 1) Pressing the control dial to start or stop the machine or the head is lifted during operation2) Appliance waiting - appliance will give a quick double beep 10 minutes and 5 minutes before the end of the keep warm cycle.3) Signifies the following;- End of preset programme- End of manual operation- End of keep warm cycle- When appliance is about to stir. | Normal OperationNormal OperationNormal Operation |
Nederlands
natural_image
Three-panel diagram showing a hand holding a mechanical clamp, with no visible text or symbolsBelangrijk
Belangrijk
natural_image
Technical illustration of a mechanical device with a rotating lever and directional arrow (no text or symbols)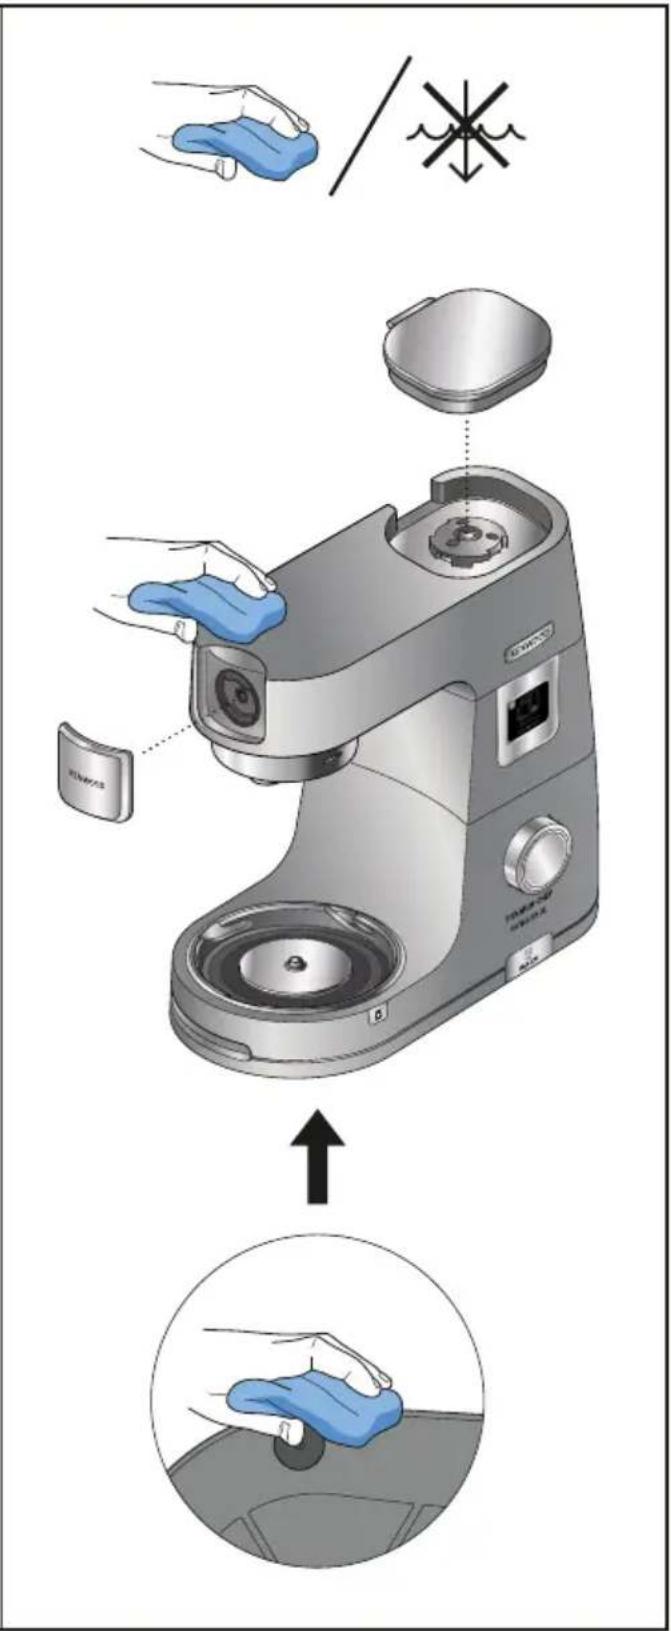
natural_image
Three-panel illustration showing a hand holding a mechanical clamp, with no visible text or symbols.Important
Important
natural_image
Technical illustration of a mechanical device with a rotating lever and directional arrow (no text or symbols)Zubehör-Anschlüsse
natural_image
Mechanical clamp assembly with curved metal components (no text or symbols visible)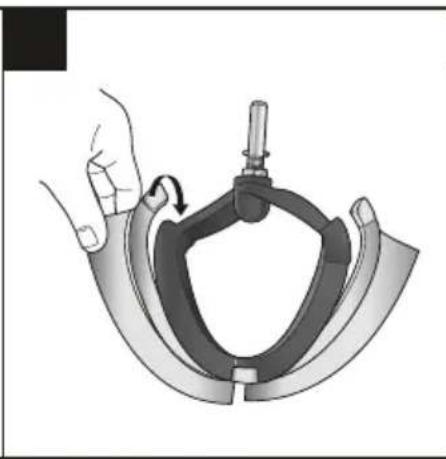
natural_image
Illustration of a hand holding a mechanical clamp or bracket, with no visible text or symbols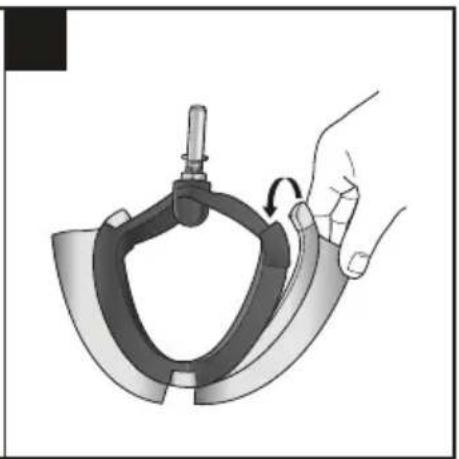
natural_image
Illustration of a hand holding a mechanical clamp or clamp device, with no visible text or symbols.Wichtig
Wichtig
natural_image
Technical illustration of a mechanical device with a rotating lever and directional arrow (no text or symbols)natural_image
Three-panel diagram showing a hand holding a mechanical clamp, with no visible text or symbols.Importante
Importante
natural_image
Technical illustration of a mechanical device with a rotating lever and directional arrow (no text or symbols)MODELLO KWL90 = 19 mm
natural_image
Three-panel illustration showing a hand holding a mechanical clamp, with arrows indicating motion (no text or symbols)Importante
Importante
natural_image
Technical illustration of a mechanical device with a rotating lever and directional arrow (no text or symbols)natural_image
Three-panel illustration showing a hand holding a mechanical clamp or bracket, with no visible text or symbols.Important
Importante
natural_image
Technical illustration of a kitchen mixer with directional arrows indicating motion (no text or symbols)natural_image
Mechanical clamp assembly with curved metal components (no text or symbols visible)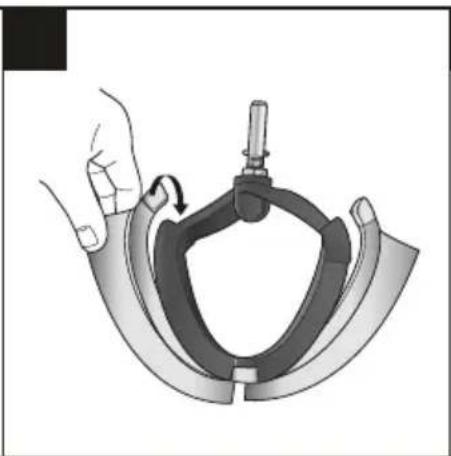
natural_image
Illustration of a hand holding a mechanical clamp or clamp device with a curved handle and lever (no text or symbols)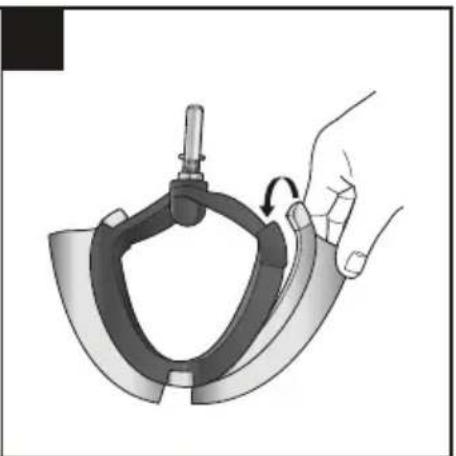
natural_image
Illustration of a hand holding a mechanical clamp or bracket, with an arrow indicating rotation (no text or symbols present)Important
Consells i suggeriments
Important
natural_image
Technical illustration of a mechanical device with a rotating lever and directional arrow (no text or symbols)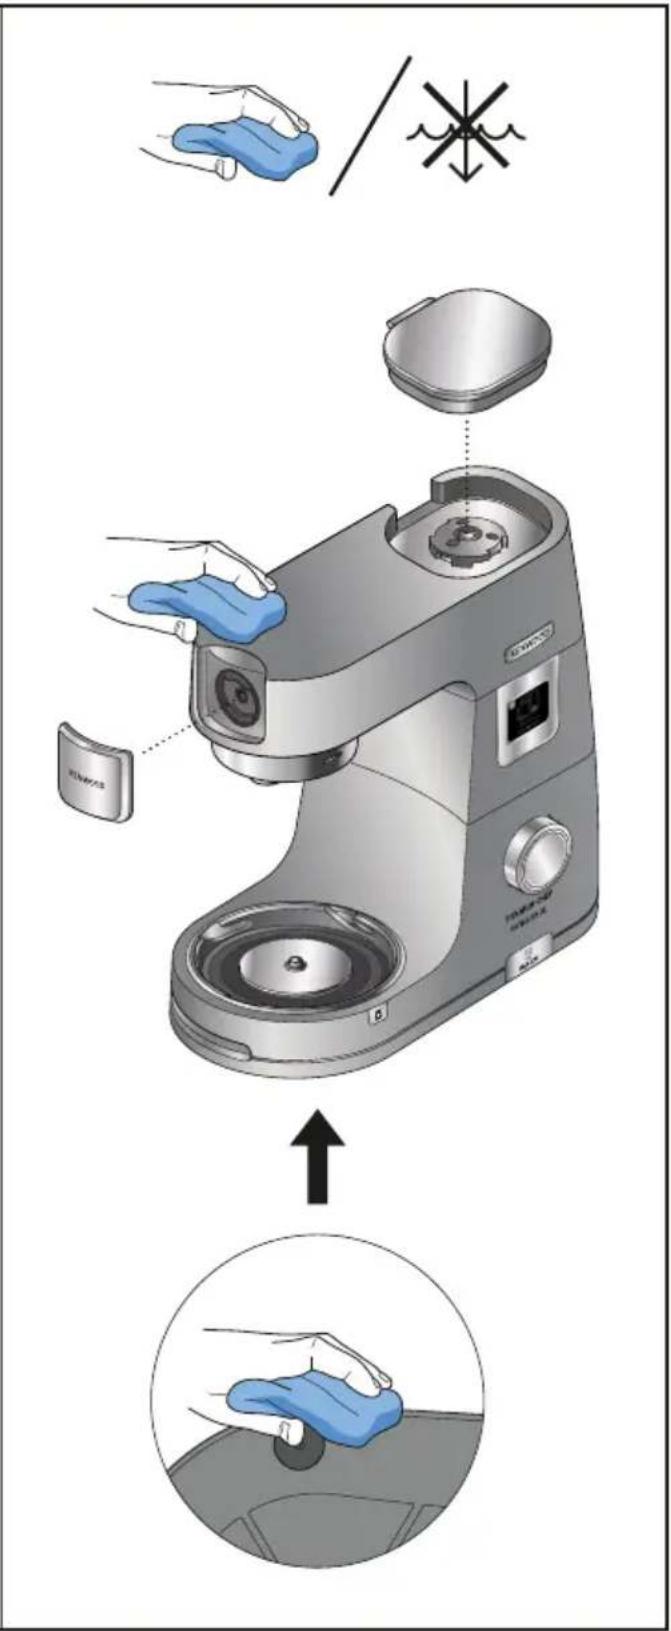
Udtag til tilbehør
Vigtigt
natural_image
Technical illustration of a mechanical device with a rotating lever and directional arrow (no text or symbols)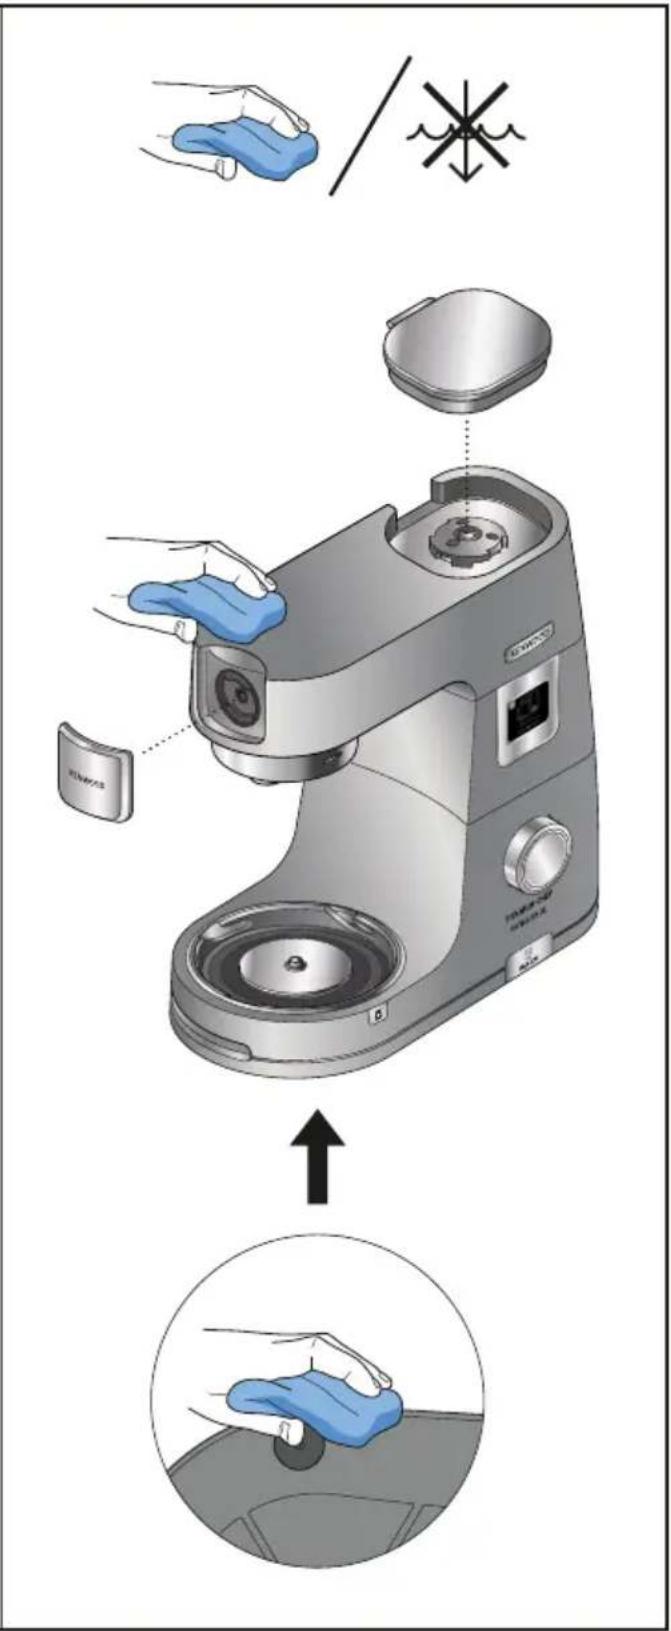
Uttag för tillbehör
① Höghastighetsuttag
② Låghastighetsuttag
③ Skåluttag
Mixer
Viktigt
natural_image
Technical illustration of a mechanical device with a rotating lever and directional arrow (no text or symbols)● Med ON/OFF-bryter i "I"-stilling
Tilbehøruttak
Viktig
natural_image
Technical illustration of a mechanical device with a rotating lever and directional arrow (no text or symbols)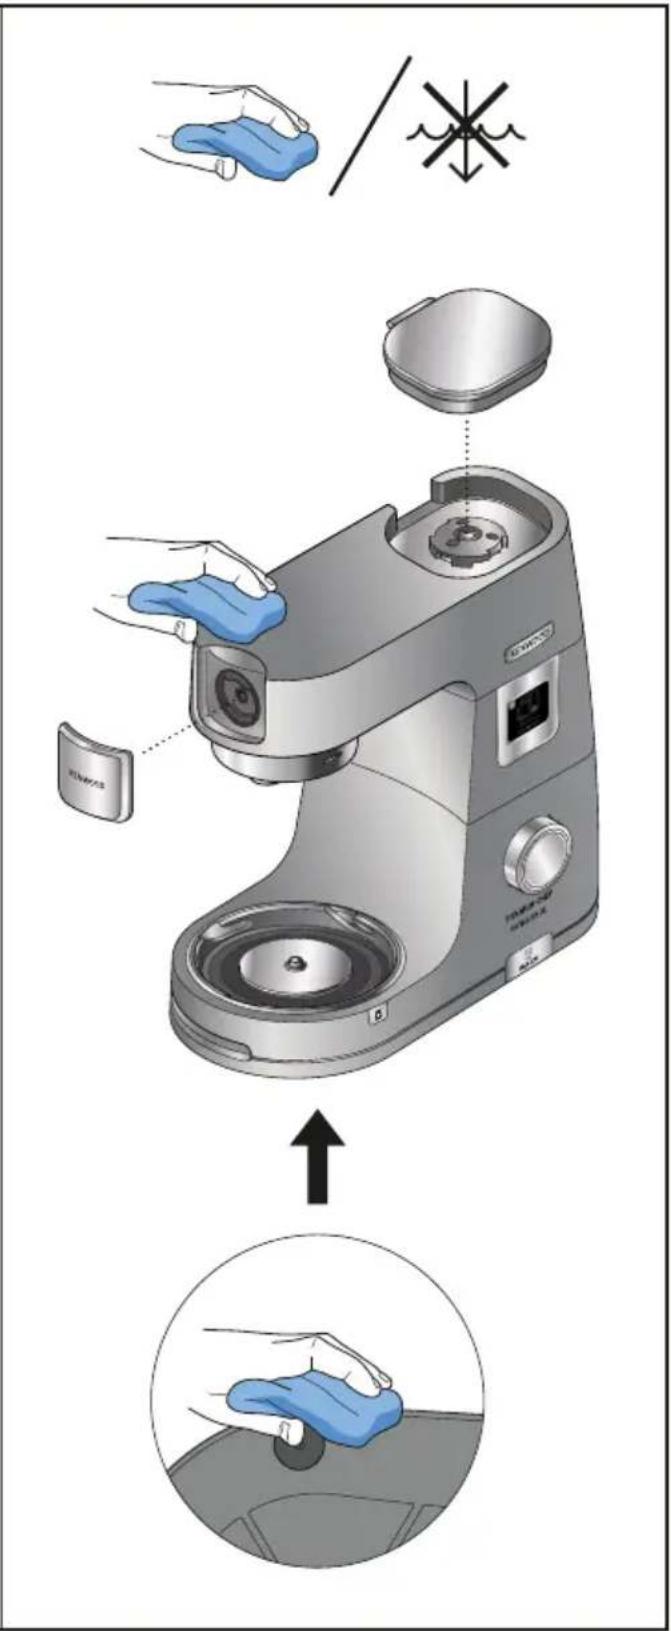
Tärkeää
natural_image
Technical illustration of a mechanical device with a rotating lever and directional arrow (no text or symbols)Eklenti çıkışları
natural_image
Mechanical clamp or bracket assembly with curved metal parts and a central fastener (no text or symbols visible)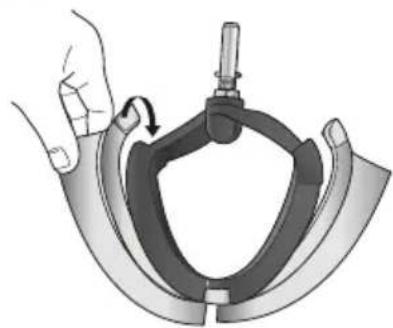
natural_image
Illustration of a hand holding a mechanical clamp or clamp device with a curved handle and lever (no text or symbols)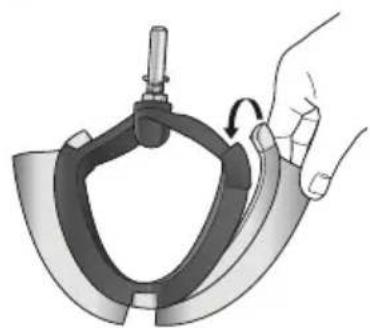
natural_image
Illustration of a hand holding a curved mechanical component with a knob, showing a rotational change (no text or symbols)Önemli
Önemli
natural_image
Technical illustration of a mechanical device with a rotating lever and directional arrow (no text or symbols)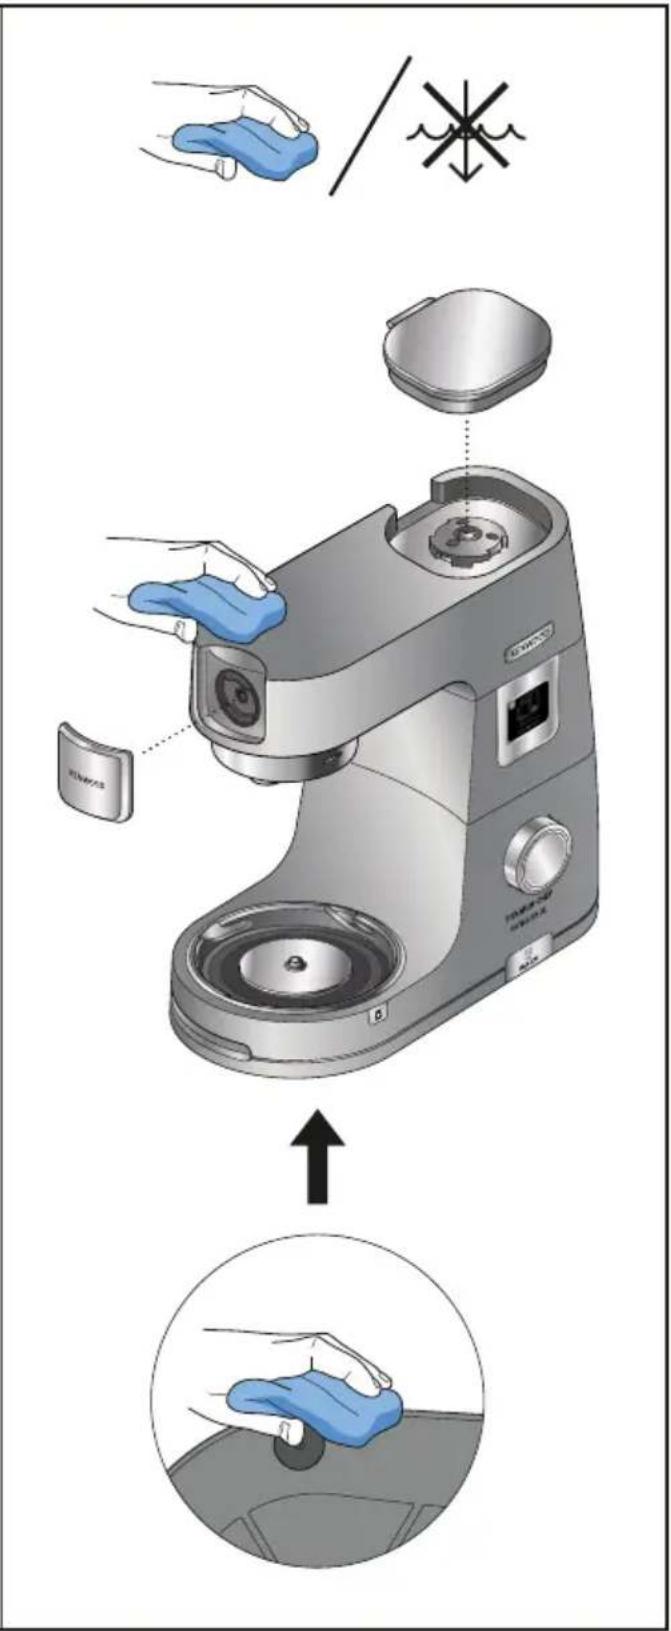
natural_image
Three-panel illustration showing a hand holding a mechanical clamp, with no visible text or symbols.Důležité
Důležité upozornění
natural_image
Technical illustration of a mechanical device with a rotating lever and directional arrow (no text or symbols)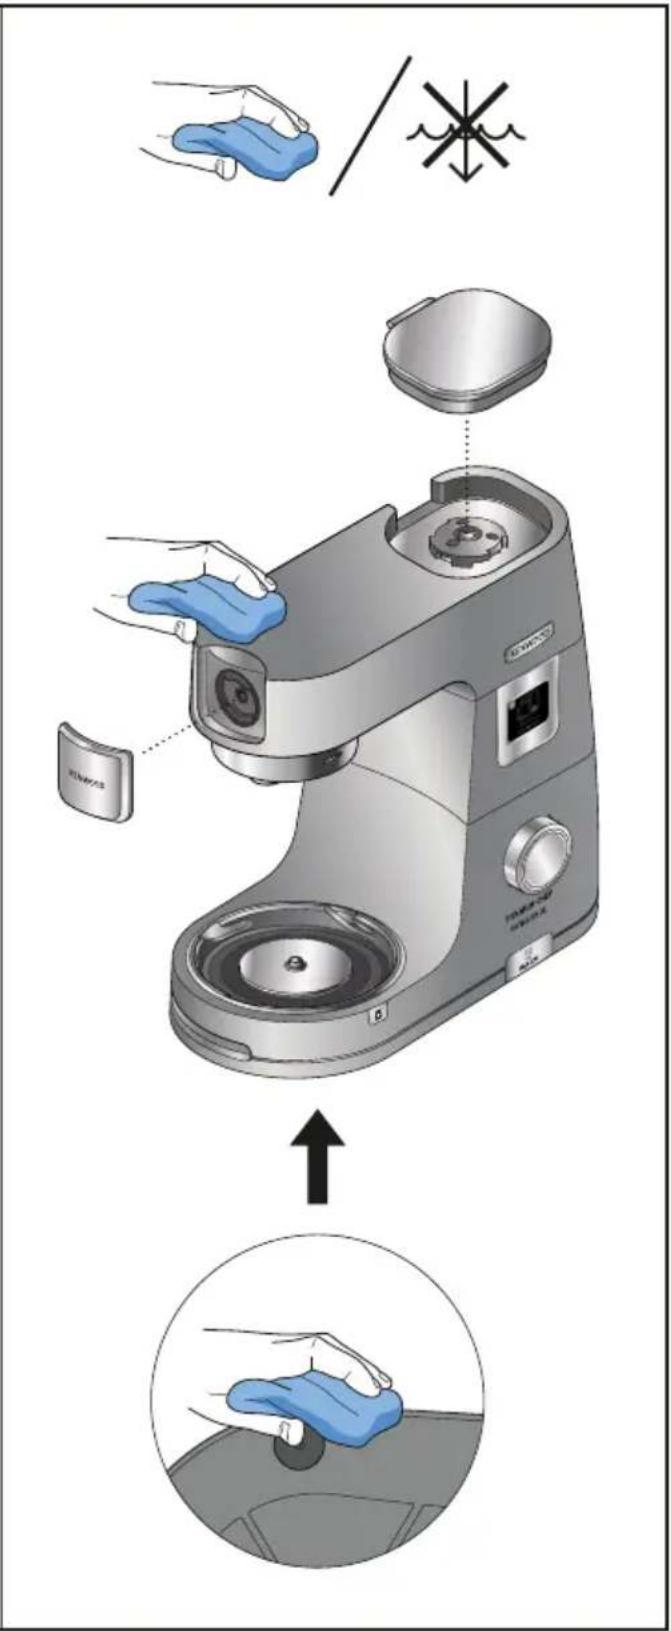
Meghajtó nyílások
Fontos
natural_image
Technical illustration of a mechanical device with a rotating lever and directional arrows, shown from two different angles (no text or symbols present)Gniazda nasadek
natural_image
Three-panel illustration showing a hand holding a mechanical clamp, with no visible text or symbols.Uwaga
Ważne
natural_image
Technical illustration of a mechanical device with a rotating lever and directional arrow (no text or symbols)natural_image
Three-panel illustration showing a hand holding a mechanical clamp, with no visible text or symbols.Σημαντικό
Σημαντικό
natural_image
Technical illustration of a mechanical device with a rotating lever and directional arrow (no text or symbols)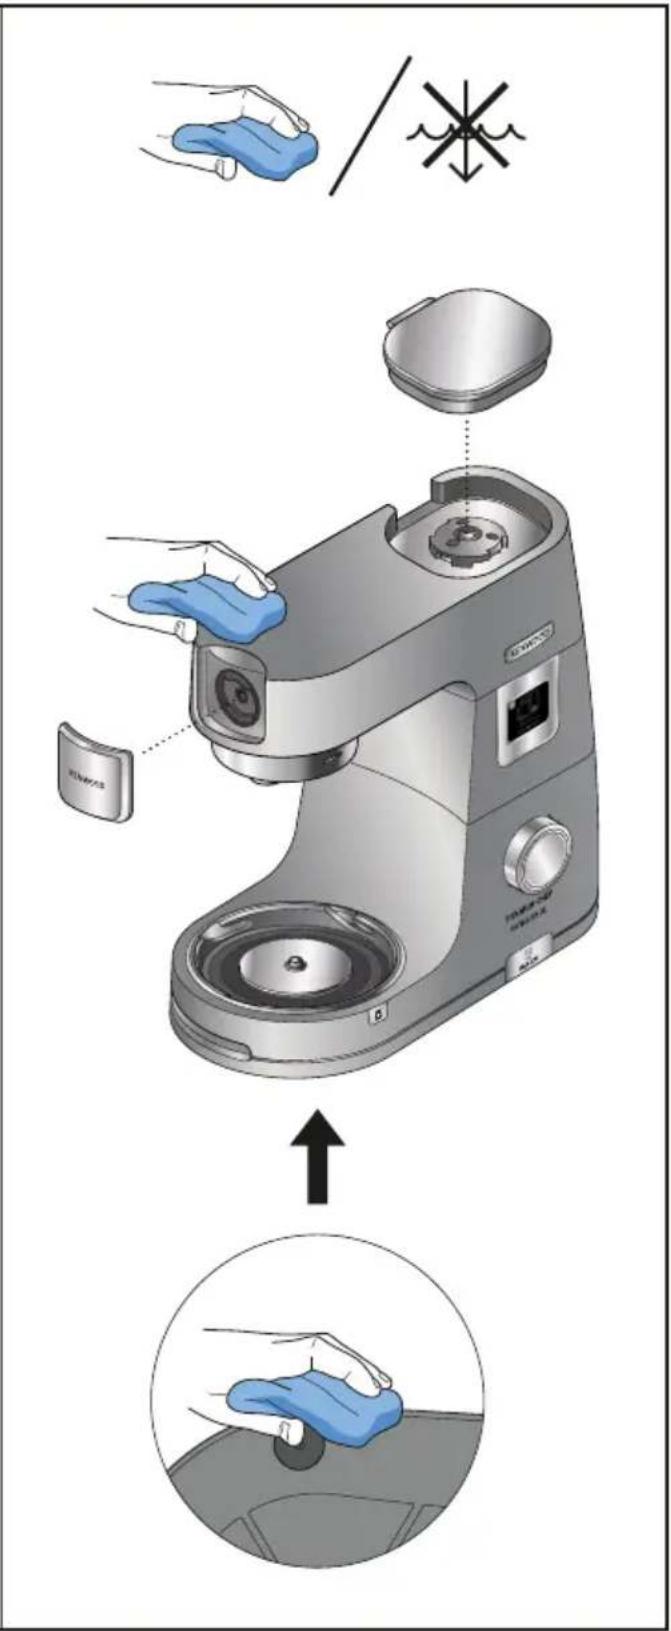
Приводы для насадок
natural_image
Three-panel illustration showing a hand holding a mechanical clamp, with no visible text or symbols.Important
Важно
natural_image
Technical illustration of a mechanical device with a rotating lever and directional arrow (no text or symbols)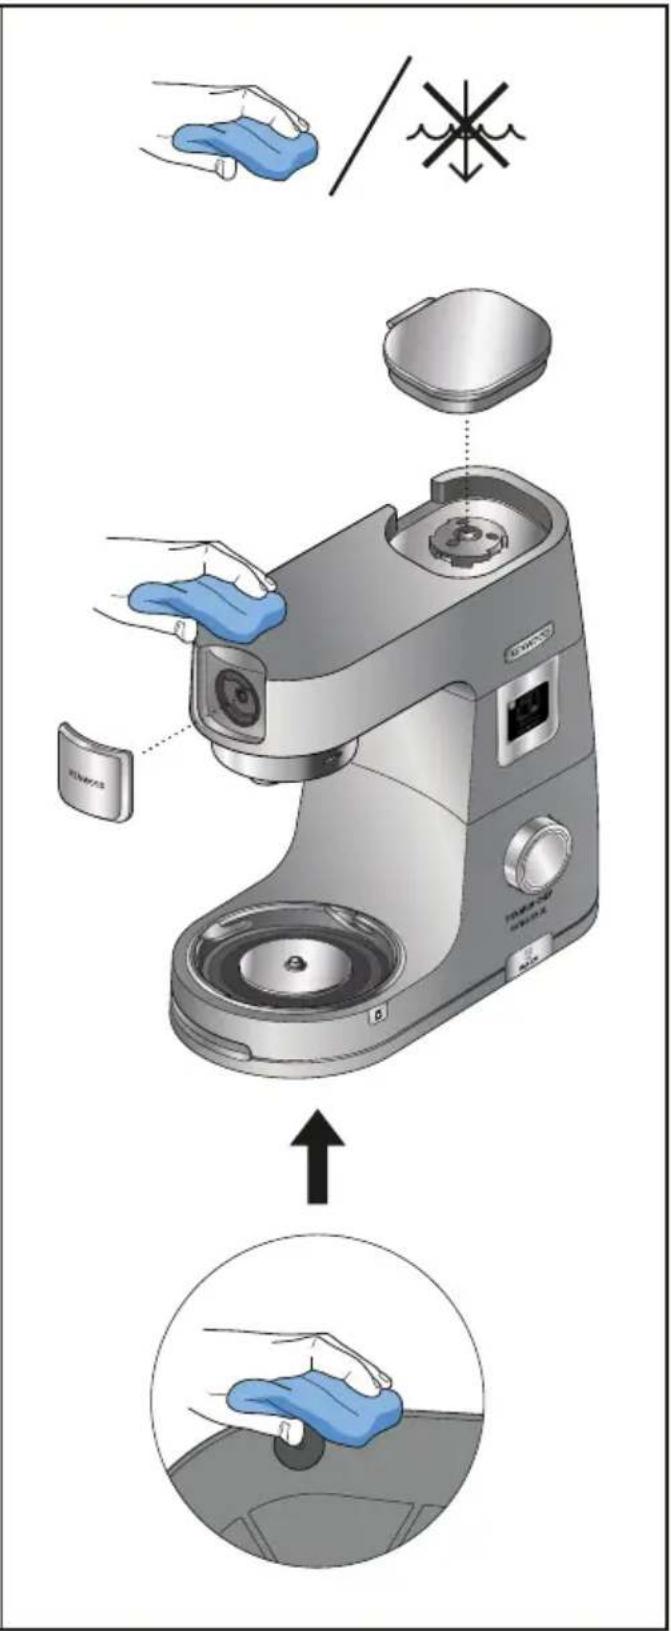
Кондырғы щығыстары
natural_image
Mechanical clamp device with curved metal frame and central hub (no text or symbols visible)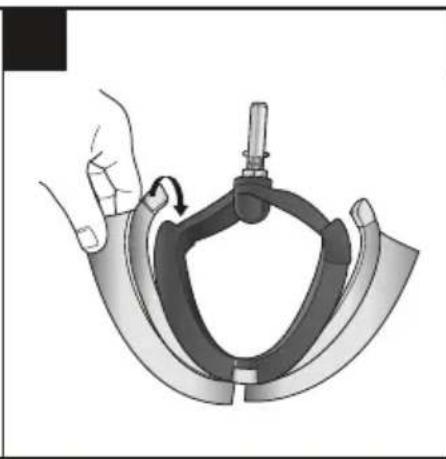
natural_image
Illustration of a hand holding a mechanical clamp or bracket, with no visible text or symbols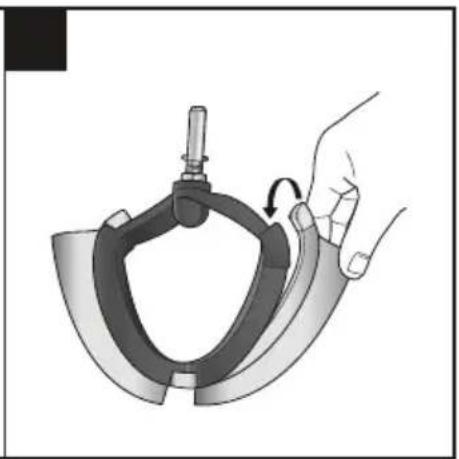
natural_image
Illustration of a hand holding a mechanical clamp or clamp device with a rotating arrow indicating rotation (no text or symbols present)Маңызды
Маңызды
natural_image
Technical illustration of a mechanical device with a rotating lever and directional arrow (no text or symbols)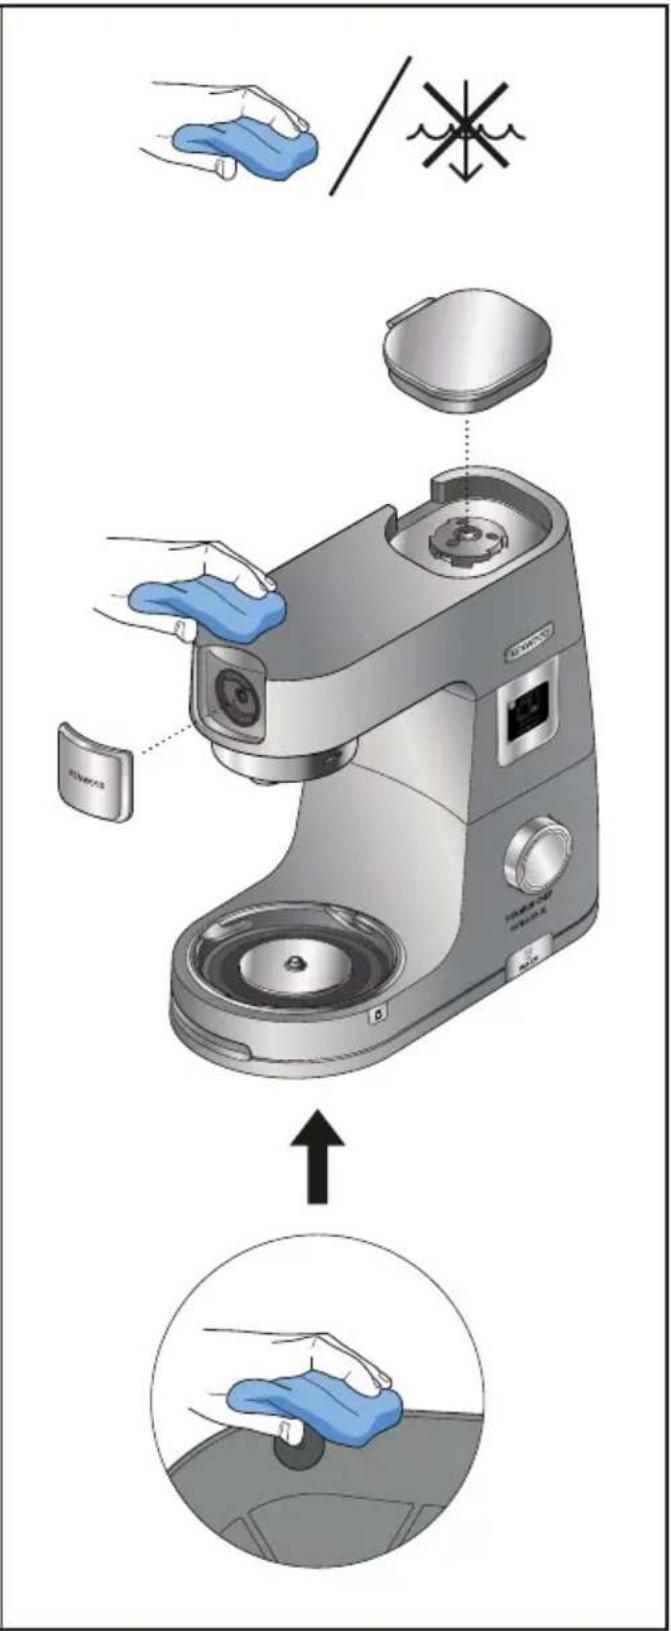
natural_image
Three-panel illustration showing a hand holding a mechanical clamp, with no visible text or symbols.Dôležité
Dôležité
natural_image
Technical illustration of a mechanical device with a rotating lever and directional arrow (no text or symbols)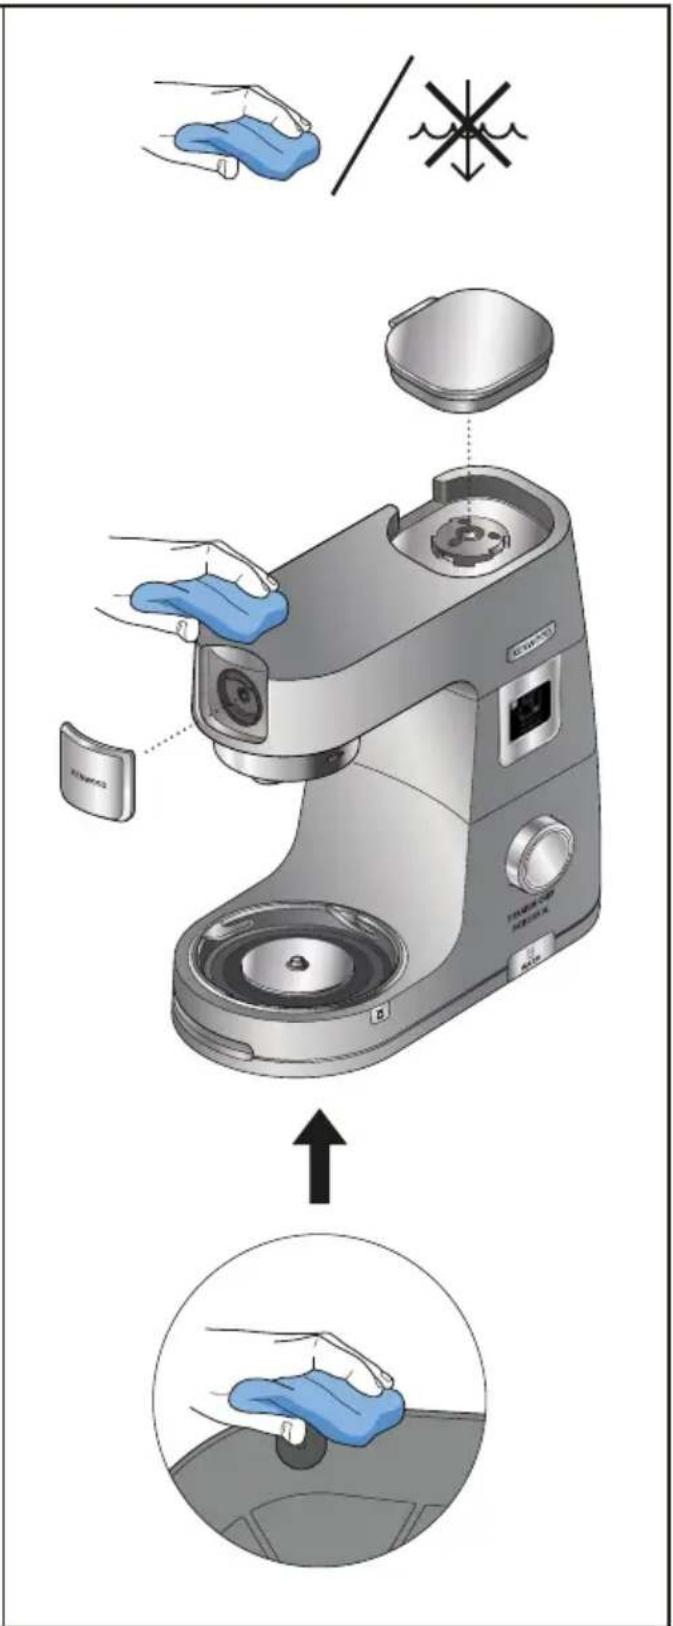
natural_image
Three-panel illustration showing a hand holding a mechanical clamp, with no visible text or symbols.Важливо
Важливо
natural_image
Technical illustration of a mechanical device with a rotating lever and directional arrow (no text or symbols)natural_image
Diagram of a mechanical device with internal components and directional arrow, labeled Q1 (no text or symbols on the diagram itself)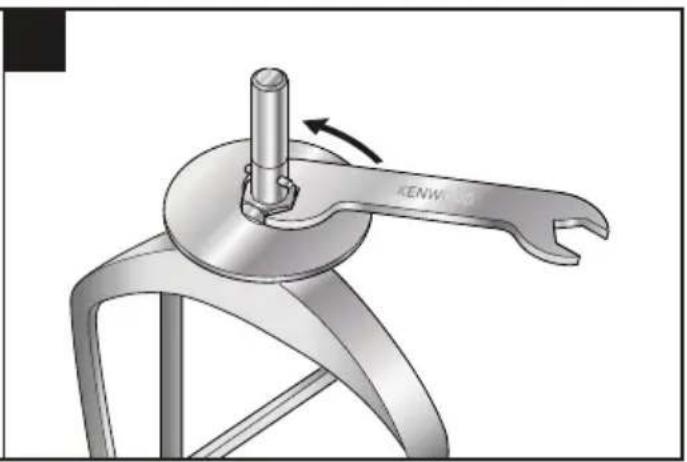
natural_image
Mechanical component diagram showing a lever mechanism with a central shaft and base, no text or symbols present.مهم
natural_image
Mechanical clamp or bracket assembly with curved metal parts and a central mounting hole (no text or symbols visible)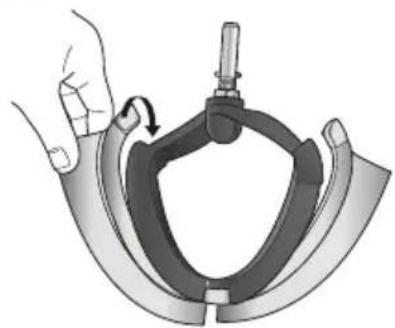
natural_image
Illustration of a hand holding a mechanical clamp or bracket, with no visible text or symbols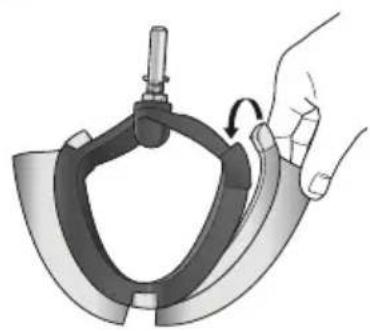
natural_image
Illustration of a hand holding a mechanical clamp or clamp device, with no visible text or symbols.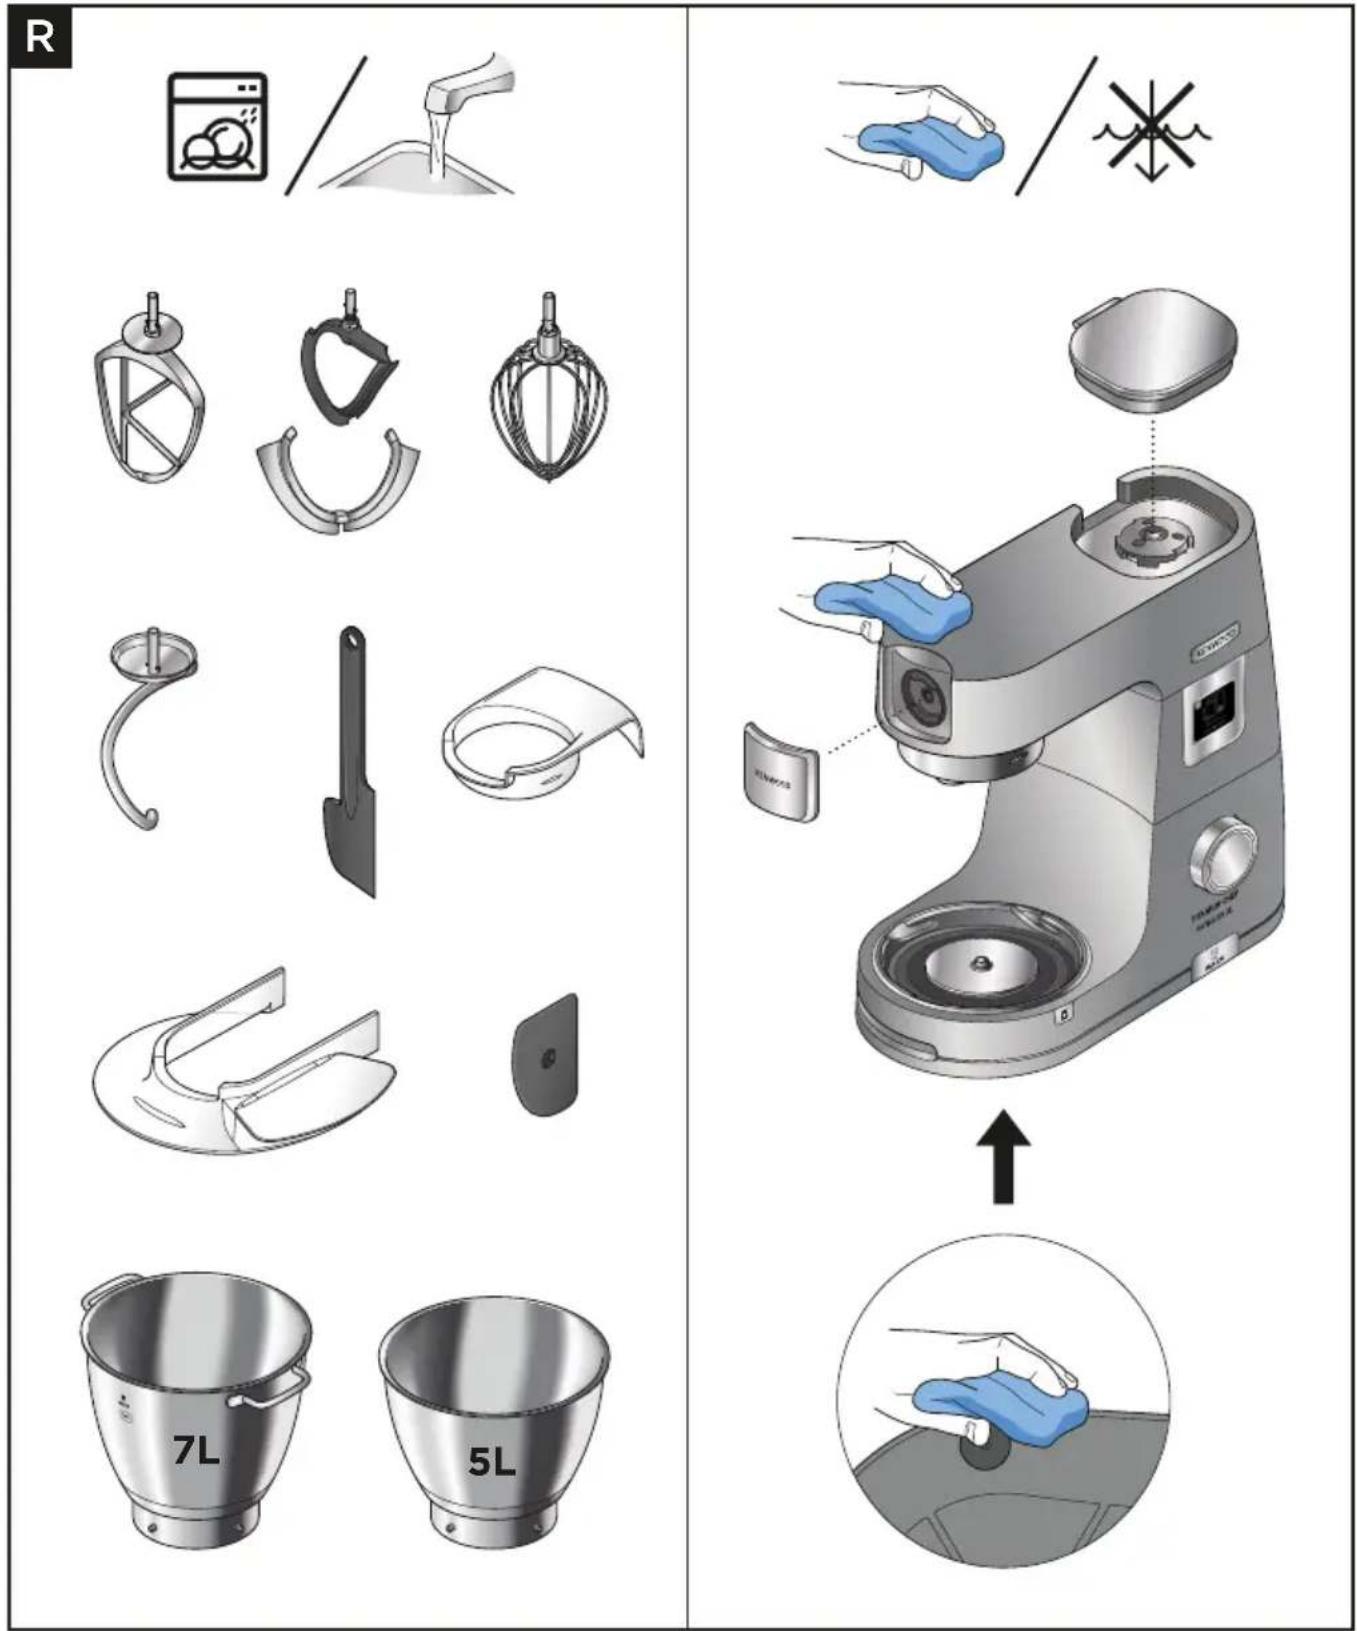
- Heating
- Power Consumption
- Before plugging in
- Important - Plug and Fuse Information
- THIS APPLIANCE MUST BE EARTHED
- Note:
- Care and Cleaning
- Power Unit And Outlet Covers
- Bowls
- Tools And Splashguard
- Attachment outlets
- Mixer
- Usage Diagram and Usage Instructions
- Important
- Splashguard Assembly
- To Assemble The Creaming Beater
- To Use Your Stand Mixer - Manual Operation (Warming Mode)
- To Use Your Stand Mixer- Manual Operation (Non Warming)
- Hints and Tips
- Hints and Tips - Dough Tool
- Manual Mode (Non Warming) - Usage Chart and Recipes
- Pizza Dough
- To Use Your Stand Mixer (Recommended Operating Speeds and Temperatures)
- To Use Your Bowl Bright™ (In-Bowl Illumination)
- To Use Your Stand Mixer Display Screen Explained
- Warming Levels and Speed Settings Explained
- To Use Your Stand Mixer - Attachments
- High-Speed Outlet Cover
- Slow-Speed Outlet Cover
- Recipe
- Prune Marinade
- To Use Your Stand Mixer - Preset Programmes
- UK
- Other countries
- IMPORTANT INFORMATION FOR CORRECT DISPOSAL OF THE PRODUCT IN ACCORDANCE WITH THE EUROPEAN DIRECTIVE ON WASTE ELECTRICAL AND ELECTRONIC EQUIPMENT (WEEE)
- Guarantee UK only
- Nederlands
- Belangrijk
- Zubehör-Anschlüsse
- Wichtig
- Importante
- Consells i suggeriments
- Udtag til tilbehør
- Vigtigt
- Uttag för tillbehör
- Viktigt
- Tilbehøruttak
- Viktig
- Tärkeää
- Eklenti çıkışları
- Önemli
- Důležité
- Důležité upozornění
- Meghajtó nyílások
- Fontos
- Gniazda nasadek
- Uwaga
- Ważne
- Σημαντικό
- Приводы для насадок
- Важно
- Кондырғы щығыстары
- Маңызды
- Dôležité
- Важливо
Brand : KENWOOD
Model : Chef Titanium Patissier XL KWL90
Category : Food processor