
IAN 290253 - Alarm Clock AURIOL - Free user manual and instructions
Find the device manual for free IAN 290253 AURIOL in PDF.


| Brand | Auriol |
| Model | IAN 290253 |
| Product type | Radio alarm clock |
| Power supply | 4.5 V (DC) via USB cable or 3 LR03 (AAA, 1.5 V) batteries |
| Main functions | Display of time, date and room temperature; 3 independent alarms (A1, A2, A3) with options for 1 day, 5 days or 7 days; snooze function; brightness adjustment (4 levels); sound or touch control; 12/24 h format; alternating display of time/date/temperature |
| Temperature range | Approximately 0°C to 50°C (32°F to 122°F) |
| Care and cleaning | Clean the exterior with a soft, dry cloth. Do not use harsh chemicals. |
| Safety | Use by children over 8 years old under supervision. Keep batteries out of reach of children. Do not recharge non-rechargeable batteries. Do not expose to extreme temperatures. |
| Package contents | 1 USB alarm clock, 3 LR03 batteries, 1 USB cable, 1 instruction manual |
| General information | For domestic use only. CE certified. Manufacturer: OWIM GmbH & Co. KG, Germany. |
Frequently Asked Questions - IAN 290253 AURIOL
User questions about IAN 290253 AURIOL
0 question about this device. Answer the ones you know or ask your own.
Ask a new question about this device
Download the instructions for your Alarm Clock in PDF format for free! Find your manual IAN 290253 - AURIOL and take your electronic device back in hand. On this page are published all the documents necessary for the use of your device. IAN 290253 by AURIOL.
USER MANUAL IAN 290253 AURIOL
USB-WECKER / USB ALARM CLOCK / RÉVEIL USB
DE AT CH
USB-WECKER
Operation and safety notes
FR BE
RÉVEIL USB
natural_image
Simple line drawing of a house with no text or symbolsnatural_image
Warning sign depicting a broken explosion (no text or symbols)EXPLOSIONSGEFAHR!
natural_image
Symbolic icon of a person recycling a circular arrow, no text or numbers presentnatural_image
Silhouette of a person disposing of trash into a bin (no text or symbols)natural_image
Symbol of a trash bin with crossed lines indicating no waste or discharge (no text or numbers present)natural_image
Simple line drawing of a trash bin with two crossed lines indicating no waste or discharge (no text or symbols)List of pictograms used 34
Introduction 34
Intended use 35
Parts description. 35
Technical data 37
Scope of delivery....37
General safety instructions 38
Safety instructions for batteries / rechargeable batteries . 40
Before initial use 48
Powered by batteries 48
Powered by low voltage source. 48
Replacing / removing the batteries ..... 49
Initial use....49
Changing basic settings. 49
Changing alarm settings 52
Activate and deactivate the alarm function ..... 53
Using the snooze function 54
Changing day / night setting. 54
Using the sound-controlled function. 55
Troubleshooting 56
Cleaning and care 57
Disposal....57
Simplified EU declaration of conformity .....60
List of pictograms used
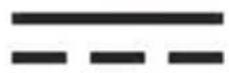
Direct current
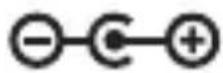
Polarity

natural_image
Simple line drawing of a house with no text or symbolsSuitable for indoor use only
USB ALARM CLOCK
Introduction
We congratulate you on the purchase of your new product. You have chosen a high quality product. The instructions for use are part of the product. They contain important information concerning safety, use and disposal. Before using the product,
34 GB/IE
please familiarise yourself with all of the safety information and instructions for use. Only use the product as described and for the specified applications. If you pass the product on to anyone else, please ensure that you also pass on all the documentation with it.
Intended use
This product shows time, date and indoor temperature. The product is only suitable for use in private households and is not intended for commercial use.
Parts description
1 SET button: Press this button to switch among the time / date / temperature display. Hold this button to access the basic settings mode. Confirm settings with this button.
2 UP button: Press this button to select the time display format 12 hrs or 24 hrs. Press and hold this button to activate / deactivate sound-controlled function.
3 DOWN button: Press this button to access the day / night setting mode. Press and hold this button to select between time display and alternating time / date / temperature display. A "Beep" sound will be heard while the display change is confirmed.
4 ALARM button: Press this button to access the alarm settings mode. Press and hold this button to active or deactivate the alarm function.
5 SNOOZE button: Press this button to active the snooze function when the alarming. Press and hold this button to deactivate the snooze function.
6 USB socket
7 Battery compartment
8 Battery compartment cover
9 PM indicator
10 Display
11 Alarm indicator (in the time display), degree indicator (in the temperature display)
12 USB cable
- Technical data
Operating voltage: 4.5 V (direct current)
Batteries: 3 x batteries LR03 (type AAA, 1.5 V)
Temperature range: approx. 0–50 °C (32–122 °F)
USB cable polarity of the power supply:

(direct current) 200 mA
- Scope of delivery
1 USB alarm clock
3 Batteries LRO3
1 USB cable
1 Instructions for use

General safety instructions
Before using the product, please familiarise yourself with all of the safety information and instructions for use! When passing this product on to others, please also include all the documents!

WARNING! DANGER OF DEATH AND ACCIDENTS FOR TODDLERS AND CHILDREN!
38 GB/IE
This product may be used by children age 8 years and up, as well as by persons with reduced physical, sensory or mental capacities, or lacking experience and / or knowledge, so long as they are supervised or instructed in the safe use of the product and understand the associated risks. Children should not be allowed to play with the product.
Cleaning and user maintenance should not be performed by children without supervision.

Safety instructions for batteries / recharge- able batteries
■ DANGER TO LIFE! Keep
batteries / rechargeable batteries out of reach of children.
If accidentally swallowed seek immediate medical attention.
natural_image
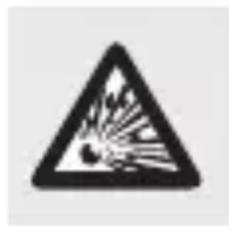
Warning symbol depicting a explosion or impact with radiating lines (no text or numbers)DANGER OF EXPLOSION!
Never recharge non- rechargeable batteries. Do not short-circuit batteries / rechargeable batteries and / or open them. Overheating, fire or bursting can be the result.
■ Never throw batteries / rechargeable batteries into fire or water.
- Do not exert mechanical loads to batteries / rechargeable batteries.
Risk of leakage of batteries / rechargeable batteries
■ Avoid extreme environmental conditions and temperatures,
which could affect batteries / rechargeable batteries, e.g. radiators / direct sunlight.
■ Avoid contact with the skin, eyes and mucous membranes. In the event of contact with battery acid, thoroughly flush the affected area with plenty of clean water and seek immediate medical attention.

WEAR PROTECTIVE GLOVES!
Leaked or damaged batteries / rechargeable batteries can cause burns on contact with the skin. Wear suitable protective gloves at all times if such an event occurs.
In the event of a leakage of batteries / rechargeable batteries, immediately remove
them from the product to prevent damage.
■ Only use the same type of batteries / rechargeable batteries. Do not mix used and new batteries / rechargeable batteries.
■ Remove batteries / rechargeable batteries if the product will not be used for a longer period.
Risk of damage of the product
■ Only use the specified type of battery / rechargeable battery!
■ Insert batteries / rechargeable batteries according to polarity marks (+) and (−) on the battery / rechargeable battery and the product.
■ Clean the contacts on the battery / rechargeable battery and in the battery compartment before inserting!
■ Remove exhausted batteries / rechargeable batteries from the product immediately.
Before initial use
■ Remove all packaging materials from the product.
● Powered by batteries
- Open the battery compartment cover and insert three batteries type AAA in the battery compartment 7. Be sure the polarity is correct. This is indicated in the battery compartment 7. Close the battery compartment 7.
● Powered by low voltage source
Plug the USB cable ^1/2 round plug into the USB socket 6 and connect to your computer with a USB port. Alternatively, you can use a USB adapter, which can be bought from a retailer.
● Replacing / removing the batteries
Note: If the display becomes dim or keeps flashing continuously, the batteries need to be changed.
■ Always replace all the batteries at the same time.
■ Only use battery type LR03.
- Open the battery compartment by the handle of the battery compartment cover 8.
If applicable, remove the old batteries. When powered by batteries, insert new batteries. Check the polarity (shown in the battery compartment 7) of the batteries.
- Close the battery compartment. Your product is now again ready for use.
Initial use
- Changing basic settings
- Press and hold the SET button for 3 seconds to access the basic settings mode.
During each of the following programming steps press the UP button 2 or DOWN button 3 to make a change.
TIP: Pressing and holding the UP button 2 or DOWN button 3 will quickly increase or decrease the numbers.
Press the SET button to confirm a setting. You will automatically advance to the next programming step.
Note: If no changes are made for 15 seconds the product will automatically return to normal display mode.
The following programming steps can be adjusted one after the other:
Step Setting Display Explanation
| 1 | Set year The year display flashes. | The year can be set up to 2099. |
| 2 | Set month The month display flashes. |
Step Setting Display Explanation
| 3 | Set day The day display flashes. | ||
| 4 | Set hour The hour display flashes. | ||
| 5 | Set minute The minute display flashes. | ||
| 6 | Set date format | DDMM MMDD | The date display format in Day-Month (DDMM) or Month-Day (MMDD). |
| 7 | Set temperature unit | °C °F | The temperature display unit in degree Celsius (°C) or degree Fahrenheit (°F). |
In program step ⑦ press the SET button 1 to confirm the temperature unit. The product will return to normal display mode.
Changing alarm settings
This product can be set with 3 alarm times (A1, A2 & A3).
Each alarm can be set with "alarm off", "5 day alarm" or "7 day alarm".
- Press the ALARM button 4 to access the alarm settings mode.
- Press UP button ② or DOWN button ③ to switch among “-:A1”, “5:A1” and “7:A1”.
Notes:
“-:A1” means alarm off.
■ "5:A1" means "5 day alarm" setting, the alarm sounds from Monday to Friday only.
■ "7:A1" means "7 day alarm" setting, the alarm sounds on everyday.
52 GB/IE
- Switch to among "5:A1" and "7:A1".
- Press SET button 1 to set the alarm time.
- The hour display flashes.
- Press UP button 2 or DOWN button 3 to set the hour.
- Press SET button 1 to confirm.
- The minute display flashes.
- Press UP button 2 or DOWN button 3 to set the minute.
- Press SET button 1 to confirm and enter the "Alarm 2" setting.
- Repeat steps 3 to 10 to set the A2 and A3 alarm time.
● Activate and deactivate the alarm function
Press and hold the ALARM button for 3 seconds to active and deactivate alarm function. If the alarm in active, the alarm indicator will display in time display.
Press and hold the ALARM button again will deactivate alarm function. the alarm indicator 11 will disappear.
Using the snooze function
Press any button when the alarm sounds to activate the snooze function. The alarm sound stop with the alarm indicator 11 flash in the time mode. The alarm will sound again 5 minutes later.
To actually shut the alarm off, press and hold the snooze button 5 3 seconds. The snooze function will now turn off.
● Changing day / night setting
This product can be set with 4 brightness levels (L3: brightest, L0: dimmest).
-
Press the DOWN button 3 for 3 seconds to access the day / night settings mode.
-
Press UP button ② or DOWN button ③ to select the brightness level for day mode.
- Press SET button 1 to confirm.
- The hour display flashes.
- Press UP button 2 or DOWN button 3 to select the start time for day mode.
- Press SET button 1 to confirm and enter night mode setting.
- Repeat steps 2 to 6 to set the night mode also.
Using the sound-controlled function
This product can be reacted by touch or acoustic signal.
- Press and hold the UP button to turn on/off the sound-controlled function.
Notes:
- "on:sd" means sound-controlled function on, the display will turn off automatically while no signal is detected for about 20 seconds.
- "-:sd" means sound-controlled function off, the display will continuously on.
Troubleshooting
The product contains delicate electronic components. For this reason it is possible that it can be disrupted by radio transmitting equipment in the immediate vicinity. Electrostatic discharges can lead to malfunctions.
In the event of such malfunctions, press and hold the UP button 2 and DOWN button 3 at the same time for 3 seconds. This will reset the product and perform a brief test of the display. The product is then ready for use again.
Note: Resetting will erase all settings.
● Cleaning and care
The product should only be cleaned externally, using a soft, dry cloth.
● Disposal
The packaging is made entirely of recyclable materials, which you may dispose of at local recycling facilities.

Observe the marking of the packaging materials for waste separation, which are marked with abbreviations (a) and numbers (b) with following meaning: 1 - 7: plastics / 20 - 22: paper and fibreboard / 80 - 98: composite materials

The product and packaging materials are recyclable, dispose of it separately for better waste treatment.
The Triman logo is valid in France only.

natural_image
Silhouette of a person sorting trash into a bin (no text or symbols)Contact your local refuse disposal authority for more details of how to dispose of your worn-out product.
natural_image
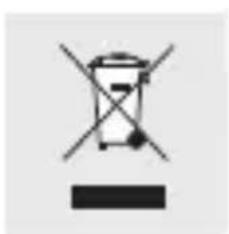
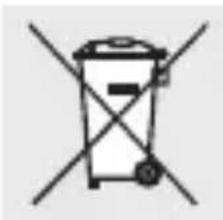
Simple line drawing of a trash bin with crossed lines indicating no waste or discharge (no text or symbols)To help protect the environment, please dispose of the product properly when it has reached the end of its useful life and not in the household waste. Information on collection points and their opening hours can be obtained from your local authority.
Faulty or used batteries / rechargeable batteries must be recycled in accordance with Directive 2006/66/EC and its amendments. Please return the batteries / rechargeable batteries and / or the product to the available collection points.
natural_image
Simple line drawing of a trash bin with two crossed lines indicating no waste or restriction (no text or symbols)Environmental damage through incorrect disposal of the batteries / rechargeable batteries!
Batteries / rechargeable batteries may not be disposed of with the usual domestic waste. They may contain toxic heavy metals and are subject to hazardous waste treatment rules and regulations. The chemical symbols for heavy metals are as follows: Cd = cadmium, Hg = mercury, Pb = lead. That is why you should dispose of used batteries / rechargeable batteries at a local collection point.
● Simplified EU declaration of conformity
Hereby, OWIM GmbH & Co. KG, Stiftsbergstraße 1, DE-74167 Neckarsulm, GERMANY declares that the product [USB ALARM CLOCK, HG02918A/HG02918B] is in compliance with Directive 2014/53/EU and 2011/65/EU.
The full text of the EU declaration of conformity is available at the following internet address: www.owim.com
CE
natural_image
Simple line drawing of a house with no text or symbolsnatural_image
Symbolic icon of a person walking with arrows indicating waste or disposal (no text or symbols)natural_image
Silhouette of a person throwing trash into a bin (no text or symbols)natural_image
Simple line drawing of a trash bin with crossed lines indicating no waste or discharge (no text or symbols)natural_image
Simple line drawing of a trash bin with two crossed lines indicating no waste or restriction (no text or symbols)natural_image
Simple line drawing of a house with no text or symbolsnatural_image
Warning symbol depicting a explosion or impact with radiating lines (no text or numbers)ONTPLOFFINGSGE- VAAR!
natural_image
Symbolic icon of a person recycling a circular arrow, no text or numbers presentnatural_image
Silhouette of a person disposing of trash into a bin (no text or symbols)natural_image
Symbol of a trash bin with crossed lines indicating no waste or discharge (no text or numbers present)natural_image
Simple line drawing of a trash bin with two crossed lines indicating no text or symbols (no text or labels)natural_image
Simple line drawing of a house with chimney (no text or symbols)NOSTE OCHRANNÉ RUKAVICE!
natural_image
Symbolic icon of a person recycling a circular arrow, no text or numbers presentnatural_image
Silhouette of a person sorting trash into a bin (no text or symbols)natural_image
Simple line drawing of a trash bin with crossed lines indicating no waste or discharge (no text or symbols)natural_image
Simple line drawing of a trash bin with two crossed lines indicating no text or symbolsnatural_image
Simple line drawing of a house with chimney (no text or symbols)natural_image
Warning sign depicting a collapse with radiating lines (no text or symbols)natural_image
Simple line drawing of a house with no text or symbolsnatural_image
Warning sign depicting explosive hazard (no text or symbols)PERIGO DE EXPLOSÃO!
natural_image
Symbol of a trash bin with two crossed lines indicating no waste or restriction (no text or labels)- USB-WECKER / USB ALARM CLOCK / RÉVEIL USB
- USB-WECKER
- RÉVEIL USB
- EXPLOSIONSGEFAHR!
- List of pictograms used 34
- Introduction 34
- General safety instructions 38
- Before initial use 48
- Initial use....49
- Troubleshooting 56
- Cleaning and care 57
- Disposal....57
- Simplified EU declaration of conformity .....60
- List of pictograms used
- USB ALARM CLOCK
- Introduction
- Intended use
- Parts description
- - Technical data
- - Scope of delivery
- General safety instructions
- WARNING! DANGER OF DEATH AND ACCIDENTS FOR TODDLERS AND CHILDREN!
- Safety instructions for batteries / recharge- able batteries
- DANGER OF EXPLOSION!
- Risk of leakage of batteries / rechargeable batteries
- WEAR PROTECTIVE GLOVES!
- Risk of damage of the product
- Before initial use
- ● Powered by batteries
- ● Powered by low voltage source
- ● Replacing / removing the batteries
- Initial use
- - Changing basic settings
- Changing alarm settings
- Notes:
- ● Activate and deactivate the alarm function
- Using the snooze function
- ● Changing day / night setting
- Using the sound-controlled function
- Troubleshooting
- ● Cleaning and care
- ● Disposal
- Environmental damage through incorrect disposal of the batteries / rechargeable batteries!
- ● Simplified EU declaration of conformity
- ONTPLOFFINGSGE- VAAR!
- NOSTE OCHRANNÉ RUKAVICE!
- PERIGO DE EXPLOSÃO!
Brand : AURIOL
Model : IAN 290253
Category : Alarm Clock