
IAN 311178 - Alarm Clock AURIOL - Free user manual and instructions
Find the device manual for free IAN 311178 AURIOL in PDF.


| Product type | Alarm clock radio |
| Brand | Auriol |
| Model | IAN 311178 |
| Dimensions (approx.) | 18 x 10 x 8 cm (7.1 x 3.9 x 3.1 in) |
| Weight (approx.) | 300 g (0.66 lb) |
| Power supply | AC 230V ~ 50 Hz; DC 3V (2 x AA batteries, not included) |
| Radio bands | AM/FM |
| Alarm | Wake to radio or buzzer; snooze function |
| Sleep timer | Yes, adjustable (e.g., 60/90/120 min) |
| Display | LED, adjustable brightness |
| Backup battery | Maintains time and alarm settings during power outage |
| Maintenance | Clean with a soft, dry cloth; do not use liquid or abrasive cleaners |
| Safety | Keep away from moisture; do not cover ventilation openings; unplug during storms |
| Spare parts | Battery compartment cover, power cord (contact support) |
| Repairability | No user-serviceable parts inside; refer to qualified service for repairs |
Frequently Asked Questions - IAN 311178 AURIOL
User questions about IAN 311178 AURIOL
0 question about this device. Answer the ones you know or ask your own.
Ask a new question about this device
Download the instructions for your Alarm Clock in PDF format for free! Find your manual IAN 311178 - AURIOL and take your electronic device back in hand. On this page are published all the documents necessary for the use of your device. IAN 311178 by AURIOL.
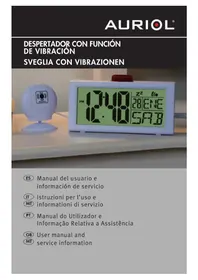
USER MANUAL IAN 311178 AURIOL
Operation and safety notes
IAN 311178
ES IT

GB / MT Operation and safety notes Page 32
EN = English
ITA = Italian
FRE = French
DUT = Dutch
Description of parts......Page 33
Included items Page 33
Technical data......Page 33
Safety Page 33
General safety information......Page 34
Safety instructions for batteries/rechargeable batteries Page 34
Before initial use....Page 34
Setting up the product....Page 35
Stand....Page 35
Wall mount......Page 35
Inserting or replacing batteries......Page 35
Operation Page 36
Reception of DCF radio signal Page 36
Changing basic settings......Page 36
Using the 12/24-hour display....Page 36
Setting the alarm Page 37
Activating/deactivating the alarm Page 37
Setting the schedule alarm (TA) Page 37
Activating/Deactivating the Schedule Alarm (TA)......Page 37
Switching off the alarm signal....Page 37
Displaying the temperature in °C/°F......Page 38
Moon phase....Page 38
Displaying summertime....Page 38
Setting the timer....Page 38
Troubleshooting Page 38
Cleaning and maintenance......Page 39
Disposal Page 39
Simplified EU declaration of conformity Page 39
Warranty Page 39
Radio-controlled LCD Clock
- Introduction
We congratulate you on the purchase of your new product. You have chosen a high quality product. The instructions for use are part of the product. They contain important information concerning safety, use and disposal. Before using the product, please familiarise yourself with all of the safety information and instructions for use. Only use the product as described and for the specified applications. If you pass the product on to anyone else, please ensure that you also pass on all the documentation with it.
• Proper use
The product is only suitable for operation in enclosed spaces at normal room temperature. The product is not intended for commercial use.
• Description of parts
| 1 | Alarm symbolTA |
| 2 | Timer symbolTIMER |
| 3 | Time display |
| 4 | Calender week |
| 5 | Battery symbol |
| 6 | Summer time symbolDST |
| 7 | Indoor air temperature |
| 8 | Moon phase |
| 9 | Day of the week display |
| 10 | Month display |
| 11 | Date display |
| 12 | Alarm 2 symbol |
| 13 | Radio symbol |
| 14 | PM symbol (afternoon)PM |
| 15 | Time zone symbolZONE |
| 16 | Alarm 1 symbol |
| 17 | Snooze symbolZz |
| 18 | SNOOZE button |
| 19 | WAVE button |
| 20 | °C/°F button |
| 21 | Battery compartment |
| 22 | Battery compartment cover |
| 23 | Folding stand |
| 24 | DOWN button |
| 25 | UP button |
| 26 | SET button |
| 27 | ALARM SET button |
| 28 | Hanger |
| 29 | ALARM ON/OFF button |
| 30 | RESET button |
| 31 | Dowel |
| 32 | Screw |
- Included items
1 Radio-controlled LCD Clock 2 Batteries 1 Dowel 1 Screw 1 Operating instructions
Technical data
Battery type: 2 x 1.5 V (direct current), AAA (supplied)
Radio signal: DCF
Frequency band: 77.5 kHz, 433.050 MHz - 434.79 MHz

Safety
KEEP ALL THE SAFETY ADVICE AND INSTRUCTIONS IN A SAFE PLACE FOR FUTURE REFERENCE!

General safety information
Children should be kept away from the product at all times. This is not a toy. This product can be used by children aged from 8 years and above and persons with reduced physical, sensory or mental capabilities or lack of experience and knowledge if they have been given supervision or instruction concerning use of the product in a safe way and understand the hazards involved. Children shall not play with the product. Cleaning and user maintenance shall not be made by children without supervision.
WARNING! Do not use the product in hospitals or medical facilities, as otherwise this may result in malfunctions of life-support systems.
Under no circumstances should you take the product apart. Improper repairs may place the user in considerable danger. Repairs should only be carried out by specialist personnel.

Safety instructions for batteries/rechargeable batteries
DANGER TO LIFE! Keep batteries/rechargeable batteries out of reach of children. If accidentally swallowed seek immediate medical attention.
DANGER OF EXPLOSION!

Never recharge non-rechargeable batteries. Do not short-circuit batteries/rechargeable batteries and/or open them. Overheating, fire or bursting can be the result.
Never throw batteries / rechargeable batteries into fire or water.
Do not exert mechanical loads on batteries / rechargeable batteries.
Risk of leakage of batteries / rechargeable batteries.
- Avoid extreme environmental conditions and temperatures that could affect batteries / rechargeable batteries, such as radiators or direct sunlight. If batteries / rechargeable batteries have leaked, avoid contact with skin, eyes, and mucous membranes with the chemicals! Immediately flush the affected areas with fresh water and seek medical attention!
WEAR PROTECTIVE GLOVES!

Leaked or damaged batteries / rechargeable batteries can cause burns on contact with the skin. Always wear suitable protective gloves if such an event occurs.
In the event of a leakage of batteries / rechargeable batteries, immediately remove them from the product to prevent damage. Only use the same type of batteries / rechargeable batteries. Do not mix used and new batteries/rechargeable batteries. ■ Remove batteries / rechargeable batteries if the product will not be used for a longer period.
Risk of damage to the product.
■ Only use the specified type of battery / rechargeable battery! Insert batteries / rechargeable batteries according to the polarity marks (+) and (-) on the battery / rechargeable battery and the product. Clean the contacts on the battery / rechargeable battery and in the battery compartment before inserting! ■ Remove exhausted batteries/rechargeable batteries from the product immediately.
- Before initial use
Note: Remove all packaging materials from the product.
■ Remove the protective foil before first use.
■ Remove the plastic strip sticking out of the battery compartment 21.
- Setting up the product
CAUTION! When choosing a position for the product, make sure that it is not exposed to direct sunlight, vibrations, heat, cold, damp, or dust. Do not install the product close to heat sources, such as radiators. Otherwise, there is a danger that the product will be damaged.
Take care that the product is suspended properly if mounted on a wall. If the product falls, it could cause injury or damage to itself or other property. Place the product on a flat, level surface. Do not place the product on valuable or sensitive surfaces without suitable protection. The surfaces may otherwise be damaged.
Stand
Open the folding stand 23 on the back of the product to support the product.
Wall mount
Note: You will need a drill for this step.
CAUTION! DANGER TO LIFE, RISK OF INJURY AND DAMAGE TO PROPERTY! Please read the operating and safety instructions for your drill carefully.
Hold the product against the wall to find a suitable installation position. Use a pencil if necessary to mark the required position.
DANGER OF ELECTRIC SHOCK! DANGER OF DAMAGE TO PROPERTY! DANGER OF
INJURY! Ensure that you do not strike electrical cables, gas or water pipes when drilling into the wall. If necessary, check the wall using a suitable detector before drilling.
Drill a suitable hole in the wall using a drill. Push a dowel 31 into the hole and screw a screw 32 into the dowel 31. Ensure that the screw 32 is not completely screwed into the dowel 31. Hook the hanger 28 of the product onto the screw 32. Do not place the product near sources of interference such as televisions, computers, thick walls, etc. These may hinder reception of the radio signal.
Inserting or replacing batteries
The battery symbol 5 appears in the LC display if the batteries are too weak. Make sure you replace the batteries at the earliest opportunity.
The product starts to receive the radio time signal as soon as the batteries are inserted.
Note: Do not alter the position of the product during reception of the signal. This may disrupt reception.
Radio time signal (DCF):
The DCF signal (time signal transmission) consists of time pulses broadcast from one of the most accurate clocks in the world. It is situated near Frankfurt/Main, Germany.
Your product receives these signals under ideal conditions up to a distance of approx. 1,500 km around Frankfurt / Main. Reception of the radio signal generally takes approx. 3–10 minutes.
☐ If it does not work properly, restart the radio signal reception process. To do this, keep the WAVE button 19 pressed for approx. 3 seconds.
Reception can be considerably impaired by obstacles (e.g. concrete walls) or sources of interference (e.g. other electrical devices). If necessary, change the location of the product (e.g. by putting it near a window) if you have problems with reception.
Operation
- Reception of DCF radio signal
The product automatically starts to search for the DCF radio signal. The radio icon 📋 13 on the LCD indicates that the product is searching for the radio signal.
It is also possible to start reception of the DCF radio signal manually on the product.
☐ Press and keep pressed the WAVE button 19 for longer than 3 seconds. The product attempts to receive the DCF radio time signal. This process takes several minutes and is indicated in the LC display by a flashing radio symbol.
Note: If the product cannot pick up the DCF radio signal on account of an error, it is also possible to set the time manually. As soon as reception of the DCF signal is successful, the manual settings are overwritten.
- Changing basic settings
- Press and keep pressed the WAVE button 19 for approx. 3 seconds. The radio symbol 13 flashes.
- Press and keep pressed the WAVE button again for approx. 3 seconds to stop the reception of the radio time signal.
- Press and keep pressed the SET button 26 for approx. 3 seconds. The acronym for the current language flashes in the day of the week display 9.
- Set the desired language by pressing the UP25 or DOWN button 24.
- Confirm your settings by pressing the SET button. The time display flashes.
- Repeat steps 4 and 5 to set the values for year, month, day, hour, minute, time zone, and DCF ON/OFF.
The following languages are available:
GER = German
ENG = English
ITA = Italian
FRE = French
DUT = Dutch
SPA = Spanish
DAN = Danish
Hint: If you press and hold down the UP or DOWN button, you accelerate the process and reach the desired value more quickly. This can also be used for setting up the other functions in the following chapters.
Note: If the buttons are not pressed for approx. 20 seconds, it will automatically exit setting mode and return to the normal time display.
Note: Should you be in a country in which the DCF signal can be received but the time is different to your current local time, you can use the time zone setting to have the product display your current local time. If you find yourself in a country in which, for example, the local time is an hour ahead of Central European Time (CET), you set the time zone to +01. The product is now still controlled by DCF but shows the time as one hour ahead of CET.
• Using the 12 / 24-hour display
While time display 3 is indicated, press the UP button 25 to switch between 12-hour and 24-hour format.
Note: The PM icon PM 14 on the LCD stands for afternoons in 12-hour format.
- Setting the alarm
Press the ALARM SET button 27 once or twice. "A1" or "A2" will be displayed in the display.
Press and keep pressed the ALARM SET button for about 2 seconds. The hour display flashes.
Press the UP 25 or DOWN button 24 to set the desired value.
Press the ALARM SET button to confirm your setting. The minute display flashes.
Press the UP or DOWN button to set the desired minute value.
Press the ALARM SET button to confirm your setting.
Press the SNOOZE button 18 as soon as the alarm signal sounds. The alarm signal stops sounding and the "Zz" symbol 17 appears in the display. The alarm will sound again 5 minutes after the set waking time or alarm time.
Press any button except the SNOOZE button to stop the alarm signal sounding.
- Activating/deactivating the alarm
Press the ALARM SET button 27 once or twice to select alarm 1 or alarm 2.
Press the ALARM ON / OFF button 29 once or twice or three times to select from M-F, S-S or M-F S-S alarm mode. The alarm 1 symbol or alarm 2 symbol will be displayed to indicate that the respective alarm is activated.
Note:
M-F mode = Alarm is on from
Monday to Friday
S-S mode = Alarm is on from
Saturday to Sunday
M-F S-S mode = Alarm is on the whole week
- Pressing the ALARM ON / OFF button again causes the appropriate alarm symbol ⚠16 or
12 to cease to be displayed. The alarm is deactivated.
- Setting the schedule alarm (TA)
- Press the ALARM SET button 27 three times. "TA" will be displayed in the display.
- Press and keep pressed the ALARM SET button for approx. 3 seconds. The year display will flash.
- Press the UP25 or DOWN button 24 to set the desired value.
- Press the ALARM SET button to confirm your setting. The month display flashes.
- Repeat steps 3 and 4 above to set the values for month, date, hour, and minute.
- Activating / Deactivating the Schedule Alarm (TA)
- Press the ALARM SET button 27 three times. "TA" will be displayed on the display.
- Press the ALARM ON / OFF button 29 once. The Schedule alarm symbol TA 1 will be displayed to indicate that the Schedule alarm is activated.
- Press the ALARM ON / OFF button again to make the Schedule alarm symbol TA disappear. The schedule alarm is deactivated.
- Switching off the alarm signal
Press any button except the SNOOZE button 18 to stop the alarm signal. You do not have to reactivate the alarm; it reactivates itself automatically according to the weekly rhythm.
Note: The alarm signal switches itself off after 2 minutes.
- Displaying the temperature in °C/°F
The current indoor air temperature 7 is indicated on the LCD.
Press the °C / °F button 20 to switch between the Celsius and Fahrenheit temperature scales.
Moonphase
The product shows the current moon phase 8 in the LC display.
It uses the following symbols:
 |  |  |  |
| Full moon Waning gibbous | Last quarter Waning crescent | ||
 |  |  |  |
| New moon Waxing crescent | First quarter Waxing gibbous | ||
- Displaying summertime
Summertime is automatically indicated on the LCD by the summertime icon DST 6. The product receives the information as to whether it is summertime or not from the DCF radio signal.
Note: Reception of the radio signal may be seriously disrupted in reinforced concrete buildings.
- Setting the timer
Press and hold the °C / °F button 20 for approx. 3 seconds. The Timer symbol TIMER 2 will be displayed. Press UP button 25 to change the values for hours and DOWN button 24 to change the values for minutes.
Hint: If you press and hold down the UP or DOWN, you accelerate the process and reach the desired value more quickly.
Press the WAVE button 19 to start the timer. The timer now begins counting down and the Timer symbol TIMER 2 is flashing. You can press the WAVE button again anytime to stop the timer from counting down. Press the WAVE button again to continue the count down. When the set time has elapsed, a signal tone will sound for a period of one minute. Press the WAVE button to stop the signal tone from sounding. Press the ALARM ON / OFF button 29 to reset the timer back to 00:00. Press and hold °C / °F button 20 for approx. 3 seconds to return to the normal time display.
Note: The maximum countdown time is 19 hours and 59 minutes!
- Troubleshooting
This product has delicate electronic components. This means that if it is placed near an object that transmits radio signals, it could cause interference. If the display indicates a problem, move such objects away from it. Electrostatic discharges may cause malfunctions. In the event of such malfunctions, remove the batteries briefly and reinsert them or press the RESET button 30 at back of the product.
Note: All settings will be cleared once the batteries are removed or the RESET button 30 has been pressed.
Cleaning and maintenance
Under no circumstances should you use liquids or detergents, as these will damage the product. The product should only be cleaned on the outside with a soft dry cloth.
Disposal
The packaging is made entirely of recyclable materials, which you may dispose of at local recycling facilities.

Observe the marking of the packaging materials for waste separation, which are marked with abbreviations (a) and numbers (b) with following meaning: 1–7: plastics / 20–22: paper and fibre-board / 80–98: composite materials.

The product and packaging materials are recyclable, dispose of it separately for better waste treatment. The Triman logo is valid in France only.

Contact your local refuse disposal authority for more details of how to dispose of your worn-out product.
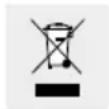
To help protect the environment, please dispose of the product properly when it has reached the end of its useful life and not in the household waste. Information on collection points and their opening hours can be obtained from your local authority.
Faulty or used batteries / rechargeable batteries must be recycled in accordance with Directive 2006/66/EC and its amendments. Please return the batteries/rechargeable batteries and/or the product to the available collection points.

Environmental damage through incorrect disposal of the batteries/rechargeable batteries!
Batteries / rechargeable batteries may not be disposed of with the usual domestic waste. They may contain toxic heavy metals and are subject to hazardous waste treatment rules and regulations. The chemical symbols for heavy metals are as follows: Cd = cadmium, Hg = mercury, Pb = lead. That is why you should dispose of used batteries / rechargeable batteries at a local collection point.
Simplified EU declaration of conformity
Hereby, OWIM GmbH & Co. KG, Stiftsbergstraße 1, DE-74167 Neckarsulm, GERMANY, declares that the product Radio-controlled LCD Clock HG04706A / HG04706B, is in compliance with Directives 2014/53/EU and 2011/65/EU. The full text of the EU declaration of conformity is available at the following internet address: www.owim.com
Warranty
The product has been manufactured to strict quality guidelines and meticulously examined before delivery. In the event of product defects you have legal rights against the retailer of this product. Your legal rights are not limited in any way by our warranty detailed below.
The warranty for this product is 3 years from the date of purchase. Should this product show any fault in materials or manufacture within 3 years from the date of purchase, we will repair or replace it – at our choice – free of charge to you.
The warranty period begins on the date of purchase. Please keep the original sales receipt in
a safe location. This document is required as your proof of purchase. This warranty becomes void if the product has been damaged, or used or maintained improperly.
The warranty applies to defects in material or manufacture. This warranty does not cover product parts subject to normal wear, thus possibly considered consumables (e.g. batteries) or for damage to fragile parts, e.g. switches, rechargeable batteries or glass parts.



- SAFETY PAGE
- BEFORE INITIAL USE....PAGE
- OPERATION PAGE
- TROUBLESHOOTING PAGE
- CLEANING AND MAINTENANCE......PAGE
- DISPOSAL PAGE
- SIMPLIFIED EU DECLARATION OF CONFORMITY PAGE
- WARRANTY PAGE
- RADIO-CONTROLLED LCD CLOCK
- INTRODUCTION
- PROPER USE
- DESCRIPTION OF PARTS
- INCLUDED ITEMS
- TECHNICAL DATA
- SAFETY
- GENERAL SAFETY INFORMATION
- SAFETY INSTRUCTIONS FOR BATTERIES/RECHARGEABLE BATTERIES
- RISK OF LEAKAGE OF BATTERIES / RECHARGEABLE BATTERIES
- RISK OF DAMAGE TO THE PRODUCT
- BEFORE INITIAL USE
- SETTING UP THE PRODUCT
- STAND
- WALL MOUNT
- CAUTION! DANGER TO LIFE, RISK OF INJURY AND DAMAGE TO PROPERTY! PLEASE READ THE OPERATING AND SAFETY INSTRUCTIONS FOR YOUR DRILL CAREFULLY
- DANGER OF ELECTRIC SHOCK! DANGER OF DAMAGE TO PROPERTY! DANGER OF
- INSERTING OR REPLACING BATTERIES
- RADIO TIME SIGNAL (DCF)
- OPERATION
- RECEPTION OF DCF RADIO SIGNAL
- CHANGING BASIC SETTINGS
- USING THE 12 / 24-HOUR DISPLAY
- SETTING THE ALARM
- ACTIVATING/DEACTIVATING THE ALARM
- NOTE
- SETTING THE SCHEDULE ALARM (TA)
- ACTIVATING / DEACTIVATING THE SCHEDULE ALARM (TA)
- SWITCHING OFF THE ALARM SIGNAL
- DISPLAYING THE TEMPERATURE IN °C/°F
- MOONPHASE
- DISPLAYING SUMMERTIME
- SETTING THE TIMER
- TROUBLESHOOTING
- CLEANING AND MAINTENANCE
- DISPOSAL
- ENVIRONMENTAL DAMAGE THROUGH INCORRECT DISPOSAL OF THE BATTERIES/RECHARGEABLE BATTERIES
- SIMPLIFIED EU DECLARATION OF CONFORMITY
- WARRANTY
Brand : AURIOL
Model : IAN 311178
Category : Alarm Clock