
IAN 274299 - Switch SILVERCREST - Free user manual and instructions
Find the device manual for free IAN 274299 SILVERCREST in PDF.

| Product Type | Digital Weekly Timer Switch |
| Brand | SilverCrest |
| Model | IAN 274299 |
| Operating Voltage | 230-240V ~ 50 Hz |
| Switched Voltage | 230-240V ~ 16(2) A |
| Maximum Switching Capacity | 3600 W |
| Ambient Temperature Range | -10°C to 40°C |
| Time Error | ±1 minute per month |
| Shortest Switching Time | 1 minute |
| Number of Programs | 10 ON/OFF program sets |
| Battery Type | NiMH 1.2V (rechargeable) |
| Battery Charging Time | 14 hours |
| Display | LCD with weekday, time, program number, AM/PM, and status icons |
| Timer Functions | Clock, Program, Random, Continuous ON/OFF, Auto, Summer time, 12/24h mode |
| Power Supply | Mains powered with internal rechargeable battery backup |
| Cleaning | Disconnect from mains; clean with soft damp cloth and mild detergent |
| Safety Features | Do not open, do not cover, do not connect heaters; use indoors only; micro-switch contact opening <3 mm |
| Warranty | 3 years from date of purchase |
| Service Contact | BAT, Lindenstraße 35, 72074 Tübingen, Germany; Tel: 00800 48720741; Email: exp@bat-tuebingen.com |
| Compliance | CE |
| Disposal | Do not dispose with household waste; separate collection according to WEEE Directive 2012/19/EC |
Frequently Asked Questions - IAN 274299 SILVERCREST
User questions about IAN 274299 SILVERCREST
0 question about this device. Answer the ones you know or ask your own.
Ask a new question about this device
Download the instructions for your Switch in PDF format for free! Find your manual IAN 274299 - SILVERCREST and take your electronic device back in hand. On this page are published all the documents necessary for the use of your device. IAN 274299 by SILVERCREST.
USER MANUAL IAN 274299 SILVERCREST
natural_image
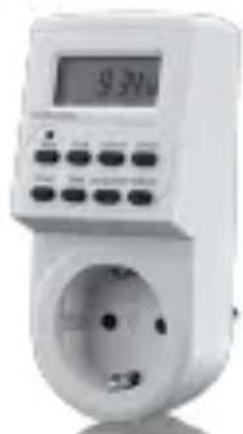
White electrical power meter with digital display and socket, no visible text or symbolsOperation and Safety Notes
DE AT CH
ZEITSCHALTUHR
ES
Before reading, unfold the page containing the illustrations and familiarise yourself with all functions of the device.
DE AT CH
GB / MT Operation and Safety Notes Page 66
MO, TU, WE, TH, FR, SA
MO, WE, FR
TU, TH, SA
MO, TU, WE
TH, FR, SA
MO, WE, FR, SU
MO, TU, WE, TH, FR, SA MO, WE, FR TU, TH, SA MO, TU, WE
TH, FR, SA MO, WE, FR, SU
natural_image
Symbol of a trash bin with two crossed lines and a solid black bar below (no text or numbers)Intended use ......Page 69
Control elements......Page 70
Technical Data......Page 71
Safety notices ......Page 72
Control- and display elements
Control elements......Page 74
Displays + Explanation ......Page 74
Random function......Page 76
Operating mode function......Page 77
Program function......Page 77
Clock function......Page 77
Preparation
Charging the device......Page 78
Reset all settings......Page 78
Setting the current time......Page 79
Setting standard and summer time.....Page 80
Setting the hour mode......Page 81
Operation
Switching to the clock function ......Page 82
(De) activating continuous operation...Page 83
Configuring programs......Page 85
Switching the random function
on and off Page 89
Cleaning......Page 90
Warranty and Service......Page 92
Service address ......Page 93
Manufacturer......Page 93
| List of pictograms used: | |
 | Observe the warning and safety instructions! |
 | Attention! Risk of electric shock! |
 | Do not dispose of electric equipment in the household waste! |
 | Use indoors |
| -10T40 | Ambient temperature |
| [0K24] | Micro-switch with a contact opening width of < 3 mm |
Timer Switch Digital – for indoors
- Introduction
Intendeduse
The device is intended as a digital weekly timer switch for use in enclosed, dry rooms and designed for private use. It is not suitable for commercial use. Only operate the device individually. Do not connect several timer switches in series. Any other use is considered improper. The manufacturer is not liable for damages due to improper use. Read the entire instructions for use before using the device. Keep these instructions for use. Include the instructions for use when passing the device on.
• Control elements (Fig. A)
1 LCD display
2 MINUTE button
3 RST/RCL button
4 RANDOM button
5 ON/AUTO/OFF button
6 Socket
7 Plug (reverse)
8 Timer button
9 CLOCK button
10 WEEK button
11 MASTERCLEAR button
12 HOUR button
LCD display (Fig. B)
13 Weekday display
14 R symbol
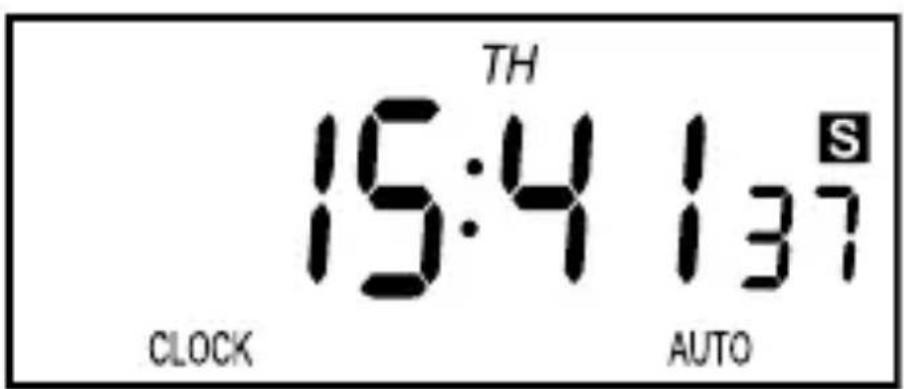
15 S symbol
16 Seconds display
17 ON - AUTO - OFF
18 Minutes display
19 PROGRAM
20 Hours display
21 CLOCK
22 Program number
23 AM - PM
24 ON - OFF
Technical Data
Model designation: DZ 20 DE
Operating voltage:230-240V \~ 50 Hz
Switchedvoltage:230-240V \~ 16(2) A
Switching capacity: max. 3600 W
Ambient temperature: -10 °C to 40 °C
-10T40
Time error: ± 1 minute / month
Shorting switching time: 1 minute
Programs: 10 ON/OFF
program sets
Battery:NiMH1.2V
100 h
Use
indoors:
CE compliant:


Safety notices
Children are not able to understand the dangers arising from improper use of electric devices. Never leave children unsupervised when using electric devices.
■ Only plug the device into safely installed sockets.
■ Only connect loads within the specified capacities of the device.
Do not cover the device. Heat accumulates when covered, creating a fire hazard.
- Regularly check the device for damage. Do not replace damaged parts but contact the manufacturer or dispose of the device in an environmentally responsible way.
- Do not open the device. Opening the device will void the warranty.
The device contains a rechargeable battery. A defective rechargeable battery must be replaced by the manufacturer.
- Do not touch the device with wet hands or bring into contact with water.
■ Disconnect the device from the power mains to de-energise.
- Do not connect heaters or similar loads to the device, as these must never be operated unattended.
●Control-and display elements
Control elements
MASTERCLEAR button 11
This button will delete all time and program settings.
• Displays + Explanation
Weekdays 13
The abbreviations on the LCD display 1 mean:
MO Monday
TU Tuesday
WE Wednesday
TH Thursday
FR Friday
SA Saturday
SU Sunday
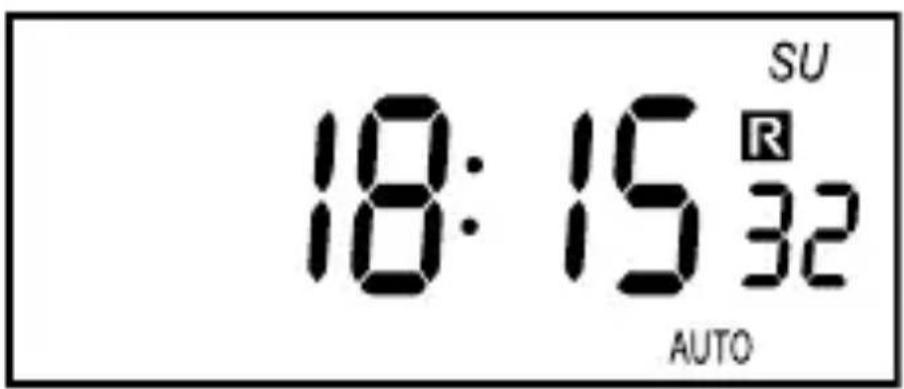
R Symbol 14
The R symbol indicates random switching is activated. The R symbol means random. In this mode the device will switch the connected loads on and off at different intervals.
S symbol 15
Indicates the clock has been set to summer time.
ON - AUTO - OFF 17
Indicates the operating mode of the device.
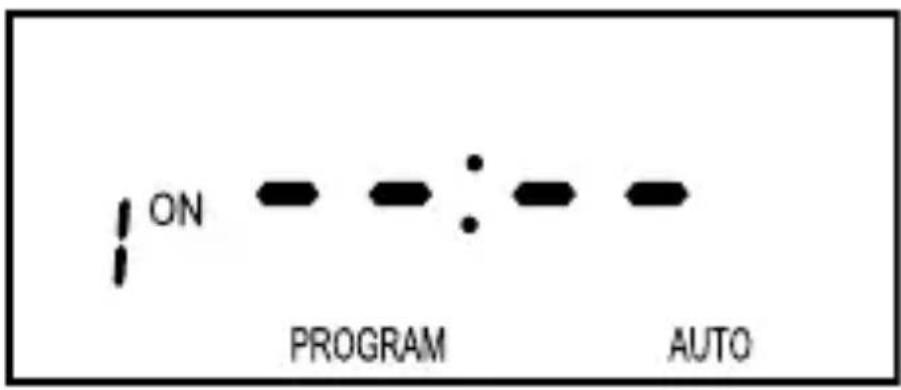
PROGRAM 19
Indicates the program function has been activated.
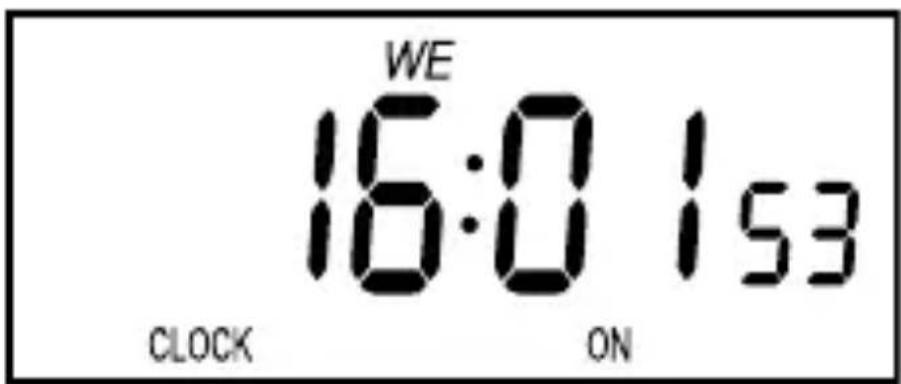
CLOCK 21
Indicates the clock function has been activated.
Program number 22
Indicates the program number in PROGRAM function.
AM - PM 23
Indicates the hour mode.
ON - OFF 24
Indicates the switching state:
ON = turn-on time, OFF = turn-off time.
The switching state is only visible under program function.
• Random function
The R symbol means random. In this mode the device will switch the connected loads on and off at different intervals.
- Operating mode function
The different operating modes are:
AUTO = automatic program operation,
ON = continuous operation ON,
OFF = continuous operation OFF.
Program function
This function allows the on- and off times to be programmed for the connected load.
Clock function
This function shows the current time in the LCD.
- Preparation
To start up the device you must:
- Charge the device.
- Reset all settings.
- Set the current time.
- Charging the device
☐ Insert the plug 7 into a mains socket.
☐ Charge the rechargeable battery for 14 hours.
Reset all settings
Note: The device does not need to be connected to the mains to configure the settings.
Reset all settings
☐ Press the MASTERCLEAR 11 button with a pen or other pointy object. The LCD display 1 will read:
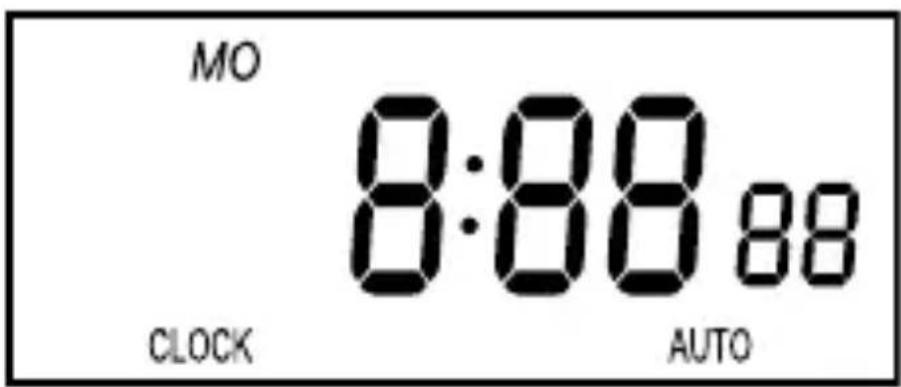
All settings cleared.
- Setting the current time
Note: Hold the HOUR, MINUTE button for faster programming.
☐ Press and hold the CLOCK 21 button.
☐ Set the current day of the week with the WEEK 10 button.
☐ Set the hour with the HOUR 12 button.
☐ Set the minute with the MINUTE button.
☐ Release the CLOCK button 21.
- Settingstandard and summer time
Setting summer time
□ Simultaneously press the CLOCK 9 and ON/AUTO/OFF 5 buttons. The LCD 1 will advance the hour display 20 by one hour and the S symbol 15 disappears.
Setting standard time
□ Simultaneously press the CLOCK 9 and ON/AUTO/OFF 5 buttons. The S symbol 15 disappears from the LCD 1 and the hour 20 decreases by one.
Setting the hour mode
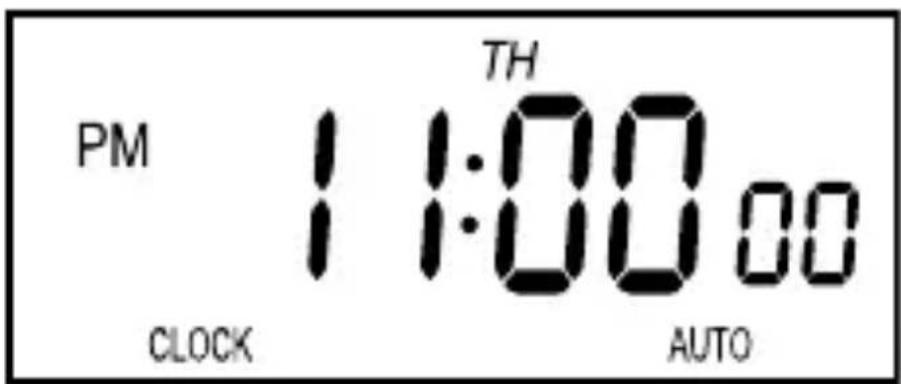
The LCD 1 can display the current time in 12- or 24-hour mode. In 12-hour mode AM means before 12 noon, PM after 12 noon. The default is 24 hour mode.
Setting to 12 hour mode
□ Simultaneously press the TIMER 8 and CLOCK 9 buttons. The LCD will show AM or PM 23. The following illustration shows 23:00 hours in 12-hour mode.
Setting to 24-hour mode
□ Simultaneously press the TIMER 8 and CLOCK 9 buttons. The LCD will stop showing AM or PM 23.
Operation
- Switching to the clock function
The LCD 1 automatically switches back to clock function if a function is not used for more than 30 seconds.
☐ Press the CLOCK 9 button to manually go to the clock function.
(De)activating continuous operation
This device has the following operating modes:
- Continuous operation,
- Automatic program operation
The default is automatic program operation. You can switch the device to continuous operation separate from the programs.
Activating continuous operation
☐ Repeatedly press the ON/AUTO/OFF 5 button until the LCD 1 reads ON 17.
Deactivating continuous operation
Repeatedly press the ON/AUTO/OFF 5 button until the LCD 1 reads OFF 17.
Activating automatic program operation
Repeatedly press the ON/AUTO/OFF 5 button until the LCD 1 reads AUTO 17. OFF → AUTO: device is switched off. ON → AUTO: device is switched on.
- Configuringprograms
You can set up to 10 ON / OFF programs. The shorted time between switching on and off is one minute.
A program consists of the switch-on and switch-off time. Both times must be programmed to be able to use a program.
Be sure the time settings of the various programs do not overlap. If the times overlap, the switch-on time takes priority.
- Check if the device is in AUTO 17 mode. If not, set to AUTO 17 (see "Setting the operating mode").
- Select the program function with the TIMER 8 button. The LCD 1 reads:
- Press the WEEK 10 button and press repeatedly to select one of the following options:
- An individual weekday, - One of the following combinations:
MO, TU, WE, TH, FR, SA, SU MO, TU, WE, TH, FR SA, SU
MO, TU, WE, TH, FR, SA MO, WE, FR TU, TH, SA
MO, TU, WE TH, FR, SA
MO, WE, FR, SU
- Set the respective time using the HOUR 12 and MINUTE 2 buttons.
- Press the TIMER 8 button to confirm the selection. The switch-on time has been programmed. The LCD 1 will switch to switch-off time.
- Set the switch-off time as described in steps 3. to 5.
- After entering the program, confirm with the CLOCK button 9 or wait 10 seconds until the current time is displayed.
Set current status
If the clock should be on at the current time (ON), the ON/OFF/AUTO button 5 must be pressed until ON appears on the screen. Then press the button again so AUTO appears. If the clock should be off at the current time (OFF), the ON/OFF/AUTO button 5 must be pressed until OFF appears on the screen. Then press the button again so AUTO appears.
Deactivating programs
You can deactivate individual programs or all. To completely deactivate a program, you must deactivate the on and off time.
☐ Press the TIMER 8 button.
☐ Repeatedly press the TIMER 8 button to select the respective switch-on time.
☐ Press the RST/RCL 3 button.
☐ Press the TIMER 8 button to select the switch-off time.
☐ Press the RST/RCL 3 button.
☐ Press the CLOCK 9 button to confirm the entry and exit.
Restoring programs
Programs can only be restored whilst deactivated.
☐ Follow the instructions in chapter "Deactivating programs" to restore a deactivated program.
- Switching the random function on and off
If the random function is activated, all set programs will be ignored from 18:00 to 6:00. Instead of that, there is a random function during this time period, which alternately switches on and off with an interval of 10 to 31 minutes.
Activating the random function
☐ Check if the device is in AUTO 17 mode. If not, set to AUTO 17 (see "Setting the operating mode").
☐ Press the RANDOM 4 button. The R symbol 14 will appear in the LCD 1.
Deactivating the random function
☐ Press the RANDOM 4 button. The R symbol 14 will disappear from the LCD 1.
- Cleaning
ATTENTION! RISK OF ELECTRIC SHOCK! Disconnect the device from the mains before cleaning.
ATTENTION! RISK OF ELECTRIC SHOCK! Do not allow liquids to enter the device. Liquids entering can result in a short circuit.
ATTENTION! Danger due to harsh cleaners.
□ Never use harsh or scouring cleaners.
□ Clean the device with a soft, slightly damped cloth and mild detergent.
☐ Ensure the device is completely dry before using it again.
- Disposal

natural_image
Symbol of a trash bin crossed with a horizontal line, representing waste or disposal (no text or numbers present)Do not dispose of electric equipment in the household waste!
In accordance with European Directive 2012 / 19 / EC relating to old electrical and electronic appliances, used electrical equipment must be collected separately and recycled in an ecologically compatible way.
Contact your local authorities for information on how to dispose of the appliance at the end of product life.

Warranty and Service
This device is covered by a 3 year warranty from the date of purchase. Please keep your receipt as proof of purchase. The product has been produced to the highest standards and thoroughly checked before dispatch. The guarantee only applies to faults in material or manufacture when used properly. Any modifications will void the guarantee. This warranty does not limit your legal rights. Please phone the service centre for guarantee claims. This is the only way to return your product free of charge.
Serviceaddress
BAT
Lindenstraße 35
72074 Tübingen
Germany
E-Mail: exp@bat-tuebingen.com
Service phone: 00800 48720741
If you need further information, we recommend that you consult Service / FAQ's on our homepage www.dvw-service.com.
IAN 274299
Manufacturer
BAT
Lindenstraße 35
72074 Tübingen
Germany

- ZEITSCHALTUHR
- ES
- DE AT CH
- Safety notices ......Page 72
- Control- and display elements
- Preparation
- Operation
- Cleaning......Page 90
- Warranty and Service......Page 92
- Timer Switch Digital – for indoors
- - Introduction
- Intendeduse
- • Control elements (Fig. A)
- LCD display (Fig. B)
- Technical Data
- Safety notices
- ●Control-and display elements
- Control elements
- MASTERCLEAR button 11
- • Displays + Explanation
- Weekdays 13
- R Symbol 14
- S symbol 15
- ON - AUTO - OFF 17
- PROGRAM 19
- CLOCK 21
- Program number 22
- AM - PM 23
- ON - OFF 24
- • Random function
- - Operating mode function
- Program function
- Clock function
- - Preparation
- - Charging the device
- Reset all settings
- - Setting the current time
- - Settingstandard and summer time
- Setting summer time
- Setting standard time
- Setting the hour mode
- Setting to 12 hour mode
- Setting to 24-hour mode
- - Switching to the clock function
- (De)activating continuous operation
- Activating continuous operation
- Deactivating continuous operation
- Activating automatic program operation
- - Configuringprograms
- Set current status
- Deactivating programs
- Restoring programs
- - Switching the random function on and off
- Activating the random function
- Deactivating the random function
- - Cleaning
- - Disposal
- Do not dispose of electric equipment in the household waste!
- Warranty and Service
- Serviceaddress
- Manufacturer
Brand : SILVERCREST
Model : IAN 274299
Category : Switch