
TWIST OB20B - Vacuum Cleaner Eldom - Free user manual and instructions
Find the device manual for free TWIST OB20B Eldom in PDF.


| Product Type | Cordless Stick Vacuum Cleaner |
| Model | TWIST OB20B |
| Brand | Eldom |
| Rated Power | 130W |
| Supply Voltage | 100-240V ~50Hz |
| Maximum Vacuum | 12 kPa |
| Operating Voltage | 22.2V |
| Battery Type | Li-Ion, 22.2V, 2200 mAh |
| Charging Voltage | 26V |
| Charging Time | Approx. 5 hours |
| Operating Time (High Speed) | Up to 20 minutes |
| Operating Time (Low Speed) | Up to 30 minutes |
| Dust Container Capacity | 0.51 L |
| Noise Level | <80 dB |
| Filter System | HEPA filter + Intake filter |
| Motorized Brush Tool | Yes, with overheating protection |
| Accessories Included | Crevice tool, Wall mount, Power charger |
| Cordless | Yes |
Frequently Asked Questions - TWIST OB20B Eldom
User questions about TWIST OB20B Eldom
0 question about this device. Answer the ones you know or ask your own.
Ask a new question about this device
Download the instructions for your Vacuum Cleaner in PDF format for free! Find your manual TWIST OB20B - Eldom and take your electronic device back in hand. On this page are published all the documents necessary for the use of your device. TWIST OB20B by Eldom.
USER MANUAL TWIST OB20B Eldom
natural_image
White and gray vacuum cleaner with extended handle and black handle (no visible text or symbols)
/PL/
Disposal of used electrical and electronic equipment (applies to the European Union countries and other European countries with separate waste collection systems).
The symbol on the product or its packaging indicates that the product should not be classified as household waste. It should be handed over to a collection point that deals with the collection and recycling of electrical and electronic devices. Correct disposal of the product prevents potential negative consequences for the environment and human health that could be caused by improper disposal of the product. Material recycling helps to preserve natural resources. For detailed information on recycling of this product, please contact your local authority, a cleaning service provider or a shop where the product has been bought.
/CZ/
AKUMULATOR
natural_image
Technical line drawing of a mechanical device with no visible text or symbols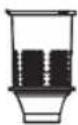
rys. 2
rys. 1
natural_image
Simple line drawing of a vertical vacuum cleaner with a downward arrow indicating motion (no text or symbols)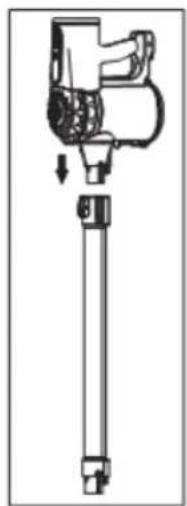
natural_image
Technical line drawing of a mechanical device with a shaft and lever assembly (no text or symbols)rys. 3
natural_image
Two views of a white industrial vacuum cleaner with visible internal components and mounting base (no text or symbols)rys. 4
LIKWIDACJA BATERII
- Before first use, please carefully read the entire content of this manual;
- The appliance is intended for private domestic use only. This appliance is not intended for use as part of economic activity;
- Do not use in the open air;
- The connecting cable should be connected to the wall outlet whose parameters are in compliance with those provided in the manual;
- The power cable must be kept away from hot surfaces;
- Move the cleaner using the holder;
- Do not use the vacuum cleaner to collect the following:
- Hot ash;
- Cigarette butts and matches;
- Sharp objects (glass splinters);
- Plaster, cement, stone dust, and flour, etc.
- Debris;
- Water or other liquids;
- Do not operate the appliance, if the filter is damaged;
- Do not cover the ventilating holes;
- Do not use the vacuum cleaner to clean wet carpets after e.g. cleaning with a washing shampoo. Wait until the foam dries and the cleaned surface is dry;
- Do not clean people or animals with the vacuum cleaner, in particular do not put the suction inlet near eyes or ears;
- Always disconnect the appliance from the mains by pulling the plug, not by the power cable;
- The appliance must be disconnected from the mains, before cleaning or replacing parts, and when it is not used;
- Do not grab the appliance, if your hands are wet;
- Do not immerse the appliance in water;
- The vacuum cleaner should be protected from moisture; do not place any dish with a liquid on it;
- Do not leave the appliance unattended;
- This appliance can be used by children, who are at least 8 years old, by people with reduced physical and mental
capabilities, and by people with lack of experience and knowledge of the equipment, provided that supervision or instructions for use of the appliance in a safe manner are ensured, so that the risks related to it are understood. Children should not play with the appliance. Children should not carry out cleaning and maintenance of the appliance without supervision;
- Exercise extreme caution, when working with the appliance in the presence of children;
- Do not use the vacuum cleaner without the filters and the waste bin;
- Do not stand on the inlet hose;
- Do not block the inlet hole;
- Use only with the original accessories provided;
- Before each cleaning and emptying, disconnect the appliance from the mains;
- Do not use, if the power cable is damaged, or when the appliance has been damaged in any other way. The appliance shall be repaired by an authorized service; information about the method of servicing is included in the warranty card and provided on www.eldom.eu;
- The appliance may be repaired only be an authorised service centre. Any modernisation or use of spare parts or components of the appliance other than the original ones is prohibited and can compromise the safety of use;
- DO NOT use the device in a manner inconsistent with its intended use and this manual;
- ELDOM Sp. z o. o. shall not be liable for potential losses due to improper use of the device.
EN
INSTRUCTION MANUAL
VACUUM CLEANER OB20B
eldom
GENERAL DESCRIPTION
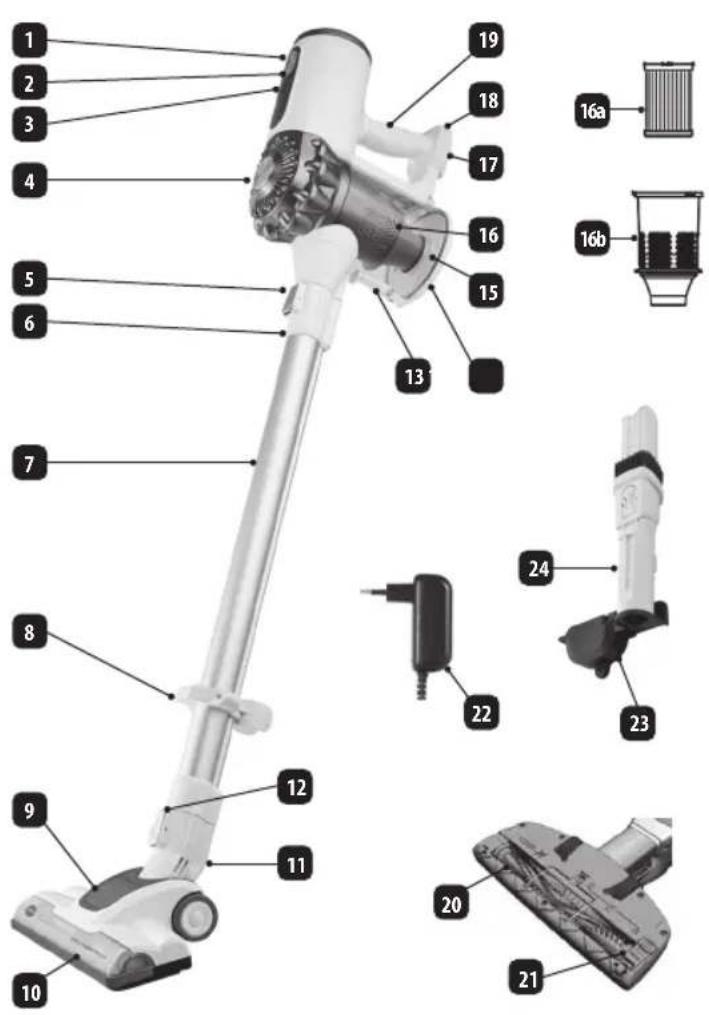
1 Power switch
2 Suction power control
3 Battery power indicator
4 Vacuum housing
5 Wand release
6 Wand adapter
7 Wand
8 Storage bracket
9 Motorized brush tool
10 Brush tool light
11 Brush tool adapter
12 Brush tool release
13 Dust canister release
14 Dust canister lid
15 Dust canister
16 Filtering unit
a. HEPA filter
b. Intake filter
17 Storage catch
18 Power charger input receptacle
19 Handle
20 Brush tool shaft
21 Brush tool shaft release
22 Power charger
23 Wall mount
24 2-in-1 crevice tool
TECHNICAL DATA
Rated power: 130W
Supply voltage: 100-240V, \~50 Hz
Maximum vacuum: 12kPa
Operating voltage: 22.2V
Charging voltage: 26V
Volume: <80dB
Operating times after full charge
- at high speed for up to 20 minutes,
- at low speed for up to 30 minutes.
Dust-container capacity: 0.51
Battery: Li-ION 22.2 V, 2200 mAh
BATTERY
- The vacuum cleaner can only be used if the integrated battery pack is fully charged. The charging time is approximately 5 hours.
- After unpacking and assembling the vacuum cleaner, charge the battery pack.
- Charge the vacuum cleaner at room temperature.
- The battery power indicator (3) flashes when charging and lights up continuously when the battery pack is fully charged. To extend the battery pack life, the first recharging should be done without any interruption and after the battery pack is completely drained.
- To extend the battery pack life, the first 3 recharging cycles should be done without any interruption, with each cycle after the battery pack is completely drained.
- A fully charged vacuum cleaner will run at full suction power for about 20 minutes. Then the suction power drops rapidly and the vacuum cleaner will need to be recharged.
- If the vacuum cleaner is not used for a long time, charge it at least once every 6 months.
- Plug the power adapter cable (22) to the power adapter input receptacle (18). Plug the power adapter (22) cord to a power outlet with the mains ratings which match the appliance ratings specified in the manual.
- Once the battery pack has been fully charged, unplug the power adapter (22) from the mains and unplug the power adapter cable from the input receptacle (18).
ASSEMBLY
Unpack the product and check all components for damage.
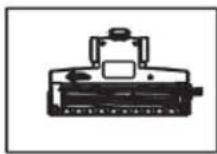
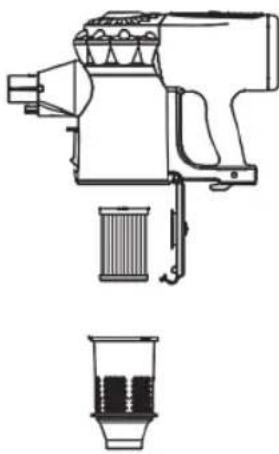
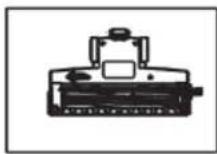
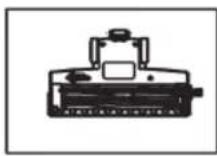
- Open the dust canister lid (14) and place the HEPA filter (16a) first and the intake filter (16b) second in the dust canister (15), see Fig. 1. Secure both filters by turning them clockwise to stop. Then, close the dust canister lid (13).
NOTE. Do not use the vacuum cleaner without the filters (16a, 16b) installed.
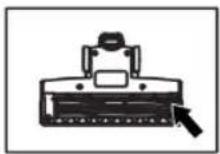
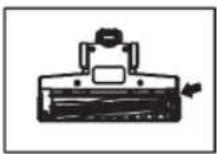
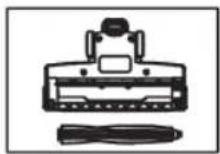
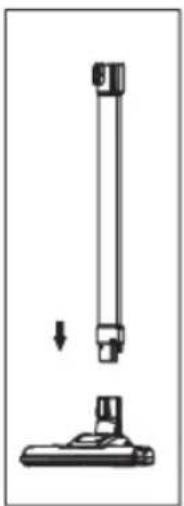
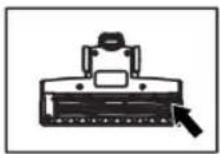
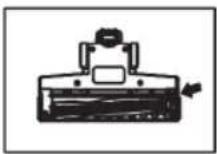
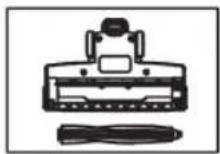
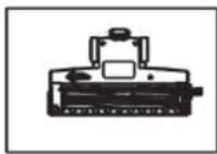
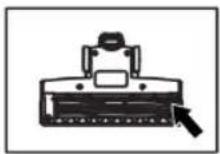
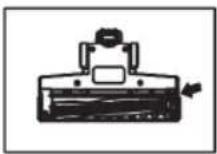
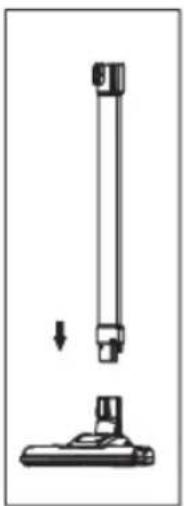
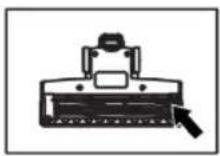
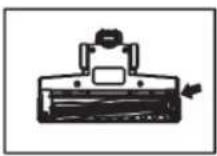
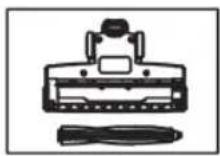
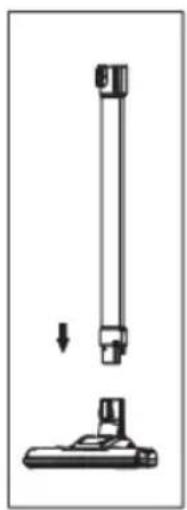
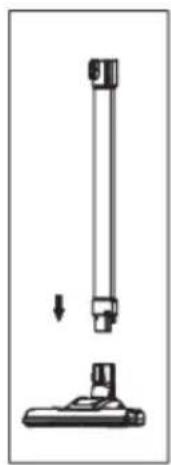
- Press the brush tool shaft release (21), install the brush tool shaft (20) in place and secure it with the release (21), see Fig. 2.
NOTE. Do not use the vacuum cleaner with the brush tool (9) without a correctly installed brush tool shaft (20).
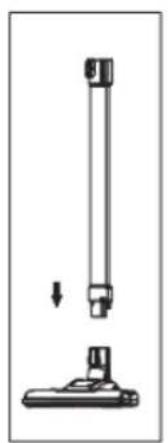
- Insert the assembled brush tool (9) in the brush tool adapter (11) or the wand adapter (6), see Fig. 2. To remove the brush tool, press the brush tool release (12) or the wand release (5) and slide it out of the adapter.
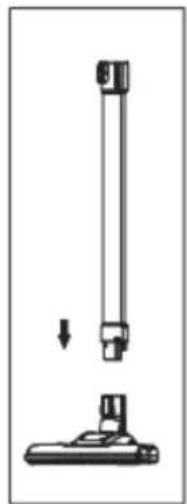
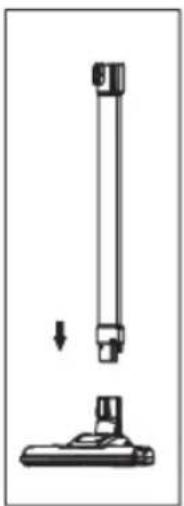
- Insert one end of the wand (7) into the wand adapter (6).
- The crevice tool (24) can be attached to the brush tool adapter (11) or the wand adapter (6) as required.
- The vacuum cleaner starts working when you press the power switch (1). The suction power can be adjusted with the suction power control (2).
- Observe the filling level of the dust canister (15). When the dust canister is filled to the MAX line, empty the dust canister (15) (see Section EMPTYING THE DUST CANISTER).
NOTE. Do not start the vacuum cleaner if the dust canister contents reach the MAX line.
- The brush tool shaft (20) in the brush tool (9) rotates at a very high speed. Do not let the brush tool (9) dwell too long at the same place to avoid damage to the flooring.
NOTE. The motorized brush tool (9) has an overheating protection that can cut off the power supply from the brush tool shaft drive (20) if the shaft drive is blocked. If this happens, turn off the vacuum cleaner, remove the brush tool shaft and clean it. Do not turn on the vacuum cleaner until it cools down.
- Press the power switch (1) to stop the vacuum cleaner.
NOTE. Do not obstruct the air outlet vents in the vacuum housing (4) when the vacuum cleaner is running.
CLEANING AND MAINTENANCE
- Before carrying out any maintenance or repair work, turn off the vacuum cleaner and disconnect it from the power supply.
- Regular cleaning and replacement of the filters (16a, 16b) and emptying the dust canister (15) will ensure failure-free operation of the vacuum cleaner.
- Clean the vacuum housing, the tools and accessories and the power cord with a soft cloth slightly damp with water and a little of dishwashing soap.
- Do not immerse the vacuum cleaner in water.
- Do not use any aggressive cleaning agents to clean the vacuum housing, otherwise its surfaces can be damaged.
Emptying the dust canister
Regular emptying of the dust canister ensures proper operation of the vacuum cleaner and helps maintain the optimum suction power.
- Make sure that the vacuum cleaner is turned off.
- Open the lid (14) of the dust canister (15) above a trash bin and dispose of the dust and debris.
- Then remove the filters (16b and 16b) from the dust canister held over the trash bin and clean the filters.
- The intake filter (16b) can be washed with water and needs to be dried thoroughly afterwards.
- Do not wash the HEPA filter (16a) with water every time you clean it. Clean it with water if the dirt is very persistent. Having cleaned it with water, dry the HEPA filter thoroughly (leave it to dry for at least 24 hours) before using it again.
- Wipe the inside of the dust canister clean with a damp cloth.
NOTE. The filters (16b, 16a) must be thoroughly dried and installed in the dust canister (15) before using the vacuum cleaner again.
Filters
Check the condition of the filters (16a, 16b) regularly and replace them periodically. This applies especially to the HEPA filter (16a).
NOTE. Filters are consumables and subject to natural wear and tear, and therefore cannot be replaced under warranty.
Cleaning the motorized brush tool (9)
- Make sure that the vacuum cleaner is turned off.
- Press the release (12 or 5) and remove the brush tool (9).
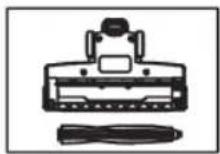
- Press the release (21) and push out the brush tool shaft (20), see Fig. 2. Clean the brush tool shaft. It is best to use scissors to cut the hair entangled in the brush tool shaft.
- Clean the brush tool (9) with a soft cloth slightly damp with water and a little of dishwashing soap.
NOTE! . Do not immerse the brush tool (9) in water.
- After cleaning, install the brush tool shaft (20) in the motorized brush tool (9) and secure it by engaging the release (21), see Fig. 2.
STORAGE
- The vacuum cleaner is self-supporting in its upright orientation and should therefore be stored with the wand fully extended.
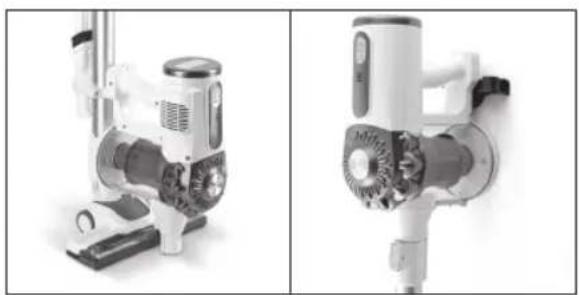
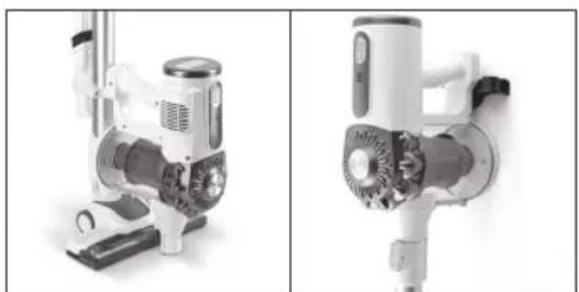
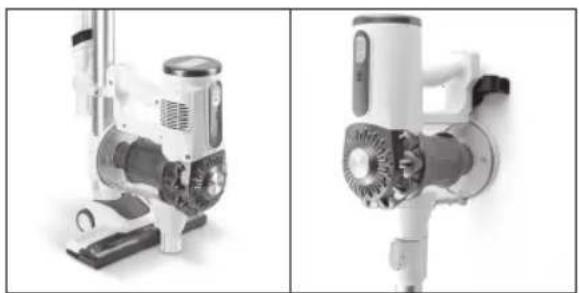
- The vacuum cleaner can also be hung on the wall mount (23) attached to a wall or by the storage bracket (8) and the storage catch (17) Fig.4.
- The wall mount and the storage bracket (23 and 8) can accommodate the crevice tool (24).
natural_image
Technical line drawing of a mechanical device with a side view showing internal components (no text or symbols)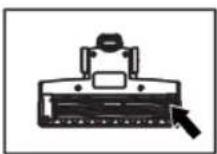
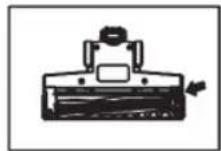
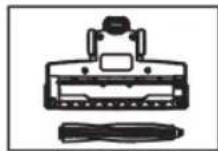
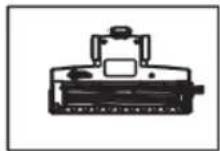
Fig. 2
Fig. 1
natural_image
Diagram of a vertical vacuum cleaner with a downward arrow indicating force or movement (no text or symbols)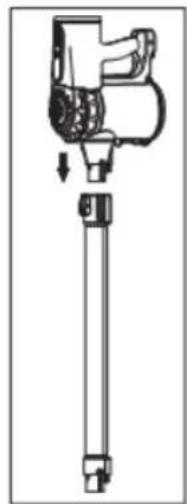
natural_image
Technical line drawing of a mechanical device with a lever and shaft (no text or symbols)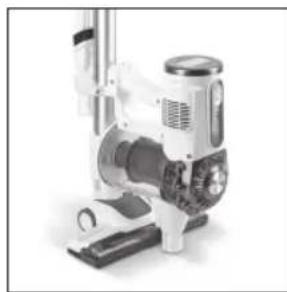
natural_image
Exterior view of a white industrial pump or scrubber device (no visible text or symbols)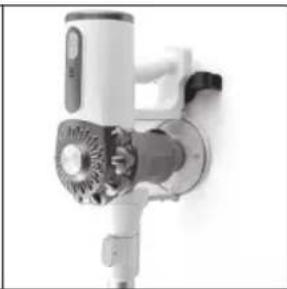
natural_image
Close-up of a white handheld vacuum cleaner with visible mechanical components and fan (no text or symbols)Fig. 4
Fig. 3
ENVIRONMENTAL PROTECTION
- the appliance is made of materials which can be recovered or recycled
- the appliance should be handed over to the appropriate centre of collection and recycling of electrical and electronic equipment.
WARRANTY
• the appliance is intended for personal use at a household,
- it is not intended for professional purposes,
- in case of misuse, the warranty is rendered null and void.
BEZPEČNOSTNÍ POKYNY
natural_image
Technical line drawing of a mechanical device with no visible text or symbols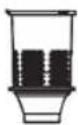
obr. 2
obr. 1
natural_image
Simple line drawing of a vertical vacuum cleaner with a downward arrow indicating motion (no text or symbols)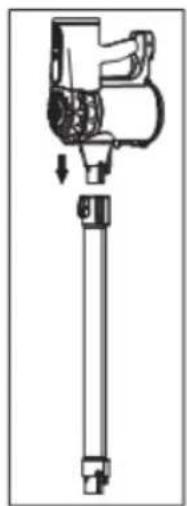
natural_image
Technical line drawing of a mechanical device with a shaft and lever assembly (no text or symbols)obr. 3
natural_image
Two views of a white industrial vacuum cleaner with visible internal components and mounting base (no text or symbols)obr. 4
OCHRANA ŽIVOTNÍHO PROSTŘEDÍ
AKKU
natural_image
Technical line drawing of a mechanical device with a side-view inset showing internal components (no text or symbols)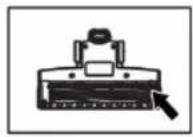
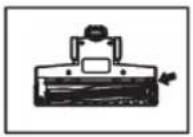
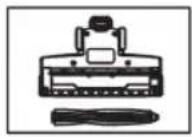
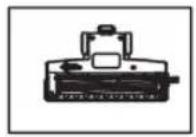
Abb. 2
Abb. 1
natural_image
Diagram of a vertical cylindrical device with a base, showing a downward arrow indicating motion (no text or symbols present)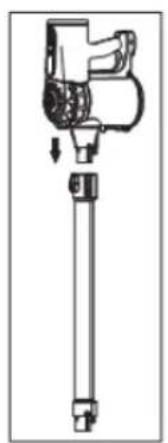
natural_image
Technical line drawing of a mechanical device with a cylindrical shaft and lever (no text or symbols)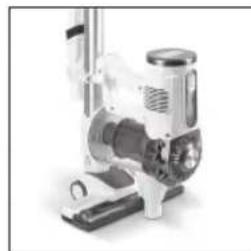
natural_image
Exterior view of a white industrial vacuum cleaner with control panel and mechanical components (no visible text or symbols)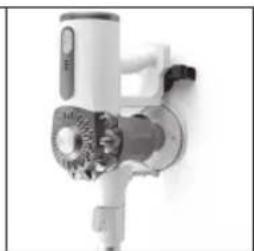
natural_image
Close-up of a white handheld device with mechanical components and a circular dial (no visible text or symbols)Abb. 4
Abb. 3
UMWELTSCHUTZ
АККУМУЛЯТОР
natural_image
Diagram of a vertical cylindrical device with a base, showing a downward arrow and a small protrusion (no text or symbols)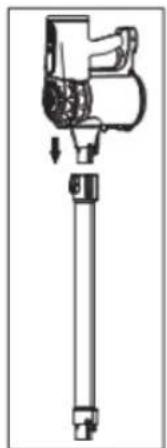
natural_image
Technical line drawing of a mechanical device with a shaft and lever (no text or symbols)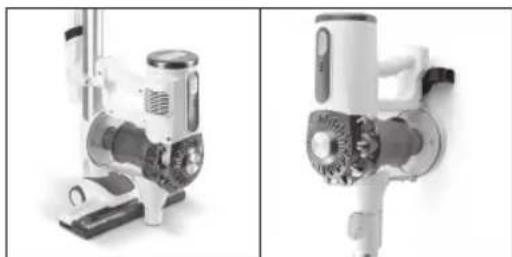
natural_image
Two views of a vacuum cleaner device showing internal components and housing (no text or symbols visible)рис.4
рис.3
AKUMULÁTOR
natural_image
Technical line drawing of a mechanical device with no visible text or symbols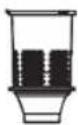
obr. 2
obr. 1
natural_image
Simple line drawing of a vertical vacuum cleaner with a downward arrow indicating force or movement (no text or symbols)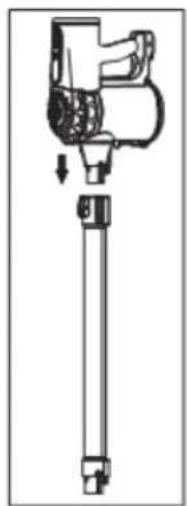
natural_image
Technical line drawing of a mechanical device with a shaft and lever assembly (no text or symbols)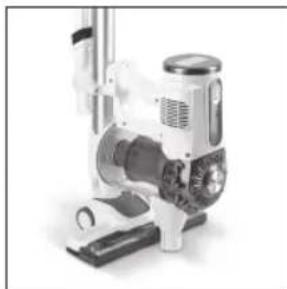
natural_image
Exterior view of a white industrial vacuum cleaner with control panel and mechanical components (no visible text or symbols)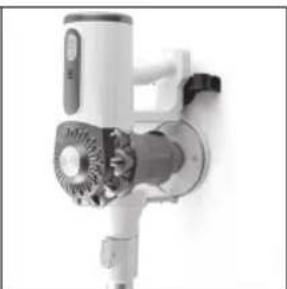
natural_image
Close-up of a white handheld electric shaver with visible gears and shaft (no text or symbols)obr. 4
obr. 3
OCHRANA ŽIVOTNÉHO PROSTREDIA
AKKUMULÁTOR
natural_image
Technical line drawing of a mechanical device with no visible text or symbols
2. rajz
- rajz
natural_image
Simple line drawing of a vertical cylindrical device with a base, showing a downward arrow indicating motion (no text or symbols)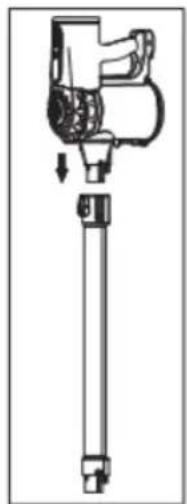
natural_image
Technical line drawing of a mechanical device with a cylindrical shaft and lever assembly (no text or symbols)- rajz
natural_image
Two views of a white electric vacuum cleaner with visible internal components and mounting base (no text or symbols)- rajz
KÖRNYEZETVÉDELEM
natural_image
Technical line drawing of a mechanical device with a side-view inset showing internal components (no text or symbols)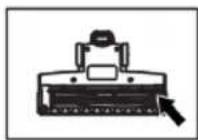
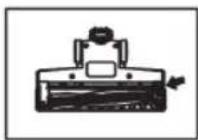
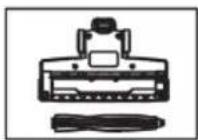
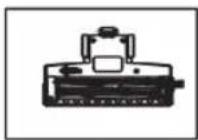
fig. 2
fig. 1
natural_image
Simple line drawing of a vertical cylindrical device with a base, showing a downward arrow indicating motion (no text or symbols)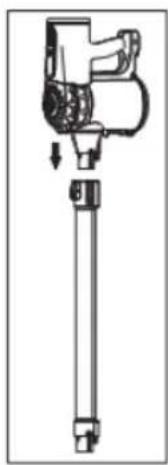
natural_image
Technical line drawing of a mechanical device with a cylindrical shaft and lever assembly (no text or symbols)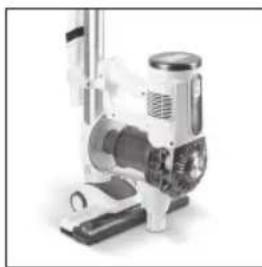
natural_image
Industrial machine component with cooling fan and mounting base (no visible text or symbols)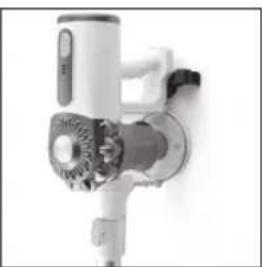
natural_image
Close-up of a white handheld device with mechanical components (no visible text or symbols)fig. 4
fig. 3

- /PL/
- /CZ/
- AKUMULATOR
- LIKWIDACJA BATERII
- EN
- INSTRUCTION MANUAL
- VACUUM CLEANER OB20B
- GENERAL DESCRIPTION
- TECHNICAL DATA
- BATTERY
- ASSEMBLY
- CLEANING AND MAINTENANCE
- Emptying the dust canister
- Filters
- Cleaning the motorized brush tool (9)
- STORAGE
- ENVIRONMENTAL PROTECTION
- WARRANTY
- BEZPEČNOSTNÍ POKYNY
- OCHRANA ŽIVOTNÍHO PROSTŘEDÍ
- AKKU
- UMWELTSCHUTZ
- АККУМУЛЯТОР
- AKUMULÁTOR
- OCHRANA ŽIVOTNÉHO PROSTREDIA
- AKKUMULÁTOR
- KÖRNYEZETVÉDELEM
Brand : Eldom
Model : TWIST OB20B
Category : Vacuum Cleaner