
N10 GPS 3in1 - Dash Cam Lamax - Free user manual and instructions
Find the device manual for free N10 GPS 3in1 Lamax in PDF.


| Product Type | 3-in-1 GPS Dashcam |
| Brand | Lamax |
| Model | N10 GPS 3in1 |
| Dimensions (W x H x D) | 7.2 x 5.0 x 3.0 cm |
| Weight | 95 g |
| Power Input | 5V DC via USB (12V car adapter included) |
| Battery | Built-in 200 mAh Li-ion |
| Maximum Resolution | Full HD 1920x1080 @ 30fps |
| Field of View | 170° wide angle |
| GPS Built-in | Yes, with GLONASS support |
| G-Sensor | 3-axis accelerometer (event detection) |
| Loop Recording | Yes, with configurable segment duration (1/3/5 min) |
| Parking Mode | Yes, motion detection and impact sensing |
| Memory Card Support | MicroSD up to 128 GB (Class 10 or UHS-I) |
| Display | 2.0 inch LCD screen |
| Mounting | Suction cup mount (windshield) |
| Operating Temperature | -20°C to 70°C |
| Warranty | 2 years |
| Spare Parts Available | Mount, USB cable, car charger, adhesive pads |
| Cleaning Instructions | Wipe with a soft, dry cloth. Avoid solvents. |
| Safety Note | Secure mount to prevent detachment during driving. |
Frequently Asked Questions - N10 GPS 3in1 Lamax
User questions about N10 GPS 3in1 Lamax
0 question about this device. Answer the ones you know or ask your own.
Ask a new question about this device
Download the instructions for your Dash Cam in PDF format for free! Find your manual N10 GPS 3in1 - Lamax and take your electronic device back in hand. On this page are published all the documents necessary for the use of your device. N10 GPS 3in1 by Lamax.
USER MANUAL N10 GPS 3in1 Lamax
natural_image
Black LAMAX digital camera with dual-mounted display and rear camera module (no visible text or symbols)CONTENTS
- BOX CONTENTS 1
- GETTING TO KNOW THE CAMERA 2
- INSTALLATION/FIRST POWER ON....3
- PLACEMENT ON WINDSCREEN....4
- BASIC FUNCTIONS .... 5
- WIFI APPLICATION 5
- SETTINGS OVERVIEW 7
- SPECIFICATIONS 8
- FIRMWARE UPDATE....9
1. BOX CONTENTS


natural_image
Diagram of a pen-like device with a circular label and a separate circular component (no text or symbols)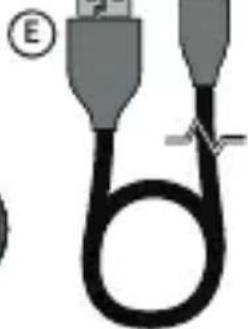
natural_image
Pure electrical circuit lines without any symbols
natural_image
Illustration of a USB cable with a labeled point F (no text or symbols on the cable itself)
natural_image
Two overlapping red squares with a white circular logo containing the letter 'G' (no text or symbols on the shapes themselves)


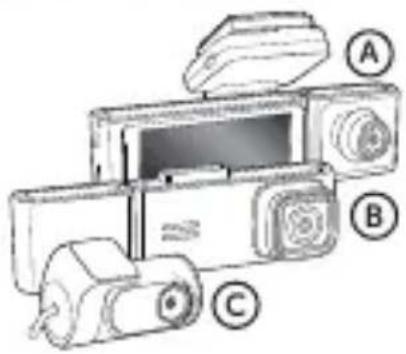
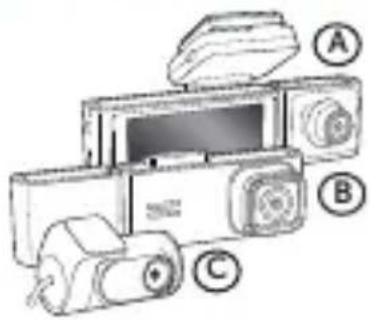
Ⓐ Interior camera
⑧ LAMAX N10 GPS 3in1 dashcam
© Rear camera
(D) Power adapter with two USB-A ports
E 3.5m power cable
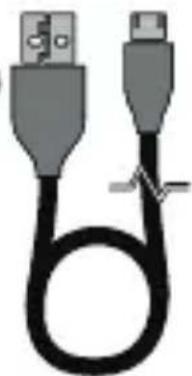
⑤ 20cm USB-C data cable
© Spare 3M adhesive sticker for mount
(H) Cable holder (5×)
① Trim tool (1×)
① Elektrostatic stickers for easier mount removal (2×)
Not shown: SD card reader
2. GETTING TO KNOW THE CAMERA

- Display
- GPS holder
- Speaker
- On/off button
- UP button
- OK button
- DOWN button
- M/8 button
Status LEDs
Green - on = camera is on but not recording.
Green - flashing = camera is on and recording.
Red = camera is off
- Microphone
- Reset button
- USB-C charging port
- Rear camera cable entry
- Memory card slot
- Interior camera port
- Rear camera
- Interior camera
CONTROL
| On/Off button | While the camera is off, press once to turn it on. |
| While the camera is on, long press to turn it off. | |
| While the camera is on, short press to sleep/wake up the display. | |
| UP button | Short press to change camera view mode. |
| Long press (for 2 seconds) to turn on/off the car camera. | |
| OK button | Press once to start/stop recording. |
| Press once to play/pause recording in playback mode. | |
| Press once to enter/confirm menu settings. | |
| DOWN button | Press once to take a photo. |
| Long press (for 2 seconds) to turn on Wi-Fi (turn on the Wi-Fi signal from the dash cam). | |
| M/8 button | Press once to enter/exit the settings menu. |
| During interrupted recording, press to enter/exit the settings menu. | |
| While recording, press to manually lock the footage against overwriting. |
3. INSTALLATION/FIRST POWER ON

flowchart
graph LR
    A["Step A: Mechanical assembly with tool input"] --> B["Step B: Tool application"]
    B --> C["Step C: Computer monitor setup"]
Ⓐ Insert the microSD card into the camera.
- Use branded cards from renowned U3 class manufacturers with a capacity of up to 256 GB.
Only remove the card when the camera is turned off.
When using the card for the first time, format it directly in the camera and repeat the format at least once a month to ensure the proper functioning of the camera.
If you need to remove the memory card, gently push it with your finger towards the camera to release it from the slot and make it easier to remove.
Warning: Never remove the memory card from the camera by force. There is a risk of damage to the action camera and the memory card.
(B) Plug the adapter into the car cigarette lighter and use the USB cable to connect it to the camera holder. The camera is designed to operate only when connected to power.
Instead of a battery, the camera contains a supercapacitor, which enables power supply and has a longer lifespan than a classic battery.
© When connected to power, the camera will automatically turn on and start recording.
In some vehicles, it is first necessary to turn the key in the ignition.
(D) Before gluing the mount to the glass, perform basic camera settings.
4. PLACEMENT ON WINDSCREEN

natural_image
Interior view of a car dashboard and steering wheel (no text or symbols visible)

natural_image
Diagram showing a device with a red handle and connected to a screen, enclosed in a blue arrow shape (no text or symbols)

natural_image
Illustration of a hand holding a device with a circular symbol and an 'E' label, no readable text or symbols present.(A) The ideal place to attach the dashcam is the space between the windscreen and the rearview mirror so as not to obstruct the driver's view.
Make sure that the cable does not interfere with the active security elements in the car (airbag).
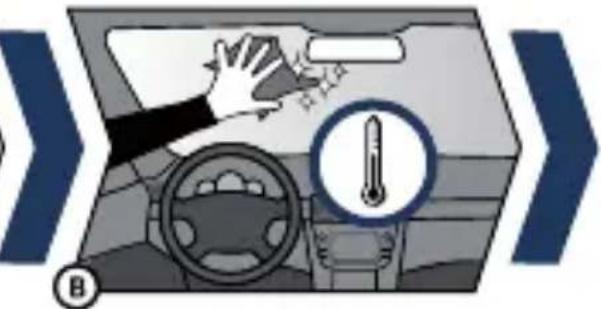
⑧ The mounting surface should be clean and dry.
The ideal temperature for adhesion is 20irc C – 40irc C.
© Remove the protective film from the 3M adhesive pad on the camera mount.
(D) Before adhering to the glass, turn on the camera and make sure it provides the right viewpoint.
E Press the 3M pad firmly onto the glass and hold.
Use electrostatic stickers for easier mount removal if desired.
5. BASIC FUNCTIONS
Automatic on/off
- Insert the adapter into the cigarette lighter socket.
After starting the car engine, the camera will automatically turn on and start recording. In some car models, the camera can turn on and start recording after the key is inserted into the ignition and turned to the on position.
- When the engine is turned off, the video recording will automatically end and the camera will turn off.
6. WIFI APPLICATION
Ⓐ Scan the QR code or go to the URL lamax-electronics.com/n10/app
⑧ Install the app on your smartphone or tablet.
© Turn on WiFi in the camera in the settings menu - the name of the dashcam and the WiFi password will appear on the display (default is 12345678).
(D) On your phone / tablet, connect to the WiFi network with the name of the camera, launch the app and connect to the camera.

Application controls—before connecting
E Connect camera
F Files dragged to your phone
© Application updates
(H) Application information

Application controls—after connecting
① Camera setting
① Front/Rear camera view
© Files in the camera
L Start/Stop recording
M Audio recording ON/OFF
N Switch photo/video mode
Switch front/rear camera
P Resolution setting

- SETTINGS OVERVIEW
| Resolution | Set the video resolution. Higher resolution = more detail and larger file. |
| Loop recording | Set the length of individual loops. Longer loop = bigger file. |
| Display the image of the rear camera | Default setting = offWhen switched on, the rear camera image will be displayed on the dashcam display. |
| Time-lapse recording | Set the length of the time-lapse recording. |
| Microphone | Turn the microphone on/off. |
| Frequency | The frequency is set according to the country of use. |
| Gallery | Playback of recordings. |
| Screen saver | Screen saver settings. |
| G-sensor | Setting the sensitivity of the G-sensor. |
| Wi-Fi | Turn Wi-Fi on/off. |
| Watermark | Turn on/off the watermark in the video. |
| Format | Format the data on the memory card. Attention, including protected files! |
| GPS | Set the GPS data. |
| System Settings | Button sound, volume, language, time zone, date and time, license plate, factory settings are set. |
| About the camera | Camera information including FW version and Wi-Fi information will be displayed. |
- SPECIFICATIONS
| Video resolution (front camera) | *3840×2160/25fps 2560×1440/30fps 1920×1080/30fps | *interpolated |
| Video resolution (front + interior camera) | 2560×1440/30fps + 1920×1080/30fps | |
| Video resolution (front+ rear camera) | *3840×2160/25fps + 1920×1080/30fps | |
| Video resolution (front + interior+ rear camera) | 2560×1440/30fps + 1920×1080/30fps + 1920×1080/30fps | |
| Angle of view (front / rear camera) | 150°/130° | |
| Video format and compression | MP4, compression H.264 | |
| Sound | Built-in microphone (option to mute) | |
| Display | 3.18" IPS 376*960 | |
| GPS | Yes | |
| G-sensor | Yes | |
| Wi-Fi | 5 GHz | |
| MicroSD card slot | Up to 256 GB | |
| Locking files against overwriting | YesOption to lock the file against overwriting by pressing a button while recording | |
| Automatic start/stop function | YesAutomatic start after power supplyAutomatic shutdown after power failure | |
| Motion detection | Yes | |
| Timelapse video | Yes | |
| Language | Czech, English, German, Polish, Hungarian, Slovak | |
| WDR | Yes | |
| Other functions | Auto launch, loop recording, motion detection, time lapse, G-sensor, time in video (on optional), GPS coordinates in video, speed in video (on optional), driver name in video (on optional), screen saver (black screen/speedometer), automatic summer/ winter time, recording protection, audio recording with option to switch off, time zone selection, memory card formatting reminder | |
| Mobile app feature | Basic settings, start/stop recording, take photo, preview front/rear camera, play videos, download videos | |
| Connectivity | Wi-Fi 5 GHzUSB-C | |
| Holder | Magnetic | |
| Attaching the holder to the glass | 3M adhesive pad | |
| Battery | Supercapacitor | |
| Charger - input | 12 - 24 V | |
| Charger - output | 5 V / 2.4 A5 V / 3 A | |
| Power cord length | 350 cm | |
| Dimensions | 144 × 45 × 38 mm | |
| Weight | 162 g | |
| Operating temperature | -10 °C - +50 °C | |
9. FIRMWARE UPDATE

flowchart
graph LR
    A["Updates"] --> B["i n l"]
    B --> C["Download"]
    C --> D["Computer monitor"]
You can always find the current camera firmware in the „Download“ section of the product website: https://www.lamax-electronics.com/n10.
UPDATE PROCEDURE
1) Remove the microSD card from the dash cam, insert it into the SD card reader and insert it into your computer, which you format in PC / Mac.
2) Download and open the .zip file where you will find the .bin file. Do not change
the file names.
3) Copy the files to the formatted microSD card.
4) Remove the reader from the computer and remove the microSD card from it. Put this in the off camera.
5) Press and hold the M button and plug in the camera. The update should start automatically after booting. "System Update" will appear on the display.
6) Make sure the camera is powered on throughout the update.
7) Wait for the update to complete completely. This usually takes 1 to 3 minutes. When the update is complete, the camera will automatically turn on.
8) Then format the memory card on the computer.
9) You can view the current firmware version in the settings in the „About camera" menu.
Typographical errors reserved.
LAMAX
ELECTRONICS
N10 GPS 3in1

natural_image
Black LAMAX 2D dual-camera device with front-mounted display and camera module (no visible text or symbols)INHALT

flowchart
graph LR
    A["QR code"] --> B["Input icon with 'i'"]
    B --> C["Download icon with '↓'"]
    C --> D["Computer monitor with '↓'"]
natural_image
Black LAMAX 2D dual-camera device with front-mounted display showing city skyline (no text or symbols visible)OBSAH
- OBSAH BALENI 1
- SEZNÁMENÍ S KAMEROU 2
- PRVNI ZAPNUTI 3
- UMÍSTĚNÍ NA SKLO ____ 4
- ZÄKLADNİ FUNKCE 5
- WIFI APLIKACE 5
- ÚPLNÉ NASTAVENÍ 7
- SPECIFIKACE 8
- AKTUALIZACE FIRMWARE 9
1. OBSAH BALENÍ

natural_image
Two overlapping red squares with a white circular logo containing the letter 'G' (no text or symbols on the shapes themselves)
natural_image
Illustration of a pen and its internal components (no text or symbols)
natural_image
Pure electrical circuit lines without any symbols
natural_image
Illustration of a USB cable with a labeled point F (no text or symbols on the cable itself)


natural_image
Plain yellow rectangle with a small black circle containing the letter 'J' in the top-left corner (no other text or symbols)flowchart
graph LR
    A["Step a: Mechanical assembly with input cable"] --> B["Step b: Inspection device"]
    B --> C["Step c: Final product inspection with monitor"]
Ⓐ Vložte microSD kartu do kamery.

natural_image
Diagram of a device with a red dashed line and a blue arrow pointing to it, no readable text or symbols present.

natural_image
Illustration of a hand holding a device with a compass and circular symbol (no text or labels)- ÚPLNÉ NASTAVENÍ
flowchart
graph LR
    A["Updates"] --> B["Image icon: i pointing hand"]
    B --> C["Download icon with download arrow"]
    C --> D["Computer monitor with download arrow"]
natural_image
Black LAMAX 2D dual-camera device with a cityscape display, shown from front and side (no text or symbols on the device itself)OBSAH
- OBSAH BALENIA....1
- ZOZNÁMENIE S KAMEROU 2
- INSTALÁCIA/PRVÉ ZAPNUTIE 3
- UMIESTNENIE NA SKLO 4
- ZÁKLADNÉ FUNKCIE 5
- WIFI APLIKÂCIE 5
- ÚPLNÉ NASTAVENIE 7
- SPECIFIKÁCIA 8
- AKTUALIZÁCIA FIRMWARE 9
1. OBSAH BALENIA


natural_image
Two overlapping red squares with a circled number ⑤ in the top-right corner (no text or symbols on the squares)
natural_image
Illustration of a cylindrical device with a circular top labeled 'D' and a separate circular button labeled 'LEAVE' (no text or symbols on the device itself)E
natural_image
Pure electrical connector diagram showing two USB connectors with a coiled cable (no text or symbols)F

natural_image
Illustration of a USB cable with two connectors (no text or symbols)

J

natural_image
Simple yellow square with a small protrusion at the top (no text or symbols)natural_image
Interior view of a car dashboard and steering wheel (no text or symbols visible)

natural_image
Diagram of a device with a monitor and antenna, no visible text or symbols
natural_image
Diagram showing a device with directional arrows and a labeled point D (no text or symbols present)
natural_image
Illustration of a hand holding a device with a compass icon and a circular symbol (no text or labels)
- ÚPLNÉ NASTAVENIE
natural_image
Exterior view of a black LAMAX digital camera with dual driving modules and a cityscape background (no text or symbols visible)TREŚĆ
- ZAWARTOŚĆ OPAKOWANIA 1
- ZAPOZNANIE SIĘ Z APARATEM....2
- INSTALACJA/PIERWSZE WŁĄCZENIE 4
- UMIESZCZENIE NA SZKLE 5
- PODSTAWOWE FUNKCJE....5
- APLIKACJA WIFI....6
- PEŁNA KONFIGURACJA 8
- SPECYFIKACJE 9
- AKTUALIZACJA FIRMWARE....11
1. ZAWARTOŚĆ OPAKOWANIA

natural_image
Two overlapping red squares with a circled number ⑤ in the top-right corner (no text or symbols on the squares themselves)
natural_image
Illustration of a cylindrical device with a labeled circular inset showing two rectangular buttons (no text or symbols)
natural_image
Pure electrical circuit lines without any symbols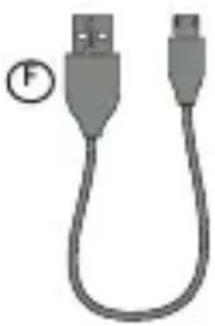
natural_image
Illustration of a USB cable with a fuse (no text or symbols)


natural_image
Plain yellow rectangle with a small circled number 'J' in the top-left corner (no other text or symbols)- PEŁNA KONFIGURACJA
natural_image
Black LAMAX dual-camera digital camera with front-mounted display and rear-mounted sensor (no visible text or symbols)TARTALOM
- A CSOMAG TARTALMA 1
- ISMERKEDÉS A FÉNYKÉPEZÖVEL 2
- TELEPÍTÉS/ELSŐ BEKAPCSOLÁS 3
- ELHELYEZÉS ÜVEGEN....4
- ALAPVETÖ FUNKCIÖK 5
- WIFI APP 5
- TELJES BEÁLLÍTÁS 8
- MÜSZAKI ADATOK....9
- ALAPSZOFTVER FRISSÍTÉS 10
1. A CSOMAG TARTALMA


natural_image
Two overlapping red squares with a white circular logo containing the letter 'G' (no text or symbols on the shapes themselves)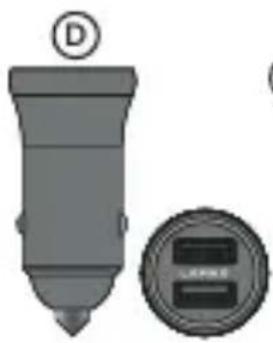
natural_image
Diagram of a pen-like device with a circular button labeled 'D' and a close-up view of its internal components (no text or symbols present)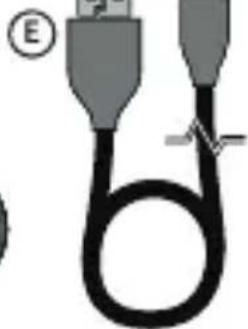
natural_image
Pure electrical circuit lines without any symbols
natural_image
Illustration of a USB cable with a labeled point F (no text or symbols on the cable itself)


flowchart
graph LR
    A["Step A: Mechanical assembly with valve and sensor"] --> B["Step B: Inspection device"]
    B --> C["Step C: Monitoring device"]

natural_image
Interior view of a car dashboard and steering wheel (no visible text or symbols)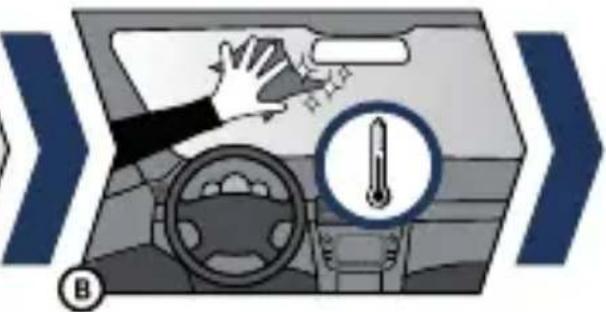

natural_image
Diagram of a device with a red laser beam and control panel, enclosed in a blue arrow shape (no text or symbols)

natural_image
Illustration of a hand holding a device with a compass and circular symbol (no text or labels)- TELJES BEÁLLÍTÁS
flowchart
graph LR
    A["QR Code"] --> B["Input Image"]
    B --> C["Download Icon"]
    C --> D["Computer Icon"]
natural_image
Black LAMAX 2D dual-camera device with front-mounted display showing city skyline and sky (no text or symbols visible)VSEBINA
- VSEBINA PAKETA 1
- SPOZNAVANJE 5 KAMERO 2
- NAMESTITEV/PRVI VKLOP 3
- NAMESTITEV NA STEKLO....4
- OSNOVNE FUNKCIJE 5
- APLIKACIJA WIFI....5
- POPOLNA NASTAVITEV 7
- SPECIFICATIONS 8
- POSODOBITEV VGODNO PROGRAMSKEGA PROGRAMA 9
1. VSEBINA PAKETA


natural_image
Two overlapping red squares with a white circular logo containing the letter 'G' (no text or symbols on the shapes themselves)
natural_image
Illustration of a cylindrical device with a circular label and a separate circular inset showing two rectangular components (no text or symbols)E

natural_image
Illustration of two USB connectors with a coiled cable (no text or symbols)F

natural_image
Illustration of a USB cable with two connectors (no text or symbols)

J

natural_image
Simple yellow rounded rectangle shape with a small protrusion at the top (no text or symbols)Ⓐ Notranja kamera
⑧ Avto kamera LAMAX N10 GPS 3v1
© Zadnja kamera
(D) Adapter z dvema priključkoma USB-A
E Napajalni kabel 3,5 m
(F) USB-C podatkovni kabel 20 cm
© Nadomestno držalo, vključno z nalepko 3M
natural_image
Interior view of a car dashboard and steering wheel (no text or symbols visible)

natural_image
Diagram of a device with a red dashed line and a blue arrow pointing to it, no readable text or symbols present.

natural_image
Illustration of a hand holding a small device with a compass and circular symbol (no text or labels)- POPOLNA NASTAVITEV
flowchart
graph LR
    A["Updates"] --> B["QR code"]
    B --> C["QR icon with hand pointing to 'i'"]
    C --> D["QR download icon with downward arrow"]
    D --> E["Computer monitor with downward arrow"]
natural_image
Black LAMAX dual-camera digital camera with front-mounted display and rear-mounted sensor (no visible text or symbols)SADRŽAJ
- SADRŽAJ PAKIRANJA....1
- UPOZNAVANJE SA KAMEROM....2
- INSTALACIJA/PRVO UKLJUČIVANJE 3
- POSTAVLJANJE NA STAKLO....4
- OSNOVNE FUNKCIJE 5
- WIFI APLIKACIJA....5
- POTPUNA POSTAVKA 7
- SPECIFICATIONS 8
- AŽURIRANJE FIRMWARE-A 9
1. SADRŽAJ PAKIRANJA


natural_image
Two overlapping red squares with a black circular logo containing the letter 'G' (no text or symbols on the shapes themselves)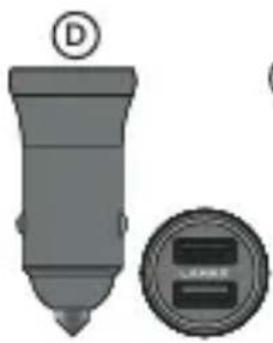
natural_image
Diagram of a pen-like device with a circular label and a separate circular component labeled 'LINKER' (no text or symbols on the device itself)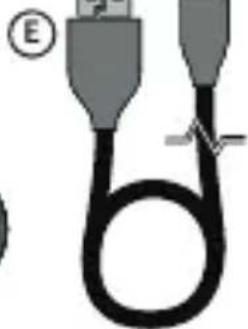
natural_image
Pure electrical circuit lines without any symbols
natural_image
Illustration of a USB cable with a pin labeled F (no text or symbols on the cable itself)

J

natural_image
Simple yellow square with a small protrusion at the top (no text or symbols)Ⓐ Unutarnja kamera
⑧ LAMAX N10 GPS 3u1 auto kamera
© Stražnja kamera
(D) Adapter s dva USB-A priključka
⑤ Kabel za napajanje 3,5 m
⑤ USB-C podatkovni kabel 20 cm
flowchart
graph LR
    A["Step A: Mechanical assembly with input cable"] --> B["Step B: Inspection instrument"]
    B --> C["Step C: Monitoring device"]
Ⓐ Umetnite microSD karticu u kameru.
- Koristite brendirane kartice renomiranih proizvođača U3 klase kapaciteta do 256 GB.
- Izvadite karticu samo kada je kamera isključena.
Kada karticu koristite prvi put, formatirajte je izravno u fotoaparatu i ponovite formatiranje barem jednom mjesečno kako biste osigurali pravilan rad fotoaparata. - Ako trebate izvaditi memorijsku karticu, nježno je gurnite prstom prema fotoa-paratu kako biste je oslobodili iz utora i lakše je izvadili.
Upozorenje: Nikada ne uklanjajte memorijsku karticu iz kamere na silu. Postoji opasnost od oštećenja akcijske kamere i memorijske kartice.

- POTPUNA POSTAVKA
| Razlika | Postavlja rezoluciju videa. Veća rezolucija = više detalja i veća datoteka. |
| Pucanje u petlju | Postavlja duljinu pojedinačnih petlji. Duža petlja = veća datoteka. |
| Prikažite sliku stražnje kamere | Zadana postavka = isključenoKada je uključeno, slika stražnje kamere bit će prikazana na zaslonu kamere. |
| Ubrzano snimanje | Postavlja duljinu snimanja ubrzanog tijeka. |
| Mikrofon | Uključuje/isključuje mikrofon. |
| Frekvencija | Učestalost je postavljena prema zemlji korištenja. |
| Galerija | Reprodukcija snimaka. |
| Čuvar zaslona | Postavke čuvara zaslona. |
| G-senzor | Podešavanje osjetljivosti G-senzora. |
| WiFi | Uključuje/isključuje Wi-Fi. |
| Vodeni žig | Uključuje/isključuje vodeni žig u videu. |
| Format | Formatira podatke na memorijskoj kartici. Pažnja, uključujući zaštićene datoteke! |
| GPS | Postavlja GPS podatke. |
| Postavke sustava | Postavljeni su zvuk gumba, glasnoća, jezik, vremenska zona, datum i vrijeme, registarska tablica, tvorničke postavke. |
| O kameri | Prikazat će se podaci o kameri uključujući verziju FW-a i informacije o Wi-Fi-ju. |
- SPECIFICATIONS
| Video rezolucija (prednja kamera) | *3840×2160/25fps 2560×1440/30fps 1920×1080/30fps | *interpolirano |
| Video rezolucija (prednja + unutarnja kamera) | 2560×1440/30fps + 1920×1080/30fps | |
| Video rezolucija (prednja + stražnja kamera) | *3840×2160/25fps + 1920×1080/30fps (*interpolirano) | |
| Video rezolucija (prednja + unutarnja + stražnja kamera) | 2560×1440/30fps + 1920×1080/30fps + 1920×1080/30fps | |
| Kut gledanja (prednja/stražnja kamera) | 150°/130° | |
| Video format i kompresija | MP4, H.264 kompresija | |
| Zvuk | Ugrađeni mikrofon (može se isključiti) | |
| Prikaz | 3.18 IPS 376*960 | |
| GPS | Da | |
| G-senzor | Da | |
| WiFi | 5 GHz | |
| microSD utor | Do 256 GB | |
| Zaključavanje datoteka od prepisivanja | DaMogućnost zaključavanja datoteke od prepisivanja pritiskom na gumb tijekom snimanja | |
| Automatska start/stop funkcija | DaAutomatski start nakon napajanjaAutomatsko isključivanje nakon nestanka struje | |
| Detektor pokreta | Da | |
| Timelapse video | Da | |
| Jezik | češki, engleski, njemački, poljski, mađarski, slovački | |
| WDR | Da | |
| Druge funkcije | Automatsko pokretanje, snimanje u petlji, detekcija pokreta, vremenski odmak, G-senzor, vrijeme u videu (opcionalno), GPS koordinate u videu, brzina u videu (opcionalno), ime vozača u videu (opcionalno), čuvar zaslona (crno) zaslon/brzinomjer), automatsko ljetno/zimsko računanje vremena, zaštita snimanja, audio snimanje s mogućnošću isključivanja, odabir vremenske zone, podsjetnik za formatiranje memorijske kartice | |
| Značajke mobilne aplikacije | Osnovne postavke, početak/zaustavljanje snimanja, snimanje fotografije, pregled prednje/ stražnje kamere, reprodukcija video, preuzimanje video | |
| Povezivost | Wi-Fi 5 GHzUSB-C | |
| Držač | Magnetski | |
| Pričvršćivanje držača na staklo | 3M naljepnica | |
| Baterija | Superkondenzator | |
| Punjač - ulaz | 12 – 24 V | |
| Punjač - izlaz | 5 V / 2.4 A5 V / 3 A | |
| Duljina kabela za napajanje | 350 cm | |
| Dimenzije | 144 × 45 × 38 mm | |
| Masa | 162 g | |
| Radna temperatura | -10 °C – +50 °C | |
9. AŽURIRANJE FIRMWARE-A

flowchart
graph LR
    A["Updates"] --> B["i"]
    B --> C["Download Icon"]
    C --> D["Computer Monitor"]
Trenutačni firmver fotoaparata uvijek možete pronaći u odjeljku „Preuzimanje“ na web stranici proizvoda: https://www.lamax-electronics.com/n10.
POSTUPAK AŽURIRANJA
1) Izvadite microSD karticu iz nadzorne kamere, umetnite je u čitač SD kartica i umet-
nite u svoje računalo koje formatirate na PC/Mac.
2) Preuzmite i otvorite .zip datoteku u kojoj ćete pronači .bin datoteku. Nemojte mijenjati nazive datoteka.
3) Kopirajte datoteke na formatiranu microSD karticu.
4) Uklonite čitač iz računala i izvadite iz njega microSD karticu. Stavi ovo u kameru.
5) Pritisnite i držite tipku M i uključite kameru. Ažuriranje bi trebalo početi automatski nakon dizanja. Na zaslonu će se pojaviti „Ažuriranje sustava“.
6) Provjerite je li kamera uključena tijekom ažuriranja.
7) Pričekajte da se ažuriranje potpuno završi. To obično traje 1 do 3 minute. Kada se ažuriranje završi, kamera će se automatski uključiti.
8) Zatim formatirajte memorijsku karticu na računalu.
9) Možete vidjeti trenutnu verziju firmvera u postavkama u izborniku „O kameri“.
Zadržano pravo na tiskarske pogreške.
LAMAX
ELECTRONICS



- CONTENTS
- BOX CONTENTS
- GETTING TO KNOW THE CAMERA
- Status LEDs
- INSTALLATION/FIRST POWER ON
- PLACEMENT ON WINDSCREEN
- BASIC FUNCTIONS
- Automatic on/off
- WIFI APPLICATION
- Application controls—before connecting
- Application controls—after connecting
- FIRMWARE UPDATE
- UPDATE PROCEDURE
- LAMAX
- ELECTRONICS
- N10 GPS 3in1
- INHALT
- OBSAH
- OBSAH BALENÍ
- OBSAH BALENIA
- TREŚĆ
- ZAWARTOŚĆ OPAKOWANIA
- TARTALOM
- A CSOMAG TARTALMA
- VSEBINA
- VSEBINA PAKETA
- SADRŽAJ
- SADRŽAJ PAKIRANJA
- AŽURIRANJE FIRMWARE-A
- POSTUPAK AŽURIRANJA
Brand : Lamax
Model : N10 GPS 3in1
Category : Dash Cam