
C11 GPS 4K - Dash Cam Lamax - Free user manual and instructions
Find the device manual for free C11 GPS 4K Lamax in PDF.


| Product Type | Dash Camera (Car Camera) |
| Brand | Lamax |
| Model | C11 GPS 4K |
| Video Resolution | 4K (3840 x 2160) at 30 fps |
| Lens Angle | 170° wide angle |
| Display | 2.0 inch IPS LCD |
| GPS | Built-in GPS module for location and speed logging |
| G-Sensor | 3-axis gravity sensor for emergency recording |
| Night Vision | WDR (Wide Dynamic Range) for low light |
| Loop Recording | Yes, automatic overwrite of oldest files |
| Parking Mode | Motion detection and impact detection when parked |
| Memory Card | microSD up to 128 GB (not included) |
| Power Supply | 5V DC via car charger (12V/24V input) |
| Battery | Built-in rechargeable lithium battery (200 mAh) |
| Dimensions | 85 x 55 x 35 mm |
| Weight | 85 g |
| Mounting | Windshield via suction cup or adhesive mount |
| Connectivity | Mini USB (charging), SD card slot |
| Audio Recording | Built-in microphone, speaker |
| File Format | Video: MP4 (H.264), Photo: JPEG |
| Application | Compatible with Lamax app (if available) for playback |
Frequently Asked Questions - C11 GPS 4K Lamax
User questions about C11 GPS 4K Lamax
0 question about this device. Answer the ones you know or ask your own.
Ask a new question about this device
Download the instructions for your Dash Cam in PDF format for free! Find your manual C11 GPS 4K - Lamax and take your electronic device back in hand. On this page are published all the documents necessary for the use of your device. C11 GPS 4K by Lamax.
USER MANUAL C11 GPS 4K Lamax
natural_image
Black LAMAX camera with circular lens and side buttons (no text or symbols on body)B

natural_image
Illustration of a cylindrical device with a separate circular component (no text or symbols)©
D
natural_image
Coiled USB cable with two connectors (no text or symbols visible)E

natural_image
Two overlapping red rounded rectangles with no text or symbolsF

G

H

natural_image
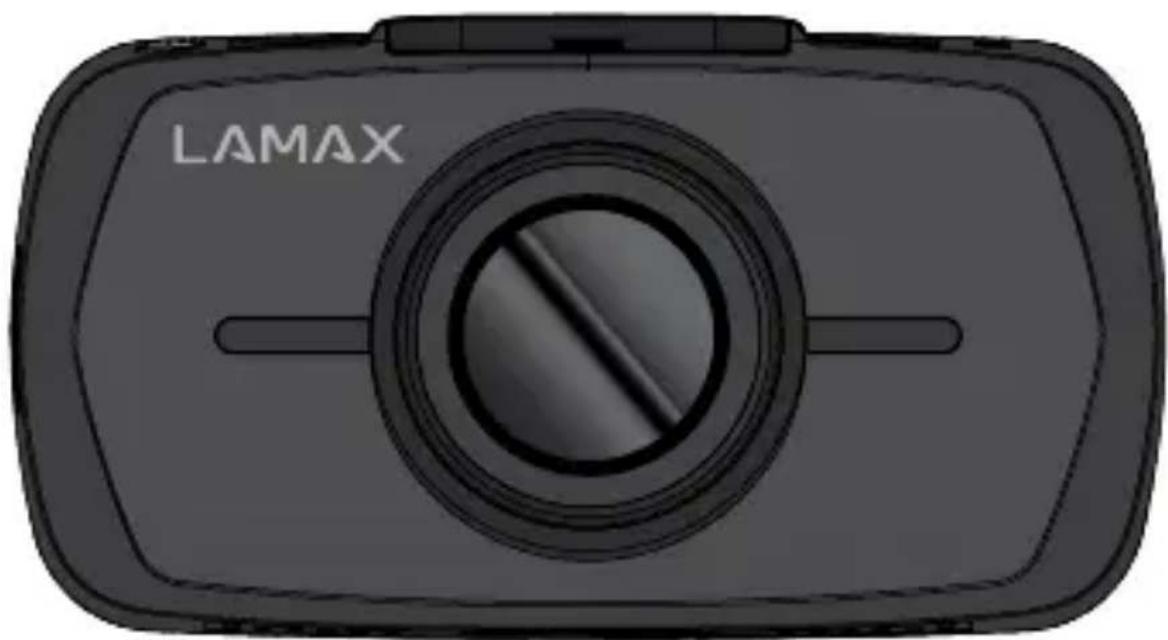
Plain yellow square with a small protrusion at the top (no text or symbols)(A) LAMAX C11 GPS 4K dashcam
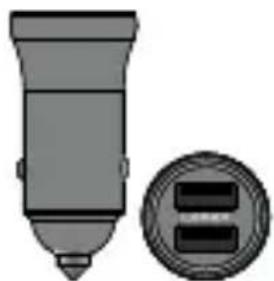
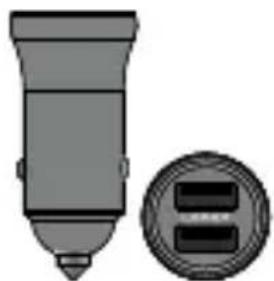
⑧ High-speed USB power adapter
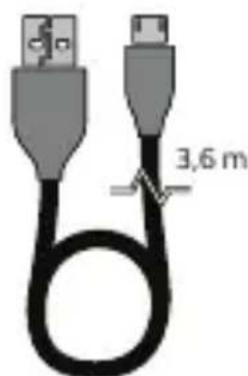
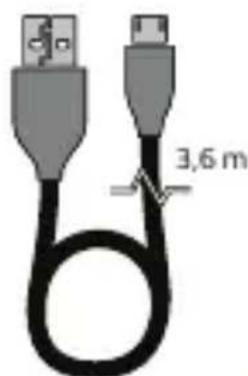
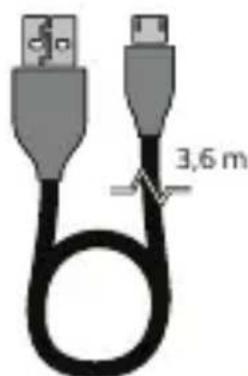
© 3.6 m power cable
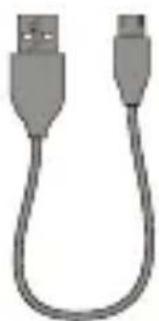
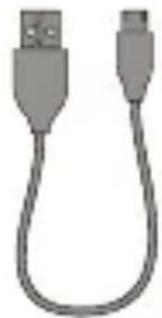
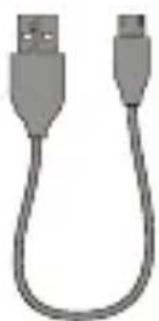
(D) 20 cm data and power cable
⑤ Spare 3M adhesive sticker for mount (2x)
F Cable holder (5x)
© Trim tool
(H) Electrostatic stickers for easier mount removal (2x)
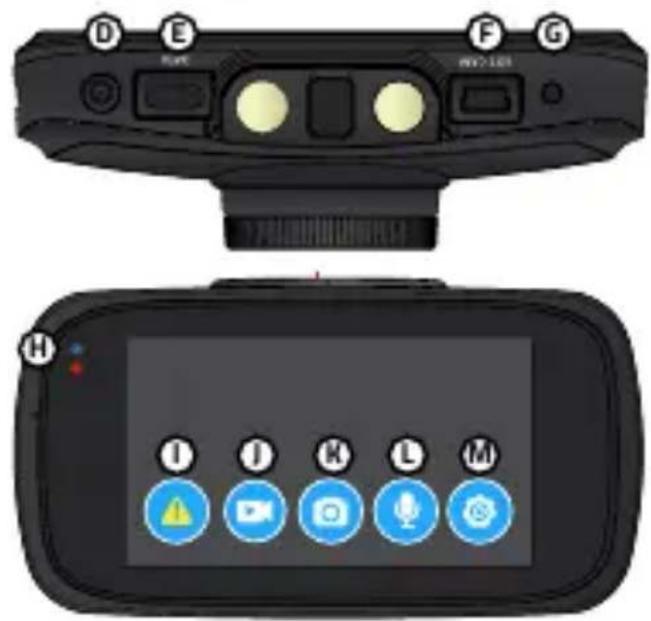
2. GETTING TO KNOW THE CAMERA / CONTROLS
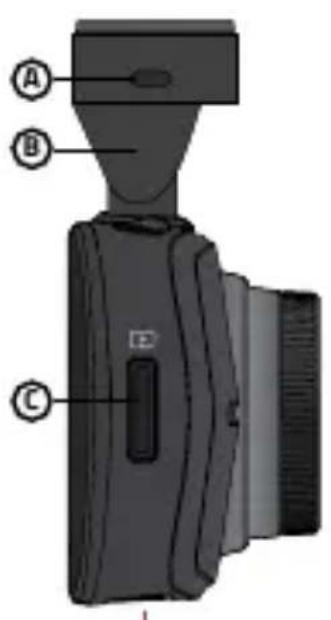
Ⓐ USB-C power port
⑧ Magnetic mount with 3M adhesive pad
© Memory card slot
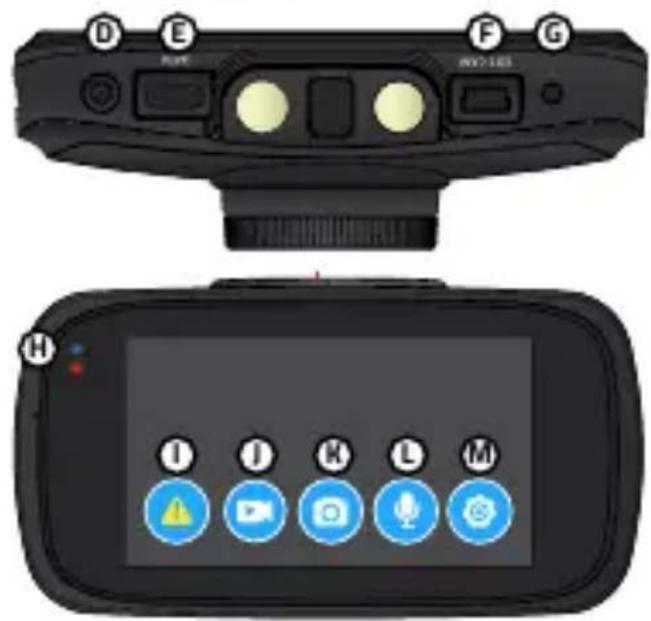
(D) POWER button
⑤ Data port (for transferring files to PC)
(F) Rear camera input (optional
G RESET button
(H) Status indicators
(blue - lit = powered)
(red - flashing = recording)
CONTROLS
| G POWER | Press anytime | Puts display to sleep |
| Hold any time | Powers camera ON / OFF | |
| I ATTENTION | Touch anytime | Protects video |
| J GALLERY | Touch anytime | Opens gallery |
| K TAKE PHOTO | Touch anytime | Takes photo |
| L MICROPHONE | Touch anytime | Mutes / Unmutes microphone |
| M SETTINGS | Touch anytime | Opens the settings |
3. INITIAL SETUP

flowchart
graph LR
    A["Input Laser"] --> B["Process Step 1"]
    B --> C["Process Step 2"]
    C --> D["Output Display"]
Ⓐ Insert the microSD card into the camera.
Use branded cards from reputable U3 class manufacturers with up to 256 GB.
Only remove the card when the camera is off.
For first use, format the card within the camera. Regularly reformat for optimal performance.
(B) Plug the adapter into the car cigarette lighter and use the USB cable to connect it to the camera mount. The camera is designed to operate only when connected to a power source.
Instead of a battery, the camera uses a supercapacitor, which has a longer life-span than a standard battery.
© When powered, the camera will automatically turn on and start recording.
Some vehicles require turning the ignition first.
(D) Perform basic camera setup before attaching the mount to the windscreen.
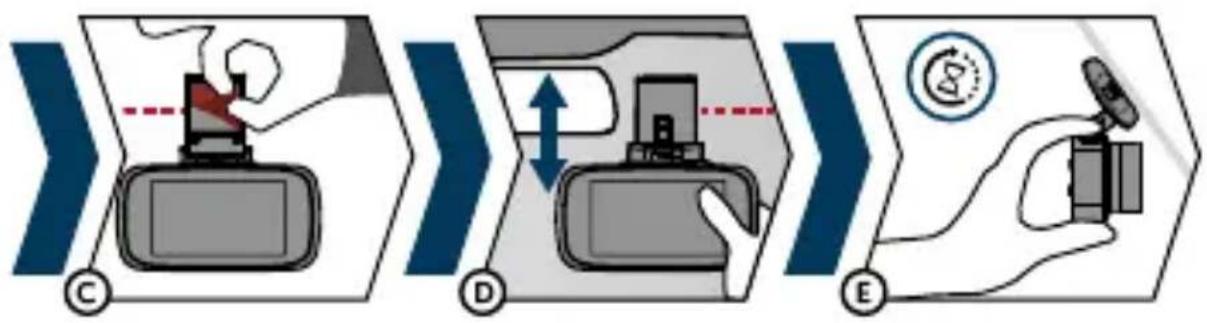
4. MOUNTING TO WINDSCREEN

flowchart
graph TD
    A["Device Placement"] --> B["Zoom/Arrow"]
    B --> C["Valve Insert"]
    C --> D["Hand Placement"]
    D --> E["Oscop/Regulator"]
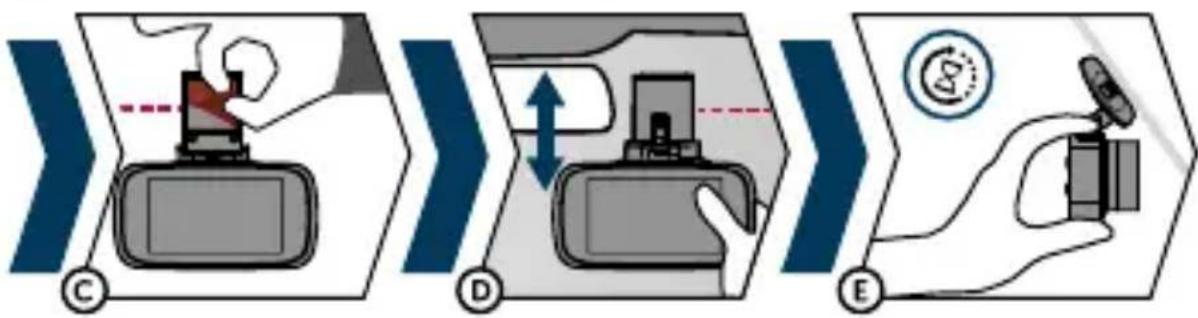
A The ideal place to attach the dashcam is the space between the windscreen and the rearview mirror so as not to obstruct the driver's view.
Make sure that the cable does not interfere with the active security elements in the car (airbag).
⑧ The mounting surface should be clean and dry.
The ideal temperature for adhesion is 20°C - 40°C.
© Remove the protective film from the 3M adhesive pad on the camera mount.
(D) Before adhering to the glass, turn on the camera and make sure it provides the right viewpoint.
E Press the 3M pad firmly onto the glass and hold.
Use electrostatic stickers for easier mount removal if desired.
5. BASIC FUNCTIONS
G-sensor
The G-sensor is designed to detect impacts. If it senses one, the current video will be automatically protected, preventing it from being overwritten.
Note: If the sensitivity is set too high and the vehicle drives on rough terrain, the SD card may fill up as multiple videos get marked for protection.
Loop Recording
The camera automatically divides the recording into shorter video files and starts overwriting the oldest unprotected files with new ones when the microSD card is full.
This ensures you don't have to worry about available space on the card.
File Protection
To protect the file from overwriting, touch the ATTENTION icon while it's being captured.
The buttons are disabled when protecting recordings.
If the current loop lasts less than 10 seconds, the previous video is also saved. If there are less than 10 seconds left in the current loop, the next video will also be saved.
6. RADAR REPORTING FUNCTION
The integrated GPS module logs your speed and GPS coordinates while alerting you to stationary speed cameras and red-light cameras.
As you approach a radar, the camera will give an audible beep and display a warning.
The database contains more than 40,000 stationary radars across Europe.
- Speed camera
– Average speed measurement - Red light cameras
– Combined red light and speed cameras
7. WIFI APPLICATION
Ⓐ Scan the QR code or go to the URL lamax-electronics.com/c11/app
⑧ Install the app on your smart device.
© Activate the Wi-Fi function on your camera – camera menu -> WiFi.
(D) You can locate the network name and password in the About Camera section of your camera.
E On your device, join the Wi-Fi network named after your camera. Once connected, input the password, open the app, and establish a connection with your dashcam.

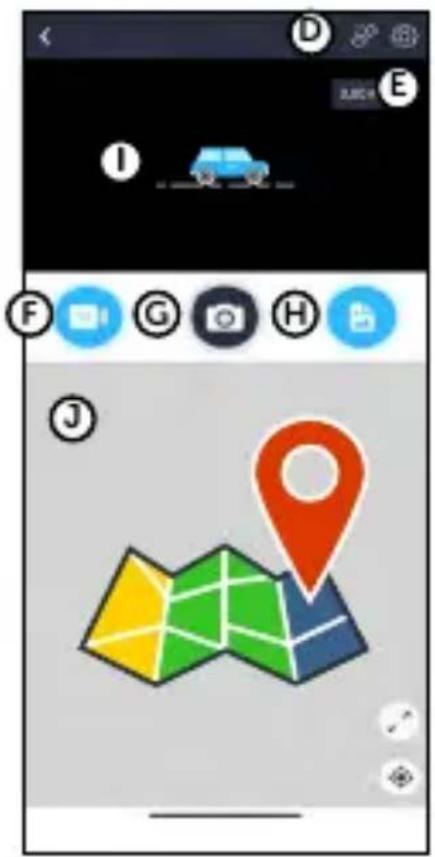
Application Controls
Ⓐ Connect camera
B Saved recordings
© Application settings
⑭ Disconnect the camera from Wi-Fi
E Camera settings
(F) Save recording
© Take a photo
H Gallery
① Preview recording
J Map


- SETTINGS OVERVIEW
| Download App | Displays a QR code to download the app. |
| Resolution | Define video quality. Higher resolutions produce detailed and larger files. |
| Loop recording | Set the length of individual loops. Longer loop = bigger file. |
| WDR | Enable / disable the Wide Dynamic Range function (brightness compensation). |
| Exposure | Fine-tune exposure settings. |
| G-sensor | Set the sensitivity of the G-sensor. |
| Screen saver | Turn on / off the screen saver. |
| Screen saver settings | Set speedometer display and speed camera alerts even when the display is off. |
| Audio settings | Adjust the volume for audio alerts. |
| Microphone | Enable or disable audio recording. |
| Language | Select your preferred device language. |
| Date and time | Manage time zone, date, and time settings. |
| Watermark | Option to embed a watermark on your video. |
| Mode | Choose from driving, parking, motion detection, or time-lapse. |
| Wi-Fi | Turn Wi-Fi on or off. |
| Radar reporting | Configure speed camera alert preferences. |
| Driver name | Customise the driver name on the video watermark. |
| Format | Erase data from the memory card. Caution: This includes protected files! |
| Format reminder | Set reminders to format the card after a specific duration. |
| Factory reset | Restore the camera to its original settings. |
| About camera | View details about the camera, such as the firmware version and Wi-Fi data. |
- SPECIFICATIONS
| Video resolution (front camera) | without rear camera: | with rear camera: |
| 3840×2160/30fps | 3840×2160/30fps | |
| 2560×1600/30fps | 2560×1600/30fps | |
| 2560×1440/60ps | 2560×1440/30fps | |
| 2560×1440/30fps | ||
| 1920×1080/60fps | ||
| Video resolution (rear camera) | 1920×1080/30fps | |
| Angle of view (front / rear camera) | 160°/140° | |
| Video format and compression | MP4, H.265 compression | |
| Sound | Built-in microphone (option to mute) | |
| Display | Touch 3" | |
| GPS | Yes | |
| Radar reporting | Yes | |
| G-sensor | Yes | |
| Wi-Fi | 2.4 GHz, 5 GHz | |
| CPL filter | Optional | |
| Storage | Supports microSD up to 256 GB | |
| File protection | Yes | |
| Option to protect the file with a single touch on the display while recording | ||
| Automatic start / shutdown | Yes | |
| Auto start when power supplied | ||
| Auto shutdown after power supply stopped | ||
| Display date and time | Yes | |
| Option to turn it off | ||
| Display speed in video | Yes | |
| Option to turn it off | ||
| Motion detection | Yes | |
| Parking mode | Yes | |
| Time lapse video | Yes | |
| Language | Czech, English, German, Polish, Hungarian, Slovak | |
| WDR | Yes |
| Other functions | Auto start, Loop recording, Motion detection, Timelapse, G-sensor, Timestamp on video (optional), GPS coordinates on video, Speed on video (optional), Driver name on video (optional), Screen saver (black screen / speedometer), Automatic summer/winter time, Recording protection, Audio recording with option to mute, Time zone selection, Memory card format reminder |
| Mobile app features | Basic settings, Start/stop recording, Take photo, View front/rear camera preview, Play videos, Download videos |
| Connectivity | Wi-Fi 5 GHzUSB-C |
| USB-C | 350 cm |
| Mount | Magnetic |
| Mount attachment on windscreen | 3M adhesive pad (suction holder optional) |
| Power | Supercapacitor |
| Charger - input | 12-24 V |
| Charger - output | 5 V / 2.4 A5 V / 3 A |
| Power cord length | 350 cm |
| Dimensions | 100 × 55 × 35 mm |
| Weight | 115 g |
| Operating temperature | -10°C ~ +50°C |
10. FIRMWARE AND RADAR DATABASE UPDATES

flowchart
graph LR
    A["QR Code"] --> B["Input Image"]
    B --> C["Download Icon"]
    C --> D["Computer Download Icon"]
Find the latest camera firmware in the „Download" section of the product website: https://www.lamax-electronics.com/c11
UPDATE PROCEDURE
1) Format a microSD card using a PC or Mac.
2) Download and extract the .zip file, ensuring to keep the file named as file .bin.
3) Transfer the extracted files to the formatted microSD card.
4) Place the card into the unpowered camera, then connect the camera to power ensuring it remains on throughout the update.
5) Wait for the update to complete. Then format the memory card on the computer.
Typographical errors reserved.
LAMAX
ELECTRONICS
C11 GPS 4K
INHALT
F Kabeleinführung der Rückkamera (optional)
© RESET-Taste
H Status indicators
(blue – lit = powered)
(red – flashing = recording)
KONTROLLE

flowchart
graph TD
    A["Device Insert"] --> B["Step C: Discharge"]
    B --> C["Step D: Internal Injection"]
    C --> D["Step E: Detection"]
    D --> E["Handheld Device"]
Anwendungssteuerung
flowchart
graph LR
    A["Updates"] --> B["Image icon: i pointing hand"]
    B --> C["Download icon with download arrow"]
    C --> D["Computer monitor with download arrow"]
natural_image
Black LAMAX camera with lens and control buttons (no text or symbols on body)B

natural_image
Illustration of a cylindrical device with a flanged top and a circular inset showing two rectangular components (no text or symbols)©
natural_image
Illustration of two USB connectors with a 3.6-meter cable, no text or symbols presentD

natural_image
Coiled USB cable with two connectors (no text or symbols visible)E

natural_image
Two overlapping red rounded rectangles with no text or symbolsF

G

H

natural_image
Plain yellow square with a small triangular top on top (no text or symbols)(A) Autokamera LAMAX C11 GPS 4K
⑧ Adaptér s extra Fast Charge USB portem
© Napájecí kabel 3,6 m
(D) Datový a napájecí kabel 20 cm
flowchart
graph LR
    A["Device Input"] --> B["Specified View"]
    B --> C["Anatomical Component with Dashed Line"]
    C --> D["Final Output"]
flowchart
graph TD
    A["Start"] --> B["Drive in car with temperature sensor"]
    B --> C["Check up hand, temperature gauge, and battery plug"]
    C --> D["Take down hand, temperature sensor, and battery plug"]
    D --> E["Check up battery plug, temperature sensor, and battery plug"]
    E --> F["End"]
Ovládání aplikace
- ÚPLNÉ NASTAVENÍ
flowchart
graph LR
    A["QR Code"] --> B["Download Icon"]
    B --> C["Download Icon with Down Arrow"]
    C --> D["Computer Monitor"]
natural_image
Black rectangular camera with a circular lens and 'LAMAX' branding on the front face (no additional text or symbols)B
natural_image
Illustration of a cylindrical device with a separate circular component (no text or symbols)©
D

natural_image
Coiled USB cable with two connectors (no text or symbols visible)E

natural_image
Two overlapping red rounded rectangles with no text or symbolsF

G

H

natural_image
Plain yellow square with a small protrusion at the top (no text or symbols)Ovládanie aplikácie
- ÚPLNÉ NASTAVENIE
flowchart
graph LR
    A["QR Code"] --> B["Download Icon"]
    B --> C["Download Icon with Down Arrow"]
    C --> D["Computer Icon with Down Arrow"]
Najnovší firmware kamery nájdete vždy v sekcii „Na stiahnutie“ na webovej stránke produktu: https://www.lamax-electronics.com/c11
POSTUP AKTUALIZÁCIE
natural_image
Black LAMAX camera with lens and control buttons (no text or symbols on body)B

natural_image
Illustration of a cylindrical device with a separate circular inset showing two rectangular components (no text or symbols)©

D
natural_image
Illustration of a USB cable with two connectors (no text or symbols)E

natural_image
Two overlapping red rounded rectangles with no text or symbolsF

G
H

natural_image
Simple yellow square icon with a small protrusion at the top (no text or symbols)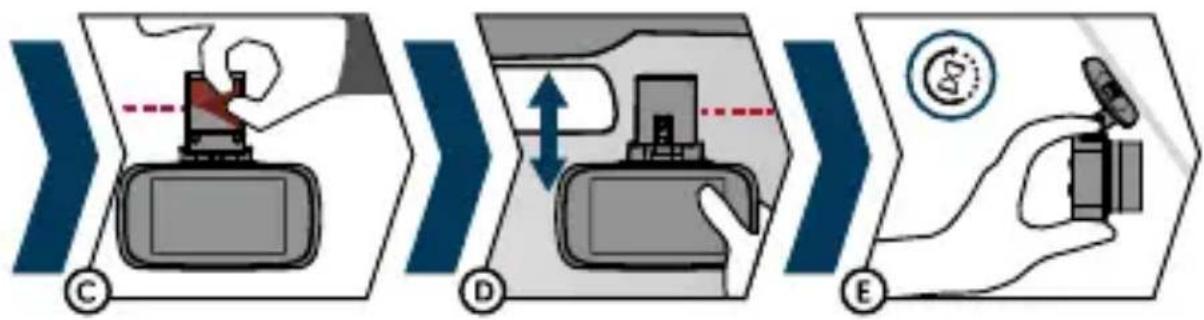
flowchart
graph TD
    A["Step C: Lock with red valve"] --> B["Step D: Lock with blue valve"]
    B --> C["Step E: Hand holding remote control"]
Kontrola aplikacji
8. PEŁNA KONFIGURACJA
flowchart
graph LR
    A["Updates"] --> B["i"]
    B --> C["Download Icon"]
    C --> D["Monitor with Down Arrow"]
1. A CSOMAG TARTALMA

Alkalmazásvezérlés
8. TELJES BEÁLLÍTÁS
flowchart
graph LR
    A["QR Code"] --> B["Download Icon"]
    B --> C["Download Icon with Down Arrow"]
    C --> D["Computer Monitor"]
natural_image
Black LAMAX camera with circular lens and side buttons (no text or symbols on body)B

natural_image
Illustration of a cylindrical device with a flanged top and a circular inset showing two rectangular components (no text or symbols)©

D

natural_image
Coiled USB cable with two connectors (no text or symbols visible)E

natural_image
Two overlapping red rounded rectangles with no text or symbolsF

G

H

natural_image
Plain yellow rectangular shape with a small protrusion at the top (no text or symbols)(A) Avto kamera LAMAX C11 GPS 4K
⑧ Adapter z dodatnim priključkom USB Fast Charge
© Napajalni kabel 3,6 m
(D) Podatkovni in napajalni kabel 20 cm
flowchart
graph LR
    A["Device Input"] --> B["Measurement"]
    B --> C["Dissection with Magnified View"]
    C --> D["Final Output"]
Ⓐ Vstavite kartico microSD v fotoaparat.
flowchart
graph TD
    A["Start"] --> B["Drive in car with thermal gauge"]
    B --> C["Check up hand down the steering wheel"]
    C --> D["Adjust speed to drive on dashboard"]
    D --> E["Check up valve position"]
    E --> F["Check up sensor placement"]
    F --> G["End"]

- POPOLNA NASTAVITEV
flowchart
graph LR
    A["QR Code"] --> B["Image with 'i' and finger pointing hand"]
    B --> C["Download Icon with downward arrow"]
    C --> D["Computer with downward arrow"]
natural_image
Black camera lens with 'LAMAX' branding on the front face (no other text or symbols visible)B
natural_image
Illustration of a cylindrical device with a separate circular inset showing two rectangular components (no text or symbols)©

D
natural_image
Coiled USB cable with two connectors (no text or symbols visible)E

natural_image
Two overlapping red rounded rectangles with no text or symbolsF

G

H

natural_image
Plain yellow square with a small protrusion at the top (no text or symbols)(A) Auto kamera LAMAX C11 GPS 4K
⑧ Adapter s dodatnim USB priključkom za brzo punjenje
© Kabel za napajanje 3,6 m
(D) Podatkovni i strujni kabel 20 cm
⑤ Rezervna 3M naljepnica za držač (2x)
F Držač kabela (5x)
© Alat za skrivanje kabela
© Elektrostaticka naljepnica za lakše skidanje držača sa stakla (2x)
2. UPOZNAVANJE SA KAMEROM / KOMANDAMA

Ⓐ USB-C priključak za napajanje
B Magnetni držač s 3M naljepnicom
© Utor za memorijsku karticu
D Tipka POWER
E Podatkovni priključak (za prijenos datoteka na računalo)

Kontrola aplikacije
Ⓐ Spojite kameru
⑧ Spremljeni zapisi
© Postavke aplikacije
D Isključite kameru iz WiFi mreže
© Postavke kamere
F Spremanje zapisa
© Napravite snimku
H Galerija
① Pregled snimanja
J Karta

8. POTPUNA POSTAVKA
flowchart
graph LR
    A["QR Code"] --> B["Download Icon"]
    B --> C["Download Icon"]
    C --> D["Computer Icon"]
Uvijek možete pronači najnoviji firmware fotoaparata u odjeljku „Preuzimanje“ na web stranici proizvoda: https://www.lamax-electronics.com/c11
POSTUPAK AŽURIRANJA
1) Pripremite microSD karticu za formatiranje na PC / Mac.
2) Preuzmite i otvorite .zip datoteku u kojoj ćete pronaći .bin datoteku. Nemojte mijenjati nazive datoteka.
3) Kopirajte datoteke na formatiranu microSD karticu.
4) Umetnite microSD karticu u izvan kamere. Uključite kameru na kontrolnu kameru u napajanje i provjerite je li uključena uključen tijekom ažuriranja. Ažuriranje bi trebalo početi automatski nakon dizanja.
5) Pričekajte da se ažuriranje potpuno završi. Zatim formatirajte memorijsku karticu na računalu.
Zadržano pravo na tiskarske pogreške.
LAMAX
ELECTRONICS



- GETTING TO KNOW THE CAMERA / CONTROLS
- INITIAL SETUP
- MOUNTING TO WINDSCREEN
- BASIC FUNCTIONS
- G-sensor
- Loop Recording
- File Protection
- RADAR REPORTING FUNCTION
- WIFI APPLICATION
- Application Controls
- FIRMWARE AND RADAR DATABASE UPDATES
- LAMAX
- ELECTRONICS
- C11 GPS 4K
- INHALT
- Anwendungssteuerung
- Ovládání aplikace
- Ovládanie aplikácie
- POSTUP AKTUALIZÁCIE
- Kontrola aplikacji
- PEŁNA KONFIGURACJA
- A CSOMAG TARTALMA
- Alkalmazásvezérlés
- TELJES BEÁLLÍTÁS
- UPOZNAVANJE SA KAMEROM / KOMANDAMA
- Kontrola aplikacije
- POTPUNA POSTAVKA
- POSTUPAK AŽURIRANJA
Brand : Lamax
Model : C11 GPS 4K
Category : Dash Cam