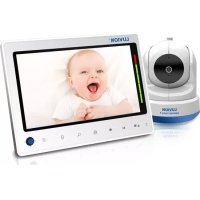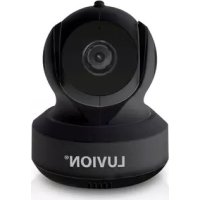
Supreme Connect 3 - Baby monitors Luvion - Free user manual and instructions
Find the device manual for free Supreme Connect 3 Luvion in PDF.


User questions about Supreme Connect 3 Luvion
0 question about this device. Answer the ones you know or ask your own.
Ask a new question about this device
Download the instructions for your Baby monitors in PDF format for free! Find your manual Supreme Connect 3 - Luvion and take your electronic device back in hand. On this page are published all the documents necessary for the use of your device. Supreme Connect 3 by Luvion.
USER MANUAL Supreme Connect 3 Luvion
Thank you for purchasing the Luvion Supreme Connect 3 baby monitor. From now on you can always see and hear your baby, wherever you are. This Connected Baby Monitor let you see your baby from the included monitor, or from your smartphone. Make sure you always keep your original proof of purchase. For warranty cases you will always be asked to show a copy of your proof of purchase. For warranty claims you can contact the Luvion dealer or the local Luvion representative. More information can be found at www.luvion.com. This manual contains all the information you need, to be able to use this Luvion Supreme Connect baby monitor safely and with pleasure. Before using the baby monitor, we recommend that you read this manual carefully. We ask for your extra attention for the safety instructions.
PACKAGE CONTENTS:
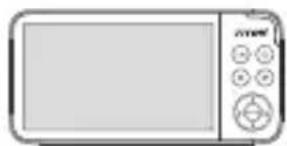
• 1 x Monitor (Parent Unit)
• 1 x Camera (Baby Unit)
- 1x User manual
• 1 x Power adaptor for Parent Unit
• 1 x Power adaptor for Baby Unit
natural_image
Illustration of a microwave oven with control panel (no text or symbols)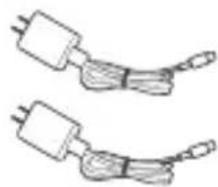
natural_image
Two identical electrical cable assemblies with terminal leads, shown in line drawing style (no text or symbols)OVERVIEW OF THE CAMERA:
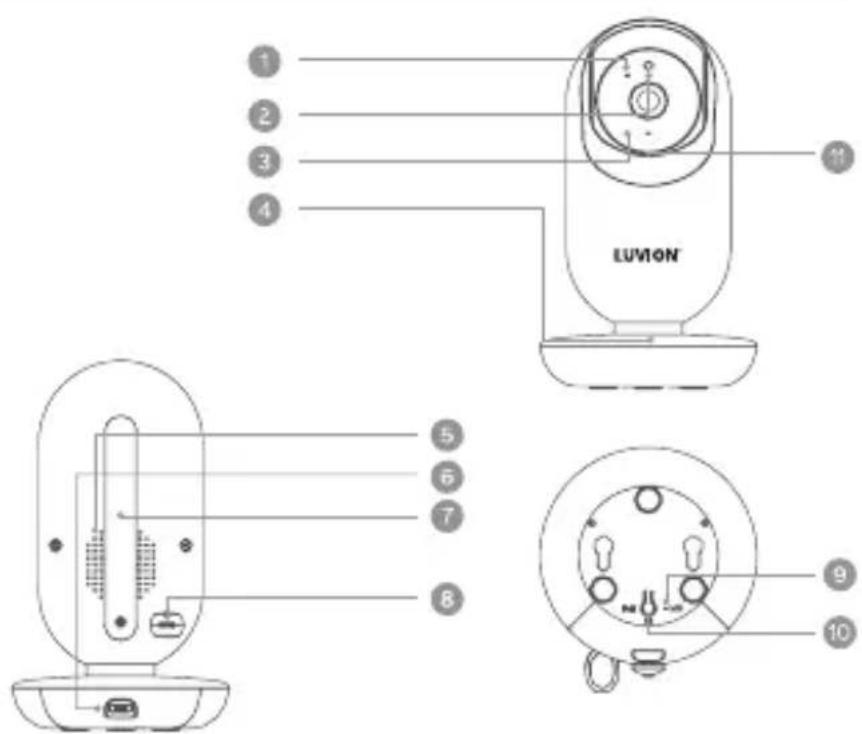
- Microphone
- Light Sensor
- Lens
- Camera Base
- Speaker
- Power Jack
- Antenna
- Temperature Sensor
- Wi-Fi Pair Button
- Monitor Pair Button
- MicroSD Card slot
text_image
LUVON 1 2 3 4 5 6 7 8 9 10OVERVIEW OF THE MONITOR:
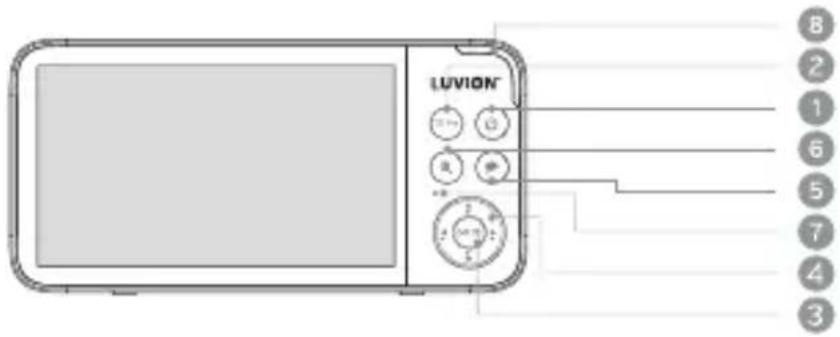
- Power/Sleep button
- Menu/Back button
- OK button/Night light on/off
- Arrow buttons
- Talk button
- Zoom
- Microphone
-
Volume indicator
-
Antenna
- Power jack USB-C
- Reset hole
- Back stand
- Speaker
- Charging indicator
text_image
LUVION 8 2 1 6 5 7 4 3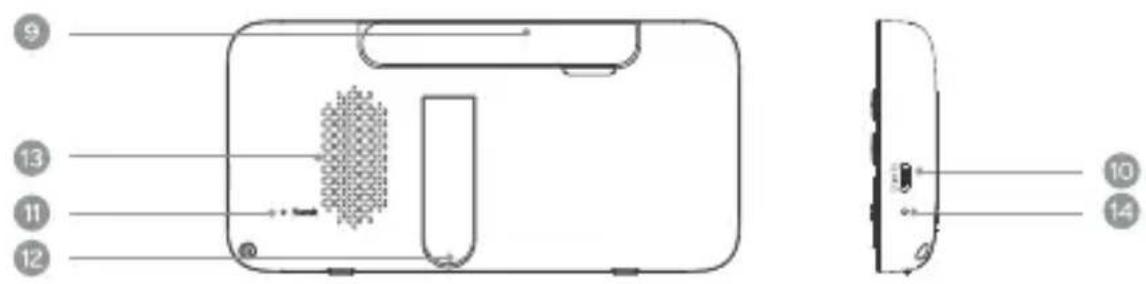
text_image
Diagram of a device rear panel with numbered parts and internal components, including a mesh chamber and labeled parts 10 and 14.OVERVIEW OF THE STATUS BAR
- Signal strength
- Current camera
- Temperature
- Night vision
- Humidity
- Lullaby
- Crying detected
- Motion detection on
- VOX on
- Video muted
- Alerts muted
- Reminder on
- Battery status
- Current time
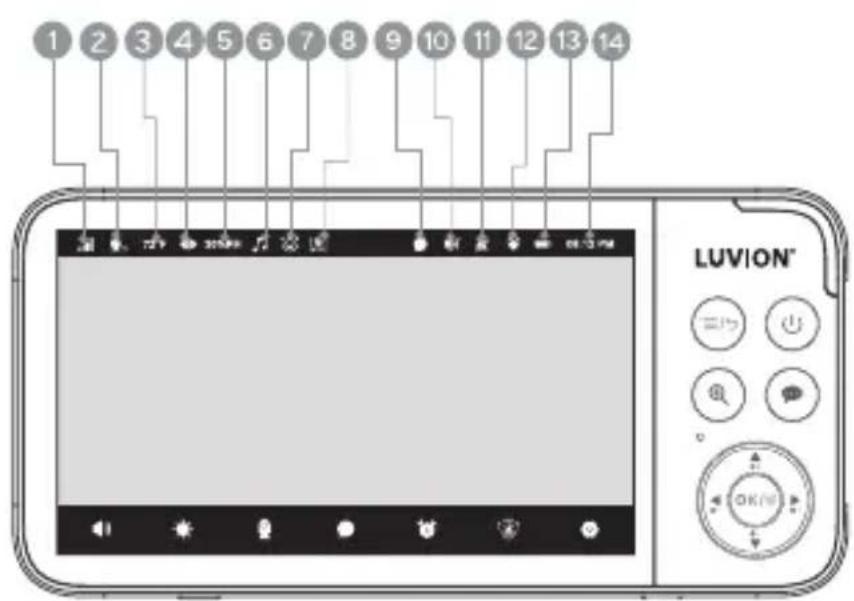
text_image
1 2 3 4 5 6 7 8 9 10 11 12 13 14 LUVION®IMPORTANT GUIDELINES FOR INSTALLING YOUR BABY MONITOR
• To use your camera (baby unit) and the monitor (Parent Unit) together, you must be able to establish a radio link between them, and the range may be affected by environmental conditions.
• Any large metallic object, like a refrigerator, a mirror, a filing cabinet, metal doors or reinforced concrete between the camera and the monitor may block the radio signal.
- The signal strength may also be reduced by other solid structures, like walls or electrical equipment, such as radios, TVs, computers, cordless or mobile phones, fluorescent lights or dimmer switches.
- Use of other 2.4 GHz products, such as wireless networks (Wi-Fi® routers), Bluetooth® systems, or microwave ovens, may cause interference with this product, so keep the Baby Monitor at least 1.5 metres (5 feet) from these types of products, or turn them off if they appear to be causing interference.
- If the signal is weak, try moving the monitor and/or the camera to different positions in the rooms.
1. SAFETY INSTRUCTIONS:

WARNING:
STRANGULATION HAZARD - Keep the unit and adapter cord more than 1 meter from the cot and out of the baby's reach.
NEVER place Baby Unit or cords within the cot. Secure the cords more than 1 meter away from the baby's reach. Never use extension cords with AC Adapters. Only use the AC Adapters provided.
This Baby Monitor is compliant with all relevant standards regarding electromagnetic fields and is, when handled as described in the User's Guide, safe to use. Therefore, always read the instructions in this User's Guide carefully before using the device.
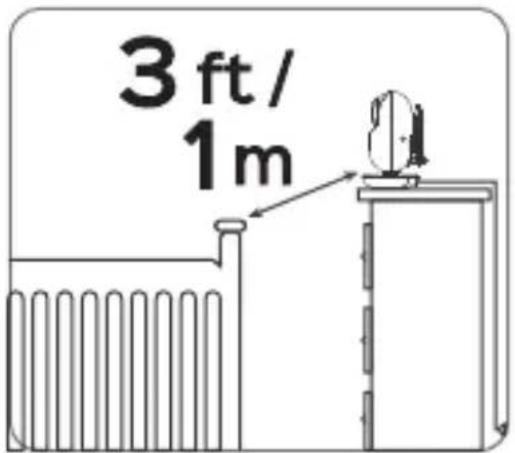
text_image
3 ft / 1m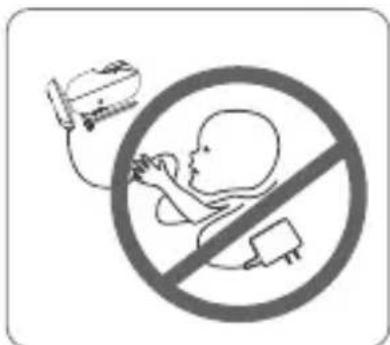
text_image
Prohibition sign with neon and medical device icons, indicating no smoking or disinfection• Adult assembly required. Keep small parts away from children when assembling.
• This product is not a toy. Do not allow children to play with it.
• This Baby Monitor is not a substitute for responsible adult supervision.
- Keep this user's guide for future reference.
- Keep the cords out of reach of children.
- Do not cover the Baby Monitor with a towel or blanket.
- Test this monitor and all its functions so that you are familiar with it prior to actual use.
- Do not use the Baby Monitor in damp areas or close to water.
- Do not install the Baby Monitor in extreme cold or heat, direct sunlight, or close to a heat source.
- Only use the chargers and power adapters provided. Do not use other chargers or power adapters as this may damage the device and battery pack.
- Only insert a battery pack of the same type.
- Do not touch the plug contacts with sharp or metal objects.
- Connect the power adapters to easily accessible electrical sockets.
- Read and keep the instructions. All the safety and operating instructions should be read before use.
- This device is designed for indoor use only.
- Don't use the units if the cord or plug is damaged.
- Don't attempt to repair or adjust any of the electrical or mechanical functions of the unit. If you do, the guarantee will be made void.
- To avoid suffocation, keep all packaging materials away from babies and small children.
- Stop using the device and contact LUVION customer service when the power cord or plug is damaged, if the device starts to make excessive noise, or when the device keeps losing connection.

WARNING:
There is a risk of explosion if the battery is replaced by an incorrect type. Dispose of used batteries according to their instructions. To reduce risk of fire or burns.
- Do not attempt to disassemble, or service the battery pack.
- Do not crush, puncture, short external contacts, or dispose of in fire or water.
- Do not heat above 60^ (140°F).
- Use specified charger only.
- Replace only with the battery pack designated for this product.
2. GETTING STARTED
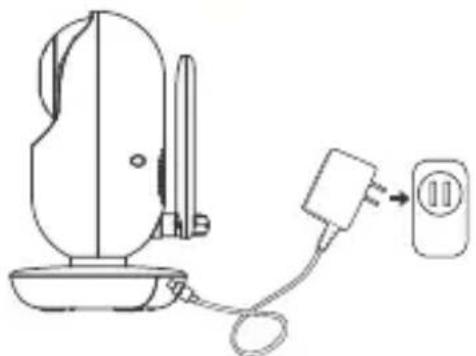
2.1 Connecting the power supply for the Camera (Baby Unit)
- Insert the USB-C DC plug of the power adapter into the USB-C DC socket on the back of the Baby Unit.
- Connect the other end of the power adaptor to mains power.
- The camera will automatically power on.
natural_image
Line drawing of a portable electric fan connected to a power outlet (no text or symbols)Note:
Only use the power adaptor (USB-C, 5VDC, 1.5A) provided.
The camera is not battery powered. Keep plugged in when in use.
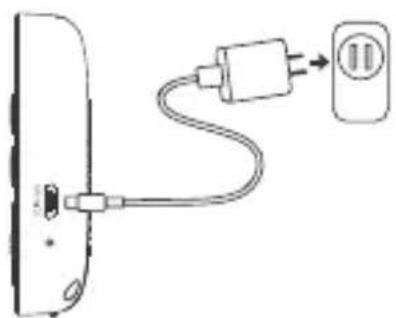
2.2 Connecting the power supply for the Monitor (Parent Unit)
- Connect the USB-C plug of the power adapter to the monitor and the other end to mains power. Only use the enclosed adapter (5VDC/1.5A), the charging indicator LED lights up.
- It takes around 5,5 hours to fully charge. The power indicator will turn on red while charging and green when fully charged.
- Press the power button to turn the monitor on. By default, the camera has been paired with the monitor when manufactured. If the camera is disconnected, please refer to 3.6, Add a camera.
natural_image
Simple line drawing of a cable being inserted into a device via a plug, with an outlet symbol nearby (no text or labels)Note:
If you place the monitor and camera too close together, you may hear echoing sounds and interference. This is not a fault. The units are designed to be operated at some distance apart, (e.g. in separate rooms) so move the units further apart.
2.3 Placing the Camera
- Position the camera in a convenient location, such as on a table, and use the pan & tilt function to aim the camera lens towards the desired monitoring area.
- Adjust the camera's angle until you are satisfied with the image in the monitor
Note: DO NOT position the camera within the baby's reach. If there is any interference with the image or sound, try relocating the units to different spots, ensuring they are not too close to other electrical equipment.
3. USING THE BABY MONITOR
Please read these instructions carefully, and be aware that this baby monitor is only intended as an aid. It is not a substitute for responsible, correct parental supervision.
3.1 Menu overview
| MAIN MENU SUB MENU DESCRIPTION | ||
 VOLUME SETTINGS VOLUME SETTINGS |  Monitor Volume Monitor Volume | Adjust video volume |
 Talk Volume Talk Volume | Adjust 2-way talk back volume | |
 Lullaby Lullaby | Play lullaby | |
 Lullaby Volume Lullaby Volume | Adjust lullaby volume | |
| [DSK7]Alert Volume | Adjust alert/reminder volume | |
| BRIGHTNESS SETTINGS |  Brightness Brightness | Adjust brightness level |
 Screen Timeout Screen Timeout | Change screen timeout to 1 min, 3 min, 5 min or never | |
| CAMERA SETTINGS |  Add Add | Add camera |
 Auto Switch Auto Switch | Automatic switching between cameras | |
 Cam View Cam View | Select camera to display | |
 Delete Delete | Remove camera | |
| VOX SETTINGS |  VOX On VOX On | Turn VOX on |
 VOX Off VOX Off | Turn VOX off | |
 REMINDER SETTINGS REMINDER SETTINGS |  Reminder Reminder | Set a reminder at a specific time |
| [BZZT]Repeat | Create a repeating reminder (2h, 4h, 6h or never) | |
 Reminder Off Reminder Off | Turn off reminder | |
 SAFETY SETTINGS SAFETY SETTINGS | [YCB7]Safety Protection | Switch off WiFi / internet acces to the camera |
 Crying Detection Crying Detection | Detect crying and alert you | |
 Motion Detection Motion Detection | Detect motion and alert you | |
 OTHER SETTINGS OTHER SETTINGS |  Device Info Device Info | Device information |
| [SGGA]TF Card | TF Card information | |
 Languages Languages | Select Language | |
 Times Times | Set the date and time on the monitor | |
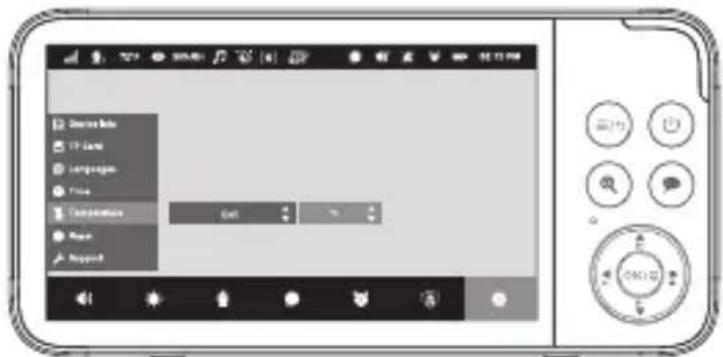
 Temperature Temperature | Select temperature scale between °C and °F | |
 Reset Reset | Reset to factory settings | |
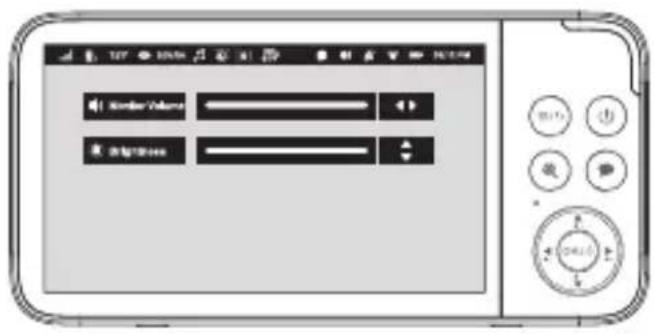
3.2 Volume settings
- Press



Talk Volume
/ , press to confirm your selection.
- Press


- If you have multiple cameras, press era, press OK to confirm.


/ to select the right cam-
- Press again to close the menu.
text_image
Mobile Media 播放设置
text_image
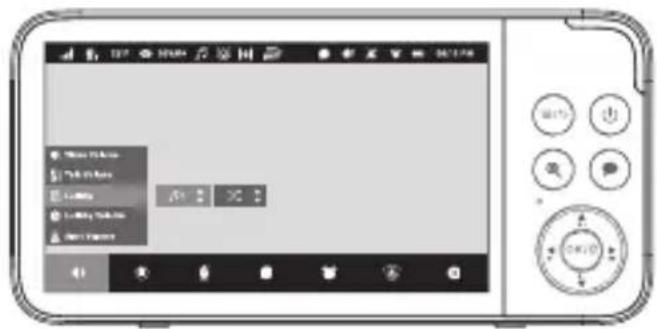
Scanned image of a digital camera interface with Chinese text labels and control buttons3.3 Lullabies
- Press

select > , press / to select


a lullaby and play mode, press to confirm.
• There are 5 lullabies and 3 white noise sounds.
- Press again to close the menu.
text_image
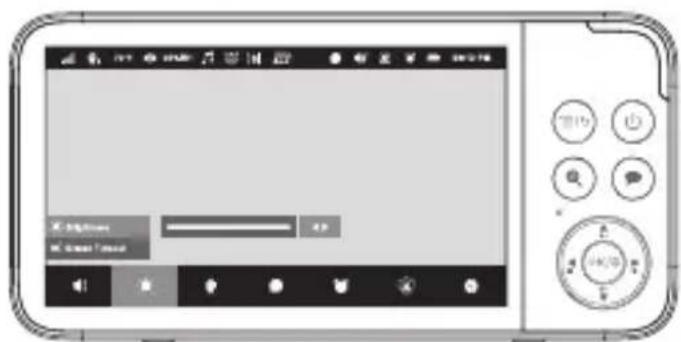
Screenshot of a mobile device interface with Chinese menu options and control buttons3.4 Brightness settings
- Press

select > , press / to adjust


the brightness, press to confirm.
text_image
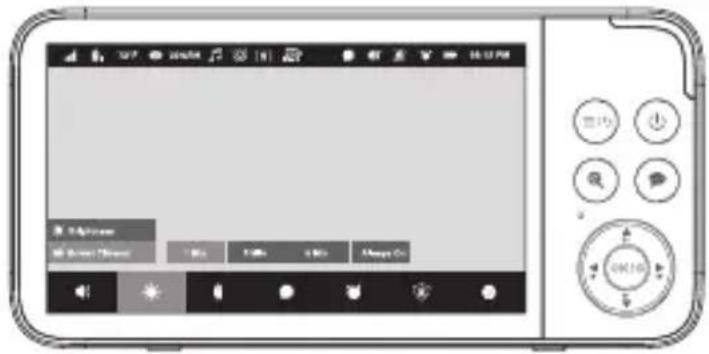
Screenshot of a mobile app interface with Chinese UI elements and control buttons3.5 Screen timeout
- Press

select > , press


time for the screen to automatically switch off, press

to confirm.
text_image
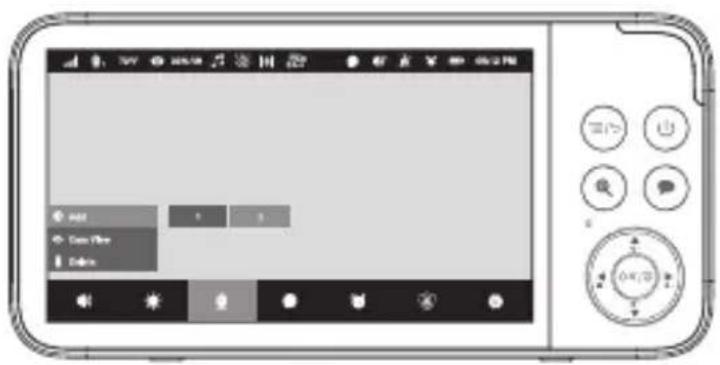
Screenshot of a mobile device interface with Chinese UI elements and control buttons3.6 Add a camera
- Press

select >> , press to confirm.

- Press and hold the pair button for 3 seconds on the camera and listen for the prompt tone. The camera will pair with the monitor automatically.
text_image
Screenshot of a mobile app interface with Chinese menu options and control buttons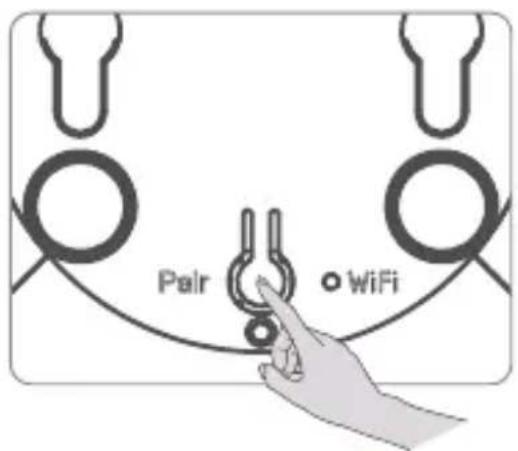
text_image
Pair WiFi3.7 View a camera
- Press

select > , select the camera you want to
view, press

to confirm.
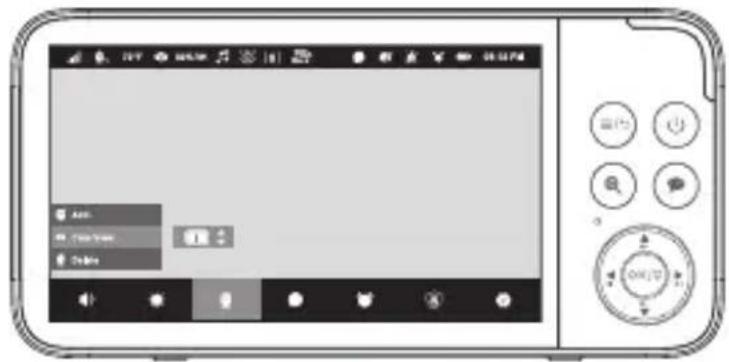
text_image
Screenshot of a mobile phone interface with Chinese UI elements and control buttons3.8 Delete a camera
- Press select >, select the camera you want to delete, press OK to confirm.
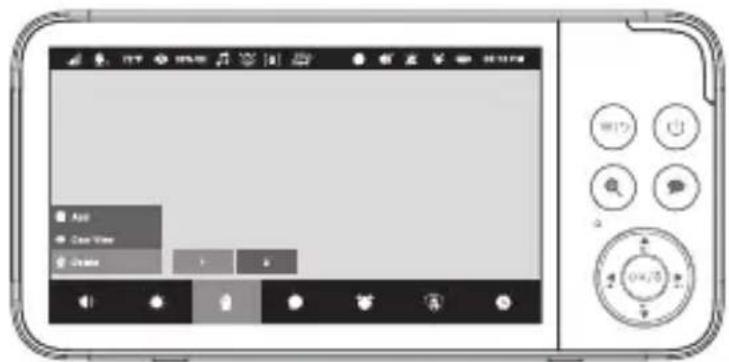
text_image
Screenshot of a mobile app interface showing menu options and control buttonsNote:
At least one camera should stay connected. The current camera number will appear in the status bar. If you also want to remove the remaining camera, press the PAIR button three times to disconnect it, then you can delete the remaining camera.
3.9 Auto switch / scan
- Press select >>, press to confirm. Auto Switch ON OK
Note:
When Auto switch is on, the monitor will every 15 seconds automatically switch from one camera to another camera (if connected).
3.10 Split screen
- Press

select > , and select 2 cameras.
Note:
Once two cameras are selected, you can view two cameras in split-screen mode. In split-screen mode, the audio will switch between cameras every 15 seconds.
3.11 VOX mode (sound activation)
- Press

select

- Select a VOX sensitivity level.
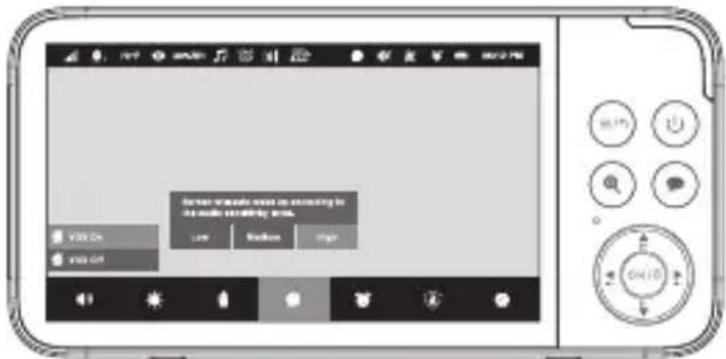
text_image
Screenshot of a mobile app interface with Chinese text and control buttons, showing a chat input and navigation controls.Note:
Once set, the monitor will enter VOX mode and go into sleep. Into VOX mode, the monitor will stop broadcasting until audio is detected by the camera above the set sensitivity level.
3.12 Reminder (timer)
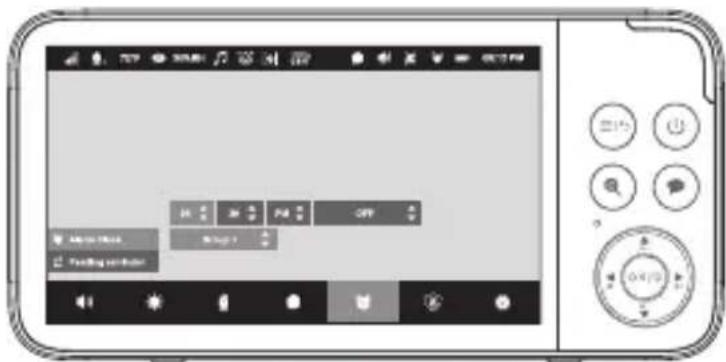
- Press select > Reminder, press / to select the group. You can set up to four alarms.
- Press to confirm a specific time for the monitor to alert you. - Press select >, and select 2 hours, 4 hours or
6 hours to create a repeating reminder.
text_image
Screenshot of a mobile phone interface with control buttons and playback controlsNote:
The reminder will sound for 30 seconds and again after 1 minute if no action is taken, but will shut off automatically if none is taken after three times.
3.13 Privacy mode (switch off wifi / internet connection)

text_image
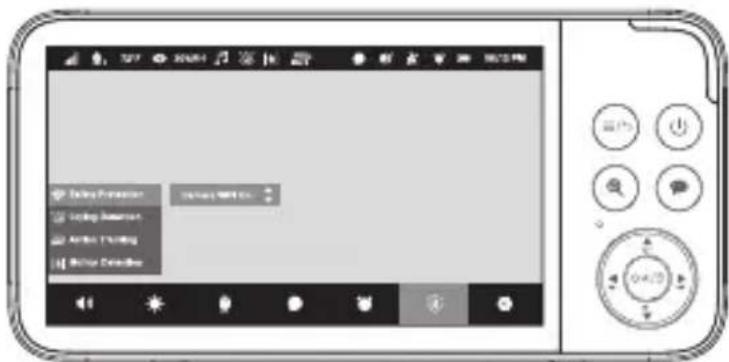
• Press select >> , Safety Protectionto block access to the camera via WiFi / Internet.

text_image
• Press select >> >> > Safety Protection WiFi ON WiFi OFFAccess Time, To turn on or off WiFi / Internet access to the camera or to set a specific time to allow WiFi / internet access to the camera.
Note:
The camera images can only be viewed in the app if WiFi access is enabled. If WiFi access is disabled, the camera images can only be viewed via the monitor.
text_image
Adobe Photoshop Adobe Photoshop Adobe Photoshop Adobe Photoshop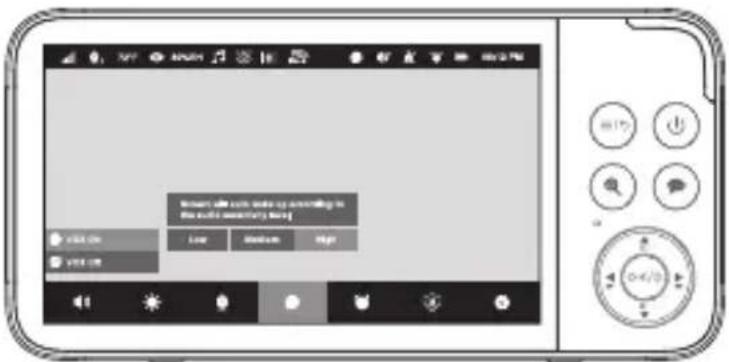
text_image
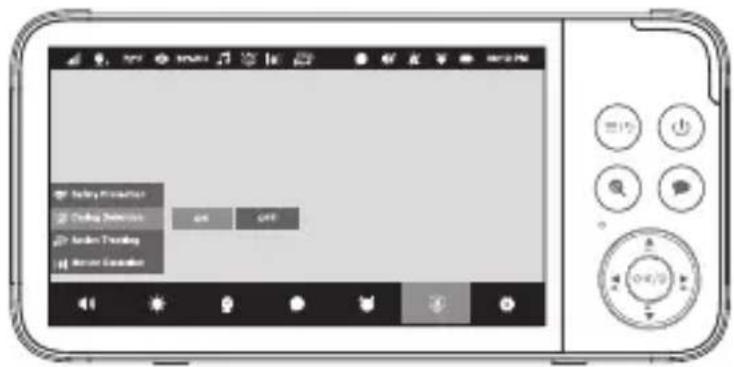
Screenshot of a mobile app interface with Chinese text and control buttons3.14 Crying detection
- Press

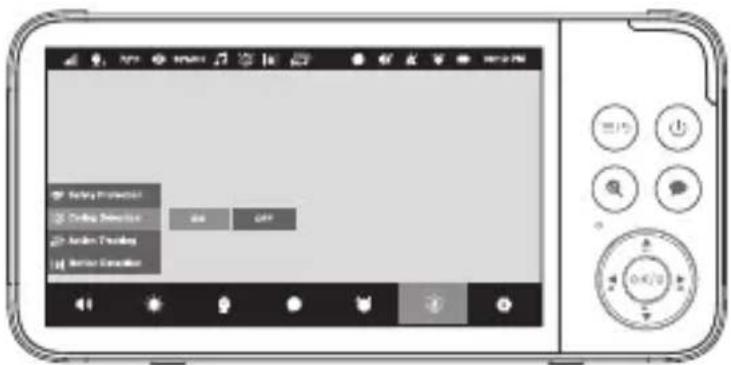
select > , to turn on / off crying
detection. When activated, the monitor will alert you when crying is detected.
text_image
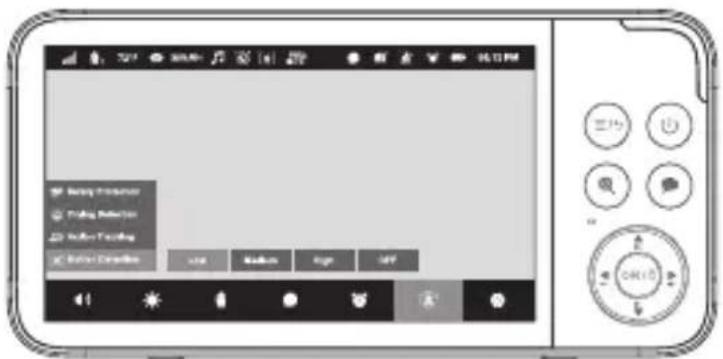
Sailing Properties Coding Direction Audio Tracking Audio Connection3.15 Motion detection
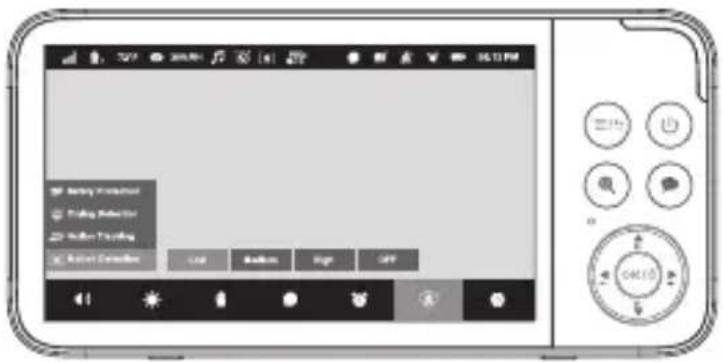
- Press

select > , select

Motion Detection
High
Middle
Low / OFF Sensitivity levels to monitor your baby's movements.
Select high sensitivity when you baby is sleeping to receive alerts for any movement. For an awake and playing baby, choose medium or low
sensitivity detection.
text_image
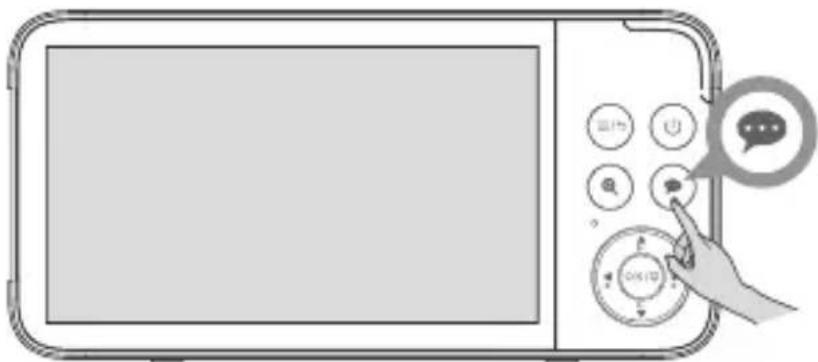
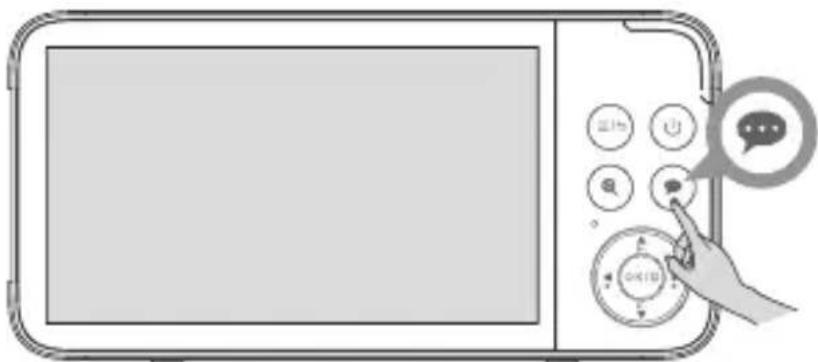
Binary Processor Filing Filter Audio Tracking Color Channels USB Media Image OFF OK/OK3.16 Talkback
- Push

to talk, release to listen.
text_image
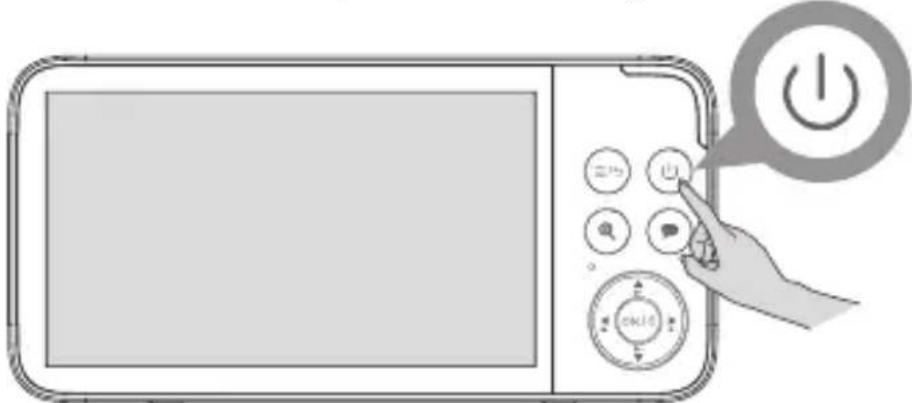
Diagram showing a hand interacting with a device panel and control buttons, with speech bubble icons visible.3.17 Sleep mode
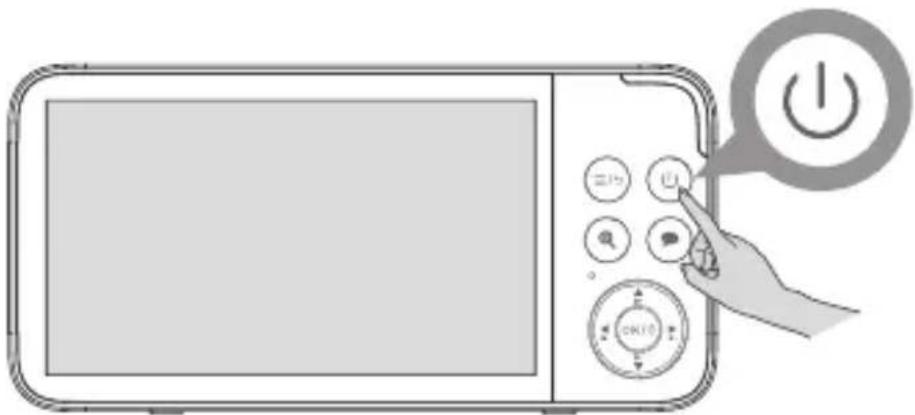
- Short press

To enter sleep mode. Press any button to wake up.
natural_image
Illustration of a hand interacting with a power button on a microwave device (no text or symbols visible)Note:
In sleep mode, the screen will turn off, but the monitor will continue to receive sounds from the camera. At the same time, if the camera detects any abnormal conditions, the monitor will be awakened.
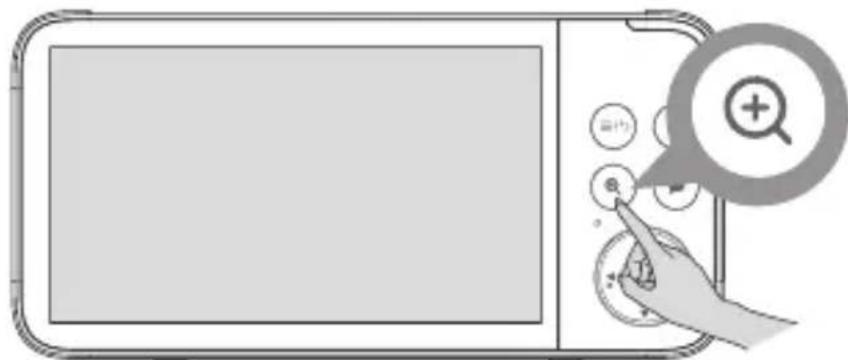
3.18 Zoom in / Zoom out
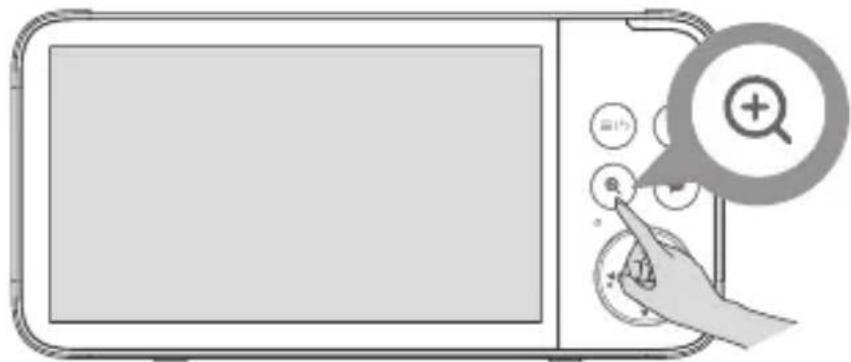
- When viewing a camera, press

to magnify the screen at 2x or 4x.
natural_image
Illustration of a hand interacting with a tablet device, showing a magnifying glass icon and control buttons (no text or symbols)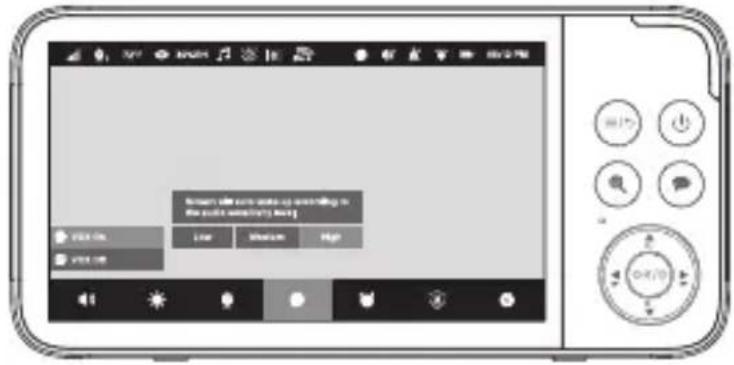
text_image
Beijing's 50% user make up something in the public security ring View On Low Medium High View On OK/703.14 Crying detection
- Press

select > , to turn on / off crying
detection. When activated, the monitor will alert you when crying is detected.
text_image
Audio Connection Coding Selection Audio Tracking Audio Connection3.15 Motion detection
- Press

select >, select / /


Low / OFF Sensitivity levels to monitor your baby's movements.
Select high sensitivity when you baby is sleeping to receive alerts for any movement. For an awake and playing baby, choose medium or low
sensitivity detection.
text_image
Battery Monitor Fishing Detector Audio Tracking Action Connection Load Button High OFF OK/OK3.16 Talkback
- Push

to talk, release to listen.
text_image
Diagram showing a hand interacting with a device panel and control buttons, with speech bubble icons visible.3.17 Sleep mode
- Short press

To enter sleep mode. Press any button to wake up.
text_image
Illustration of a remote control panel with labeled buttons and a hand pointing to the button, accompanied by a power button icon.Note:
In sleep mode, the screen will turn off, but the monitor will continue to receive sounds from the camera. At the same time, if the camera detects any abnormal conditions, the monitor will be awakened.
3.18 Zoom in / Zoom out
- When viewing a camera, press

to magnify the screen at 2x or 4x.
text_image
Diagram showing a hand interacting with a device screen and a magnifying glass icon labeled '+', indicating search or optimization.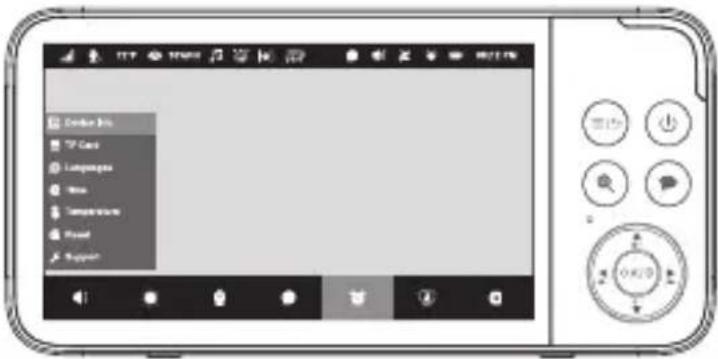
text_image
Enter Bits TV Cars Languages Bus Temperature Road Support3.23 Volume / Brightness / Night Light
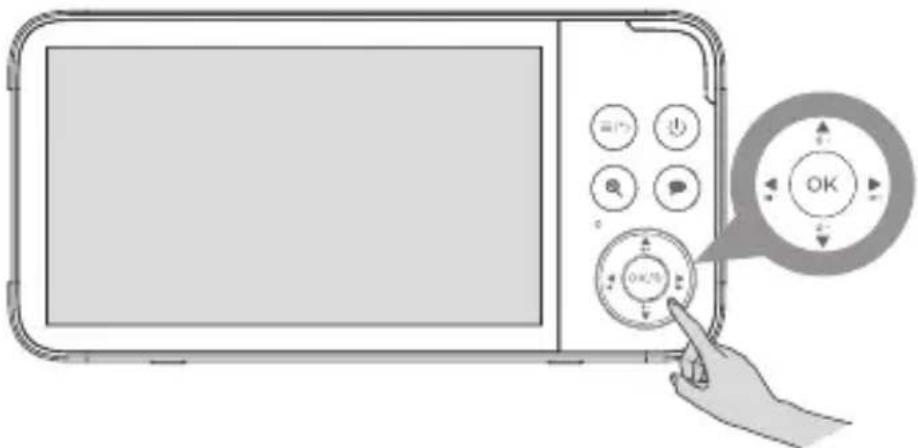
- When the menu is not active, briefly press the 'OK' button, then use the volume up/down buttons or the screen brightness +/- buttons to adjust the settings. To switch the night light on or off on the baby unit (camera), press and hold the 'OK' button."
text_image
Diagram showing a hand interacting with a device's screen, featuring a circular dial labeled 'OK' and directional arrows.3.24 Reset hole
- If the monitor does not respond when you press any button, you can use a pin to press the reset hole on the back of the monitor to restart it.
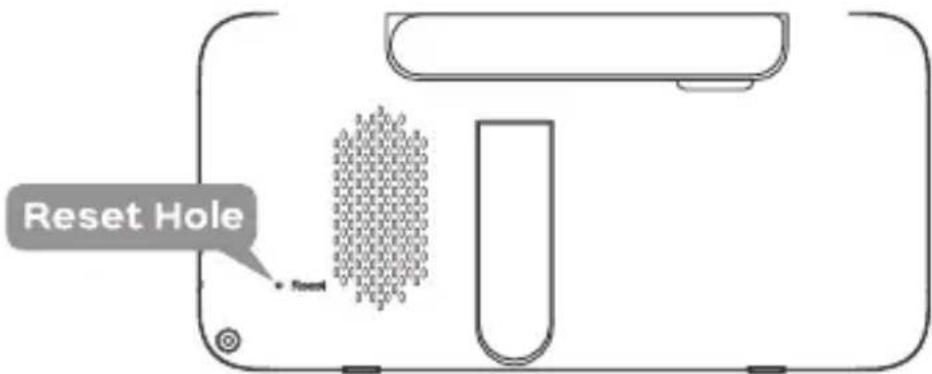
text_image
Reset Hole Reset4. USING THE BB CAM APP
Connect the camera to the power adaptor, then plug into mains power. The camera must be within range of the WiFi router with which you want to connect. Make sure the password of your WiFi network is available for entering during the in-app setup process.
Check privacy mode on the monitor to make sure WiFi / internet acces is not restricted for the camera (see chapter 3.13).
Make sure your WiFi network is set to 2.4GHz, 5GHz WiFi is not supported.
4.1 Minimum system requirements
- Android™ System: Version 8.0 or above
- iPhone®/iPad® iOS: Version 12.0 or above
• High Speed (WiFi) Internet
At least 0.6 Mbps upload bandwidth per camera (you can test your internet speed on this site: http://www.speedtest.net)
4.2 Installing the BB cam app
Scan the QR code or go to www.luvion.com/apps to download and install the BB Cam app. You can also search for BB cam in the Apple App Store of Google Play store.
text_image
QR code image containing encoded data, no visible human-readable textScan the QR code to download and install the BB Cam app. You can also search for BB cam in the Apple App Store or Google Play store.
Make sure that the BB Cam app is allowed to use wireless data.
If you want to receive immediate updates (push notifications) from the app, please allow the BB Cam app to send notifications to your device.
4.3 Sign into your BB cam app account
If you don't have an account yet, tap "Register" to create one. Choose your
country or region and enter your email address and password, then tap "Send" to receive a verification code. If you don't receive the code within 60 seconds you can request a new one.
If you already have an account tap "Login".
4.4 Connecting the camera to your phone
- Before adding the camera, ensure that your phone is connected to your 2.4GHz WiFi network, allow the BB cam app to find and connect to devices on your local network.
- Tap "Add device"
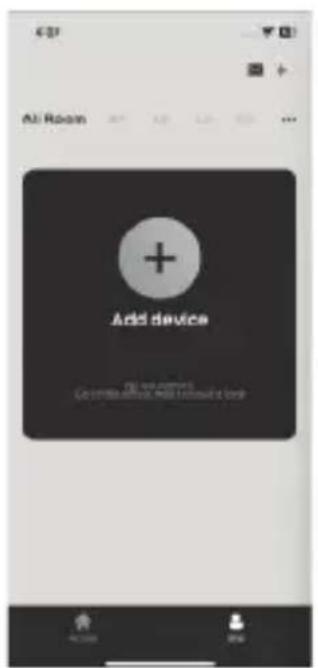
text_image
Add Room + Add device For all users Commaison, will release a web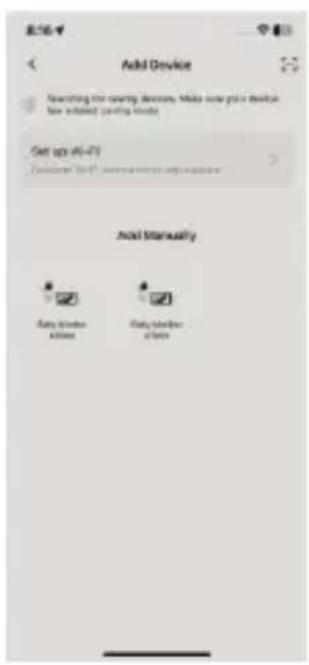
text_image
Add Device Searching your quantity device, Make some you a device new installed (carving devices) Set up to 45-FT Add Manually Auto Window Active Auto Window Active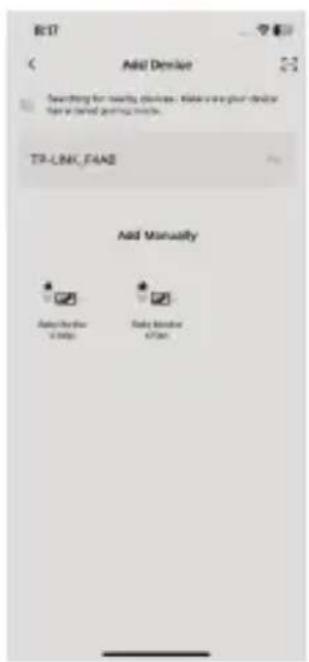
text_image
Add Device Searching for monthly devices. Make more your device type in saved settings. TR-LNK_F4AE Add Manually Make this device 3 days Make another 67 days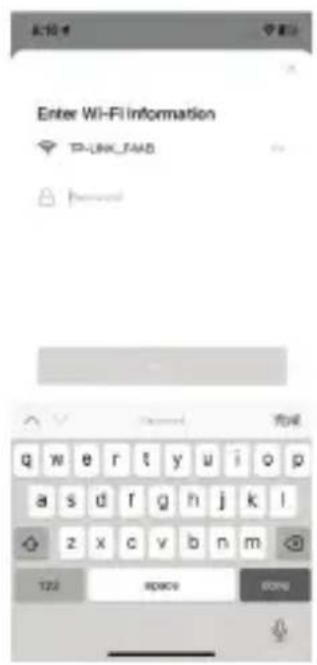
text_image
Enter Wi-Fi information SP-LINK_FAID forward- Allow the BB cam app to access your location and use Bluetooth ^TM .
- Select your WiFi network and enter the password.
- Select the Supreme Connect 3 camera you want to connect to the BB Cam app.
- Use a pin or a paperclip to press and hold the Wifi button on the bottom of the camera for 5 seconds. When you hear the prompt tone click "Next".
Note:
Short press the WIFI button three times in a row to reset all WIFI settings and delete the registration information.
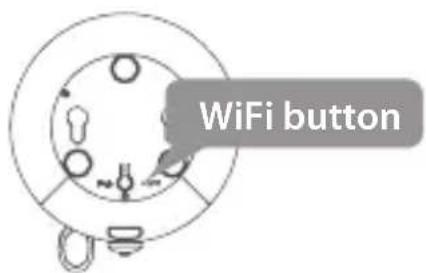
text_image
WiFi button- Your device will be found immediately. Tap "Add" and enter the password for the WiFi network to which your phone is connected. Otherwise, you will not be able to link your phone to the device.
- When you hear the prompt tone, your device has been set up successfully, and you will be able to see your baby monitor on the homepage.
- You can now hear and see your baby anytime and anywhere!
If you have another camera to pair, simply tap "Add Device" and follow the steps outlined above.
4.5 Home page overview
After you successfully set up the camera, you will see your camera listed on the home page.
- Notification center
- Add camera
- Home management
- Other settings
4.5.1 Join a home
If you have received an invitation code from the manager of Home, press ••••, select "Join a home" and enter the invitation code.
4.5.2 Home management
On the homepage, press ••••,
select through "My home" to manage your home settings and members.

text_image
11:25 All Rooms Baby Monitor 2 Baby Monitor JWY Monitor 1 2 3 44.5.3 View message history
On the homepage, press 📂, To view message history (alarm from abnormal conditions, camera management history or account logon history).
4.6 Settings overview
4.6.1 Language settings
Press ⚙, select "Language" to set the language.
4.6.2 Reset password
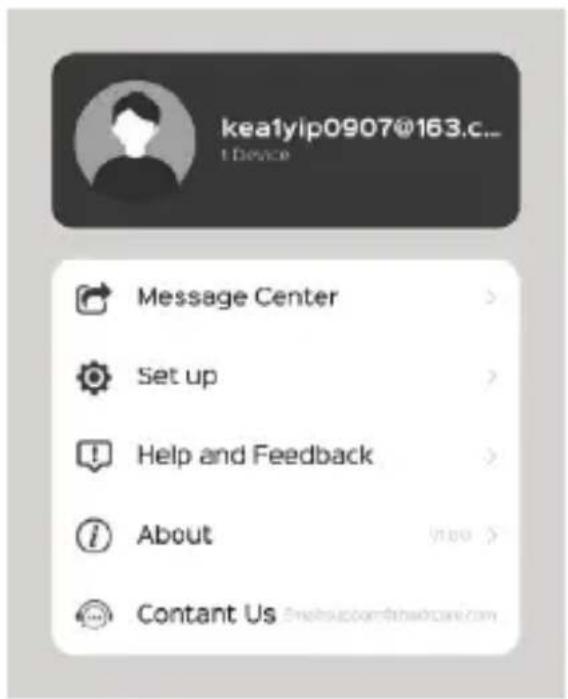
Press ⚙️, select "Account settings" and tap reset password.
text_image
kea1yip0907@163.c... Device Message Center > Set up > Help and Feedback > About Content Us emailsupport@fnbwcare.com4.7 Live view page overview
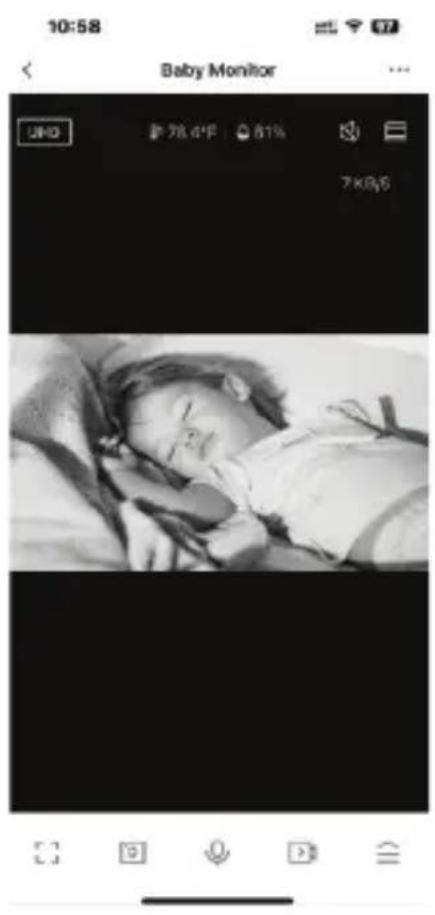
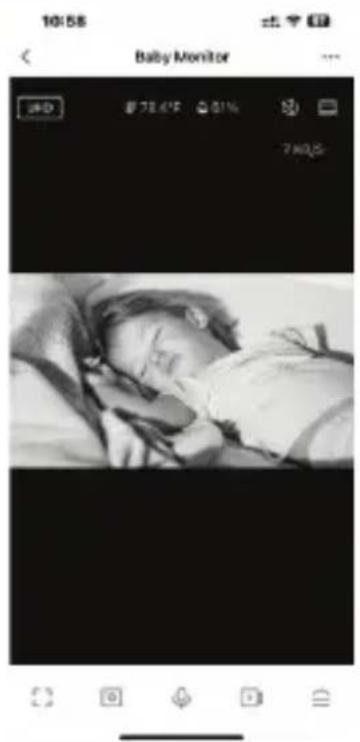
text_image
10:58 Baby Monitor WHO 7KB/6 28.4% 81% 7KB/6 | Video quality |
 | Temperature and humidity |
 | Mute |
 | Screen size |
 | Unfold button |
 | Recording |
 | Talkback |
 | Screenshot |
 | Landscape view |
4.7.1 Feature bar
 | Playback View playback | |
 | Gallery View recordings and screenshots | |
 | Brightness / Dark mode Switch display mode | |
 | Camera switch Turn on/off camera | |
 | Night mode Turn on/off night vision | |
 | Lullaby volume Adjust lullaby volume | |
 | Motion tracking Turn on/off motion tracking | |
 | Motion detection Turn on/off motion detecting | |
 | Temperature Set temperature scale between °C and °F | |
 | Lullaby Play lullaby | |
 | Feeding timers Set (feeding) timers at a specific time or repeat timers |
4.8 Fonctions & operation
4.8.1 Lullaby volume setting
Press ≡, and press ✦, and use the volume bar to set the volume.
4.8.2 Device volume setting
On the live view page press ••••, select sounds and use the bar to set the volume. Adjust the volume of your phone if the sound is still too low.
Note:
The volume of the lullabies is synchronized with the device volume.
4.8.3 Lullaby
On the live view page, press and press > and press / to choose your favourite lullaby, and press to play. Press to change play mode, default is loop. Use the bar to adjust the volume.
4.8.4 Temperature
On the live view page, press ≡ and press ➤ to select temperature unit and set High/Low temperature alarm.
4.8.5 Night vision mode
On the live view page, press ≡ and press ✦ to choose between On / Off / Automatically.
4.8.6 Feeding timers
On the live view page, press ≡ and press ✦, select "Time interval" or "Timing" "Time interval" means you set a time interval to keep getting a notifications from the app. "Timing" means that app will remind you once at the time you set.
4.8.7 Privacy mode
On the live view page, press ≡ and press ✦ to stop your camera transmitting sounds and images.
4.8.8 Motion tracking
On the live view page, press ≧ and press ✦ to turn on motion tracking, tap again to turn off, it will track your baby automatically when your baby moves through the room.
4.8.9 Motion detection
On the live view page, press and press to turn on motion detection, tap again to turn off, it will detect your baby's motion, if the baby moves it will send a notification to you.
Press ••••, select Detection alarm settings to set the motion detection alarm settings.
4.8.10 Play back recorded videos
Please ensure that you have installed a FAT32 memory card.
On the live view page, press and press ✦ to view earlier recoded videos.
4.8.11 Light / Dark mode
On the live view page, press and press ✦ to switch between light and dark mode.
4.8.12 Pan & tilt control
On the live view page, press ≡ and press ✦ and press / ▲/▼ to ▶ control the camera.
4.8.13 Status reports
On the live view page, press ≡ and press ✦ to view the status reports of the camera.
4.8.14 Talk back
• One-way intercom on the live view page press and hold 🔒 to talk, release to listen. The sounds of the camera are muted when talking. By default the system is set to one way communication mode.
- Two-way talk back on the live view page press •••, select "basic function" > "Talk mode" and select Two-way talk.
4.8.15 Zoom in / Zoom out
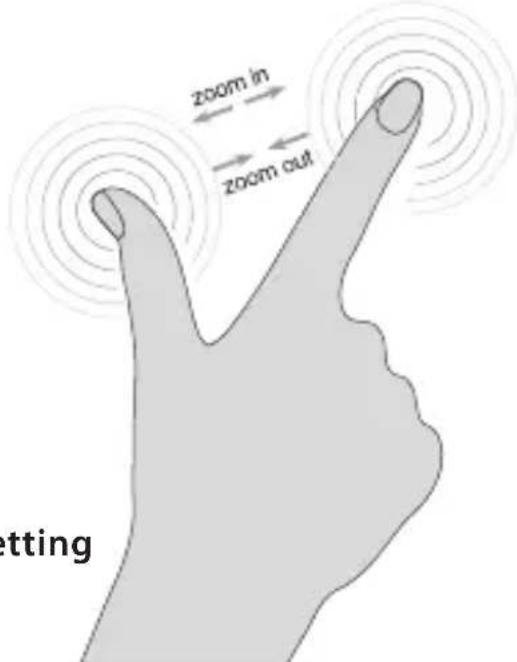
- On the live view page, tap to adjust the screen ratio.
- Use a sliding gesture with 2 fingers on the screen to zoom in or out.
4.8.16 Activity detection area settings
On the live view page press •,• select Detection Alarm Settings > Surveillance Area Setting to edit the activity zone by dragging the border.
Note: You will receive an alert when the child climbs out of this area.
text_image
zoom in zoom out Setting4.8.17 Schedule
On the live view page press ..., select Detection alarm settings > Schedule to add a timer.
4.8.18 Offline notification
On the live view page press •••, select Offline notification to turn it on or off.
4.9 Camera settings
4.9.1 Select room by room
On the live view page press ..., select camera 1, you can rename the cameras and organize them into the appropriate rooms.
4.9.2 Share cameras with your family
On the live view page press •••, select Share Device and select a sharing method, such as sharing via account, link, etc. You can see who has access to the cameras.
4.9.3 Enable video watermark
On the live view page press •••, select Basic function settings > Time watermark to turn it on or off.
4.9.4 Remove camera
On the live view page press •••, and tap Remove device.
Note:
Once you remove the camera, it will no longer be accessible to anyone you share the camera with.
NOTE: If both the monitor and app are connected to the camera, any settings changed on one end will be synchronized on the other.
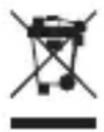
5. DISPOSAL OF THE DEVICE (ENVIRONMENT)

duct is labelled with this crossed out wheel bin symboldance with European Directive 2012/19/EC to indicatemust not be disposed of with your other household waste.
Due to the presence of hazardous substances, mixtures or
components, electrical and electronic devices that are not subject
to selective sorting are potentially dangerous to the environment and human health. Please check your local city office or waste disposal service for the return and recycling of this product.
6. CLEANING
Clean the Baby Monitor with a slightly damp cloth or with an anti-static cloth. Never use cleaning agents or abrasive solvents.
Cleaning and care
- Do not clean any part of the product with thinners or other solvents and chemicals – this may cause permanent damage to the product which is not covered by the warranty.
- Keep the Baby Monitor away from hot, humid areas or strong sunlight, and don't let it get wet.
- Every effort has been made to ensure high standards of reliability for your Baby Monitor. However, if something does go wrong, please do not try to repair it yourself – contact Customer Service for assistance.
IMPORTANT
Always switch off and disconnect the power adaptor before cleaning your baby monitor.
7. TROUBLE SHOOTING
No display
- Try recharging the battery.
- Reset the Units. Unplug both the Units' electrical power, then plug them back in.
- Is the Unit switched on?
- Press and hold the ON/OFF button on the Parent Unit for 3 seconds to switch it ON.
- Is the correct camera selected? Change the camera number, if necessary.
- Is the VOX function activated? The screen will be activated when sound is detected or press any button to activate the screen.
If the Baby Unit has lost its link with the Parent Unit
- If the Baby Unit is too far away it may be going out of range, so move the Baby Unit closer to the Parent Unit.
- Reset both the Parent Unit and Baby Unit by disconnecting them from the electrical power. Wait about 15 seconds before reconnecting. Allow up to one minute for the Baby Unit and the Parent Unit to synchronize.
Signal interference
- Your Baby and Parent Units may be too close. Move them further apart.
- Make sure there is at least 1 to 2m between the 2 Units to avoid audio feedback.
- If the Baby Unit is too far away, it may be out of range. Move the Baby Unit closer to the Parent Unit.
• Make sure that the Baby and Parent Units are not near other electrical equipment, such as a television, computer or cordless/mobile telephone. Move the Baby Unit or Parent Unit 3 feet away from other electrical equipment. - Use of other 2.4 GHz products, such as wireless networks (Wi-Fi® routers), Bluetooth™ systems, or microwave ovens, may cause interference with this product. Keep the Baby Unit or Parent Unit at least 3 feet away from these types of products, or switch them off if they appear to be causing interference.
- If the signal is weak, try moving the Parent and/or Baby Unit to different positions in the rooms.
8. TECHNICAL SPECIFICATIONS
General
RF Frequency: 2412 MHz - 2472 MHz
Modulation Mode: OFDM
Operating Temperature: -10 to +45°C
Operating Humidity: <85%
Transmission Range: Up to 300m (1000ft) in open field
Monitor:
LCD Display: 5" TFT COLOR DISPLAY
Resolution: 1280*720p
Battery: 5000mAh Li-ion 3.7V rechargeable
Power Adapter: Input: 100-240VAC,50-60Hz;
Output: 5V / 1.5A, Type C
Dimensions (W x H x D): 158mm x 77mm x 18,5mm
Camera:
Resolution: 2K
Minimum illumination: 0 Lux (IR on)
Night Vision Control: Auto
Night vision range: 5m (15ft)
Temperature sensor: Yes
Power Adapter: Input: 100-240VAC,50-60Hz;
Output: 5V / 1.5A, Type C
Pan & Tilt: 65 degrees vertical, 285 degrees
horizontal
Dimensions (W x H x D): 148mm x 87mm x 87mm
Specifications are subject to change without prior notice.
9. DECLARATION OF CONFORMITY
Luvion declares that the radio equipment type Luvion Supreme Connect 3 is in compliance with Directive 2014/53/EU. The full text of the EU declaration of conformity is available at: luvion.com/doc/supreme-connect-3
INTRODUCTIE
natural_image
Simple line drawing of a microwave oven with control panel (no text or symbols)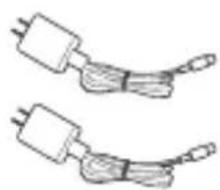
natural_image
Two identical electrical components with wires, no text or symbols visibleOVERZICHT VAN DE CAMERA (BABYTOESTEL):
text_image
Diagram of a device rear panel with numbered parts for identificationOVERZICHT VAN DE STATUSBALK
1. SAFETY INSTRUCTIONS:

WAARSCHUWING:
text_image
Prohibition sign with neon and plug symbols, indicating no smoking or disinfectionnatural_image
Line drawing of a portable electric shaver connected to a power outlet (no text or symbols)Let op:
2.2 Connecting the power supply for the Monitor (Parent Unit)
natural_image
Simple line drawing of a cable being inserted into a device via a plug, with an outlet symbol nearby (no text or labels)Let op:
LUVION Premium Baby products
text_image
Scanned image of a digital camera interface with Chinese text labels and control buttons3.3 Slaapliedjes
- Druk op

text_image
Share Options Share Options Locking Locking Options Next Features3.4 Helderheidsinstellingen
• Druk op

text_image
Screenshot of a mobile app interface with a video player control panel and playback controls3.5 Scherm time-out
- Druk op

selecteer




text_image
Screenshot of a mobile phone interface with Chinese UI elements and control buttonstext_image
Screenshot of a mobile phone interface with control buttons and a display screen showing text options like 'OK', 'Cancel', and 'Add'.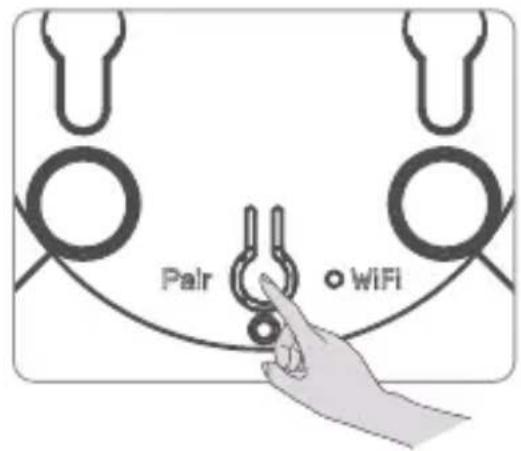
text_image
Pair WiFitext_image
Screenshot of a mobile device interface with Chinese menu options and control buttonstext_image
Screenshot of a mobile app interface with Chinese menu options and playback controlsLet op:
text_image
Screenshot of a mobile app interface with Chinese text, showing a dashboard and control panel.Note:
text_image
Screenshot of a mobile app interface with menu options and control buttonsLet op:
text_image
Safety Provider Safety System Audio Funding Audio Connection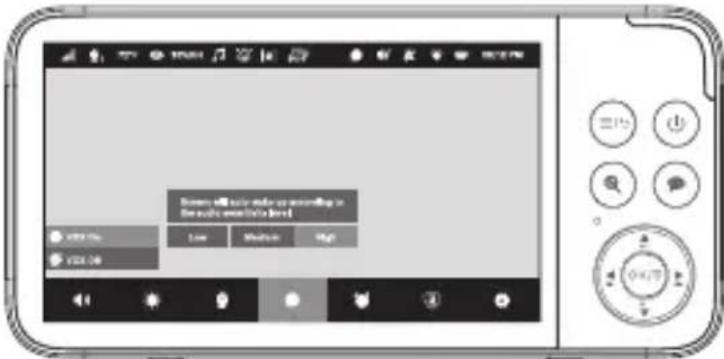
text_image
Windows 65:04:00 How does you make us according to this device will change it based Low Medium High 123.003.14 Huildetectie
- Druk op

selecteer
text_image
Security Protocols Coding Detection Audio Tracking Monitor Connection3.15 Motion detection
- Druk op

selecteer

[8] Motion Detection ecteer /

text_image
OFF OK Cancel Help Save Remove Up Down Add Delete Add Delete Add Delete Add Delete Add Delete Add Delete Add Delete Add Delete Add Delete Add Delete Add Delete Add Delete Add Delete Add Delete Add Delete Add Delete Add Delete Add Delete Add Delete Add Delete Add Delete Add Delete Add Delete Add Delete Add Delete Add Decrease Add Delete Add Delete Add Delete Add Delete Add Delete Add Delete Add Delete Add Delete Add Delete Add Delete Add Delete Add Delete Add Delete Add Delete Add Delete Add Delete Add Delete Add Delete Add Delete Add Delete Add Delete Add3.16 Terug spreken
- Druk

text_image
Diagram showing a hand interacting with a device panel, displaying icons for UI, chat, and screen control.3.17 Sleep mode
• Druk kort op

natural_image
Illustration of a hand interacting with a device via a touchscreen display (no text or symbols visible)text_image
Diagram showing a hand interacting with a device's screen, featuring a circular dial labeled 'OK' and control buttons.3.20 Nachtzicht
text_image
Screenshot of two smartphone interfaces showing app interface with menu options and status bar in Chinese3.22 Instellingen
text_image
Diagram showing a hand interacting with a device control panel, with an 'OK' button highlighted and directional arrows indicating action.3.23 Resetgaatje
text_image
QR code image containing encoded data, no visible human-readable texttext_image
Add Device Set up All-Fi Add Manually Add Device Searching for mostly devices. Make sure color devices has entered cooling unit. Add Manually Add Device Searching for mostly devices. Make sure color devices has entered cooling unit. Add Manually Add Manually Enter Wi-Fi Information TP-LINK_FAIRS OK q w e r t y u i o p a s d f g h j k l z x c v b n m 123 space 070text_image
11:25 All Room Baby Monitor 2 Baby Monitor Add Servicetext_image
kea1yip0907@163.c... I Device Message Center > Set up > Help and Feedback > About Content Ustext_image
10:58 Baby Monitor WHO 78.6% 87% 7K8/64.8.10 Play back recorded videos
text_image
zoom in zoom out4.8.18 Offlinemelding
7. PROBLEEMOPLOSSING
Geen beeld
Afmetingen (W x H x D): 158mm x 77mm x 18,5mm
Camera:
Resolutie: 2K
Minimale verlichting: 0 Lux (IR on)
luvion.com/doc/supreme-connect-3

INTRODUCTION
natural_image
Illustration of household appliances including a microwave, a microwave oven, and two electrical connectors (no text or symbols)text_image
Technical diagram of a device with numbered parts, showing front and side views with labeled components.VUE D'ENSEMBLE DE LA BARRE D'ÉTAT :
text_image
Prohibition sign with neon and child pictograms, indicating no smoking or disinfectionnatural_image
Line drawing of a portable electric stove with a power outlet connected to a plug (no text or symbols)Remarque :
natural_image
Simple line drawing of a cable being inserted into a device (no text or symbols)Remarque :
text_image
Mobile Name Brightness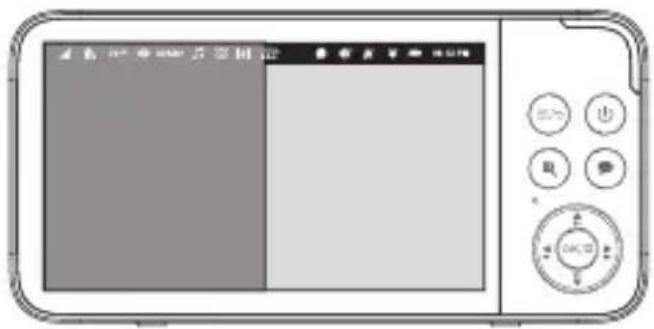
text_image
Scanned image of a digital camera interface with Chinese text labels and control buttons3.3 Berceuses
- Appuie sur

sélectionne



text_image
Screenshot of a mobile device interface showing a context menu with options like 'Watchbox', 'Live Home', and 'Play Action'.text_image
Scanned screenshot of a mobile device interface with Chinese UI elements and control buttons3.5 Screen timeout
- Appuie sur

sélectionne

text_image
Scanned screenshot of a mobile device interface with Chinese UI elements and control buttonstext_image
Screenshot of a mobile app interface with Chinese menu options and control buttons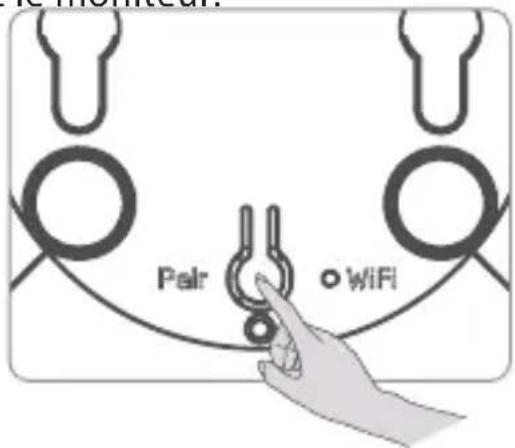
text_image
Pair WiFi3.7 Voir une caméra
- Appuie sur

sélectionne
text_image
Scanned screenshot of a mobile phone interface with Chinese UI elements and control buttonstext_image
Screenshot of a mobile phone interface with Chinese menu options and control buttonsRemarque :
text_image
Power and audio as according to the audio supplementary key. OK Cancel HelpRemarque :
text_image
Screenshot of a mobile audio player interface with playback controls and control buttonsRemarque :
text_image
Save Procedure Cryogenicity Active Tracking Western DetectionRemarque :
text_image
Entry Preference Entry Selection Settings Setting Enter Selection Live Redraw Sign OFF OK Cancel3.16 Fonction Parler (Talkback)
- Appuie sur

text_image
Diagram showing a hand interacting with a device panel and displaying multiple function buttons with speech bubbles, including a speech bubble icon.3.17 Mode veille
natural_image
Illustration of a hand pressing a button on a remote control panel with a power button icon (no text or symbols)Remarque :
natural_image
Illustration of a hand interacting with a touchscreen device, showing a magnifying glass icon and control buttons (no text or symbols)text_image
Screenshot of a mobile app interface with Chinese menu options and control buttons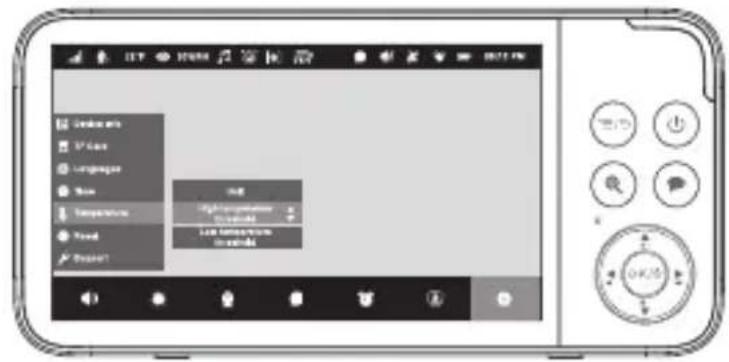
text_image
Temperature Low Temperature Low Temperature Low Temperature3.22 Paramètres
text_image
Diagram showing a hand interacting with a remote control panel, with an 'OK' button highlighted and directional arrows indicating action.text_image
QR code image containing encoded data, no visible human-readable texttext_image
All Rooms Baby Monitor 0 Baby Monitor 1 Autohometext_image
kea1yip0907@163.c... 1 Canycle Message Center > Set up > Help and Feedback > About Content Us Email support@heetcare.comLUVION Premium Baby products
text_image
10:58 Baby Monitor 78.6% 01% 780%4.8.14 Fonction Parler (Talk back)
Dimensions (L × H × P) : 158mm × 77mm × 18,5mm
Caméra :
Résolution : 2K
Dimensions (L × H × P) : 148mm × 87mm × 87mm
natural_image
Illustration of various household appliances including a LUVAN, microwave, and cable connectors (no text or symbols)KAMERAÜBERSICHT:
text_image
Diagram of a device rear panel with numbered parts and internal components, including a textured screen and labeled parts 10 and 14.text_image
Prohibition sign with neon and medical symbols, featuring a baby and a pill symbol in a circlenatural_image
Line drawing of a portable electric heater connected to a power outlet (no text or symbols)Hinweis:
natural_image
Simple line drawing of a cable being inserted into a device (no text or symbols)Hinweis:
text_image
Scanned image of a mobile phone interface with Chinese text labels and control buttons3.3 Schlaflieder
- Drücke

wähle



text_image
Screenshot of a mobile device interface showing a media control panel with options like 'Video Settings', 'Smartphone', and 'Mobile'.text_image
Screenshot of a mobile app interface with status bar, navigation buttons, and control paneltext_image
Screenshot of a mobile app interface with Chinese UI elements and control buttonstext_image
Screenshot of a mobile phone interface with control buttons and a play screen showing menu options like 'Add', 'Save Now', and 'Delete'.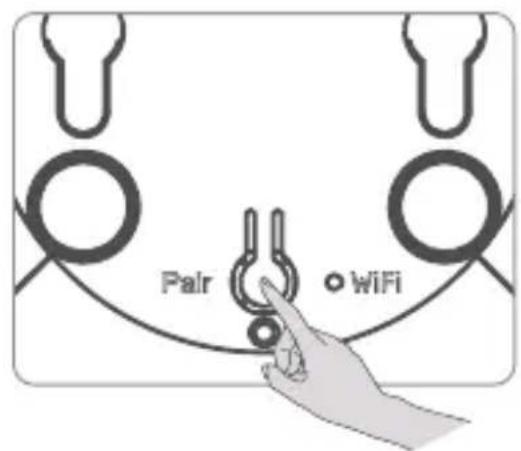
text_image
Pair WiFi3.7 Kamera anzeigen
text_image
Screenshot of a mobile phone interface with Chinese UI elements and control buttons3.8 Kamera löschen
text_image
Screenshot of a mobile phone interface showing a screen with app icons and a control panel with buttons.Hinweis:
text_image
User at Music video according to the music similarity book. Video Audio Music LogoHinweis:
text_image
Screenshot of a mobile device interface with Chinese UI elements and control buttonsHinweis:
text_image
Safety Provider C:\Users\MPT15 Crying Software Action Handling Writer SelectionHinweis:
text_image
Send Preference Loading Preference Active Tracking Active Connectiontext_image
Diagram showing a hand interacting with a device panel and its interface, with speech bubble and control buttons visible.text_image
Illustration of a microwave oven with labeled buttons and a hand pointing to the power button, symbolizing action or operation.Hinweis:
text_image
Diagram showing a hand interacting with a touchscreen device, with a magnifying glass highlighting the function icon.3.19 Pan & tilt
- Drücke


text_image
Diagram showing a hand interacting with a microwave control panel, with one dial labeled 'OK' and directional arrows indicating action.Low temperature threshold

dann nutze / zu

stellen.
text_image
Context Read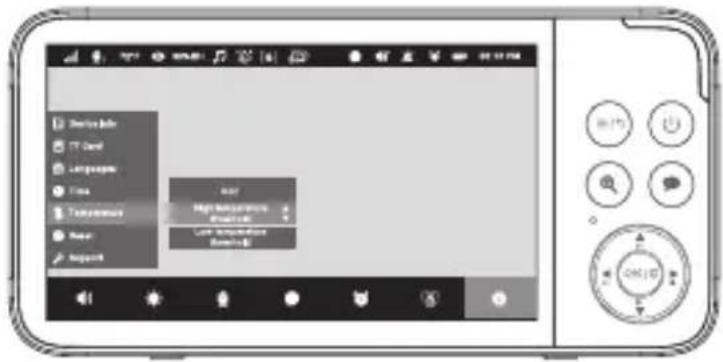
text_image
Device Info TV Card Language Time Transporter New Support High Performance Performance Low Performance Controltext_image
Subscribe iTunes Language Time Temperature Feed Supporttext_image
Diagram showing a hand interacting with a device's screen and control buttons, with a speech bubble indicating 'OK' (OK) in the center.3.24 Reset-Loch
text_image
QR code image containing encoded data, no visible human-readable texttext_image
Add Device Searching for every day, always save your minutes Find a hidden list the tools. Set up AI-F1 Remove iOS to install any of the users. Add Manually Baby folder Baby folder Baby folder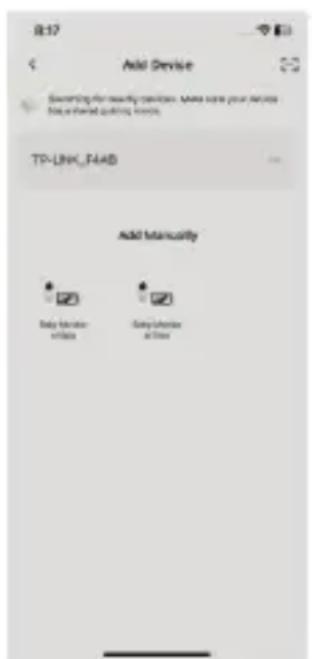
text_image
8:17 Add Device Switching for monthly services. Make some your device free shared cooling tools. TP-LINK_F44B Add Manually Baby Phone or Phone Baby Phone or Phone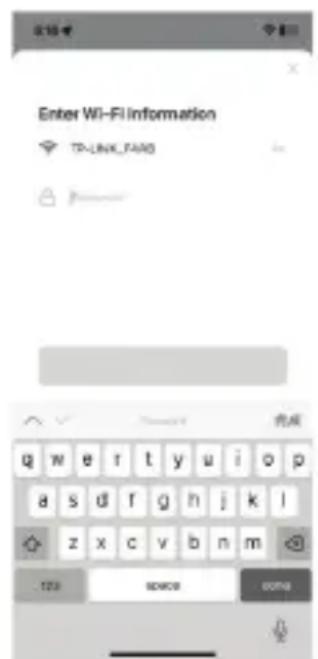
text_image
Enter WI-FI Information TP-LINK_FANG 完成 q w e r t y u i o p a s d f g h j k l z x c v b n m 123 SERVICE 0006text_image
10:58 Baby Monitor UK 2 7:28.41F 67% 74/3/06text_image
zoom in zoom out hs. t,4.8.17 Zeitplan
Maße (B × H × T): 148mm × 87mm × 87mm