Easy Plus 2 - Baby monitors Luvion - Free user manual and instructions
Find the device manual for free Easy Plus 2 Luvion in PDF.


User questions about Easy Plus 2 Luvion
0 question about this device. Answer the ones you know or ask your own.
Ask a new question about this device
Download the instructions for your Baby monitors in PDF format for free! Find your manual Easy Plus 2 - Luvion and take your electronic device back in hand. On this page are published all the documents necessary for the use of your device. Easy Plus 2 by Luvion.
USER MANUAL Easy Plus 2 Luvion
MANUAL D'INSTRUCTIONS

BENUTZERHANDBUCH
TABLE OF CONTENTS
| INTRODUCTION | 2 | |
| SAFETY | INSTRUCTIONS | 2 |
| CONTENTS OF PACKAGE | 3 | |
| OVERVIEW OF PARENT UNIT (MONITOR) | 4 | |
| OVERVIEW OF BABY UNIT (CAMERA) | 5 | |
| GETTING | STARTED | 6 |
| MENU | 9 | |
| PAIRING | 12 | |
| TROUBLESHOOTING | 14 | |
| TECHNICAL SPECIFICATIONS | 15 | |
INTRODUCTION
Thank you for purchasing the Luvion Easy+. Now, you will be able to see and hear your baby everywhere in and around the house.
Please keep the original dated sales receipt for your administration and proof of warranty. For service and warranty issues, you will always be asked for a copy. For warranty issues, you may contact your Luvion dealer or your local Luvion distributor. More information can be found on our website: www.luvion.com.
This user manual provides you with all information necessary for a safe, pleasant, and easy use of the Luvion Easy+. Before use, we ask you to thoroughly read this user manual. We ask for your special attention for the safety instructions below.
LUVION
Delft, The Netherlands
www.luvion.com
SAFETY INSTRUCTIONS
- Keep small parts away from children.
This product is not intended as a toy. Please refrain children from playing with the product. - This product is not intended as a substitute for adult supervision.
Only use the original supplied power chargers. - Do not use the product in humid conditions or nearby water.
Always keep the camera and any cords of the power adapters at least 1,5 meter away from the baby.
Only use the product between 10^ - 35^ - Do not attempt to open the product yourself or you may void your warranty, please contact your local dealer or distributor.
Batteries:
- Fully charge the monitor before first use, to ensure an optimal battery capacity.
CONTENTS OF PACKAGE
The box includes the following components:
Easy+
- 1 x parent unit (monitor)
- 1 x baby unit (camera)
- 1 x power adapter for the parent unit 1 x power adapter for the baby unit
- 1x user manual
Easy+ Duo
- 1 x parent unit (monitor)
- 2x baby unit (camera)
- 1 x power adapter for the parent unit 2 × power adapter for the baby unit
- 1x user manual
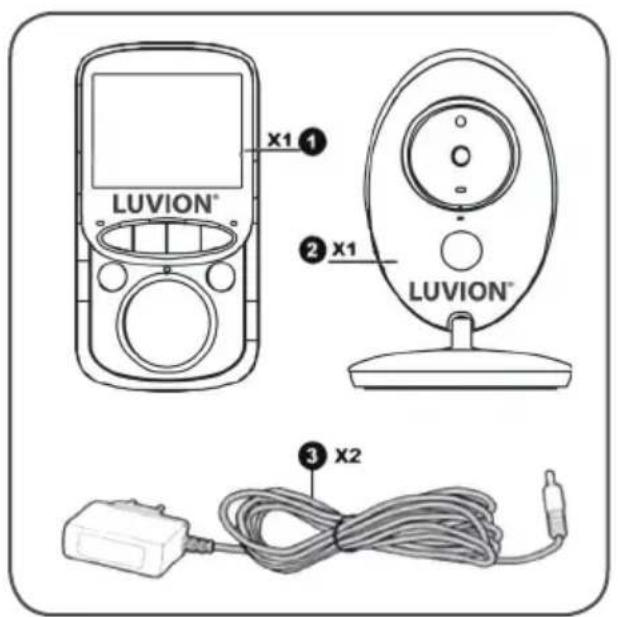
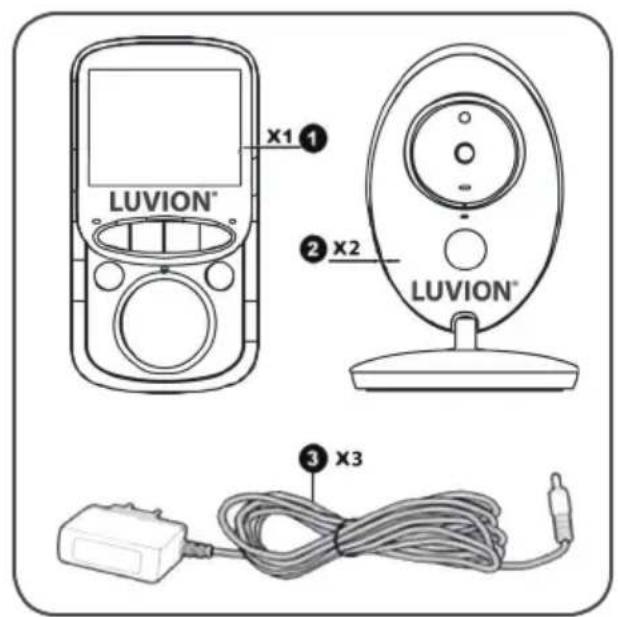
Check the package to confirm that you have received the complete system, including all components listed above.
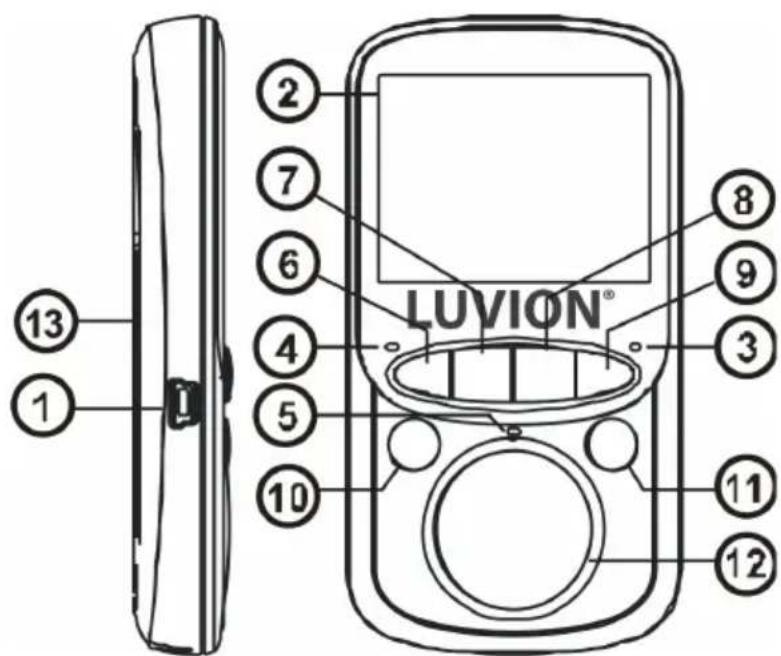
- Power connector - Connect the included USB power adapter to power and/or charge the parent unit.
- LCD display - 2.4"LCD Screen.
- Power indicator LED - indicates whether the parent unit is switched on.
- Connection LED - indicates whether there is a connection with the camera
- Microphone - The sounds detected by this microphone will be transmitted to the baby unit (camera) when the Talk button is pressed.
- Return / Volume down / Auto switch - Inside the menu use the return button to return to the previous menu option. Outside the menu press shortly to decrease the volume or hold to activate automatic camera switching.
- Vox button - Press this button to switch to VOX mode or to leave the VOX mode.
- Talk button - Press this button to speak through the baby unit to your child.
- Forward / Volume up / Manual switch - Inside the menu use the forward button to advance to the next menu option. Outside the menu press shortly to increase the volume or hold to manually switch between cameras.
- Menu / OK button - Use the Menu / OK button to open the main menu or to confirm a selection.
- On/Off button - Hold to turn the parent unit ON or OFF. When in the menu press to return to previous menu.
- Loudspeaker - Produces the sound from the baby unit.
- Battery compartment - Replaceable Lithium Ion-battery
OVERVIEW OF BABY UNIT (CAMERA)
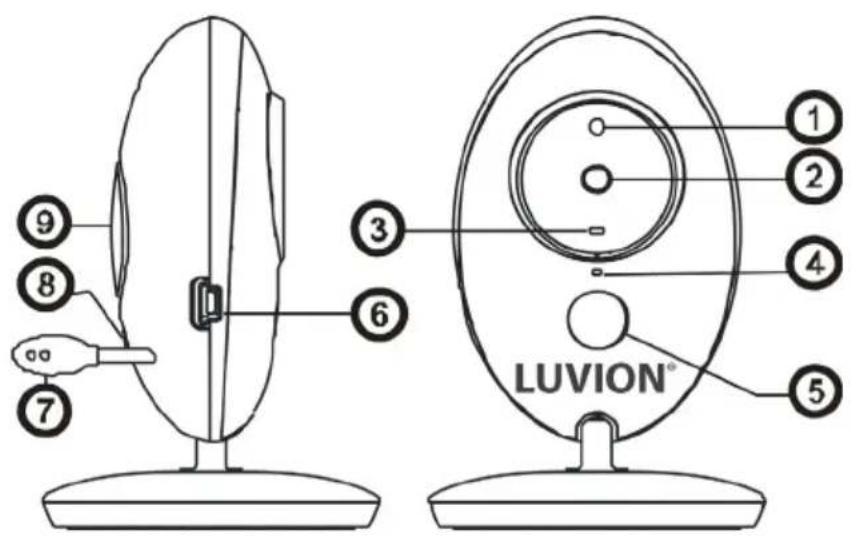
- Light sensor - Allows the baby unit to correct itself under changing light conditions.
- Camera lens - Detects the visual environment and sends this to the parent unit.
- Power indicator LED - indicates whether the baby unit is switched on.
- Microphone - Detects sound and sends this to the parent unit.
- Infrared LED - Allows for 5m distance of night vision, automatically activates within low light conditions.
- Power connector - Input for the Luvion power adapter.
- Temperature sensor - The measured ambient temperature is displayed on the screen of the parent unit.
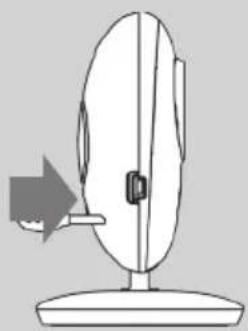
- Pairing button - Establishes a new connection between the baby and parent unit during the pairing process. Pairing should be used when installing an additional camera or when the monitor does not recognize the baby unit. Consult page 12 for more information on the pairing process.
- Loudspeaker - Enables the ability to talk to your child over distance.
INSTALLING THE PARENT UNIT (MONITOR)
- Carefully unpack the parent unit (monitor).
- Connect the power adapter to the parent unit and power socket. The parent unit will start charging; the battery indication on the top right of the screen will now indicate charging. During first use, please allow the unit to completely charge to ensure optimal battery capacity.

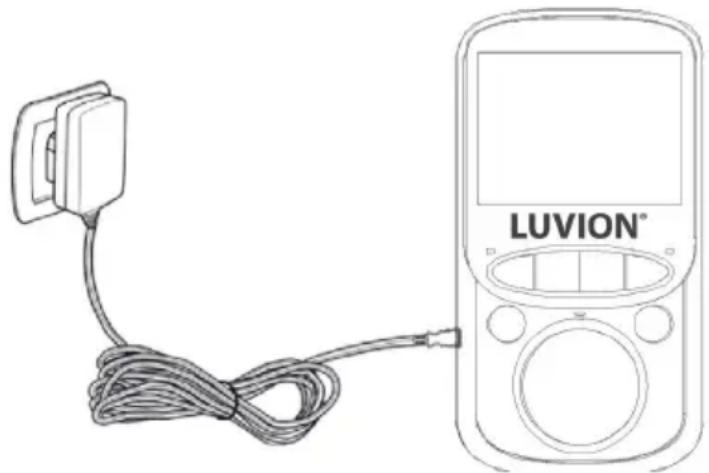
NOTE: CHARGE THE PARENT UNIT COMPLETELY BEFORE FIRST USE.
Hold the ON/OFF button to switch the monitor on. The screen will now show the Luvion introduction screen.
INSTALLING THE BABY UNIT (CAMERA)
Before you install the baby unit (camera), carefully plan where and how you want to position it. Make sure that you take in account the length of the power cable and the position of the power socket, because the baby unit (camera) needs to be connected to the power grid.
- Carefully unpack the baby unit (camera).
- Place the baby unit in the preferred position. You can place the baby unit on a table/cabinet, or you can mount it on a wall with the provided plugs and screws.
NOTE: Before permanently installing the baby unit (camera), make sure that the wireless connection between the baby unit and parent unit is suffi cient. Verify this when both the parent unit and baby unit are placed in the positions from which you would like to use them.
NOTE: Avoid walls or other obstructions between the baby and parent unit as much as possible. For a good sound sensitivity and image quality it is recommended to place the baby unit between 1,5 and 3 meters away from the baby.
NOTE: The range will be affected by anything in between monitor and camera, both physical or digital. Especially metal objects, like kitchen appliances, steel doors or reinforced concrete can signifi cantly limit the signal. Walls, ceilings windows and signals emitted by radio or electrical equipment (such as TV's, computers, cordless or mobile phones), will also limit the range.
-
Connect the power adapter to the baby unit and a power socket.
-
The power LED will now light up.
The parent unit will display the video of the baby unit, when both are switched on and within range of each other. The message "Connecting" will be displayed on the screen of the parent unit when the baby unit is outside the range of the parent unit or when the baby unit is not switched on or recognized.
USING THE SYSTEM
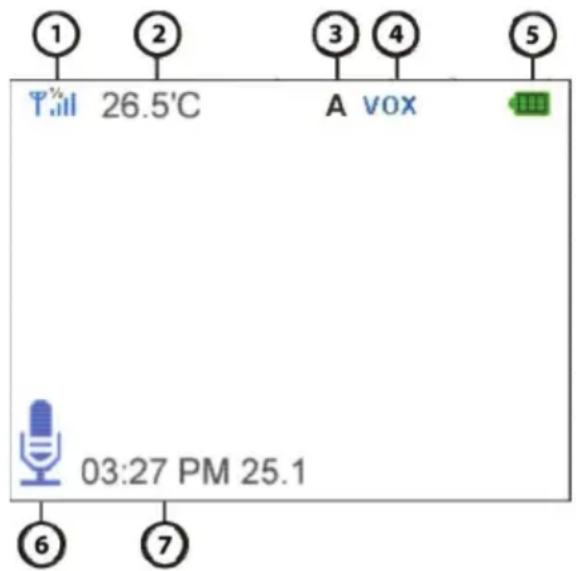
The video of the baby unit will be displayed on the screen of the parent unit when both are switched on. The icons on the screen are explained below.
- Signal indicator - The signal indicator shows the strength of the connection between units. no bars indicate a poor signal and 4 bars indicate the strongest signal (see table).
- Temperature indicator - Displays the temperature measured by the baby unit.
- Switch Indicator - Monitor will automatically switch between cameras when activated
- VOX indicator - Appears when the VOX mode is activated.
- Battery indicator -Indicates the battery life of the parent unit.
| Signal strength Indicator Warning | ||
| Perfect None | Y | |
| Good None | Y | |
| Fair None | Y | |
| Low Out of Range | Y | |
| No Signal Out of Range | Y | |
- 'Talk'-indicator - Appears when the talk button is pressed. You can now talk through the baby unit.
- Date and time - Displays the current date and time.
OUT OF RANGE
When the baby unit is positioned too far away from the parent unit, the message "Connecting..." will appear on the screen of the parent unit and the video will start to flicker. When there is no connection between the baby and the parent unit, the screen of the parent unit will be black and display the message "Connecting..."

NOTE: If moving the baby and parent unit closer together does not help, try pairing the baby and parent unit. See Pairing chapter.
MENU
Open the menu of the Luvion Easy to change the device settings.
Press the OK/Menu button on the parent unit to open the menu.
Use the left and right buttons to select a submenu.
Press the OK button to confirm a selection, marked with a frame, and open a submenu.
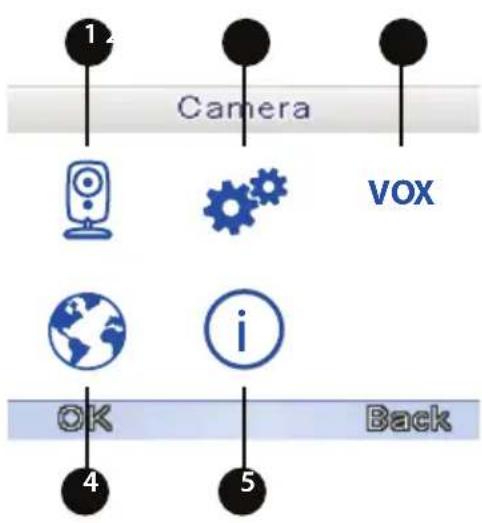
- Pairing Use this submenu to pair the baby unit (camera) with the parent unit (monitor).
- Settings Use this submenu to set the date and time, temperature settings, camera switching mode and the display backlight.
- VOX Use this submenu to (de)activate the VOX mode and to set the VOX mode sensitivity.
- Languages Use this submenu to set the Language.
- System Information Use this submenu to display the installed software and product information.
MENU>CAMERA
The parent unit (monitor) and the baby unit (camera) are paired at the factory. You don't need to repeat this procedure unless they loose connection.
Press the Menu/Ok button to enter the main menu.
Select the Camera icon and press ok to confirm the selection and open the Camera menu.
Select camera 1 or 2
Press Ok again to start the Pairing procedure.
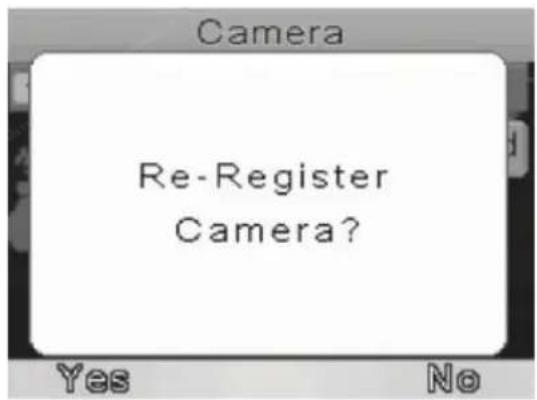
A message appears asking if you want to re- register the camera. select "YES" and press the Ok button to confirm.
You have 10 seconds to briefly press the pairing button on the camera.
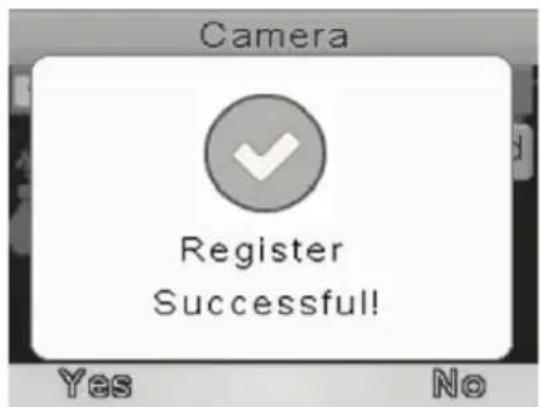
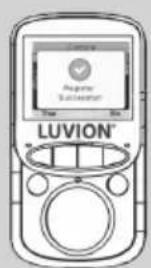
> If pairing is successful the message "Register Successful!" will be displayed.
MENU> SETTINGS
You can use the Settings menu to set the time and date, to change the temperature unit, select camera switch mode or to set the backlight brightness and backlight time interval.
Select the settings icon in the main menu
Press OK to confirm your selection.
Press left or right to select the right submenu.
Press the OK button to confirm your selection.
MENU> SETTINGS>TIMEANDDATE
You can use the Time and date menu to set the date and time or to change the format of the date and time.
Press left or right to change the value.
Use the talk back button to change the selection.
Press the OK button to confirm new settings or use the Back button to return to the previous menu.
MENU> SETTINGS>TEMPERATUREUNIT
You can set the temperature unit of measure to Celcius or to Fahrenheit in this menu.
Press left or right to select the desired temperature measurement unit.
Press the OK button to confirm, or press the Back button to return to the previous menu.
MENU > SETTINGS >CAMERA SWITCHING MODE
You can set the camera switching to manual or automatic in this menu
Press left or right to select the desired mode.
Press the OK button to confirm, or press the Back button to return to the previous menu.
Settime/date

HH:MM
00:08

YYYY/MM/DD
2000/01/01

Daylight saving
Off
Save
Back
Temperature unit

Celsius

Fahrenhei
OK
Back
MENU> SETTINGS> LCD BACKLIGHT
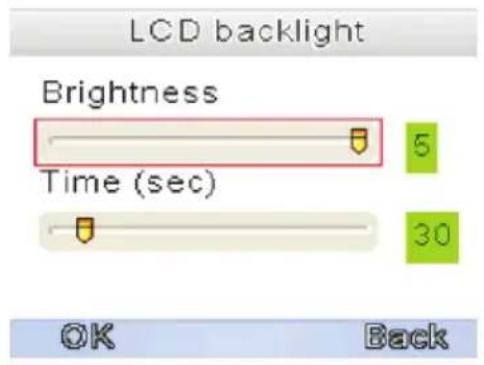
You can change the LCD backlight brightness and the time interval of the baby unit video in this menu. When the image of the video is too dark, try to increase the brightness.
The minimum Brightness is one, the maximum Brightness is 5. The minimum backlight time interval is 20 seconds, the maximum backlight time interval is 120 seconds.
Press left or right to change the value.
Use the talk back button to switch between Brightness and Time.
Press the OK button to confirm new settings or use the Back button to return to the previous menu.
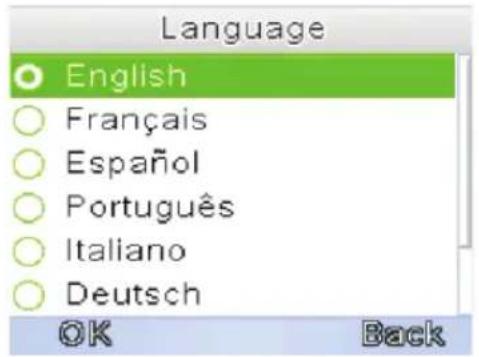
MENU>LANGUAGE
You can use the Language menu to choose your preferred language.
Select the Language icon in the main menu.
Press OK to confirm your selection.
Press left or right to select your preferred language.
Press the OK button to confirm your selection or use the back button to return to the previous menu.
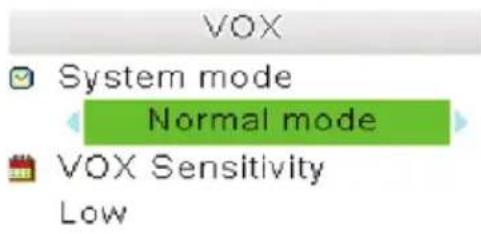
MENU>VOX
You can activate or deactivate the VOX mode and adjust its sensitivity in this menu.
The VOX mode turns the display screen off after a while with no sound in order to conserve battery power. When VOX sensitivity is set higher, softer sounds will be detected.
Select the VOX icon in the main menu.
Press OK to confirm your selection
Press talk back button to choose between System mode and VOX sensitivity.
Press left or right to change the value.
Press OK to save your settings or press Back to return to the previous menu.

PAIRING
Use the Pairing function to connect a baby unit (camera) to the parent unit (monitor).
1 Plug the charger into the wall socket and connect to the camera, to power on the camera.
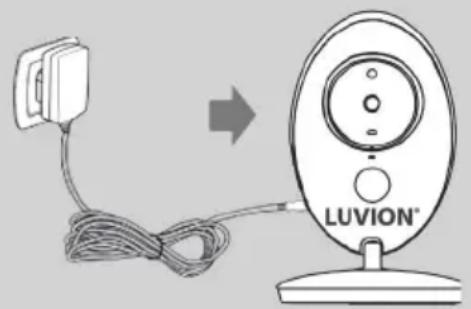
2 Hold the power button on the monitor to switch on the monitor.
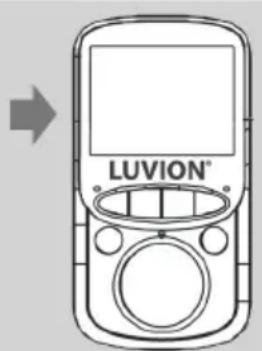
3 Press the OK button to open the main menu.
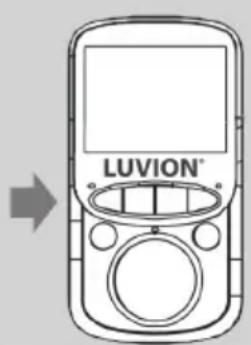
4
Use the right and left arrow buttons to select the CAMERA menu.
Press the OK button to open the CAMERA menu.
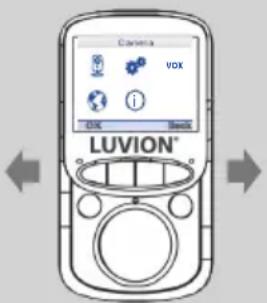
5
Select the desired camera (1 or 2) and press OK button to pair the Camera
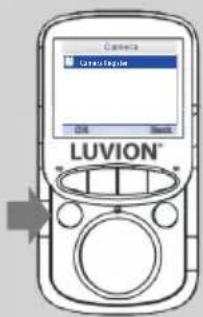
6
The screen will display "Re-Register the Camera?"
Press OK to confirm.
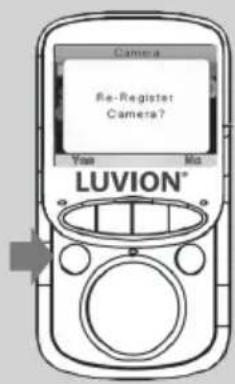
7
The screen will display "Please press the Pair key on your baby unit."
Within 10 seconds, briefly press the baby unit (camera) pair button to pair the baby unit (camera) to the parent unit (monitor).
If pairing was successful, the screen will display the message "Register Successful!"
TROUBLESHOOTING
If you have any problems with the Luvion Easy+, there is often a quick and simple solution.
Please try the following:
| Problem Solution | |
| No video from the baby unit | 1. Check the power supply of the baby unit. Make sure the power adapter is plugged in. 2. Make sure that the parent unit is switched on. 3. Make sure that the baby unit is in range of the parent unit. 4. Make sure that the parent unit is not in VOX mode (press the VOX button shortly to exit the VOX mode). 5. Make sure the monitor isn't in powersave mode by pressing any button. |
| The video is dropping / I have a constant low reception / "Buiten Bereik" message | 1. Move the baby unit closer to the parent unit. 2. Try repositioning the baby and/or parent unit (away from walls) to improve the reception. 3. (re-)Pair the parent unit with the baby unit (see pairing chapter) |
| Audio problems 1. Make sure | that the volume on the parent unit is not muted. Press the > volume button on the parent unit to increase the volume. 2. Make sure that there is sound within range of the baby unit microphone. 3. If the unit emits a loud, screeching noise, move the baby and parent unit further apart. |
| The video is or has become choppy | 1. The video may become choppy when a lower frame rate is experienced (i.e. 10 frames per second instead of 20 frames per second). 2. Try moving the baby unit closer to the parent unit. 3. Remove obstructions between the baby and parent unit. |
| The battery of the parent unit runs out very fast | Use the VOX mode for longer battery life. |
TECHNICAL SPECIFICATIONS
| General Specifications | |
| Operating Frequency Range 2.400 MHz ~ 2.483,5 MHz | |
| Transmitting Power 17 dBm Max | |
| Receiving Sensitivity -90 dBm | |
| Type of Spread Spectrum FHSS 16 Channels | |
| Type of Modulation GSFK | |
| Data Rate 2 Mbps | |
| Transmitting Distance 300 m (Line of Sight) | |
| Baby unit (camera) | |
| Image Sensor Type 0.3Mpix Color CMOS Image Sensor | |
| Eff ective Pixels H: 320 px, V: 240 px | |
| Image Resolution/Frame Rate 20 fps | |
| White Balance Auto | |
| Lens 3.15 mm, F 2.8 | |
| Field of View 60° | |
| IR On/Off | >15 Lux Off, <15 Lux On |
| IR LED Type/Nacht Vision | 850 nm / 5 m |
| Speaker Output | 1.0 W Max |
| Power Requirement | 5 Vdc |
| Power Consumption 150mA (IR OFF) 400mA (IR ON) | |
| Operating Temperature Range | -10° ~ 45° |
| Operating Humidity Range | 85% HR |
| Environment Rating | N/A (for indoor use only) |
| Dimensions | 67x105x67 mm |
| Regulation Compliance | CE & Rohs |
| Camera Housing Material | Plastic |
| Parent unit (monitor) | |
| LCD Panel Size 2.4" / 6,1 cm | |
| LCD Resolution H: 320 px, V: 240 px | |
| Viewing Angle H: 110°, V: 140° | |
| Power Requirement 5 Vdc 500mA +/- 5 % | |
| Power Consumption 250mA MAX. | |
| Operating Temperature - 10° ~ 45° | |
| Operating Humidity 0% ~ 85% | |
| Battery 750mAh | |
·NOTE
Outdoor use in France, Italy, Russia and Ukraine is not allowed


This device is for indoor use only.
This item is in compliance with the essential requirements and other relevant provisions of European Directives. The declaration of conformity is available through: https://www.luvion.nl/doc/Easy-Plus
INHOUDSOPGAVE
| INTRODUCTIE | 18 | |
| VEILIGHEIDSINSTRUCTIES | 18 | |
| INHOUD VAN DIT PAKKET | 19 | |
| OVERZICHT OUDER UNIT (MONITOR) | 20 | |
| OVERZICHT BABY UNIT (CAMERA) | 21 | |
| KLAARMAKEN VOOR GEBRUIK | 22 | |
| MENU | 25 | |
| PAIRING | 28 | |
| PROBLEEM & OPLOSSING | 30 | |
| TECHNISCHE SPECIFICATIES | 31 | |
INTRODUCTIE
2 Temperature unit
LCD backlight
OK
Back
Settime/date
HH:MM
00:08
YYYY/MM/DD
2000/01/01
Daylight saving Off
Save
Back
Temperature unit
Celsius
Fahrenhei
OK
Back
MENU > INSTELLINGEN > LCDVERLICHTING
This device is for indoor use only
Time and date
2 Temperature unit
LCD backlight
OK
Back
Settime/date
HH:MM
00:08
YYYY/MM/DD
2000/01/01
Daylight saving
Off
Save
Back
Temperature unit
Celsius
Fahrenheit
OK
Back
MENU>PARAMETRES> RETROECLAIRAGE LCD
This device is for Indoor use only
Delft, The Netherlands
www.luvion.com
SICHERHEITSHINWEISE
2 Temperature unit
LCD backlight
OK
Back
Settime/date
HH:MM
00:08
YYYY/MM/DD
2000/01/01
Daylight saving Off
Save
Back
Temperature unit
Celsius
Fahrenhei
OK
Back
MENU > EINSTELLUNGEN > LCD BACKLIGHT
This device is for indoor use only
Luvion Premium Babyproducts
Visit us at:
www.Luvion.com