
Aspiroclean Essenza 600 - Vacuum Cleaner Di4 - Free user manual and instructions
Find the device manual for free Aspiroclean Essenza 600 Di4 in PDF.

User questions about Aspiroclean Essenza 600 Di4
0 question about this device. Answer the ones you know or ask your own.
Ask a new question about this device
Download the instructions for your Vacuum Cleaner in PDF format for free! Find your manual Aspiroclean Essenza 600 - Di4 and take your electronic device back in hand. On this page are published all the documents necessary for the use of your device. Aspiroclean Essenza 600 by Di4.
USER MANUAL Aspiroclean Essenza 600 Di4
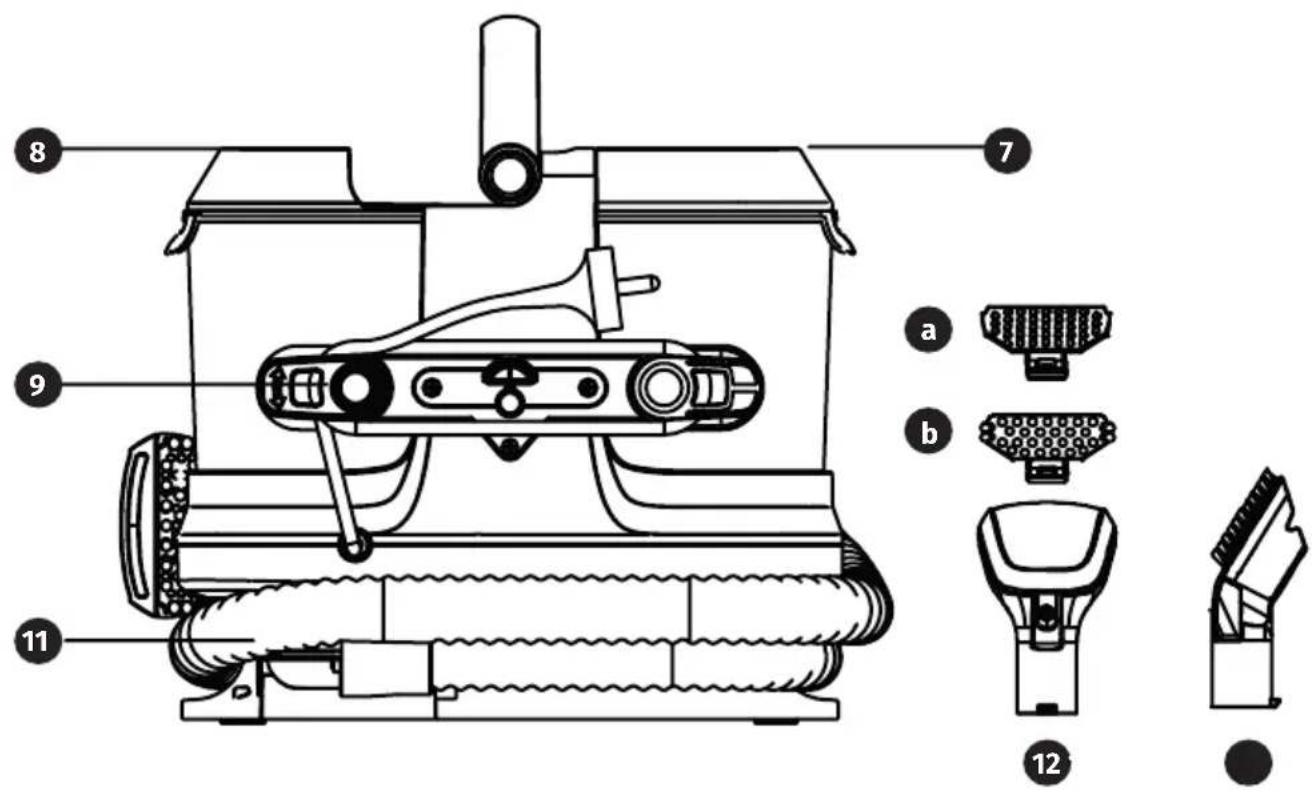
FIG.1
natural_image
Line drawing of a portable air purifier device with no text or symbols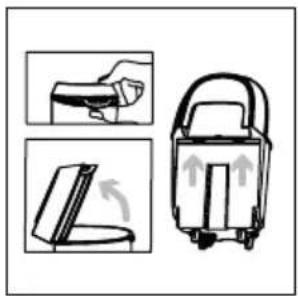
natural_image
Illustration of a hand holding a small object, with two views showing the same object and an upward arrow indicating rotation (no text or symbols present)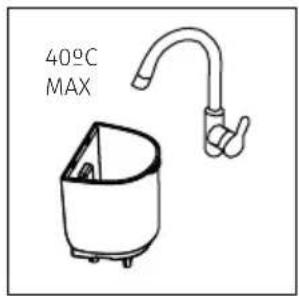

natural_image
Line drawing of a kitchen appliance with a lid and base, showing steam rising from the side (no text or symbols)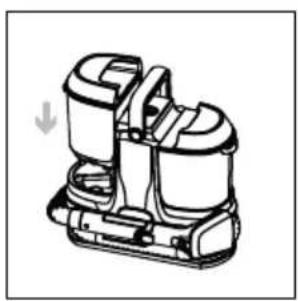
natural_image
Technical line drawing of a mechanical device with two cylindrical components and a downward arrow indicating motion (no text or symbols)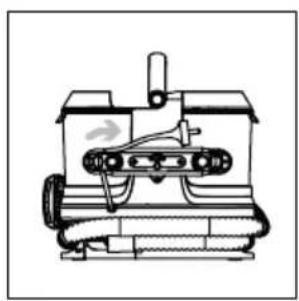
natural_image
Technical line drawing of a mechanical device with no visible text or symbols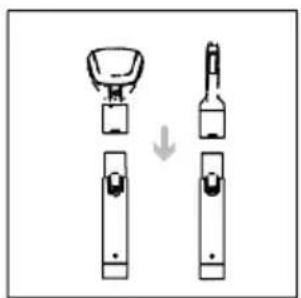
natural_image
Diagram showing two types of hand tools or devices with a downward arrow indicating transformation (no text or symbols present)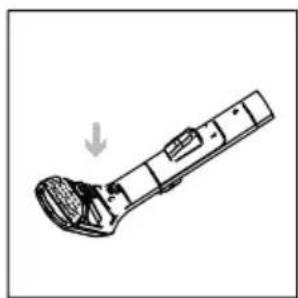
natural_image
Diagram of a handheld device with a curved handle and internal components, showing a downward arrow (no text or symbols)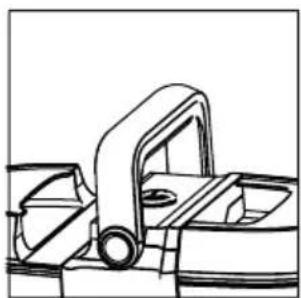
natural_image
Technical line drawing of a mechanical component with no visible text or symbolsFIG.2
natural_image
Simple line drawing of a bucket being lifted by a rod (no text or symbols)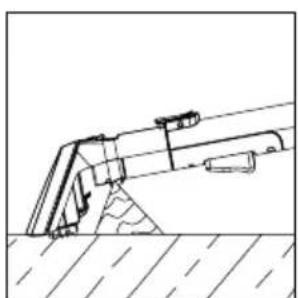
natural_image
Technical line drawing of a mechanical assembly or tool with no visible text or symbols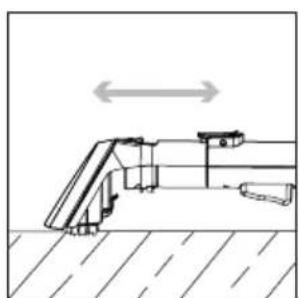
natural_image
Technical line drawing of a mechanical assembly with no visible text or symbols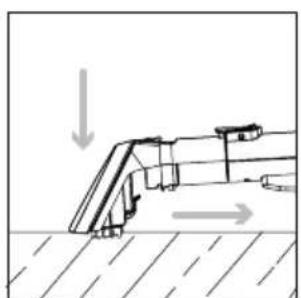
natural_image
Diagram of a mechanical or structural component with directional arrows indicating movement, no text or symbols present.FIG.3
natural_image
Simple line drawing of a mechanical lever or bracket with a checkmark indicating a detail (no text or symbols present)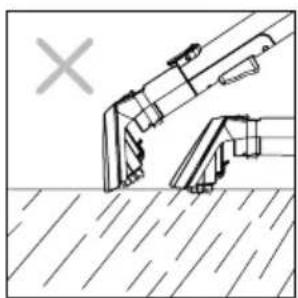
natural_image
Diagram showing a mechanical tool interacting with a surface, with no visible text or symbolsFIG.4
natural_image
Diagram of a mechanical device interacting with a surface, showing motion direction (no text or symbols)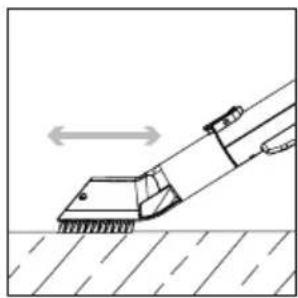
natural_image
Diagram of a robotic arm pulling a surface with a directional arrow indicating motion (no text or symbols)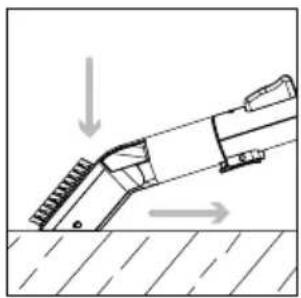
natural_image
Diagram of a mechanical lever system with directional arrows indicating motion (no text or symbols)FIG.5
natural_image
Line drawing of a mechanical device with an upward arrow indicating motion (no text or symbols)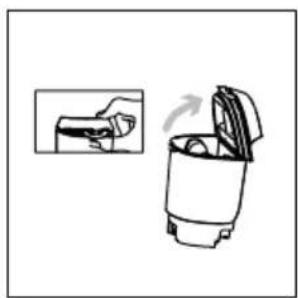
natural_image
Simple line drawing of a hand holding a tool next to a cylindrical container with an open lid, showing a motion arrow (no text or symbols)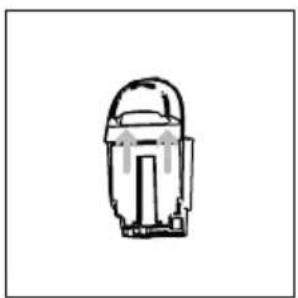
natural_image
Simple line drawing of a mechanical component with no text or symbols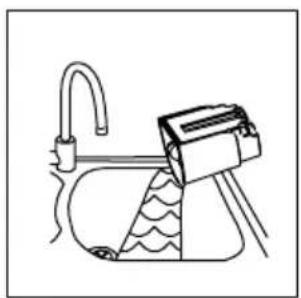
natural_image
Simple line drawing of a kitchen sink with a water dispenser and handle (no text or symbols)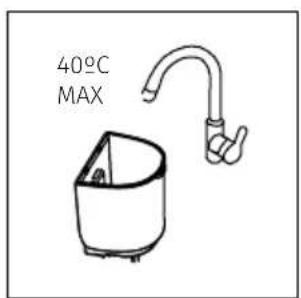
natural_image
Simple line drawing of a mechanical component with no text or symbols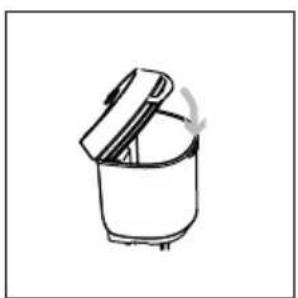
natural_image
Simple line drawing of a cooking pot with a lid and a curved arrow indicating rotation (no text or symbols)
natural_image
Diagram of a hand operating a mechanical device with a downward arrow indicating motion (no text or symbols present)FIG.6

natural_image
Line drawing of a kitchen sink with a washing machine and bucket (no text or symbols)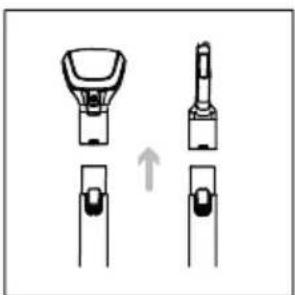
natural_image
Diagram showing three mechanical components with an arrow indicating transformation (no text or symbols)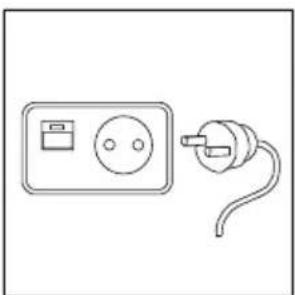
natural_image
Simple line drawing of a wall-mounted power outlet connected to a plug (no text or symbols)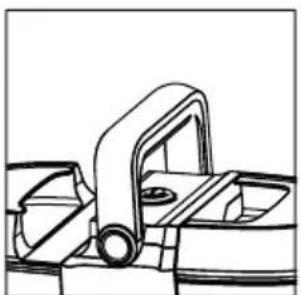
natural_image
Technical line drawing of a mechanical component or bracket assembly (no text or symbols)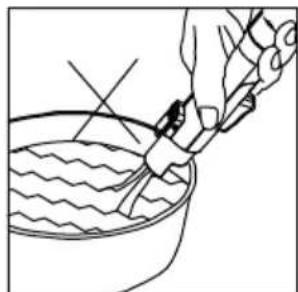
natural_image
Line drawing of a hand using a tool to clean or wash liquid in a bowl (no text or symbols)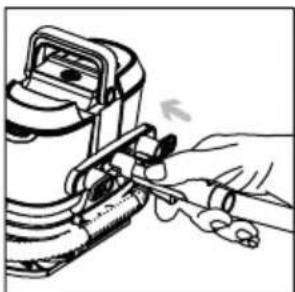
natural_image
Illustration of a hand using a tool to adjust or install a mechanical component (no text or symbols visible)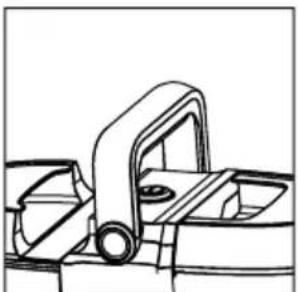
natural_image
Technical line drawing of a mechanical assembly with no visible text or symbolsFIG.6
natural_image
Line drawing of a mechanical device with no visible text or symbols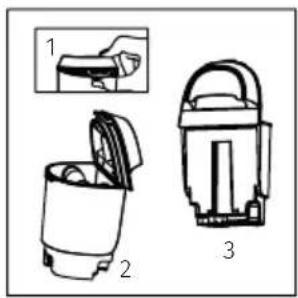
natural_image
Three technical illustrations of a portable device with open lid, shown from different angles (no text or symbols)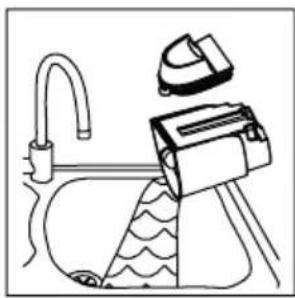
natural_image
Line drawing of a kitchen sink with a washing machine and a showerhead (no text or symbols)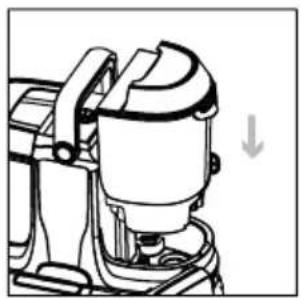
natural_image
Line drawing of a mechanical device with a downward arrow indicating motion (no text or symbols)FIG.7
natural_image
Diagram showing a mechanical assembly with two parts and an arrow indicating transformation (no text or symbols)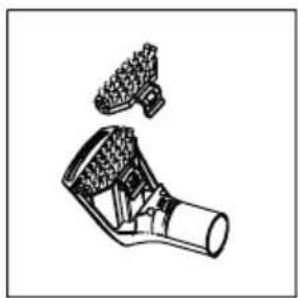
natural_image
Technical line drawing of a mechanical component with textured surfaces and a protruding knob (no text or symbols)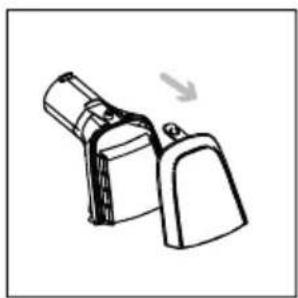
natural_image
Simple line drawing of a device with a handle and base, no text or symbols present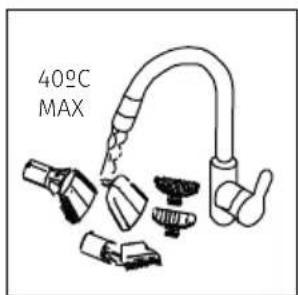
natural_image
Line drawing of a handheld device with two lenses (no text or symbols)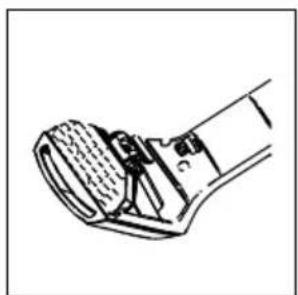
natural_image
Line drawing of a foot with a textured grip and small feet, no text or symbols presentFIG.8
natural_image
Line drawing of a mechanical device with an upward arrow indicating motion (no text or symbols)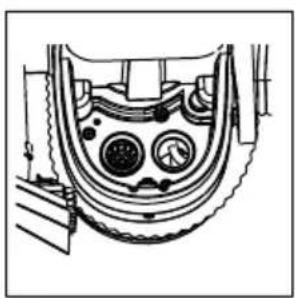
natural_image
Technical line drawing of a mechanical component with no visible text or symbolsESPAÑOL
AGRADECEMOS QUE HAYA DEPOSITADO SU CONFIANZA EN DI4 Y DESEAMOS QUE EL FUNCIONAMIENTO DEL PRODUCTO LE SATISFAGA PLENAMENTE.
ATENCIÓN
WE WOULD LIKE TO THANK YOU FOR CHOOSING DI4. WE WISH THE PRODUCT PERFORMS TO YOUR SATISFACTION AND PLEASURE.
GENERAL INFORMATION
FIRST CHECK THAT THE APPLIANCE IS COMPLETE AND UNDAMAGED. CONTACT THE STORE WHERE YOU PURCHASED THE PRODUCT IN THE EVENT OF ANY DOUBT.
DESCRIPTION
- Carry handle
- On/Off button (located under handle)
- Clean water/solution tank
- Dirty water tank
- Standard cleaning tool
- Brush release button
- Clean water/solution tank lid
- Dirty water tank lid
- Quick cord release hooks
- Hose storage clip
- Hose
- Attachments for standard cleaning tool*2
a) Multipurpose brush
b) Rubber brush - Crevice tool
SAFETY INSTRUCTIONS
If the supply cord is damaged, it must be replaced by the manufacturer, it's service agent or similarly qualified persons in order to avoid a hazard. This appliance can be used by persons with reduced physical, sensory, or mental capabilities or lack of experience and knowledge if they have been given supervision or instruction concerning use of the appliance in a safe way and understand the hazards involved. Children shall not play with the
appliance. Regarding the detailed instructions for the method and frequency of cleaning and the precautions during user maintenance, refer to the selection “CLEANING AND MANTENANCE”. The liquid must not be directed towards equipment containing electrical components such as the interior of ovens. The filling aperture must not be opened during use. The appliance has to be unplugged after use and before carrying out user maintenance on the appliance. The appliance shall not be left unattended while it is connected to the supply mains. The appliance is not to be used if it has been dropped, if there are visible signs of damage or if it is leaking. Keep the appliance out of reach of children when it is energized or cooling down. Plug must be removed from socket-outlet before cleaning or maintaining the appliance.
This device is designed for use at a maximum altitude up to 2000m above sea level.
WARNING! Plastic bags can be dangerous. To avoid danger, keep plastic bags away from babies and children. Do not allow children to play with packaging materials. Suffocation hazard!
IMPORTANT WARNINGS
Prior to plugging in the product, check that your mains voltage is the same as the one indicated on the product label. The mains connection cable must not be tangled or wrapped around the product during use. Do not pull on the connection cord in order to unplug it. Do not use, connect, or disconnect the device to the mains with your hands or feet wet. Proceed according to the conservation and cleaning section of this manual for cleaning. Unplug the
product immediately from the mains in the event of any breakdown or damage and contact an authorized technical support service. In order to prevent any risk of danger, do not open the device. Only qualified technical personnel from the brand's Official Technical support service may carry out repairs or procedures on the device. Any incorrect use or improper handling of the product shall render the warranty null and void. Only an authorized technical support service center may carry out repairs on this product. This appliance is designed exclusively for domestic use, in no case should be a commercial or industrial use. In case of misuse or tampering with the product, it will be out of warranty. Do not use the appliance to vacuum sharp objects (pins, nails, glass, etc.), incandescent objects (matches, cigarettes, hot ashes, etc.), erodent liquids (solvent, corrosive, detergent, etc.), inflammable or explosive substances (gasoline, alcohol, etc.). The liquid not be directed towards equipment containing electrical components, such as the interior of ovens. Do not use outdoors. Use only original accessories.
B&B TRENDS SL. disclaims all liability for damage that may occur to people, animals or objects, for the non-observance of these warnings.
INSTRUCTIONS FOR USE
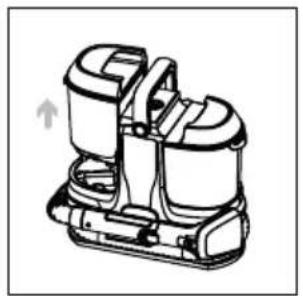
Preparation Before Operation
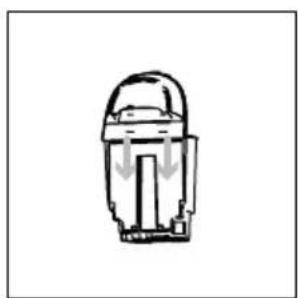
- Lift the clean water/solution tank handle and pull to remove the tank.
- Open the lid at the top of the tank with your hands. Then remove the lid.
- Fill the tank with warm water (max 40^ C) and solution to the desired clean level, indicated by the lines on the tank.
- Put the lid back onto the clean water/solution tank.
- Refit the clean water/solution tank onto the machine until it clicks into place.
- Swipe up quick release hook and remove the cord from the clips.
- Plug the machine into the socket.
- Select a cleaning tool:
A. Standard cleaning tool: for cleaning carpets, rugs, sofas and upholstery
a) Multi-purpose brush for cleaning carpets, rugs, sofas and upholstery.
b) Rubber brush for cleaning tiles, hard floor and removing pet hair.
A. Crevice tool: For edge and tight spot/crevice cleaning.
-
Press the brush release button and attach the tool onto the end of the hose. Release the button when in place.
-
To fit an attachment to the cleaning tool, insert the front of the selected attachment into the front of the cleaning tool and push the clip down until it clicks into place.
-
Press the on/off button to switch the machine on. (FIG 1)
Using the Cleaning Tools
Using the standard cleaning tool
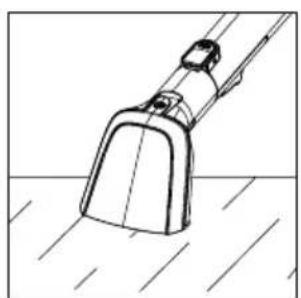
- For spills, always pick up the excess liquid before using water/solution. Tilt the tool forward onto the spill and pull back.
- Press the trigger on the cleaning tool to release water and solution.
- Use the brush to agitate stubborn stains, scrubbing back and forth.
- Tilt the nozzle forward so the nozzle is in contact with the surface. Pull back to recover
the water and solution. (FIG 2)
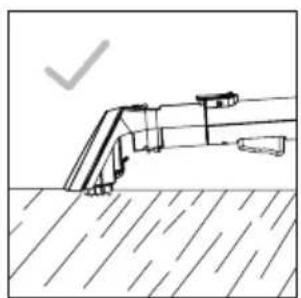
Important: Over-tilting or under-tilting the hand tool may result in poor water pickup. (FIG 3)
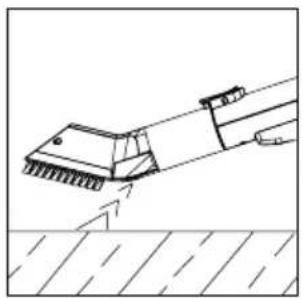
Using the crevice tool
- Press the trigger on the crevice tool to release water and solution.
- Use the brush to agitate any stubborn stains, scrubbing back and forth.
- Turn the tool over and tilt the nozzle forwards so the nozzle is in contact with the surface. Pull back to recover the water and solution. (FIG 4)
MAINTENANCE AND CLEANING
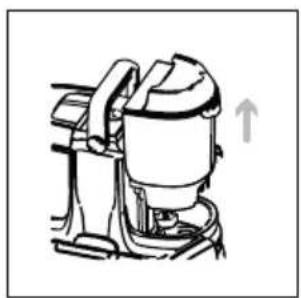
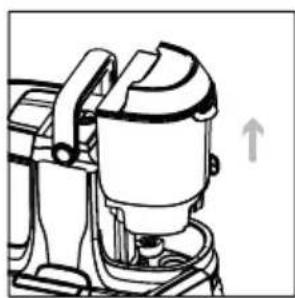
Emptying and Cleaning the Dirty Water Tank
Important: Always unplug and switch off the machine before performing maintenance or troubleshooting. The dirty water tank is fitted with a float. When the tank is full, the float will automatically shut off suction. You will notice this because the motor noise will increase. Once the float is activated, empty the dirty water tank immediately. If the dirty water tank is not completely full, turn off the machine at the power switch and wait for the float to settle before continuing. Always empty and rinse the clean water/solution tank and the dirty water tank. Leave them to air dry before refitting or storing.
Steps:
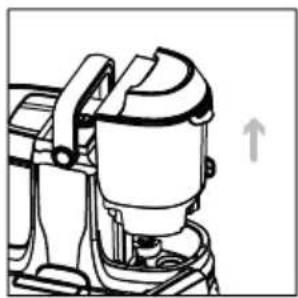
- Pull to release the tank and lift it by the carry handle to remove.
- Pull and lift the lid to remove it from the dirty water tank.
- Empty the dirty water into a sink or toilet.
- Rinse the dirty water tank and lid under warm water (maximum 40^ C) to remove dirt and debris.
- To refit the lid, align it with the tank and push firmly until it locks into place.
- Refit the dirty water tank onto the machine until it clicks securely into position. (FIG 5)
Cleaning the Hose
Important: Clean the hose after each use to remove any debris or water left inside.
Steps:
- Empty the dirty water into a sink or toilet.
- Press the brush release button and pull to remove the tool from the hose.
- Plug the machine into the mains and switch it
- Press the on/off button to turn the machine on.
Caution: Do not clean in direct contact with water.
- Insert the semicircle of the straw handle into the semicircle of the body, then press the handle button to flush and clean the hose.
- Press the on/off button to switch the machine off. Unplug the machine from the mains.
- Press and lift the sewage (dirty water) tank by the handle to disassemble.
- Pull and lift the lid to remove it from the dirty water tank. Slide the buttons out first, then lift off the lid completely.
- Empty the dirty water into the sink or toilet.
- Refit the sewage (dirty water) tank back onto the machine, following the indicated direction, until it clicks securely into place. (FIG 6)
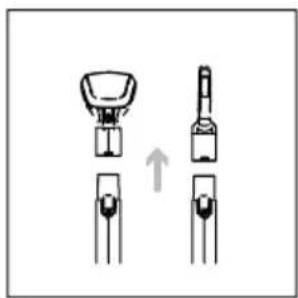
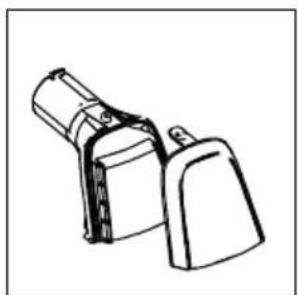
Removing and Cleaning Tool and Attachments
- Press the brush release button and pull to remove the tool from the hose.
- Pull and lift the clip to remove the attachment and brush from the cleaning tool.
- Rinse the tools, attachments, and brush under warm water (max 40^ C) to remove dirt and debris.
- To refit the attachment and brush, slide put it back into the cleaning tool until it clicks into place. (FIG 7)
Cleaning the Filter Grill
- Pull and lift the tank to remove it.
- Remove any dirt or debris from the filter grill located underneath the dirty water tank. (FIG 8)
TROUBLE SHOOTING
| Problem Possible causes / Solutions | |
| There is an accessory missing | - Check the contents of the box. |
| Why does the machine have no power? | - The plug may not be fully inserted into the electrical socket.- The fuse in the plug may need replacement.- The motor thermostat may have tripped. If this happens, unplug the machine, check for blockages, and clean the filter grill. |
| Why won't the water/solution dispense? | - Squeeze the trigger on the hose to release the solution and water mix. (See Using the Cleaning Tools).- Ensure the clean water/solution tank is securely fitted. (See Preparation Before Operation).- The clean water/solution tank is empty. Refill it. (See Preparation Before Operation).- The clean water/solution tank valve may be stuck. Hold the tank over the sink and press the valve underneath to release.- Air is trapped in the pump and hose. Switch on the machine, lower the hose to the floor, and hold the trigger for up to 1 minute. |
| Why won’t the machine pick up? | - The float in the dirty water tank may have been activated. Empty the tank and wait for the float to settle before restarting.- The tool nozzle may not be in contact with the surface; tilt it forwards. (See Using the Cleaning Tools).- The cleaning tool may be blocked. Check and clear it. (See Removing and cleaning the cleaning tool and attachments).- The dirty water tank may not be correctly assembled, or the lid may not be properly fitted. (See Emptying and cleaning the dirty water tank).- Ensure the cleaning tool nozzle is correctly fitted. (See Using the Cleaning Tools).- Check and clean the filter grill under the dirty water tank. (See Cleaning the Filter Grill). |
PRODUCT DISPOSAL
This product complies with European Directive 2012/19/EU on electrical and electronic devices, known as WEEE (Waste electrical and electronic equipment), which establishes the applicable legal framework in the European Union regarding the elimination and recycling of electrical and electronic devices. Do not put this product in the bin. Take it to your closest electrical and electronic waste treatment centre.
Information related to power consumption in the off and standby modes, as well as in the network standby mode of the appliance pursuant to EU Regulation 2023/826 can be found at the following link: https://di4-home.com/pages/ecodesign-info
FRANÇAIS
NOUS AIMERIONS VOUS REMERCIER D'AVOIR CHOISI DI4. NOUS ESPÉRONS QUE CE PRODUIT RÉPONDRA À VOS BESOINS ET À VOS GOÛTS.
INFORMATIONS GÉNÉRALES
VÉRIFIEZ AVANT TOUT QUE L'APPAREIL EST COMPLET ET NE PRÉSENTE AUCUN DOMMAGE. EN CAS DE DOUTE, VEUILLEZ CONTACTER LE MAGASIN DANS LEQUEL VOUS AVEZ ACHETÉ LE PRODUIT.
DESCRIPTION
MISE AU REBUT DU PRODUIT
B&B TRENDS, SL. guarantees compliance of this product, for the use for which it is, during the period established by the legislation in force in the country of sale. In the case of breakdown during the term of this warranty, users are entitled to repair or else the replacement of the product at no charge if the former is unavailable, unless one of these options proves impossible to fulfil or is disproportionate. In this case, you can then opt for a reduction in price or cancellation of the sale, which must be dealt with directly with the sales vendor. This also covers replacement of spare parts provided that the product has been used according to the recommendations specified in this manual for both cases, and has not been tampered with by any third party that is not authorised by B & B TRENDS, SL. The warranty will not cover any parts subject to wear and tear. This warranty does not affect your rights as a consumer in accordance with the provisions in Directive 1999/44/EC for member states of the European Union.
USE OF WARRANTY
Customers must contact a B&B TRENDS, SL., authorised Technical Service for repair of the product. Since any tampering of the same by anyone not authorised by B&B TRENDS, SL., or the careless or improper use of the same shall render this warranty null and void. You must keep the purchase invoice, receipt or delivery docket in order to exercise your warranty rights. For technical service and after-sales care outside the Spanish territory, please submit your query to the point of sale where you purchased the item.
BON DE GARANTIE


- ESPAÑOL
- ATENCIÓN
- GENERAL INFORMATION
- DESCRIPTION
- SAFETY INSTRUCTIONS
- IMPORTANT WARNINGS
- INSTRUCTIONS FOR USE
- Preparation Before Operation
- Using the Cleaning Tools
- Using the crevice tool
- MAINTENANCE AND CLEANING
- Emptying and Cleaning the Dirty Water Tank
- Steps:
- Cleaning the Hose
- Removing and Cleaning Tool and Attachments
- Cleaning the Filter Grill
- PRODUCT DISPOSAL
- FRANÇAIS
- INFORMATIONS GÉNÉRALES
- MISE AU REBUT DU PRODUIT
- USE OF WARRANTY
- BON DE GARANTIE
Brand : Di4
Model : Aspiroclean Essenza 600
Category : Vacuum Cleaner