
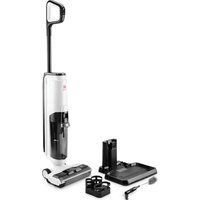
Aspirovac CA600 - Vacuum Cleaner Di4 - Free user manual and instructions
Find the device manual for free Aspirovac CA600 Di4 in PDF.

| Product type | Bagless vacuum cleaner |
| Brand | Di4 |
| Model | Aspirovac CA600 |
| Usage | Domestic |
| Power supply | Mains 220-240 V ~ 50/60 Hz |
| Rated power | 700 W (estimated) |
| Dust bin capacity | 1.5 L (estimated) |
| Filtration | Washable foam filter |
| Power cord length | 5 m (estimated) |
| Noise level | 75 dB (estimated) |
| Net weight | 4 kg (estimated) |
| Dimensions (L x W x H) | 30 x 25 x 20 cm (estimated) |
| Included accessories | Floor nozzle, crevice tool, dusting brush, telescopic tube |
| Main functions | Adjustable brush for hard floors/carpets, on/off switch |
| Maintenance | Regular cleaning of filter and dust bin |
| Safety | Auto shut-off in case of overheating (not specified), overcurrent protection |
| Warranty | 2 years (EU legal compliance) |
| Country of origin | China (estimated) |
Frequently Asked Questions - Aspirovac CA600 Di4
User questions about Aspirovac CA600 Di4
0 question about this device. Answer the ones you know or ask your own.
Ask a new question about this device
Download the instructions for your Vacuum Cleaner in PDF format for free! Find your manual Aspirovac CA600 - Di4 and take your electronic device back in hand. On this page are published all the documents necessary for the use of your device. Aspirovac CA600 by Di4.
USER MANUAL Aspirovac CA600 Di4
natural_image
Black and white photo of a vacuum cleaner with handle and lever (no text or symbols visible)ESPAÑOL
GRACIAS POR HABER ELEGIDO UN PRODUCTO DI4. ESPERAMOS QUE SE AJUSTE A SUS NECESIDADES Y SEA DE SU AGRADO.
ADVERTENCIA
natural_image
Illustration of three different behaviors: a no-smoking symbol, a device emitting exhaust smoke, and a trash bin (no text or labels present)natural_image
Technical illustration of a mechanical device with two views: one showing internal components and the other showing external housing (no text or symbols)Fig. 1
natural_image
Technical line drawing of a mechanical device with a cylindrical shaft and a multi-stage assembly (no text or symbols)natural_image
Illustration of a rope being twisted with a hook, labeled Fig. 3 (no text or symbols on the diagram itself)Fig. 3
natural_image
Diagram of a mechanical device with an arrow indicating motion, labeled 'Fig. 4' (no text or symbols on the diagram itself)natural_image
Technical line drawing of a mechanical component labeled Fig. 5, showing a lever and base (no text or symbols beyond label)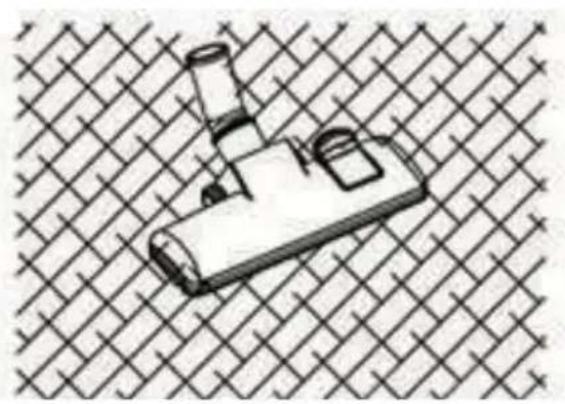
natural_image
Illustration of a mechanical component with a handle and base, set against a woven background (no text or symbols)natural_image
Illustration of a handheld device with a handle and screen, placed on a grid background (no text or symbols)natural_image
Two technical line drawings of mechanical components, one with a curved cutout and the other a flanged bracket (no text or symbols)FUNCIONAMIENTO DEL ASPIRADOR
natural_image
Technical line drawing of a mechanical device with two views: top shows internal components, bottom shows external housing (no text or symbols)Fig. 6
natural_image
Technical line drawing of a mechanical device with internal components and directional arrows (no text or symbols)natural_image
Technical illustration of a mechanical device with two views showing internal components and directional arrows (no text or symbols)natural_image
Illustration of a fire extinguisher, a fire hydrant, and a trash bin (no text or symbols)natural_image
Illustration showing three different electrical circuit components: a switch, a power plug, and a motor (no text or symbols present)Fig. 1
natural_image
Technical line drawing of a mechanical device with a cylindrical shaft and attached housing, labeled Fig. 2 (no text or symbols on the diagram itself)natural_image
Illustration of a hand holding a ruler with an arrow indicating motion (no text or symbols)natural_image
Diagram of a mechanical device with a lever and handle, labeled Fig. 4 (no text or symbols on the diagram itself)Fig. 4
natural_image
Isometric line drawing of a mechanical component with no visible text or symbolsLimpar carpetes

natural_image
Illustration of a handheld device with a cylindrical lens and handle, placed on a grid background (no text or symbols)natural_image
Technical line drawing of a mechanical device with two views showing internal components and rotation arrows (no text or symbols)Fig. 6
natural_image
Diagram of a mechanical device with a top component and internal structure, labeled Fig. 8 (no text or symbols on the diagram itself)- Remova o filtro de entrada de esponja da parte superior do recipiente do pó. (Fig.9)
natural_image
Technical illustration of a mechanical device with two views showing internal components and directional arrows (no text or symbols)WE WOULD LIKE TO THANK YOU FOR CHOOSING DI4. WE WISH THE PRODUCT PERFORMS TO YOUR SATISFACTION AND PLEASURE.
WARNING
PLEASE READ THE INSTRUCTIONS FOR USE CAREFULLY PRIOR TO USING THE PRODUCT. STORE THESE IN A SAFE PLACE FOR FUTURE REFERENCE.
DESCRIPTION
- Floor brush
- Extension tube
- Dust container release button
- ON/OFF button
- Power cord
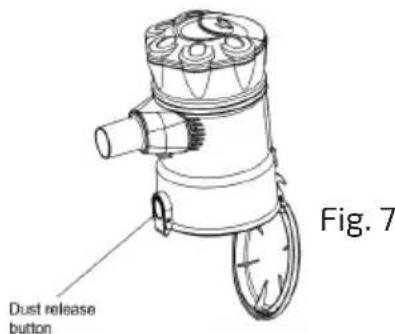
- Dust release button
- Dusting nozzle
- Crevice nozzle
- wall bracket
- Fixed screw
SAFETY INSTRUCTIONS
This appliance can be used by children aged from 8 years and above and persons with reduced physical, sensory or mental capabilities or lack of experience and knowledge if they have been given supervision or instruction concerning use of the appliance in a safe way and understand the hazards involved. Children shall not play with the appliance. Cleaning and user maintenance shall not be made by children without supervision.
If the supply cord is damaged it must be replaced by the manufacturer, its service agent or similarly qualified persons in order to avoid a hazard.
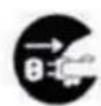
Plug must be removed from socket-outlet before cleaning or maintaining the appliance.
This device is designed for use at a maximum altitude up to 2000m above sea level.
IMPORTANT WARNINGS
Prior to plugging in the product, check that your mains voltage is the same as the one indicated on the product label.
The mains connection cable must not be tangled or wrapped around the product during use.
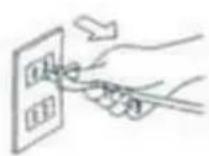
Do not pull on the connection cord in order to unplug it.
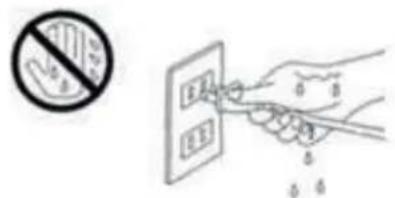
Do not use, connect or disconnect the device to the mains with your hands or feet wet.
Proceed according to the conservation and cleaning section of this manual for cleaning.
Unplug the product immediately from the mains in the event of any breakdown or damage and contact an authorised Technical support service.
In order to prevent any risk of danger, do not open the device. Only qualified technical personnel from the brand's Official Technical support service may carry out repairs or procedures on the device. Any incorrect use or improper handling of the product shall render the warranty null and void. Only an authorised technical support service centre may carry out repairs on this product.
This appliance is designed exclusively for domestic use, in no case should be a commercial or industrial use. In case of misuse or tampering with the product, it will be out of warranty.
Do not use the appliance to vacuum liquids (water, etc), sharp objects (pins, pins, nails, glass, etc), incandescent objects (matches, cigarettes)
Never use the turbo brush to: Polish floors, suck (Liquids, wet or damp dust, hot ash, burning objects, such as cigarettes, matches, sharp and hard items, such us: razors, pins, thumbtacks, pieces of glass, etc), flour, cement, plaster, printer or photocopier toner, etc.
B&B TRENDS SL. disclaims all liability for damages that may occur to people, animals or objects, for the non-observance of these warnings.
PRECAUTIONARY MEASURES
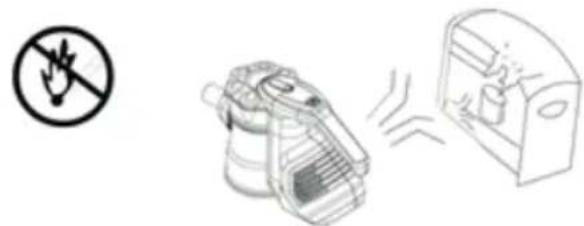
Important: If the suction opening in the unit or the hose is blocked, switch off the vacuum cleaner and remove the blocking substance before you start the unit again.
- Do not operate the vacuum cleaner too close to heaters, radiators or cigarette butts.
natural_image
Illustration of a hand holding a prohibition symbol, a trash bin with smoke, and a trash bin with smoke (no text or labels)- Before inserting the power plug into the wall outlet, make sure that your hands are dry.
-
Before you start vacuuming, make sure to remove large or sharp objects that might damage the dust cup filter.
-
When pulling out the power plug from the wall outlet, pull the plug not the power cord.
-
Do not pick up anything that is burning or smoking such as cigarettes, matches or hot ashes.
-
Do not use without dust cup filter in place
OPERATING INSTRUCTIONS
Note: Always remove the power plug from the wall outlet before assembling or removing accessories.
Assembling the main body
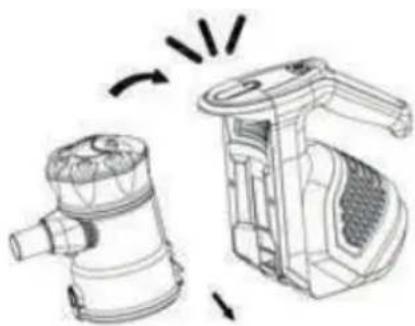
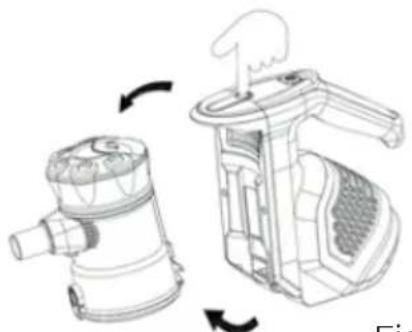
• Install the dust container by inserting the clip into the main body, then twisting into place. It will “click” to secure. (Fig.1)
natural_image
Technical line drawing of a mechanical device with no visible text or symbolsFig. 1
- Push the telescopic extension tube into the suction hole opening (Fig.2)
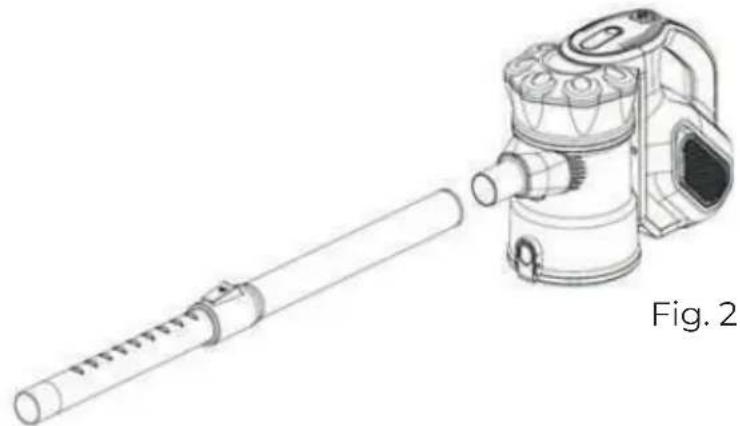
natural_image
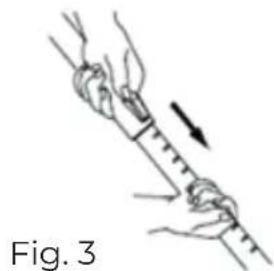
Technical line drawing of a mechanical device with a cylindrical shaft and a multi-stage assembly (no text or symbols)- Adjust the length of the telescopic tube by pushing the locking mechanism down and pulling out the bottom section of the tube to a suitable length. (Fig. 3)
natural_image
Illustration of a rope being twisted with a ruler, showing motion direction (no text or symbols)Use the accessories
Floor nozzle
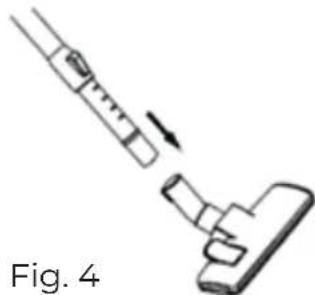
- Fit the floor nozzle into the telescopic tube. (Fig. 4)
natural_image
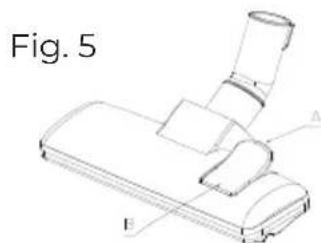
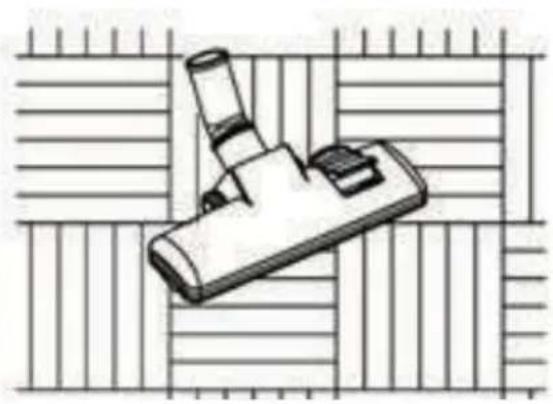
Diagram of a vacuum cleaner with a lever and handle, labeled Fig. 4 (no text or symbols on the diagram itself)- The floor nozzle has two settings. When cleaning hard surfaces(parquet flooring, flooring tiles, etc.), the nozzle brushes should be extended. When cleaning carpets and mats, the brushes should be retracted into the nozzle. Press the brush change button to switch between the two settings. (Fig. 5)

natural_image
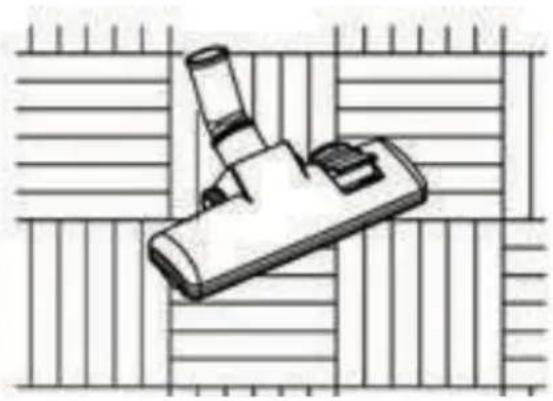
Illustration of a mechanical component with a handle and base, set against a lattice background (no text or symbols)Cleaning carpet
natural_image
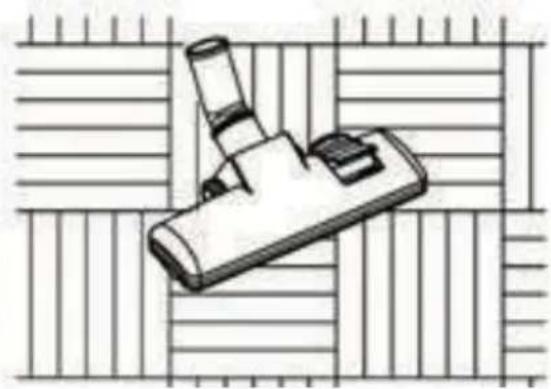
Illustration of a handheld device with a cylindrical lens and handle, placed on a grid background (no text or symbols)Cleaning wooden floor
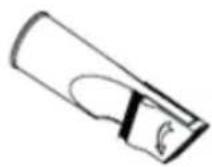
Crevice nozzle
For radiators, corners, skirtings, etc.
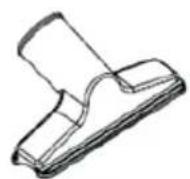
Dusting nozzle
For furniture, curtains, drapes, etc.
- Push the power plug into the socket.
- Use the Power ON/OFF button to turn on the appliance.
- To turn off the vacuum, press the Power ON/OFF button again.
MAINTAINING THE VACUUM
Cleaning the dust container:
- Press the dust container release button and disassemble the unit so only the main body remains.
- Unclip the dust container from the main body. (Fig. 6)
natural_image
Technical line drawing of a mechanical device with two views showing internal components (no text or symbols)Fig. 6
- Over a waste bin, press the dust release button to open the bottom cover and expel any dust, dirt and debris. Wipe clean only, do not submerge in water. (Fig.7)
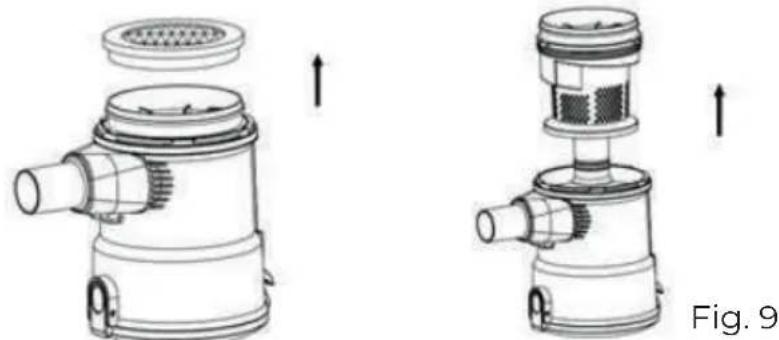
Cleaning the filter:
- Remove the dust container from the main body.
- Twist the lid of the dust container anit-clockwise to open (Fig.8)
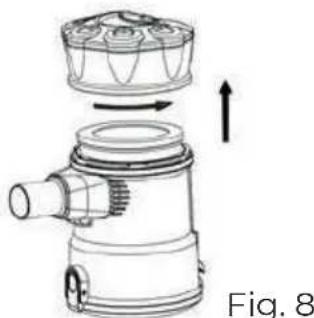
natural_image
Technical line drawing of a mechanical device with internal components and directional arrows (no text or symbols)- Remove the sponge inlet filter from the top of the dust container. (Fig. 9)
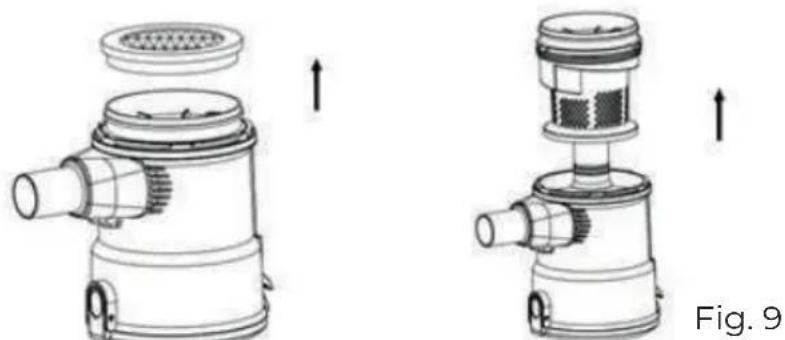
natural_image
Technical illustration of a mechanical device with two views showing internal components and directional arrows (no text or symbols)- Rinse thoroughly under clean fresh water. Do not use soap or other cleaning agents.
- Allow filter to dry naturally before placing back into the vacuum. Do not place on radiators or use additional appliances, such as a hair dryer, to dry the filter. Doing so may cause the filter to warp or for other irreparable damage to occur.
PRODUCT DISPOSAL
This product complies with European Directive 2012/19/EU on electrical and electronic devices, known as WEEE (Waste Electrical and Electronic Equipment), provides the legal framework applicable in the European Union for the disposal and reuse of waste electronic and electrical devices. Do not dispose of this product in the bin, instead going to the electrical and electronic waste collection centre closest to your home.
FRANÇAIS
NOUS VOUS REMERCIONS D'AVOIR CHOISI DI4. NOUS SOUHAITONS QUE CE PRODUIT VOUS APPORTE SATISFACTION ET QUE VOUS PRE- NIEZ PLAISIR À L'UTILISER.
AVERTISSEMENT
VEUILLEZ LIRE ATTENTIVEMENT LE MODE D'EMPLOI AVANT D'UTILISER LE PRODUIT. CONSERVEZ-LE DANS UN ENDROIT SÛR POUR POUVOIR LE CONSULTER ULTÉRIEUREMENT.
DESCRIPTION
natural_image
Illustration of a fire extinguisher, a portable device, and a trash bin (no text or symbols)Fig. 1
natural_image
Technical line drawing of a mechanical device with a cylindrical shaft and attached housing, labeled Fig. 2 (no text or symbols on the diagram itself)natural_image
Illustration of hands tying a rope knot with a ruler, showing motion direction (no text or symbols)Fig. 3
natural_image
Diagram of a mechanical device with a lever and handle, labeled Fig. 4 (no text or symbols on the diagram itself)natural_image
Illustration of a mechanical component with no visible text or symbolsNettoyage de tapis

natural_image
Illustration of a microscope on a screen with grid background (no text or symbols)natural_image
Technical illustration of a hand operating a device with rotating arrows indicating rotation (no text or symbols present)Fig. 6
natural_image
Technical line drawing of a mechanical device with internal components and directional arrows (no text or symbols)natural_image
Technical illustration of a mechanical device with two views showing internal components and directional arrows (no text or symbols)natural_image
Illustration of a fire extinguisher, a fire hydrant device, and a fire extinguisher (no text or symbols)Fig. 1
natural_image
Technical line drawing of a mechanical device with a cylindrical shaft and a multi-port housing (no text or symbols)natural_image
Illustration of a rope being twisted with a ruler, labeled Fig. 3 (no text or symbols on the diagram itself)natural_image
Diagram of a vacuum cleaner with a lever and handle, labeled Fig. 4 (no text or symbols on the diagram itself)natural_image
Illustration of a mechanical component with a handle and base, set against a woven background (no text or symbols)Pulizia di tappeti
natural_image
Illustration of a handheld device with a cylindrical lens, placed on a grid background (no text or symbols)Pulizia di parquet
natural_image
Technical line drawing of a mechanical device with two views: one showing internal components and the other showing a handle mechanism (no text or symbols)Fig. 6
natural_image
Technical line drawing of a mechanical device with internal components and directional arrows (no text or symbols)natural_image
Technical line drawing of a mechanical device with two views showing internal components and directional arrows (no text or symbols)natural_image
Illustration of a fire extinguisher and its exhaust bag (no text or symbols)natural_image
Illustration showing a hand inserting a plug into a power socket, then to clean a device with rotating arrows (no text or symbols)natural_image
Technical line drawing of a mechanical device with a cylindrical shaft and attached housing, labeled Abb. 2 (no text or symbols on the diagram itself)natural_image
Illustration of a rope being lifted with a ruler, showing motion direction (no text or symbols)Zubehör verwenden
Bodendüse
natural_image
Diagram of a vacuum cleaner with a lever and handle, labeled Abb. 4 (no text or symbols on the diagram itself)natural_image
Isometric line drawing of a mechanical component with no visible text or symbolsnatural_image
Illustration of a microscope on a screen with grid background (no text or symbols)natural_image
Technical line drawing of a mechanical device with two views showing internal components and rotation arrows (no text or symbols)Abb. 6
natural_image
Technical line drawing of a mechanical device with no visible text or symbolsnatural_image
Technical illustration of a mechanical device with two views showing internal components and directional arrows (no text or symbols)natural_image
Illustration of a fire extinguisher, a mechanical device, and a trash bin (no text or symbols)natural_image
Illustration of three different industrial tools: a battery, a hand holding a switch, and a portable device with a rotating fan (no text or symbols present)Фиг.1
natural_image
Technical line drawing of a mechanical device with a cylindrical shaft and a multi-port housing (no text or symbols)natural_image
Technical line drawing of a vacuum cleaner component (no text or symbols)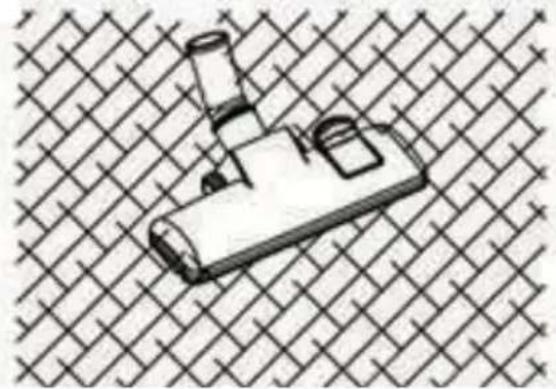
natural_image
Illustration of a mechanical device with a handle and mounting bracket, set against a woven background (no text or symbols)Почистване на килим
natural_image
Illustration of a microscope on a grid background (no text or symbols)natural_image
Two technical line drawings of mechanical components, one with a curved cutout and the other with a curved edge (no text or symbols)natural_image
Technical line drawing of a mechanical device with two views showing internal components (no text or symbols)Фиг.6
natural_image
Technical illustration of a mechanical device with two views showing internal components and directional arrows (no text or symbols)natural_image
Technical line drawing of a mechanical component with no visible text or symbols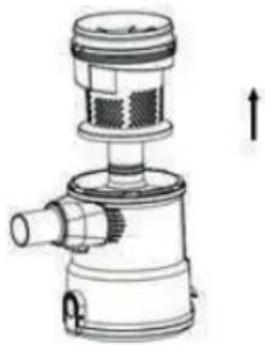
natural_image
Technical line drawing of a mechanical device with no visible text or symbolsالشكل 9
natural_image
Diagram showing two mechanical components with arrows indicating rotation, no text or symbols present6 الشكل
الشكل 7
تنظيف المرشح
natural_image
Technical line drawing of a mechanical device with internal components and directional arrows (no text or symbols)8 الشكل
natural_image
Illustration of a handheld device with a handle and lens, set against a woven background (no text or symbols)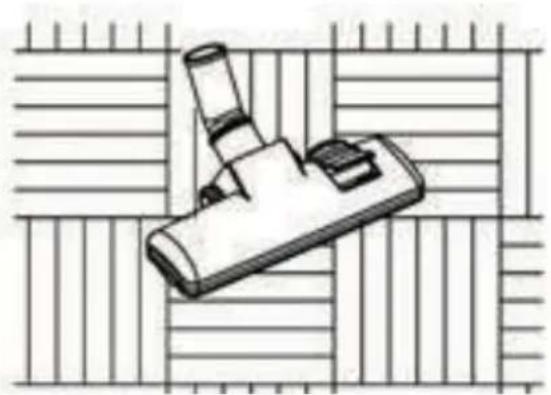
natural_image
Illustration of a handheld device with a cylindrical lens and base, placed on a grid background (no text or symbols)natural_image
Illustration of two industrial machines, one with a handle and the other with a meshed cover, showing mechanical components and motion arrows (no text or symbols)1 الشكل
natural_image
Technical line drawing of a mechanical device with a cylindrical shaft and a vacuum cleaner (no text or symbols)natural_image
Illustration of a handbag and a door mechanism (no text or symbols)
B&B TRENDS, SL. guarantees compliance of this product, for the use for which it is, during the period established by the legislation in force in the country of sale. In the case of breakdown during the term of this warranty, users are entitled to repair or else the replacement of the product at no charge if the former is unavailable, unless one of these options proves impossible to fulfil or is disproportionate. In this case, you can then opt for a reduction in price or cancellation of the sale, which must be dealt with directly with the sales vendor. This also covers replacement of spare parts provided that the product has been used according to the recommendations specified in this manual for both cases, and has not been tampered with by any third party that is not authorised by B & B TRENDS, SL. The warranty will not cover any parts subject to wear and tear. This warranty does not affect your rights as a consumer in accordance with the provisions in Directive 1999/44/EC for member states of the European Union.
USE OF WARRANTY
Customers must contact a B&B TRENDS, SL., authorised Technical Service for repair of the product. Since any tampering of the same by anyone not authorised by B&B TRENDS, SL., or the careless or improper use of the same shall render this warranty null and void.
You must keep the purchase invoice, receipt or delivery docket in order to exercise your warranty rights.
For technical service and after-sales care outside the Spanish territory, please submit your query to the point of sale where you purchased the item.
BON DE GARANTIE
Check out your nearest service station at https://www.di4.eu/
ufesa
B&B TRENDS, S.L. · C.I.F. B-86880473


- ESPAÑOL
- ADVERTENCIA
- FUNCIONAMIENTO DEL ASPIRADOR
- WARNING
- DESCRIPTION
- SAFETY INSTRUCTIONS
- IMPORTANT WARNINGS
- PRECAUTIONARY MEASURES
- OPERATING INSTRUCTIONS
- Assembling the main body
- Use the accessories
- Floor nozzle
- Crevice nozzle
- Dusting nozzle
- MAINTAINING THE VACUUM
- Cleaning the dust container:
- Cleaning the filter:
- PRODUCT DISPOSAL
- FRANÇAIS
- AVERTISSEMENT
- Zubehör verwenden
- تنظيف المرشح
- USE OF WARRANTY
- BON DE GARANTIE
- ufesa
Brand : Di4
Model : Aspirovac CA600
Category : Vacuum Cleaner