
MOC02EGMEU - Microwave Oven SMEG - Free user manual and instructions
Find the device manual for free MOC02EGMEU SMEG in PDF.

| Brand | Smeg |
| Model | MOC02EGMEU |
| Product type | Microwave oven |
| Power supply | 230-240 V ~ 50 Hz |
| Microwave power (output) | 900 W |
| Microwave power (input) | 1450 W |
| Grill power | 950-1000 W |
| Convection power | 2000-2100 W |
| Main functions | Microwave, Grill, Convection, Defrost, Heating, Air fry, Microwave+Grill, Microwave+Convection, Grill+Convection |
| Automatic programs | Chef Menu with 25 programs (meat, fish, vegetables, cakes, bread, etc.) |
| Included accessories | Glass turntable, raised grid, Crisp plate, Air fry basket |
| Interior cavity | Enamel-coated, easy to clean |
| Safety | Child lock, automatic stop, microwave protection, door safety |
| Cleaning and maintenance | Regular cleaning with a soft cloth, do not use abrasive products, steam jets or metal sponges |
| Installation | Flat surface, free space of at least 30 cm above, 20 cm on sides, do not install near a heat source |
| Repairability | Interventions by qualified technician only, original spare parts recommended |
Frequently Asked Questions - MOC02EGMEU SMEG
User questions about MOC02EGMEU SMEG
0 question about this device. Answer the ones you know or ask your own.
Ask a new question about this device
Download the instructions for your Microwave Oven in PDF format for free! Find your manual MOC02EGMEU - SMEG and take your electronic device back in hand. On this page are published all the documents necessary for the use of your device. MOC02EGMEU by SMEG.
USER MANUAL MOC02EGMEU SMEG
IMPORTANT SAFETY INSTRUCTIONS READ CAREFULLY AND KEEP FOR FUTURE REFERENCE
1 Instructions
This user manual is an integral part of the appliance and must therefore be kept in its entirety and within the user's reach for the whole working life of the appliance.
1.1 Intended use
Failure to comply with the safety instructions and failure to read the instructions for the microwave oven may lead to the appliance being used incorrectly and cause personal injury.
- Do not use the appliance for purposes other than those for which it was designed. Improper use could cause injury.
- The appliance is not designed to operate with external timers or with remote-control systems.
- Use the appliance indoors, protected from weather conditions.
-
This appliance is intended for cooking food in domestic and similar environments, such as:
-
staff kitchen areas in shops, offices and other working environments
- by guests in hotels, motels and other residential accommodation
- bed and breakfast facilities / farm accommodation
- any other use, for example in restaurants, bars and coffee shops is considered improper.
1.2 General safety instructions
Follow all safety instructions in order to use the appliance safely:
WARNING: When in use, the appliance and its accessible parts become very hot. Small children should be kept away from the appliance. Never touch the heating elements during use.
- Protect your hands by wearing oven gloves when moving food inside the oven.
- Never try to put out a fire or flames with water: Turn off the appliance and smother the flames with a fire blanket or other appropriate cover.
- This appliance may be used by children aged at least 8 and by people of reduced physical, sensory or mental capacity, or lacking in experience in the use of electrical appliances, provided that they are supervised or instructed by adults who are responsible for their safety.
Children must not play with the appliance.
- Keep children under the age of 8 away from the appliance and power cable unless they are constantly supervised.
- Keep children under the age of 8 away from the appliance when it is in use.
- Cleaning and maintenance must not be carried out by unsupervised children.

Instructions
- The cooking process must always be monitored. A short cooking process must be continuously monitored.
- Never leave the appliance unattended during cooking operations where fats or oils could be released, as these could then heat up and catch fire.
- Be very careful.
- Do not pour water directly on very hot waveguide covers.
- Keep the oven door closed during cooking.
- Switch off the appliance immediately after use.
- Allow the appliance to cool down after use. Do not touch the waveguide covers inside the oven or the heating elements, as they can be very hot. Danger of burns or scalds!
- Do not insert pointed metal objects (cutlery or utensils) into the slots in the appliance.
-
Do not use or store flammable materials near the appliance.
-
Do not use aerosols in the vicinity of this appliance whilst it is in use.
- Do not modify this appliance.
- Installation and servicing should be carried out by qualified personnel in accordance with current standards.
- Do not try to repair the appliance yourself or without the assistance of a qualified technician.
- Do not pull the cable to unplug the appliance.
- Do not use extension cables.
- Minimum height of free space necessary above the top surface of the oven is 30~cm .
- Appliance must not be placed in a cabinet.

WARNING: If the door or door seals are damaged, the oven must not be operated until it has been repaired by a competent person.

WARNING: It is hazardous for anyone other than a competent person to carry out any service or repair operation that involves the removal of a cover which gives protection against exposure to microwave energy.
Instructions

1.3 Caution when using this appliance
- Do not sit on the appliance.
- Do not use abrasive or corrosive detergents (e.g. powder products, stain removers and metallic sponges), rough materials or sharp metal scrapers on glass parts as they may scratch the surface and cause the glass to shatter. Use wooden or plastic utensils.
- Do not use cleaning products containing chlorine, ammonia, bleach or alcohol on steel parts or parts with a metallic surface finish (e.g. anodised, nickel-plated or chrome-plated).
- Do not use steam jets to clean the appliance.
- Do not spray any spray products near the appliance.
- Do not obstruct ventilation openings and heat dispersal slots.
- Fire hazard: Do not leave objects inside the appliance.
- Do not use the appliance to heat rooms for any reason.
- Do not use plastic cookware or containers unsuitable for microwave cooking.
- Do not use plastic containers unsuitable for microwave cooking when cooking food.
- Do not put sealed fins or containers in the oven.
WARNING: Do not use hermetically sealed containers to heat food in the microwave, as the increased pressure may cause damage or explosions when the container is opened.

- Do not cook food wrapped in plastic, aluminium or tin foil.
- Do not cover the bottom of the oven cavity with aluminium or tin foil sheets.
- Do not place pans or trays directly on the bottom of the oven cavity.
If you wish to use greaseproof paper, place it so that it will not interfere with the hot air circulation inside the oven. - Never use the oven door to lever the appliance into place when fitting.
- Avoid exerting too much pressure on the oven door when open.
- Do not rest any weight or sit on the open door of the appliance.
Take care that no objects are stuck in the doors. - Do not install / use the appliance outdoors.
Install / use the appliance on a flat, stable surface. - Do not remove the waveguide covers on the sides of the microwave cavity, which prevent grease and food residue from entering the slots.

Instructions
- In the case of vertical combustible walls, install / use the appliance at a minimum distance of 8cm .
- This appliance must not be installed in boats or caravans.
- The appliance must not be installed on a pedestal.
- Do not immerse the appliance, the power cord or the plug in water or any other liquid.
- Avoid spilling liquids onto the power plug and base.
- If the power cable becomes damaged, contact technical support immediately to arrange for it to be replaced in order to avoid possible hazards.
- Always use any necessary/required personal protective equipment (PPE) before performing any work on the appliance (installation, maintenance, positioning or movement).
- Before performing any work on the appliance, switch off the power supply.
Metallic containers for food and beverages are not allowed during microwave cooking. -
When heating food in plastic or paper containers, keep an eye on the oven due to the possibility of ignition.
-
The microwave oven is intended for heating food and beverages. Drying of food or clothing and heating of warming pads, slippers, sponges, damp cloth and similar may lead to risk of injury, ignition or fire.
- If smoke is observed, switch off or unplug the appliance and keep the door closed in order to stifle any flames.
- Microwave heating of beverages can result in delayed eruptive boiling, therefore care must be taken when handling the container.
- The contents of feeding bottles and baby food jars shall be stirred or shaken and the temperature checked before consumption, in order to avoid burns.
- Eggs in their shell and whole hard-boiled eggs should not be heated in microwave ovens since they may explode, even after microwave heating has ended.
- Failure to maintain the oven in a clean condition could lead to deterioration of the surface that could adversely affect the life of the appliance and possibly result in a hazardous situation.
Information on power consumption in off/stand-by mode
Technical data on the appliance's power consumption in off/stand-by mode can be found at www.smeg.com under the page corresponding to the product in question.
Instructions

1.4 Connecting the appliance
Make sure that the voltage and frequency of the power supply correspond to those indicated on the data plate on the bottom of the appliance.
If the plug of the appliance is not compatible with the socket, contact our Technical Assistance service for a replacement.
Children must not play with this appliance.
- Keep the appliance and its power cable out of the reach of children.
Always unplug the appliance from the power socket if it is to be left unattended and before assembly, disassembly or cleaning.
- Disconnect the appliance from the power supply before changing the accessories or approaching moving parts when in use.
The accessible surface may be hot during operation.
1.5 Manufacturer liability
The manufacturer declines any liability for damage to persons or property caused by:
- Use of the appliance other than the one envisaged.
- Not having read the user manual.
- Tampering with any part of the appliance.
- Use of non-original spare parts.
- Failure to comply with the safety instructions.

Please store these instructions carefully. If the appliance is transferred to others, they should also be given this instructions booklet.
These instructions can be downloaded from the Smeg website "www.smeg.com".
1.6 Disposal
Electrical appliances must not be disposed of together with household waste.
Devices marked with this symbol are subject to European Directive 2012/19/EU requirements.
- All waste electrical and electronic appliances must be disposed of separately from household waste and taken to authorised waste disposal facilities. Disposing of the used appliance correctly will help to safeguard the environment and human health. For further information regarding the disposal of used appliances, please contact your local authority waste disposal department or the shop where the appliance was purchased.


Instructions / Description

1.7 Installation
1) Select a level surface that provides enough open space for the intake and/or outlet vents.
- The minimum installation height is 85 cm .
- The rear surface of appliance shall be placed against a wall. Leave a minimum clearance of 30~cm above the oven. A minimum clearance of 20~cm is required between the oven and any adjacent walls.
- Do not remove the legs from the bottom of the oven.
- Blocking the intake and/or outlet openings can damage the oven.
- Place the oven as far away from radios and TV as possible. Operation of microwave oven may cause interference to your radio or TV reception.
2) Plug your oven into a standard household outlet. Be sure the voltage and the frequency is the same as the voltage and the frequency on the rating label.

Do not install oven over a range cooktop or other heat-producing appliance. If installed near or over a heat source, the oven could be damaged and the warranty would be void.
2 Appliance description (Fig. A)
1) Control panel and display
2) Oven light
3) Door
4) Fan
5) Roller ring
6) Turntable
7) Grill rack
8) Crisp plate
9 Air fryer basket
Technical specifications
| Rated Voltage/ Frequency | 230-240 V~ 50 Hz |
| Microwave Input 1450 W | |
| Microwave Output 900 W | |
| Grill 950-1000 W | |
| Convection 2000-2100 W | |
2.1 Before first use

Danger of burns High appliance temperature
-
Failure to follow these instructions may result in fire, burns or scalds.
-
Remove any protective film from the outside or inside of the appliance, including accessories.
Description

- Remove any labels (apart from the technical data plate) from the accessories and shelves.
- Remove and wash all the accessories (see section "4 Cleaning and maintenance").

Before use, make sure that all the components are intact.
2.2 Description of the parts (Fig. A)
Light (2)
The appliance's interior lighting comes on:
- When the door is opened.
during cooking.
Fan (4)
The internal fan cools the appliance and operates during cooking.
The fan causes a steady outflow of air from above the door which may continue for a short time even after the appliance has been switched off.
Roller ring (5)
The appliance is equipped with a roller ring in the centre of the cooking cavity on which the turntable rests.
2.3 Description of accessories (Fig.A)
Turntable (6)
Glass turntable in the centre of the microwave base, used as a support surface and to collect food residues during cooking. It rotates during use to ensure even heat distribution.
Grill rack (7)
Grid that allows food to be placed in a raised position in the oven. Optimises cooking with a grill or fan function. Ideal for even browning, gratinating and roasting.
Crisp plate (8)
Tray that allows you to cook food evenly and to a golden brown. Ideal for pizzas, savoury cakes and gratins, it ensures crisp results in a short time.
Air fryer basket (9)
Perforated tray that allows optimal circulation of hot air, ideal for air frying breaded, pre-cooked and/or frozen foods.

The accessories intended to come into contact with food are made of materials that comply with the provisions of current legislation.


Description
2.4 Description of the controls (Fig. D)

START/STOP button (10)
A short press allows you to confirm the required function or to start or pause cooking. Press and hold to stop cooking or access the user settings section (only available in clock mode).
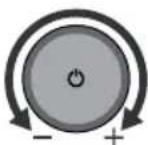
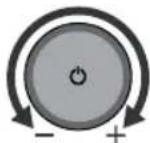
Navigation knob (11)
Allows you to navigate through the available functions and cooking settings.
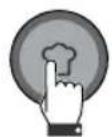
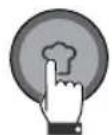
Chef Menu button (12)
Gives access to the Chef Menu for automatic programmes.

Plus button (13)
Allows you to activate one of the following functions depending on when it is selected:
Once a cooking function has been set, it allows you to add a second function to start sequentially from the first (multi-step function).
- When cooking, it adds cooking time in 30 second increments (+30 second function).
- In clock mode, it immediately starts microwave cooking at maximum power (Quick Start function).

Back button (14)
Returns to the previous selection.
Display (15)
The display shows the functions, parameters and the values of the cooking settings.
Description

2.5 Description of the display (Fig. E)
Display icons
| Icon Meaning | |
| 1 | Microwave |
| 2 | Grill |
| 3 | Fan-assisted |
| 4 | Defrost |
| 5 | Warm |
| 6 | Air-Fry |
| 7 | Microwave + Grill |
| 8 | Microwave + Fan-assisted |
| 9 | Grill + Fan-assisted |
| 10 | Child lock |
| 11 | Clock |
| 12 | Cooking timer |
| 13 | Pre-heating |
| Icon Meaning | |
| 14 | Meat and poultry |
| 15 | Fish and shellfish |
| 16 | Vegetables |
| 17 | Cakes and sweets |
| 18 | Bread, pizza and cereals |

Power/weight indicator (19)
Displays cooking power or food weight.
Clock and timer (20)
Displays the time ① and the cooking time ② set on the timer.
Temperature and recipe number (21)
Displays the cooking temperature and the automatic programme number in the Chef Menu.

Use
3 Use
3.1 First use
- Heat the empty oven to the maximum temperature to burn off any residues from the manufacturing process.
- Ventilate the room and leave the room while the appliance is heating up.
- When the appliance is used for the first time, when heating, it may give off unpleasant smells due to manufacturing residues remaining on some components. These smells usually disappear after the appliance has been heated for the first time.
Using the accessories (Fig. C)
The turntable must be correctly positioned on the roller ring and the accessories can be placed on it if required.
| Accessory | Instructions for use (Fig. C) | Compatible functions | ||||||
| + | + | + | ||||||
| (1)x | ✓ | ✓ | ✓ | X | X | ✓ | ||
| (2) (3) x | ✓ | ✓ | XXX | ✓ | ||||
| (4)x | ✓ | ✓ | ✓ | X | X | ✓ | ||
Use

3.2 How to use the microwave oven
Setting the time
When connecting the appliance for the first time or after a power failure, the
flashing time 12:00 and the clock symbol appear on the display.
The current time has to be set in order to start a cooking function:
1) Turn the knob to set the hour to the required value.
2) Confirm using the START/STOP button.
3) Repeat the procedure to set the minutes and confirm the selected time.

To set the current time and/or the display format (12h/24h) see "3.3 Settings Menu".
Selecting the cooking functions
To start using the microwave and select the cooking function:
1) Turn the knob to select the required function.
2) Confirm by pressing the START/STOP button to access the cooking settings available for the selected function (see specific table).
3) Turn the knob to adjust the parameters and press the START/STOP button to confirm.
4) When you have finished adjusting the selectable settings, press the START/STOP button to start.

| Use | |
| This symbol indicates a plate suitable for use in a microwave oven (not supplied). | |
| Function Description Settings Accessory | |
| Microwave Quickly cook, defrost or heat food and drinks. | Power Cooking time |
| Grill Produces excellent grilling and gratinating results. | Cooking time |
| Fan-assisted Gives you the same cooking results as a traditional oven. | Temperature Cooking time |
| Defrost Allows you to defrost frozen food in two ways: • Auto Defrost: allows you to choose between automatic programmes (see specific table) and set the weight of the food. The time is calculated automatically. • Manual Defrost: allows you to set the required defrosting time manually. | Food weight (Auto Defrost) Cooking time (Manual Defrost) |
| Use | ||
| Function Description Settings Accessory | ||
| Warm Useful for reheating or keeping food warm. | Cooking time | |
| Air-Fry Useful for frying without oil or with a small amount of oil. | • Temperature • Cooking time | + |
| Microwave + Grill Combines microwave and grill cooking for faster grilling and browning. | • Power • Cooking time | |
| Microwave + Fan-assisted Combines microwave and fan-assisted cooking for faster oven cooking. | • Power • Temperature • Cooking time | |
| Grill + Fan-assisted Combines the grill and fan-assisted cooking for crispy and succulent results. | • Temperature • Cooking time | |

Use
Selecting Chef Menu functions
Various automatic programmes can be selected for each food category in the Chef Menu.

Once the type and weight of the food has been set, the appliance automatically selects the most appropriate cooking mode.

Slight variations in time are possible depending on the ingredients or cooking accessories used and the degree of cooking required. We recommend that you always check the food at the end of the preset cooking time.
1) Press the Chef Menu button.
2) Turn the knob to select the food category.
3) Confirm using the START/STOP button.
4) Turn the knob to set the required programme. The recipe indicator P flashes.
5) Confirm using the START/STOP button. Once the recipe has been selected, you can change the set weight (see "Changing the cooking settings").
6) Turn the knob to set the food weight.
7) Press the START/STOP button to start.
Category Programme Weight Function Accessory Cooking tips
| Meat and poultry | P01 | Meat | 150-600 g | Cover during cooking. Use slices no thicker than 3 cm. Cover and allow to rest before serving. | ||
| P02 | Chicken 150-600 g | Cover during cooking. Use slices no thicker than 3 cm. Cover and allow to rest before serving. | ||||
| P03 | Bacon 4-8 pcs - | |||||
| P04 | Roast chicken 1-1.2 kg - | |||||
| P05 | Chicken wings 150-300 g | + | - | |||
| P06 | Chicken nuggets | 300 g | + | - | ||
| Fish and shellfish | P07 | Fish fillets (thick slice) | 150-650 g - | |||
| P08 | Fish fillets (thin slice) | 150-650 g - | ||||
| P09 | Shrimps 250 g | Cover and allow to rest before serving. | ||||
| P10 | Fish fingers (frozen) | 300 g | + | - | ||
| Use | ||||||
| Category Programme Weight Function Accessory Cooking tips | ||||||
| Vegetables | P11 | Potatoes 1-3 pcs | Pierce before cooking. | |||
| P12 | Hard vegetables | 200-400 g | Cover during cooking. | |||
| P13 | Soft vegetables | 200-400 g | Cover during cooking. | |||
| P14 | Frozen vegetables | 250 g | - | |||
| P15 | Chips (frozen) | 300 g | - | |||
| Cakes and sweets | P16 | Popcorn 100 g - | Recommended for butter and soft cheeses. | |||
| P17 | Melting 113 g | |||||
| P18 | Mug cake 115 g - | |||||
| P19 | Cake 475 g - | |||||
| P20 | Muffins 740 g | + | - | |||
Use

Category Programme Weight Function Accessory Cooking tips
| Bread, pizza and cereals | P21 | Toast 100 g | + | Turn half way through cooking. | ||
| P22 | Rice 200-600 g | Ratio to water = 1:1.8 Cover during cooking. | ||||
| P23 | Pizza (reheating) | 100-400 g - | ||||
| P24 | Pizza (frozen) 300 g - | |||||
| P25 | Lasagne/ Pasta bake | 300-500 g - |

Programme Weight Cooking tips
| AUTO DEFROST | d01 | Minced meat 125 - 500 g | Turn half way through cooking. |
| d02 | Meat | 400 - 800 g | |
| d03 | Fish | 500 g - 1 kg | |
| d04 | Vegetables | 300 - 500 g | |
| d05 | Bread | 280 - 600 g |

Use
Changing the cooking settings
Each cooking setting can be changed by following the steps below:
Before you start cooking:
1) Turn the knob to select the required parameter.
2) Press the START/STOP button to confirm.
3) Turn the knob to set the required value.
4) Press the START/STOP button to move to the next parameter or to start cooking.
During cooking:
1) Press the START/STOP button to pause cooking.
2) Press the BACK button; the last parameter set will flash.
3) Turn the knob to change the value of the selected parameter.
4) Press the BACK button again to return to the previous parameters and change them using the knob.
Preheating
The fan assisted cooking, air frying and combined fan assisted cooking functions are always preceded by a preheating phase, which allows the appliance to reach the cooking temperature more quickly.
During this phase, the indicatorlights up.
To start cooking, press the START/STOP button at the end of the preheating phase.

If the dish has already been placed in the oven, the START/ STOP button (13) has to be pressed in order for cooking to start, also after the preheating stage has finished.
End of cooking
If a cooking duration has been set, it ends automatically. The text End appears on the display, the timer symbol flashes and a buzzer sounds, which can be switched off using the START/STOP button. To end cooking manually and go back to the clock display, press and hold the START/STOP button for at least 3 seconds.
Use

Quick Start Function
In clock mode, press and hold the PLUS button to activate the Quick Start function to start cooking immediately. The microwave function is activated for 30 seconds at maximum power.
+30 seconds function
During cooking, press the PLUS button to quickly increase the time in 30 second increments.

This function is not available for the automatic programmes in the Chef Menu and for the Auto Defrost and Auto Warm functions.
Multi-step Function
During the function selection phase, it is possible to set a sequence of up to 2 cooking functions that are automatically activated at the end of the previous function.
To add a sequence of functions:
1) After setting a cooking function (before starting to cook), press the PLUS button. The icons of the available cooking functions flash on the display.
2) Set the parameters for the second function.
3) Start cooking.

It is not possible to activate the multi-step function once cooking has started.
3.3 Settings Menu

The settings menu can only be accessed when the microwave is in clock mode.
1) Press and hold the START/STOP button.
2) Turn the knob to scroll through the menu items.
3) Press the START/STOP button to confirm the setting to be configured.
4) Press and hold the START/STOP button to save the setting and exit the menu.

Child lock
This function allows the appliance to lock (On) the controls.
When the function is active, the indicator lights up on the display.

To disable the function, go back to the Settings menu and select OFF.

Sound
Enables (On) or disables (OFF) the sounds emitted by the microwave.

Clock format
Sets the time display to a 12 (12H) or 24 hour (24H) format.

Use
Modifying the time
1) The clock icon appears on the display and the hours start to flash.
2) Turn the knob to the required value.
3) Confirm using the SET button.
4) Repeat the procedure to set the minutes.

Setting the units of measurement
Set the units of measurement for temperature and weight according to the following table:
| Hardness level | Temperature Weight |
| EU °C kg | |
| US °F lb | |

Display brightness
This allows you to select the brightness of the display according to the following table:
| Hardness level Display brightness |
| 1 25% |
| 2 100% |

Turntable setting
When enabled (On), the turntable is rotated to optimise cooking results.
Can only be deactivated (OFF) for cooking functions that do not use microwave mode.

It does not affect the automatic programme settings of the Chef Menu.
| Function | Turntable (Default) | Modifiable |
| ≈ | On | x |
| ... | On | ✓ |
| On | ✓ | |
| * | On | x |
| On | x | |
| On | ✓ | |
| ≈+ | On | x |
| ≈+ | On | x |
| ...+ | On | ✓ |
Cleaning and maintenance

4 Cleaning and maintenance
The instructions manual contains cleaning and maintenance instructions and recommendations from the manufacturer to the customer. Any other intervention should be carried out by an authorised service centre.
Before cleaning, ALWAYS remove the plug from the mains power supply and allow the appliance to cool down.

Caution
- Do not use steam jets to clean the appliance.
- Do not use cleaning products containing chlorine, ammonia, bleach or alcohol on steel parts or parts with a metallic surface finish.
- Do not use abrasive or corrosive detergents.
- Do not use rough or abrasive materials or sharp metal scrapers.
- Clean the components and accessories regularly after each use.
Cleaning the surfaces
To keep the surfaces in good condition, they should be cleaned regularly after use. Let them cool first.
Ordinary daily cleaning
Always and only use specific products that do not contain abrasives or chlorine-based acids.
Pour the product onto a damp cloth and wipe the surface, rinse thoroughly and dry with a soft cloth or a microfibre cloth.
Food stains or residues
Do not use steel sponges and sharp scrapers as they will damage the surface.
Use normal, non-abrasive products and a wooden or plastic tool, if necessary. Rinse thoroughly and dry with a soft cloth or a microfibre cloth.
Do not allow residues of sugary foods (such as jam) to set inside the oven. If left to set for too long, they might damage the enamel lining of the appliance.


Cleaning and maintenance
Cleaning the accessories
Wash all accessories in warm soapy water with a soft sponge or a soft cloth. Rinse and dry thoroughly. Do not use abrasive detergents, metallic sponges or metal tools to clean the accessories as they may damage the surfaces.
Cleaning the door glazing
The glass in the door should always be kept perfectly clean. Use absorbent kitchen roll. In case of stubborn dirt, wash with a damp sponge and an ordinary detergent.
Cleaning the oven cavity
In order to keep your oven in the best possible condition, clean it regularly after letting it cool down.
Avoid letting food residue dry inside the oven cavity, as this could damage the enamel.
What to do if...
| Problem Possible cause Solution | ||
| The microwave oven does not switch on. | The plug has not been properly inserted into the power socket. | Make sure the plug has been inserted properly into the power socket. |
| Possible cable or electronic board failure. | Contact your local service centre. | |
| No power. | Make sure that the power supply is working properly. If the problem persists, contact a qualified electrician. | |
| The oven light does not switch on. | The plug has not been properly inserted into the power socket. | Make sure the plug has been inserted properly into the power socket. |
| The light bulb or microwave oven door sensor may be faulty. | Contact your local service centre. | |
| Cooking does not start. | No confirmation. | Make sure that you confirm the cooking phase when you have set the required values (see "3.2 How to use the microwave oven"). |
| The microwave door is not closed. | Make sure that the microwave door is closed. | |
| The microwave oven door sensor may be faulty. | Contact your local service centre. | |
| The turntable does not rotate or makes a noise during operation. | The plate is not positioned correctly on the support. | Make sure that the plate is correctly positioned. |
| The support is not inserted correctly. | Make sure that the support is inserted correctly. | |
| What to do if... | ||
| Problem Possible cause Solution | ||
| There are sparks and crackles inside the microwave cooking. | Cookware with metallic finishes were used. | Make sure that you only use containers that are suitable for microwave cooking. |
| Forks or other metal utensils have been left inside the microwave. | ||
| Aluminium foil has been used inside the microwave oven. | ||
| Hot air or steam escapes around the door or from the vents during use. | It is normal for hot air to escape from above the door to cool the oven during use. | Wait for the appliance to cool down normally. If hot air or steam continues to escape, or if it escapes from other parts of the oven, contact your local service centre. |
| One of the following error codes appears on the display: E-01 / E-02 / E-03 / E-04 / E-05 / E-06 / E-07 / E-08 / E-09 / E-10. | - | Contact your local service centre. |

If the problem has not been resolved or in the case of other types of fault, contact your local technical support centre.
Instructions
IMPORTANTS AVERTISSEMENTS DE SECURITE LIRE ATTENTIVEMENT ET CONSERVER POUR Toute UTILISATION FUTURE
1 Instructions
Technical specifications
Quick Start-function
Antes de usar, verifies everything components.
EcnIbBepcaHnH ee yNIOtHeHH naOBpeXDeHb, He nCNoJIb3yInTe np6op Do tex nop, noka OH He 6yDet OTpeMOHTnpOBaH y NOnHOMOueHHbM CneuHaJNCToM.

ПЕДУПЕЖДECHNE:
Onacho 1nIy6oR OeIOBeka, 3a NCKJIouyeHHeM yNoJHomOueHHoro nepcoHaJa, npOBoHTb Texo6cnyxHBaHne HIN peMOHT, CBraAHbIX C DeMOHTaxKem 3aUHTbl OT MKNPOBOJHOBOJ 3HeprHn.
HctpyKuH

1.3 MepbI npedoctopoxhoctn OTHOCHTeNbHO daHHoro np6opa
He caaNTecb Ha npu6Op.
He nCnoJb3yIte dIry OYnCTK nCTeKJIaHHbIX NOBepxHOCTe arpeccNBhIE a6pa3HBHbIe NII Koppo3NoHHbIe YnCTaUne cpeCTBa (HaNPmep, nOPOuKNI, PTHOBbIOHNTeN I MetaJIInueckne MoaJIKN), rpy6bIe MaTePnaJIbI NIN OCTpbE MToJIInueckne cKe6Kn, NoCKoJIbKy OH MOrYT nOuapanatb IOBepXHOCTb, 4TO npIBeT K pa3pyuWeHIO CTeKJIa. Pn Heo6xoIMoCTn NOnb3yIITecb DepeBraHHbIMN NII pIactMacCOBBIM KxOHbIMn PrnHaJNeJXHOCTaMn.
-ДячNTKIN KOMnoHENTOB n3 CTaJI INn CMeTALnueCKOI OTdEKNo(HaNPmep, C aHOIpOBaHHo, HKeJInpOBaHHo INn XpOMnpOBaHHo NOBepXHOCTbIO)He NOLb3yInTeCb YNCTaUIMn CpeDCTBAMn, COePxaUIMn XnOp, HAwATbIPhBi CNrpt,OT6eINBaIOuNe BeIecTBa INn CNrpt.
He nCnoB3yIe cTpyn npa dny ouHCTKN npbopa.
He pacnbIyIe aap03oN B6n3np6opa.
He 3acnoHnTe OTBepCTnI npope3n, npedHa3HaueHHbIe IIN BENTnIaun n OTBOda TeIIa.
- Onachoctb BO3ropaHn: He octabnIte npedMeTb BHyTpnp6opa.
HnB Koem cnyae He nCnoJb3yI np6op dna o6orpBa nomeueHra.
He noIb3yItecb npnbopamn nnn emKoCTaMn 13 pIactMaCCb, He npiroDhbIMn IJI nprirotOBHeHn PNIuB MmKpOBoNHOBOI neu.
He nCnoJb3yIte PnactIKOBbie KOHTeHepbl, KOTOpBHe NODXODT IpnroTOBHeNpOdyKTOB MKNPOBOJHOBOI neH.
He nomeaute B pa6oyu kamepy 3akpbTbe 6aHKn IIN KOHTeHepbl.
- PEPENyPEXDEHNE: He
ИСПОЛБ3уITE rePMeTnUHO 3aKpbIbIe
КоТeнЕрbl ДЯ HArpeBa NIIu
В МИКРОВОЛНOBОI Neu, TAK KAK
ПОБИшЕHOEДaBNeHne MoXeT npINBeCTN
К ТраВМAM ИИ B3рБY Пи OTKpbITN
КоТeнЕра.
He roTOBbTe NnUy, 3aBepHyTyO B nlaCTNk, aIOMHn HnH fOnbry.
He hakpbBaIte dno pa6oey kamepb aIOOMHHeBOHnOIOBAAHOH OJbROH.
He cTAbBe KAcTpIOJI nn npOTnBHN HeNocpeIcTBeHNO Ha IHO pa6OueKamepbl.
- Ecnn Bbl xotnte nCnoNb3OBaTb 6yMaIy IINBbIneuKN, pa3MeuAaTe ee TaK, yTObbl OHa He MeUana UnpKuLyuTn TOpJeero BO3Dyxa B Neu.
3anpeaetc nCnoB3OBaTb OTkpbyIyIO dBepuy B kauectBe pbuara npn pa3meHnn npnbopa BHyTpni KxOHHO Wka.
3anpeaetc CnHKOM CNbHO HaxmAtb Ha OTKpyIO DBepuy.
He onnpaTecb Ha OTKpbTyIO DBepy Hc aNTecb Ha Hee.
Cneinte 3a tem, yto6bI B IBepe neu He 3actpeBaII npedmetbl.
He yctaHabnBaIte n He nCnoB3yIte np6op Ha OTKpbITOM BO3dyxe.
- YCTAHOBNTe/HcnoJb3yIte np6Op Ha yCTOuHBOI rOpHOTaJIbHOI NOBepxHOCTN.

HctpyKuH
He chnmaite 3aunty BOnHOBOOB no 6okam MInKPOBNOBOI KAmepbl, TAK kak OHn IpeIoTbpaAoiT nonaHne Xnpa N OCTaTKOB NiuN B ueni.
-ПиHAJIINHnBepTKaJIbHbIXCTeHOK n3TopIOuHX MaTePnaIob yCTaHOBka/ 3KcIIyataun np6opa DOJXHa OcyIeCTBnTbCn Ha paCCTOAHn MNHMym8cm.
3anpeaetcyaTahabnBaTb daHHbn np6op Ha katepax nnn B TpeInepax.
3anpeaetc yctahabnbaTb np6Op Ha noCTABky.
He norpykaiTe npnbop, Ka6eIb nHTAHnI nn BnKy B BDOy IINB IIO6yIO dpuyIO XnKoCTb.
He donyckaite nonadHn XnKocTn Ha Bnky Ka6eJnTahn n 6a3y 3JeKTponiTAHn.
Bo n36exaHne IIObO onaCHOCTn, npn NOBpeXdEHH KabeJI NHTAHN HemeJeHNO CBJNTecb CO CnyKboi TexHnueCKo NOpDepKKn Dnra erO 3aMeHbl.
- Npeed npoBeHnem IIO6bIX pa60t ha npnbope(yctAHOBKa,TexO6cnyKXBaHne, pa3MeIeHne nn nepemeIeHne) 6ra3aTeJIbHO nOJIb3yIteCb cpeCTBaMn INHNBNUdYaNbHOI 3aUHTbl.
- Pered npoBeHnem IIO6bIX pa60T Ha np6ope HeO6xOdmo OTKJIouHTb 06uee 3neKtpOniTahHe.
3anpeaetc nCNoIb3OBaTb MeTAnIIueckne KOHTeHepbl DnI npOdyKTOB NITAHN I HANITKOB BO Bpem npIroTOBHeHnB MmKPOBOJHOBOI neu.
BHHMaTeIbHoCneIte3aNeuebIO BO BpeMpa3OrpeBa npOdyKToB B PnactIKOBbIXnn6yMaXHbIX KOHTeHepax, TAK KAKOHMOrT 3aRopeTbcra.
MnKpOBoJHOBa neyb npEHa3HaueHa Ia pa3OrpeBa npOyKTob nHTAHn H anHTKOB.CuKa npOyKTOB nn OeXdbI HArpeBaHne noOorpeBaTeJe 6IIO, TaOnueK, y6OK, BnaXhIx TkaHei N T. P. MoryT npVBecTH K TpaBMam, NCKpOo6pa3OBAHIO nn Noxapam.
-Пиннчпдыма Вьклioчпгпрбор
ИИ N BьHbTe BnIky n3 ceTeBOJ po3eTKN,
OCTaBJIЯ 3akpyToI DBepUy, YTO6bl
пpeДOTВРАТТь ПОДАнHe ПламEH N
ПOMeшeHne.
- Пи И спОЛьЗОВАнN MИКРОВОНовы X neуен ДЯ pa3OrpeBa Nn HArpeBa XnДКоCTe npOceC 3akInaHnЯ MoXet npOn3OHTN C 3aDépXko: OcToPoxHo obpaauTecb c KOHTeHepOM.
- NepemewaTe HIN BCTpXHNTe coepxHMOe 6yTbIOK 6aHOe, npOBepra TemnepaTypy neped ynoTpe6neHEm, TTo6bl 36exatb OXOROB.
HeHarpeBaIteB MInKpOBoJHOBOI neu CbIpbIe RaIca NII BapeHbIe Rua BCKOpIyNe, TAK KAK OHN MOrYT B3OpBaTbcra IaXe Iocne pa3OrpeBa B MInKpOBoJHOBOI neu.
HeBbIIOJIHHeNe OunCTKn neu MoKeT npINBeCTN K H3HOcy NOBepXHOCTeN, HApUWeHHIO cPoka cnJx6bl npnbopa n BO3HKnHOBeHHIO ONaChbIX CHTyaCNI.
HhOpMaun O notpe6JeHHN 3Heprn B BBIKIOUeHHOM pexHMe/peXHMe OxHaHH
Texnueckne daHbIe o notpe6nemOM MOUHOCTN B BBIKIOueHHOM pexnme/ peXnme OxuaHn npnbopa MoXHo HauTn Ha caTe WWW.smeg.com Ha cTpaHnue, NocBaeHHo DAHHOMY I3dEInIO.
HctpyKuH

MepbI npeOCTOpoxKHOCTN/OncaHne

1.7 MoHTax
1) Bb6epnte poBHyIO NOBepxHocTb, Ha KOTopoI IOCTaTOUHO OTKpbIToro npoctpaHCTBa InBnyCKhbx N/nnn BblNyCKhbx OTBepCTn.
- Мнимальная ВICOTA Дя установки 85 cm.
3aHna NOBepxHOCTb yCTPOINCTBa 6bITb NOBepHyTa K CTHe. OctabTe HAD neybIO 3a3Op He Mehee 30cm.Mejy neybIO npnIeRAOUMN CTehAMn DOJXeH CO6IIOaTbcra MNHMaJIbHbI 3a3Op 20 cm.
He cHnMaIte Hoxknc O nHa neu.
- BLOKINPOBka BnYCKhIx N/nnn BbInyCKhIx OTBepCTn MoXeT npNBecTn K NOBpeJdeHIO neu.
- YCTAHOBNTe neyb kak MOxHO daNbwe ot paHIO n TeJeBn3opa. Bo3MOxHbI NOMEXn pni npHeMe cnHaNoB paHIO n TeJeBnDEnn BO Bpempa6OtBu MINKPOBOJHOBOI neu.
2) BkIIOUHTe neyb B cTaNdApTHyIO 6bITOBYIO po3ETky. Y6eINTEcB, yTO HAnpJxHHe N qACTOTa COBnAaIOT C HAnpJxHHeM N qACTOTOn, yKa3aHHbIMN Ha nacnOpTHoT Ta6nUKe.

He yctaHabnBaIte neyb HAd BapOHH NaHeJIbIO nHn DpyHM hCToHnKOM TeJHa. Pn YcTaHOBKe pAdom C hCToHnKOM TeJHa NAd Hm, Neyb MoXeT 6bITb NOBpeXdeHa, a rapaHTna 6ydet aHHyInpOBaHa.
2 OnncaHne np6opa (Pnc.A)
1)Pahelb ynpablenn n dncnnne
2) Jlamnoquka
3)Дверца
4) BeHTnJIrTOp
5)BpaaiooeecKoIbfo
6)Bpaaioaera Tapejka
7)Пиногнгая ршетka
8) Tapekenka crisp
9) Kop3nHa nIa BO3duuHoi XapKn
TexHnueckne xapakTepcntkn
- npN OTKpbTIN DBepeBb;
BO Bpem npiroTOBneHn nn.
BeHTnIaTOp (4)
BHytpenHn BeHTnIaTOp OxnaXdaeT np6op n BkIOuAeTCB BO BpeM npHrTOBHeHn Pn
BentnIaTOp CO3daet HOpMaJIbHbI NOtOK BO3dUxa, KOToPbI BbIXoIIT HApJyB 3OHe HAD IBePcE, B TOM YIcNe B TeueHne HEnpOdoJXHTeJIbHO BpeMeH NocJe BbIKIOUeHnI np6opa.
BpaauoueecKaJbO (5)
Pnp6op cna6xeh BpaauoumcKoIboumB ceHTpe paooey Kamepb,Ha KOtopooe ONpapetc Bpaauouaac TapeIka.
2.3 OnncanHe akceccyapob (Pnc.A)
Bpaaioaia TapeIka (6)
CTeKJIaHHa BpaAiooJcra TapeIka B ceHTpe OCHOBAHn MIKpOBoJHOBOI neu,NCIOJIb3yEmaB KauEcTBe ONOpHOI NOBepxHOCTn I dIra c6opa OCTaTKOB NIIu BO BpeMa npriTOBHeHn. OHa BpaAaETcR np npabote neu, YTObI obecneHTb paBHomephoe pacnpedeHne Tenna.
PnnoHrapewetka (7)
PeWetka, No3BOJIOUaRa pa3MeaTaB npOdyKtBu Ha BbICote BHyTpN neu. OHa TaKxpe UnyuAeT npiroTOBHeHne npn BbIope fYHKcN rpnI Nn KOHBekCnN. IDeaJIbHO NOxODHT nPaBHomePHoro NOpymAHNBAHN, 3aneKaHn N o6XapNBAHN.
Tapeika crisp (8)
PpOHTBHeB, KOToPbI NO3BOJAreT oBeCneuHb paBHomepeHoe npnroTOBHeHne NnC 30oNtHcTOn KOpOyKo. IealbHo NODXODNT DnA NnCUp, CoJeHbIX nIpOROB n O6xapKn B cyXapX. No3BOJare T noLyuHTb XpyCTaUyIO KOpOuy 3a KOpOTKoe BpEmr.
Kop3nHa IJIa BO3yUHOn XapKn (9)
NepopnpoBHHb npOTnBeHb, oBecneuBAIOU ONTmAlhHyO UnpKylAIO TOpayero BO3DyXa H NdealbHO NOxODAUNI B03DyShOH JapKN NaHPOBaHHbx, PpeBapnteJbHO npriTOBHeHHbx I/nn 3amOpoxeHHbx npOyKTOB.

Akeccyapbl, KOtOpbIe MOryt KOHTaKTHpOBaTb C NnueBbIMN npOdyKTAMN, H3rOToBJIeHbI H3 MaTePnaJIOB, KOTOpbIE COOTBETCTBYOT Tpe6oBaHnM DeiCTByUoJero 3aKOHOdATEJIbCTBa.

Onncahne
2.4 OnncanHe opraHOB ynpabIeHn (Pnc.D)

Khoonka START/STOP (10)
KpaTKoe Haxatne No3BOJareT NOdTBepnITb Tpe6yemyo 0fYHKUIO nnHauatb/ npnoCTaHOBNTb npiroTOBHeHne. Haxmnte n ydepxNBaIte HaxatoN dnn octahOba npiroTOBHeHn nn nepexOda K pa3dEny noIb3OBATEJIbCKNX HAcTpoEk (IOCTynHO TOIbKO B pEXMme YacOB).
Pukka Hauhraa (11)
I03BONaTe nepemeaaTbCm Mekny DOCTyINHbIMN yHKUaMn HAcTpOuKaMn npiroTOBHeHn.
KhoNka MeHIO weΦ-nOBapa (12)
IpeoctabnaretocTynKMeHIOweo nobapa an ABtOMaTHuecknx nporpaMM.

Khonka Plus (13)
I03BOJnEaKTHBnPOBaTb OdHy H3 CJIeNyIOx yHKuB B 3aBnCmOCTN OT TORO, KOrda OHa BbIbnpaETc:
- Pocne yCTAHOBKN yHKnnpnroTOBHeHn MOxHO do6aBnTB BTOpyo yHKnIO, KOTOPa 6ydet BbINONHrTbcn oCne BbIbpaHHo nepBOH cyHKn (yHKnMHOCTUeHcatoTO npnrTOBHeHn).
Bo BpeMa yBeJIuCyTe BpeMa npiroTOBJIeHnC WaROM 30 ceKHyD (fynKzna+30ceKyHd).
BpeXnme yacOB HeMeIeHHO 3anyckaet npiroTOBHeHne B MInKpOBoNHOBOI neHn Ha MaKcImaJIbHOI MOUHOCTH (yHKuia Quick Start).

Khonka Back (14)
Bo3Bpat K npedbyuemy Bb6opy.
Диспел (15)
Cnyknt dna oTo6paXeHn yHKn npametpoB n 3HaueHn npiroTOBneHn.
Onncahne

2.5 OnncanHe nncnpe (Pnc.E)
IkoHKnHa dncnnee
| Иконka 3начениe | |
| 1 | ≈ |
| 2 | … |
| 3 | |
| 4 | * |
| 5 | SSS |
| 6 | # |
| 7 | ≈+ |
| 8 | ≈+ |
| 9 | + |
| 10 | 0-π |
| 11 | |
| 12 | |
| 13 | |
OTo6paKaet Bpemr N IINITeNbHOCTb npHroTOBneHn, 3aDaHHbIe Ha TaMepe.
Temnepatypa n Homep pecenta (21)
OTo6paKaETemnepaTypynpriROTOBHeH N HOMep aBTOMaTnuecko nporpaMMb B MeHIO IeΦ-NOBap


HcnoJb3OBaHne
3 NcnoJb3OBaHne
3.1 IepBoe nCnoJb3OBaHne
HarpeTe ncyTO dYXOBky Do MaKcImaJIbHOI TEMnepaTpybl IydaJIeHn BO3MOxHbIX npOn3BOIDCTBeHHbIX OCTATKOB.
Bo BpemHaPepa npnbopa noknhte nomeueHne npoBepnBaTe erO.
Bo Bpem HarpBa npn nepbom nCnoB3OBAHnn npnbop MoKet nCnyckatb HnnpnTHbIe 3anaxn 13-3a HAnuHcEIOB Cm3Kn Ha HeKOTOpbIX KOMNoHEHTax. TaKne 3anaxn O6bHuHO nChc3aOT NocNe nepBBOHarpeBa.
IcnoJb3OBAHne npHaJdxHoCTe (Pnc.C)
Bpaaoua TapekdaJxha 6bIb npabnIbHO paonoloxeHa Ha Bpaauoemc KoIbue. Bo3MOXHbIe akceccyapbl MOxHO CTABNTb TapeNky.
| АкCEDСУСТРУКЦЕ NO Инchestropy С�ionalы Ваню (Pис. С) | Совмостrimble Фундции | ||||||
| (1)х | ✓ | ✓ | ✓ | X | X | ✓ | |
| (2) (3) | X | ✓ | ✓ | XXX | ✓ | ||
| (4)х | ✓ | ✓ | ✓ | X | X | X | ✓ |
HcnoJb3OBaHne

3.2 KaK noJb3OBaTbCRA MKNKPOBOJIHOBOI NeYbIO
YcTahOBKa TeKyuIero BpeMeHH
Pn nepBOM NOKIOUeHnn NnNocne OTKIOUeHna 3JNEKTponHTAHn Ha dinCnlee NOKA3bBAETcMnraIOuee

BpemnIKOKHKa YacOB
YTo6bHaayatbIIO6oe npiroTOBneHne, Heo6xOIMO Hactpontb Tekyuee BpeM.
1) NOBOPaHBAIte npabyIO pyky, yTO6bI yCTaHOBnTb Tpe6yEmoe 3HaueHne.
2)ПоДТВЕРДИТе HAXATиEM KHONKIN START/STOP.
3) NOBTOpe 3TO DeNCTBNE DnA HACTPOKIMNHyt N NOITBepDNTe BB6paHHoe Bpemr.

Дя n3MeHeHn TeKyuero BpeMeHH H/Hnn 0to6paXeHn (12 4/24 4) cmOtpHTe «3.3 MeHIO Hactpoek>.
Bb6op fYHKun npnroTOBneHna
YTO6bl Hauatb NCNoB3OBaTb MKNPOBOJHOByIO neyb N BbI6paTb cyHKUIO npnroTOBJIeHn:
1) NOBepHnTe pyky, yTO6bI BBb6paTb Tpe6yEmyIO dyHKUHO.
2)ПодтВерпгБыбогнхаTNHКНONK START/STOP,TO NO3BOHNT nepeHTN K HAcTPOHkAM npHrOToBNeHnA, DOCTyHbIM IЯ BbIbpaHHoF yHKuIN (cM. cpeuaJIbHyIO Ta6JInuY).
3) Повернite pyky, утобу OTperулроват napametpbI, a 3aTeMHxMITE Ha KhoNkY START/STOP nOДТВЕРЖDEHЯ.
4) Nocne BbINONHeHnHaCTpoeK HaxMnte Ha KhoNky START/STOP, YTo6bHaayatb npuroTOBneHne.

HcnoJb3OBaHne

3TOT CnMBOJ O6O3Haayet 6IIO, KOtOpoe MOxHO npHrTOBNTb B MKNKPOBOLHOBOJ Neu (He BXoDHT B KOMNKeKT).
PpuroToBneHne, pa3MopaxnBaHne Hnn 6bICTpbn pa3OrpeB ebl n HAnNTKOB.
MoHOCb
BpeMa npuroTOBneHnA


rnilb
No3B0JraT NOJyHTb OTNIuH0 3axapenHbI I N OIpymaHeHHbI 6nOda.
BpeMa npuroTOBneHnA


KoHBeKuHa
ObeceneuBaet Te Xe pe3yIbTaTbI npiroTOBHeHn, UTo I TpaNcNoHHaJ dyXOBKa.
Temnepatypa
Bpem npnroTOBneHn


Pa3mopaxnBaHne
P03B0JrE pa3MopaxnBaTb 3AMOPoxeHHbI npOyKtbl DBym rCnoc6am:
Bec npoaykta (abTomatueckoe pa3mopaxnBaHne)
Bpem npnroTOBneHna (pyhoe pa3mopaxnBaHne)
- ABTOMATNuecka pa3MOp03Ka: Bb6op cpei ABTOMATNueCKNX nporpaMM (cm. CneuNbHyTO Tabniuy) n yctAHOBKa BECa npOdykTa.Bpem paccHTbBaETcA ABTOMATNueckn.
PyuHoe pa3MopaxnBaHne: NO3BOJRAET BpyHyU yCTAHOBHTb Bpempa3MopaxnBAHn.
KaJdyu HactpoKy npiroToBneHn moXHO n3MeHnTb, BblONHnB CneDyUOune DeiCTBnI.
Ipeed nauanom npiroTOBneHn:
1) NOBepHnTe pyky, yTo6bI BB6paTb Tpe6yEmbl npametp.
2) Haxmte Ha KhoNky START/STOP nOHTBepxKeHnY.
3)Повернitepykydo HxHoro 3HaueHnYaCa.
4) Haxmte Ha KhoNky START/STOP, yTo6bI nepeiTu K cJeDyUoSeMy npaMeTpY nn 3anyCTnTb npiroTOBneHne.
BoBpem npiroTOBneHHa:
1) Haxmte Ha KhoNky START/STOP, yTO6bI npIOCTaHOBNTb npnroTOBneHHe.
2) Haxmte Ha KhoNky BACK; hauHaeT Mngatb nocneHn 3aDaHHbI npapametp.
3) NOBEPHIne pyky, yTO6bl n3MeHnTb 3HaueHHe Bb6paHHoro napametpa.
4) Haxmte eue pa3 KhoNky BACK, yTo6bI BepHyTbcK npdeBldyuIm napametpam Nn3MeHHTb nx C nOMoUbO pykN.
PpeBapnteIbHbI HarpE
Функцям пи�OTOBнень ржime KOHBekun, BO3dUshOH 空pkn KOM6HnHPOBaHHORO npNTOBNeHn Bcerda npedweCTByet CTaINr npedBapnteIbHoro HarpEBA, 10TOpa r No3BOJareT npibopy 6bICTpee DOCTNu b TemnepaTypbl pniroTOBneHn.
Ha 3TOM 3Tane 3aropaetcHnDnKaTophna lamna
YTO6bHaayatb npnroTOBneHHe, HAXMnte Ha KhoNky START/STOP B KOHcE 3Tana npedBaupntelhoro HarpeBa.

Ecn6IIOyXe NOMEeHO B dYxOBky,HaxMHTe Ha KNOKy START/STOP (13), yTo6bI Hauatb npnroTOBJIeHne. 3To DeiCTBHe MOxHO OcyIeCTBHTb H B KOHcpe PpeBaPHTelbHorO pa3OrpeBa.
OkoHuaHne npHroTOBJeHHa
Ecn 3aDAno Bpem npiroTOBneHnnpoccc roTOBKn 3aBepwaeTcagBTOMATNueckn. Ha dncnnee
OTo6paKaaeTcHaaNcB

HauHaet MItatb IKOHKa TaMepa 2
H NOJaETc3ByKOBOu CnHaJ, KOTOpBIMOxHO OTKIOUHTb C NOMOUsbKHOINSTART/STOP.
YTO6bl 3aBepuNTb npnroTOBneHne BpyHyIO N BepHyTbC K OTo6paXeHHIO YacOB, HaxMITE N yIepXHBaIte KHOJKY START/STOP HaxKToB B TeUHeNEMINHMym 3 cekyHd.
HcnoJb3OBaHne
Функцябьсгро nycka Quick Start
B pexime yacob haxmnte n ydepxnbaiTe haxaToHKnKpyPLUS,TO6bIakTnBnpoBaTb YHKUo Quick Start n HemeJeHNO Haatb npiroTOBHeHne. YHKsMaNkPoBOHOBO neu aKtNBpyetcHa 30 cekyHd npi MAKcImaJIbHO MOUHOCTn.
ΦyHKu+30ceKyHd
Bo Bpem npnroTOBneHn HaxMnte KhoNky PLUS, yTo6b 6bictpo yBelenuHTb BpeMa C Warom 30 cekyHd.

3TaФункин HeDocTynHaДЯ ABTOMATNueCKNX nporpamM B MeHIO WeΦ-NoBapa N ДЯ Φункин ABTOMATNueCKORO pa3MopaxKINBAHNИ pa3OrpeBa.
ФункцяЯ
MHOROCTyneHqAToro
PnHrTOBLeHHa
Pn BbIbope yHKuN MoXHO 3aDaTb NocJeIOBATEbHOe BbINOJIHeHEmaKcMym 2 yHKuN npriTOBNeHn, KOtOpBe AKTNbPyOTc ABTomATUeCKn B KOHc npedWeCTByUoSei m yHKuN.
YTO6bl DO6aBHTb NocJeIOBATEbHOCTb yHKcN:
1)Poe HACTPOKu yHKUH
3.3 MeHIO HacTpoek

IocTyK MeHIO BO3MOXeH TOJIbI HaxOxKeHH Neu YacOB.
1) Haxmte n ydepxnBaHT KhoNky START/STOP.
2) NOBepHnTe pyky, yTo6bI nyHKtbl MeHIO.
3) Haxmte Ha KhoNky S' yTO6bI NOITBepnTb HAcTp
4) Haxmte n ydepxnbai START/STOP, 106bl HactpoKy N BbIuN3 MeH

BloKnpoBka ot deTe
I03B0JraT 3a6noknpoBaTb ynpabJeHn np6opom.
Ecnn daHna yHKnra aKTNbI dncnnee 3aropaetc nHnNKata

YTO6bl OTKJIIOUHTb BepHNTecb B MeHIO HAcIpuGn Bbl6epHTe OFF.

3BykoBbIe CnHahJIbI
AKnBpyet (On) nnn otKnIouaet (OF 3ByKObIe CNrHaJIbl, NOdABaEmble neybIO.
YINVIVI.
3) 3aynctnte npnroTOBneHne.

HeBo3MOxHo aKTHBnPoBaTb yHKcHIO MHOROCTypeHcyatoR npnroTOBneHna, ecnn yxe Haato npnrTOBneHne 6Ioua.

HcnoJb3OBaHne
N3MeHeHne yOca
1)Ha nncnnee noBnaeTcra IKOHka yacob ①, HauHHaOT MmAtb cHpbl, 06o3Haayoune yac.
2)Повернite pyky Do HxHoro 3HaueHnY qaca.
3) NpntBepnTe HaxaTne KhoNk SET.
4) BbnoHnHe aHaNoRnHbIe DeNCTBnIa HAcTPOkMnHyT.

HactpoKa eHHnCbI n3MepeHnA
YCTAHOBNTe eINHnCbl N3Mepenna TemnepaTpyb IN BECa B COOTBcTCTBnC npNBedeHHo Hxke Ta6nuei.
CLJIA ^ yHT

ApKocTb nOcBETKn HcPJIe
I03BONJET BbI6pATb yPOBeHb IAPKOCn DnCnJIeB COOTBETCTBn CO CNeDyUoJe TApNuei:
Ee MoXHO OTKIOUHTb (OFF) TOnbKO IJnA yHKcI npiroTOBJeHn, KOtOpbie He IcNoJIb3yOT peKIM MmKpOBONHOBNeu.

TyaHDoH MnIeKaHTueH AnnnaHue Ko. Tn,
N6IOH AH Poy, B3u3rao, UyHne, 528311
ΦωaHb, ΓaHdOH, Ktα.
Pnpmep:SN4030500011
Iata n3rtoBnene: 40305,To ectb 5 MapTa 2014 r.
Instruktioner

VIGTIGE SIKKERHEDSADVARSLER L&S GRUNDIGT OG OPBEVAR TIL FREMTIDIG BRUG
1 Instruktioner
Jnlll Jnlll clll lalall g Jncl I aclil aai 1 aclil aiai y Iauiy I aii I aii I aii I aii I aii I aii I aii I aii I aii I aii I aii I aii I aii I aii I aii I aii I aii I aii I aii I aii I aii I aii I aii I aii I aii I aii I aii I aii I aii I aii I aii I aii I aii I aii
中
Cilggi Cilai jie Cilalill Jy
ll aiaa all sall no ydlall aiall g blll
jLJLJnJnJnJnJnJnJnJnJnJnJnJnJnJnJnJnJnJnJnJnJnJnJnJnJnJnJnJnJnJnJnJnJnJnJnJnJnJnJnJnJnJnJnJnJnJnJnJnJnJnJ
江zai 之
aal l 1 1 1 1 1

jgl
法一:
gJ gJ gJ gJ gJ gJ gJ gJ gJ gJ gJ gJ gJ gJ gJ
.
JST
ai + 1 = ai + a_i
ab = ( a1 + a_2) = 2
1
.
( x^ ( x) - y) = - 1x^ + 2y^
J 1 J 1 J 1 J 1 J 1 J 1 J 1 J 1 J 1 J 1 J 1 J 1 J 1 J 1 J 1 J 1 J 1 J 1 J 1 J 1 J 1 J 1 J 1 J 1 J 1 J 1 J 1 J 1 J 1 J 1 J 1 J 1 J 1 J 1 J
:
1 (J)
biill .(gabll aIac 1.《PLUS》
gabla cdilgagaii 1c
2.
( 2) Sn = na1 + ( n - 1) S_n - 1
1 1

A
( 1 + u) = u1 + u + u( 1 + u) u >

#
g 11111111111111111111111111111111111111111111111111111111111
jll jll l 13
/ jii j j bll
(13) (START/STOP)
J

gbi 1
gblgblgblgblgblgblgblgblgblgblgblgblgblgblgblgblgblgblgblgblgblgblgblgblgblgblgblgblgblgblgblgblgblgblgblgblgblgblgblgblgblgblgblgblgblgblgblgblgblgblg
#
( 1 + u) = u1 + u + u( 1 + u) u >

(C)
3
aillg k jlll jll g
aill aillie cllal l 1
3.1
·
a
j_4 = 8
A
e 1
i j 1
.
| + | ≈ | + | ≈ | + | ≈ | ≈ | (C) | |
| ✓ | X | X | ✓ | ✓ | ✓ | (1)x | ||
| ✓ | XX | X | ✓ | ✓ | X | (2) (3) | ||
| ✓ | X | X | ✓ | ✓ | ✓ | (4)x | ||

#
| الله�� الله�� الله�� الله�� الله�� الله�� الله�� الله�� الله�� الله�� الله�� الله�� الله�� الله�� الله�� الله�� الله�� الله�� الله�� الله�� الله�� الله�� الله�� الله�� الله�� الله�� | الله�� الله�� 14 |
| الله�� الله�� 15 | |
| الله�� الله�� 16 | |
| الله�� الله�� 17 | |
| الله�� الله�� 18 |
2.5 (E)
aaiii 1i
aalalalalalalalalalalalalalalalalalal
(15)
1 1

aagil
213 (A)
212(A
(6)
j 1 j 1 j 1 j 1 j 1 j 1 j 1 j 1 j 1 j 1 j 1 j 1 j 1 j 1 j 1 j 1 j 1 j 1 j 1 j 1 j 1 j 1 j 1 j 1 j 1 j 1 j 1 j 1 j 1 j 1 j 1 j 1 j 1 j 1 j
(7)
Jd j 1000000000000000000000000000000000000000000000000000000000000000000000
(8)
4a2g 5glua 5pab 5b 3i i
1jll gag .gall jg 1
gaa aaaa 62g 6jll g 6ll 6
(9)
j 1 j 1 j 1 j 1 j 1 j 1 j 1 j 1 j 1 j 1 j 1 j 1 j 1 j 1 j 1 j 1 j 1 j 1 j 1 j 1 j 1 j 1 j 1 j 1 j 1 j 1 j 1 j 1 j 1 j 1 j 1 j 1 j 1 j 1 j
aalaaai aaiiaai 1aiai iaii pi

(2)
ylll lal jglal alall
·
.
(4)
1 1 1 1 1 1 1 1 1 1 1 1 1 1 1 1 1 1 1 1 1 1 1 1 1
(5)
aagai iiai 1g jg jgl 1g jgl g

/

(A)
aLill 1
1
m = 311
S OBC = S COD + S_ BOC
山
四四四
aaiie 1
aaii ciaal gall
50~240-230
1450
900
1000-950
2100-2000
2
j
G
g 1
= ( x1,y1) , = ( x2,y2)

1.7
jwa 12bww jii
1(a)
1
85
jgl jglll gblll
30 2
20 2
.0gla
.
·
存在 x,y ( ab,52ab)
jalil
aagaaal jy Jyj yj.
jlll jlll l 1
21.
22 22 22
aill 10000000000000000000000000000000000000

i
a 1
y
La.
J 1
J !
iIolll 1
j
a
(”ailll
J 1
iL

- 1
()
4" 1

C
1.5
j
J 1
i111 111
j 1 j 1 j 1 j 1 j 1 j 1 j 1 j 1 j 1 j
a_4 = 12
Jaaal, aaiall gao jia jajn
1
1
1
. 1. ( a + b) ( a^2 - ab + b^2) = a^3 + b^3 .
yla 111 111 111 111 111

Smeg ggo no 1aill .山jz jS.《www.smeg.com》
15 131 aalll jaoe laol jgeall Jai
ai = bi = 1
Jia aai bll jao ne jall Jai 45jai all 1jai yjai yjai g jai all
a
1.6 jiee
1
2012/19/
.EU
1
J 1 J 1 1 1 1 1 1 1 1 1 1 1 1 1 1 1 1 1 1 1 1 1 1 1 1 1 1 1 1 1 1 1 1 1 1 1 1 1 1 1 1 1 1 1 1 1 1 1 1 1 1 0
J
J
J
J
J
J
J
J
J
J
J
J
J
J
J
J
J
J
J
J
J
J
J
J
J
J
J
J
J
J
J
J
J
J
J
J
J
J
J
J
J
J
J
J
J
J
J
J
J
J
J
J
J
J
J
J
J
J
J
J
J
J
J
J
J
J
J
J
J
J
J
J
J
J
J
J
J
J
J
J
J
J
J
J
J
J
J
J
J
J
J
J
华
L

J 1 J 1 J 1 J 1 J 1 J 1 J 1 J 1 J 1 J 1 J 1 J 1 J 1 J 1 J 1 J 1 J 1 J 1 J 1 J 1 J 1 J 1 J 1 J 1 J 1 J 1 J 1 J 1 J 1 J 1 J 1 J 1 J 1 J 1 J
y j 111111111111111111111111111111111111111
aai 14y (g y gall Jol5ll g wll
iL 111 111 111 111 111 111 111 111 111 111 111 111 111 111 1
j1aiai 1
.
.
S Cull = a1S_
aall 1n jy y
·
1 1 1 1 1 1 1 1 1 1 1 1 1 1 1 1 1 1 1 1 1 1 1 1
.
aal lal 120
yclg yll aabbl aee al g 1
. gall jg gall llg 2
a 1
i 1
dglwly aolll aiall lilll 1 jaii jay
lc jall slwyl/laill alg iag g
aaiall ic www.smeg.com yggo
.

C
a 1 a 1 1 1 1 1 1 1 1 1 1 1 1 1 1 1 1 1 1 1 1 1 1 1
.
aai 1 g aai gaiy 1 g y iiy
1 1
15 jill sic 42.89
j kui bi wll iji
j 2 jai jai jai jai jai jai
y
aalll lgyg yall gaiy ggyg yall g y
1.3 j
()
1
S APQ = S AQP + S_ PQQ
j_4 = 2
.
( xt^2 - x) t + xy^2 = ( x) f^
1 1
pabll 1iic gggssll jg sall
.
j6 = j1a
- novalii
·
jsL
·
·
奇及小 a_0 < a < 90
…
华
jll jll jll jll jll jll jll jll jll jll jll jll jll jll jll jll jll jll jll jll jll jll jll jll jll jll jll jll jll jll jll jll jll jll jll jll jll jll jll jll jll jll jll jll jll jll jll jll jll jll jll
olalldiy 1g jdlrall eab! jz
pldiy g jgljgl jzgl jzgl
. wlae jclbc g jgljgl jilb
8 10 10 10
Jl 8 10 10
Jl 8 10 10
Jl 8 10 10
Jl 8 10 10
Jl 8 10 10
Jl 8 10 10
Jl 8 10 10
Jl 8 10 10
.
J 8 J 8 J 8 J 8
8 1y1 Jab yla! 1c yal .jall plaiuol cii
.
a1i 1111 101 101 101 101 101 101 101 101 101 101 101 101 101 101 101 101 101 101 101 101 101
1
Jg jglal 1e jge Jaiuall Jd Jg piaiial Jglia g Jolc blaill .jglal pliaiul
1.1 2gaaal
1 1
y 11 11
1
·
jglal j 1
- 1
- iJlalll 1iJIaJI 1IJIaJI 1IJIbJI 1IJIbJI 1IJIbJI 1IJIbJI 1IJIbJI 1IJIbJI 1IJIbJI 1IJIbJI 1IJIbJI 1IJIbJI 1IJIbJI 1IJIbJI 1IJIbJI 1IJIbJI 1IJIbJI 1IJIbJI 1IJIbJI 1

- IMPORTANT SAFETY INSTRUCTIONS READ CAREFULLY AND KEEP FOR FUTURE REFERENCE
- Instructions
- Intended use
- General safety instructions
- Instructions
- Caution when using this appliance
- Information on power consumption in off/stand-by mode
- Connecting the appliance
- Manufacturer liability
- Disposal
- Instructions / Description
- Installation
- Appliance description (Fig. A)
- Before first use
- Danger of burns High appliance temperature
- Description
- Description of the parts (Fig. A)
- Light (2)
- Fan (4)
- Roller ring (5)
- Description of accessories (Fig.A)
- Turntable (6)
- Grill rack (7)
- Crisp plate (8)
- Air fryer basket (9)
- Description of the controls (Fig. D)
- START/STOP button (10)
- Navigation knob (11)
- Chef Menu button (12)
- Plus button (13)
- Back button (14)
- Display (15)
- Description of the display (Fig. E)
- Display icons
- Power/weight indicator (19)
- Clock and timer (20)
- Temperature and recipe number (21)
- Use
- Use
- First use
- Using the accessories (Fig. C)
- How to use the microwave oven
- Setting the time
- Selecting the cooking functions
- Selecting Chef Menu functions
- Changing the cooking settings
- Preheating
- End of cooking
- Quick Start Function
- +30 seconds function
- Multi-step Function
- Settings Menu
- Child lock
- Sound
- Clock format
- Modifying the time
- Setting the units of measurement
- Display brightness
- Turntable setting
- Cleaning and maintenance
- Cleaning and maintenance
- Caution
- Cleaning the surfaces
- Ordinary daily cleaning
- Food stains or residues
- Cleaning the accessories
- Cleaning the door glazing
- Cleaning the oven cavity
- What to do if...
- IMPORTANTS AVERTISSEMENTS DE SECURITE LIRE ATTENTIVEMENT ET CONSERVER POUR Toute UTILISATION FUTURE
- Technical specifications
- Quick Start-function
- Antes de usar, verifies everything components.
- ПЕДУПЕЖДECHNE:
- HctpyKuH
- MepbI npedoctopoxhoctn OTHOCHTeNbHO daHHoro np6opa
- HhOpMaun O notpe6JeHHN 3Heprn B BBIKIOUeHHOM pexHMe/peXHMe OxHaHH
- MepbI npeOCTOpoxKHOCTN/OncaHne
- MoHTax
- OnncaHne np6opa (Pnc.A)
- BeHTnIaTOp (4)
- BpaauoueecKaJbO (5)
- OnncanHe akceccyapob (Pnc.A)
- Bpaaioaia TapeIka (6)
- PnnoHrapewetka (7)
- Tapeika crisp (8)
- Kop3nHa IJIa BO3yUHOn XapKn (9)
- Onncahne
- OnncanHe opraHOB ynpabIeHn (Pnc.D)
- Khoonka START/STOP (10)
- Pukka Hauhraa (11)
- KhoNka MeHIO weΦ-nOBapa (12)
- Khonka Plus (13)
- Khonka Back (14)
- Диспел (15)
- OnncanHe nncnpe (Pnc.E)
- IkoHKnHa dncnnee
- Temnepatypa n Homep pecenta (21)
- HcnoJb3OBaHne
- NcnoJb3OBaHne
- IepBoe nCnoJb3OBaHne
- KaK noJb3OBaTbCRA MKNKPOBOJIHOBOI NeYbIO
- YcTahOBKa TeKyuIero BpeMeHH
- Bb6op fYHKun npnroTOBneHna
- rnilb
- KoHBeKuHa
- Pa3mopaxnBaHne
- PpeBapnteIbHbI HarpE
- OkoHuaHne npHroTOBJeHHa
- Функцябьсгро nycka Quick Start
- ΦyHKu+30ceKyHd
- ФункцяЯ
- MHOROCTyneHqAToro
- PnHrTOBLeHHa
- MeHIO HacTpoek
- BloKnpoBka ot deTe
- 3BykoBbIe CnHahJIbI
- N3MeHeHne yOca
- HactpoKa eHHnCbI n3MepeHnA
- ApKocTb nOcBETKn HcPJIe
- Instruktioner
- VIGTIGE SIKKERHEDSADVARSLER L&S GRUNDIGT OG OPBEVAR TIL FREMTIDIG BRUG
- Instruktioner
- A
- ( 1 + u) = u1 + u + u( 1 + u) u >
- #
- gbi 1
- (C)
- aagil
- (A)
- 212(A
- (6)
- (7)
- (8)
- (9)
- (2)
- (4)
- (5)
- /
- (A)
- 1.7
- C
- 1.5
- 华
- L
- 1
Brand : SMEG
Model : MOC02EGMEU
Category : Microwave Oven