Inspex 4000 - Inspection camera Duramaxx - Free user manual and instructions
Find the device manual for free Inspex 4000 Duramaxx in PDF.

User questions about Inspex 4000 Duramaxx
0 question about this device. Answer the ones you know or ask your own.
Ask a new question about this device
Download the instructions for your Inspection camera in PDF format for free! Find your manual Inspex 4000 - Duramaxx and take your electronic device back in hand. On this page are published all the documents necessary for the use of your device. Inspex 4000 by Duramaxx.
USER MANUAL Inspex 4000 Duramaxx
natural_image
Green circuit board pattern with white traces and connectors (no text or symbols)Inspektionskamera
text_image
DURAMAXX DC LPVIN VIDEOOUT CAM SN: 20140text_image
Technical diagram of a scientific instrument with labeled parts including probe, test tube, and calibration devicetext_image
Technical diagram of an open portable electronic device with labeled components and a separate screen setup for display or testing.text_image
Technical diagram of a mechanical component with numbered parts and directional arrows indicating motion or force.Fernbedienung
text_image
Diagram of an experimental setup with labeled components including a test tube, a coil, and cable ends, plus a magnified view of the coil.text_image
Schritt 3 Storm Codec 6.09.15 (Final) Setup Welcome to the Storm Codec Installation Wizard Storm Codec is a popular Codec Pack with useful tools, this installation wizard will guide your installation of it. We strongly recommended that you exit all Windows programs before running this setup program. Click Cancel to quit the setup program, then close any programs you have running. Click Next to continue. Next > CancelSchritt 4

text_image
Storm Codec 6.09.15 (Final) Setup License Agreement Please review the license terms before installing Storm Codec. (1).Storm Codec: As a addon & enhance of Windows Media Player,Storm Codec provide a solution to most popular media files, streams and VCD/DVD, it can play RealMedia, QuickTime, MPEG-2, MPEG-4 (DivX/XviD/3ivx, MP4, AVC/H264...), ratDVD, AC3/DTS, VP3/VP6, Indeo, XVD, Theora, Subtitles, OGG/OGM, Matroska, APE, FLAC, TTA, AAC, MPC, Voxware, 3GP/AMR... without any other Media Player (But latest Windows Media Player it recommend for the new Windows Media format). (2).Installation Mode: 1. Typical: Install all modules of Storm Codec, it's for users who hs no special requests. If you accept the terms of the agreement, click I Agree to continue. You must accept the agreement to install Storm Codec. 2006-09-15 by Jain & Ring? < Back I Agree CancelSchritt 5

text_image
Storm Codec 6.09.15 (Final) Setup Current Version detected Please decide what to do. Current Version of Storm Codec was found in your system, Please select your choice then press [Next] to continue. Add/Reinstall components (Repair) Uninstall Storm Codec 2006-09-15 by Jain & Ringz < Back Next > CancelSchritt 6

text_image
Storm Codec 6.09.15 (Final) Setup Choose Components Choose which features of Storm Codec you want to install. Typical Player and Tools GSpot 2.60 B00 RealPlayer 10.5 Core QuickTime 7 Core Common Audio/Video Codec ffdshow Audio Support: MPEG/AAC Audio Support: AC3/DTS/LPCM Audio Support: OGG Vorbis Video Support: TSCC Description Position your mouse over a component to see its description. Space required: 65.9MB Check the components you want to install, Click Next to continue. 2006-09-15 by lain & Ringz < Back Next > CancelSchritt 7

text_image
Storm Codec 6.09.15 (Final) Setup Choose Install Location Choose the folder in which to install Storm Codec. Setup will install Storm Codec in the following folder. To install in a different folder, click Browse and select another folder. Click Install to start the installation. Destination Folder #\Program Files\Ringz Studio\Storm Codec\ Browse... Space required: 65.9MB Space available: 1.4GB 2006-09-15 by Iain & Ringz < Back Install Cancel
text_image
Schritt 8 Storm Codec 6.09.15 (Final) Setup Installing Please wait while Storm Codec is being installed. Installing QuickTime 7.13 Codec... Show details
text_image
Schritt 9 Storm Codec 6.09.15 (Final) Setup Completing the Storm Codec Setup Wizard Storm Codec has been installed on your computer. Click Finish to close this wizard. View help onlineAkku aufladen
natural_image
Line drawing of an open medical or scientific kit with a device, tubing, and control panel (no text or symbols)Member of Berlin Brands Group
Handwerkerstr. 11
15366 Dahlwitz-Hoppegarten
Deutschland
natural_image
Symbol of a trash bin crossed with a diagonal line and a horizontal line, representing no waste or disposal (no text or labels)Berlin Brands Group UK Ltd
PO Box 1145
Oxford, OX1 9UW
United Kingdom
Dear Customer,
Congratulations on purchasing this equipment. Please read this manual carefully and take care of the following hints to avoid damages. Any failure caused by ignoring the mentioned items and cautions mentioned in the instruction manual are not covered by our warranty and any liability.
Safety Instructions
- Do not place the device in the rain.
- Do not place any objects filled with liquids, such as vases, on the device.
- Use only the recommended accessories.
- Do not repair the device yourself.
- Consult servicing from qualified service personnel.
- Do not drop metal objects into the device.
Power cord / power supply
- Connect the device only to sockets that correspond to the voltage specified on the device.
- Insert the plug all the way into the socket.
- Do not pull, bend, or place heavy objects on the cable.
- Do not handle the plug with wet hands.
- Grasp the body of the plug when pulling out of the socket.
- Do not use with a damaged power cord or loose outlet.
- Install this unit so that the power cord can be unplugged immediately if a problem occurs.
Small Objects / Packaging Parts
Keep small objects (for example, screws and other assembly materials or memory cards) and packaging parts out of reach of children so that will not be swallowed. Do not let children to play with packaging film: risk of suffocation.
Installation
- Position the device on a dry, flat, waterproof and heat-resistant surface.
- The socket must be readily accessible so that you may disconnect the unit quickly from the circuit in an emergency.
- Do not install or position this unit in a bookcase, built-in cupboard or other narrow space. Ensure good ventilation of the device.
- Do not place the device on amplifiers or other equipment which may become hot. The heat can damage the unit. Do not expose the device to direct sunlight, high temperatures, excessive moisture or unnecessary shocks.
Intended Use
- This unit is used to inspect pipes with a diameter of 25-120mm. It is intended solely for this purpose and must be used for this purpose only. It may only be used in the manner as described in this manual.
- This device is not intended to be used by people with reduced physical, sensory or mental abilities or lack of experience and / or knowledge (including children), unless they are supervised by a person responsible for their safety or if they receive instruction on how the device is to be used. Children should be supervised to ensure that they do not play with the device.
Cleaning
Do not use volatile liquids such as insecticide spray. If too much strong pressure is used when wiping the device clean, surfaces may be damaged. Rubber or plastic should not be in contact with the device over a long period of time.
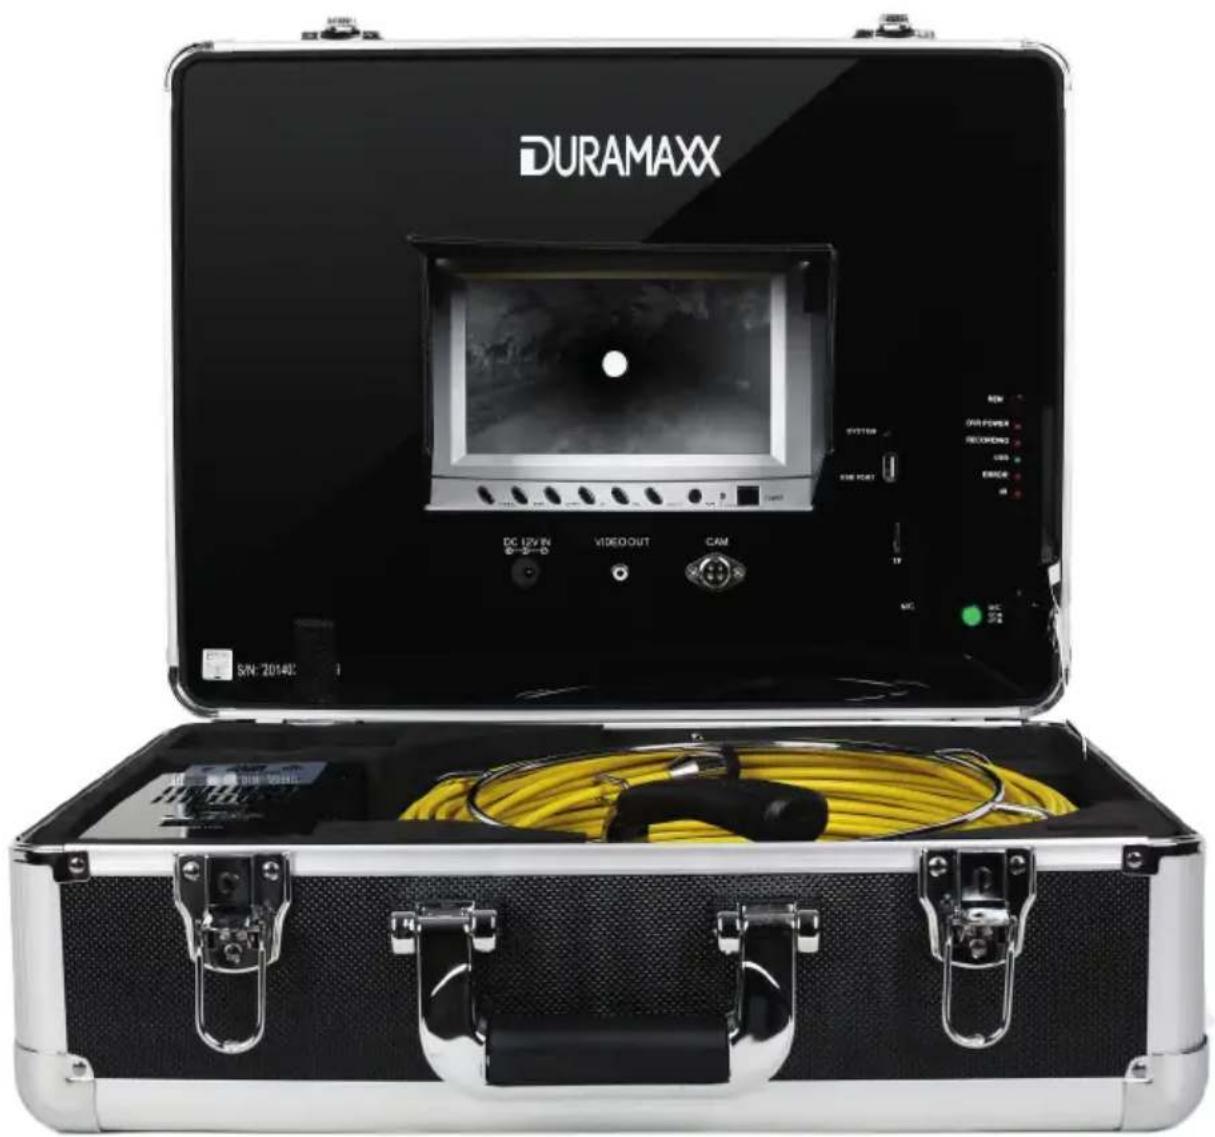
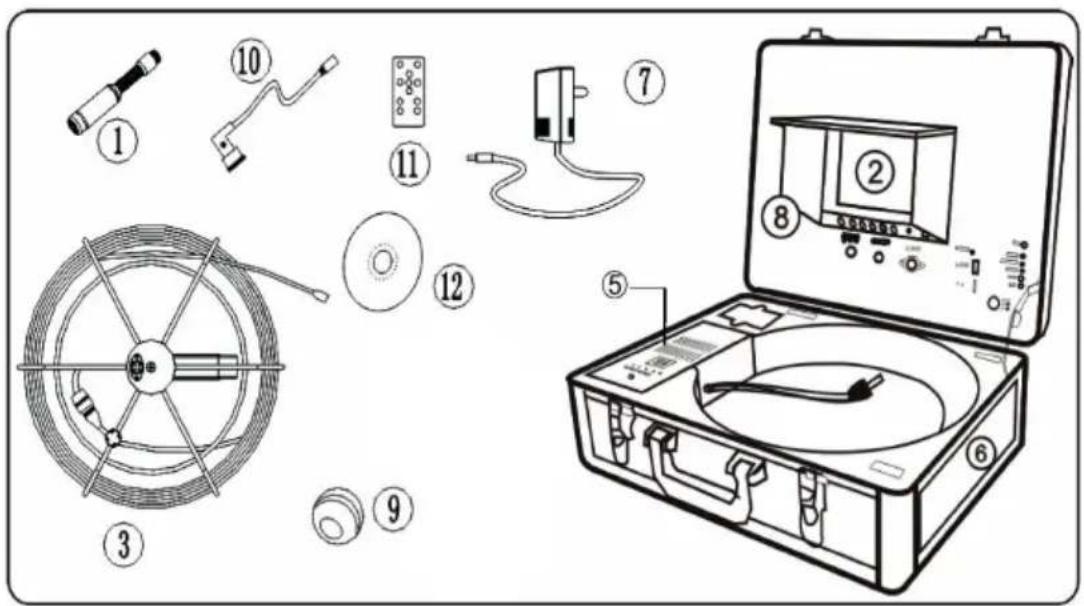
Delivery
text_image
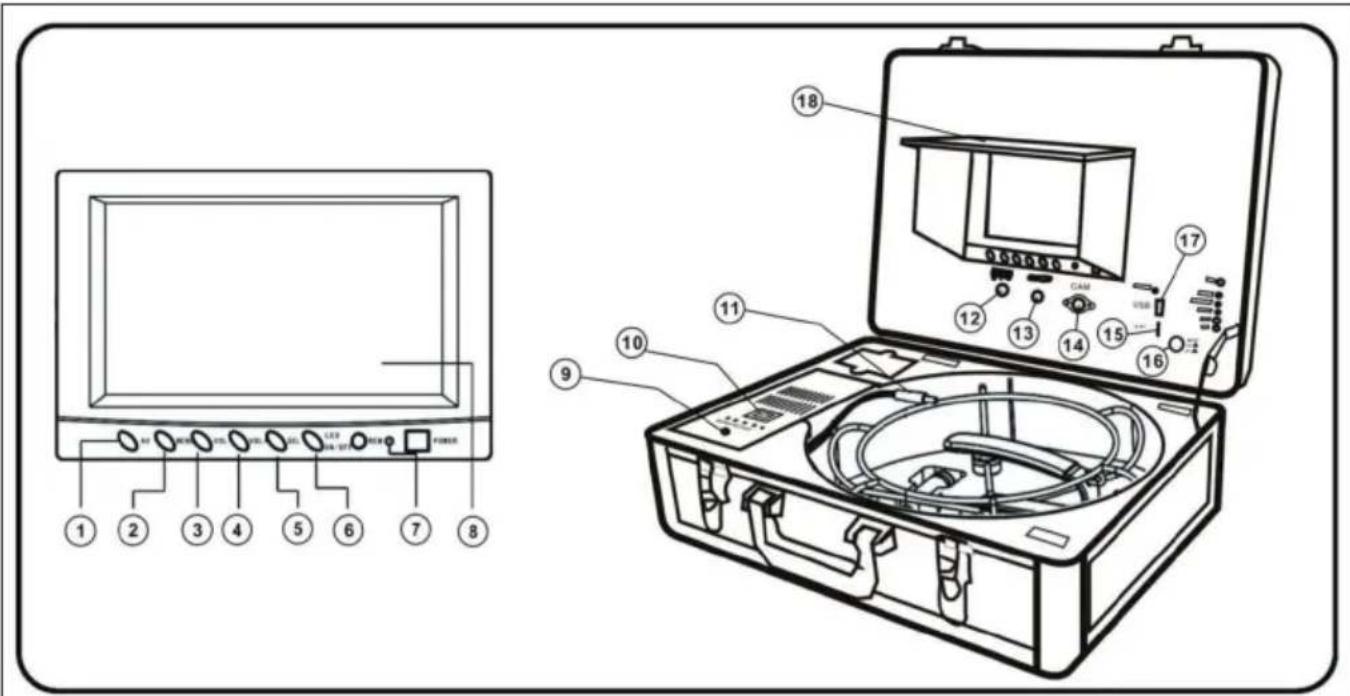
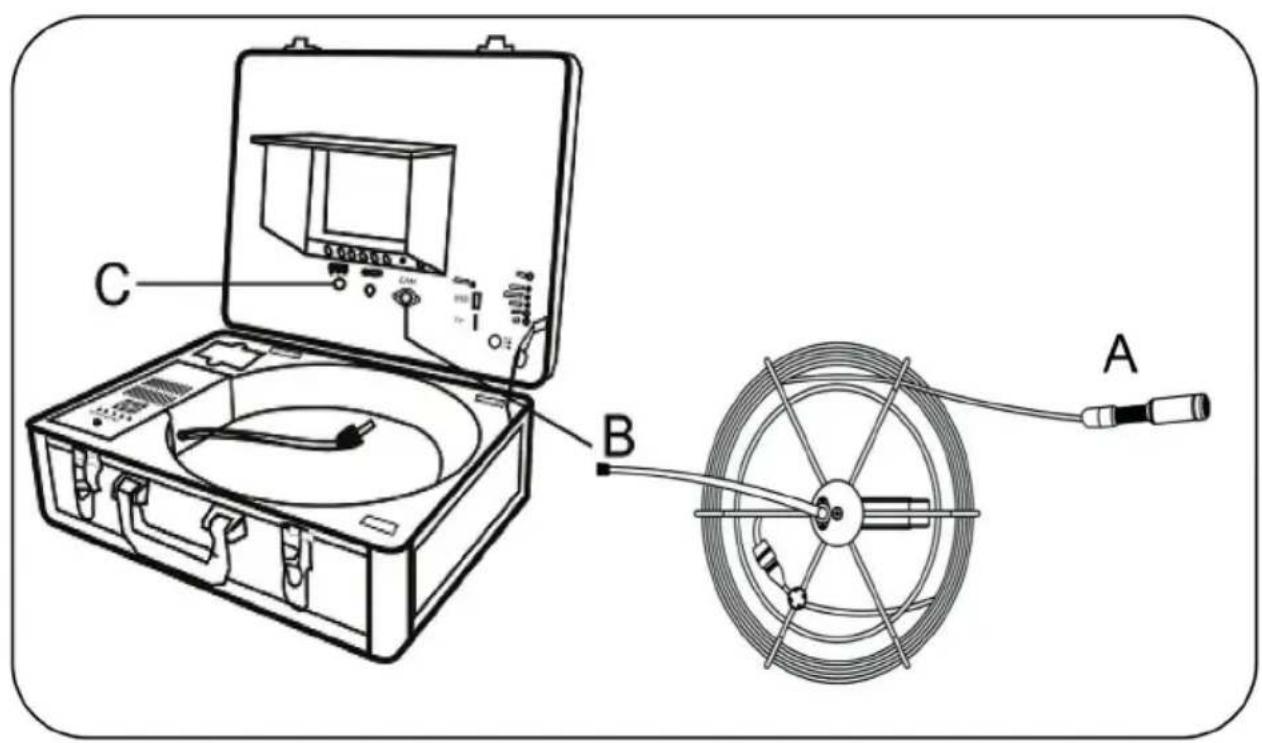
Diagram of a scientific instrument with labeled parts including probe, test tube, and calibration device| 1 Camera 5 Li-ion battery case | 9 EVA | ball protection | ||
| 2 7' monitor 6 Protective case | 10 1.5 | m video cable | ||
| 3 Camera cable and cable reel | 7 DC | 12V charging adapter & power cord | 11 Remote control for recording function | |
| 8 Visor 12 CD-ROM | ||||
Product Description
text_image
Technical diagram of an electronic device with labeled components including power input, display screen, and internal circuit board.| 1 AV selection button 10 Power supply / charging | switch |
| 2 Menu 11 DC 12V output cable | |
| 3 Down button 12 DC 12V input | |
| 4 Up button 13 Video output | |
| 5 Menu up / down 14 Camera connection | |
| 6 LED ON / OFF 15 SD card slot | |
| 7 ON / OFF button 16 Microphone | |
| 8 TFT screen 17 USB port | |
| 9 Charging port 18 Sun protection |
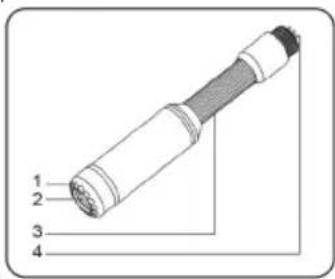
Camera head
1 White LEDs
2 Lens
3 Spring
4 Gold connection
text_image
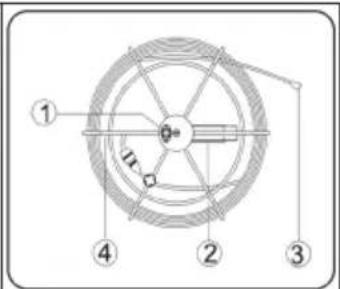
1 2 3 4Cable reel
1 Connection (monitor)
2 Handle
3 Camera connector
4 Cable reel
text_image
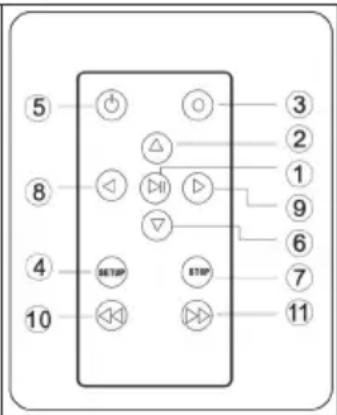
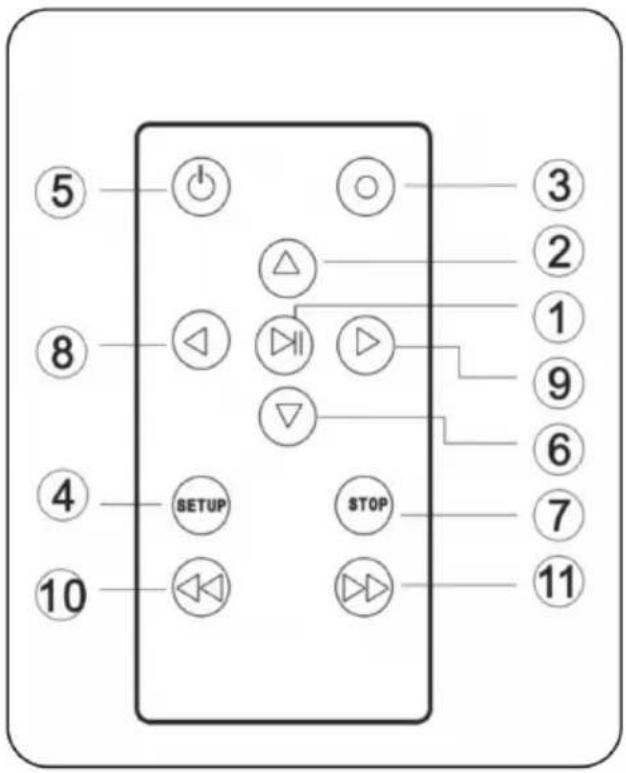
Technical diagram of a mechanical component with numbered parts and directional arrows indicating motion or forceRemote control
1 Enter: to view or play the video
2 Up: navigate up / to the previous menu item
3 REC: start recording
4 Setup: system settings and recording capabilities
5 Power: switch system on
6 Down: navigate down / to the next menu item
7 Exit: exit or stop the current menu item
8 Left: navigation to the left
9 Right: navigate to the right
text_image
⑤ ⑧ ④ 10 ③ ② ① ⑨ ⑥ ⑦ ⑪ ⑬ ⑭ ⑮ ⑰ △ ▽ SETOP STOPGetting Started
- IMPORTANT: When you connect the camera to the monitor, the unit must be switched off. Otherwise it could be damaged.
- Screw the camera to the cable connector (Figure A) and connect the cable reel to the monitor (Figure B).
- Insert the fuse into the connector on the side of the battery compartment.
- With the power cord, connect the power connector of the device with a mains outlet. (If you want to use battery power, connect the DC 12V output cable of the battery with the DC 12V input and press the battery button (you can also charge the battery during operation). Proceed as follows: plug the charging adapter into the socket and charging port. Connect the DC 12 V output cable of the battery with the DC 12V input and press the battery button).
Attention: Pay attention to the proper use of the charging adapter and the power cord. Otherwise the device may fail to operate properly or the battery could be damaged.
- Press the power button on the front of the monitor.
- Press the LED button and adjust the menu brightness.
-
Start the recording when desired.
-
Insert the camera into the pipe and roll up the cable until you have reached the desired depth.
-
Using a video cable, you can the display the image on a larger screen.
-
After completion of the work, remove the camera from the tube. Unscrew the camera and clean it with a clean, soft, dry cloth and return it to its previous position
text_image
Diagram of an experimental setup with labeled components including a test chamber, instrument, and cable spool, showing connections to points A and B.System Menu Settings
| Clock: Setting Set time and date | |
| Time Format Choose between 12h and 24h display | |
| Year Set year | |
| Month Set month | |
| Day Set day | |
| Hour Set hour | |
| Minute Set minute | |
| Second Set second | |
| Language Setting Choose between English and Chinese | |
| System Display software version, | display product version, free and used memory are connected |
| Record Setup Choose between USB and SD as destination memory | |
| Play Mode Choose play mode | |
| Master Reset Press OK to reset the unit | |
| Firmware Update Choose the location where the new firmware will be saved | |
| Browse File Displays all files on the current SD or USB | |
| storage medium USB- oder SD-S | Speichermedium auswerfen (nur wenn ein SD-/USB-Speicher verbunden ist). Führen Sie diesen Menüpunkt aus, bevor Sie ein SD-/USB-Speichermedium entfernen. |
| Remove USB / micro SD Device Eject USB or SD device (only when an SD / USB memory is connected). Use this menu item before removing a SD / USB storage device. | |
Recording Mode
-
Set the Video button on the screen to video.
-
Remove the insulation sheet from the remote control.
-
Press button 5 on the remote control to access the recording system.
-
Insert a USB or SD memory device into the appropriate port. The existing connection is displayed via the display and LED indicator. Note: If you plug in the device before the device is turned on, it may not be recognised by the device. In this case, remove the media device and try again.
-
Press button 3 on the remote control to start recording. The recording LED turns on. Press button 3 again during recording to take a photo of the current image. The photo is saved on the storage medium. (The snapshot function is available only on new models.)
text_image
5 8 4 10 SETUP STOP 3 2 1 9 6 7 11-
Press button 7 on the remote control to stop recording.
-
Press button 1 on the remote control to play the recording back.
-
Press button 4 on the remote control to manage your recordings. Alternatively, you may also press „Play Video“ on the screen. Note: The recording system sometimes requires 10 -20 seconds to calibrate. Therefore, let it run for at least 20 seconds if you would like to record something. The maximum size of the storage medium is 8 GB.
Recording Duration
During recording, the screen shows the recording time and the maximum recording time (up to 3 hours). Press „Setup“ to set the maximum recording (1 - 180 minutes). Standard setting is 60 minutes. When the recording exceeds 60 minutes, the system will create a new recording file.
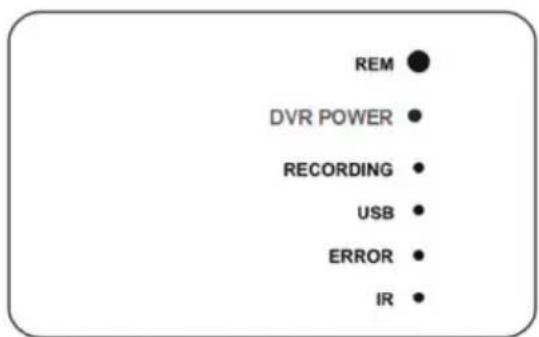
LED Indicators
- REM: remote receiver
- Power: indicates that the device is turned on
- Recording: blinks during recording
- USB: indicates that a USB memory device is connected
- Error: system or USB memory device failure
- IR: flashes when the remote control is used
text_image
REM DVR POWER RECORDING USB ERROR IRScheduled Recording
You may also schedule a recording in advance. Simply select a scheduled recording in the setup menu. The device will ask for the desired time of the recording start. This setting is only valid once. For following recordings it must be set again.
Video format: The resolution is 640 * 480. Videos need about 500MB per hour.
Audio Recording: A microphone on the control panel allows you to record your voice simultaneously while recording a video.
Compatible video formats
• Divx3.11 / DivX4 / DivX5 / MPEG1 / MPEG2
- MPEG4 (MPEG4 video file format: AVI, M4V, MPG, MPEG)
Note: The video player of the unit does not support some downloaded videos.
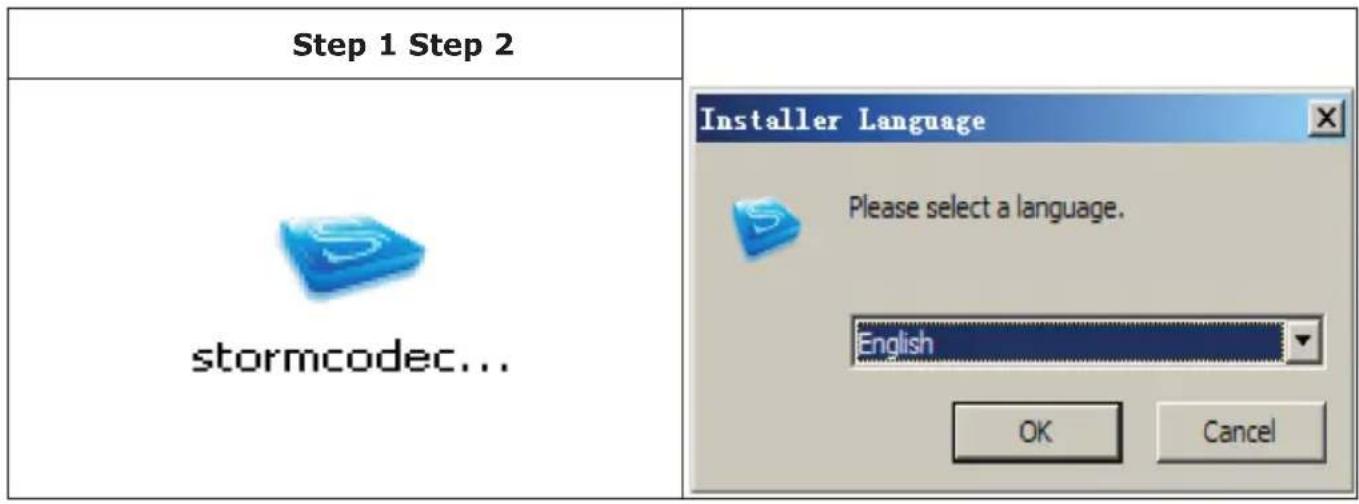
Codec Installation
If you can not play the files on your computer, install the codec software from the CD-ROM that is included with delivery. Alternatively, you may get the software for free at this web address: kmplayer.en.softonic.com/download. Insert the CD-ROM, click the following icon and follow the installation steps as shown in the following images.
text_image
Step 1 Step 2 stormcodec... Installer Language Please select a language. English OK Cancel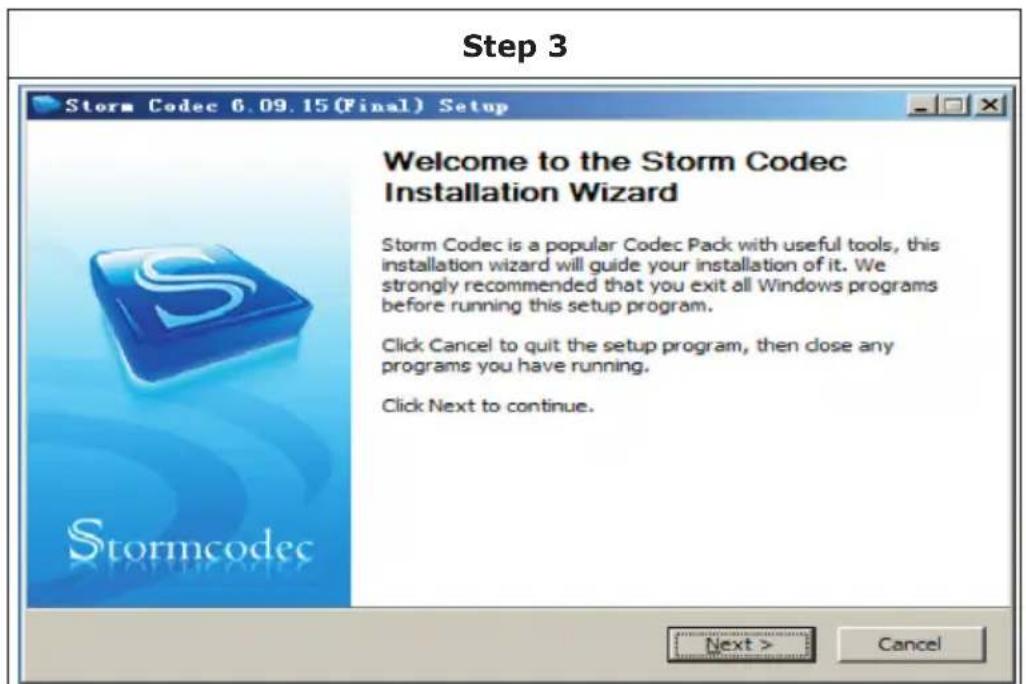
text_image
Step 3 Storm Codec 6.09.15 (Final) Setup Welcome to the Storm Codec Installation Wizard Storm Codec is a popular Codec Pack with useful tools, this installation wizard will guide your installation of it. We strongly recommended that you exit all Windows programs before running this setup program. Click Cancel to quit the setup program, then close any programs you have running. Click Next to continue. Next > CancelStep 4

text_image
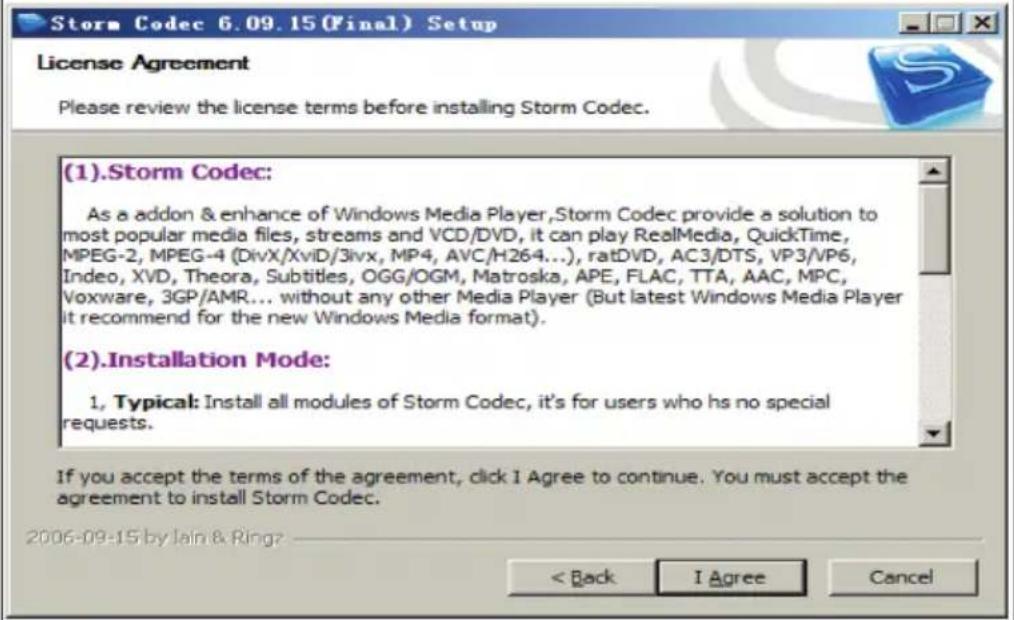
Storm Codec 6.09.15 (Final) Setup License Agreement Please review the license terms before installing Storm Codec. (1).Storm Codec: As a addon & enhance of Windows Media Player,Storm Codec provide a solution to most popular media files, streams and VCD/DVD, it can play RealMedia, QuickTime, MPEG-2, MPEG-4 (DivX/XviD/3ivx, MP4, AVC/H264...), ratDVD, AC3/DTS, VP3/VP6, Indeo, XVD, Theora, Subtitles, OGG/OGM, Matroska, APE, FLAC, TTA, AAC, MPC, Voxware, 3GP/AMR... without any other Media Player (But latest Windows Media Player it recommend for the new Windows Media format). (2).Installation Mode: 1. Typical: Install all modules of Storm Codec, it's for users who hs no special requests. If you accept the terms of the agreement, click I Agree to continue. You must accept the agreement to install Storm Codec. 2006-09-15 by Jain & Ring? < Back I Agree CancelStep 5
text_image
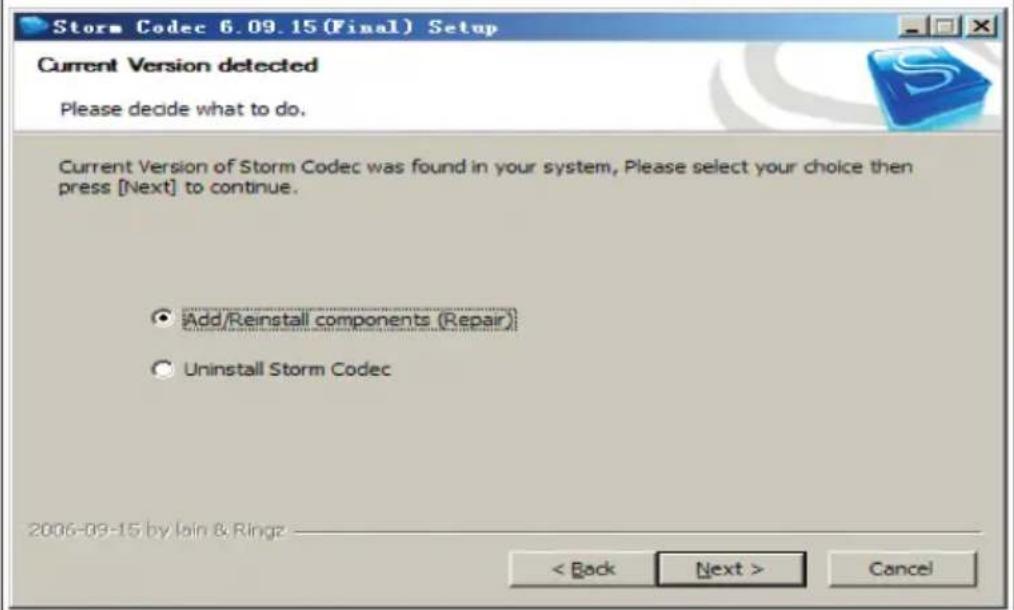
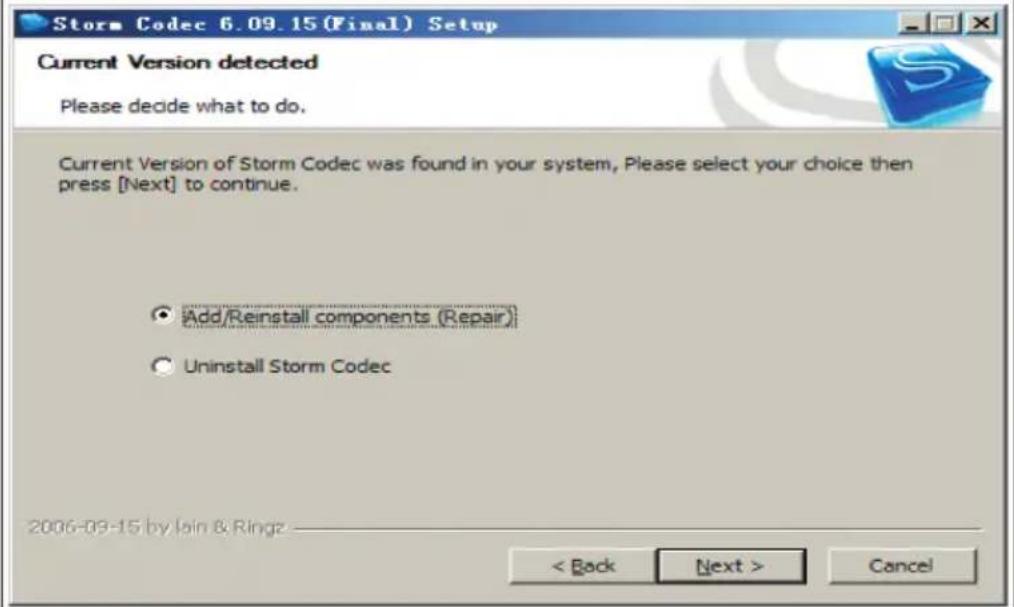
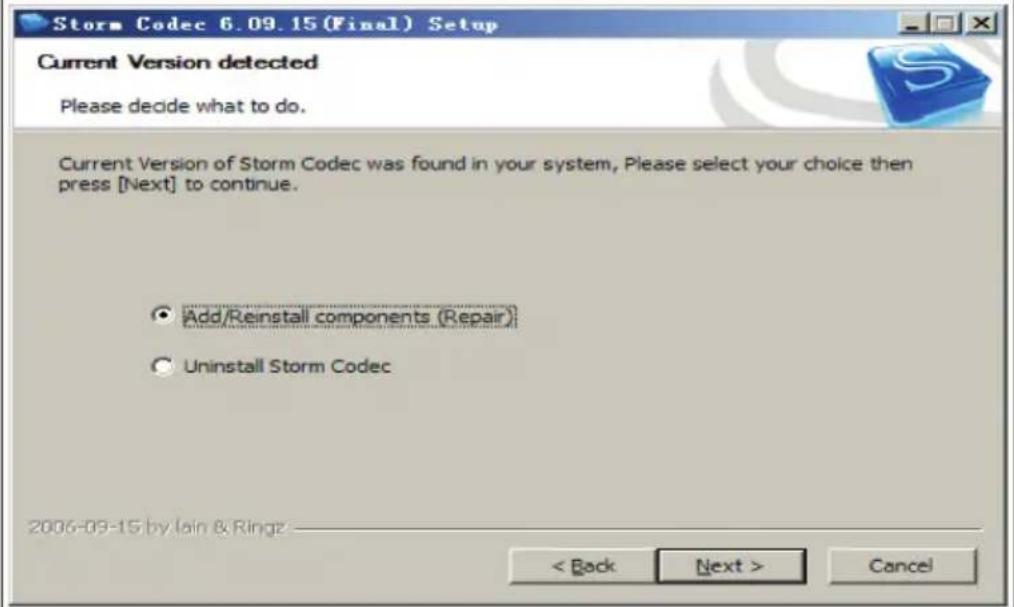
Storm Codec 6.09.15 (Final) Setup Current Version detected Please decide what to do. Current Version of Storm Codec was found in your system, Please select your choice then press [Next] to continue. Add/Reinstall components (Repair) Uninstall Storm Codec 2006-09-15 by Jain & Ringz < Back Next > CancelStep 6

text_image
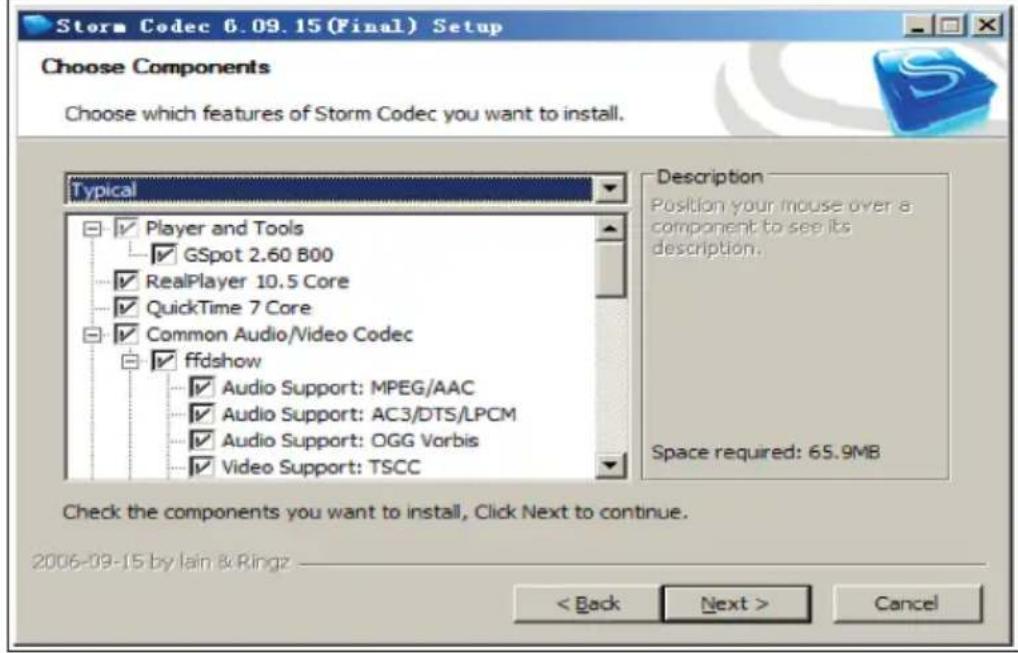
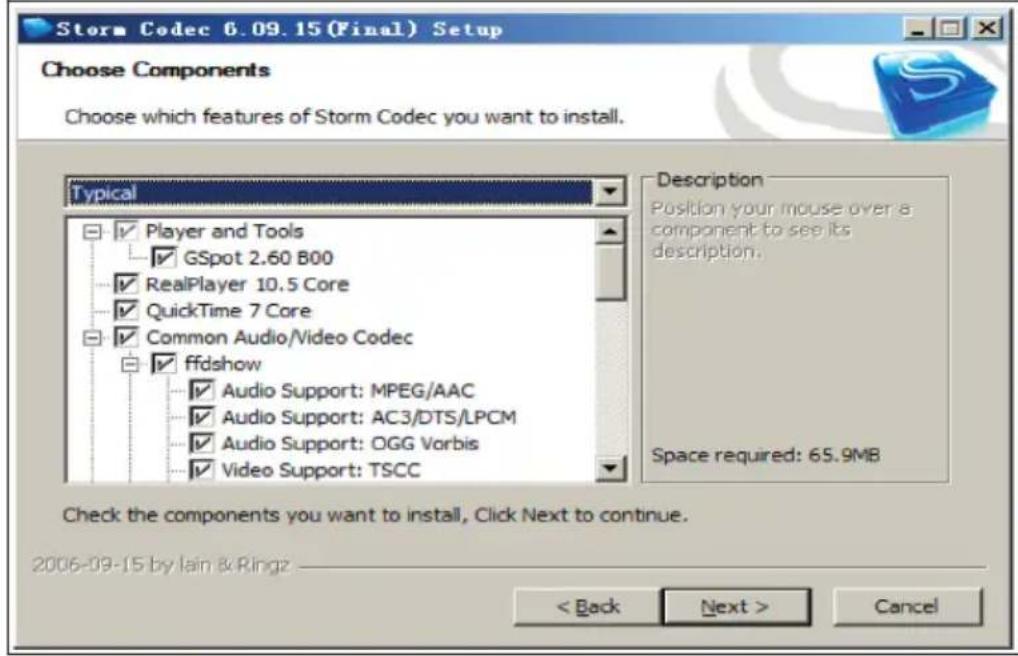
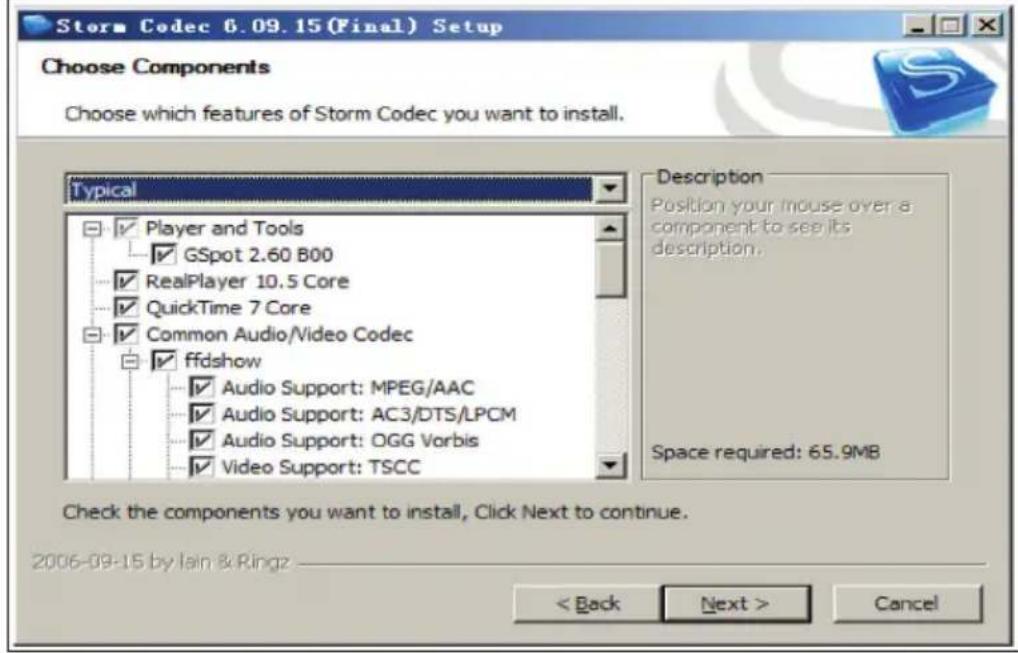
Storm Codec 6.09.15 (Final) Setup Choose Components Choose which features of Storm Codec you want to install. Typical Player and Tools GSpot 2.60 B00 RealPlayer 10.5 Core QuickTime 7 Core Common Audio/Video Codec ffdshow Audio Support: MPEG/AAC Audio Support: AC3/DTS/LPCM Audio Support: OGG Vorbis Video Support: TSCC Description Position your mouse over a component to see its description. Space required: 65.9MB Check the components you want to install, Click Next to continue. 2006-09-15 by lain & Ring2 < Back Next > CancelStep 7

text_image
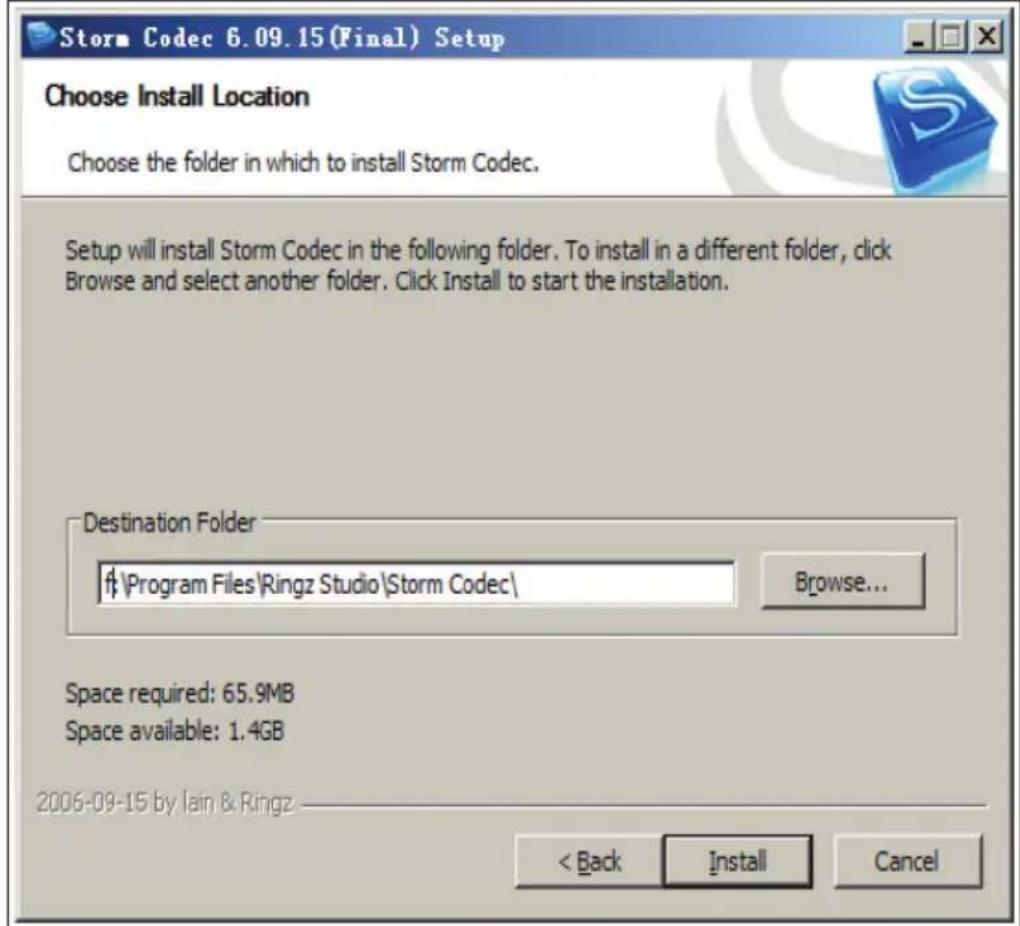
Storm Codec 6.09.15 (Final) Setup Choose Install Location Choose the folder in which to install Storm Codec. Setup will install Storm Codec in the following folder. To install in a different folder, click Browse and select another folder. Click Install to start the installation. Destination Folder #\Program Files\Ringz Studio\Storm Codec\ Browse... Space required: 65.9MB Space available: 1.4GB 2006-09-15 by Iain & Ringz < Back Install Cancel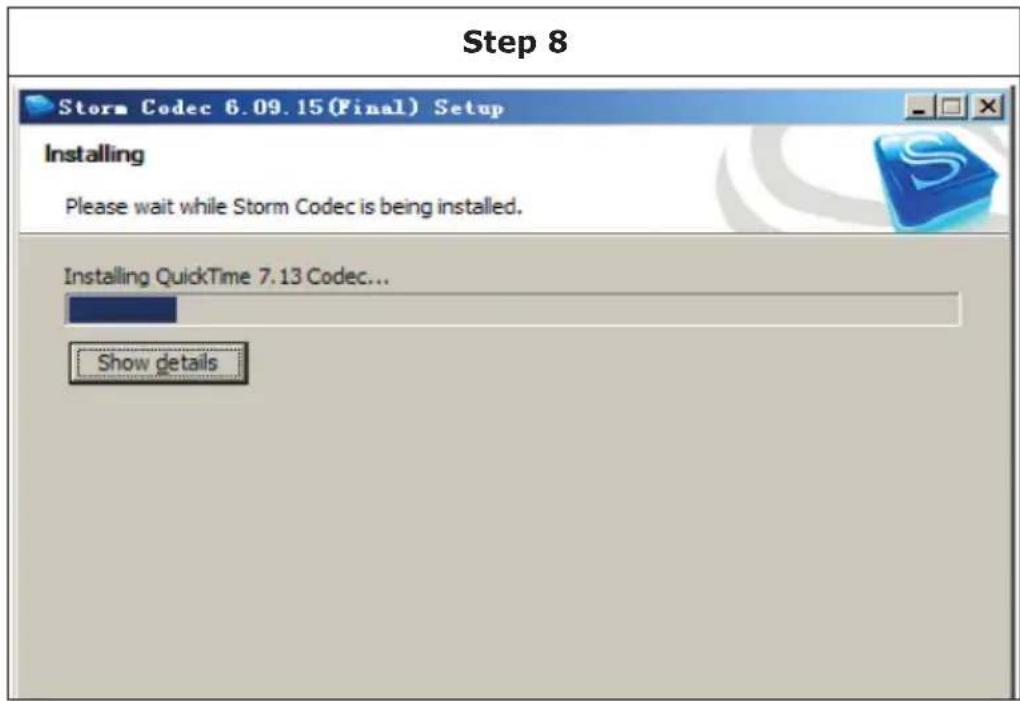
text_image
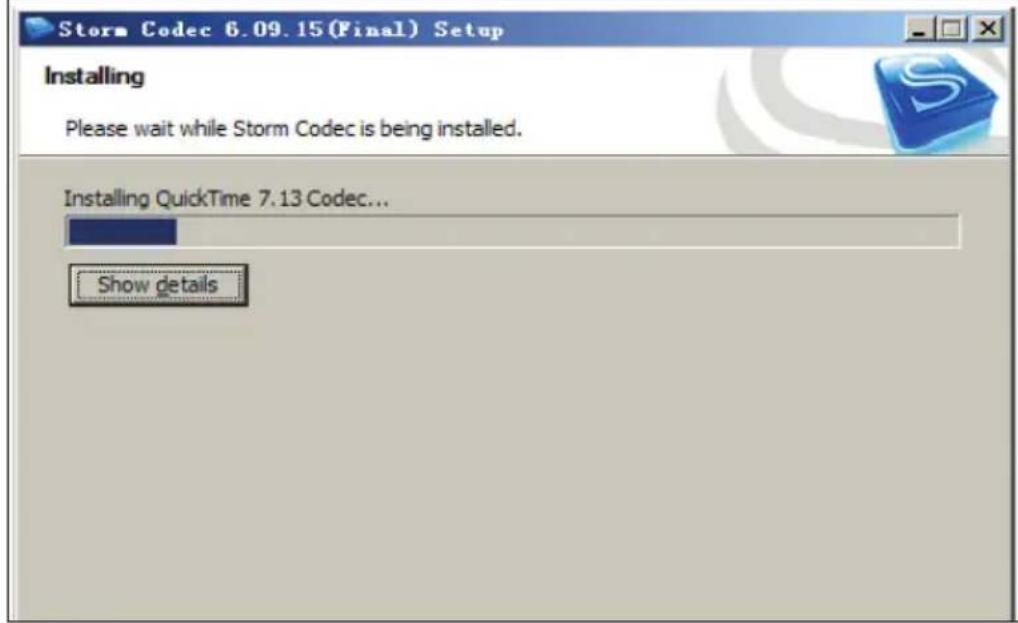
Step 8 Storm Codec 6.09.15(Final) Setup Installing Please wait while Storm Codec is being installed. Installing QuickTime 7.13 Codec... Show details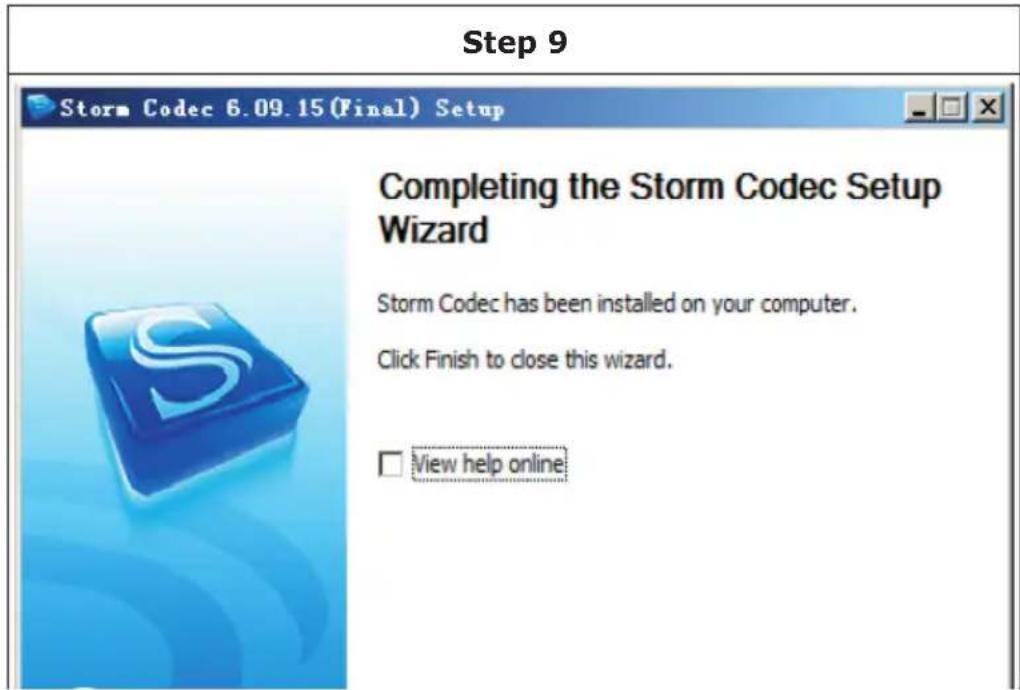
text_image
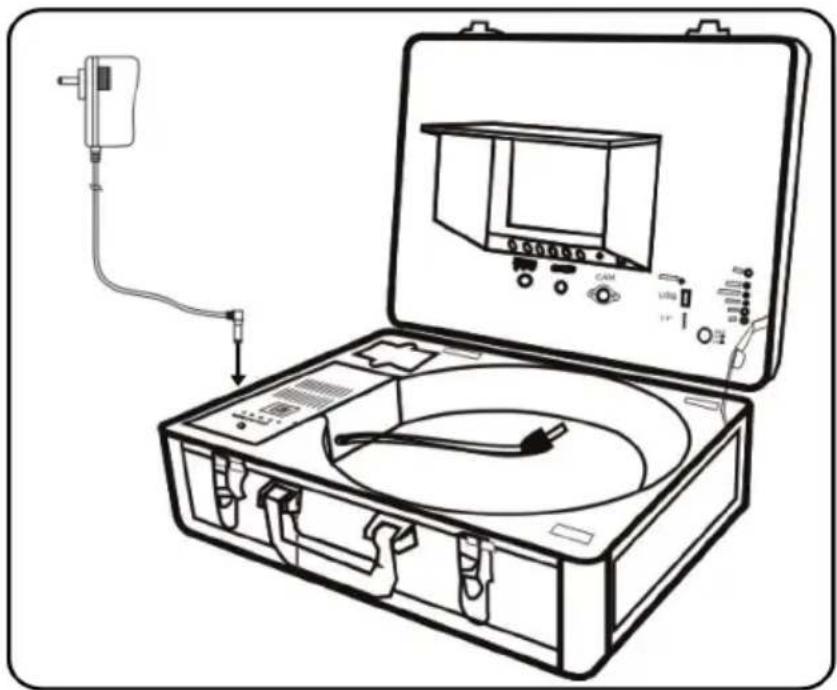
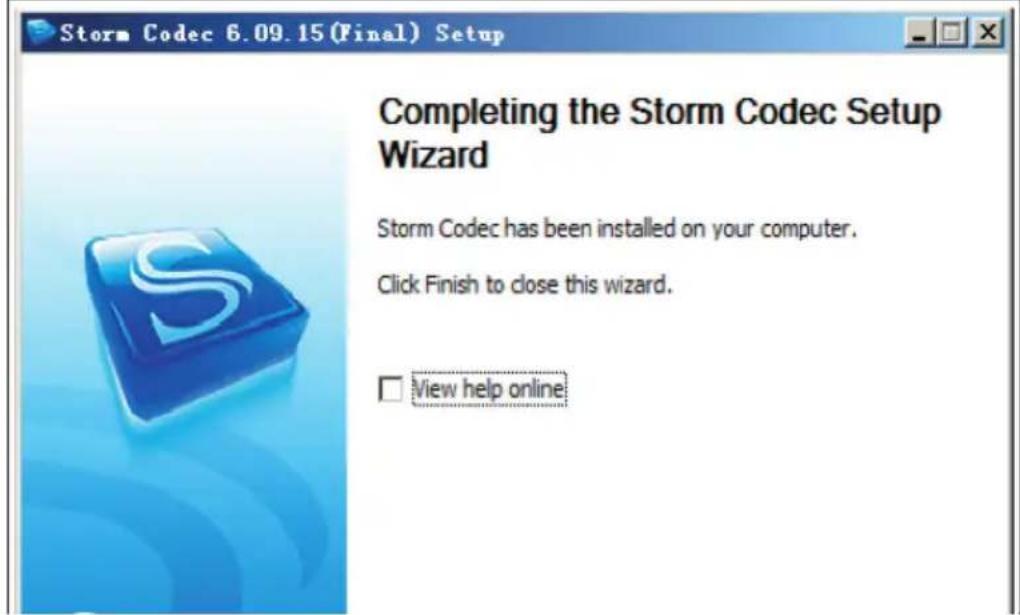
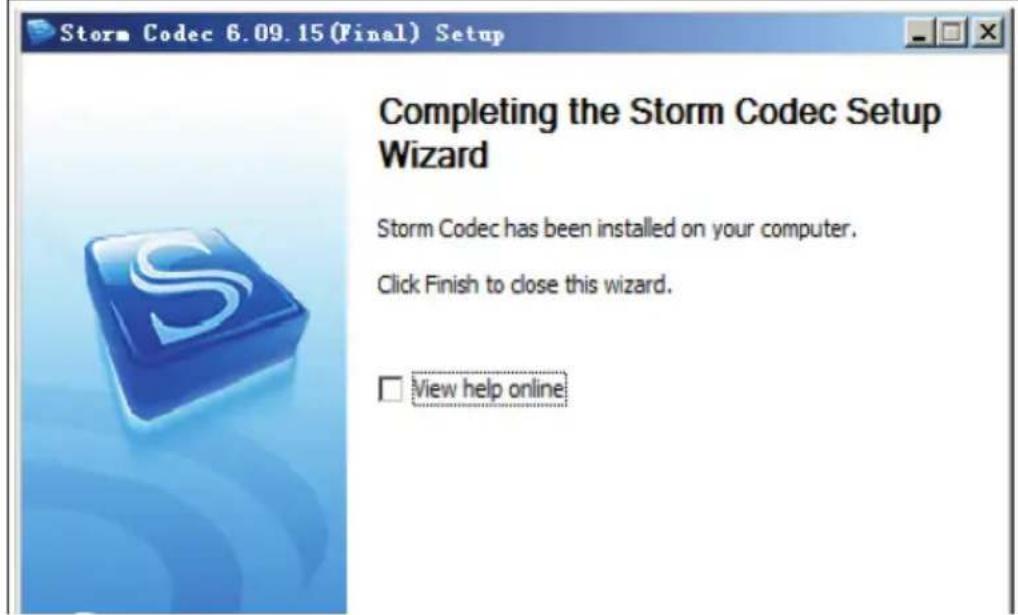
Step 9 Storm Codec 6.09.15 (Final) Setup Completing the Storm Codec Setup Wizard Storm Codec has been installed on your computer. Click Finish to close this wizard. View help onlineRecharge Battery
-
Plug the charging adapter into a mains outlet and the charging port.
-
Press the battery button while the device is switched off. The battery may be charged while the device is turned on and in use. However, a completely discharged battery can only be charged when the device is switched off.
-
The charging LED turns red during charging and turns green when the battery is charged. The charge usually lasts 5-6 hours.
natural_image
Line drawing of an open medical or testing kit with a device, tubing, and control panel (no text or symbols)IMPORTANT NOTE: Do not overcharge the battery. Overcharging can damage the battery and result in leakage of battery fluid.
Troubleshooting
| Problem Possible Cause and Solution | ||
| Blank screen Change | the fuse. | |
| Charge the battery. | ||
| Check the power connection. Connect if necessary. | ||
| No signal Reconnect | the device according to the guide. | |
| Check the camera and screw it into place. | ||
| Clean the connections on camera and the main unit. | ||
| The camera has no light or a weak light | Press the menu button and adjust the LED brightness | |
| No recording Press the | the Video button and go to "Video 2". | |
| Press the power button. The monitor light should be green. | ||
| Use a different USB / SD memory and try again. | ||
| Faulty recording Turn | off the device, restart and try again. | |
| Flickering picture Weak battery. Recharge the battery. | ||
| Incorrect use of charging cables and power cords. Replace the cable. | ||
| Battery recharge does not work | Make sure that you are using the correct cable. | |
DISPOSAL CONSIDERATIONS

natural_image
Symbol of a trash bin with crossed lines indicating no waste, and a solid rectangle below (no text or labels)If there is a legal regulation for the disposal of electrical and electronic devices in your country, this symbol on the product or on the packaging indicates that this product must not be disposed of with household waste. Instead, it must be taken to a collection point for the recycling of electrical and electronic equipment. By disposing of it in accordance with the rules, you are protecting the environment and the health of your fellow human beings from negative consequences. For information about the recycling and disposal of this product, please contact your local authority or your household waste disposal service.
MANUFACTURER & IMPORTER (UK)
CE
Chal-Tec GmbH, Wallstrasse 16, 10179 Berlin,
Germany.
Importer for Great Britain:
Berlin Brands Group UK Ltd
PO Box 1145
Oxford
UK CA
OX1 9UW
United Kingdom
Chère cliente, cher client,
text_image
Diagram of a scientific instrument with labeled parts including probe, test tube, and calibration casetext_image
Technical diagram of an electronic device with labeled components including power input, display screen, and internal circuit board.text_image
① ② ③ ④ ⑤Télécommande
text_image
Diagram of an experimental setup with labeled components including a test tube, cable, and probe, alongside a wire spool.text_image
Étape 3 Storm Codec 6.09.15 (Final) Setup Welcome to the Storm Codec Installation Wizard Storm Codec is a popular Codec Pack with useful tools, this installation wizard will guide your installation of it. We strongly recommended that you exit all Windows programs before running this setup program. Click Cancel to quit the setup program, then close any programs you have running. Click Next to continue. Next > CancelÉtape 4

text_image
Storm Codec 6.09.15 (Final) Setup License Agreement Please review the license terms before installing Storm Codec. (1).Storm Codec: As a addon & enhance of Windows Media Player,Storm Codec provide a solution to most popular media files, streams and VCD/DVD, it can play RealMedia, QuickTime, MPEG-2, MPEG-4 (DivX/XviD/3ivx, MP4, AVC/H264...), ratDVD, AC3/DTS, VP3/VP6, Indeo, XVD, Theora, Subtitles, OGG/OGM, Matroska, APE, FLAC, TTA, AAC, MPC, Voxware, 3GP/AMR... without any other Media Player (But latest Windows Media Player it recommend for the new Windows Media format). (2).Installation Mode: 1. Typical: Install all modules of Storm Codec, it's for users who hs no special requests. If you accept the terms of the agreement, click I Agree to continue. You must accept the agreement to install Storm Codec. 2006-09-15 by Jain & Ring? < Back I Agree CancelÉtape 5

text_image
Storm Codec 6.09.15 (Final) Setup Current Version detected Please decide what to do. Current Version of Storm Codec was found in your system, Please select your choice then press [Next] to continue. Add/Reinstall components (Repair) Uninstall Storm Codec 2006-09-15 by Jain & Ringz < Back Next > CancelÉtape 6
text_image
Storm Codec 6.09.15 (Final) Setup Choose Components Choose which features of Storm Codec you want to install. Typical Player and Tools GSpot 2.60 B00 RealPlayer 10.5 Core QuickTime 7 Core Common Audio/Video Codec ffdshow Audio Support: MPEG/AAC Audio Support: AC3/DTS/LPCM Audio Support: OGG Vorbis Video Support: TSCC Description Position your mouse over a component to see its description. Space required: 65.9MB Check the components you want to install, Click Next to continue. 2006-09-15 by lain & Ring2 < Back Next > CancelÉtape 7

text_image
Storm Codec 6.09.15 (Final) Setup Choose Install Location Choose the folder in which to install Storm Codec. Setup will install Storm Codec in the following folder. To install in a different folder, click Browse and select another folder. Click Install to start the installation. Destination Folder #\Program Files\Ringz Studio\Storm Codec\ Browse... Space required: 65.9MB Space available: 1.4GB 2006-09-15 by Iain & Ringz < Back Install CancelÉtape 8

text_image
Storm Codec 6.09.15(Final) Setup Installing Please wait while Storm Codec is being installed. Installing QuickTime 7.13 Codec... Show detailsÉtape 9

text_image
Storm Codec 6.09.15 (Final) Setup Completing the Storm Codec Setup Wizard Storm Codec has been installed on your computer. Click Finish to close this wizard. View help onlinenatural_image
Line drawing of an open medical or testing kit with a device, tubing, and control panel (no text or symbols)natural_image
Symbol of a trash bin with crossed diagonals and a blank rectangular base (no text or labels)Berlin Brands Group UK Ltd
PO Box 1145
Oxford
OX1 9UW
United Kingdom
Gentile cliente,
text_image
Diagram of a scientific instrument with labeled parts including probe, test tube, and calibration devicetext_image
Technical diagram of an electronic device with labeled components including power input, display, and control casetext_image
① ② ③ ④ ⑤Telecomando
text_image
Diagram of an experimental setup with labeled components including a test chamber, instrument, and cable spool.text_image
Fase 1 Fase 2 stormcodec... Installer Language Please select a language. English OK Cancel
text_image
Fase 3 Storm Codec 6.09.15 (Final) Setup Welcome to the Storm Codec Installation Wizard Storm Codec is a popular Codec Pack with useful tools, this installation wizard will guide your installation of it. We strongly recommended that you exit all Windows programs before running this setup program. Click Cancel to quit the setup program, then close any programs you have running. Click Next to continue. Next > CancelFase 4

text_image
Storm Codec 6.09.15 (Final) Setup License Agreement Please review the license terms before installing Storm Codec. (1).Storm Codec: As a addon & enhance of Windows Media Player,Storm Codec provide a solution to most popular media files, streams and VCD/DVD, it can play RealMedia, QuickTime, MPEG-2, MPEG-4 (DivX/XviD/3ivx, MP4, AVC/H264...), ratDVD, AC3/DTS, VP3/VP6, Indeo, XVD, Theora, Subtitles, OGG/OGM, Matroska, APE, FLAC, TTA, AAC, MPC, Voxware, 3GP/AMR... without any other Media Player (But latest Windows Media Player it recommend for the new Windows Media format). (2).Installation Mode: 1. Typical: Install all modules of Storm Codec, it's for users who hs no special requests. If you accept the terms of the agreement, click I Agree to continue. You must accept the agreement to install Storm Codec. 2006-09-15 by Jain & Ring? < Back I Agree CancelFase 5
text_image
Storm Codec 6.09.15 (Final) Setup Current Version detected Please decide what to do. Current Version of Storm Codec was found in your system, Please select your choice then press [Next] to continue. Add/Reinstall components (Repair) Uninstall Storm Codec 2006-09-15 by Jain & Ringz < Back Next > CancelFase 6
text_image
Storm Codec 6.09.15 (Final) Setup Choose Components Choose which features of Storm Codec you want to install. Typical Player and Tools GSpot 2.60 B00 RealPlayer 10.5 Core QuickTime 7 Core Common Audio/Video Codec ffdshow Audio Support: MPEG/AAC Audio Support: AC3/DTS/LPCM Audio Support: OGG Vorbis Video Support: TSCC Description Position your mouse over a component to see its description. Space required: 65.9MB Check the components you want to install, Click Next to continue. 2006-09-15 by lain & Ring2 < Back Next > CancelFase 7

text_image
Storm Codec 6.09.15 (Final) Setup Choose Install Location Choose the folder in which to install Storm Codec. Setup will install Storm Codec in the following folder. To install in a different folder, click Browse and select another folder. Click Install to start the installation. Destination Folder #\Program Files\Ringz Studio\Storm Codec\ Browse... Space required: 65.9MB Space available: 1.4GB 2006-09-15 by Iain & Ringz < Back Install CancelFase 8

text_image
Storm Codec 6.09.15(Final) Setup Installing Please wait while Storm Codec is being installed. Installing QuickTime 7.13 Codec... Show detailsFase 9
text_image
Storm Codec 6.09.15 (Final) Setup Completing the Storm Codec Setup Wizard Storm Codec has been installed on your computer. Click Finish to close this wizard. View help onlinenatural_image
Line drawing of an open medical or scientific kit with a device, tubing, and control panel (no text or symbols)natural_image
Symbol of a trash bin crossed with a diagonal line and a horizontal bar below (no text or labels)PRODUTTORE E IMPORTATORE (UK)
Produttore:
Chal-Tec GmbH, Wallstraße 16, 10179 Berlino, Germania.
Berlin Brands Group UK Ltd
PO Box 1145
Oxford, OX1 9UW
United Kingdom
Estimado cliente:
text_image
Diagram of a scientific instrument with labeled parts including probe, test tube, and calibration casetext_image
Technical diagram of an open electrical testing device with labeled components and a separate screen setup for display.text_image
Technical diagram of a mechanical component with numbered parts and directional arrows indicating motion or force.Mando a distancia
text_image
Diagram of an experimental setup with labeled components including a test tube, cable, and probe, showing open case and wire connection.text_image
Paso 1 Paso 2 stormcodec... Installer Language Please select a language. English OK Cancel
text_image
Paso 3 Storm Codec 6.09.15 (Final) Setup Welcome to the Storm Codec Installation Wizard Storm Codec is a popular Codec Pack with useful tools, this installation wizard will guide your installation of it. We strongly recommended that you exit all Windows programs before running this setup program. Click Cancel to quit the setup program, then close any programs you have running. Click Next to continue. Next > CancelPaso 4
text_image
Storm Codec 6.09.15 (Final) Setup License Agreement Please review the license terms before installing Storm Codec. (1).Storm Codec: As a addon & enhance of Windows Media Player,Storm Codec provide a solution to most popular media files, streams and VCD/DVD, it can play RealMedia, QuickTime, MPEG-2, MPEG-4 (DivX/XviD/3ivx, MP4, AVC/H264...), ratDVD, AC3/DTS, VP3/VP6, Indeo, XVD, Theora, Subtitles, OGG/OGM, Matroska, APE, FLAC, TTA, AAC, MPC, Voxware, 3GP/AMR... without any other Media Player (But latest Windows Media Player it recommend for the new Windows Media format). (2).Installation Mode: 1. Typical: Install all modules of Storm Codec, it's for users who hs no special requests. If you accept the terms of the agreement, click I Agree to continue. You must accept the agreement to install Storm Codec. 2006-09-15 by Jain & Ring? < Back I Agree CancelPaso 5
text_image
Storm Codec 6.09.15 (Final) Setup Current Version detected Please decide what to do. Current Version of Storm Codec was found in your system, Please select your choice then press [Next] to continue. Add/Reinstall components (Repair) Uninstall Storm Codec 2006-09-15 by Jain & Ringz < Back Next > CancelPaso 6
text_image
Storm Codec 6.09.15 (Final) Setup Choose Components Choose which features of Storm Codec you want to install. Typical Player and Tools GSpot 2.60 B00 RealPlayer 10.5 Core QuickTime 7 Core Common Audio/Video Codec ffdshow Audio Support: MPEG/AAC Audio Support: AC3/DTS/LPCM Audio Support: OGG Vorbis Video Support: TSCC Description Position your mouse over a component to see its description. Space required: 65.9MB Check the components you want to install, Click Next to continue. 2006-09-15 by Iain & Ring2 < Back Next > CancelPaso 7
text_image
Storm Codec 6.09.15 (Final) Setup Choose Install Location Choose the folder in which to install Storm Codec. Setup will install Storm Codec in the following folder. To install in a different folder, click Browse and select another folder. Click Install to start the installation. Destination Folder #\Program Files\Ringz Studio\Storm Codec\ Browse... Space required: 65.9MB Space available: 1.4GB 2006-09-15 by Iain & Ringz < Back Install CancelPaso 8
text_image
Storm Codec 6.09.15 (Final) Setup Installing Please wait while Storm Codec is being installed. Installing QuickTime 7.13 Codec... Show detailsPaso 9
text_image
Storm Codec 6.09.15 (Final) Setup Completing the Storm Codec Setup Wizard Storm Codec has been installed on your computer. Click Finish to close this wizard. View help onlineCargar la batería
natural_image
Line drawing of a medical or scientific instrument kit with open case, internal dial, and connected tubing (no text or symbols)natural_image
Symbol of a trash bin with crossed lines indicating no waste or restriction, and a solid black rectangle below (no text or labels)Berlin Brands Group UK Ltd
PO Box 1145
Oxford
OX1 9UW
United Kingdom