HTF-R1 - Thermostat Duramaxx - Free user manual and instructions
Find the device manual for free HTF-R1 Duramaxx in PDF.

User questions about HTF-R1 Duramaxx
0 question about this device. Answer the ones you know or ask your own.
Ask a new question about this device
Download the instructions for your Thermostat in PDF format for free! Find your manual HTF-R1 - Duramaxx and take your electronic device back in hand. On this page are published all the documents necessary for the use of your device. HTF-R1 by Duramaxx.
USER MANUAL HTF-R1 Duramaxx
natural_image
Green circuit board pattern with white traces and connectors (no text or symbols)natural_image
White industrial water heater device with circular vent and digital display (no visible text or symbols)text_image
20.5°C 3 AWDnatural_image
Line drawing of a rectangular electronic device with circular ports and a handle (no text or symbols)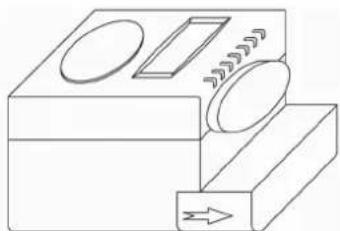
natural_image
Simple line drawing of a mechanical device with no text or symbols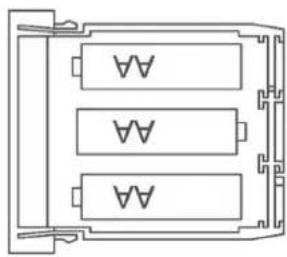
natural_image
Pure electrical circuit lines without any symbolstext_image
Technical diagram showing a mechanical assembly with labeled components and directional arrows indicating motion or flow.Adapter
natural_image
Mechanical gear mechanism diagram with no text or symbols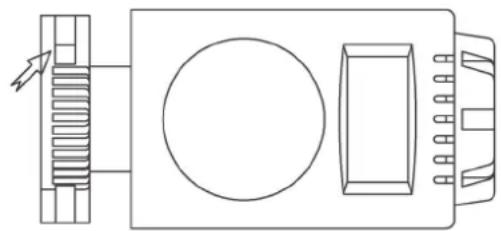
natural_image
Pure technical line drawing of a mechanical or electrical component with no text, numbers, or symbolsnatural_image
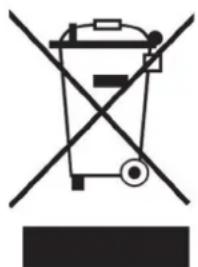
Symbol of a trash bin crossed out by a diagonal line, with no text or labels present.Congratulations on purchasing this equipment. Please read this manual carefully and take care of the following hints on installation and use to avoid technical damages. Any failure caused by ignoring the mentioned items and cautions mentioned in the operation and installation instructions are not covered by our warranty and any liability.
Contents
Technical Data 6
Packing Content 6
Safety Instructions 6
Display and Product Description 7
Installation and Adapters 7
Manual Operations 8
Pairing with Thermostat Control Unit 9
Battery Low Alarm 9
Removing the Thermostat 9
Environment Concerns 9
Declaration of Conformity 9
Technical Data
| Item number 10027580 | |
| Suitable radiator valves Honeywell-Braukmann | MNGHeimeierJunkersLandis&Gyr „Duodyr”Danvoss RA / RAV / RAVL |
| Measurement Temperature Range 0°C – 35°C | |
| Setting Temperature Range 5°C – 30°C | |
| Power source 3 x 1.5 V AAA Alkaline Batteries | (not included) |
Packing Content
- Thermostat
- Actuator
- Adapters and Accessories
Safety Instructions
- Read all the safety and operating instructions carefully and retain them for future reference.
- Avoid moisture, extreme temperatures, shock and vibration.
• Used indoors only and do not be exposed in sunshine. - Do not open the temperature controller. Repaired must be performed by authorized service personnel only.
- Changes or modifications to this unit not expressly approved by the party responsible for compliance will void the user's authority to operate the equipment.
- Battery may explode or leak if it is mistreated. Do not attempt to recharge it or disassemble it. Do not dispose of the old battery in a fi re.
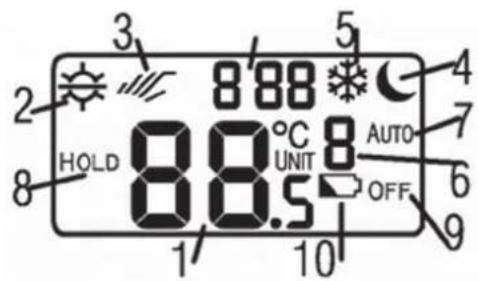
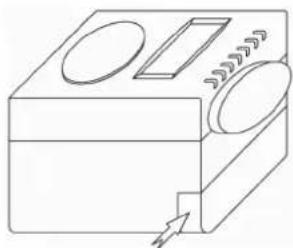
Display and Product Description
1 Setting Temperature
2 Comfort/Semi-Comfort
3 Manual Override symbol
4 Economic Setting symbol
5 Anti-Frozen symbol
6 Valve actuator UNIT number
7 Program AUTO Control symbol
8 Temporary HOLD symbol
9 OFF symbol
10 Battery Low symbol
text_image
3 2 HOLD 8 8.5 1 10 5 4 7 AUTO 6 OFF 9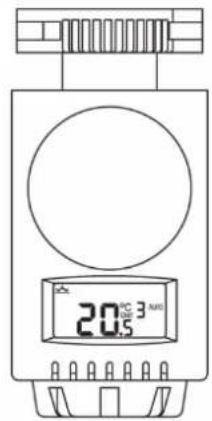
text_image
20.5°C 3 AWDInstallation and Adapters
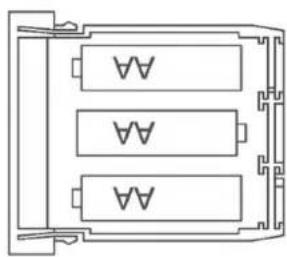
Installing Batteries
- Before first use you have to install batteries. (3 x AA/LR6/AM3 size Alkaline Batteries not Included)
- Press the two sides of the Battery Compartment at bottom of the unit. Then pull it out.
- Insert the batteries to battery compartment. Making sure the battery to match up the + and - polarity marking.
- Push back battery compartment to the unit.
natural_image
Line drawing of a rectangular device with circular components and a handle, no text or symbols present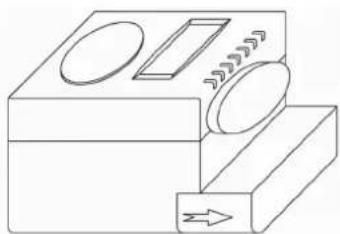
natural_image
Simple line drawing of a mechanical device with no text or symbols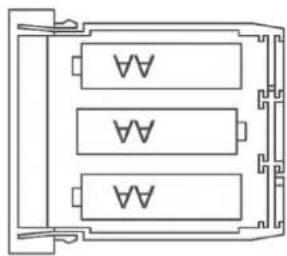
natural_image
Pure electrical circuit lines without any symbolsInstalling the Thermostat
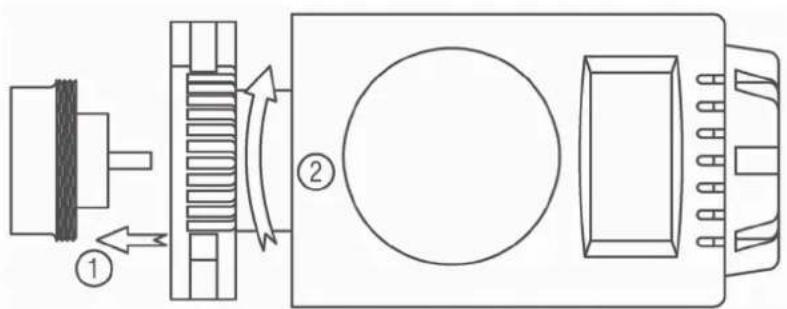
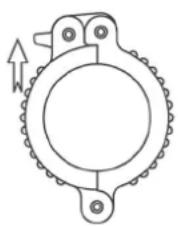
Before installing the thermostat to the radiator valve you need to replace the original thermostat first. The thermostat can be easily to install on all common radiator valve without causing any dirt or water staining. You no longer need the old thermostat head.
- Lossen and take off the old thermostat head.
- Place the thermostat on to the valve or adapter, whereby the fl at surface to point upwards as shown in image on the right (1).
- Turning the knurled nut forwards and tighten it firmly by hand. Do not use a tool for this! (2).
• Thermostat is ready for operation.
text_image
Technical diagram showing a mechanical assembly with labeled components and directional arrows indicating motion or flow.Adapters
For the valve adapters you may use, please refer to below table.
| Manufacture | Illustration | Adapter |
| HONEYWELL-BRAUKMANN MNGHEIMEIERJUNKERSLANDISGYR ‘DUODYR’ | Not Required | |
| DANFOSS RA | 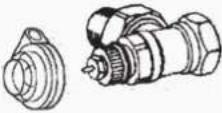 | Required |
| DANFOSS RAV | 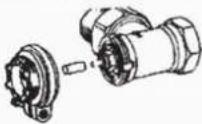 | Required |
| DANFOSS RAVL | 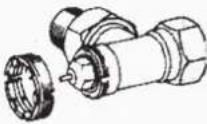 | Required |
Manual Operation
All manual operation is temporary and be override till the next commands from thermostat control unit.
Pre-set Temperatures
- Press the round button on the top of LCD display. The manual operation of 4 different pre-set temperatures:

Comfort

Semi-comfort
Economic
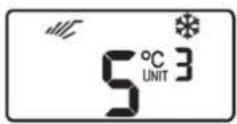
Anti-frozen
- Turning the dial in front of the actuator, can adjust temperature setting value.
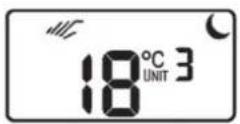
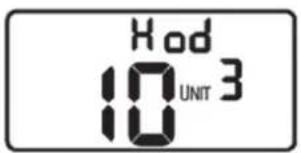
ON/OFF and Temporary HOLD
- Press and hold 3 seconds the round button on the top of LCD display. "ON" will appear on display. Turning the dial to select ON or OF. Press the button to confirm and quit.
- Turning the dial to Hod appears on display top. Press the button to enter Hold setting. Turning the dial set HOLD continue hours, from 1 to 24 hours. Press and hold 3 seconds the button to confirm the setting and quit.
text_image
Hod 10 UNIT 3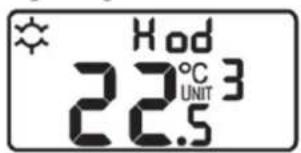
text_image
Hod 22.5°C UNIT 3Pairing with Thermostat Control Unit
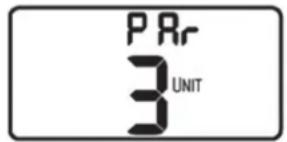
Using the suitable Thermostat Contril Unit (not included) you can pair and control up to 3 thermostat easily and comfortable without any manual operating the thermostats. To pait the thermostat with the control unit follow the steps below:
1 Hold the round button for 6 seconds till Par appears on the display.
2 Refer to the Instruction Manual of your Control Unit.
3 After the pairing procedure succeed, the paired "UNIT" number will appears on the display.
text_image
PRr 3 UNITBattery Low Alarm
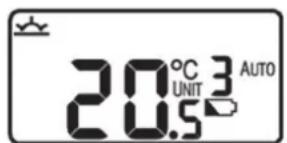
- Battery low alarm, when battery is low, the battery low Symbol displays and fl ashes. And actuator will also send battery low information to thermostat control unit.
- You need to replace the battery.
text_image
20.5°C UNIT 3 AUTORemoving the Thermostat
Resume your valve, when emergency. For example, if your thermostat's batteries are dead and you haven't got replacement. You can easily to remove thermostat and actuator to resume your valve.
- Pull the bar on the knurled nut (as shown on right image) outward. Now thermostat and actuator released from your valve and your valve resumed.
- You can also easily to pull back the knurled nut and relock the bar. Then attached your thermostat and actuator back to valve again as instructed above mentioned.
natural_image
Mechanical gear mechanism diagram with no text or symbols
natural_image
Pure technical line drawing of a mechanical or electrical component assembly without any text, numbers, or symbolsEnvironment Concerns
natural_image
Symbol of a trash bin crossed out by a diagonal line, with no text or labels present.According to the European waste regulation 2002/96/EG this symbol on the product or on its packaging indicates that this product may not be treated as household waste. Instead it should be taken to the appropriate collection point for the recycling of electrical and electronic equipment. By ensuring this product is disposed of correctly, you will help prevent potential negative consequences for the environment and human health, which could otherwise be caused by inappropriate waste handling of this product. For more detailed information about recycling of this product, please contact your local council or your household waste disposal service.
Your product contains batteries covered by the European Directive. 2006/66/EG, which cannot be disposed of with normal household waste. Please check local rules on separate collection of batteries. The correct disposal of batteries helps prevent potentially negative consequences on the environment and human health.
Declaration of Conformity

Producer: Chal-Tec GmbH, Wallstraße 16, 10179 Berlin.
This product is conform to the following European Directives:
2014/30/EU (EMC)
2011/65/EU (RoHS)
Chère cliente, cher client,
text_image
20.5°C 3 AWDnatural_image
Line drawing of a rectangular device with circular and rectangular components, no text or symbols present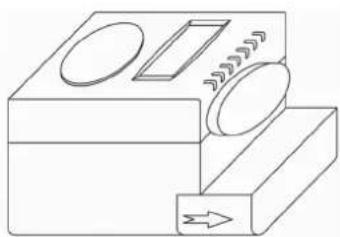
natural_image
Simple line drawing of a mechanical device with no text or symbols