SED 3.7 H4 - Electric epilator SILVERCREST - Free user manual and instructions
Find the device manual for free SED 3.7 H4 SILVERCREST in PDF.

User questions about SED 3.7 H4 SILVERCREST
0 question about this device. Answer the ones you know or ask your own.
Ask a new question about this device
Download the instructions for your Electric epilator in PDF format for free! Find your manual SED 3.7 H4 - SILVERCREST and take your electronic device back in hand. On this page are published all the documents necessary for the use of your device. SED 3.7 H4 by SILVERCREST.
USER MANUAL SED 3.7 H4 SILVERCREST
Operating instructions
FR BE
GB/IE Operating instructions Page 1
| DE/AT/CH Bedienungsanleitung Seite 25 | |||
| FR/BE Mode d'emploi Page 51 | |||
| NL/BE Gebruiksaanwijzing Pagina 79 | |||
| CZ Návod k obsluze Strana 103 | |||
| PL | Instrukcja obstugi Strona 125 | ||
| SK | Návod na obsluhu | Strana | 149 |
| ES | Instrucciones de uso | Página | 171 |
| DK | Betjeningsvejledning | Side | 195 |
| IT | Istruzioni per l'uso | Pagina | 217 |
| HU | Használati utasítás | Oldal | 241 |
text_image
A ① ② ③ ④ ⑤ ⑥ ⑦ ⑧ ⑨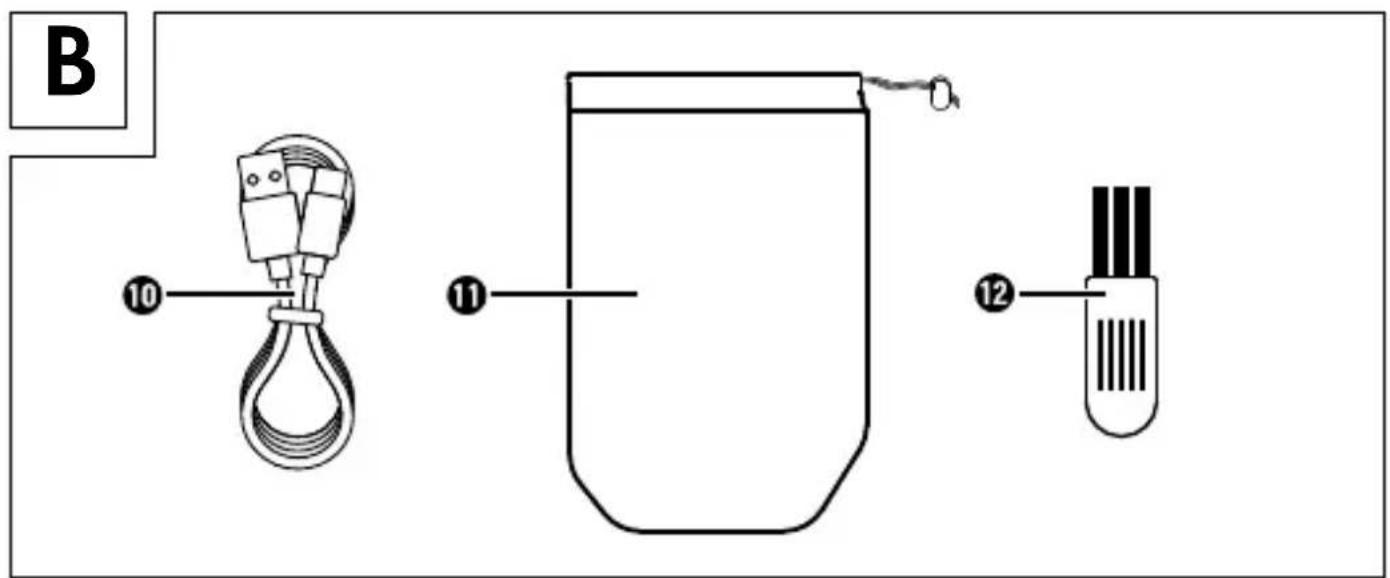
text_image
B 10 11 12Table of Contents
Introduction....2
Intended Use 2
Items supplied 2
Operating Elements....3
Technical data ....3
Warnings and symbols used....4
Safety information 5
Before first use.... 10
Charging the integrated battery 10
Assembly / disassembly 12
Tips and Tricks 14
Epilation 15
Cleaning and care 16
Storage....17
Troubleshooting....17
Disposal 18
Disposal of the appliance....18
Disposal of the packaging 19
Ordering replacement parts.... 20
Kompernass Handels GmbH warranty ..... 21
Service 23
Importer 23
Introduction
Congratulations on the purchase of your new appliance.
You have clearly decided in favour of a quality product. These operating instructions are a part of this product. They contain important information in regard to safety, use and disposal. Before using the product, familiarise yourself with all of these operating and safety instructions. Use the product only as described and only for the specified areas of application. In addition, pass these documents on, together with the product, to any future owner.
Intended Use
This appliance is intended exclusively for the epilation of human hair in domestic households. Do not use it for commercial purposes! This appliance is not intended for any other use or for uses beyond those mentioned.
Items supplied
The appliance is supplied with the following components as standard:
■ Epilator
■ Protective cap
■ Massage roller attachment
- Charging cable
- Cleaning brush
■ Storage pouch
■ Operating Instructions
Extract all parts of the appliance from the carton and remove all packaging material. Check the contents to ensure everything has been supplied, and for signs of visible damage.
If the delivery is incomplete, or has been damaged due to defective packaging or transportation, contact the Service Hotline (see section Service).
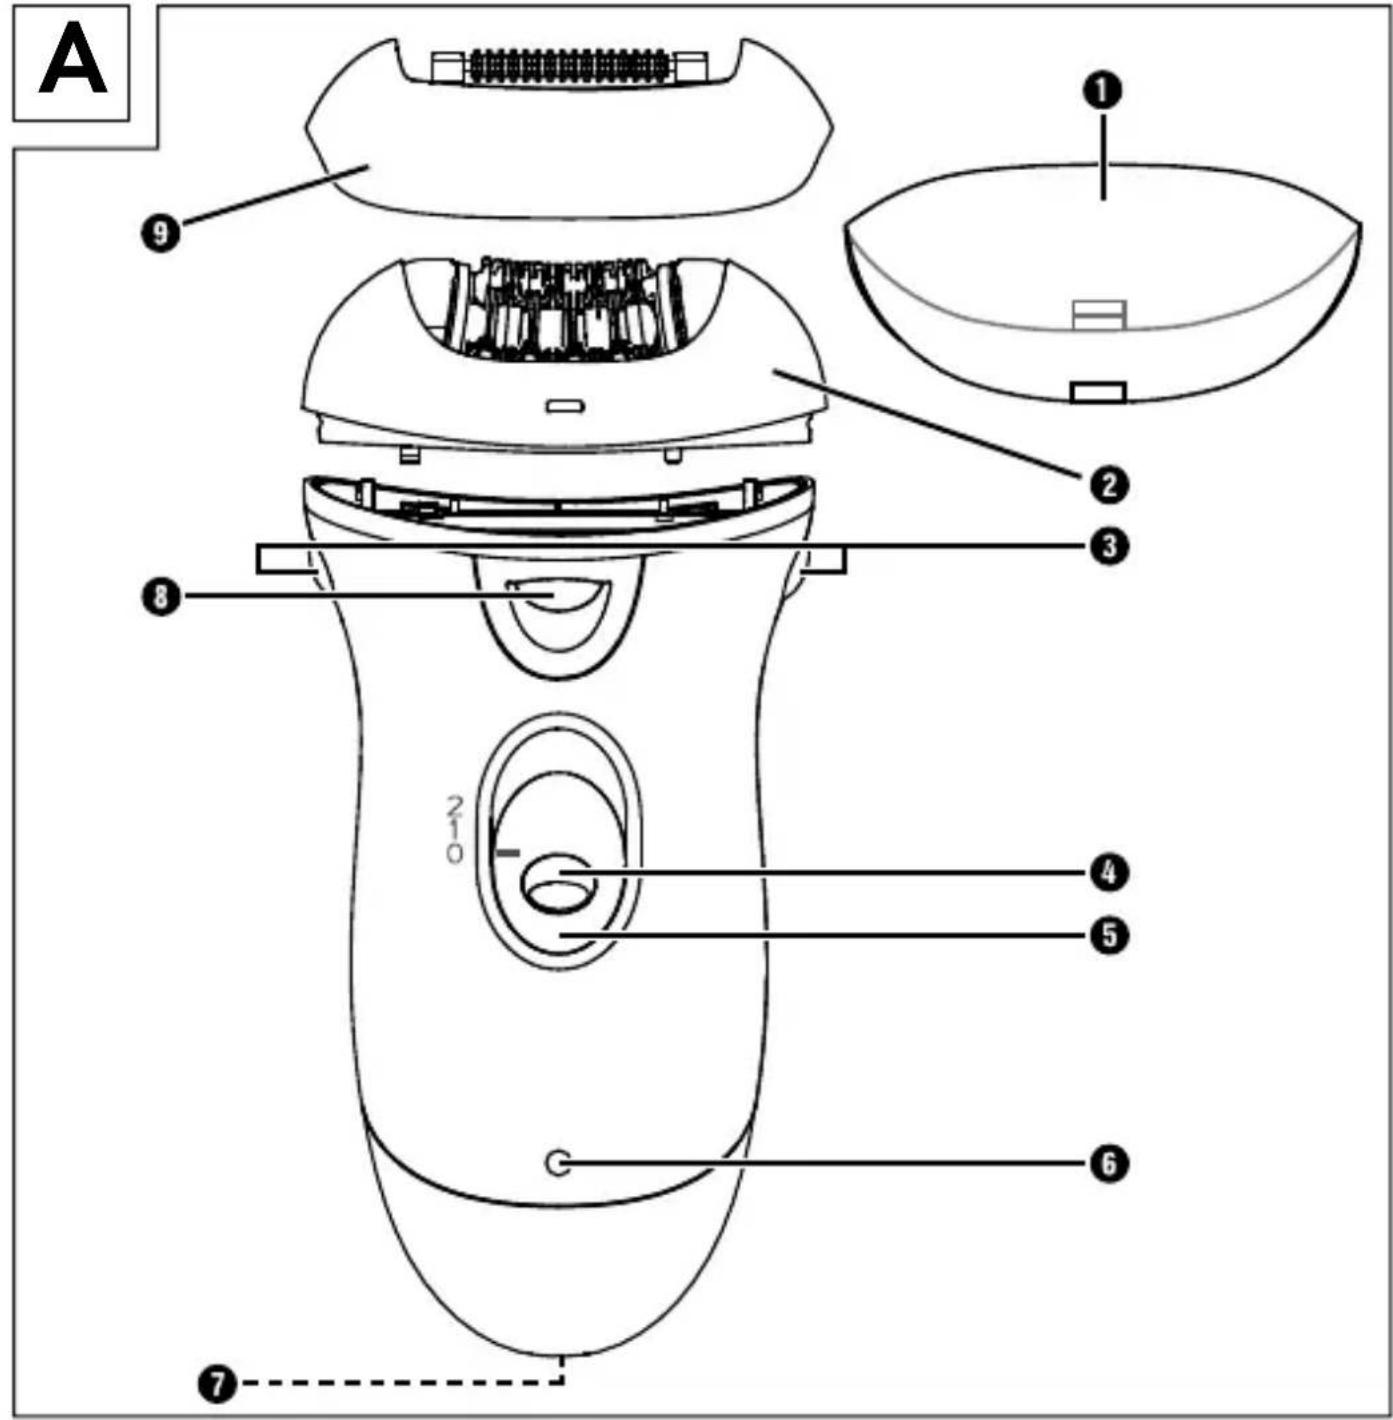
Operating Elements
Figure A:
1 Protective cap
② Epilatorhead
③ Restraint fixtures for epilator head
4 Travel lock
⑤ Sliding switch with two speed levels
⑥Indicatorlight red/green
⑦USB-Cport
⑧ LED light
⑨ Massage roller attachment
Figure B:
10 USB charging cable (USB type A to USB type C)
⑪ Storage pouch
12 Cleaning brush
Technical data
| Input voltage 5 V | == |
| Input current 2 A max. | |
| Integrated battery (Li-ion) | 800 mAh / 3.7 V === / 2.96 Wh |
| Protection class | III / [IMAGE] |
Warnings and symbols used
The following warnings and symbols are used in these operating instructions, on the packaging and on the appliance (where applicable):
 | DANGER! A warning with this symbol and the signal word "DANGER" indicates an imminently hazardous situation which will result in death or serious injury if not avoided. |
 | WARNING! A warning with this symbol and the signal word "WARNING" indicates a potentially hazardous situation which could result in death or serious injury if not avoided. |
 | CAUTION! A warning with this symbol and the signal word "CAUTION" indicates a potentially hazardous situation that could result in a minor or moderate injury if not avoided. |
 | ATTENTION! A warning with this symbol and the signal word "ATTENTION" indicates a potential situation that could result in property damage if not avoided. |
 | A note identifies additional information that facilitates the use of the appliance. |
 | DC current/voltage |
 | Use the appliance indoors only. |
 | Protection through extra-low voltage |
Notes on trademarks
USB® is a registered trademark of USB Implementers Forum, Inc. All other names and products may be trademarks or registered trademarks of their respective owner.
Safety information
DANGER!
For charging, connect the USB power adapter only to a properly installed and earthed power outlet. Ensure that the power supply corresponds with the specifications on the type plate of the USB power adapter.
In the event of a malfunction and before cleaning the appliance, disconnect the USB power adapter from the power outlet and the charging cable from the appliance.
▶ During charging, make sure that the charging cable does not become wet or damp. Route the cable in such a way that it cannot get caught or damaged.
▶ To prevent risks, stop using the appliance or accessory immediately if it is damaged.
▶ Never touch the appliance or the charging cable with wet hands.
▶ Never immerse the appliance in water or other liquids!
▶ Never use or charge the appliance near water, especially in the immediate vicinity of sinks, baths or other similar containers.
Do not use the appliance while taking a bath or shower. The proximity of water is hazardous, even if the appliance is switched off.
▶ After every charging, unplug the USB power adapter from the power outlet and the charging cable from the appliance.
▶ Switch off the appliance after each use, before cleaning it and before charging.
▶ Do not operate the appliance if it has been dropped or is damaged in any way. Have the appliance checked and/or repaired by a qualified technician, if necessary.
▶ Do not open the housing or attempt to repair the appliance yourself. This can lead to risks
and also invalidates the warranty. Defective appliances should be repaired by authorized specialists only.
WARNING!
▶ Never leave children unattended with the packaging material. Keep children away from the packaging. Risk of suffocation!
▶ Do not allow children to play with the appliance.
This appliance may be used by children aged 8 and above and persons with limited physical, sensory or mental capabilities or lack of experience and knowledge, provided that they are under supervision or have been told how to use the appliance safely and are aware of the potential risks.
- Cleaning and user maintenance tasks may not be carried out by children unless they are supervised.
▶ Use only the original accessories for this appliance. Accessory parts from other manufacturers may not be suitable, and this may lead to risks!
- Do not kink or crush the charging cable, and make sure to route the charging cable so that it cannot be stepped on or tripped over.
▶ WARNING! Keep the appliance dry.
CAUTION!
Use the appliance only indoors.
▶ Use only the supplied charging cable to charge the appliance.
▶ Charge the appliance with a USB power adapter with protection class II that is approved for use with household appliances and has an output voltage of 5 V == and a maximum output current of 2 A.
- When using a USB power adapter, the power outlet used must always be easily accessible so that the USB power adapter can be quickly removed from the outlet in a dangerous situation. You should also observe the operating instructions for the USB power adapter.
▶ Do not wrap the charging cable around the appliance, and protect it from being damaged.
▶ Do not use any aggressive cleaning liquids or solvents to clean the appliance. They could damage the surface.
WARNING! SAFETY GUIDELINES FOR RECHARGEABLE BATTERIES
The product is equipped or supplied with a lithium-ion battery.
This appliance contains a battery that cannot be replaced by the user.
The appliance has an integrated lithium-ion battery. Incorrect handling can lead to fire, explosions, leakage of dangerous substances or other hazards!
▶ Do not throw the appliance into an open fire.
▶ Do not open or short-circuit the battery. This could cause the battery to overheat and explode. There is a risk of fire!
Before first use
1) Charge the battery as described in the section Charging the integrated battery.
2) We recommend cleaning the appliance and all parts as described in the section Cleaning and care before using them for the first time. This will remove any residues left from the production process.
The appliance is now ready for use.
Charging the integrated battery
DANGER! Risk of fatal electric shock! Charge the appliance indoors in dry locations away from water. Do not charge the appliance next to or above a sink filled with water.
i Note:
Before using the appliance for the first time, the integrated battery must be completely charged.
The USB charging cable ⑩ and the USB-C port ⑦ are used only to charge the internal battery. They are not suitable for data transmission.
Charge the appliance with a USB power adapter with protection class II that is approved for use with household appliances and has an output voltage of 5 V==and a maximum output current of 2 A.
Use only the supplied USB charging cable 10 to charge the integrated battery. Disconnect the USB charging cable 10 from the appliance when charging is complete.
The appliance cannot be operated during charging.
Do not recharge the appliance until the indicator light ⑥ starts flashing alternately red and green (indicating low battery charge level).
3) Make sure that the mark on the sliding switch ⑤ points to "0", meaning that the appliance is switched off.
4) Connect the USB-A plug of the USB charging cable 10 to a suitable USB power adapter.
5) Connect the USB-C plug of the USB charging cable ⑩ to the USB-C port ⑦ on the appliance.
6) Plug the power adapter into a power outlet. The indicator light ⑥ lights up red to indicate that the appliance is charging.
| Indicator light 6 Charge level | |
| Flashing alternately red/green. | Low battery. Recharge immediately. |
| Lights up red. Battery is charging. | |
| Lights up green. Battery is fully charged. | |
7) As soon as the indicator light ⑥ lights up green, the battery is charged.
8) Pull the USB power adapter out of the power outlet and disconnect the USB charging cable ⑩ from the appliance.
Assembly / disassembly
To attach or detach the attachments, proceed as follows. First, make sure that the mark on the sliding switch ⑤ points to "0", meaning that the appliance is switched off.
natural_image
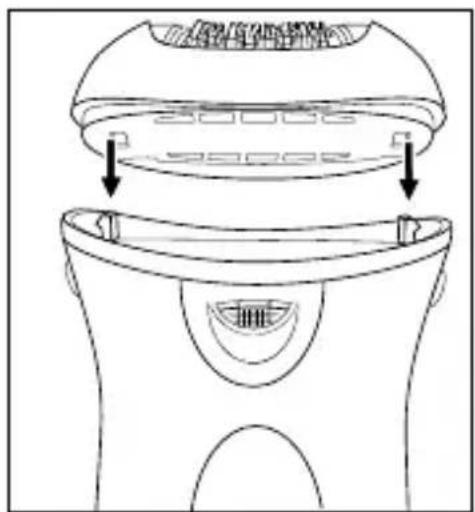
Line drawing of a mechanical device with a top component and internal components, showing no text or symbols.Fig. 1
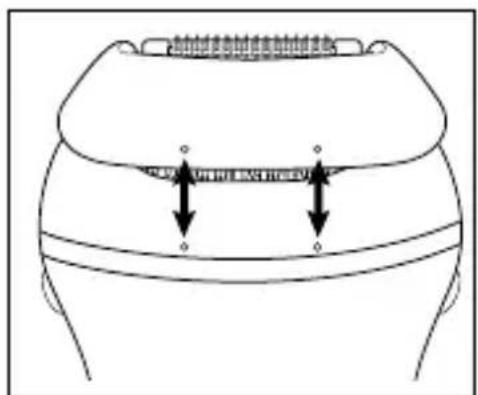
Epilator head ②:
1) Press the epilator head ② onto the holder on the appliance. The hooks must latch into the two recesses (see Fig. 1). The epilator head ② clicks audibly into place.
2) For removal, hold the two restraint fixtures ③ pressed together, then pull the epilator head ② upwards.
text_image
WATER WITH BEVERFig. 2
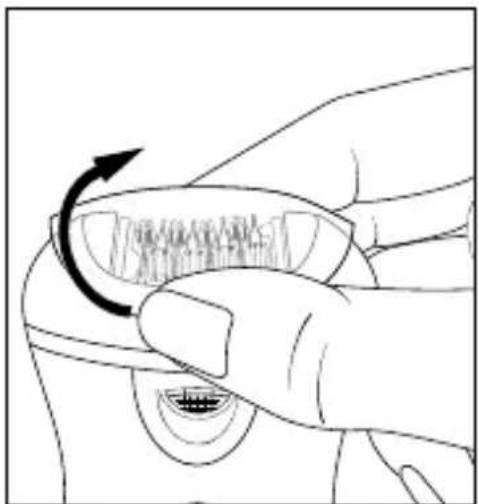
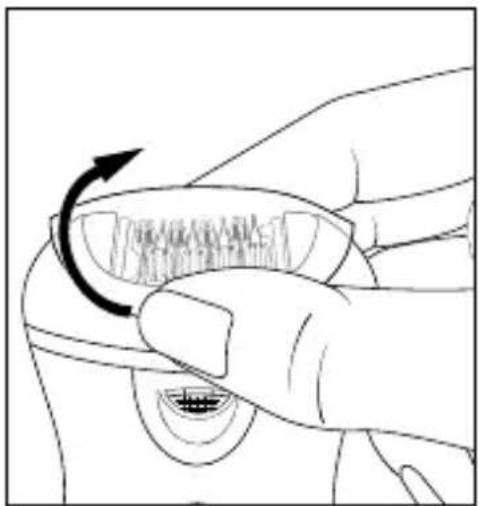
Massage roller attachment ⑨:
1) Turn the appliance and the massage roller attachment ⑨ so that the markings point towards each other (see Fig. 2).
2) Fit the massage roller attachment ⑨ onto the epilator head ②. The matching recesses/tabs on the front and back must engage.
natural_image
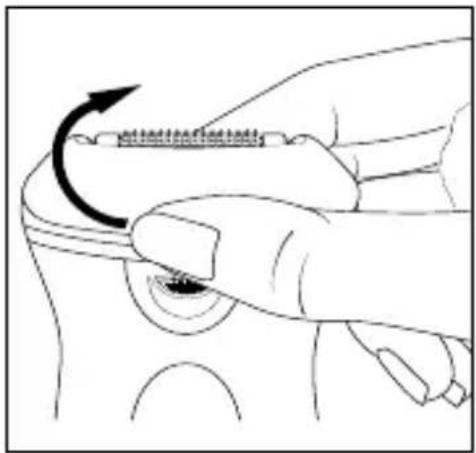
Illustration of a hand using a tool to adjust a small object, showing an arrow indicating rotation (no text or symbols present)Fig. 3
3) Pull off the massage roller attachment ⑨ (see Fig. 3).

natural_image
Line drawing of a hand holding a car wheel with a curved arrow indicating rotation (no text or symbols)Fig. 4
Protective cap ①:
1) Turn the protective cap ① so that the smaller recess faces the front of the appliance.
2) Place the protective cap ① on the epilator head ②. The matching recesses/tabs on the front and back must engage as with the massage roller attachment ⑨.
3) Pull off the protective cap ① (see Fig. 4).
Tips and Tricks
① Note: Do not use the appliance if ...
- You have a sunburn on the specific part of the body.
— Skin irritation or redness is extant.
— You have a skin disease such as, for example, neurodermatitis.
— You have pimples, moles or warts on the specific parts of the body.
— You have wounds, open sores or raised scars on the specific parts of the body.
First test the appliance on a small hidden location to establish the skin compatibility.
■ The hairs should be between 0.3 cm and 0.5 cm long. Shorter hairs are not gripped by the tweezers and plucking out longer hairs is very painful. If needs be, shorten long hair.
■ The skin must be free of grease or cream residues. Otherwise, the tweezers will stick/soil and the efficiency of the appliance will be reduced.
■ The skin must be completely dry.
The best time for epilation is in the evening after a shower. Then the skin is somewhat softened, so that the hairs can be plucked out easily. In addition, the skin can recover overnight, and any skin reddening will recede.
Before epilation, treat the skin with a peeling or a massage glove. This helps remove dead skin cells, ingrowing hairs are avoided, and fine hairs stand proud. This enables the appliance to grip the hairs better.
■ After epilation, nurture the skin with a moisturising lotion or cream. Ideally, the cream will contain aloe vera or camomile extracts to soothe and maintain the skin.
Epilation
If the body parts to be epilated are prepared:
1) Rub your hand once more against the growth direction of the hairs to be removed. Through this the hairs will be raised so that they can be better captured by the tweezers.
2) Remove the protective cap ① from the epilator head ②.
3) If necessary, fit the massage roller attachment ⑨ onto the epilator head ②. The massage rollers stimulate the skin and thus ensure a gentler epilation experience.
4) Press the travel lock ④ and move the sliding switch ⑤ to the desired speed level: The marking must indicate the desired level.
— Level 1: for sensitive areas (armpits and bikini line)
- Level 2: for legs
During operation, the LED light ⑧ illuminates the skin area being depilated.
5) Hold the skin tight with one hand.
6) Apply the epilator perpendicular to your skin and, without exerting any pressure, move it against the direction of the hair growth. The side with the sliding switch ⑤ must be facing towards you. Do not make back and forth or circular movements.
7) Always start anew and pass over the body part to be epilated several times, so that all of the hair is removed.
(i) Note: It may be that the hair grows back after a few days. The reason for this is that these hairs were too short to be removed during the last epilation session.
8) When you are finished with the treatment, switch off the appliance. To do this, press the travel lock ④ while moving the sliding switch ⑤ to "0" at the same time.
9) Remove the massage roller attachment ⑨ if present. Clean the epilator head ② and the massage roller attachment ⑨ as described in the section Cleaning and care. Place the epilator head ② back on the appliance once it is completely dry.
10) Place the protective cap ① on the epilator head ②.
① Note: Stop using the epilator head ② if it is damaged! To order a new epilator head ②, please contact the Service department (see the section Ordering spare parts).
Cleaning and care
DANGER! Do not clean the appliance and accessories while charging it. First pull the USB power adapter out of the power outlet and disconnect the USB charging cable ⑩ from the appliance. Never immerse the appliance in water or other liquids!
■ After every use clean the epilator head ② with the supplied cleaning brush ⑫ to remove loose hairs.
■ Disinfect the epilator head ② regularly by spraying and cleaning it with disinfectant spray.
■ To clean the epilator head ② thoroughly, it can be detached from the appliance. Clean the epilator head ② under running water and then allow it to dry.
■ Clean the massage roller attachment ⑨ under running water and then allow it to dry.
■ Wipe the appliance lightly with a damp cloth. If required, use some mild detergent on the cloth. Then wipe it with a dry cloth, and ensure that the appliance is completely dry before the next use.
Storage
■ Always protect the epilator head ② with the supplied protective cap ①.
■ Store the appliance and all parts in the storage pouch ⑪.
■ Store the appliance at a dry and dustfree location.
Troubleshooting
| Problem Cause | Solution | |
| The appliance does not function. | The battery is drained. | Recharge the appliance. |
| The appliance is defective. | In this case, contact CustomerServices. | |
| The appliance only runs slowly.The plucking of the hairs is very painful. | The battery is drained. | Recharge the appliance. |
| The hairs may be too long. | Shorten the hairs to about 0.3 - 0.5 cm. See also the section "Tips and Tricks". | |
| Not all hairs are plucked. | It is possible that the hairs are too short. | The hairs should have a length of 0.3 - 0.5 cm. |
| You are working too fast. | Move the appliance more slowly over your skin. |
If you are unable to resolve the problem by following the above-mentioned suggestions, please contact the Service department (see Service section).
Disposal
Applies only to France:
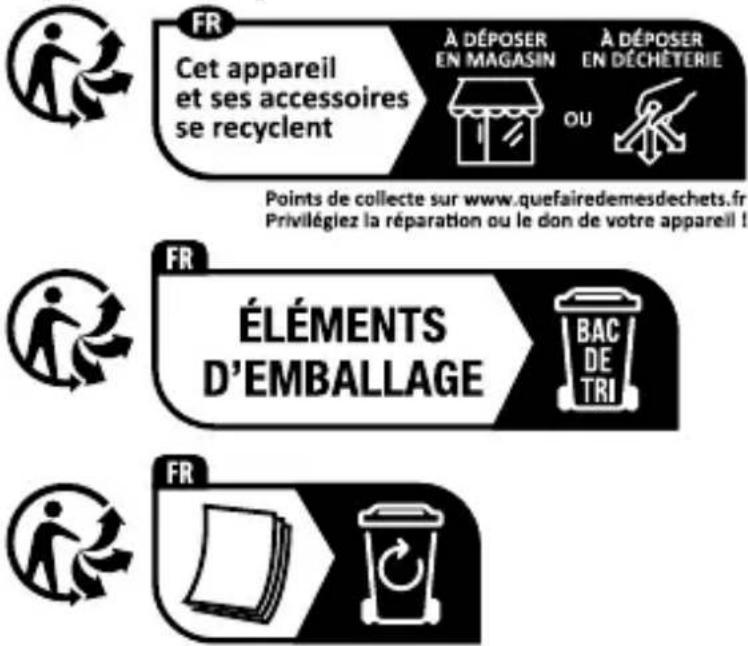
The product, its packaging and the operating instructions are recyclable. They are subject to an extended manufacturer responsibility and will be collected separately.
Disposal of the appliance
natural_image
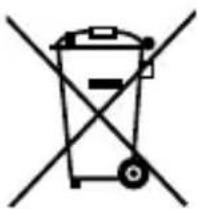
Symbol of a trash bin crossed with a diagonal line, representing no waste or discharge (no text or labels)The adjacent symbol of a crossed-out dustbin means that this appliance is subject to Directive 2012/19/EU. This directive states that this appliance may not be disposed of in the normal household waste at the end of its useful life, but must be taken to specially set-up collection locations, recycling depots or disposal companies.
The disposal is free of charge for the user. Protect the environment and dispose of this appliance properly.
If your old appliance has stored any personal data, you are responsible for deleting it yourself before returning it.
If it is possible to do so without destroying the old appliance, remove the old batteries or rechargeable batteries before returning the appliance for disposal and take them to a separate collection point. In the case of permanently installed rechargeable batteries, you must indicate during disposal that the appliance contains a battery.
The integrated rechargeable battery in this appliance cannot be removed for disposal.
Your local community or municipal authorities can provide information on how to dispose of the worn-out product.
Disposal of the packaging
The packaging materials have been selected for their environmental friendliness and ease of disposal and are therefore recyclable. Dispose of packaging materials that are no longer needed in accordance with applicable local regulations.
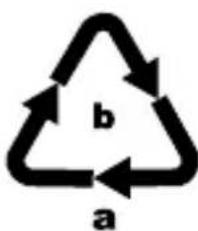
text_image
b aDispose of the packaging in an environmentally friendly manner. Note the labelling on the packaging and separate the packaging material components for disposal, if necessary. The packaging material is labelled with abbreviations (a) and numbers (b) with the following meanings: 1–7: plastics, 20–22: paper and cardboard, 80–98: composites.
Ordering replacement parts
You can order replacement parts for this product on the Internet at www.kompernass.com.

text_image
SED 3.7 H4Scan the QR code with your smartphone/tablet.
You can use this QR code to go directly to our website to view and order the available spare parts.
(i) Note: If you have problems with your online order, you can contact our service centre by phone or e-mail.
Always quote the article number (IAN) 444870_2307 in your order.
Please note that online ordering of replacement parts is not possible for all countries.
This appliance has a 3-year warranty valid from the date of purchase. If this product has any faults, you, the buyer, have certain statutory rights. Your statutory rights are not restricted in any way by the warranty described below.
Warranty conditions
The warranty period starts on the date of purchase. Please keep your receipt in a safe place. This will be required as proof of purchase.
If any material or manufacturing fault occurs within three years of the date of purchase of the product, we will either repair or replace the product for you or refund the purchase price (at our discretion). This warranty service requires that you present the defective appliance and the proof of purchase (receipt) within the three-year warranty period, along with a brief written description of the fault and of when it occurred.
If the defect is covered by the warranty, your product will either be repaired or replaced by us. The repair or replacement of a product does not signify the beginning of a new warranty period.
Warranty period and statutory claims for defects
The warranty period is not prolonged by repairs effected under the warranty. This also applies to replaced and repaired components. Any damage and defects present at the time of purchase must be reported immediately after unpacking. Repairs carried out after expiry of the warranty period shall be subject to a fee.
Scope of the warranty
This appliance has been manufactured in accordance with strict quality guidelines and inspected meticulously prior to delivery.
The warranty covers material faults or production faults. The warranty does not extend to product parts subject to normal wear and tear or to fragile parts which could be considered as consumable parts such as switches, batteries or parts made of glass.
The warranty does not apply if the product has been damaged, improperly used or improperly maintained. The directions in the operating instructions for the product regarding proper use of the product are to be strictly followed. Uses and actions that are discouraged in the operating instructions or which are warned against must be avoided.
This product is intended solely for private use and not for commercial purposes. The warranty shall be deemed void in cases of misuse or improper handling, use of force and modifications / repairs which have not been carried out by one of our authorised Service centres.
Warranty claim procedure
To ensure quick processing of your case, please observe the following instructions:
■ Please have the till receipt and the item number (IAN) 444870_2307 available as proof of purchase.
■ You will find the item number on the type plate on the product, an engraving on the product, on the front page of the operating instructions (below left) or on the sticker on the rear or bottom of the product.
If functional or other defects occur, please contact the service department listed either by telephone or by e-mail.
■ You can return a defective product to us free of charge to the service address that will be provided to you. Ensure that you enclose the proof of purchase (till receipt) and information about what the defect is and when it occurred.

text_image
PDF ONLINE www.idi-service.comYou can download these instructions along with many other manuals, product videos and installation software at www.lidl-service.com.
This QR code will take you directly to the Lidl service page (www.lidl-service.com) where you can open your operating instructions by entering the item number (IAN) 444870_2307.
Service
GB Service Great Britain
Tel.: 0800 404 7657
E-Mail: kompernass@lidl.co.uk
IE ServiceIreland
Tel.: 1800 101010
E-Mail: kompernass@lidl.ie
IAN 444870_2307
Importer
Please note that the following address is not the service address. Please use the service address provided in the operating instructions.
KOMPERNASS HANDELS GMBH
BURGSTRASSE 21
44867 BOCHUM
GERMANY
www.kompernass.com
Inhaltsverzeichnis
Einführung 26
natural_image
Line drawing of a mechanical component with two arrows indicating assembly or movement (no text or symbols)Abb. 1
Epilierkopf 2:
text_image
WATER WITH BONEAbb. 2
natural_image
Illustration of a hand holding a small electronic component with an arrow indicating rotation (no text or symbols present)Abb. 3
natural_image
Line drawing of a hand holding a car wheel with a curved arrow indicating rotation (no text or symbols)Abb. 4
Schutzkappe ①:
natural_image
Simple line drawing of a trash bin with two crossed lines indicating no waste or restriction (no text or symbols)text_image
SED 3.7 H4KOMPERNASS HANDELS GMBH
BURGSTRASSE 21
44867 BOCHUM
DEUTSCHLAND
www.kompernass.com
Sommaire
Introduction 52
natural_image
Line drawing of a door handle with internal components and arrows indicating movement (no text or symbols)Fig. 1
text_image
WATER WITH THE BONEFig. 2
natural_image
Illustration of a hand using a tool to adjust a small object with an arrow indicating rotation (no text or symbols present)Fig. 3
natural_image
Line drawing of a hand holding a car wheel with a curved arrow indicating rotation (no text or symbols)Fig. 4
natural_image
Simple line drawing of a trash bin with two crossed lines indicating no waste or restriction (no text or symbols)natural_image
Simple line drawing of a recycling symbol (three chasing arrows) with no text or labelstext_image
SED 3.7 H4KOMPERNASS HANDELS GMBH
BURGSTRASSE 21
44867 BOCHUM
ALLEMAGNE
www.kompernass.com
Inhoud
Inleiding 80
⚠ WAARSCHUWING! VEILIGHEIDS-VOORSCHRIFTEN VOOR ACCU'S
natural_image
Line drawing of a mechanical device with a top component and internal components, showing no text or symbols.Afb. 1
Epileerkop 2:
text_image
WATER WITH BEVERAfb. 2
natural_image
Illustration of a hand using a tool to adjust a small object with an arrow indicating rotation (no text or symbols present)Afb. 3
natural_image
Line drawing of a hand holding a car's wheel with a curved arrow indicating rotation (no text or symbols)Afb. 4
Beschermingskap ①:
natural_image
Symbol of a trash bin crossed out by two diagonal lines (no text or labels)text_image
SED 3.7 H4KOMPERNASS HANDELS GMBH
BURGSTRASSE 21
44867 BOCHUM
DUITSLAND
www.kompernass.com
Obsah
Úvod....104
text_image
Technical diagram showing a device with labeled components and directional arrows indicating assembly or operation.Obr. 1
Epilační hlava ②:
natural_image
Illustration of a hand holding a screwdriver with an arrow indicating rotation (no text or symbols)Obr. 3

natural_image
Line drawing of a hand holding a small object with a curved arrow indicating rotation (no text or symbols)Obr. 4
Ochranné víčko ①:
natural_image
Symbol of a trash bin crossed with two crossed lines, representing waste or discharge (no text or labels)text_image
SED 3.7 H4KOMPERNASS HANDELS GMBH
BURGSTRASSE 21
44867 BOCHUM
NĚMECKO
www.kompernass.com
Spis treści
Wprowadzenie 126
natural_image
Line drawing of a mechanical device with a top component and internal components, showing no text or symbols.Rys. 1
text_image
WATER WITH THE BONERys. 2
natural_image
Illustration of a hand using a tool to adjust a small object with an arrow indicating rotation (no text or symbols present)Rys. 3
natural_image
Line drawing of a hand holding a car's wheel with a curved arrow indicating rotation (no text or symbols)Rys. 4
Nasadka ochronna 1:
natural_image
Symbol of a trash bin crossed with a diagonal line, representing no waste or discharge (no text or labels)text_image
SED 3.7 H4KOMPERNASS HANDELS GMBH
BURGSTRASSE 21
44867 BOCHUM
NIEMCY
www.kompernass.com
Obsah
Úvod.... 150
Používanie primerané účelu.... 150
text_image
Technical diagram showing a device with labeled components and directional arrows indicating assembly or operation.Obr. 1
Epilačná hlavica ②:
text_image
UPP BATHYObr. 2
text_image
Diagram showing a hand holding a device with an arrow indicating rotation or adjustment, labeled 'Attitude to the right side'.Obr. 3
natural_image
Line drawing of a hand holding a car wheel with a curved arrow indicating rotation (no text or symbols)Obr. 4
Ochranné viečko ①:
text_image
FR © Document Recycle Binnatural_image
Simple line drawing of a trash bin with two crossed lines indicating no waste or restriction (no text or symbols)text_image
QR code image containing encoded data, no visible human-readable textSED 3.7 H4
KOMPERNASS HANDELS GMBH
BURGSTRASSE 21
44867 BOCHUM
NEMECKO
www.kompernass.com
Indice
Introducción 172
natural_image
Line drawing of a mechanical device with a top component and two arrows indicating assembly or movement (no text or symbols)Fig. 1
text_image
Diagram showing anatomical or structural features with arrows indicating direction of movement or force, possibly from a medical or engineering context.Fig. 2
natural_image
Illustration of a hand using a tool to adjust a small object with an arrow indicating rotation (no text or symbols present)Fig. 3
natural_image
Line drawing of a hand holding a car's wheel with a curved arrow indicating rotation (no text or symbols)Fig. 4
Caperuza protectora ①:
natural_image
Symbol of a trash bin crossed with a diagonal line, representing no waste or discharge (no text or labels)text_image
SED 3.7 H4KOMPERNASS HANDELS GMBH
BURGSTRASSE 21
44867 BOCHUM
ALEMANIA
www.kompernass.com
Indholdsfortegnelse
text_image
Technical diagram showing a mechanical component with downward arrows indicating assembly or disassembly steps.Fig. 1
Epileringshoved ②:
natural_image
Illustration of a hand using a tool to adjust a screw-like component (no text or symbols present)Fig. 3

natural_image
Line drawing of a hand holding a car's seat with a curved arrow indicating rotation (no text or symbols)Fig. 4
natural_image
Simple line drawing of a trash bin with crossed lines indicating no waste or prohibition (no text or symbols)text_image
SED 3.7 H4KOMPERNASS HANDELS GMBH
BURGSTRASSE 21
44867 BOCHUM
TYSKLAND
www.kompernass.com
Indice
Introduzione....218
Uso conforme.... 218
natural_image
Line drawing of a mechanical device with a top component and internal components, showing no text or symbols.Fig. 1
Testina epilante ②:
text_image
WATER WITH THE BONEFig. 2
natural_image
Illustration of a hand using a tool to adjust a small object with an arrow indicating rotation (no text or symbols present)Fig. 3
natural_image
Line drawing of a hand holding a car's wheel with a curved arrow indicating rotation (no text or symbols)Fig. 4
natural_image
Symbol of a trash bin crossed with two crossed lines, representing no waste or discharge (no text or labels)text_image
SED 3.7 H4KOMPERNASS HANDELS GMBH
BURGSTRASSE 21
44867 BOCHUM
GERMANIA
www.kompernass.com
Tartalomjegyzék
Bevezetés.... 242
text_image
Technical diagram showing a device with labeled components and directional arrows indicating assembly or operation.- ábra
Epiláló fej ②:
natural_image
Hand holding a small electronic component with an arrow indicating rotation (no text or symbols)- ábra
natural_image
Line drawing of a hand holding a small object with a curved arrow indicating rotation (no text or symbols)- ábra
Védősapka ①:
natural_image
Symbol of a trash bin crossed out by two diagonal lines (no text or labels)text_image
SED 3.7 H4KOMPERNASS HANDELS GMBH
BURGSTRASSE 21
44867 BOCHUM
NÉMETORSZÁG
www.kompernass.com

text_image
PDF ONLINE www.lidl-service.com
text_image
FR RECOCONOMATIONKOMPERNASS HANDELS GMBH
BURGSTRASSE 21
44867 BOCHUM
GERMANY
www.kompernass.com
Last Information Update · Stand der Informationen · Version des informations
Stand van de informatie · Stav informací · Stan informacji · Stav informácií
Estado de las informaciones · Tilstand af information · Versione delle informazioni