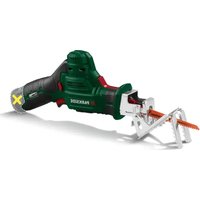
PAAS 12 B2 - Drill PARKSIDE - Free user manual and instructions
Find the device manual for free PAAS 12 B2 PARKSIDE in PDF.


| Product type | Cordless branch cutter (sabre saw) |
| Brand and model | Parkside PAAS 12 B2 |
| Rated voltage | 12 V === |
| No-load speed | 0–2700 min⁻¹ |
| Stroke length | 20 mm |
| Max. cutting length | 80 mm (wood) / 50 mm (metal profiles/tubes) |
| Blade holder | 1/2" (12.7 mm) |
| Compatible battery (not included) | Parkside PAPK 12 A4 (2.0 Ah Li-ion) or other X 12 V TEAM batteries |
| Compatible charger (not included) | Parkside PLGK 12 A3 (input 220–240 V~, 50–60 Hz, output 12 V=== 2.4 A) |
| Weight | Approx. 1.2 kg (without battery) |
| Dimensions (L × W × H) | Approx. 280 × 80 × 120 mm |
| Sound pressure level | 77.5 dB(A) (uncertainty 5 dB) |
| Sound power level | 85.5 dB(A) (uncertainty 5 dB) |
| Vibrations (cutting panels) | 4.142 m/s² (uncertainty 1.5 m/s²) |
| Vibrations (cutting beams) | 4.231 m/s² (uncertainty 1.5 m/s²) |
| Power supply | 12 V Li-ion battery (X 12 V TEAM system) |
| Main functions | Straight, curved, plunge and flush cuts; electronic variable speed |
| Safety | Lock-off switch, restart protection, insulated handle |
| Maintenance and cleaning | Clean with a dry cloth; use a soft brush for hard-to-reach areas; do not use aggressive products |
| Spare parts and repairability | Saw blades and retaining bracket available; repair only by authorized service |
| Warranty | 3 years (wear parts excluded) |
| General information | Supplied with carry case, HCS blade 152×1 mm 6 TPI, retaining bracket, instruction manual |
Frequently Asked Questions - PAAS 12 B2 PARKSIDE
User questions about PAAS 12 B2 PARKSIDE
0 question about this device. Answer the ones you know or ask your own.
Ask a new question about this device
Download the instructions for your Drill in PDF format for free! Find your manual PAAS 12 B2 - PARKSIDE and take your electronic device back in hand. On this page are published all the documents necessary for the use of your device. PAAS 12 B2 by PARKSIDE.
USER MANUAL PAAS 12 B2 PARKSIDE
PDF ONLINE
parkside-diy.com
natural_image
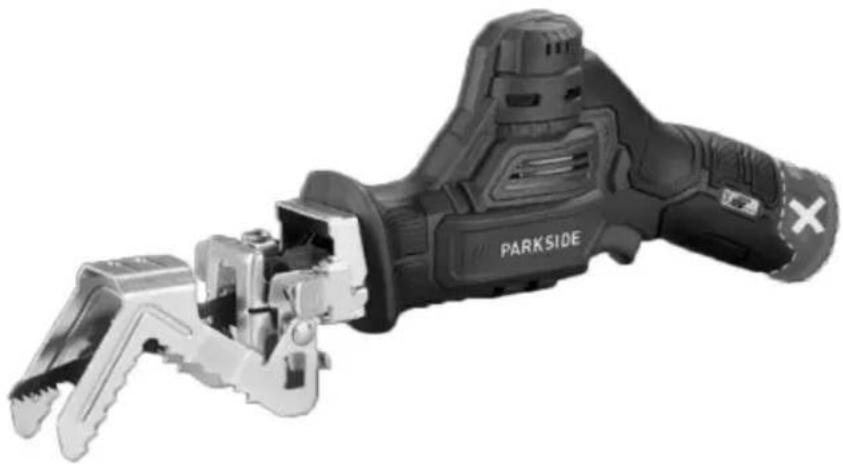
Black Parkside robotic tool with metal grip and handle, no visible text or symbols on the device itself.12 V AKKU-ASTSÄGE/12V CORDLESS GARDEN SAW/
12 V COUPEBRANCHES SANS FIL PAAS 12 B2
DE AT CH
12 V AKKU-ASTSÄGE
Bedienungsanleitung
Translation of the original instructions
FR BE
12 V COUPE-BRANCHES SANS FIL
Mode d'emploi
12 V ACCU TAKKENZAAG
Gebruiksaanwijzing
The battery pack may only be charged using chargers of the X 12V TEAM series. The battery pack has the following charging times depending on the charger:
List of pictograms used ...... Page 26
Introduction Page 27
Intended use.... Page 27
Scope of delivery Page 27
Parts list Page 27
Technical data. Page 28
General safety instructions.... Page 29
General power tool safety warnings.... Page 29
Safety instructions for reciprocating saws....Page 32
Vibration and noise reduction.... Page 32
Behaviour in emergency situations. Page 32
Residual risks Page 32
Battery charger safety warnings.... Page 33
Before first use.... Page 34
Unpacking the product.... Page 34
Accessories Page 34
Charging the battery pack Page 34
Attaching/removing the battery pack....Page 35
Checking the battery pack's charging level....Page 35
Assembly Page 35
Fitting/removing the grip bracket Page 35
Fitting/changing the saw blade .... Page 35
Operation.... Page 36
Switching on/off Page 36
Working instructions Page 36
Regular cuts ...... Page 37
Plunge cuts.... Page 37
Flush cuts.... Page 37
Cleaning and care Page 37
Maintenance Page 38
Repair Page 38
Replacement parts/Accessories.... Page 38
Storage Page 38
Transportation.... Page 38
Disposal Page 39
Warranty.... Page 39
Warranty claim procedure.... Page 40
Service Page 40
EU declaration of conformity.... Page 41
| List of pictograms used | |||
 | WARNING! – Designating a hazard with moderate risk, which can result in death or severe injury if not avoided (e.g. risk of electric shock) |  | This symbol means that the operating instructions must be observed when using the product. |
 | |||
 | CAUTION! – Designating a hazard with low risk, which could result in minor or moderate injury if not avoided (e.g. risk of scalding) |  | Always unplug the charger 11 from the mains before removing the battery pack 9 from the charger or inserting the battery pack. |
 | NOTICE! – Warns of possible damage to property/the product if not avoided (e.g. risk of short circuit) |  | Always switch the product off, remove the battery pack 9 and let the product cool down before making any adjustments. |
 | Wear hearing protection! Wear pro  /e gloves! /e gloves! | ||
 | Alternating current/voltage Direct current/voltage | ||
 | Use the product in dry indoor spaces only. |  | Fuse |
| min-1 | Revolutions per minute | ||
 | Protection class II (double insulation) |  | Protect the battery pack 9 from heat and continuous intense sunlight. |
 | Protect the battery pack 9 from fire. |  | Protect the battery pack 9 from water and moisture. |
 | CE mark indicates conformity with relevant EU directives applicable for this product. |  | Safety information Instructions for use |
12V CORDLESS GARDEN SAW
Introduction
We congratulate you on the purchase of your new product. You have chosen a high quality product. The instructions for use are part of the product. They contain important information concerning safety, use and disposal. Before using the product, please familiarise yourself with all of the safety information and instructions for use. Only use the product as described and for the specified applications. If you pass the product on to anyone else, please ensure that you also pass on all the documentation with it.
Intended use
This Cordless garden saw (hereinafter “product” or “power tool”) is a reciprocating saw intended for sawing wood, plastics and building materials up to a fixed stop (base plate).
The product is suitable for rough sawing, straight and curved cuts and cuts surfaces flush.
- With the grip bracket mounted, the product is suitable for sawing branches.
- Observe the information on saw blades and the working instructions for sawing.
■ Any other uses of or modifications to the product are deemed to be improper usage and may result in serious physical injury.
■ The manufacturer accepts no responsibility for damage(s) attributable to misuse.
■ This product is not intended for commercial use.
- Scope of delivery
WARNING!
The product and the packaging are not children's toys! Children must not play with plastic bags, sheets and small parts! There is a danger of choking and suffocation!
NOTE
HCS = High carbon steel
▶ TPI = teeth per inch = the number of teeth per inch (2.54 cm)
1 Cordless garden saw
1 Grip bracket
1 Saw blade for wood (HCS, 152 × 1 mm, 6 TPI)
1 Carrying case
1 User manual
NOTE
▶ Battery pack and charger are not included.
Parts list
Before reading, unfold the pages containing the illustrations and familiarise yourself with all functions of the product.
(Fig. A, B, C)
1 Saw blade
2 Base plate
3 Quick-release chuck
4 Hand guard
5 Release (grip bracket)
5a Slot
6 Switch lock
7 Handle
8 Release button (battery pack)
9 Battery pack *
10 On/off switch
11 Charger *
12 Charging control LED (green)
13 Charging control LED (red)
14 Grip bracket
15 Charging level LEDs (red/orange/green)
* Not included in delivery
- Technical data
| 12V Cordless garden saw PAAS 12 B2 | |
| Model number: | HG11034 (charger with VDE plug)HG11034-BS (charger with BS plug) |
| Rated voltage: | 12 V === |
| Rated idle stroke rate n0: | 0-2,700 min -1 |
| Stroke length: | 20 mm |
| Max. cut length: | 80 mm (Wood)50 mm (Metal profiles/ metal pipes) |
| Saw blade holder: | 12" (12.7 mm) |
| Battery pack * PAPK 12 A4 | |
| Model number: | HG10468 |
| Type: Lithium-Ion | |
| Rated voltage: | 12 V === |
| Capacity: | 2.0 Ah |
| Charger * PLGK 12 A3 | |
| Model number: | HG11358 (VDE plug)HG11358-BS(BS plug) |
| Input | |
| Rated voltage: | 20-240 V~, 50-60 Hz |
| Rated power consumption: | 50 W |
| Fuse (internal): | 2 A [IMAGE] |
| Output | |
| Rated voltage: | 12 V === |
| Rated current: | 2.4 A |
| Charging time: | approx. 60 minutes |
| Protection class: | II/□ (double insulation) |
* Not included in delivery
Recommended ambient temperature
| While charging: | +4 °C to +40 °C |
| During operation: | +4 °C to +40 °C |
| During storage: | +20 °C to +26 °C |
Noise emission value
Noise measurement value determined in accordance with EN 62841. The A-rated noise level of the power tool at the working location is typically as follows:
| Sound pressure level LpA : | 77.5 dB |
| Uncertainty KpA : | 5 dB |
| Sound power level LWA : | 85.5 dB |
| Uncertainty KWA : | 5 dB |
WARNING!

Wear hearing protection!
Vibration emission value
Total vibration values (vector total of three directions) determined in accordance with EN 62841:
| Sawing chipboard ah,B : | 4.142 m/s 2 |
| Uncertainty K: | 1.5 m/s 2 |
| Sawing wood beams ah,WB : | 4.231 m/s 2 |
| Uncertainty K: | 1.5 m/s 2 |
NOTE
The vibration emission values and the noise emission values given in these instructions have been measured in accordance with a standardised test procedure and can be used for comparison of the power tool with another tool.
The specified total vibration values and the noise emission values can also be used to make a provisional load estimate.

WARNING!
Depending on the manner in which the power tool is being used and, in particular, the kind of workpiece being worked, the vibration and noise emission values can deviate from the values given in these instructions during actual use of the power tool.
It is necessary to establish safety measures to protect the operator based on an estimation of the vibration load during actual use (wherein all states of operation must be included, e.g. times when the power tool is switched off and times where the power tool is switched on but running without load).

General safety instructions
● General power tool safety warnings

WARNING!


Read all safety warnings, instructions, illustrations and specifications provided with this power tool. Failure to follow all instructions listed below may result in electric shock, fire and/or serious injury.
Save all warnings and instructions for future reference.
The term “power tool” in the warnings refers to your mains-operated (corded) power tool or battery-operated (cordless) power tool.
Work area safety
a) Keep work area clean and well lit. Cluttered or dark areas invite accidents.
b) Do not operate power tools in explosive atmospheres, such as in the presence of flammable liquids, gases or dust. Power tools create sparks which may ignite the dust or fumes.
c) Keep children and bystanders away while operating a power tool. Distractions can cause you to lose control.
Electrical safety
a) Power tool plugs must match the outlet. Never modify the plug in any way. Do not use any adapter plugs with earthed (grounded) power tools. Unmodified plugs and matching outlets will reduce risk of electric shock.
b) Avoid body contact with earthed or grounded surfaces, such as pipes, radiators, ranges and refrigerators. There is an increased risk of electric shock if your body is earthed or grounded.
c) Do not expose power tools to rain or wet conditions. Water entering a power tool will increase the risk of electric shock.
d) Do not abuse the cord. Never use the cord for carrying, pulling or unplugging the power tool. Keep cord away from heat, oil, sharp edges or moving parts. Damaged or entangled cords increase the risk of electric shock.
e) When operating a power tool outdoors, use an extension cord suitable for outdoor use. Use of a cord suitable for outdoor use reduces the risk of electric shock.
f) If operating a power tool in a damp location is unavoidable, use a residual current device (RCD) protected supply. Use of an RCD reduces the risk of electric shock.
Personal safety
a) Stay alert, watch what you are doing and use common sense when operating a power tool. Do not use a power tool while you are tired or under the influence of drugs, alcohol or medication. A moment of inattention while operating power tools may result in serious personal injury.
b) Use personal protective equipment. Always wear eye protection. Protective equipment such as dust mask, non-skid safety shoes, hard hat, or hearing protection used for appropriate conditions will reduce personal injuries.
c) Prevent unintentional starting. Ensure the switch is in the off-position before connecting to power source and/or battery pack, picking up or carrying the tool. Carrying power tools with your finger on the switch or energising power tools that have the switch on invites accidents.
d) Remove any adjusting key or wrench before turning the power tool on. A wrench or a key left attached to a rotating part of the power tool may result in personal injury.
e) Do not overreach. Keep proper footing and balance at all times.
This enables better control of the power tool in unexpected situations.
f) Dress properly. Do not wear loose clothing or jewellery. Keep your hair, clothing and gloves away
from moving parts. Loose clothes, jewellery or long hair can be caught in moving parts.
g) If devices are provided for the connection of dust extraction and collection facilities, ensure these are connected and properly used. Use of dust collection can reduce dust-related hazards.
h) Do not let familiarity gained from frequent use of tools allow you to become complacent and ignore tool safety principles. A careless action can cause severe injury within a fraction of a second.
Power tool use and care
a) Do not force the power tool. Use the correct power tool for your application. The correct power tool will do the job better and safer at the rate for which it was designed.
b) Do not use the power tool if the switch does not turn it on and off. Any power tool that cannot be controlled with the switch is dangerous and must be repaired.
c) Disconnect the plug from the power source and/or the battery pack, if detachable, from the power tool before making any adjustments, changing accessories, or storing power tools. Such preventive safety measures reduce the risk of starting the power tool accidentally.
d) Store idle power tools out of the reach of children and do not allow persons unfamiliar with the power tool or these instructions to operate the power tool. Power tools are dangerous in the hands of untrained users.
e) Maintain power tools and accessories. Check for misalignment or binding of
moving parts, breakage of parts and any other condition that may affect the power tool's operation. If damaged, have the power tool repaired before use. Many accidents are caused by poorly maintained power tools.
f) Keep cutting tools sharp and clean. Properly maintained cutting tools with sharp cutting edges are less likely to bind and are easier to control.
g) Use the power tool, accessories and tool bits etc. in accordance with these instructions, taking into account the working conditions and the work to be performed.
Use of the power tool for operations different from those intended could result in a hazardous situation.
h) Keep handles and grasping surfaces dry, clean and free from oil and grease. Slippery handles and grasping surfaces do not allow for safe handling and control of the tool in unexpected situations.
Battery tool use and care
a) Recharge only with the charger specified by the manufacturer. A charger that is suitable for one type of battery pack may create a risk of fire when used with another battery pack.
b) Use power tools only with specifically designated battery packs. Use of any other battery packs may create a risk of injury and fire.
c) When battery pack is not in use, keep it away from other metal objects, like paper clips, coins, keys, nails, screws or other small metal objects, that can make a connection from one terminal
to another. Shorting the battery terminals together may cause burns or a fire.
d) Under abusive conditions, liquid may be ejected from the battery; avoid contact. If contact accidentally occurs, flush with water. If liquid contacts eyes, additionally seek medical help. Liquid ejected from the battery may cause irritation or burns.
e) Do not use a battery pack for tool that is damaged or modified. Damaged or modified batteries exhibit unpredictable behaviour resulting in fire, explosion or risk of injury.
f) Do not expose a battery pack or tool to fire or excessive temperature. Exposure to fire or temperature above +130 °C (+265 °F) may cause explosion.
g) Follow all charging instructions and do not charge the battery pack or tool outside the temperature range specified in the instructions. Charging improperly or at temperatures outside the specified range may damage the battery and increase the risk of the fire.

CAUTION! RISK OF EXPLOSION! Never charge non-rechargeable batteries!


Protect the rechargeable battery from heat, for example from continuous exposure to sunlight, fire, water and moisture. There is a risk of explosion.
Service
a) Have your power tool serviced by a qualified repair person using only identical replacement parts.
This will ensure that the safety of the power tool is maintained.
b) Never service damaged battery packs. Service of battery packs should be only be performed by the manufactured or authorized service providers.
● Safety instructions for reciprocating saws
a) Hold the power tool by insulated gripping surfaces, when performing an operation where the cutting accessory may contact hidden wiring or its own cord.
Cutting accessory contacting a “live” wire may make exposed metal parts of the power tool “live” and could give the operator an electric shock.
b) Use clamps or another practical way to secure and support the workpiece to a stable platform.
Holding the workpiece by hand or against your body leaves it unstable and may lead to loss of control.
c) Wear a dust mask!

WARNING!
Do not use any accessories that are not recommended by PARKSIDE. This can lead to electric shock and fire.
● Vibration and noise reduction
To reduce the impact of noise and vibration emission, limit the time of operation, use low-vibration and low-noise operating modes as well as wear personal protective equipment.
Take the following points into account to minimise the vibration and noise exposure risks:
■ Only use the product as intended by its design and these instructions.
■ Ensure that the product is in good condition and well maintained.
- Keep tight grip on the handles/grip surface.
- Maintain this product in accordance with these instructions and keep it well lubricated (where appropriate).
■ Plan your work schedule to spread any high vibration tool use across a longer period of time.
● Behaviour in emergency situations
Familiarise yourself with the use of this product by means of this instruction manual. Memorise the safety warnings and follow them to the letter. This will help to prevent risks and hazards.
■ Always be alert when using this product, so that you can recognise and handle risks early. Fast intervention can prevent serious injury and damage to property.
■ Switch the product off and remove the battery pack if there are malfunctions. Have the product checked by a qualified professional and repaired, if necessary, before you operate it again.
- Residual risks
Even if you are operating this product in accordance with all the safety requirements, potential risks of injury and damage remain. The following dangers can arise in connection with the structure and design of this product:
■ Health defects resulting from vibration emission if the product is being used over long periods of time or not adequately managed and properly maintained.
NOTE
This product produces an electromagnetic field during operation! This field may under some circumstances interfere with active or passive medical implants!
To reduce the risk of serious or fatal injury, we recommend persons with medical implants to consult their doctor and the medical implant manufacturer before operating this product!
● Battery charger safety warnings
This appliance can be used by children aged from 8 years and above and persons with reduced physical, sensory or mental capabilities or lack of experience and knowledge if they have been given supervision or instruction concerning use of the appliance in a safe way and understand the hazards involved. Children shall not play with the appliance.
Cleaning and user maintenance shall not be made by children without supervision.
- Do not charge non-rechargeable batteries. Disregarding this instruction is hazardous.
- If the supply cord is damaged, it must be replaced by the manufacturer, its service agent or similarly qualified persons in order to avoid a hazard.
■ Protect the electrical parts against moisture. Do not immerse such parts in water or other liquids to avoid electrical shock. Never hold the appliance under running water. Pay attention to the instructions provided for cleaning, maintenance and repair.
The appliance is suitable for indoor use only.
⚠ NOTICE! This charger is only designed for charging the following battery pack types:
| /// PARKSIDE 12 Vbattery pack | ||
| PAPK 12 A3 | 2.0 Ah | 3 cells |
| PAPK 12 B3 | 4.0 Ah | 6 cells |
| PAPK 12 C1 | 2.5 Ah | 3 cells |
| PAPK 12 D1 | 5.0 Ah | 6 cells |
Suitable battery packs and chargers
| Battery pack: | X/12VxTeam |
| Charger: X 12 | V/Teekside |
Customers can obtain compatible replacement batteries and chargers from the LIDL online shop www.lidl.de.
Before first use
● Unpacking the product
- Take the product out of the packaging and remove all packaging materials and plastic wrappings.
- Check to make sure that all listed parts are included (see "Scope of delivery").
- Check whether the product and all parts are in good condition, if any damage or defect is detected, do not use the product, but follow the procedure described in chapter "Warranty".
Accessories
To operate this product safely and correctly, the following accessories, i.e. tools and saw blades, are necessary:
-Suitable saw blade
- Accessories and saw blades are available through your authorised dealer. When buying always consider the technical requirements of this product (see “Technical data”).
□ Use only the additional equipment and accessories specified in the user manual. Using attachments or accessory tools other than those recommended in the user manual can lead to a risk of injury.
☐ If you are not certain, ask a qualified specialist and get advice from your trusted dealer.
● Charging the battery pack
⚠ WARNING! Risk of injury!

Always unplug the charger 11 from the mains before inserting/ removing the battery pack 9.
NOTE
You can charge the battery pack 9 at any time without reducing its life cycle.
Interrupting the charging process does not damage the battery pack 9.
Let the charger 11 cool down for at least 15 minutes between successive charging processes.
The charging control LEDs (red 13 and green 12) indicate the status of the charger 11 and the battery pack 9.
Before operation: Charge the battery pack 9 when it is at medium or low charging level (see "Checking the battery pack's charging level").
| LED | Status |
| Red LED 13lights up | Battery pack 9charges |
| Green LED 12lights up | Battery pack 9 fully charged |
| Green LED 12and red LED 13flashingLED Status | Battery pack 9 defective |
| Red LED 13 flashing | Battery pack 9 too cold or too warm |
| Green LED 12 lights up (without battery pack 9) | Charger 11 ready |
- Insert the battery pack 9 into the charger 11.
- Connect the mains plug of the charger 11 to a mains outlet.
- When the battery pack 9 is fully charged:
- Disconnect the mains plug of the charger 11 from the mains outlet.
- Remove the battery pack 9 from the charger 11.
- Attaching/removing the battery pack
Attaching the battery pack
- Push the battery pack 9 into the handle 7.
- Ensure the battery pack 9 clicks noticeably in place.
Removing the battery pack
- Press the release button 8 on the battery pack 9.
- Pull the battery pack 9 from the handle 7.
- Checking the battery pack's charging level
☐ Press the switch lock 6 and the on/off switch 10 simultaneously. The charging level LEDs 15 display the charging level as follows:
| Colour Charging level | |
| Red/orange/green Maximum | |
| Red/orange Medium | |
| Red Low |
Assembly
● Fitting/removing the grip bracket
(Fig. B, C, D)
WARNING! Risk of injury!

Always switch the product off, remove the battery pack 9 and let the product cool down before making any adjustments.
Fitting the grip bracket
- Press the release 5 on both sides of the grip bracket 14.
- Push the grip bracket 14 over the guides on the base plate 2 until it audibly locks into the slot 5a.
Removing the grip bracket
- Press the release 5 on both sides of the grip bracket 14.
- Pull the grip bracket 14 out of the guides.
● Fitting/changing the saw blade
⚠ WARNING! Risk of injury!

Always switch the product off, remove the battery pack 9 and let the product cool down before making any adjustments.
⚠️ CAUTION! Risk of injury!

Saw blades are sharp and can become hot during use. Always wear protective gloves when handling saw blades.
⚠ NOTICE! Risk of property damage!
The teeth of the saw blade 1 must point downwards.
- Turn the quick-release chuck 3 in the direction of the arrow until it stops. Hold the quick-release chuck in this position.
- Push the saw blade 1 into the quick-release chuck 3 until it stops.
- Release the quick-release chuck 3 so that it returns to its initial position.
- The saw blade 1 is now locked.
Operation
- Switching on/off
CAUTION! Risk of injury!

Always wear protective gloves when handling or working with the product.
CAUTION! Risk of injury!
Before switching on the product: Ensure the saw blade 1 is not in contact with the workpiece.
▶ Ensure your stance is stable. Always hold the product firmly with both hands while working.
Keep your hands away from the saw blade 1 when the product is in operation.
NOTE
You cannot lock the on/off switch 10 for continuous operation.
Switching on
- Release the switch lock 6 by pushing it in on the left or right side.
- Press and hold the on/off switch 10.
- Regulate the speed as required by changing the amount of pressure on the on/off switch 10.
Switching off
-
Release the on/off switch 10.
-
When releasing the on/off switch 10, the switch lock 6 moves back into its original position.
● Working instructions
⚠️ CAUTION! Risk of injury and damage to property!
▶ Wear protective gloves when handling the saw blade 1. In this way, you avoid injury from cuts.
Do not use any blunt or bent saw blades or saw blades which are damaged in any other way.
Before sawing the workpiece, check for hidden foreign objects such as nails and screws and remove them.
Always insert a suitable saw blade.
▶ Secure the workpiece with the aid of clamping devices on the workbench.
Apply only as much pressure as is required for sawing. If there is excessive pressure, the saw blade may bend and break.
Switch the product off immediately if the saw blade jams. Try to spread the saw cut and carefully pull the saw blade out.
▶ Always stand to the side of the product when working.
▶ Always make sure that the workplace is well ventilated.
Avoid over-stressing the product while working.
▶ Saw the material at a constant speed.
- Regular cuts
- Verify the saw blade 1 is not touching the workpiece.
- Switch the product on.
- Apply the base plate 2 to the workpiece.
- Use even pressure, advancing at a steady pace when making the cut.
You can make horizontal, diagonal, or vertical cuts (Fig. E).
- When working with the grip bracket 14, move the product downwards while applying light pressure (Fig. G).
- When you are finished:
-Switch the product off.
- Pull the saw blade 1 out of the workpiece.
- Plunge cuts
(Fig. F)
⚠️ CAUTION! Risk of kickback and personal injury!
Only make plunge cuts in soft materials (e.g. wood or plasterboard) using a short saw blade (max. length: 150 mm).
Plunge cuts are very challenging and are associated with a higher risk of injuries. Only use this technique if you are familiar with it.
NOTE
Before making plunge cuts: Remove the grip bracket 14.
- Place the front edge of the base plate 2 on the workpiece so that the saw blade 1 does not touch the workpiece.
- Switch the product on.
-
Slowly plunge the saw blade 1 into the workpiece.
-
When you have cut through the depth of the workpiece, continue sawing as usual.
Flush cuts
⚠️ CAUTION! Risk of kickback and personal injury!
Make sure that the saw blade 1 is longer than the pipe diameter.
NOTE
Before making flush cuts: Remove the grip bracket 14.
Using a flexible bi-metal saw blade you can saw off protruding workpieces (e.g. water pipes) flush to a wall.
- Place the saw blade 1 directly against the wall.
- Bend the saw blade 1 by applying lateral pressure to the product so that the base plate 2 makes contact with the wall.
- Switch the product on.
- Saw off the workpiece by applying constant pressure.
● Cleaning and care
⚠ WARNING! Risk of injury!

Always switch the product off, remove the battery pack 9 and let the product cool down before making any adjustments.
NOTE
Do not use chemical, alkaline, abrasive or other aggressive detergents or disinfectants to clean this product as they might be harmful to its surfaces.
▶ Never allow fluids to get into the product.
■ Regular and proper cleaning helps to ensure safe use and prolongs the life of the product.
□ Always keep the product clean, dry and free from oil or grease.
□ After each use and before storage: Remove debris from the product.
□ Clean the product with a dry cloth.
☐ Use a soft brush for areas that are hard to reach.
☐ In particular, clean the air vents after every use with a cloth and soft brush. The vents must always be clear.
Maintenance
Before and after each use: Check the product and accessories (e.g. saw blades) for wear and damage. If required, replace worn or damaged accessories. Observe the technical requirements (see "Technical data").
☐ Check covers and safety devices for sound condition and correct installation. If that is not the case, have them replaced by an expert.
☐ Replace the saw blade 1 if it becomes blunt, bent or damaged in any other way.
Repair
This product does not contain any parts that can be repaired by the user.
□ Contact an authorised service centre or a similarly qualified person to have the product checked and repaired.
● Replacement parts/Accessories
- Customers can obtain compatible replacement parts and accessories via www.optimex-shop.com.
■ You can only place orders online.
□ Have the order number ready for your order.
□ Contact the Lidl service hotline (see "Service") for further information.
| Part Order number | |
| Saw blade 199944 | 974305 |
| Grip bracket 14999 | 44974304 |
Storage
The ideal temperature for a long term storage (longer than 3 months) is between +20 °C and +26 °C.
□ Clean the product as described above.
□ Store the product and its accessories in a dark, dry, frost-free, well-ventilated place.
□ Always store the product in a place that is inaccessible to children.
□ Store the product in its carrying case.
Battery pack
☐ Before storing for extended periods: Only store the battery pack 9 partially charged. The battery pack should be charged at 40 % to 60 % (red and orange charging level LEDs 15 light up).
☐ When storing for extended periods: Check the charging level of the battery pack 9 about every 3 months. Recharge the battery pack, if necessary.
Transportation
□ Transport the product in its carrying case.
□ Protect the product from any heavy impact or strong vibrations which may occur during transportation in vehicles.
☐ Secure the product to prevent it from slipping or falling over.
● Disposal
The packaging is made entirely of recyclable materials, which you may dispose of at local recycling facilities.
Observe the marking of the

packaging materials for waste separation, which are marked with abbreviations (a) and numbers (b) with following meaning: 1–7: plastics/20–22: paper and fibreboard/80–98: composite materials.
Product:
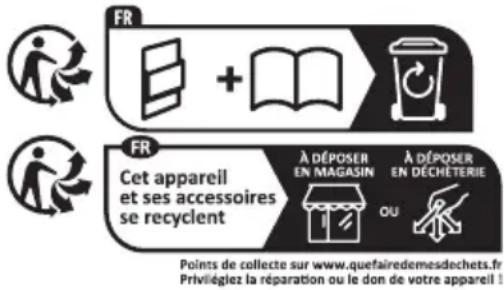
The product incl. accessories and packaging materials are recyclable and are subject to extended producer responsibility.
Dispose them separately, following the illustrated Info-tri (sorting information), for better waste treatment.
The Triman logo is valid in France only.

Contact your local refuse disposal authority for more details of how to dispose of your worn-out product.
to protect the environment, please dispose of the product properly when it has reached the end of its useful life and not in the household waste. Information on collection points and their opening hours can be obtained from your local authority.
Faulty or used batteries/rechargeable batteries must be recycled. Return the batteries/rechargeable batteries and/or the product to the available collection points.
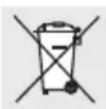
Environmental damage through incorrect disposal of the batteries/rechargeable batteries!
Remove the batteries/battery pack from the product before disposal.
Batteries/rechargeable batteries may not be disposed of with the usual domestic waste. They may contain toxic heavy metals and are subject to hazardous waste treatment rules and regulations. The chemical symbols for heavy metals are as follows: Cd = cadmium, Hg = mercury, Pb = lead. That is why you should dispose of used batteries/rechargeable batteries at a local collection point.
Warranty
The product has been manufactured to strict quality guidelines and meticulously examined before delivery. In the event of material or manufacturing defects you have legal rights against the retailer of this product. Your legal rights are not limited in any way by our warranty detailed below.
The warranty for this product is 3 years from the date of purchase. The warranty period begins on the date of purchase. Keep the original sales receipt in a safe location as this document is required as proof of purchase.
Any damage or defects already present at the time of purchase must be reported without delay after unpacking the product.
Should the product show any fault in materials or manufacture within 3 years from the date of purchase, we will repair or replace it – at our choice – free of charge to you. The warranty period is not extended as a result of a claim being granted. This also applies to replaced and repaired parts.
This warranty becomes void if the product has been damaged, or used or maintained improperly.
The warranty covers material or manufacturing defects. This warranty does not cover product parts subject to normal wear and tear, thus considered consumables (e.g. batteries, rechargeable batteries, tubes, cartridges), nor damage to fragile parts, e.g. switches or glass parts.
● Warranty claim procedure
So that your request can be processed quickly, please observe the following instructions:
For all inquiries, please have the receipt and item number (IAN 479238_2410) ready as proof of purchase.
The article number can be taken from the identification label on the product, engraving on the product, the front cover of your manual (at the bottom left), or the sticker on the back or bottom of the product.
If malfunctions or other defects arise, first contact the service department indicated below by phone or email.
You can then send a product recorded as defective to the communicated service address postage-free, making sure to enclose proof of purchase (receipt) and information on the details of the defect and when it occurred.

You can download and view this and numerous other manuals at parkside-diy.com. This QR code takes you directly to parkside-diy.com. Choose your country and use the search screen to search for the operating instructions. Entering the item number (IAN) 479238_2410 takes you to the operating instructions for your item.
Service
GB Service Great Britain
Tel.:08000569216
E-Mail:owim@lidl.co.uk
IE Service Ireland
Tel.:1800200736
E-Mail:owim@lidl.ie

● EU declaration of conformity
EU DECLARATION OF CONFORMITY (No 479238\_2410)
IAN: 479238_2410
Product identification:
"PARKSIDE" Cordless Garden Saw
Model Number: HG11034
The object of the declaration described above is in conformity with the relevant Union harmonisation legislation:
Directive 2006/42/EC
Directive 2014/30/EU
Directive 2011/65/EU and all related amendments
References to the relevant harmonised standards used or references to the other technical specifications in relation to which conformity is declared:
N° / Parts
Directive 2006/42/EC
EN 62841-1:2015/A11:2022
EN 62841-2-11:2016/A1:2020
Directive 2014/30/EU
EN IEC 55014-1:2021
EN IEC 55014-2:2021
The object of the declaration described above is in conformity with Directive 2011/65/EU of the European Parliament and of the Council of 8 June 2011 on the restriction of the use of certain hazardous substances in electrical and electronic equipment:
N° / Parts
EN IEC 63000:2018
Keeper of the technical documentation: OWIM GmbH & Co.KG
Signed for and on behalf of:
This declaration of conformity is issued under the sole responsibility of the manufacturer.
Translation of the original declaration of conformity
Neckarsulm 27.11.2024
Place
Date
ppa. Paul ppa. Budheim ppa. Stehen Haensel ppa. Jens Buchheim
Authorised Signatory Authorised Signatory
12 V ACCU TAKKENZAAG
Inleiding



- V AKKU-ASTSÄGE/12V CORDLESS GARDEN SAW/
- V COUPEBRANCHES SANS FIL PAAS 12 B2
- V AKKU-ASTSÄGE
- V COUPE-BRANCHES SANS FIL
- V ACCU TAKKENZAAG
- List of pictograms used ...... Page 26
- Introduction Page 27
- General safety instructions.... Page 29
- Before first use.... Page 34
- Assembly Page 35
- Operation.... Page 36
- Working instructions Page 36
- Cleaning and care Page 37
- Disposal Page 39
- Warranty.... Page 39
- Service Page 40
- EU declaration of conformity.... Page 41
- 12V CORDLESS GARDEN SAW
- Introduction
- Intended use
- - Scope of delivery
- WARNING!
- NOTE
- Parts list
- Noise emission value
- Vibration emission value
- General safety instructions
- Save all warnings and instructions for future reference.
- Work area safety
- Electrical safety
- Personal safety
- Power tool use and care
- Battery tool use and care
- CAUTION! RISK OF EXPLOSION! Never charge non-rechargeable batteries!
- Service
- Before first use
- ● Unpacking the product
- Accessories
- ● Charging the battery pack
- ⚠ WARNING! Risk of injury!
- - Attaching/removing the battery pack
- Attaching the battery pack
- Removing the battery pack
- - Checking the battery pack's charging level
- Assembly
- ● Fitting/removing the grip bracket
- WARNING! Risk of injury!
- Fitting the grip bracket
- Removing the grip bracket
- ● Fitting/changing the saw blade
- ⚠️ CAUTION! Risk of injury!
- ⚠ NOTICE! Risk of property damage!
- Operation
- - Switching on/off
- CAUTION! Risk of injury!
- Switching on
- Switching off
- ● Working instructions
- ⚠️ CAUTION! Risk of injury and damage to property!
- - Regular cuts
- - Plunge cuts
- ⚠️ CAUTION! Risk of kickback and personal injury!
- Flush cuts
- ● Cleaning and care
- Maintenance
- Repair
- ● Replacement parts/Accessories
- Storage
- Battery pack
- Transportation
- ● Disposal
- Observe the marking of the
- Product:
- Environmental damage through incorrect disposal of the batteries/rechargeable batteries!
- Warranty
- ● Warranty claim procedure
- ● EU declaration of conformity
- EU DECLARATION OF CONFORMITY (No 479238\_2410)
- Inleiding
Brand : PARKSIDE
Model : PAAS 12 B2
Category : Drill