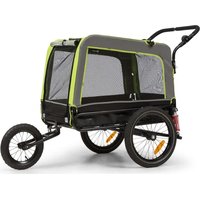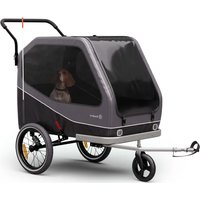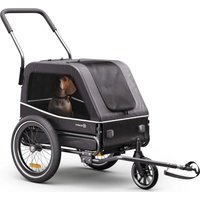
Goldie Home - Bike trailer Klarfit - Free user manual and instructions
Find the device manual for free Goldie Home Klarfit in PDF.


User questions about Goldie Home Klarfit
0 question about this device. Answer the ones you know or ask your own.
Ask a new question about this device
Download the instructions for your Bike trailer in PDF format for free! Find your manual Goldie Home - Klarfit and take your electronic device back in hand. On this page are published all the documents necessary for the use of your device. Goldie Home by Klarfit.
USER MANUAL Goldie Home Klarfit
text_image
QR code image containing encoded data, no visible human-readable textINHALT
Berlin Brands Group UK Limited
PO Box 42
272 Kensington High Street
London, W8 6ND
United Kingdom
SICHERHEITSHINWEISE
flowchart
graph TD
    A["Assembly of leather jacket"] --> B["Step 1: Lasso being loaded"]
    B --> C["Step 2: Lasso is attached to the seat"]
    C --> D["Step 3: Lasso is assembled into the seat"]
    D --> E["Step 4: Lasso is assembled into the body panel"]
    E --> F["Step 5: Lasso is assembled into the seat panel"]
natural_image
Three-step photo sequence showing a device interior, hand placing part, and final storage unit (no text or symbols visible)natural_image
Close-up of hands holding a yellow tool against a green grass field (no text or symbols visible)natural_image
Step-by-step assembly of a car seatbelt buckle adjustment, showing step-by-step insertion and disassembly (no text or symbols visible)Montage der Räder
natural_image
Close-up of hands adjusting a bicycle wheel rim, showing the wheel rim being adjusted from a red arrow (no text or symbols visible)natural_image
Sequence of four-step automotive assembly steps showing tool installation and mounting (no text or symbols visible)natural_image
Side-by-side comparison of a car's side profile and its red flag, showing front and rear views with no visible text or symbols.Congratulations on purchasing this product. Please read this manual carefully and take care of the following hints on installation and use to avoid technical damages. Any failure caused by ignoring the items and cautions mentioned in the operation and installation instructions are not covered by our warranty and any liability. Scan the QR code to get access to the latest user manual and more product information.

text_image
QR code image containing encoded data, no visible human-readable textCONTENTS
Manufacturer & Importer (UK) 13
Safety Instructions 14
Parts in Package 15
Assembly 16
Hitching the Trailer on the Bicycle 19
Loading and unloading pets 21
TECHNICAL DATA
| Item number 10045147, 10045148 | |
| Permissible load 40 kg | |
| Recommended maximum speed 16 km/h |
MANUFACTURER & IMPORTER (UK)
Manufacturer:
Chal-Tec GmbH, Wallstrasse 16, 10179 Berlin, Germany.
Importer for Great Britain:
Berlin Brands Group UK Limited
PO Box 42
272 Kensington High Street
London, W8 6ND
United Kingdom
SAFETY INSTRUCTIONS
- The trailer is intended to carry pet only. No human passengers!
• Maximum load: 40 kg. - Always ride with the rear door closed. When riding, you pet should always be secured with the safety leash adjusted to the correct length.
• Maximum speed: 16km/hour.
• Always wear a helmet when riding. - Carefully check the bolts, nuts and safety pins. Make sure that all these parts are properly tightened or locked.
- Be aware that riding with the trailer increases your braking distance and may affect your ability to control the bicycle. Thoroughly practise in a safe area until you become familiar with it.
- Only use factory-supplied wheels, with the tires inflated to 30-35 P.S.I. Check pressure before each use.
- Do not make any alterations to the trailer or hitch, which could result in injury or death.
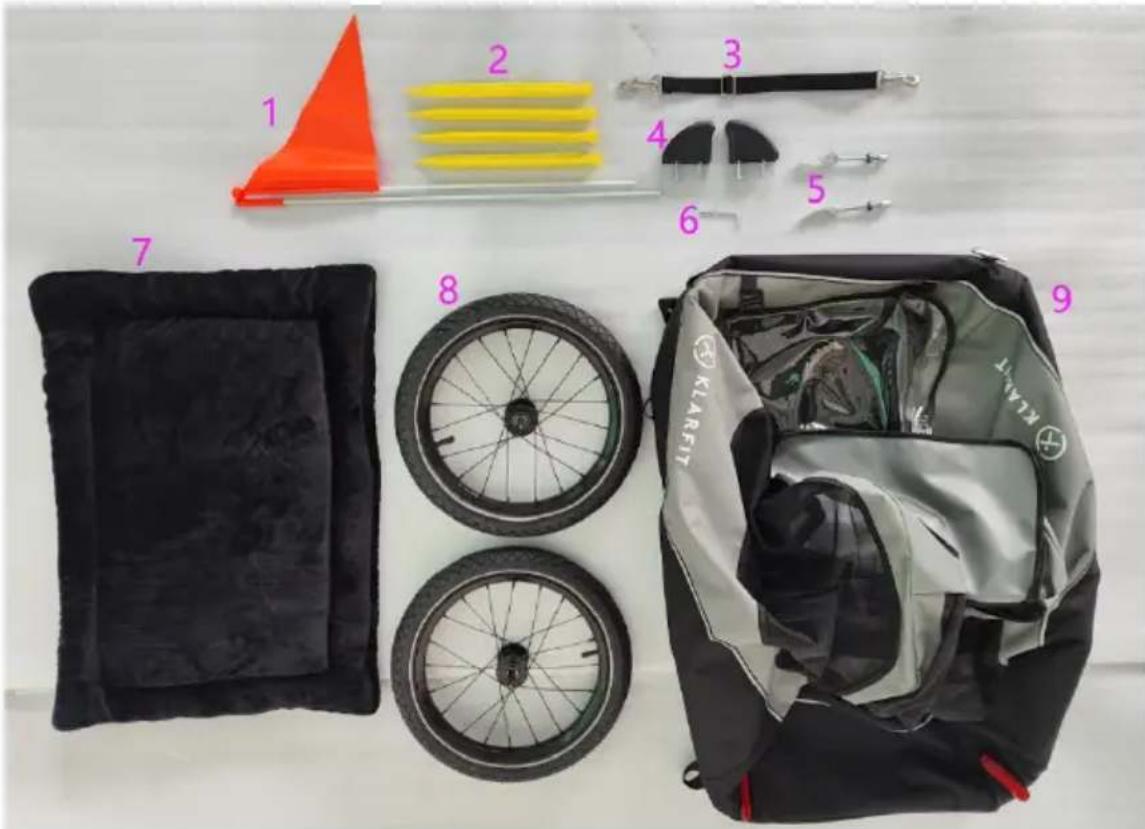
PARTS IN PACKAGE
text_image
1 2 3 4 5 6 7 8 9 KLARFIT| # Name Quantity | |
| 1 Safety Flag 1 | |
| 2 Ground Pegs 4 | |
| 3 Safety Leash 1 | |
| 4 Wheel Guards 2 | |
| 5 Quick Release 2 | |
| 6 Hex Key(4mm) 1 | |
| 7 Mat 1 | |
| 8 Wheels 2 | |
| 9 Trailer Body 1 |
ASSEMBLY
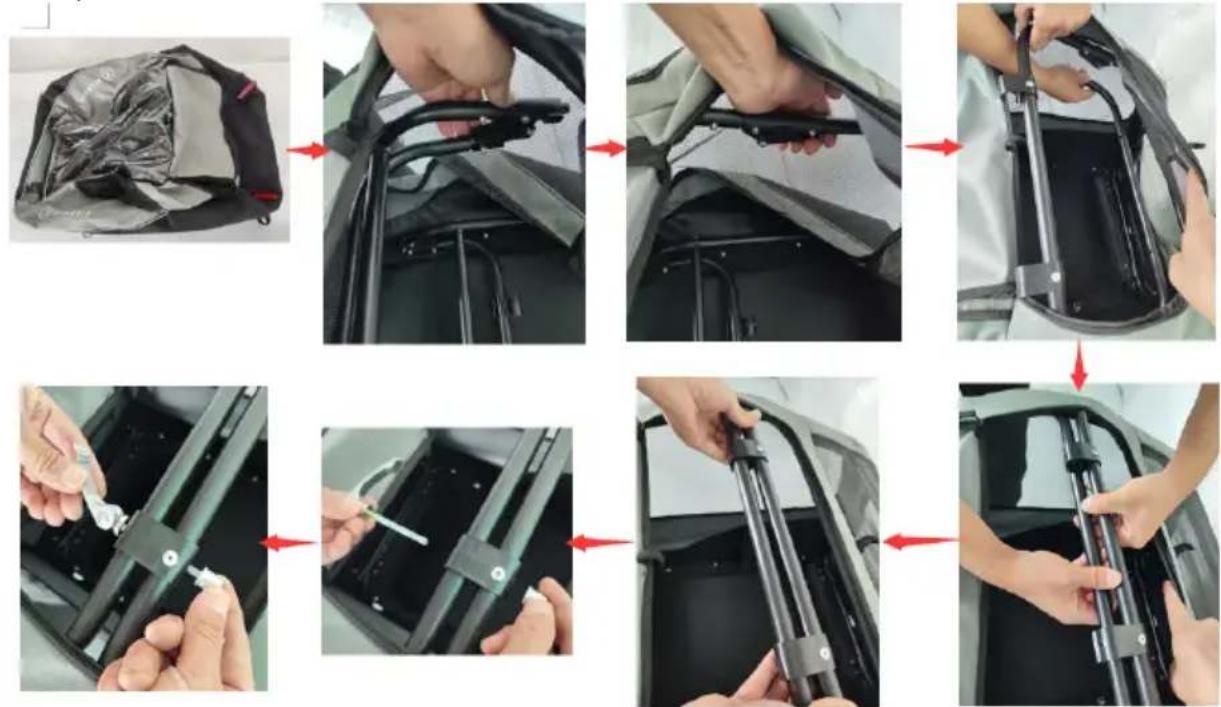
1. Unfolding the trailer body
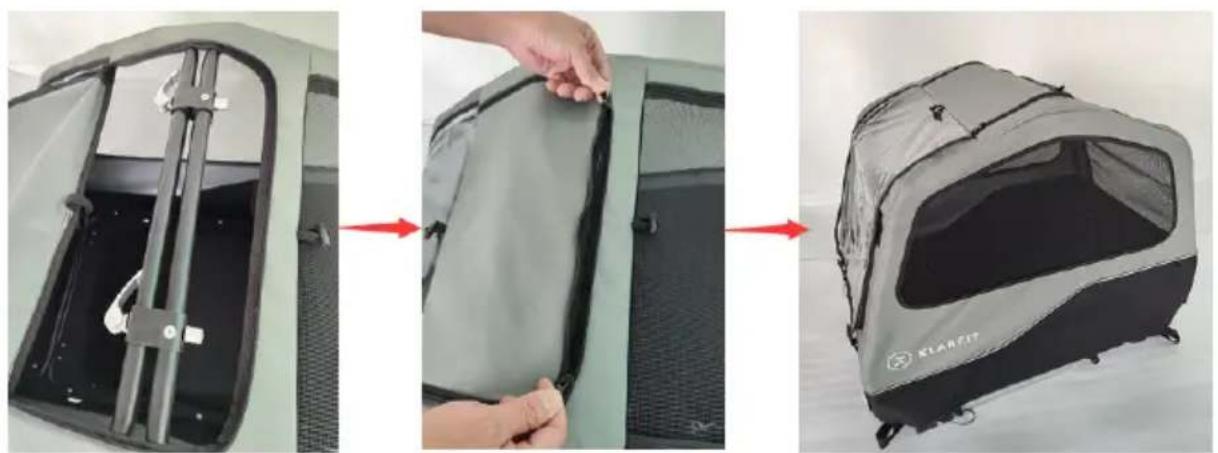
(1). Take the Trailer body out from the carton, unfold the frame folding mechanism (Remark: press the button on it and push inward to fold it up), assemble the frame as per following images and steps. Use the quick release lock the frame tube, please make sure the frame locked safety.
flowchart
graph TD
    A["Assembly of leather jacket"] --> B["Step 1: Lasso being attached"]
    B --> C["Step 2: Lasso is inserted into the seat"]
    C --> D["Step 3: Lasso is assembled into the frame"]
    D --> E["Step 4: Lasso is added to the seat"]
    E --> F["Step 5: Lasso is assembled into the frame"]
    F --> G["Final assembly with a cable and plastic component"]
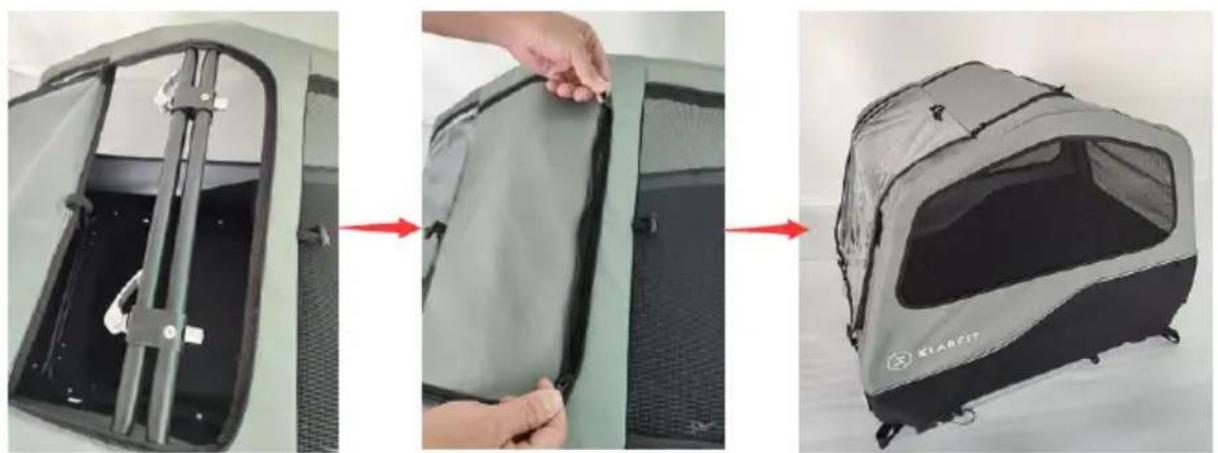
(2). Use the quick release lock both side tightly and then pull up the zipper.
natural_image
Three-step photo sequence showing a device with internal components, hand placing part, and final packaging (no text or symbols visible)Remark: The assembled trailer body could be used as a cage under this condition.
Additional function
There have ring strap on four corners of the assembled trailer body, with the ground pegs, the assembled trailer body could be used as a cage and camping outside.
Please see below instructed picture.

natural_image
Close-up of hands holding a yellow tool against a green grass field (no text or symbols visible)2. Wheel Guards assembly
Open the zipper under the side wall inside, and use the Hex Key mount the wheels guards on both sides as per following images and steps, make sure the wheel guards mounted tightly.

natural_image
Step-by-step assembly of a car seatbelt repair procedure, showing step-by-step insertion and disassembly (no text or symbols visible)Wheels assembly
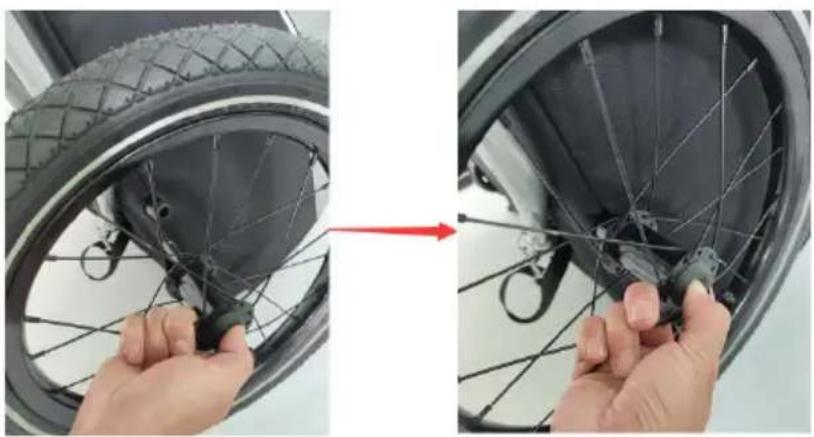
Press the axle center button and insert the axle into the frame tube simultaneously, make sure the wheel mounted safety.
Remark: press the button and do the opposite step to remove the wheel.
natural_image
Close-up of hands adjusting a bicycle wheel rim after installation, showing tire marking and cable termination (no text or symbols visible)4. Install the tow bar
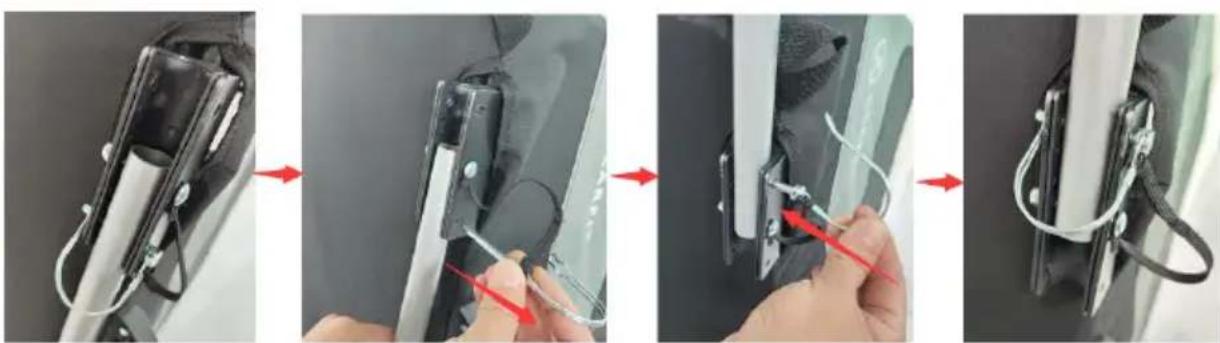
Lift the trailer up. Remove safety pin from back hole in two bar mount. Swivel the tow bar 180^ . Lock the tow bar into place by re-inserting the safety pin.

WARNING! Danger of serious injury or death
The tow bar safety pin must be locked into place before using the trailer. A tow bar that has not secured properly could loose during travel, resulting in serious injury or death.
natural_image
Four-panel sequence showing a hand holding a small electronic device with wires, connected by wires to a device component (no text or symbols visible)5. Attaching the Safety Flag
Insert the flag pole into the flag pocket on the left rear corner of the side panel. Always use the safety flag. It is an essential safety device, which can help make you more visible to motorists and other cyclists.
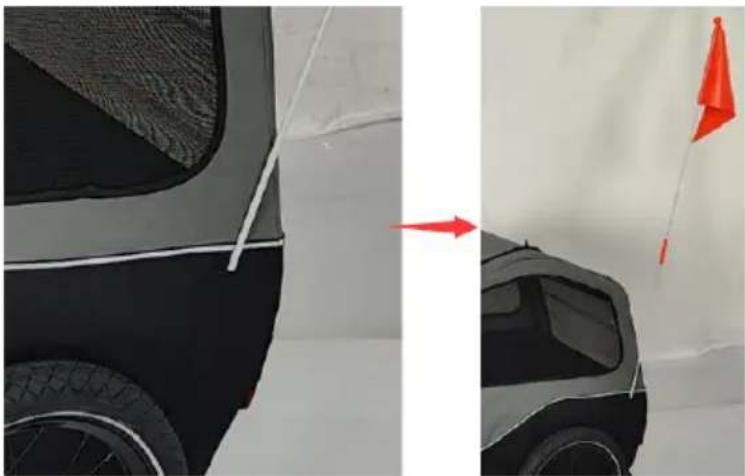
natural_image
Side-by-side comparison of a car's side profile and its 3D rendering, showing a red flag on the right side (no text or symbols)HITCHING THE TRAILER ON THE BICYCLE
NOTE: The universal hitch is only suitable for bicycle with full axle or/and with quick release axle.
1. Bicycles with Full Axle
Remove the left hand axle nut from the bicycle. Any spacers or washers can generally be retained. Put the hitch on the axle and re-attach the nut.

WARNING!
Danger of serious injury or death
- The axle nut must be tightened on the axle thread by at least 5 full turns, so that adequate clamping force is ensured. A thread which is too short can result in accidental loosening of the rear wheel and therefore cause serious injury or death.
- Wrap the safety strap around the chain stay and fasten it to the tow bar D-ring with the snap hook.
WARNING!
Danger of serious injury or death
Hitch and safety strap must be properly installed. Inspect the hitch and tow bar frequently for any damage or loose fasteners. Damaged or improperly installed can result in serious injury or death.
2. Bicycles with Quick Release Axle
Remove the quick release from the bike and guide it through the hitch along with the quick release axle. Push the quick release through the wheel hollow axle again, screw the nut and clamp the quick release with the correct pressure.
In order to ensure that the hub is clamped sufficiently in the hollow axle, the quick release lever must begin gripping as it moves from the open to the middle position, and approaching the closed position you should clearly feel resistance as you tighten. If it is too easy or too difficult to move the quick release lever, tighten or loosen the quick release nut on the other side of the hub.

WARNING!
Danger of serious injury or death
- The axle nut must be tightened on the axle thread by at least 5 full turns, so that adequate clamping force is ensured. A thread which is too short can result in accidental loosening of the rear wheel and therefore cause serious injury or death.
- Wrap the safety strap around the chain stay and fasten it to the tow bar D-ring with the snap hook.

WARNING!
Danger of serious injury or death
Hitch and safety strap must be properly installed. Inspect the hitch and tow bar frequently for any damage or loose fasteners. Damaged or improperly installed can result in serious injury or death.
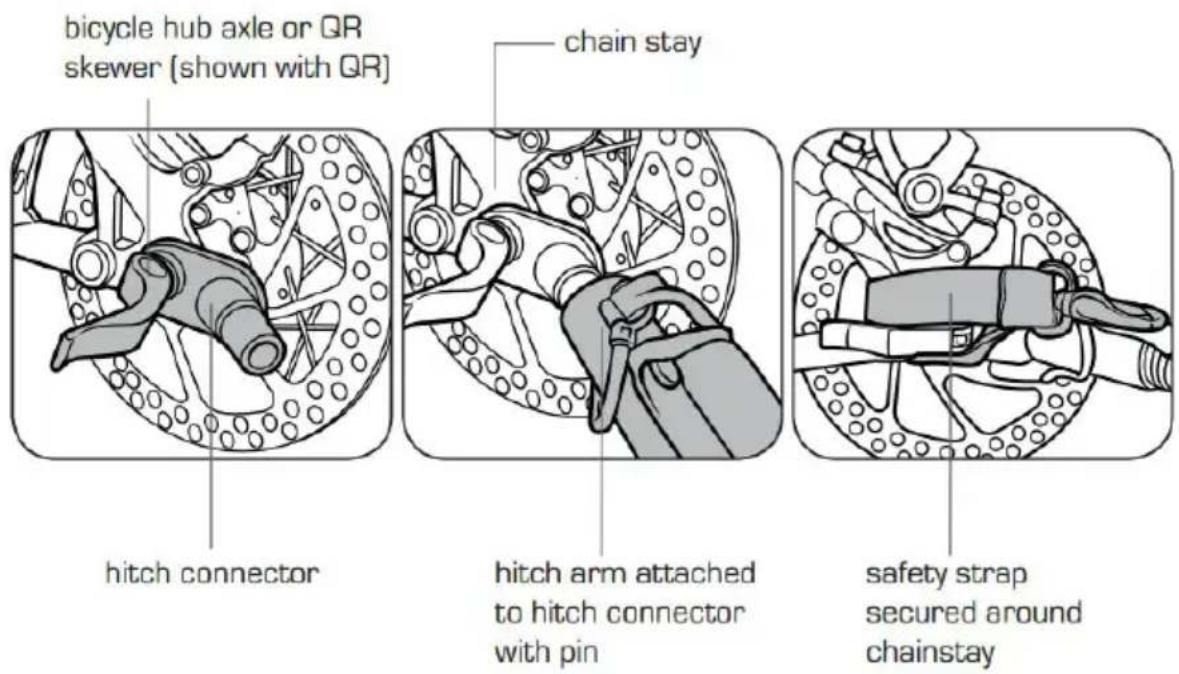
text_image
bicycle hub axle or QR skewer (shown with QR) chain stay hitch connector hitch arm attached to hitch connector with pin safety strap secured around chainstayLOADING AND UNLOADING PETS
Load and unload pet only through the rear door, with the front door closed and the trailer attached to the bicycle. Put the mat inside the trailer(if needed),with the pet inside the trailer, snap one end of the safety leash (included) to the pet's collar and the other end to the D-ring located inside the trailer. Adjust the length of the leash so that the pet cannot exit through the front window when it is open. Always close the rear door while riding.
Cher client, chère cliente,
text_image
QR code image containing encoded data, no visible human-readable textSOMMAIRE
Berlin Brands GOIup UK Ltd
PO Box 42
272 Kensington High Street
London, W8 6ND
United Kingdom
CONSIGNES DE SÉCURITÉ
natural_image
Set of nine items including a black quilt, bicycles, and a black LAXT box on a white surface (no text or symbols visible)flowchart
graph TD
    A["Car Body with Jacket"] --> B["Assembly"]
    B --> C["Adjustment to Lock Frame"]
    C --> D["Assembly with Lock Frame"]
    D --> E["Adjustment to Lock Frame"]
    E --> F["Assembly with Lock Frame"]
    F --> G["Final Assembly"]
natural_image
Three-step assembly process showing a device with internal components, hand placing a component, and final assembled package (no text or symbols visible)natural_image
Close-up of hands holding a yellow tool against a green grass field (no text or symbols visible)2. Installation des enjoliveurs
natural_image
Step-by-step instructions for installing a black car seatbelt, showing step-by-step assembly and mounting (no text or symbols)Montage des roues
natural_image
Close-up of hands adjusting a bicycle wheel rim, showing the tire being cut with a red arrow (no text or symbols visible)natural_image
Four-panel sequence showing a hand holding a cable with red arrows indicating the process, no text or symbols present.natural_image
Side-by-side comparison of a car's side profile and its 3D rendering, showing a white cable being pulled out by a red flag (no text or symbols visible)ATTELAGE DE LA REMORQUE AU VÉLO
text_image
QR code image containing encoded data, no visible human-readable textINDICE
Berlin Brands Group UK Limited
PO Box 42
272 Kensington High Street
London, W8 6ND
United Kingdom
AVVERTENZE DI SICUREZZA
flowchart
graph TD
    A["Car Body with Jacket"] --> B["Assembly of parts"]
    B --> C["Adjustment to seat frame"]
    C --> D["Assembly of seats"]
    D --> E["Adjustment to bracket"]
    E --> F["Assembly of seats"]
natural_image
Three-step assembly process showing a device with internal components, hand placing part, and final assembled package (no text or symbols visible)natural_image
Close-up of hands holding a yellow and black object against a green grass field (no text or symbols visible)natural_image
Step-by-step photo showing a car seatbelt adjustment procedure, including locking, securing, and adjusting the seatbelt (no text or symbols visible)natural_image
Close-up of hands installing a bicycle wheel rim, showing the tire being adjusted to form a seat (no text or symbols visible)natural_image
Sequence of four-step automotive assembly steps showing tool installation and mounting (no text or symbols visible)natural_image
Side-by-side comparison of a car's side profile and its red flag, showing front and rear views with no visible text or symbols.COLLEGAMENTO DEL RIMORCHIO ALLA BICICLETTA
text_image
QR code image containing encoded data, no visible human-readable textCONTENIDO
Berlin Brands Group UK Limited
PO Box 42
272 Kensington High Street
London, W8 6ND
Reino Unido
flowchart
graph TD
    A["Car Body with Jacket"] --> B["Assembly of parts"]
    B --> C["Adjustment to seat frame"]
    C --> D["Assembly of seats"]
    D --> E["Adjustment to bracket"]
    E --> F["Assembly of seats"]
(2) Conecte firmemente ambos lados con el cierre rápido y suba la cremallera.