LCWB90 - Plane Vevor - Free user manual and instructions

Find the device manual for free LCWB90 Vevor in PDF.
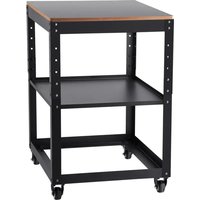
Vevor LCWB90 - Plane
📄 96 pages English EN Download 💬 AI Question 10 questions ⚙️ Specs
Notice Vevor LCWB90 - page 3
Pick your language and provide your email: we'll send you a specifically translated version.
Product TypePortable Workbench
BrandVevor
ModelLCWB90
Platform Dimensions700 x 600 mm
Adjustable Height800 mm - 900 mm (3 positions)
Net Weight21.9 kg
Gross Weight25.4 kg
Maximum Load45 kg (100 lb)
Main MaterialSteel
Wheels2 universal wheels + 2 directional wheels
Main FunctionPortable work support for workshop or construction site
Height AdjustmentBy aligning holes and fixing with M6 screws
Assembly RequiredYes, screws provided (M6, M8)
SafetyCheck screw tightness before use; lock wheels; wear gloves
MaintenanceClean regularly; have repairs done by a professional
Spare PartsScrews, nuts, wheels, columns (available on request)
RepairabilityRepairable by a professional with original parts
WarrantyElectronic warranty certificate at www.vevor.com/support
UsageDomestic and professional
Included AccessoriesWorktop, panel, columns, partitions, wheels, screws

Frequently Asked Questions - LCWB90 Vevor

What is the maximum load supported by the LCWB90 workbench?
The maximum load is 45 kg (100 lb). Do not exceed this limit to avoid any risk of tipping or deformation.
How to adjust the height of the workbench?
Unscrew the M6 screws at the desired positions on the columns, align the holes (heights: 800, 850 or 900 mm), then retighten firmly. Refer to the diagram in the manual.
What tools are needed for assembly?
A set of Allen keys (for M8 screws) and a wrench or socket are recommended. Most screws are provided with the hardware.
Is the workbench stable on uneven ground?
It is advisable to work on a flat, smooth surface. The wheels must be locked. If the ground is uneven, the workbench may tip over.
Can I use the workbench outdoors?
Yes, but avoid exposure to rain or moisture. Store it protected from the weather after use.
How to maintain the workbench?
Clean it regularly with a dry cloth. Check the tightness of screws and nuts. If damaged, have it repaired by a professional with original parts.
Are the wheels included?
Yes, the workbench comes with 2 universal wheels and 2 directional wheels. They are fixed with M8 screws.
What is the warranty of this workbench?
Vevor provides an electronic warranty certificate. For more information, visit www.vevor.com/support.
Can I buy spare parts?
Yes, parts such as columns, screws, and wheels are available. Contact Vevor support via the website.
Is the worktop non-slip?
The surface is smooth steel. To improve grip, you can place a non-slip mat or a clamp.

User questions about LCWB90 Vevor

0 question about this device. Answer the ones you know or ask your own.

Ask a new question about this device

Your email remains private: it is only used to notify you if someone answers your question.

No questions yet. Be the first to ask one.

Download the instructions for your Plane in PDF format for free! Find your manual LCWB90 - Vevor and take your electronic device back in hand. On this page are published all the documents necessary for the use of your device. LCWB90 by Vevor.

USER MANUAL LCWB90 Vevor

Technical Support and E-Warranty Certificate

www.vevor.com/support

Portable Workbench

USER MANUAL

MODEL: LCWB90

We continue to be committed to provide you tools with competitive price.

"Save Half", "Half Price" or any other similar expressions used by us only represents an estimate of savings you might benefit from buying certain tools with us compared to the top brands and does not necessarily mean to cover all categories of tools offered by us.

are kindly reminded to verify carefully when you are placing an order with us if you are actually saving half in comparison with the top major brands.

VEVOR®

Portable Workbench
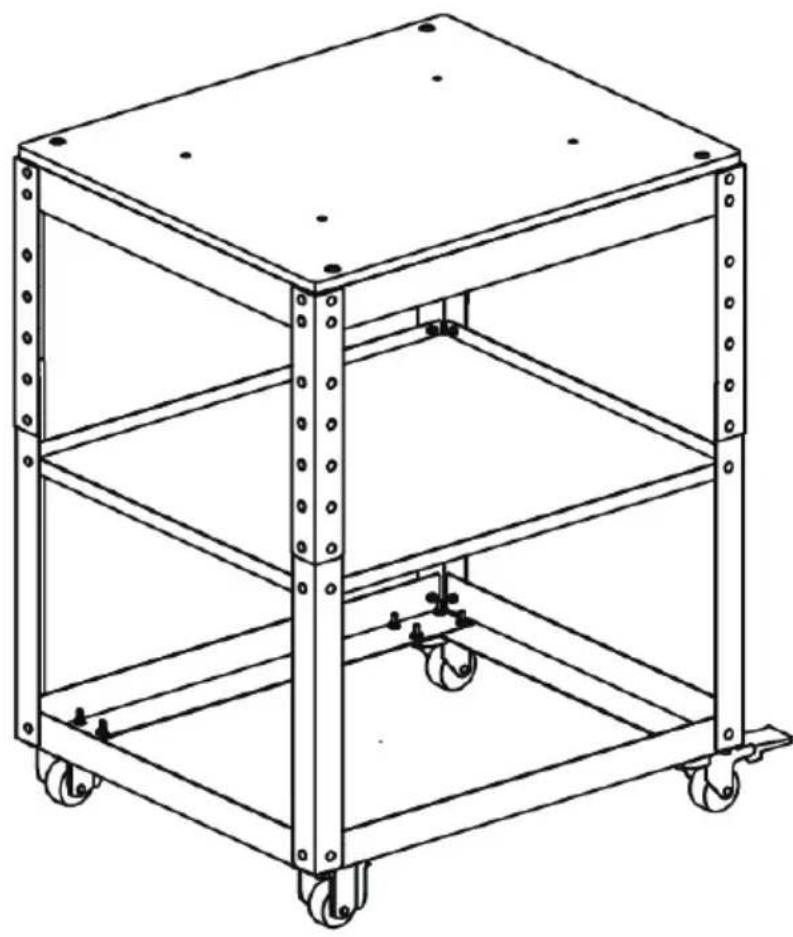
Line drawing of a multi-level industrial shelving unit with wheels and mounting holes.

NEED HELP? CONTACT US!

Have product questions? Need technical support? Please feel free to contact us:

Technical Support and E-Warranty Certificate www.vevor.com/support

This is the original instruction, please read all manual instructions carefully before operating. VEVOR reserves clear interpretation of our user manual. The appearance of the product shall be subject to the product you received. Please forgive us that we won't inform you again if there is any technology or software updates on our product.

GENERAL SAFETY RULES

IMPORTANT: carefully read the instructions in this manual as well as the general safety instructions before using this tool.

Vevor LCWB90 - GENERAL SAFETY RULES - 1

Before using the tool, read the instruction book carefully.

WARNING! Read the instructions and use or operate without following the instructions listed below will result in deformation, inflexible movement, loss of bearing weight or serious injury.

WORKPLACE

1) Keep the workplace clean and bright. A messy and dark place can cause accidents. 2) Do not expose the workbench to rain or wet environment. 3) Pay attention to whether the ground is smooth when working outdoors to prevent tilt and collapse.

PORTABLE WORKBENCH USE AND PRECAUTIONS.

1) Check whether the screws and nuts are tightened to prevent collapse during use. 2) When preparing for work, check whether the universal wheel is locked to prevent sliding during use. 3) Use safety devices. Always wear gloves. 4) Maintain the portable workbench, check the installation deviation of the moving parts, whether it is stuck, screw damage and other conditions affecting the operation of the portable workbench, such as damage, portable workbench must be repaired before use, many accidents caused by poor maintenance.

MAINTENANCE

1) Send your portable workbench to professional maintenance personnel, must use the same spare parts for replacement, this will ensure the safety of use after maintenance.

PRODUCT PARAMETER

ModelLCWB90
Length700mm
Width600mm
Maximum Adjustable Height900mm
Medium Adjustable Height850mm
Minimum Adjustable Height800mm
Load Limit100lbs
G.W25.4kg
N.W21.9kg

STRUCTURE AND PART NAME

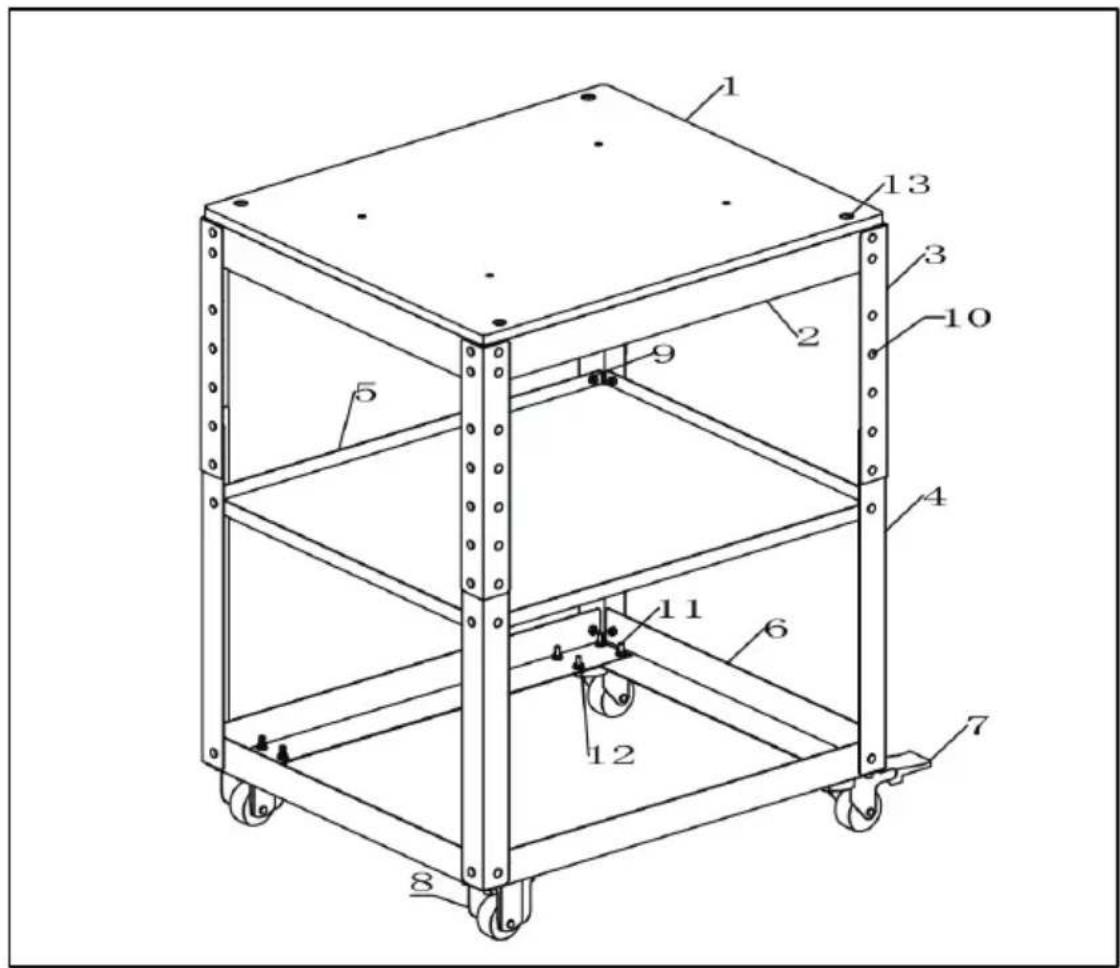
Technical diagram of a multi-level industrial cart with numbered components for identification.

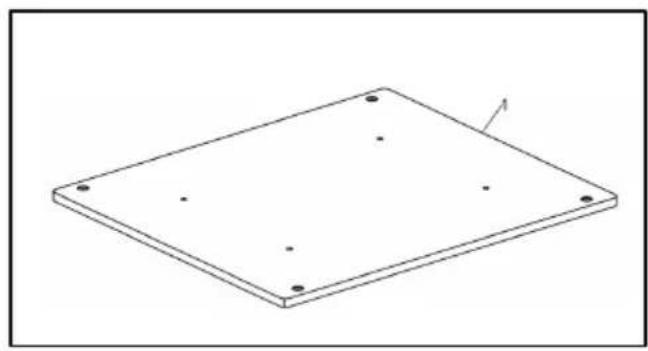
Isometric view of a square plate with four corner holes and a small arrow indicating direction.

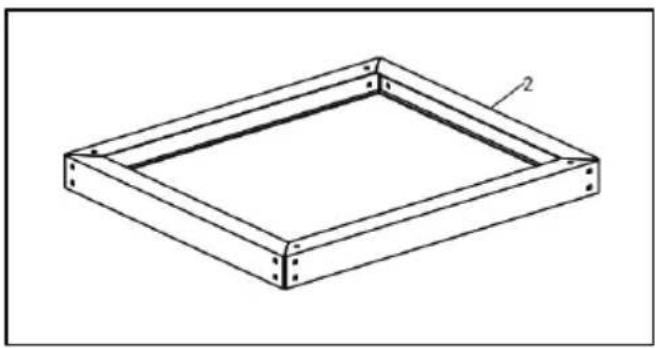
Isometric line drawing of a square frame with bolt holes and a labeled corner.

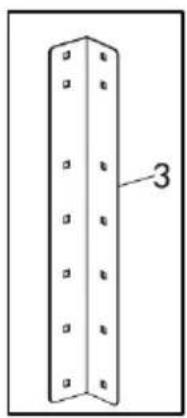
Simple line drawing of a vertical panel with square holes and a labeled arrow pointing to the top section.

Simple line drawing of a vertical rectangular object with four small square holes and a labeled arrow pointing to the side.

Simple line drawing of a diamond-shaped frame with labeled corner point '5'.

Isometric line drawing of a rectangular frame with mounting holes and a labeled corner.

Technical line drawing of a mechanical lever with a wheel and plate.

Technical line drawing of a mechanical component with a curved wheel and mounting holes.

9

10

12 11

13

Name of Parts:

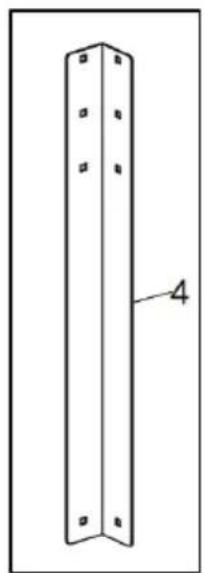
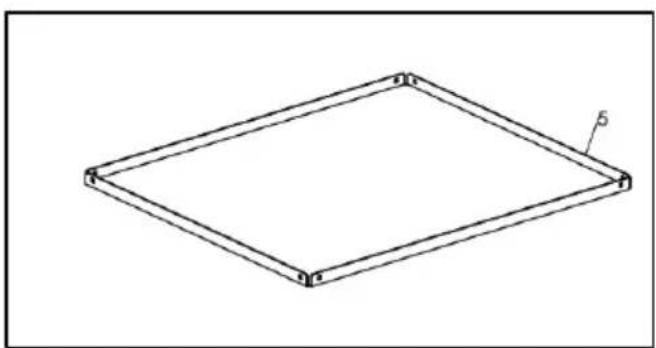
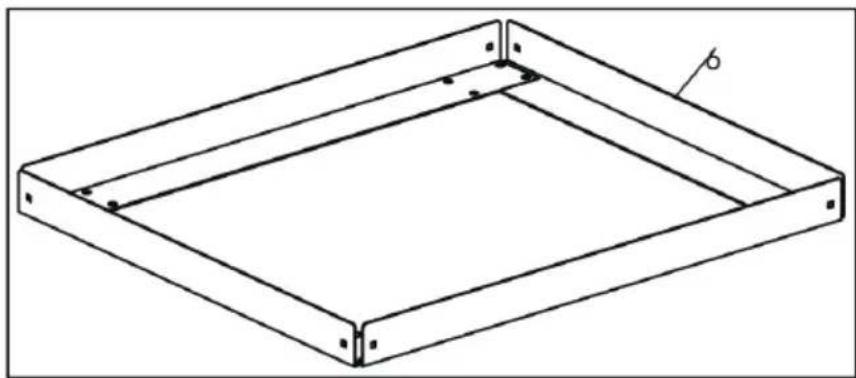
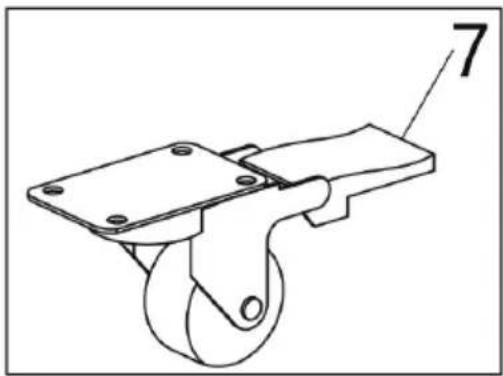
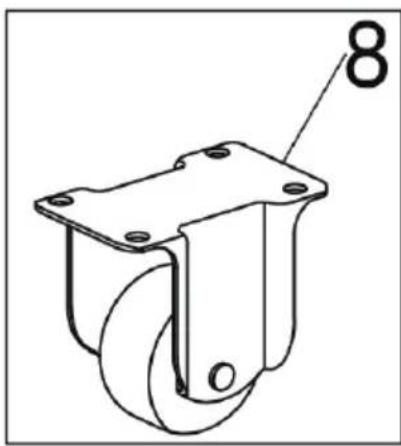
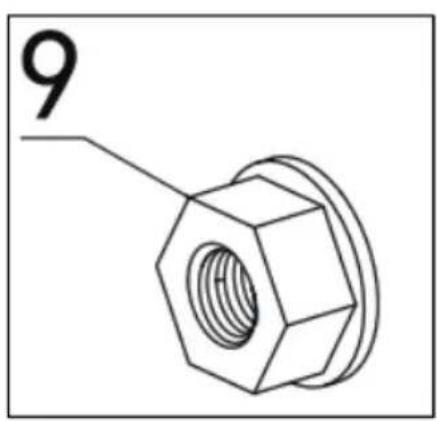
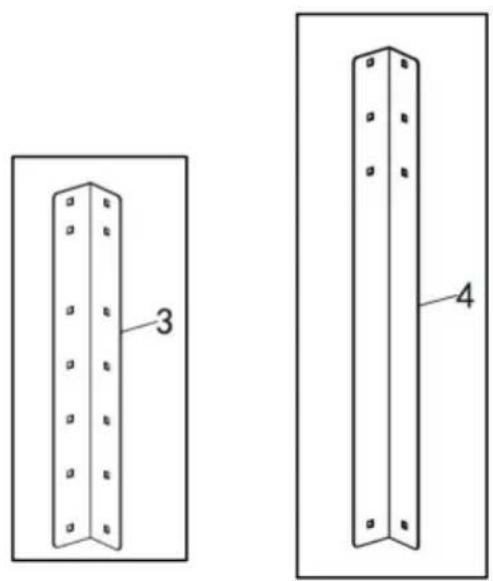
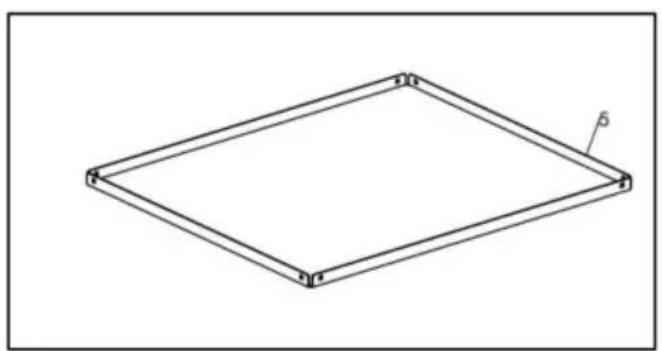
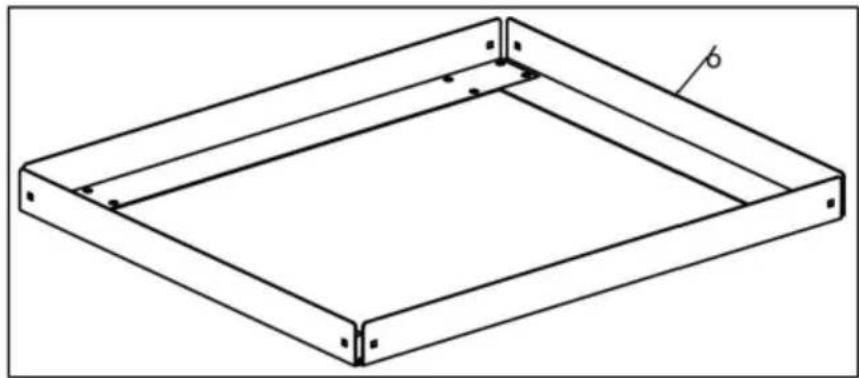
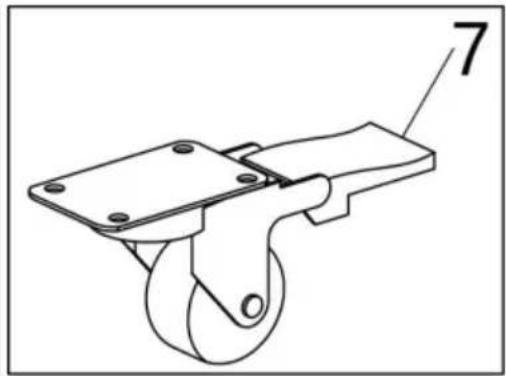
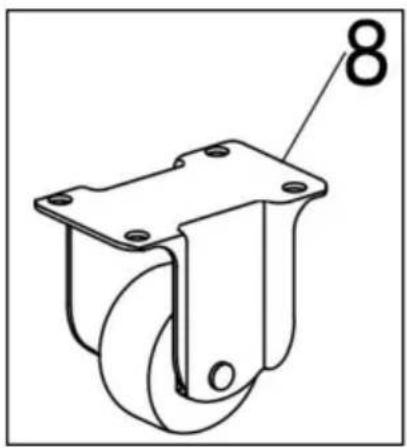
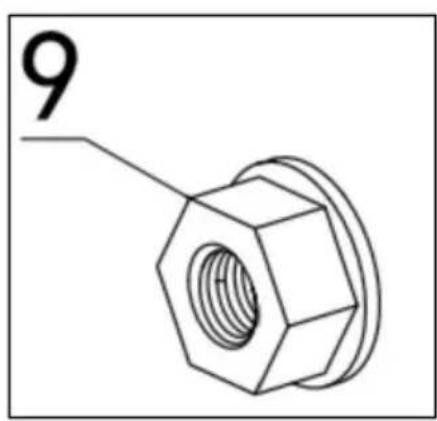
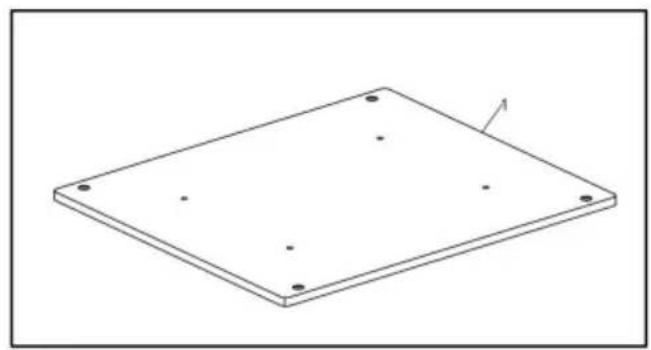
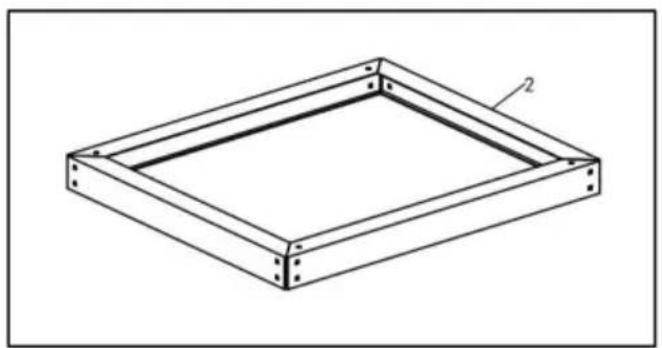
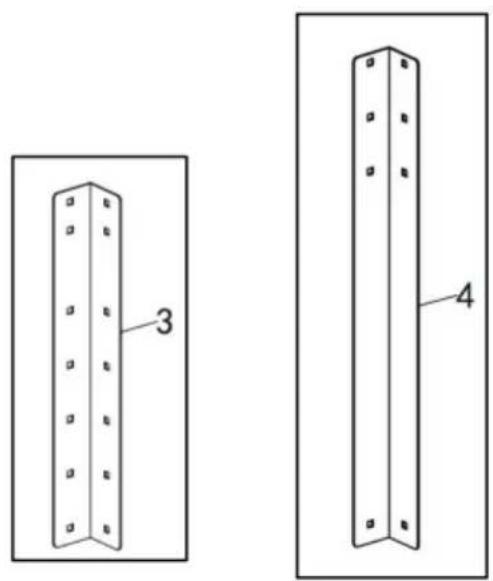
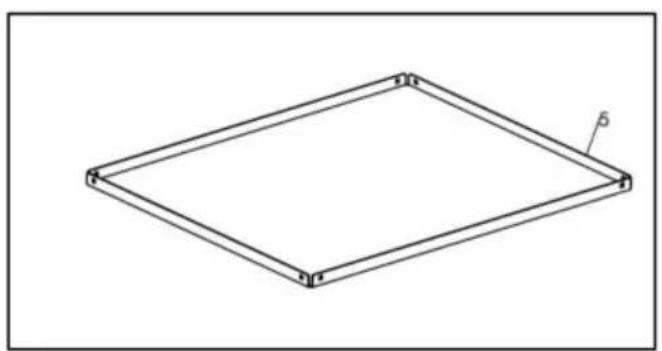
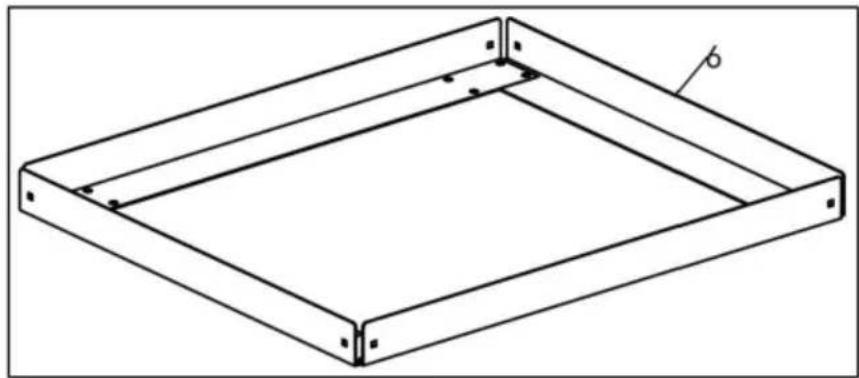
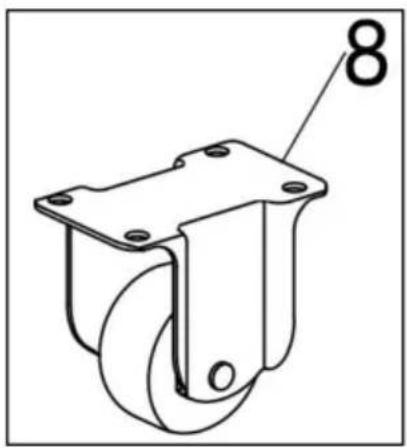
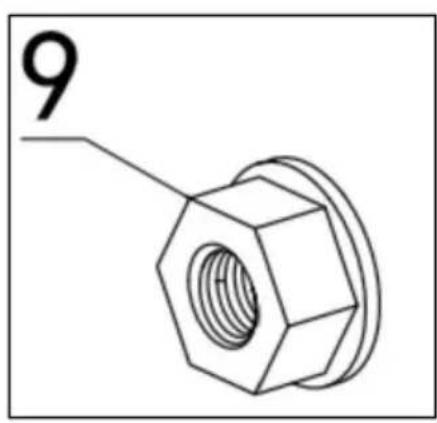
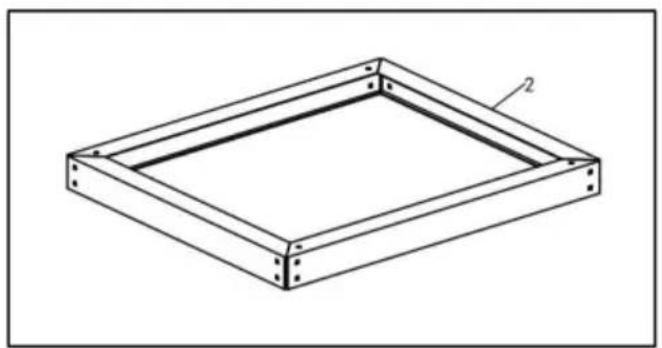
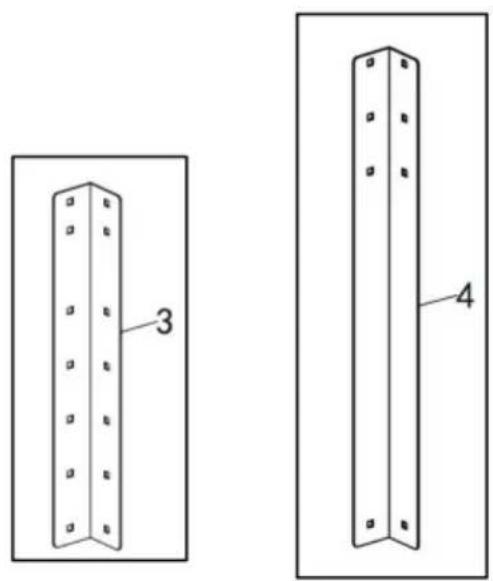
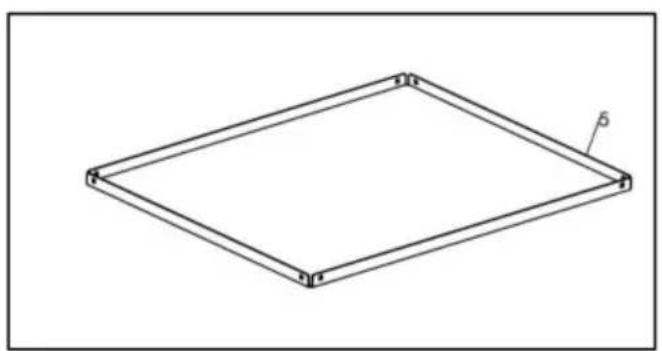
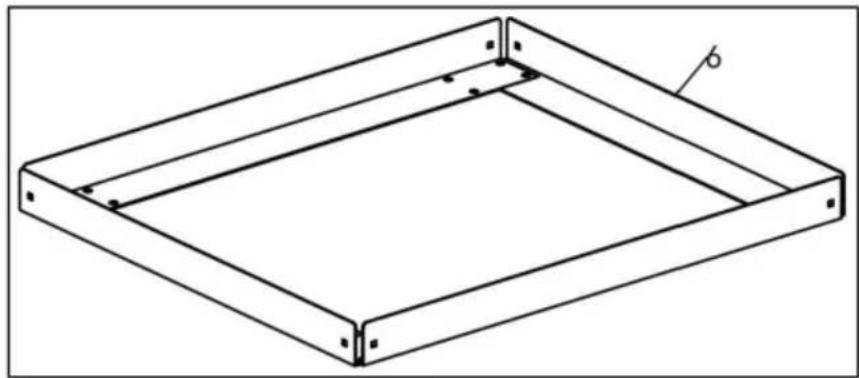
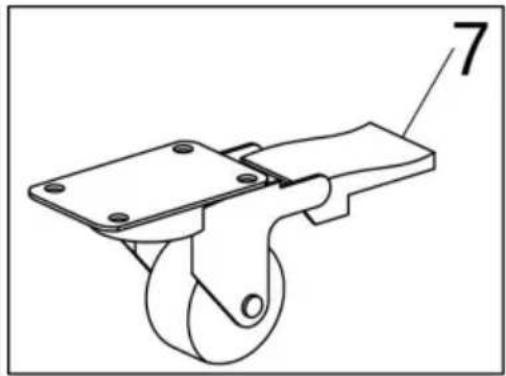
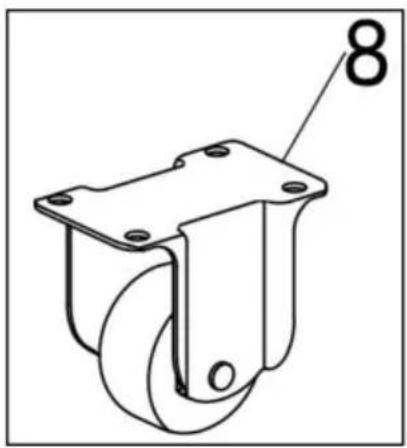
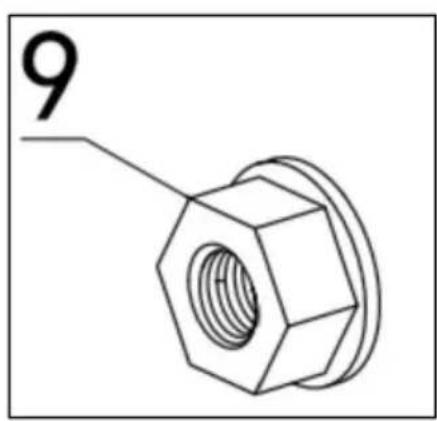
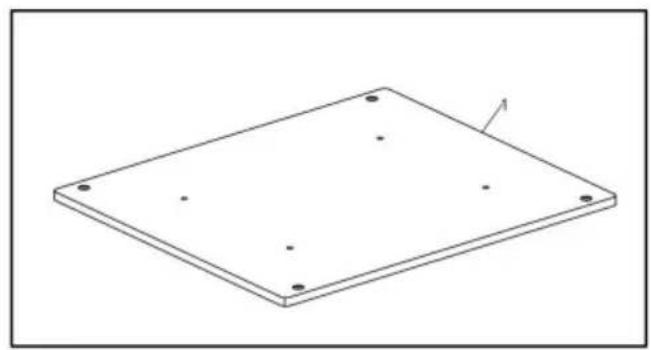
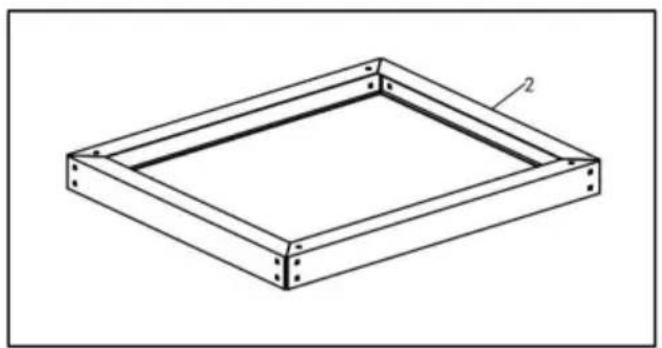
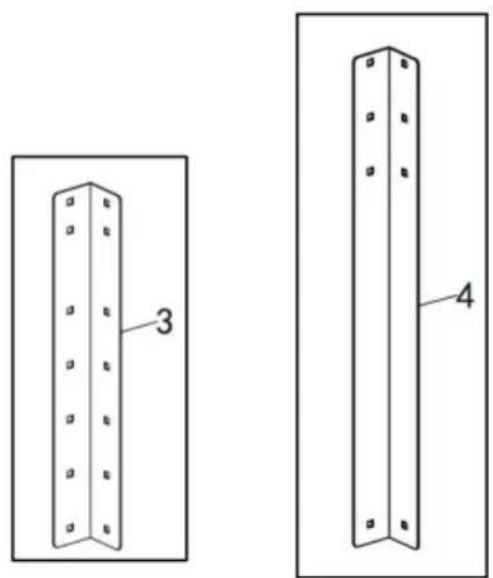
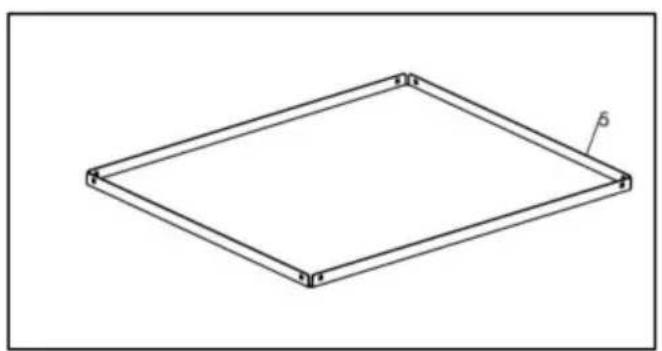
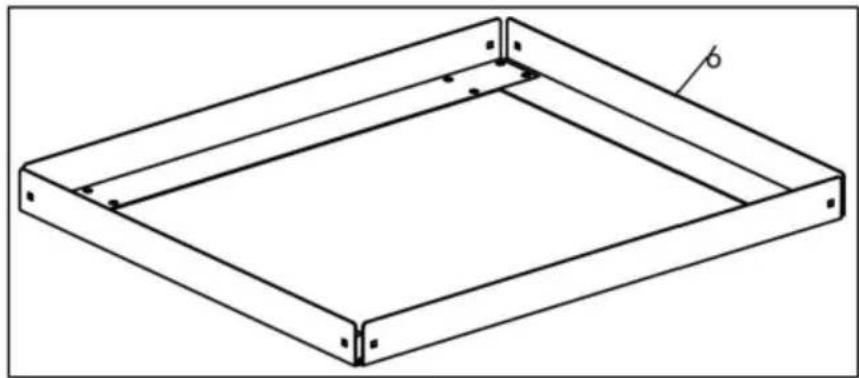
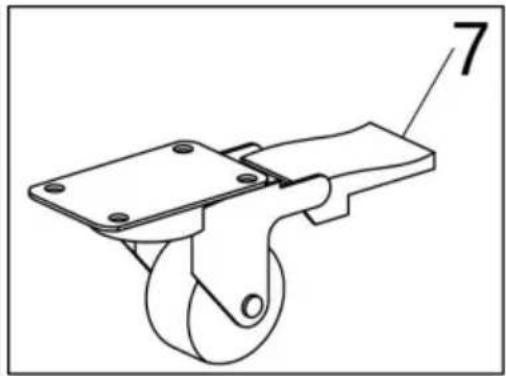
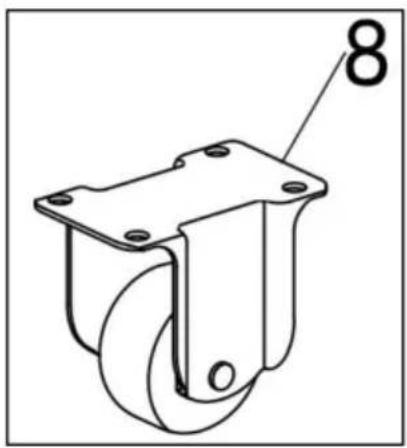
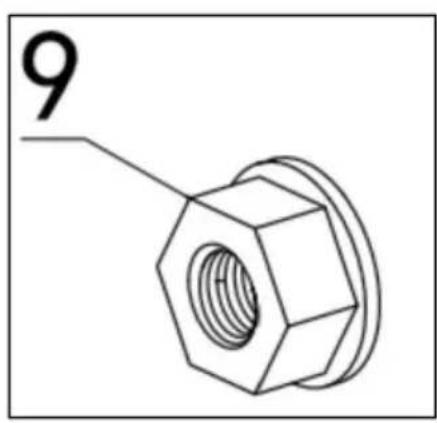
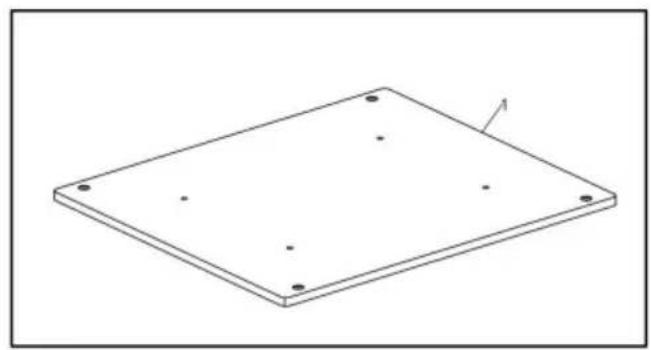
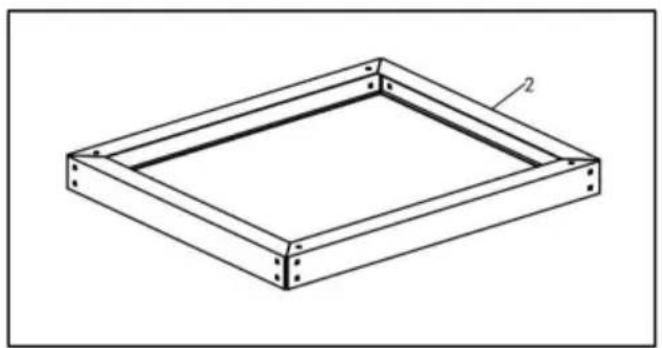
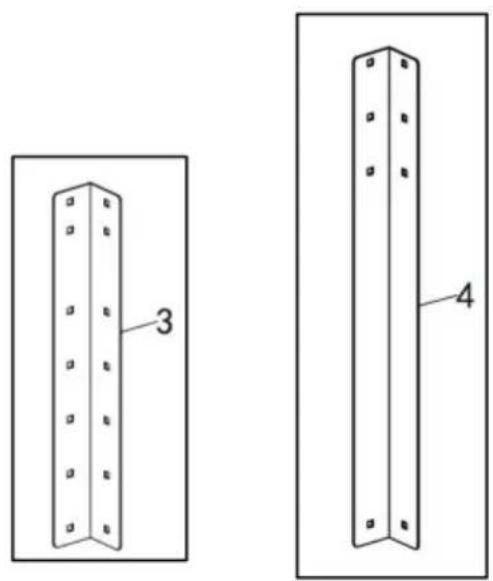
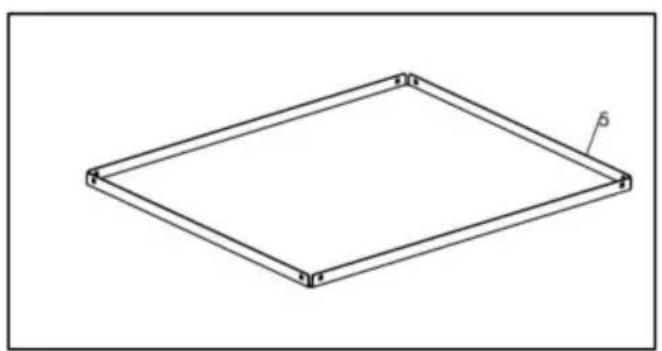
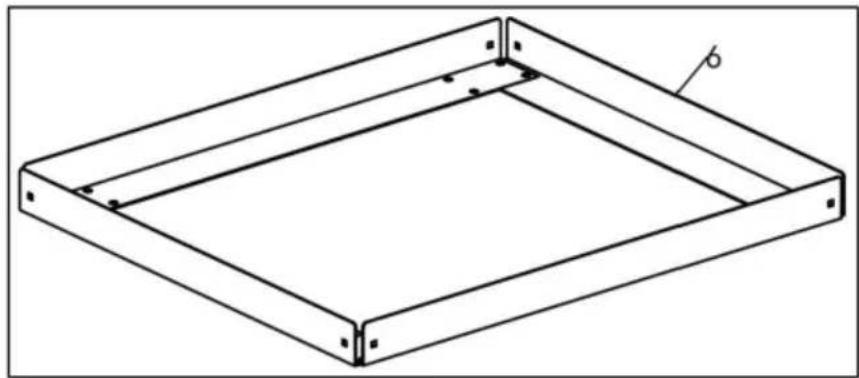
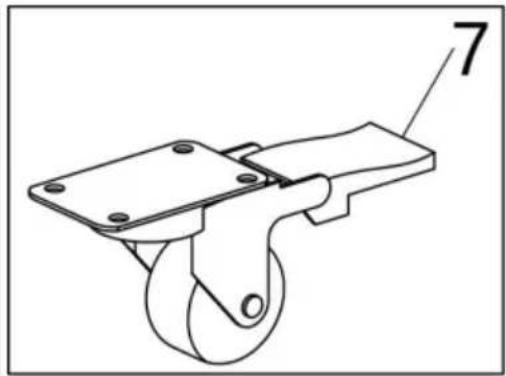
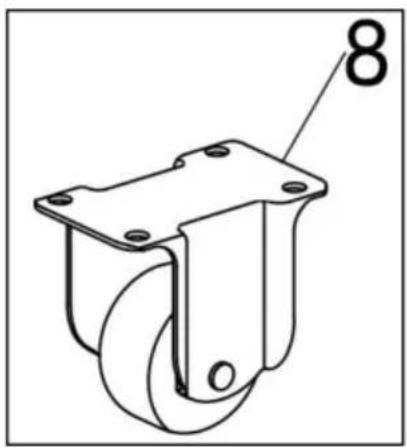
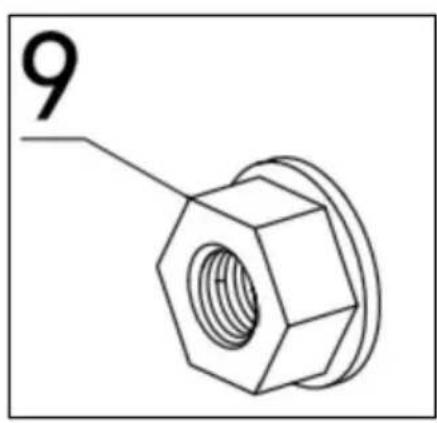
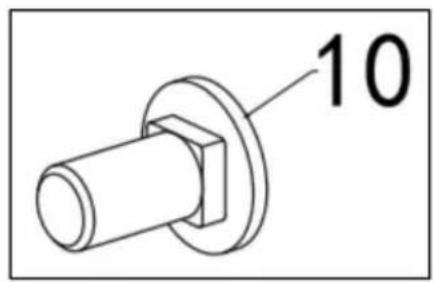
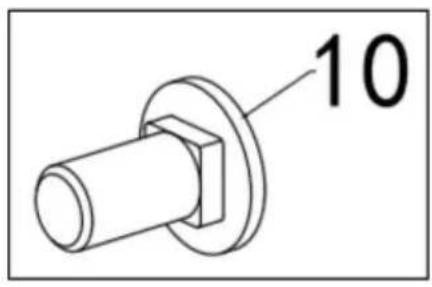
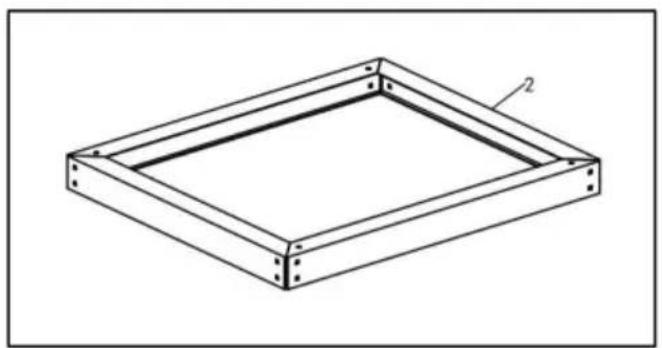
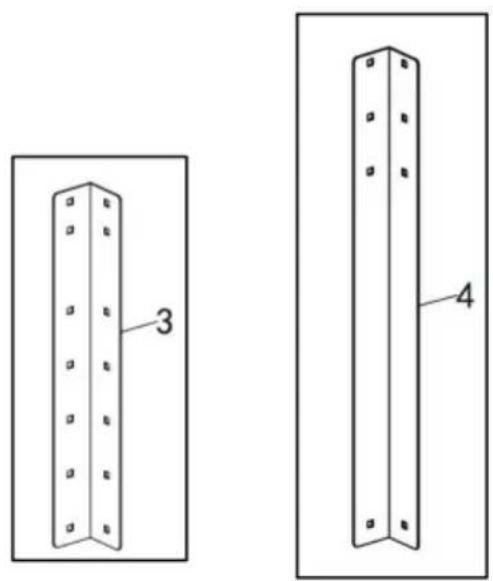
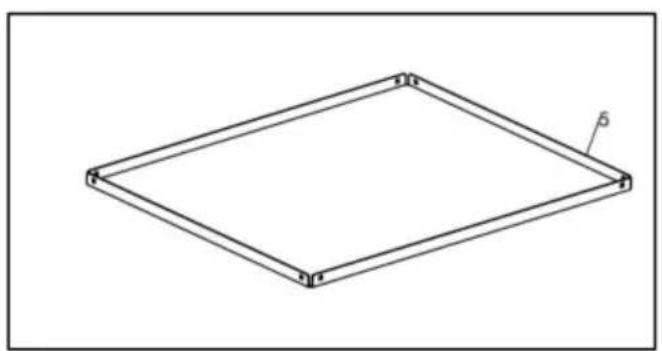
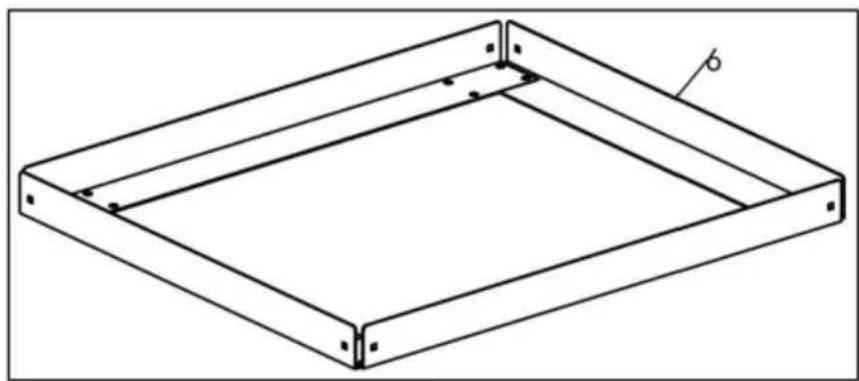
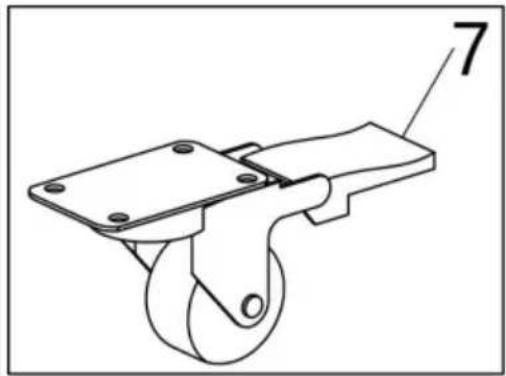
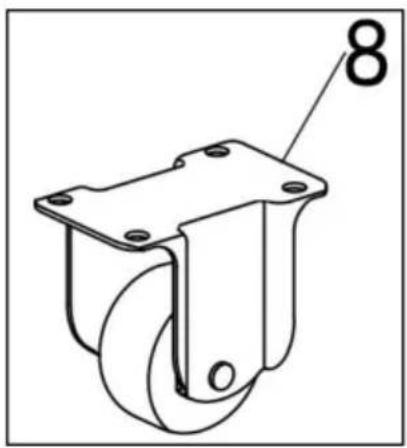
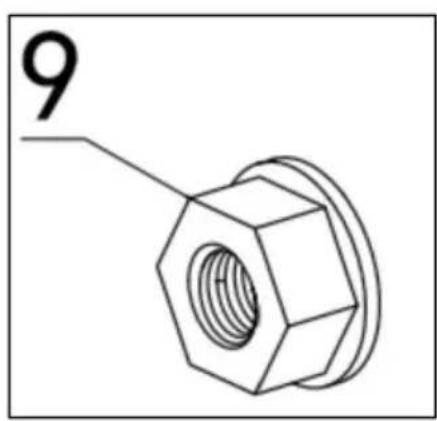
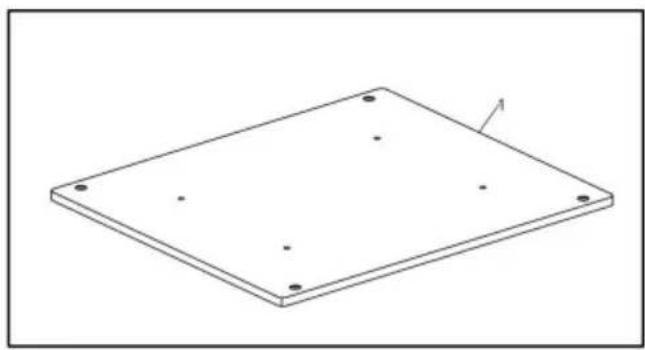
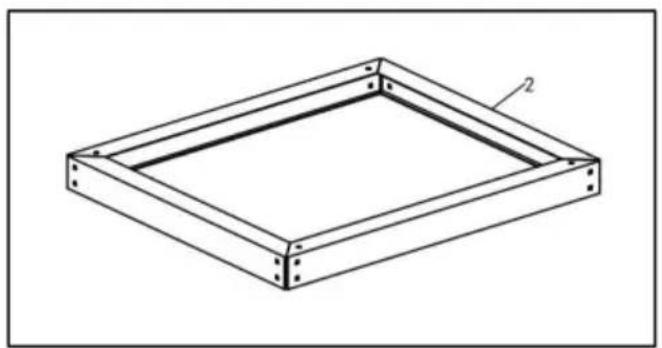
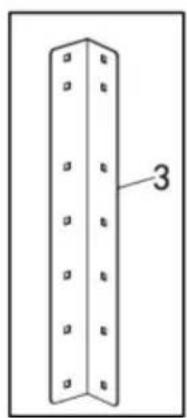
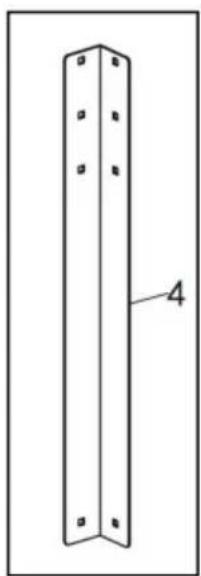
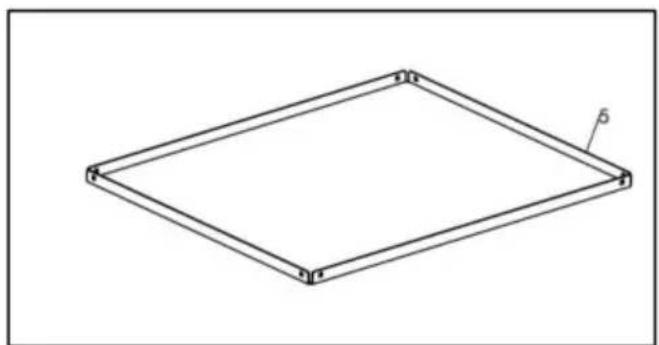
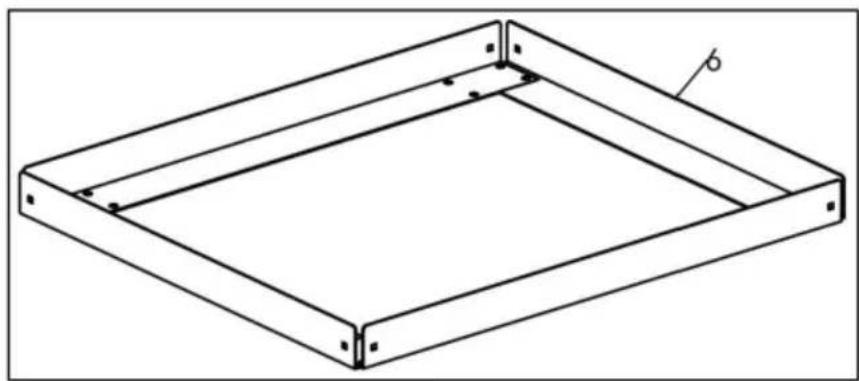
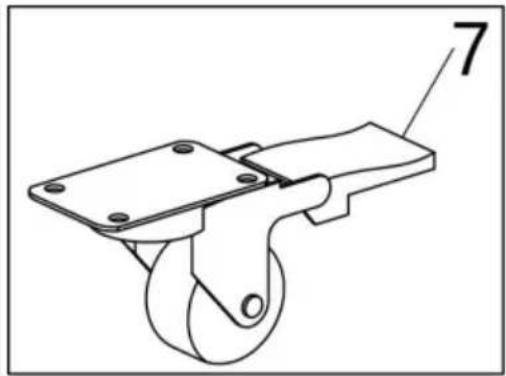
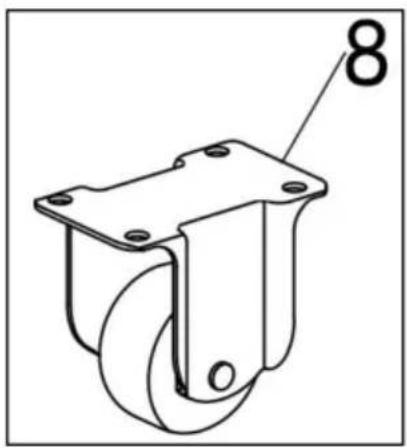
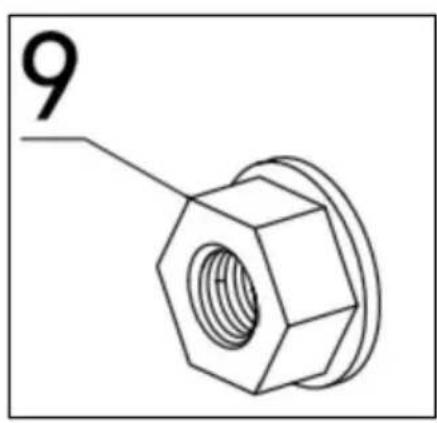
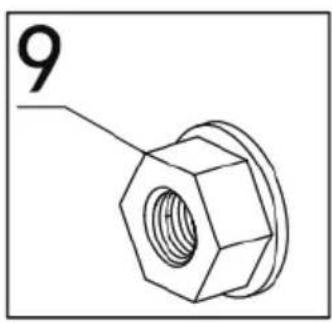
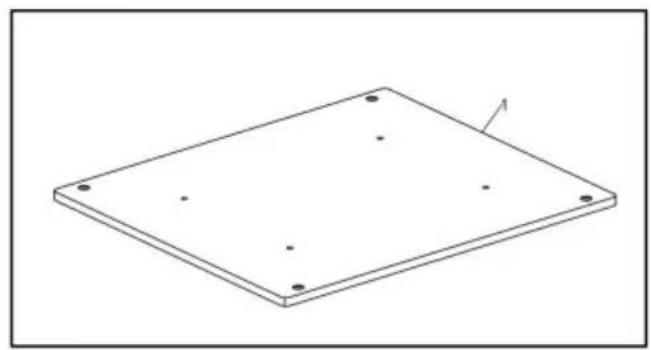
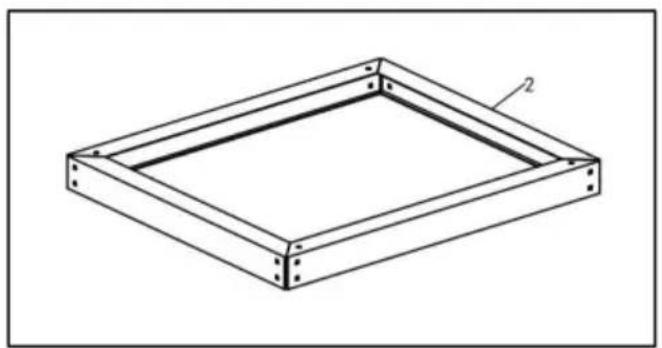
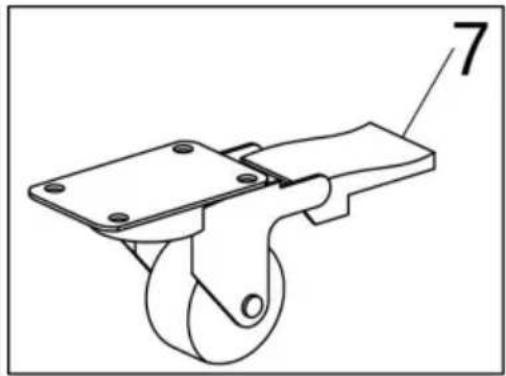
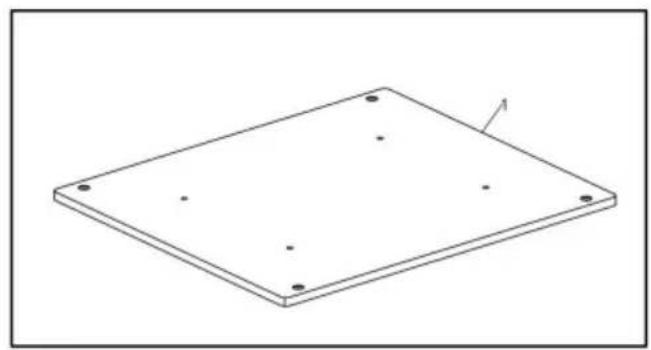
1: Platform 2: Panel 3: WB90 Column 4: WB90 Column 5: Bulkhead 6: Bower Bulkhead 7: Universal Wheel 8: Directional Wheel 9: M6 Flange Nut

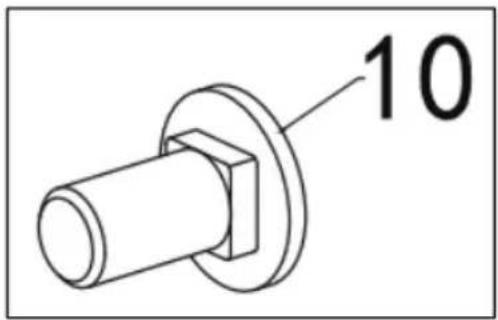
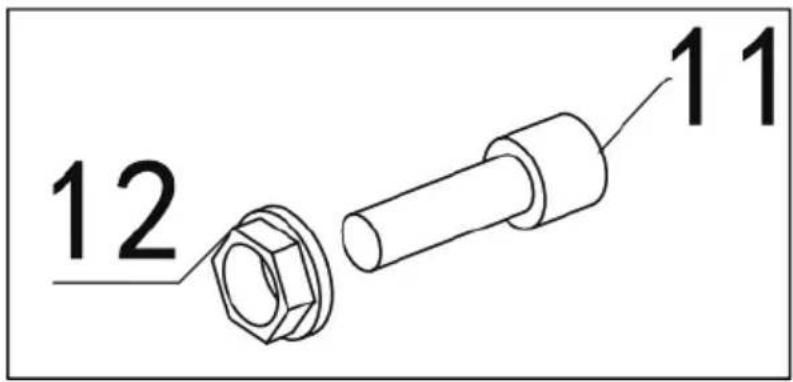
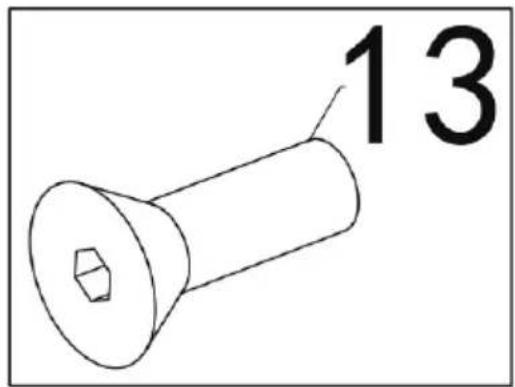
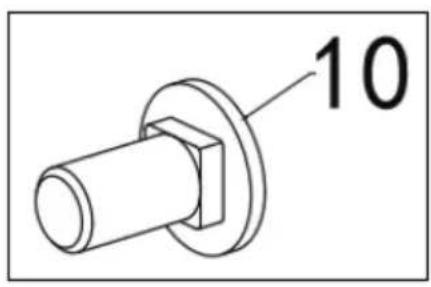
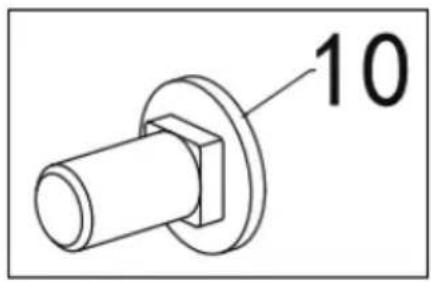
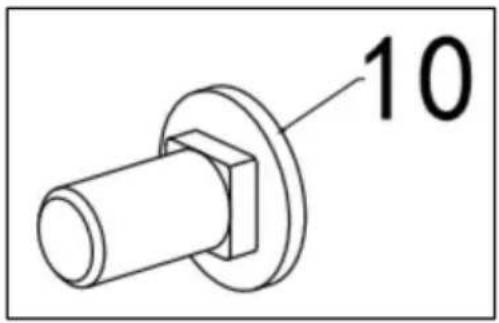
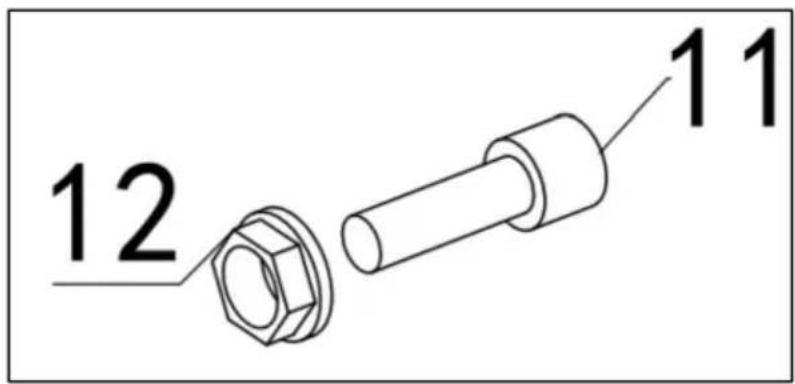
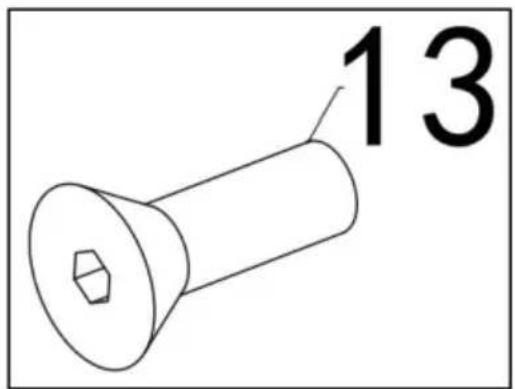
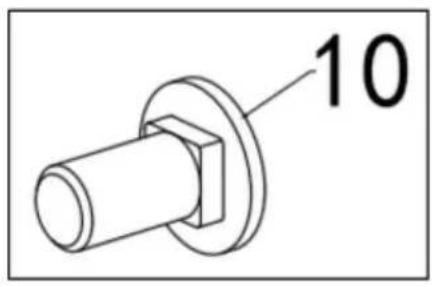
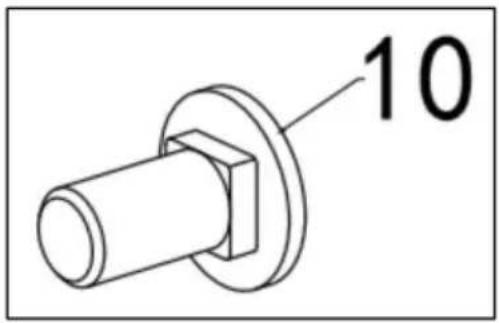
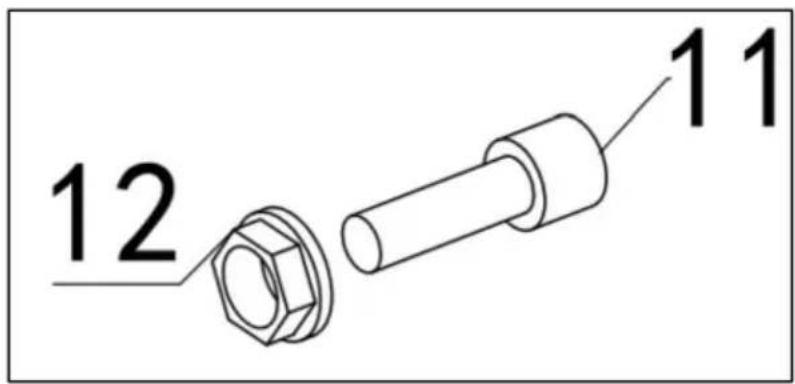
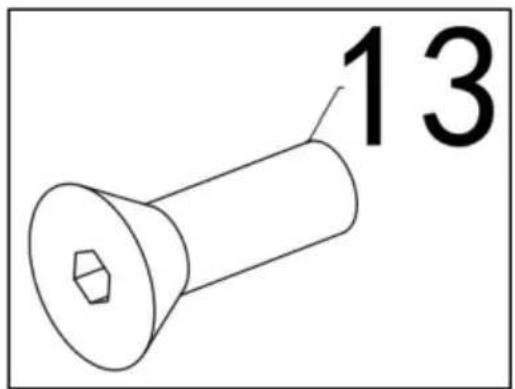
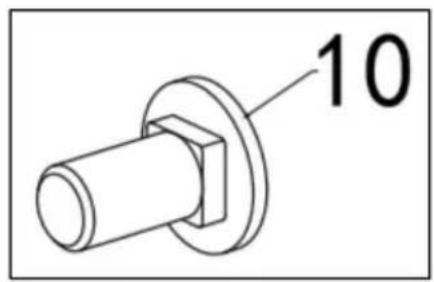
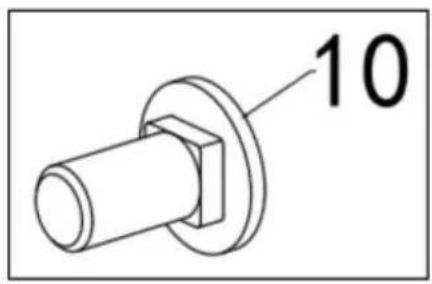
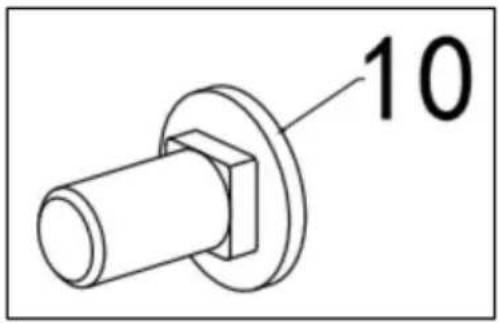
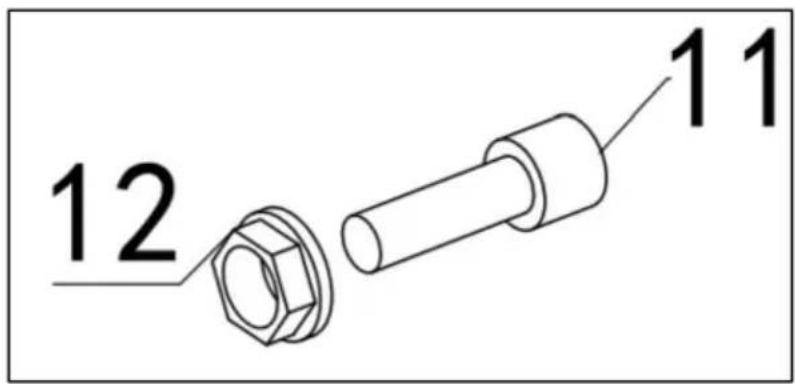
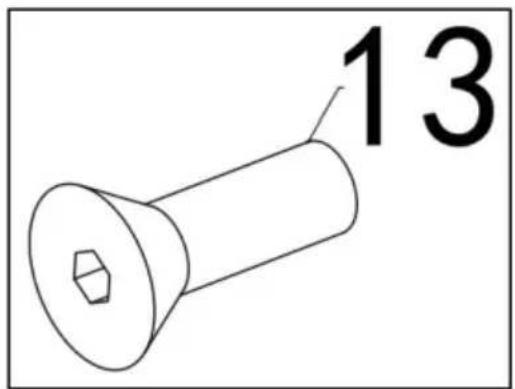
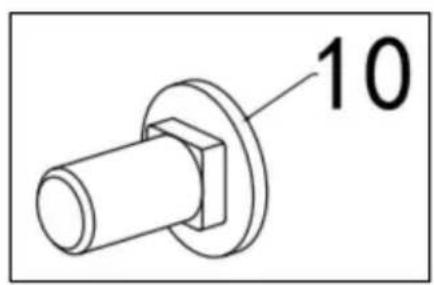
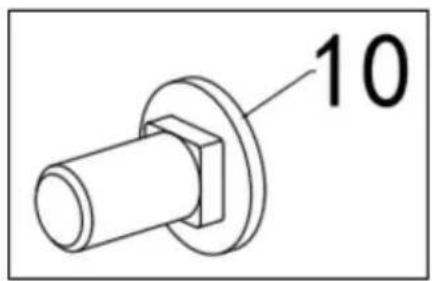
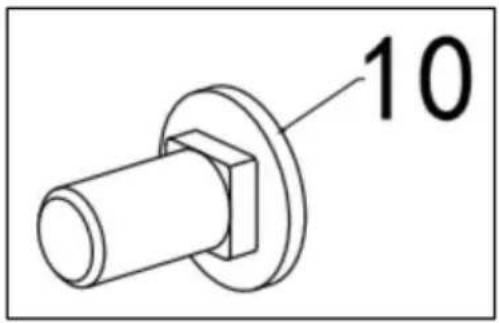
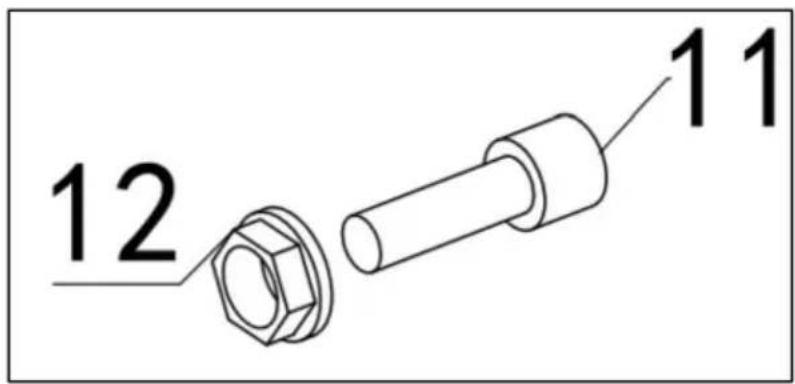
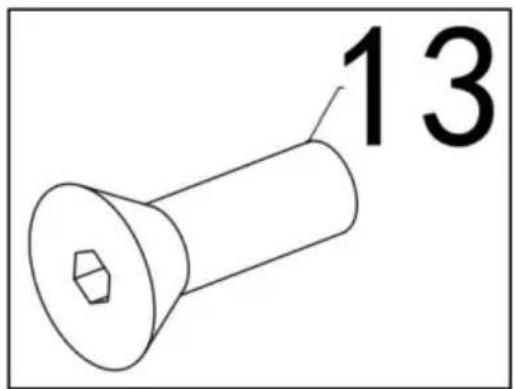
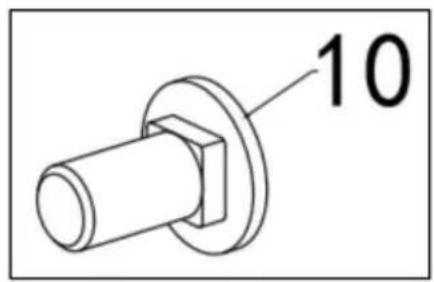
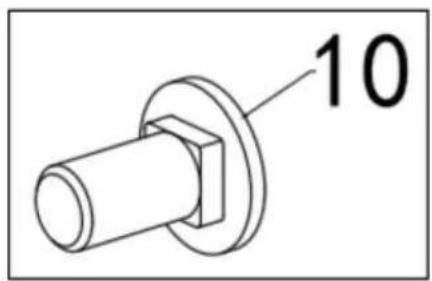
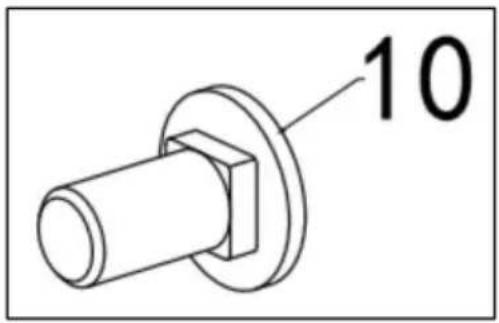
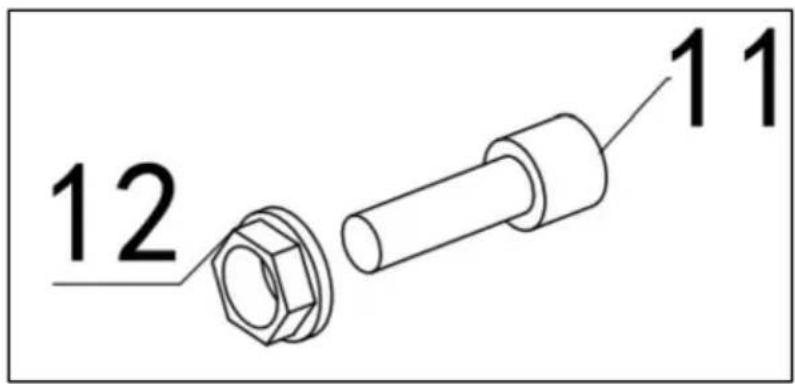
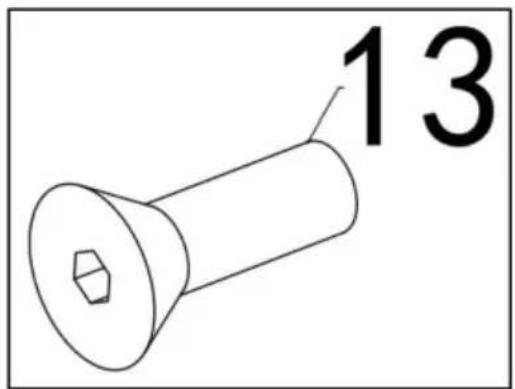
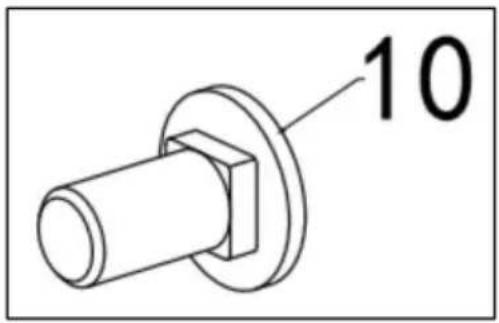
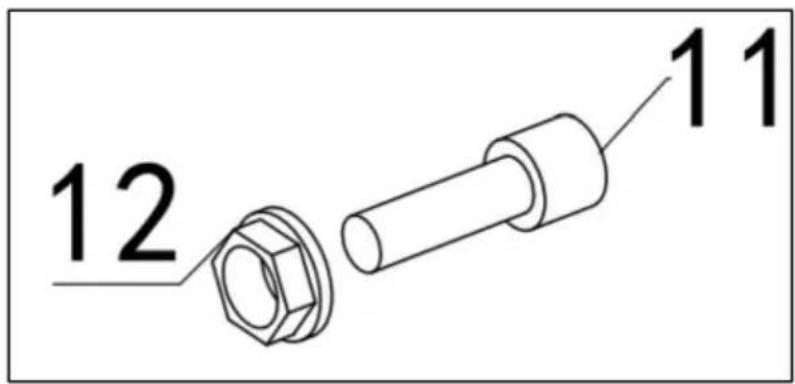
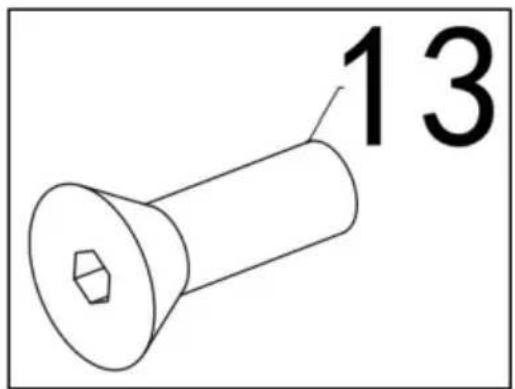
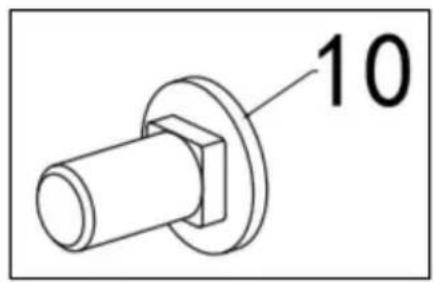
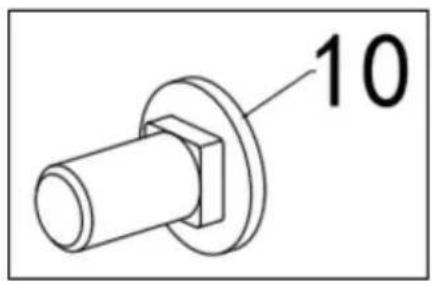
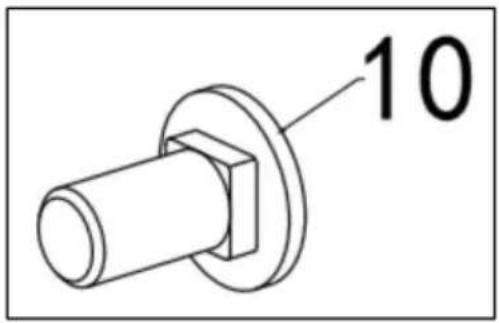
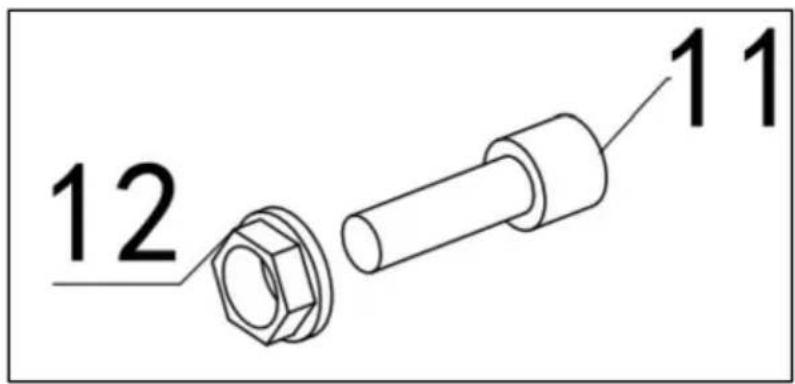
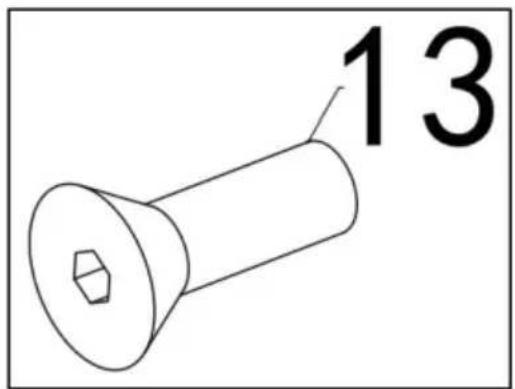
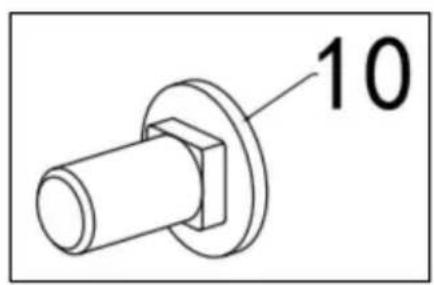
10: M6 Carriage Screws 11: M8 Hex Socket Screws 12: M8 Flange Nuts 13: M8 Hexagon Socket Countersunk Head Screws

ASSEMBLE STEPS

STEP. 1

Fix 7 (universal wheel) and 8 (universal wheel) to 6 (lower divider) with 11 (M8 hex socket screws) and 12 (M8 flange nut).

STEP. 2

Use 10 (M6 carriage screws) and 9 (M6 flange nuts) to fix 4 (WB90 column 2) in 6 (lower partition) around.

STEP. 3

Fix 5 (partition) into 4 (WB90 column 2) with 10 (M6 carriage screws) and 9 (M6 flange nuts).

STEP. 4

Fix 3 (WB90 Post 1) on the remaining two holes of 4 (WB90 post 2) with 10 (M6 carriage screws) and 9 (M6 flange nuts).

STEP. 5

Fix 2 (panel) into 3 (WB90 column 1). Put 10 (M6 carriage screw) and 9 (M6 flange nut) into the top two holes of 3 (WB90 column 1) and tighten.

STEP. 6

Put 1 (bench) on 2 (panel), put 13 (M8 hexagonal countersunk head screw) into 1 (bench) four holes to tighten, make it fixed.

ADJUST THE HEIGHT

1) The maximum height is 900mm. As shown in the figure: First, align the hole positions in 1.2.3 of Figure 3 (WB90 column 1) and 4 (WB90 column 2), then insert 10 (M6 carriage screws) and 9 (M6 flange nuts) into the hole 1.2.3 and tighten them.
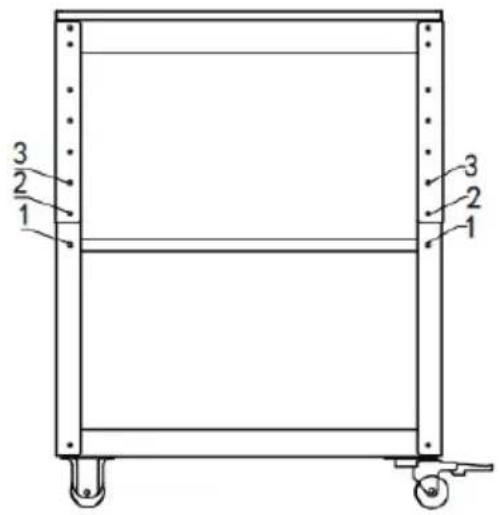
1 2 3 1 2 3

9

10

2) Medium height 850mm as shown in Figure 1: First align hole 3 (WB90 column 1) and hole 4 (WB90 column 2) 2.3.4 one by one, then insert 10 (M6 carriage screws) and 9 (M6 flange nuts) into hole 2.3.4 and tighten it.
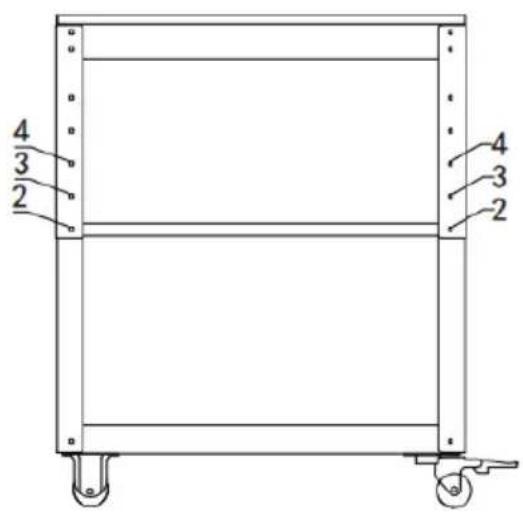
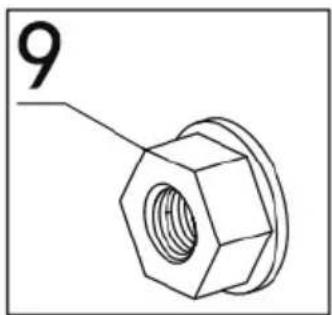
4 3 2 4 3 2

9

10

3) Minimum height of 800 as shown in Figure 3. First, align holes 3 (WB90 column 1) and 4 (WB90 column 2) 3.4.5 one by one, then insert 10 (M6 carriage screws) and 9 (M6 flange nuts) into hole 3.4.5 and tighten them.
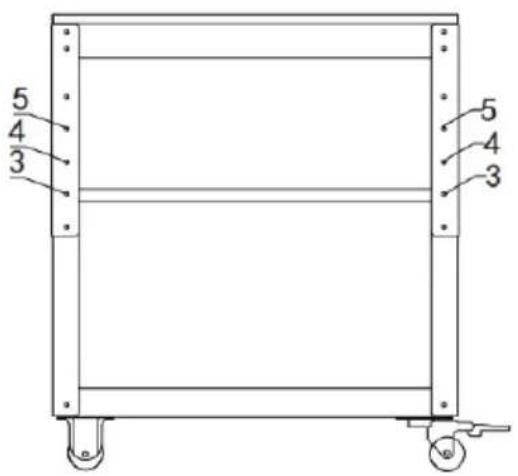
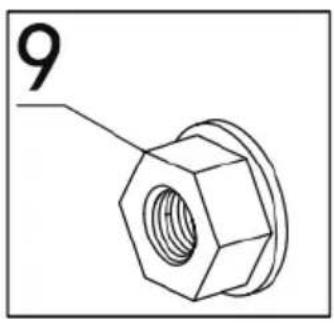
5 4 3 5 4 3

Technical line drawing of a hexagonal nut with threaded center (no text or symbols)

10

VEVOR®

TOUGH TOOLS, HALF PRICE

Technical Support and E-Warranty Certificate www.vevor.com/support

VEVOR®

TOUGH TOOLS, HALF PRICE
Isometric line drawing of a rectangular plate with four corner holes and a small protrusion (no text or symbols)

Isometric line drawing of a square frame with mounting holes and a labeled dimension (no text or symbols)

Two technical diagrams of a structural panel with labeled parts (3 and 4), no text or symbols present.

Pure geometric diagram of a parallelogram with labeled angle β (no text or symbols beyond the label)

Isometric line drawing of a rectangular frame with mounting holes and a labeled component 'b' (no text or symbols beyond label)

Technical line drawing of a mechanical lever with a labeled part (7), no text or symbols present.

Technical line drawing of a mechanical component with a labeled part (8), no text or symbols present.

Technical line drawing of a hexagonal nut with threaded center (no text or symbols).

10

12 11

13

Part names:

10

VEVOR®

TOUGH TOOLS, HALF PRICE

www.vevor.com/support

Portable Workbench

USER MANUAL

MODEL: LCWB90

Isometric line drawing of a rectangular plate with four corner holes and a small protrusion (no text or symbols).

Isometric line drawing of a square frame with mounting holes and a labeled dimension (no text or symbols).

Two technical diagrams of a structural panel with labeled parts (3 and 4), no text or symbols present.

Pure geometric diagram of a parallelogram with labeled angle β (no text or symbols beyond the label).

Isometric line drawing of a rectangular frame with mounting holes and a labeled component 'b' (no text or symbols beyond label).

Technical line drawing of a mechanical lever with a labeled part (7), no text or symbols present.

Technical line drawing of a mechanical component with a labeled part (8), no text or symbols present.

Technical line drawing of a hexagonal nut with threaded center (no text or symbols).

10

12 11

13

Part names:

10

10

VEVOR®

TOUGH TOOLS, HALF PRICE

electronics www.vevor.com/support

!NEED HELP? CONTACT

Isometric line drawing of a rectangular plate with four corner holes and a small protrusion (no text or symbols).

Isometric line drawing of a square frame with mounting holes and a labeled dimension (no text or symbols).

Two technical diagrams of a structural panel with labeled parts (3 and 4), no text or symbols present.

Pure geometric diagram of a parallelogram with labeled angle β (no text or symbols beyond the label).

Isometric line drawing of a rectangular frame with mounting holes and a labeled component 'b' (no text or symbols beyond label).

Technical line drawing of a mechanical lever with a labeled part (7), no text or symbols present.

Technical line drawing of a mechanical component with a labeled part (8), no text or symbols present.

Technical line drawing of a hexagonal nut with threaded center (no text or symbols).

10

12 11

13

Part names:

10

10

VEVOR®

TOUGH TOOLS, HALF PRICE

Isometric line drawing of a rectangular plate with four corner holes and a small protrusion (no text or symbols).

Isometric line drawing of a square frame with mounting holes and a labeled dimension.

Two technical line drawings of a vertical structural component with labeled parts (3 and 4).

Pure geometric diagram of a parallelogram with labeled angle β.

Isometric line drawing of a rectangular frame with mounting holes and a labeled component 'b'.

Technical line drawing of a mechanical lever with a labeled part (7).

Technical line drawing of a mechanical component with a labeled part (8).

Technical line drawing of a hexagonal nut with threaded center.

10

12 11

13

10

10

VEVOR®

TOUGH TOOLS, HALF PRICE

!NEED HELP? CONTACT US

Isometric line drawing of a rectangular plate with four corner holes and a small protrusion.

Isometric line drawing of a square frame with mounting holes and a labeled dimension.

Two technical diagrams of a structural panel with labeled parts (3 and 4).

Pure geometric diagram of a parallelogram with labeled angle β.

Isometric line drawing of a rectangular frame with mounting holes and a labeled component 'b'.

Technical line drawing of a mechanical lever with a labeled part (7).

Technical line drawing of a mechanical component with a labeled part (8).

Technical line drawing of a hexagonal nut with threaded center.

10

12 11

13

Part name:

10

10

VEVOR®

TOUGH TOOLS, HALF PRICE

www.vevor.com/support

Portable workbench

USER MANUAL

MODEL: LCWB90

!NEED HELP? CONTACT US

Isometric line drawing of a rectangular plate with four corner holes and a small protrusion (no text or symbols)

Isometric line drawing of a square frame with mounting holes and a labeled dimension (no text or symbols)

Two technical diagrams of a structural panel with labeled parts (3 and 4), no text or symbols present.

Pure geometric diagram of a parallelogram with labeled angle β (no text or symbols beyond the label)

Isometric line drawing of a rectangular frame with mounting holes and a labeled component 'b' (no text or symbols beyond label)

Technical line drawing of a mechanical lever with a labeled part (7), no text or symbols present

Technical line drawing of a mechanical component with a labeled part (8), no text or symbols present.

Technical line drawing of a hexagonal nut with threaded center (no text or symbols)

10

12 11

13

10

10

VEVOR®

TOUGH TOOLS, HALF PRICE

Technical support and e-warranty certificate www.vevor.com/support

VEVOR®

TOUGH TOOLS, HALF PRICE
www.vevor.com/support

Portable workbench

USER MANUAL

MODEL: LCWB90
!NEED HELP? CONTACT US
Isometric line drawing of a rectangular plate with four corner holes and a small protrusion (no text or symbols)

Isometric line drawing of a square frame with mounting holes and a labeled dimension (no text or symbols)

Simple line drawing of a vertical panel with square holes and a labeled section '3' (no text or symbols beyond the label)

Simple line drawing of a vertical metal frame with mounting holes and a labeled dimension (no text or symbols)

Pure geometric diagram of a parallelogram with labeled side 'δ' (no text or symbols beyond the label)

Isometric line drawing of a rectangular frame with mounting holes and a labeled component 'b' (no text or symbols beyond label)

Technical line drawing of a mechanical lever with a labeled part (7), no text or symbols present

Technical line drawing of a mechanical component with a labeled part (8), no text or symbols present.

Technical line drawing of a hexagonal nut with threaded center (no text or symbols)

10

12 11

13

Parts list:

1: Platform 2: Panel 3: WB90 column 4: WB90 column 5: Bulkhead 6: Bow bulkhead 7: Universal wheel 8: Directional wheel 9: M6 flange nut
10

Manual assistant
Powered by Anthropic
Waiting for your message
Product information

Brand : Vevor

Model : LCWB90

Category : Plane