
XF8W218 - Repair tool Vevor - Free user manual and instructions
Find the device manual for free XF8W218 Vevor in PDF.

| Product Type | Repair creeper with tool tray and step |
| Brand | Vevor |
| Model | XF8W218 |
| Maximum load capacity | 300 lb (136 kg) |
| Seat dimensions | 360 x 240 mm |
| Product dimensions (assembled) | 420 x 360 x 440 mm |
| Main materials | Steel, foam, nylon casters |
| Number of casters | 5 (swivel, 2.5 inch threaded stem) |
| Tool tray included | Yes |
| Integrated step | Yes |
| Main functions | Mobile seat for under-vehicle repair, use as stepladder |
| Assembly required | Yes, includes all necessary parts and tools |
| Maintenance and cleaning | Weekly inspection, bi-monthly cleaning, monthly lubrication |
| Safety | Do not exceed 300 lb, do not stand on the seat, use on flat and firm surface |
| Spare parts available | Yes, contact Pro-Lift or Vevor customer service |
| Repairability | Inspection by authorized center if suspected overload or damage |
| Warranty | Electronic warranty certificate available at www.vevor.com/support |
Frequently Asked Questions - XF8W218 Vevor
User questions about XF8W218 Vevor
0 question about this device. Answer the ones you know or ask your own.
Ask a new question about this device
Download the instructions for your Repair tool in PDF format for free! Find your manual XF8W218 - Vevor and take your electronic device back in hand. On this page are published all the documents necessary for the use of your device. XF8W218 by Vevor.
USER MANUAL XF8W218 Vevor
Technical Support and E-Warranty Certificate www.vevor.com/support
Repair Seats
MODEL:XF8W218
We continue to be committed to provide you tools with competitive price. "Save Half", "Half Price" or any other similar expressions used by us only represents an estimate of savings you might benefit from buying certain tools with us compared to the major top brands and does not necessarily mean to cover all categories of tools offered by us. You are kindly reminded to verify carefully when you are placing an order with us if you are actually Saving Half in comparison with the top major brands.
VEVOR®
TOUGH TOOLS, HALF PRICE
Repair Seats
Model:XF8W218
natural_image
Line drawing of a mechanical frame with two curved ends and a central square base (no text or symbols)Step Stool

natural_image
Line drawing of a two-wheeled cart with wheels and handle (no text or symbols)Creeper Seat
NEED HELP? CONTACT US!
Have product questions? Need technical support? Please feel free to contact us:
Technical Support and E-Warranty Certificate www.vevor.com/support
This is the original instruction, please read all manual instructions carefully before operating. VEVOR reserves a clear interpretation of o user manual. The appearance of the product shall be subject to the product you received. Please forgive us that we won't inform you ag there are any technology or software updates on our product.
WARNING:
Read this material before using this product. Failure to do so can re serious injury.
Assembly precautions
- Assemble only according to these instructions. Improper assembly can create hazards.
- Keep children, pets, and bystanders out of the area during assembly. Distractions can cause you to lose control of tools, injuring yourself or others.
·Weight capacity and other product capabilities apply to properly and completely assembled product only. Do not use if incompletely or improve assembled.
Use precautions
·This product is not a toy. Do not allow children to play with or near and store out of reach of children.
- Use the stool and accessories as intended and in accordance with the instructions, taking into account with the working conditions and the work be performed. Use of the stool for operations different from those intended could result in a hazardous situation.
- Inspect before every use; do not use if parts are loose or damaged.
·Do not exceed weight capacity of 300 lbs.(136kg).
- NOTE: Be aware of dynamic loading! Sudden shifts in the load may be create excess load, which may result in product failure.
- Store idle equipment. When not in use, this product must be stored in location to inhibit rust.
- The warnings, cautions, and instructions discussed in this instruction manual can not cover all possible conditions and situations that may occur. It must be understood by the operator that common sense and caution are factors which cannot be built into this product but must be supplied by the operator.
WARNING: Do not stand on Stool Pad. Serious injury can occur.
TECHNICAL PARAMETERS
| Model | XF8W218 |
| Rated Load (lbs) | 300 |
| Seat size (mm) | 360*240 |
| Product size (mm) | 420*360*440 |
PART LIST
| Part | Description | picture | Qty |
| 1 | Screw rod caster wheels with a diameter of 2.5 |  | 5 |
| 2 | Screws (with a specification of M8*60mm) | 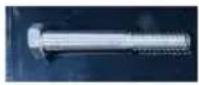 | 4 |
| 3 | Screws (with a specification of M6*16mm) | 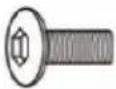 | 10 |
| 4 | Screws (with a specification of M6*40mm) | 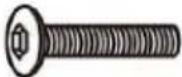 | 2 |
| 5 | Cap nuts (with a specification of M8) | 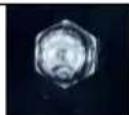 | 4 |
| 6 | Lock nuts (with a specification of M6) |  | 2 |
| 7 | Washers (with a diameter of 8mm) |  | 4 |
| 8 | Washers (with a diameter of 6mm) |  | 4 |
| 9 | Open - end wrenches | 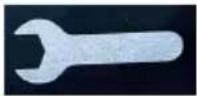 | 1 |
| 10 | hex key | 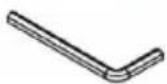 | 1 |
SAFETY AND GENERAL INFORMATION
Save these instructions.
For your safety, read, understand, and follow the information provided on this device before using. The owner and/or operator shall have an understanding of the device, its operating characteristics and safety operations before operating the equipment. The owner and/or operator be aware that use and repair of this product may require special skills knowledge. Instructions and safety information shall be read and discuss the operator in the operator's native language, making sure that the operator comprehends their contents, before use of this equipment is authorized to doubt exists as to the safe and proper use of this device.remove from immediately.
Inspect before each use.
Do not use if abnormal conditions such as cracked welds, damaged, missing parts are noted. Any equipment that appears damaged in any found to be worn, or operates abnormally shall be removed from service repaired. If the equipment has been or is suspected to have been sufficient an abnormal load or shock, immediately discontinue use until inspected factory authorized repair facility (contact distributor or manufacturer for authorized repair facilities). It is recommended that an annual inspection made by an authorized repair facility, Labels and Operator's Manuals available from the manufacturer.
WARNING
- Read, understand, and follow all instructions before using this device
- Never use a creeper/step stool that is damaged.
- Clean any mud, grease, oil or slippery liquids before using creeper/
- Do not exceed rated capacity. Rated capacity is 300 lbs. (includes and equipment).
-
Sit down gently. Avoid shock loads caused by jumping or falling or
-
Do not stand on seat.
- When used as a step stool, device must be on firm, level surface legs contacting ground.
- Make sure step stool is at appropriate height for intended purpose. overreach.
- Only one person shall use step stool at a time.
- Keep out of the reach of children. This device is not appropriate for use.
- Use on smooth, level surfaces only
INSTRUCTION FOR USE
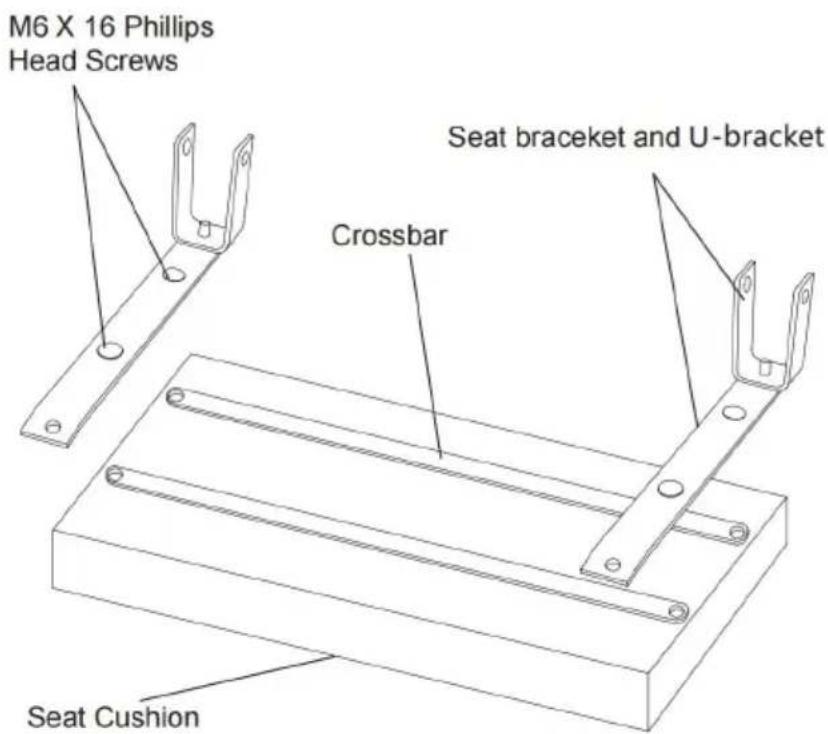
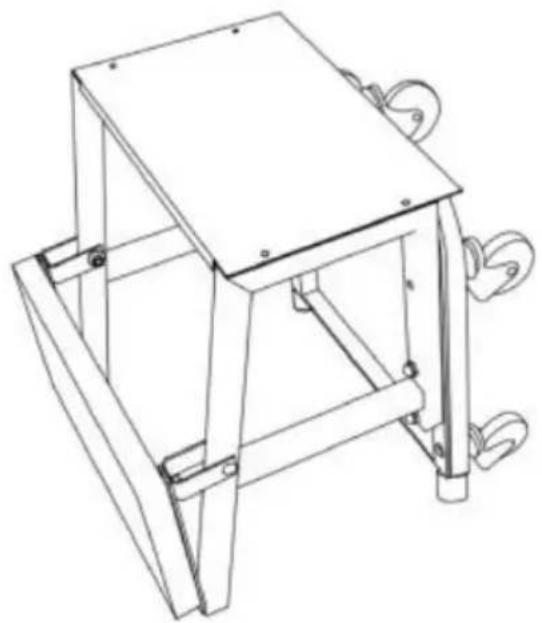
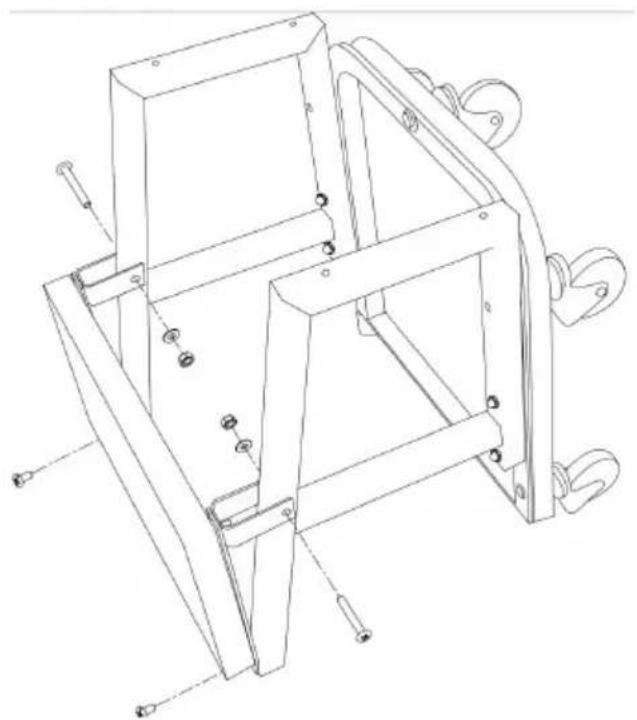
Figure 1 - Attaching U-brackets
PREPARATION/ASSEMBLY
Prior to assembling your Creeper, it is essential to ensure that all pa accounted for. In case any part is missing or damaged, refrain from to assemble or utilize the product. Instead, get in touch with Pro-Lift service to obtain replacement parts.
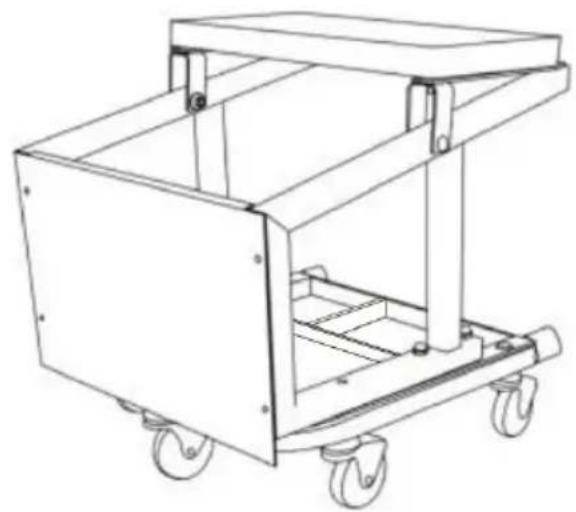
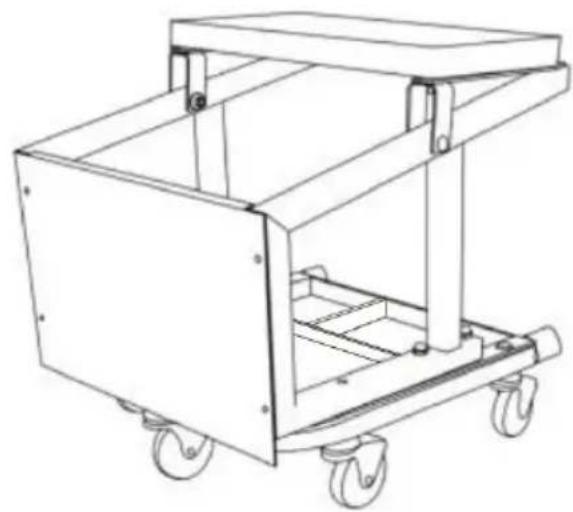
Package Contents: 1 Seat Pad Section, 1 Caster Frame Section, 1 T
Side Frame Sections, 2 Seat Support Brackets & U-brackets, 5 Caste assorted hardware.
- Place the Seat Cushion with its underside facing down. Align the ho Crossbars with those of the seat. Subsequently, align the holes of the Support Bars and fasten them using four M6 x 16 Phillips Head Scr, depicted in Fig. 1.

Figure 2 - Assembling tool tray and casters
- Assemble tool tray and five casters to caster frame using Allen hex barrels. Then attach two creeper side frames to caster frame with two hex head bolts, two washers and two acorn nuts each (Fig 2).
natural_image
Technical line drawing of a mechanical frame assembly with mounting holes and bolts (no text or symbols)- Attach creeper seat to creeper side frames using two M6 x 40 Phillips head screws, with washers, and nuts, and M6 x 16 Phillips head screws as in Figure 3.
Figure 3 - Attaching Creeper Seat
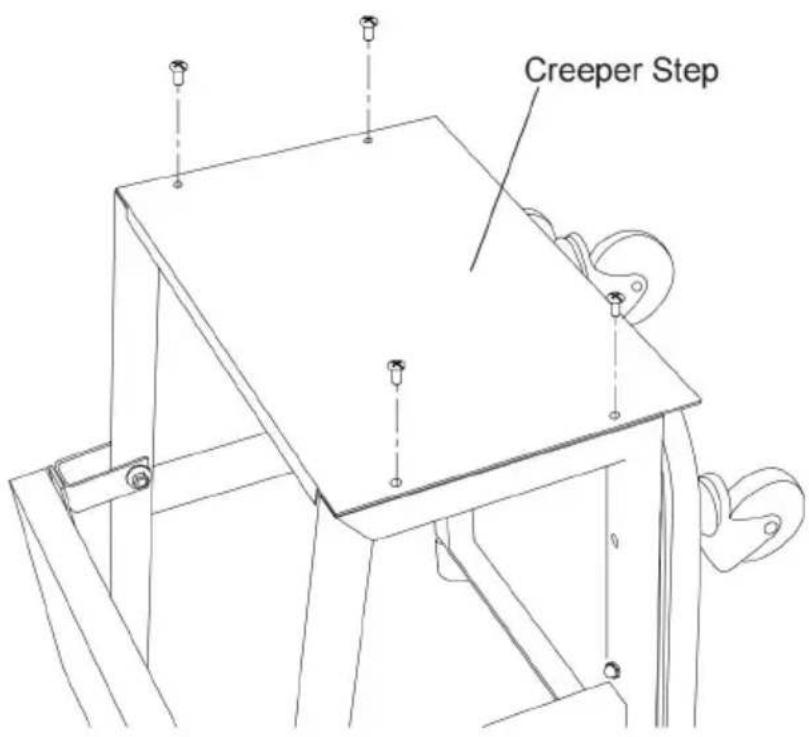
- Fasten creeper step to side frames using four M6 x 16 Phillips head screws (Fig. 4).
Figure 4 - Attaching Step to Side Frames
MAINTENANCE INSTRUCTIONS
1. Regular Inspection
Conducted weekly. Check the seat surface for cracks, tears, or signs. Examine the connections of the seat frame to see if they are loose, damaged. Test whether the seat adjustment mechanisms (such as height adjustment and backrest tilt) work smoothly.
2. Cleaning
Performed bi-weekly. Use a vacuum cleaner with a soft brush attachment remove dirt, debris, and dust from the seat surface, crevices, and unfor fabric seats, mix a mild detergent with warm water. Dip a soft solution and gently wipe the seat surface following the fabric's texture over-wetting. For leather seats, use a specialized leather cleaner. Apply amount to a clean, soft cloth and wipe the seat in a circular motion dry cloth to buff the leather to restore its shine.
3. Lubrication
Done monthly. Apply a small amount of multi-purpose grease to the I pivot points of the seat adjustment mechanisms to maintain smooth oil and prevent squeaking. Check the rollers or sliders (if applicable) and them with a silicone-based lubricant to ensure easy movement.

CAUTION: Do not lubricate casters
VEVOR®
TOUGH TOOLS, HALF PRICE
Technical Support and E-Warranty Certificate
www.vevor.com/support
VEVOR®
TOUGH TOOLS, HALF PRICE
natural_image
Line drawing of a mechanical frame with two curved ends and a central square base (no text or symbols)Step Stool

natural_image
Line drawing of a two-wheeled cart with wheels and handle (no text or symbols)Creeper Seat
POTRZEBUJESZ POMOCY? SKONTAKTUJ SIE Z NAMI!
natural_image
Technical line drawing of a mechanical frame assembly with mounting holes and bolts (no text or symbols)www.vevor.com/support
VEVOR®
TOUGH TOOLS, HALF PRICE
natural_image
Line drawing of a mechanical frame with two curved ends and a central square base (no text or symbols)Step Stool
natural_image
Line drawing of a two-wheeled cart with wheels and handle (no text or symbols)Creeper Seat
natural_image
Technical line drawing of a mechanical frame assembly with mounting holes and bolts (no text or symbols)www.vevor.com/support
VEVOR®
TOUGH TOOLS, HALF PRICE
www.vevor.com/support
natural_image
Line drawing of a mechanical frame with two curved hook handles (no text or symbols)Step Stool

natural_image
Line drawing of a two-wheeled cart with wheels and handle (no text or symbols)Creeper Seat
BESOIN D'AIDE? CONTACTEZ-NOUS!
Figure 1 - Fixation des supports en U
PRÉPARATION/MONTAGE
natural_image
Technical line drawing of a mechanical frame assembly with mounting holes and bolts (no text or symbols)natural_image
Line drawing of a mechanical frame with two curved hook handles (no text or symbols)Step Stool

natural_image
Line drawing of a two-wheeled cart with wheels and handle (no text or symbols)Creeper Seat
HULP NODIG? NEEM CONTACT MET ONS OP!
Figuur 1 - U-beugels bevestigen
VOORBEREIDING/MONTAGE
natural_image
Technical line drawing of a mechanical frame assembly with mounting holes and bolts (no text or symbols)www.vevor.com/support
VEVOR®
TOUGH TOOLS, HALF PRICE
natural_image
Line drawing of a mechanical frame with two curved hook handles (no text or symbols)Step Stool
natural_image
Line drawing of a two-wheeled cart with wheels and handle (no text or symbols)Creeper Seat
BEHÖVER HJÄLP? KONTAKTA OSS!
natural_image
Technical line drawing of a mechanical frame assembly with mounting holes and bolts (no text or symbols)www.vevor.com/support
VEVOR®
TOUGH TOOLS, HALF PRICE
natural_image
Line drawing of a mechanical frame with two curved hook handles (no text or symbols)Step Stool

natural_image
Line drawing of a two-wheeled cart with wheels and handle (no text or symbols)Creeper Seat
natural_image
Technical line drawing of a mechanical frame assembly with mounting holes and bolts (no text or symbols)natural_image
Line drawing of a mechanical frame with two curved ends and a central square base (no text or symbols)Step Stool

natural_image
Line drawing of a two-wheeled cart with wheels and handle (no text or symbols)Creeper Seat


