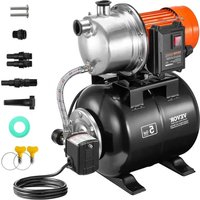
FSP20DC-2 - Water pump Vevor - Free user manual and instructions
Find the device manual for free FSP20DC-2 Vevor in PDF.


User questions about FSP20DC-2 Vevor
0 question about this device. Answer the ones you know or ask your own.
Ask a new question about this device
Download the instructions for your Water pump in PDF format for free! Find your manual FSP20DC-2 - Vevor and take your electronic device back in hand. On this page are published all the documents necessary for the use of your device. FSP20DC-2 by Vevor.
USER MANUAL FSP20DC-2 Vevor
Technical Support and E-Warranty Certificate www.vevor.com/support
CORDLESS WATER TRANSFER PUMP USER MANUAL
MODEL: FSP20DC-2
We continue to be committed to provide you tools with competitive price. "Save Half", "Half Price" or any other similar expressions used by us only represents an estimate of savings you might benefit from buying certain tools with us compared to the major top brands and does not necessarily mean to cover all categories of tools offered by us. You are kindly reminded to verify carefully when you are placing an order with us if you are actually Saving Half in comparison with the top major brands.
MODEL: FSP20DC-2

natural_image
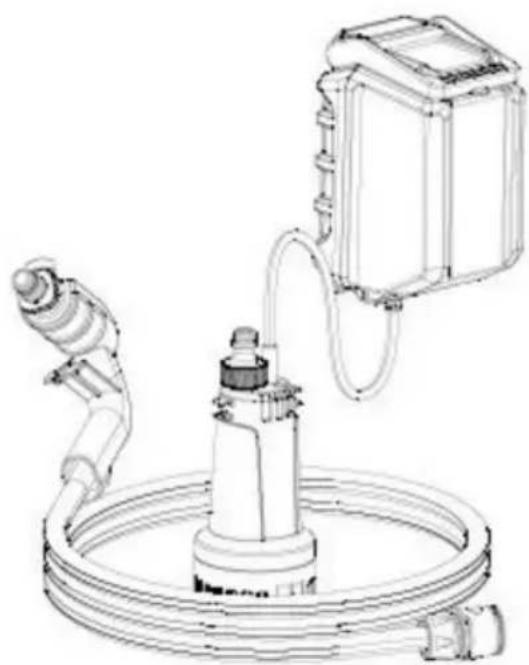
Technical line drawing of a mechanical device with hoses and a housing unit (no text or symbols)(The picture is for reference only, please refer to the actual object)
NEED HELP? CONTACT US!
Have product questions? Need technical support? Please feel free contact us:
Technical Support and E-Warranty Certificate www.vevor.com/support
This is the original instruction, please read all manual instructions carefully before operating. VEVOR reserves a clear interpretation of user manual. The appearance of the product shall be subject to the product you received. Please forgive us that we won't inform you there are any technology or software updates on our product.
INTENDED USE
The rain barrel pump is designed to pump water from a rain barrel or rain collected tank. It is ideal for watering your garden. The appliance is intended exclusively for pumping clear water and rainwater up to a temperature of max. 35°C. Any other use that is not expressly permitted in these operating instructions (e.g. pumping of foods, salt water, motor fuels, chemicals or water containing abrasive substances) may damage the appliance and represents a serious risk for the user.
This appliance is not designed for continuous operation. Continuous operation can reduce operating life and invalidate the guarantee.
This appliance is not suitable for commercial use. Commercial use will invalidate the guarantee.
The operator or user is responsible for accidents or damage to other people or their property. The manufacturer accepts no liability for damages caused by improper use or incorrect operation of the appliance.
Specification
| Model | FSP20DC-2 |
| Input | DC 20V Max 5.5A |
| H.max | 66ft (20m) |
| Q.max | 528GPH (2000L/H) |
| waterproofing grade | IPX8 |
\* BATTERY AND CHARGER ARE NOT SUPPLIED
Working with the appliance
■ Never allow children or persons who are not familiar with these instructions to use the machine.
Local regulations regarding the minimum age of operators may apply.
■ Take suitable precautions to keep children away from the appliance while it is running. There is a risk of injury.
■ Always disconnect the appliance from the power supply before assembling, disassembling or cleaning.
■ The appliance must not be used at altitudes higher than 2000 m.
WARNING!
■ Store out of the reach of children. Ingestion may cause chemical burns, perforation soft tissues and death. Severe burns may occur within 2 hours after ingestion. See medical attention immediately.
■ The normal temperature range for charging the battery is 4–40°C.
■ Fluids may leak out of rechargeable battery units if they are misused. If this happens, avoid contact with the fluid. If contact occurs, flush the affected area with water. Seek additional medical help if any of the fluid gets into your eyes. Escaping battery fluid may cause skin irritation or burns.
- Do not expose the appliance or the battery to high temperatures.
■ Be aware of the risk of short-circuiting the poles of the battery-powered appliance or battery with metal objects.
■ Do not use modified or damaged batteries.
■ Wear suitable footwear to protect yourself from electric shocks.
- Do not use the appliance near flammable liquids or gases. Failure to observe this warning may result in a fire or explosion.
- Pumping aggressive, abrasive (grinding), corrosive, flammable (e.g. motor fuels) or explosive liquids, salt water, cleaning agents and food-stuffs is not permitted. The temperature of the pumped liquid must not exceed 35°C.
- Do not work with a damaged or incomplete appliance or an appliance that has been modified without the consent of the manufacturer. Before use, have the required electrical protection measures checked by a specialist.
- Keep an eye on the appliance during operation to detect automatic shut-down or dry running of the pump in good time. Ignoring this warning will invalidate the warranty and any liability claims.
■ Please note that the pump is not suitable for continuous operation (e.g. for watercourses in garden ponds). Check the appliance regularly to ensure that it is functioning properly.
■ Note that there are lubricants used in the appliance which may cause damage or contamination if they leak out. Do not use the pump in garden ponds with fish stock or valuable plants.
■ Do not carry or fasten the appliance by the hose.
■ Protect the appliance from frost and from running dry.
■ Only use original accessories and do not carry out any modifications to the appliance.
- Read the instructions on "Cleaning, maintenance, storage" in the operating manual. All measures that go beyond this, in particular those that involve opening the appliance, must be carried out by a qualified electrician. In the event of a fault, always contact our Service Centre.
Additional safety instructions
If there is a risk of flooding, make sure that the cordless rain barrel pump is set up in an area that is safe from flooding.
■ Rechargeable batteries must be removed from the appliance before charging.
If the appliance is going to be stored for a long period and not used, the battery must be re- moved.
■ Do not leave the appliance outside if there is a danger of frost.
Safety guidelines for battery chargers
This appliance may be used by children aged 8 years and above and by persons with limit- ed physical, sensory or mental capabilities or lack of experience and knowledge, provided that they are under supervision or have been told how to use the appliance safely and are aware of the potential risks.
- Do not allow children to play with the appliance. Cleaning and user maintenance tasks may not be carried out by children unless they are supervised.
■ To avoid potential risks, a damaged mains cable should be replaced by the manufacturer or the manufacturer's customer service department or a similarly qualified person.

The charger is suitable for indoor use only.
WARNING!
To avoid potential risks, a damaged mable should be replaced by the manufacturer the manufacturer's customer service department or a similarly qualified person.
Before use
Charging the battery pack (see fig. A)
CAUTION!
▶ Always unplug the appliance before you remove the battery pack from or connect it to charger.
NOTE
▶ Never charge the battery pack at an ambient temperature of below 10^ C or above 40^ C lithium-ion battery is to be stored for an ex-tended period, the charge level should be regularly. The optimum charge level between 50% and 80%. The storage climate should be and dry and the ambient temperature should be between 0^ C and 50^ C.
■ Connect the battery pack to the high-speed battery charger (see fig. A).
- Insert the mains plug into the mains socket. The control LED lights up red.
■ The green control LED indicates that the charging process is complete and the battery pack is ready for use.
CAUTION!
If the red control LED flashes, this means that the battery pack has overheated and be charged.
If the red and green control LED both flash, this means that the battery defective.
- Switch off the charger for at least 15 minutes between successive charging sessions. Also disconnect the power plug from the mains pow- er socket.
Getting started Assembly
Mounting the wall bracket
■ Remove the screw+nut from the clamp in the wall bracket.
■ Insert the nut on the back of the wall
bracket into the hexagonal recess (see fig. B).
- Attach the wall bracket to the wall using three screws (not included). Note, the distance from wall bracket to the rain barrel is restricted by the length of the connection cable and the depth of the rain barrel.
Attaching the operating unit (fig. B)
■ Hook the operating unit into the wall bracket
■ Fasten the operating panel onto the wall bracket using the screw.
Connecting the connection hose
■ Screw the quick-connect adapter with the sealing ring onto the thread of the pump.
■ Push the connection hose onto the quick-connect adapter.
Attachment to the rain barrel
Instead of using the wall bracket, you can also attach the operating unit directly onto the rainbarrel.
■ Hook the clip instead of the wall bracket into the operating unit.
■ Attach the clip to the edge of the rain barrel.
Immersing the pump

WARNING!
■ Make sure you do not hold or hang therapy by the connection cable damage to the connection cables may cause an electrochok.
■ Use the plastic hook or the connection hose to immerse or raise the pump.
- Place the pump into the rain barrel. Note that the maximum immersion depth is 1.8 m due to the length of the connection hose.
■ Hook the plastic hook onto the edge of the rain barrel.
■ Wind the excess connection cable around the pump and fix the cable onto the side of the pump using one of the cable clips.
NOTE
- Be careful that dirt and sand may accumulate the bottom of the barrel over time and this damage the pump. We recommend placing the pump on a brick.
Shortening the connection hose (fig. C)
You can shorten the connection hose to prevent the excess length from causing problems.
■ Press the connection hose out of the plastic hook.
■ Unscrew the union nut from the connecting piece.
■ Pull the connection hose out of the connecting piece.
■ Shorten the connection hose to the desired length by cutting off the excess.
■ Re-attach the connection hose to the connecting piece and the plastic hook in the reverse order.
Connecting the pump to the operating unit
■ Connect the plug of the connection cable to the connection socket on the operating unit.
■ Screw the union nut of the plug onto the connection socket.
Attaching/disconnecting the battery pack to/from the appliance (fig. D) Inserting the battery pack
■ Pull the handle upwards.
- Flip open the battery cover on the operating unit.
■ To insert the battery pack into the appliance, push the battery pack along the guide rail into the appliance. It clicks audibly into place.
Removing the battery pack
■ To remove the battery pack, press the re-lease button for the battery pack and pull the battery pack out of the appliance.
■ Close the battery cover on the operating unit.
■ Push the handle back down.
Checking the battery charge level
- Press the battery charge level button to check the status of the battery (see also main diagram).
The status/remaining charge will be shown on the battery display LED as follows: RED/ORANGE/GREEN = maximum charge RED/ORANGE = medium charge RED low charge - charge the battery
Operation
NOTE
The minimum water depth during use must be
Switching on/off
Switching the pump on
- Insert the battery pack into the operating unit (See "Attaching/disconnecting the battery pack to/from the appliance").
- Press the power button. The charge level indicator lights up and the pump starts sucking up water.
Switching the pump off
■ Press the power button. The pump switches off.
■ Remove the battery pack from the operating unit (See "Attaching/disconnecting the battery pack to/from the appliance").
Timer
■ With the pump running, press the timer but- ton .
The timer LEDs light up.
- Press 1 time -> 5 mins operating time
- Press 2 times -> 10 mins operating time
- Press 3 times -> 15 mins operating time
As soon as the set time has elapsed, the pswitches off automatically.
- To switch off the timer before the time has elapsed, press the timer button repeatedly all the timer LEDs go out.

CAUTION!
- Keep an eye on the appliance during diperato detect automatic shut-down or drying of the pump in good time and to avoid damage.
Charge level indicator
The charge level of the battery is indicated during operation by the corresponding LED lights the charge level indicator.
Green LED lights up: battery charge level >60%
Yellow LED lights up: battery charge level 60%–30%
Red LED lights up: battery charge level 30%–10%
Red LED flashes: battery charge level <10%; battery needs to be charged
Cleaning, maintenance and storage

WARNING! RISK OF INJURY! Always switch the appliance off and remove the battery before carrying out any work on the appliance.
■ Clean the appliance regularly, preferably immediately after completion of the work.
■ Clean the pump with fresh water after each use.
■ Use a water jet to remove any lint and fibrous particles that may have become trapped on and under the pump casing.
Cleaning the filter (fig. E)
The suction foot of the pump contains that if detects the pump from contamination. It should be checked occasionally and clean necessary, depending on the degree of contamination of the water:
■ Remove the battery pack from the operating unit.
■ Remove the suction foot.
■ Clean the suction foot under clear running water.
■ Re-attach the suction foot in the reverse order.
NOTE
▶ Do not operate the pump without the suction attached.
Flushing the pump
After pumping very dirty water, you need to flush the pump to prevent deposits in the pump.
■ Pump lukewarm water (max. 35^ C) until the pumped water runs clear.
Storage
■ Clean the pump before storage.
■ Store the pump in a dry and frost-proof location and out of the reach of children.
If you are planning on not using the pump for a long time, it must be thoroughly cleaned and rinsed after the last use and before you use it again. Otherwise, you may experience start-up difficulties due to deposits and residues.
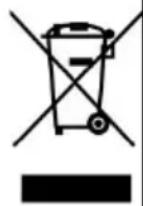
This product is subject to the provision of European Directive 2012/19/EC. The symbol showing a wheelie bin crossed through indicates that the product requires separate refuse collection in the European Union. This applies to the product and all accessories marked with this symbol. Products marked as such may not be discarded with normal domestic waste, but must be taken to a collection point for recycling electrical and electronic devices
Manufacturer: Shanghaimuxinmuyeyouxiangongsi
Address: Shuangchenglu 803nong11hao1602A-1609shi, baoshanqu, shanghai 200000 CN.
Imported to AUS: SIHAO PTY LTD. 1 ROKEVA STREETEASTWOOD NSW 2122 Australia
Imported to USA: Sanven Technology Ltd. Suite 250, 9166 Anaheim Place, Rancho Cucamonga, CA 91730
| EC | REP |
E-CrossStu GmbH Mainzer Landstr.69, 60329 Frankfurt am Main
| UK | REP |
YH CONSULTING LIMITED. C/O YH Consulting Limited Office 147, Centurion House London Road. Staines-upon-Thames. Surrey. TW18 4A
VEVOR®
TOUGH TOOLS, HALF PRICE
Technical Support and E-Warranty Certificate www.vevor.com/support
VEVOR®
TOUGH TOOLS, HALF PRICE
natural_image
Technical line drawing of a mechanical device with hoses and a housing unit (no text or symbols)C/O YH Consulting Limited Bureau 147, Centurion House, London Road, Staines-upon-Thames, Surrey, TW18 4AX
VEVOR®
TOUGH TOOLS, HALF PRICE
www.vevor.com/support
KABELLOSES WASSERTRANSFERPUMPE
BENUTZERHANDBUCH
MODELL: FSP20DC-2
natural_image
Technical line drawing of a mechanical device with hoses and a housing unit (no text or symbols)C/O YH Consulting Limited Office 147, Centurion House,
London Road, Staines-upon-Thames, Surrey, TW18 4AX
VEVOR®
TOUGH TOOLS, HALF PRICE
elettronica www.vevor.com/support
natural_image
Technical line drawing of a mechanical device with hoses and a housing unit (no text or symbols)Importato in AUS: SIHAO PTY LTD. 1 ROKEVA STREETEASTWOOD NSW 2122 Australia
Importato negli USA: Sanven Technology Ltd. Suite 250, 9166 Anaheim Place, Rancho Cucamonga, CA 91730
natural_image
Technical line drawing of a mechanical device with hoses and a housing unit (no text or symbols)natural_image
Technical line drawing of a mechanical device with hoses and a housing unit (no text or symbols)Rancho Cucamonga, CA 91730
| Przedstaw ciel UE |
E-CrossStu GmbH
Mainzer Landstr.69, 60329 Frankfurt nad Menem.
| REP WIELKIEJ BRYTANII |
YH CONSULTING LIMITED.
C/O YH Consulting Limited Biuro 147, Centurion House,
London Road, Staines-upon-Thames, Surrey, TW18 4AX
VEVOR®
TOUGH TOOLS, HALF PRICE
www.vevor.com/support
SNOERLOZE WATEROVERDRACHTPOMP
GEBRUIKERSHANDLEIDING
MODEL: FSP20DC-2
DRAADLOZE WATER TRANSFERPOMP
MODEL: FSP20DC-2
natural_image
Technical line drawing of a mechanical device with hoses and a housing unit (no text or symbols)HULP NODIG? NEEM CONTACT MET ONS OP!
C/O YH Consulting Limited Kantoor 147, Centurion House,
Londen Road, Staines-upon-Thames, Surrey, TW18 4AX
VEVOR®
TOUGH TOOLS, HALF PRICE
Technische ondersteuning en e-garantiecertificaat www.vevor.com/support
VEVOR®
TOUGH TOOLS, HALF PRICE
www.vevor.com/support
TRÄDLÖS VATTENÖVERFÖRINGSPUMP
ANVÄNDARMANUAL
MODELL: FSP20DC-2
natural_image
Technical line drawing of a mechanical device with hoses and a housing unit (no text or symbols)C/O YH Consulting Limited Office 147, Centurion House, London Road, Staines-upon-Thames, Surrey, TW18 4AX
VEVOR®
TOUGH TOOLS, HALF PRICE