USER MANUAL DS-19 Vevor
Technical Support and E-Warranty Certificate
www.vevor.com/support
Strapping Machine
MODEL: DS-19
We continue to be committed to providing you with tools at competitive prices. "Save Half", "Half Price", or any other similar expressions used by us only represent an estimate of savings you might benefit from buying certain tools with us compared to top brands, and do not necessarily mean to cover all categories of tools offered by us. We kindly remind you to verify carefully when placing an order with us if you are actually saving half in comparison with the top major brands.
MODEL: DS-19
Have product questions? Need technical support? Please feel free to contact us:
Technical Support and E-Warranty Certificate
www.vevor.com/support
This is the original instruction. Please read all manual instructions carefully before operating. VEVOR reserves a clear interpretation of the user manual. The appearance of the product shall be subject to the product you received. Please forgive us that we won't inform you of any technology or software updates on our product.
Thank you very much for choosing this Strapping Machine.
- Please read all of the instructions before using it. The information will help you achieve the best possible results.
The products carried in this catalog may be different in color than the advertised item.
INSTRUCTIONS
This manual enables the customer to use the tool correctly and to simplify the procedure. The operating instructions contain important information about how to use the tool safely, correctly, and effectively. Strict adherence to operating instructions helps avoid hazards, reduce repairs and interruptions, and increase reliability and service life.
Please must follow this instruction when using the tool. Operators must read carefully and strictly: include operations, replacement of consumables, troubleshooting and repair.

CAUTION! This sign indicates a life and health hazard.

WARNING! This flag indicates the risk that damage may cause damage to the object itself.
Where this flag is used indicates the failure to follow the instructions may cause the operation to fail.
Additional operating instructions include the safe and correct use of the tool, in addition to compliance with the safety standards and technical standards of the current place.
Environmental protection instruction
All materials in this tool do not contain any chemical substances that may be harmful to human health.
All parts must be handled in accordance with the relevant regulations.
Electronic components must be split up and processed into electronic and mechanical parts.

Statement of battery treatment:
·Do not open the battery
- It is strictly forbidden to throw batteries into ordinary bins, fire and water. Treat used or out-of-life batteries under a complete recycling process
2. Safety instruction
Important notice
Please read this instruction carefully. Preventive maintenance and repair must be carried out by trained personnel.
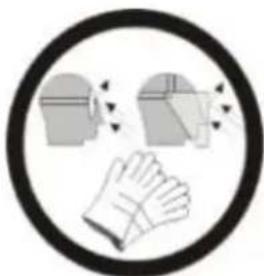
Self-protection!
A device to protect eye and face must be worn when operating the tool
Power protection
The battery must be removed before maintenance and repair.
Warning
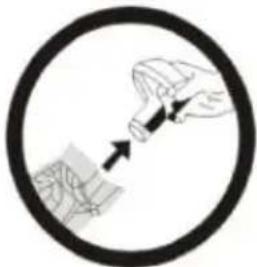
The strap may break! Hold the strap in a safe place with your hands when cutting the strap.
Warning
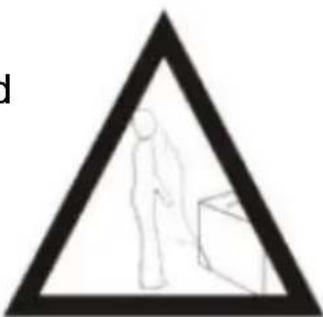
The strap may break! Do not stand parallel to the strap when the strap is tight to prevent the strap from breaking suddenly.
Warning
The strap may break! Hold the strap in a safe place with your hands when cutting the strap.


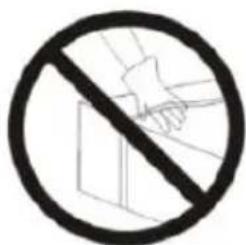
Risk at the squeeze:
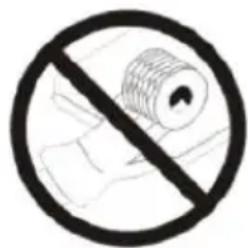
Please don't put your fingers in the running tension wheel.
Attention:
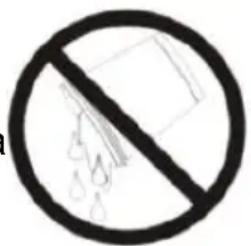
Waterproof!
Do not use water or steam cleaning

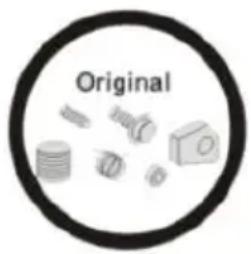
Must use the original company made parts!
If the original parts are not used due to problems, the Company does not assume the responsibility and obligation.
Design goals
-This tool is suitable for the packaging of large goo pallets,etc. -This tool strictly considers the safety of use in the design and manufacturing process. -This tool is designed specifically for PP, PET straps.
Safe instructions for the safe use of batteries and chargers
Please check the plug and cable before use, if there damage, it must be replaced by the qualified person not charge other types of battery and use original accessories only. Please keep the charger clean, and the charger slot free of foreign objects and protect a dirt. Please put the charger in a dry place to avoid m
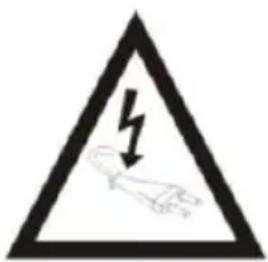
Do not open the battery, avoid being squeezed. And do not put the battery in a fire to avoid explosion. After the battery is removed from the charger, avoid contact with metal objects to avoid short circuits. Keep the battery dry and avoid corrosion by decontamination of liquids. It is strictly forbidden
to place the battery in an environment above 50° C or below 10° C. Damage batteries should not be used longer.
MODEL AND PARAMETERS
3. Technical data
Tension force: 800N-5000N
Sealing: Frictionwelding
Battery charger voltage: AC100-240V, 50/60Hz
Battery parameter: 18V/4.0Ah Li-Ion
Strap thickness: 0.5-1.2mm
ASSEMBLY AND USE
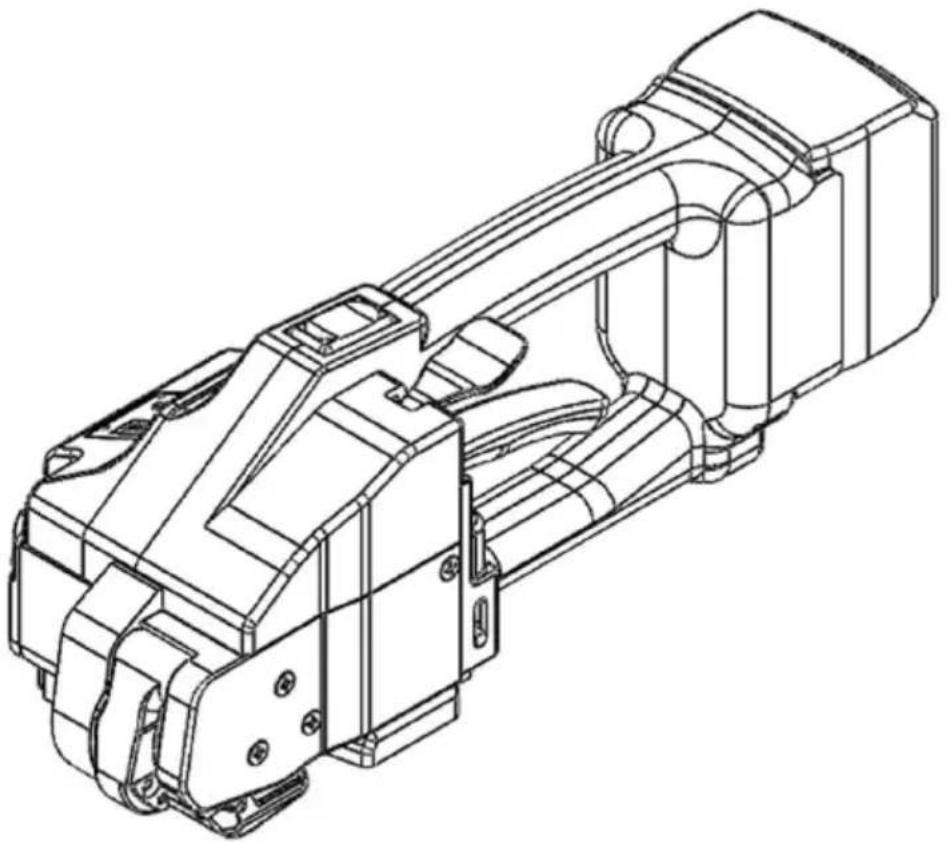
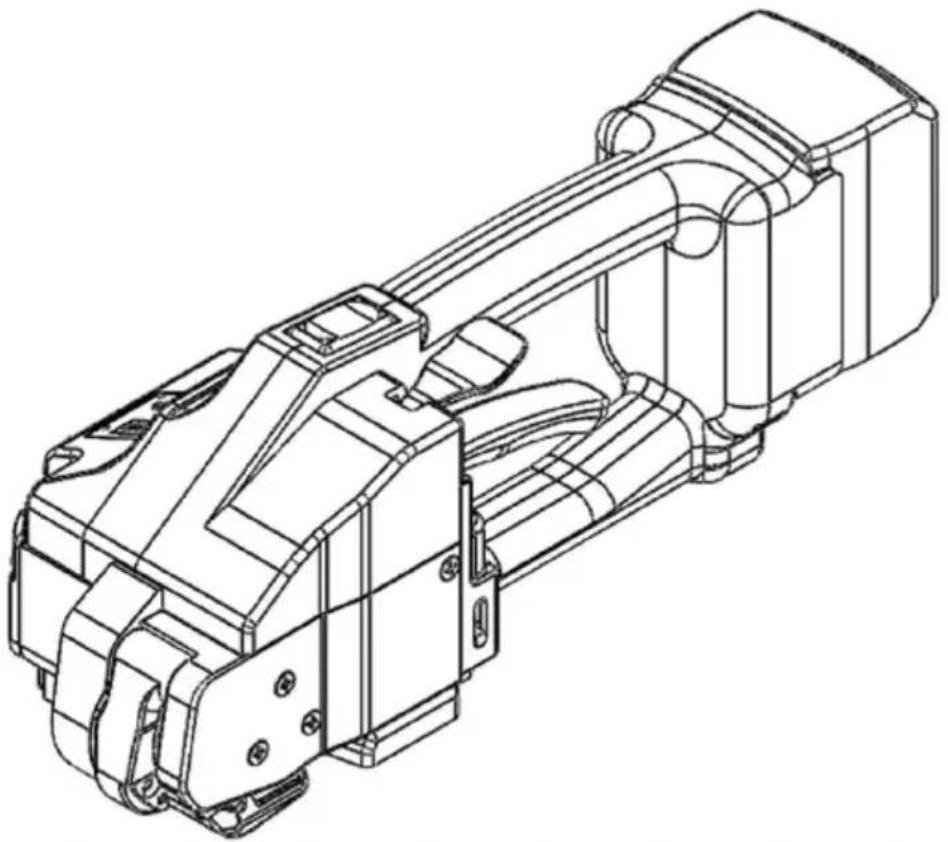
4. Parts Description
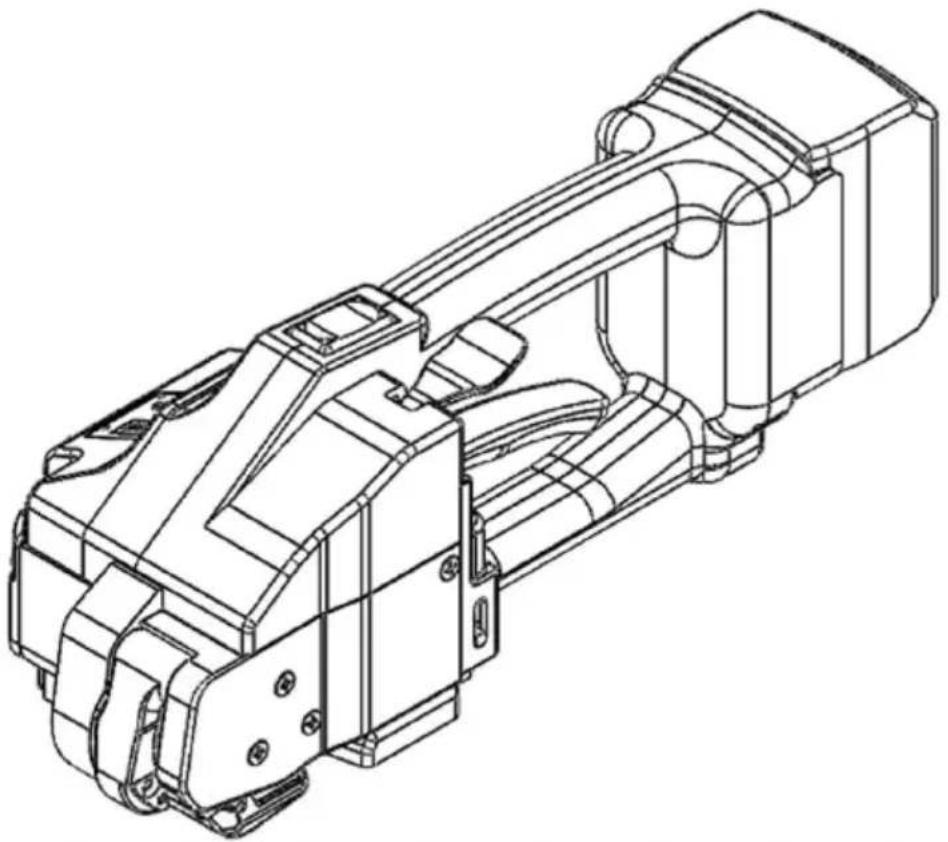
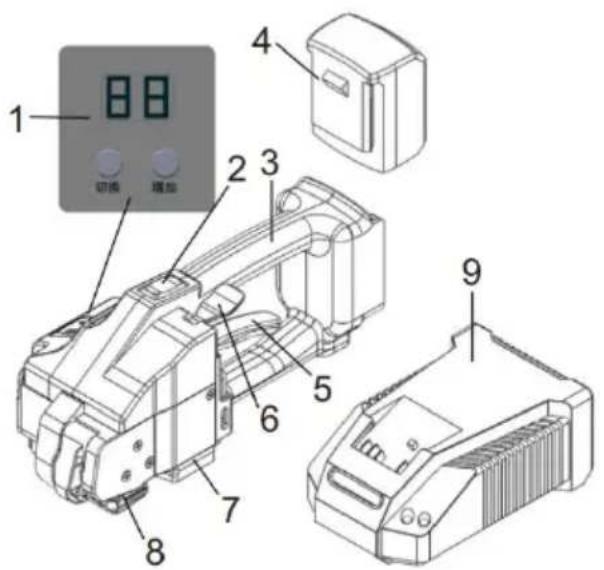
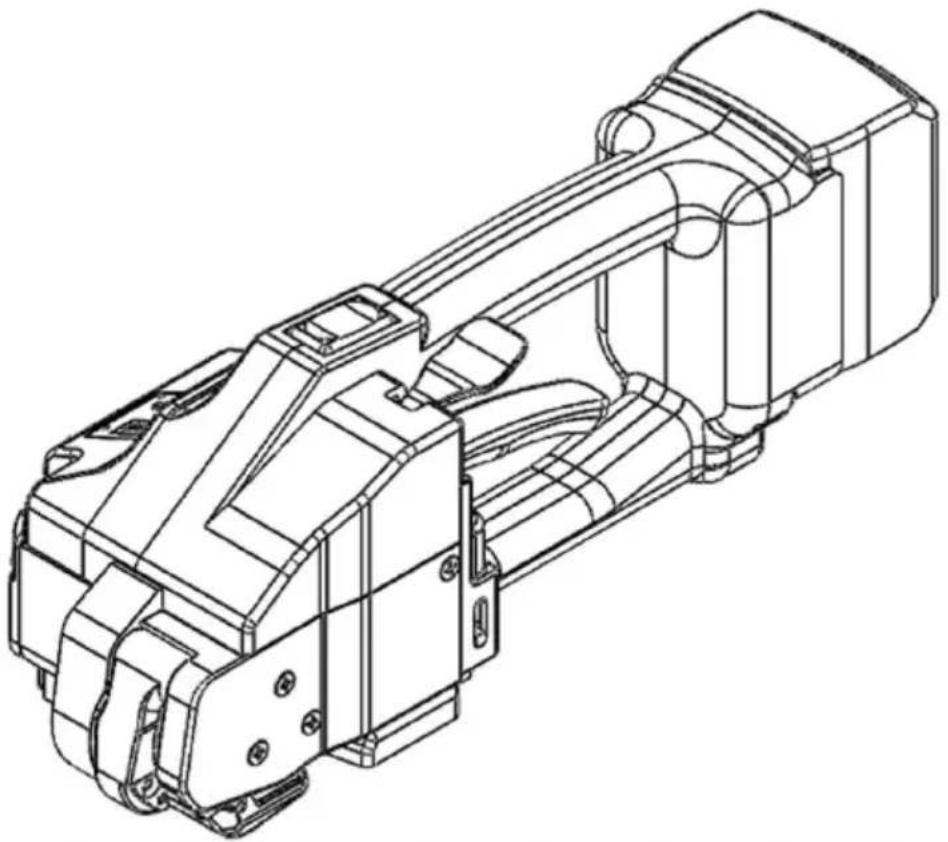
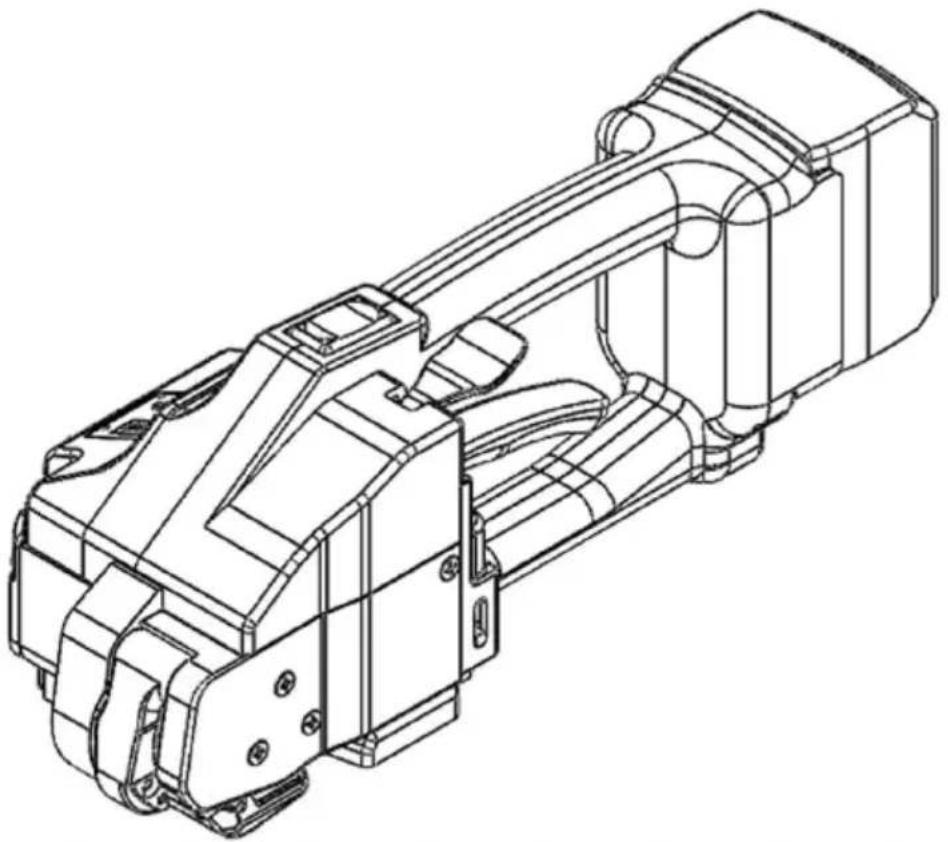
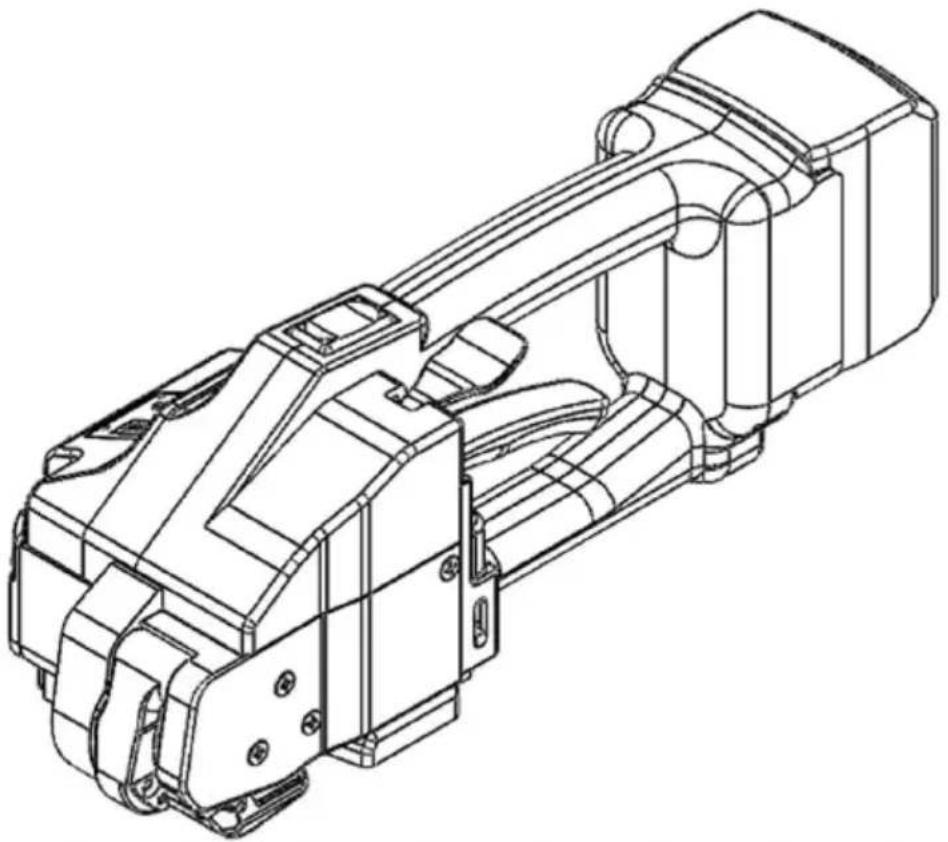
4.1 Construction name
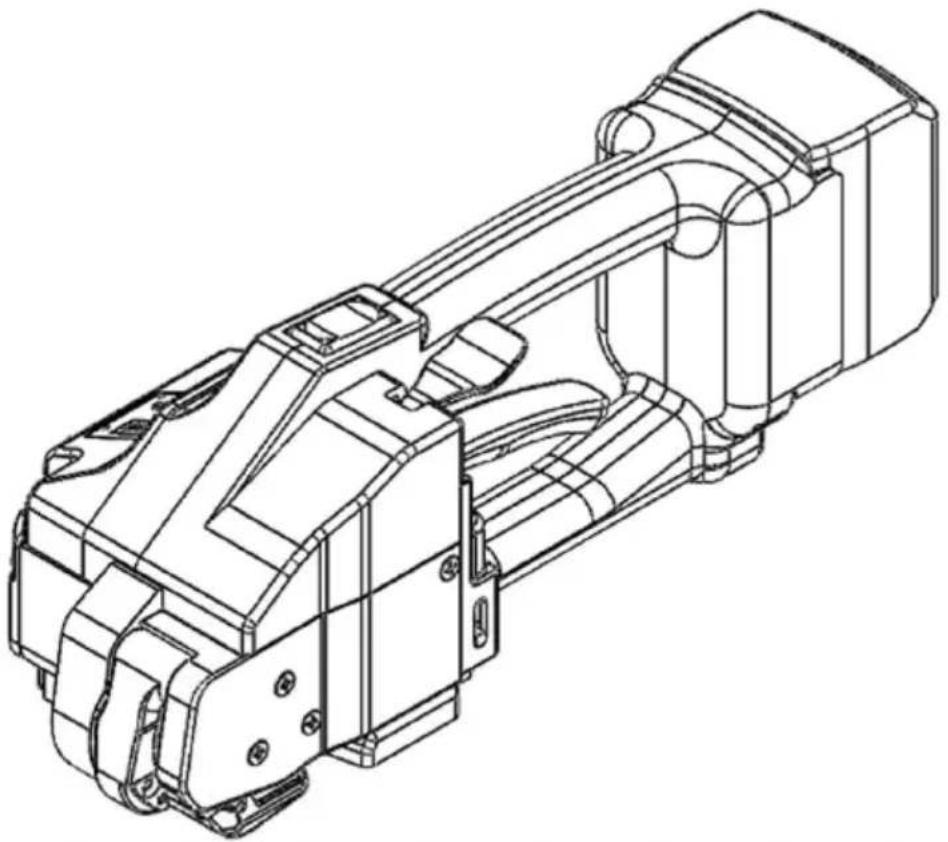
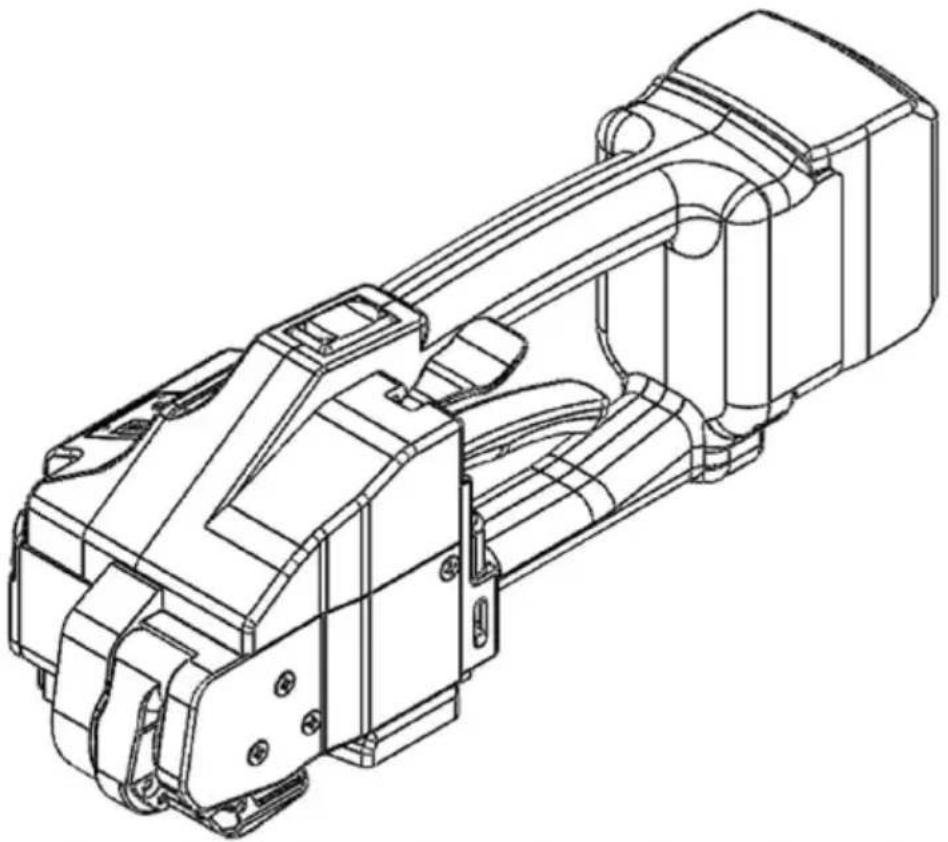
1 Connecting panel 2 Tightening switch 3 Handle 4 Battery 5 Rocker lever 6 Welding button 7 Welding part and cutter knife 8 Tension wheel 9 Battery charger
4.2 Connecting panel
1 Switcher Mode button 2 Gear increase button 3 Gear display 4 Mode display For detailed information Please refer to see Section 6.3
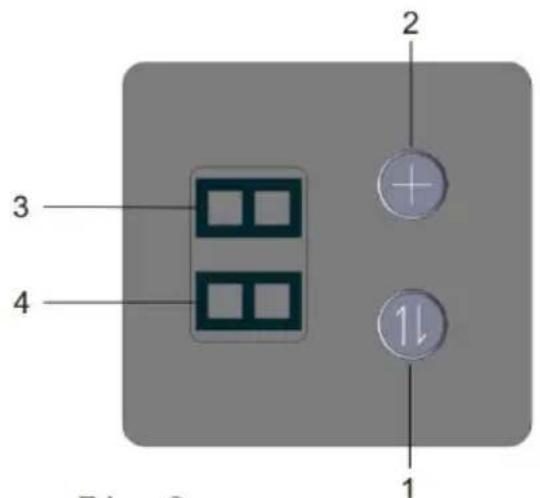
Fig. 2
4.3 Operation function
- Clamping the strap through the flanks on the rocker(1)
- Tension wheel (2) rotates counterclockwise for tension
- Upper tooth plate (3) friction melting the strap
- Cutter Knife (4) cut off the upper strap
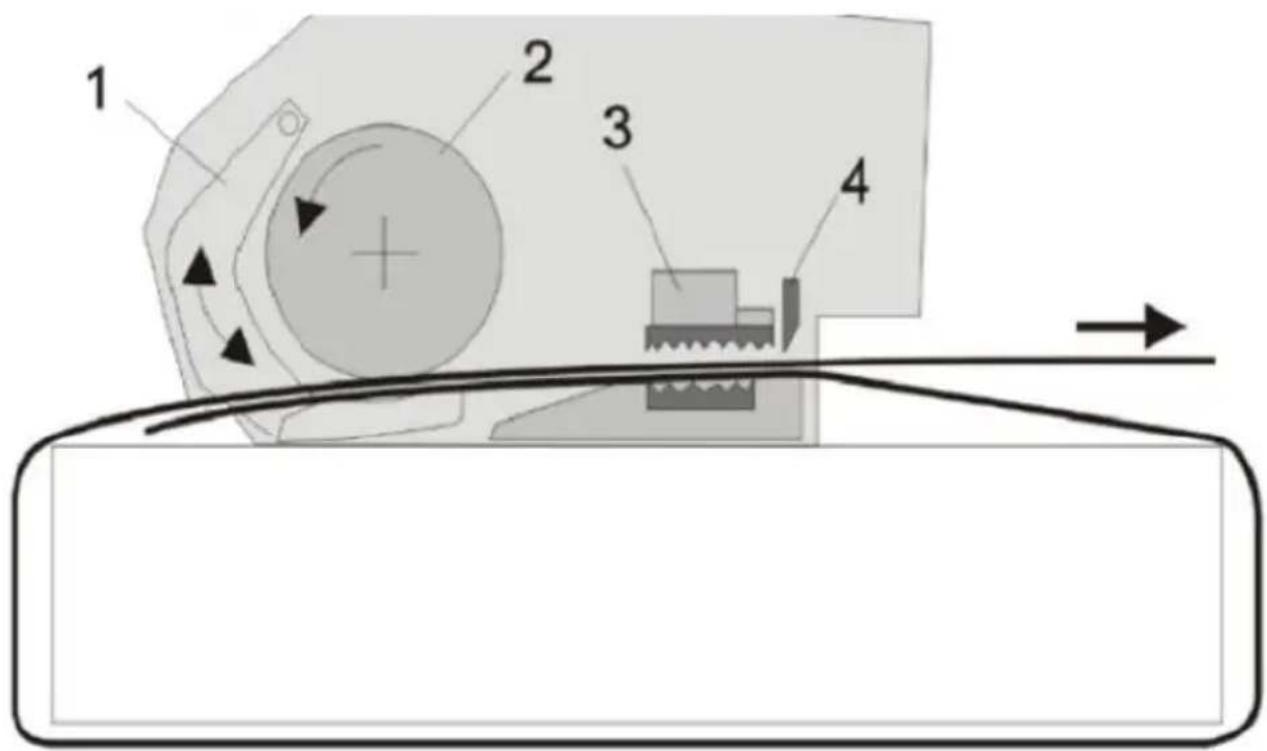
Fig. 3
5. Initialization operation
5.1 Battery charger
The charger power supply must meet the specifications shown in the picture on the left. The charger is only suitable for batteries with a voltage range of 10.8V to 18V.
5.2 Safety instructions
5.2 Safety instructions
- Do not open the battery. - Protect the battery from high temperatures, flames, water, and moisture. - If the battery is damaged or used improperly, toxic fumes may be emitted from the battery.
The workplace must maintain air circulation. If any discomfort occurs, seek medical attention immediately.
- Damaged batteries can leak liquid and contaminate other parts. Check contaminated parts.
- Unused batteries must be kept away from paper clips, hard coins, keys, nails, screws, or other small metal objects. These objects may connect the battery contacts and cause a short circuit.
- If used improperly, the battery may leak liquid. Avoid contact with such liquids. If accidental contact occurs, rinse with water immediately. If the liquid gets into the eyes, seek medical treatment immediately.
5.3 Operation
How to use the battery correctly
Instructions: Before using the strapping tool for the first time, ensure the battery has sufficient power.
Note: Do not start and stop the switch when the battery is exhausted. To extend battery life, charge the battery at a temperature between 0-45°C. Do not leave the battery in a car during summer. If the battery life significantly decreases after charging, the battery is damaged and must be replaced.
5.4 Repairs and services
Cleaning: Periodically clean the battery's vents with a soft, clean, dry brush.
Handling: Batteries shipped by third parties (e.g., by air transport or a commissioned transportation company) require special packaging and labeling.
If necessary, ask a hazardous materials specialist for information about sending dangerous goods.
Treatment of waste batteries: Damaged strapping tools, storage batteries, accessories, and discarded packaging materials must be recycled in an environmentally friendly manner.
6. Operation Instruction
- Load the rechargeable battery (6/1) into the packing tool.
- Wrap the PP/PET belt around the bundle from top to bottom, holding the strap so that the lower edge of the tie belt is about 20 cm away from the hand (as shown in Figure 6).
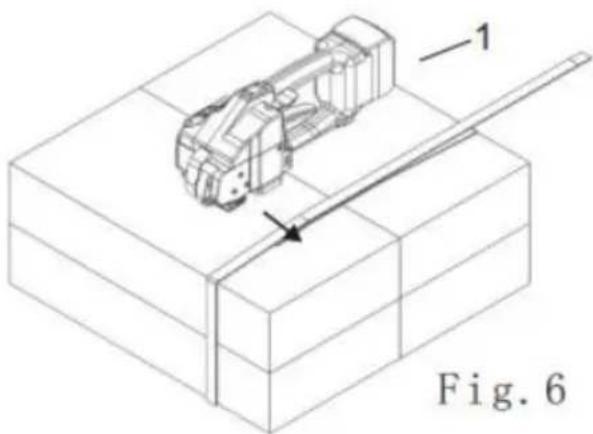
- Hold the tool with the right hand and put the inlet lever (7/1) in the open position.
- Completely insert the strap into the body of the tool. As shown, place the PP or PET strap in the correct position; the leading part of the strap should exceed the tool body by about 5 cm.
- Release the inlet lever.
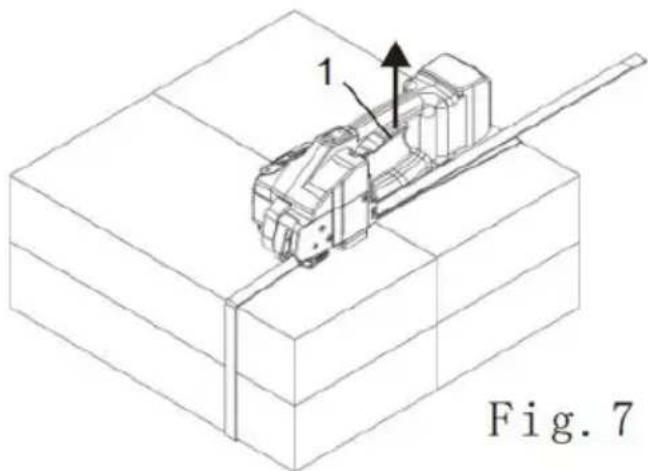
- Press and hold the tight button (8/1) for about 3 seconds; the tool will turn on the operating mode. Press the tight button (8/1) to start the tightening until the necessary or desired tension is reached.
- The strap tension can be adjusted on the operator panel (see section 6.2). If an unexpected condition occurs during the tightening process, such as incorrect strap placement or slipping, pull up the inlet control lever (7/1) to loosen the strap with the tension wheel.
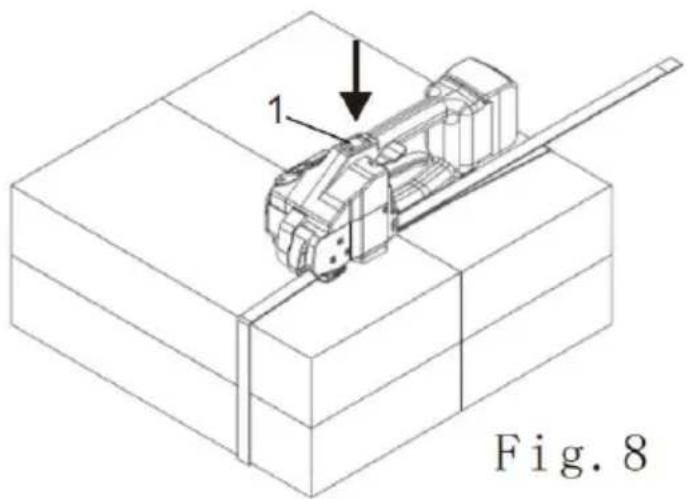
- Press the cut-off button (9/1) to begin the friction melting action; the upper strap will automatically cut off after the friction is complete.
- After the friction melting cooling time has elapsed, the strapping tool emits a 'whisper' sound signal; then pull up the rocker lever.
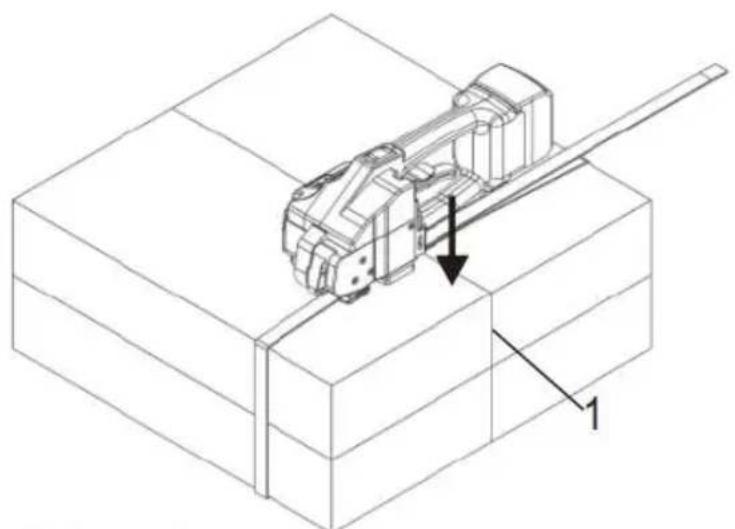
Fig. 9
- Swing the tool to the right rear so that it detaches from the strap, and check the friction melting surface on the strap (see section 6.2). If the strapping tool is used in a dirty environment, it is recommended to check it daily for wear and tear, preferably using a compressed air gun for cleaning.
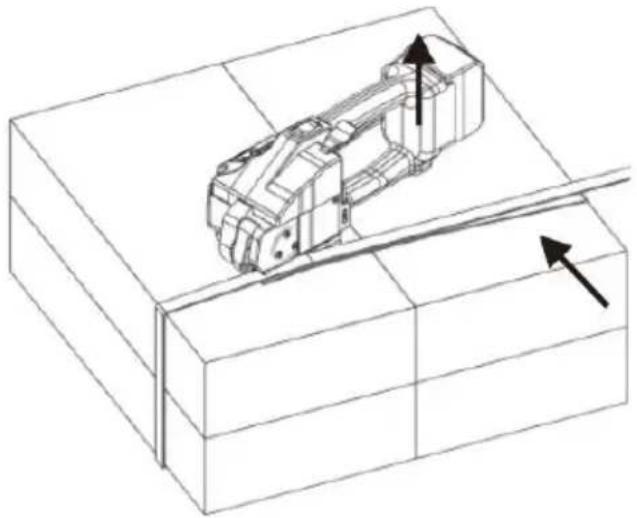
Fig. 10
6.2 Sealing checking
Check the appearance of the friction melting face (reference Figure 12) that should be uniform and flat. If the surface is not well, check the friction melting time setting (see 6.3, Section 3).

- Good friction melting surface (the whole surface is properly melted together, no extra material is squeezed out of both sides of the strap).
- Bad friction melting surface (no full friction fusion with short time).
- Bad friction melting surface (material is squeezed out of both sides of the strap for a long time).
Incorrect friction melting does not bundle objects reliably.
Do not transport or carry the objects that do not bundle the straps properly.

6.3 Panel checking
a) Normal indication
After inserting the battery and turning on the operating mode, the digital display panel will show the current battery power by default ("7" means the full power, "1" means the minimum power). Press the toggle button to switch the display mode: B = Battery power; C = Welding Gear; P = Tension force Gear.
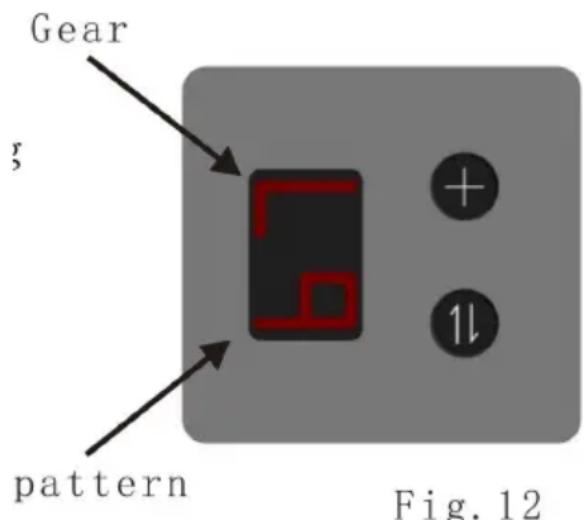
b) Display the meaning of each section of the panel under abnormal circumstances
1. E0: The machine temperature is too high. 2. E1: Battery overpressure. 3. E2: Battery low pressure (to be charged). 4. E3: Motor line is not connected. 5. E4: Motor over current. 6. E5: High battery temperature. 7. E6: Low battery temperature. 8. E7: Startup check failed.
6.3.1 Check the battery power
Please check the right side of panel CNC display in a non-operational state or press the toggle button. When the letter (13/2) on the left side of the digital display panel is shown as B, the right number (13/3) means the current battery power.
1 = Power empty (must be charged immediately);
2-4 = Less power (rechargeable);
5-7 = Full power (no charge required).
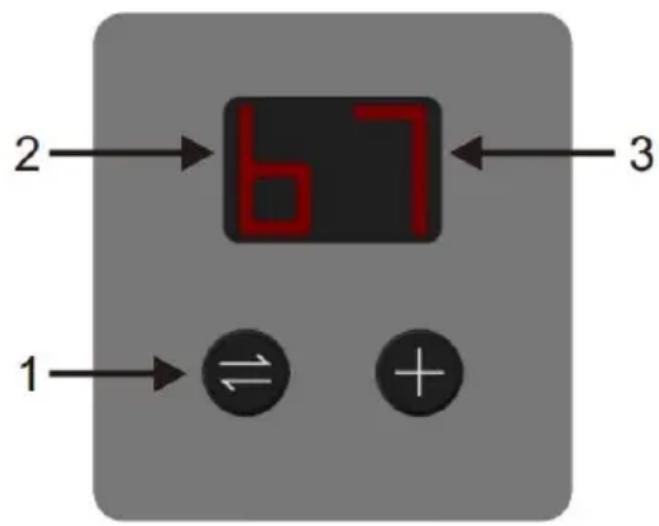
Fig. 13
6.3.2 Set the packing tension force
- Press the toggle button (14/1) until the letter (14/2) on the left of the digital panel shows P;
- Press the Gear increase button (14/4) until the number on the right side digital panel (14/3) shows the desired tension force.
1 = Minimum packing tension force (approx. 600N) 7 = Maximum packing tension force (approx. 4000N)
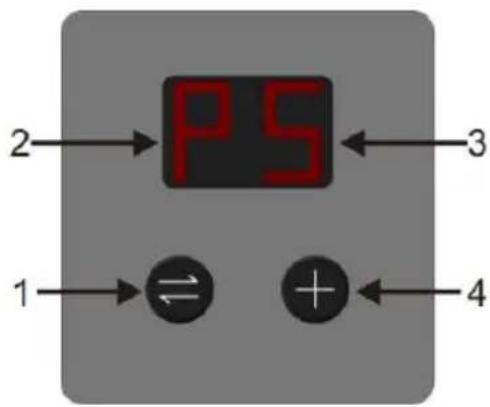
Fig. 14
6.3.3 Set the fusion time
- Press the toggle button (15/1) until the letter (15/2) on the left of the digital panel shows C. - Press the Gear increase button (14/4) until the number on the right side digital panel (14/3) shows the desired fusion time. 1 = Minimum fusion time, 7 = Maximum fusion time.
Note: The fusion time will affect the strap cut. If the fusion effect is not given, please extend the fusion time.
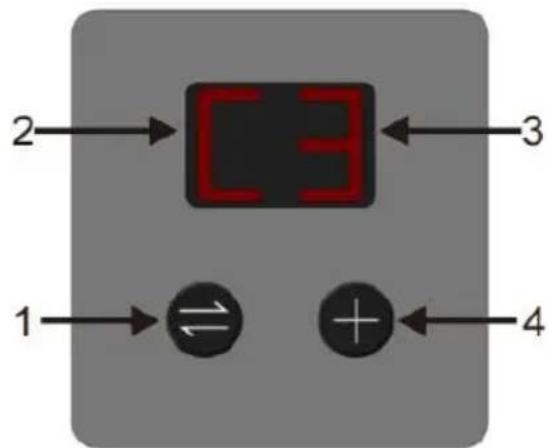
Fig. 15
6.4 Strap width setting
This tool can work for two different strap widths: 16mm (5/8") / 19mm (3/4"). a) Change the strap width from 16mm to 19mm.
- Please take the battery off the machine.
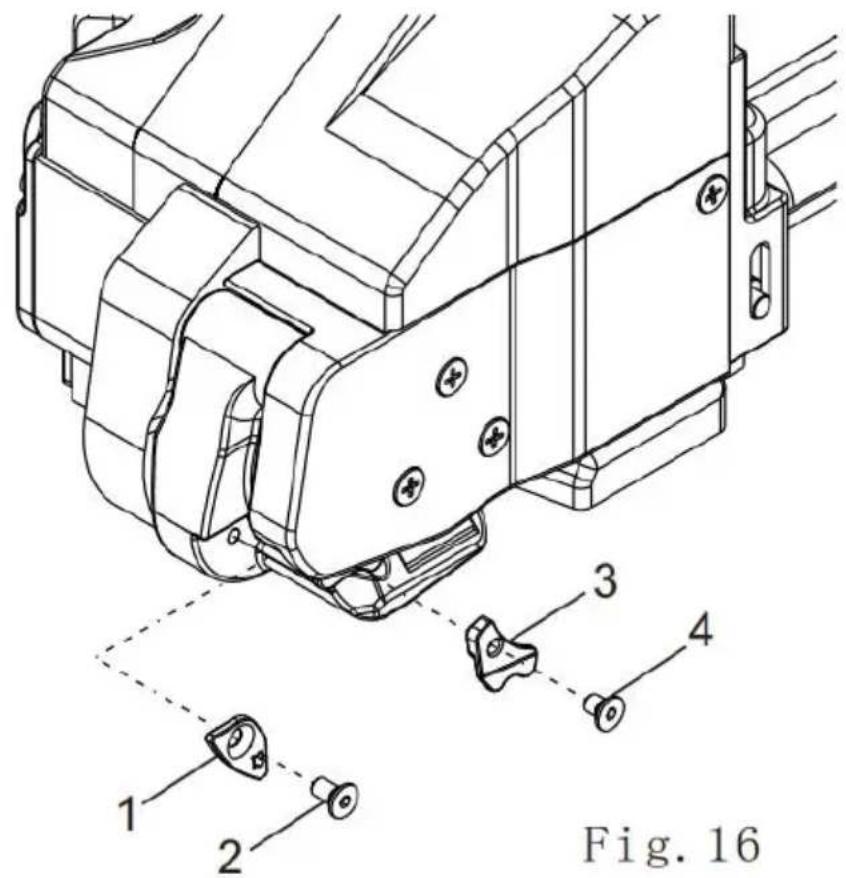
- Please release the screw (16/2) then take off the blocking pawl 16mm (16/1).
Pull up the inlet control lever, release the screw (16/4) and take off the strap guide 16mm (16/3).
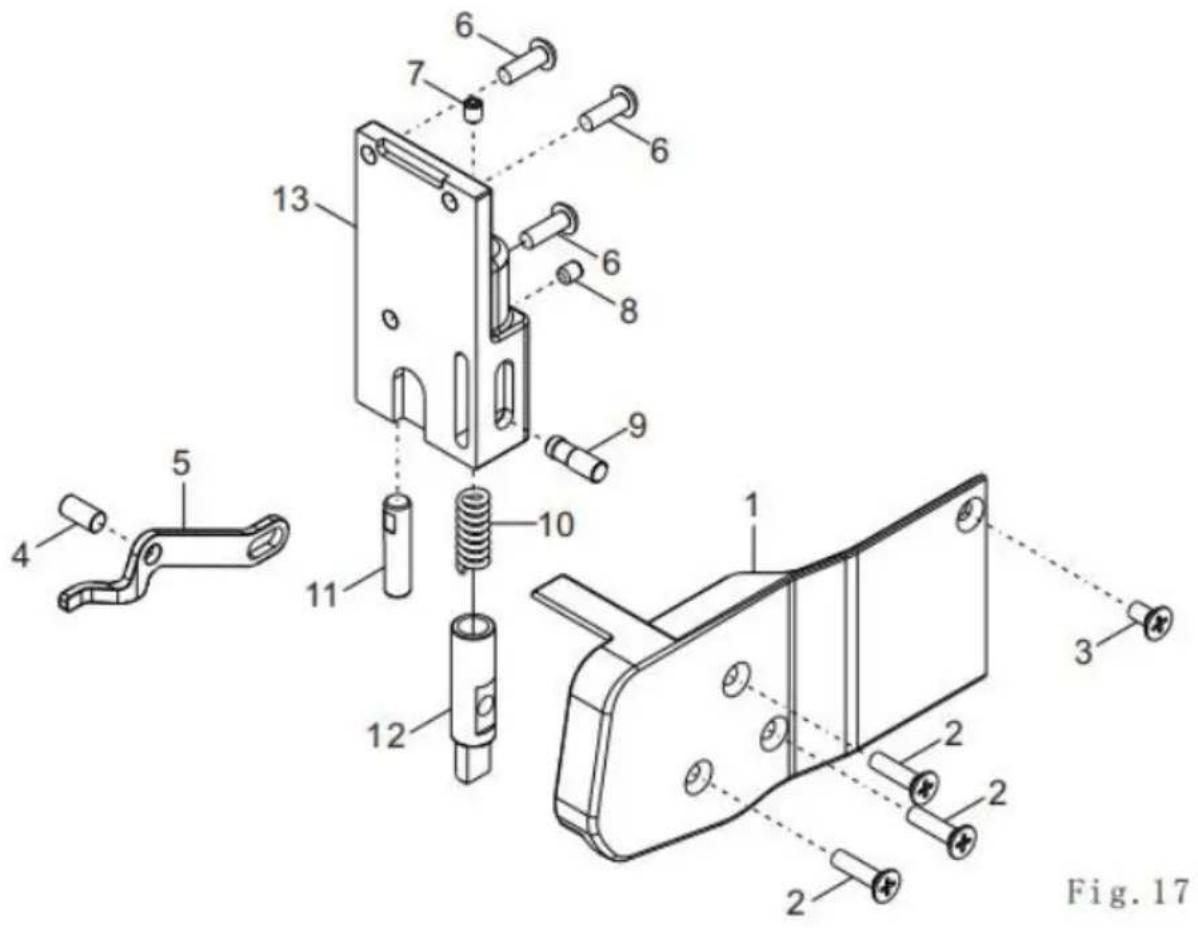
Take off the screws (17/2) and (17/3), then pick up the cover welding assembly (17/1).
Take off the round pin (17/4), then remove the screw (17/6), take off the limit cover plate (17/13).
Release the screw (17/7), pull out the inner limited rod (17/11), rotate it 180 degrees and reinstall to the side cover (17/13), locking screw (17/7).
Pull out the cylinder pin (17/9), the drive rod (17/5) then release the screw (17/8), pull out the drive rod (17/5), the outer limited rod (17/12), rotate the outer limiting bar (17/12) 180 degrees and reassemble the side cover (17/13), locking screw (17/8).
b) Change the strap width from 15-16mm to 12-13mm, please refer to "a" step.
- Install blocking pawl 13mm (16/1) and sink screw (16/2) and tighten with fastener.
- Thread tightening agent mounted with strap guide 13mm (16/3) and sink screw (16/4).
- Rotating the inner limited rod (17/11).
- Rotating the outer limited rod (17/12).
7. Preventive maintenance and repair
7.1 Cleaning and replacing the tension wheel
Disassemble
- Please take off the battery
- Screw down the head screw (18/3) and remove the side cover (18/2)
- Carefully remove the tension wheel (18/1)
- Clean the tension wheel with compressed air (please wear protective glasses)
- If there is a large amount of dirt embedded in the teeth on the tension wheel, careful cleaning must be done with sharp tools.
- Check the sharpness of the teeth on the tension wheel, and if some teeth are ground, replace them in time.
Note:
In order to prevent damage to the teeth, do not clean the tension wheels while the machine is running.
Assemble
- Install the part that has just been removed in reverse order.
- Tighten the sink screw with thread fasteners (18/3).
7.2 Cleaning and replacing the tooth plate
- Please take off the battery.
- Remove the tooth plate (19/2) after taking the sunken head screw (19/1).
- Clean the tension wheel with compressed air (please wear protective glasses). If there is a large amount of dirt embedded in the teeth on the tooth plate, careful cleaning must be done with sharp tools.
- If some teeth are ground, replace it in time.
Assemble
- Install the part that has just been removed in reverse order.
- Tighten the sink screw with thread fastener.
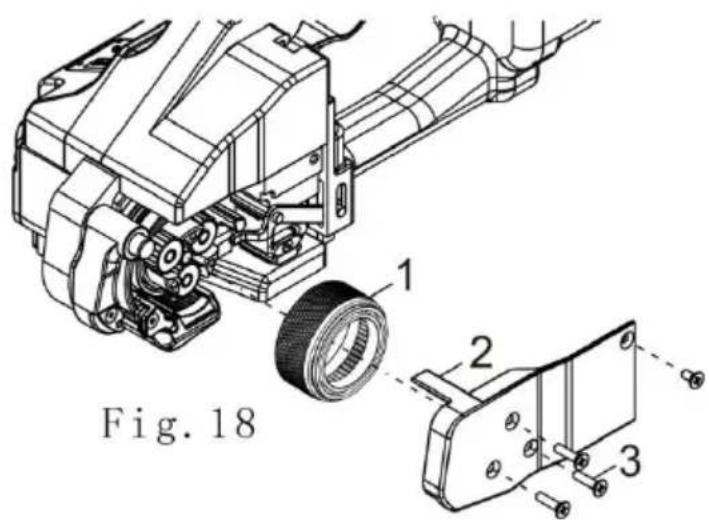
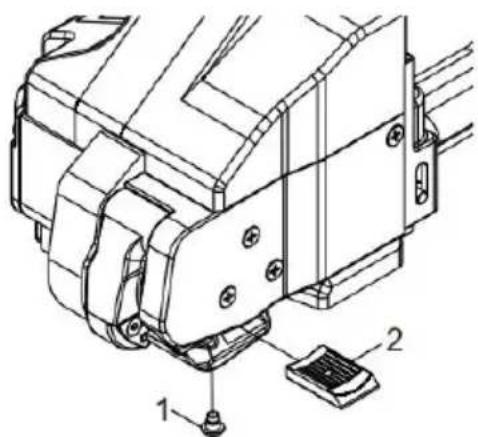
Fig. 19
7.3
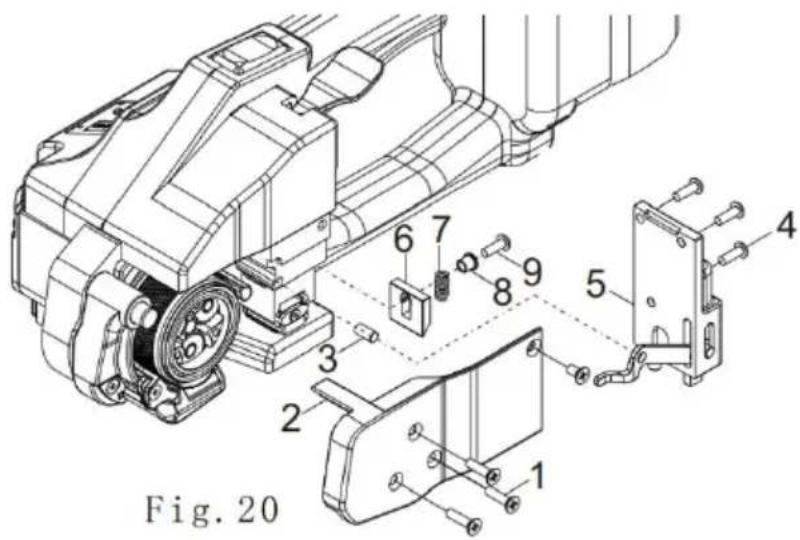
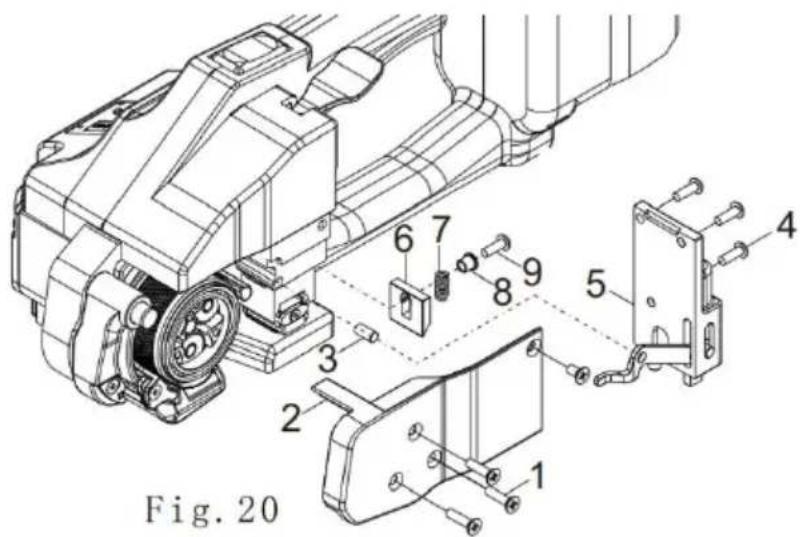
Replacing cutter knife
Disassemble
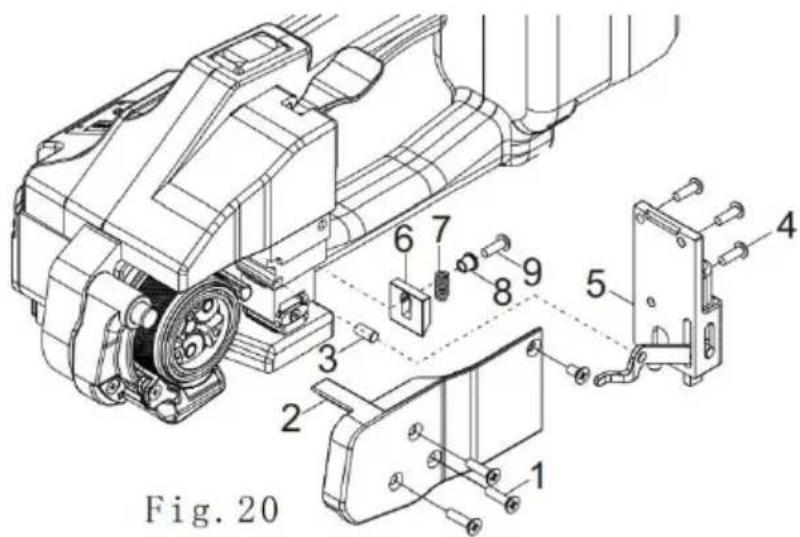
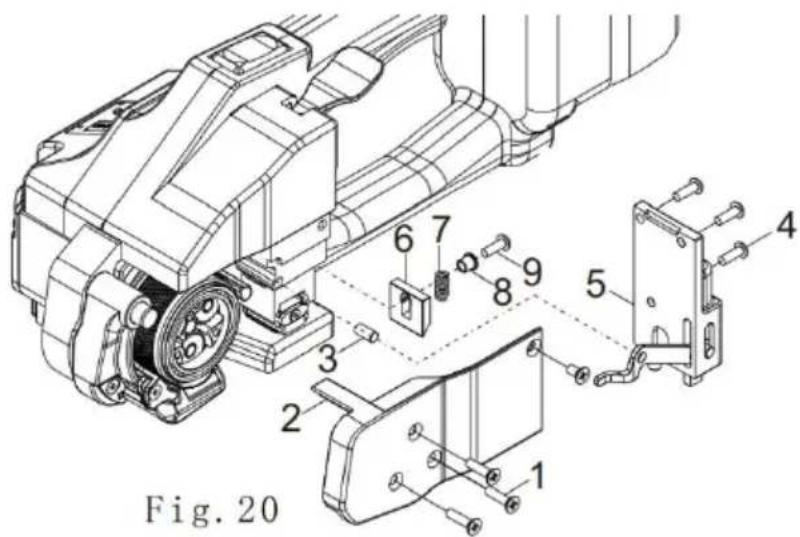
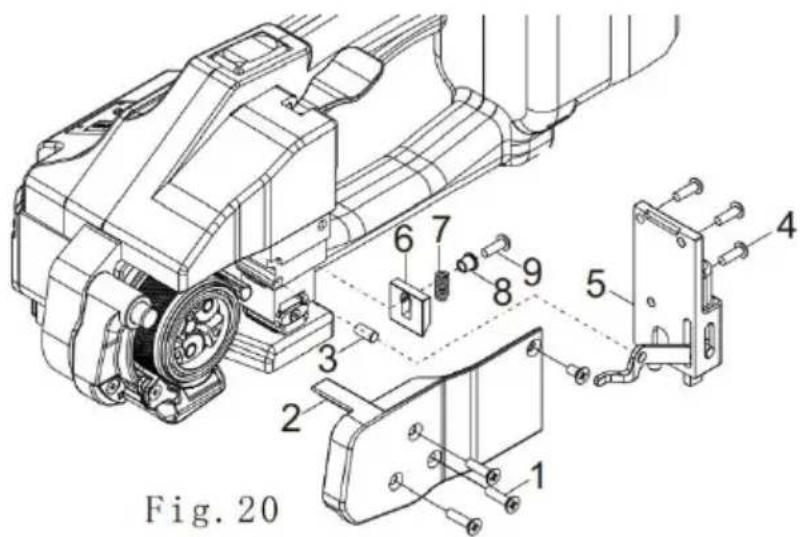
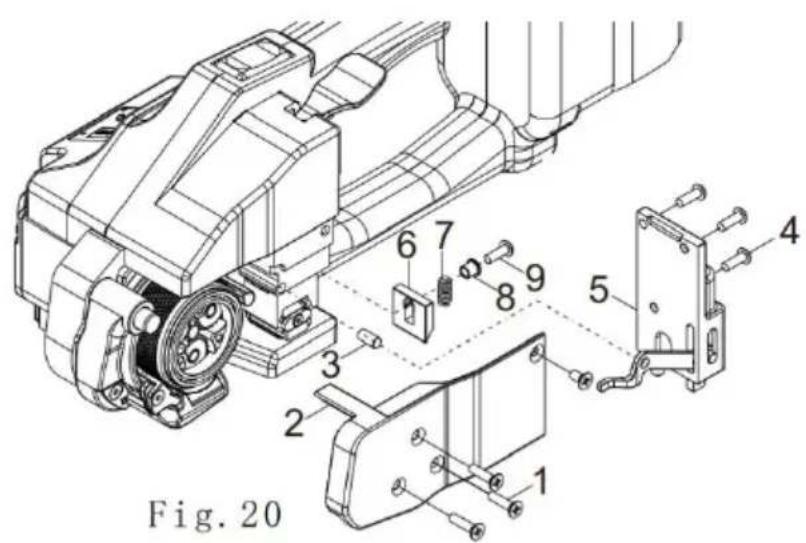
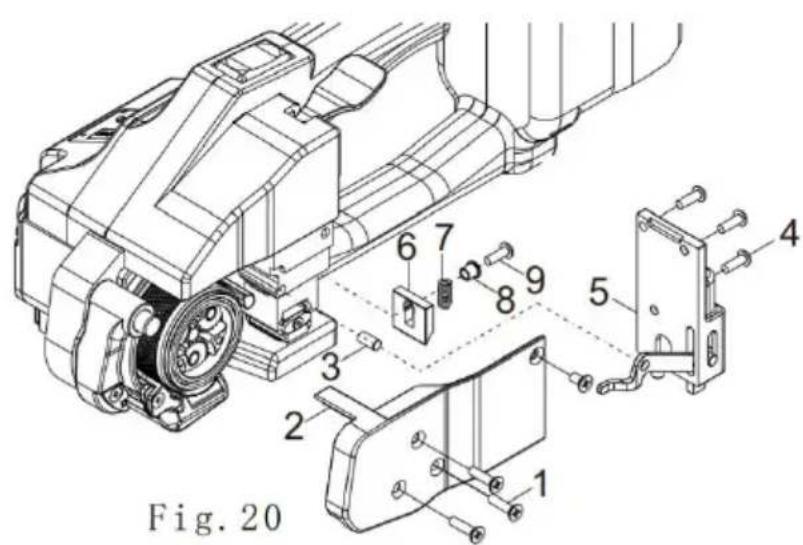
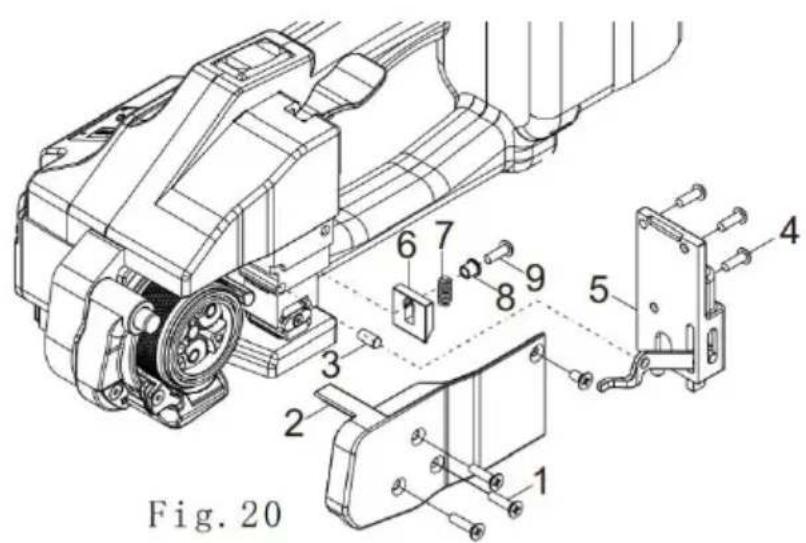
- Take the sunken head screw (20/1) and remove the side cover. - Remove the cylinder pin (20/3) and remove the round head screw (20/4). Take off the limiting assembly (20/5).
- Remove the round head screw (20/9) and remove the cutter (20/6) with the flange bushing (20/8) and replace the new cutter.
Note:
The cutter spring mounted on the cutter (20/6) is easy to bounce off when removed.
Assemble
- Install the part that has just been removed in reverse order.
- Before assembling the cutter, check whether the compression spring is installed or not.
- Tighten the sink screw with thread fasteners (20/1), (20/4), (20/9).
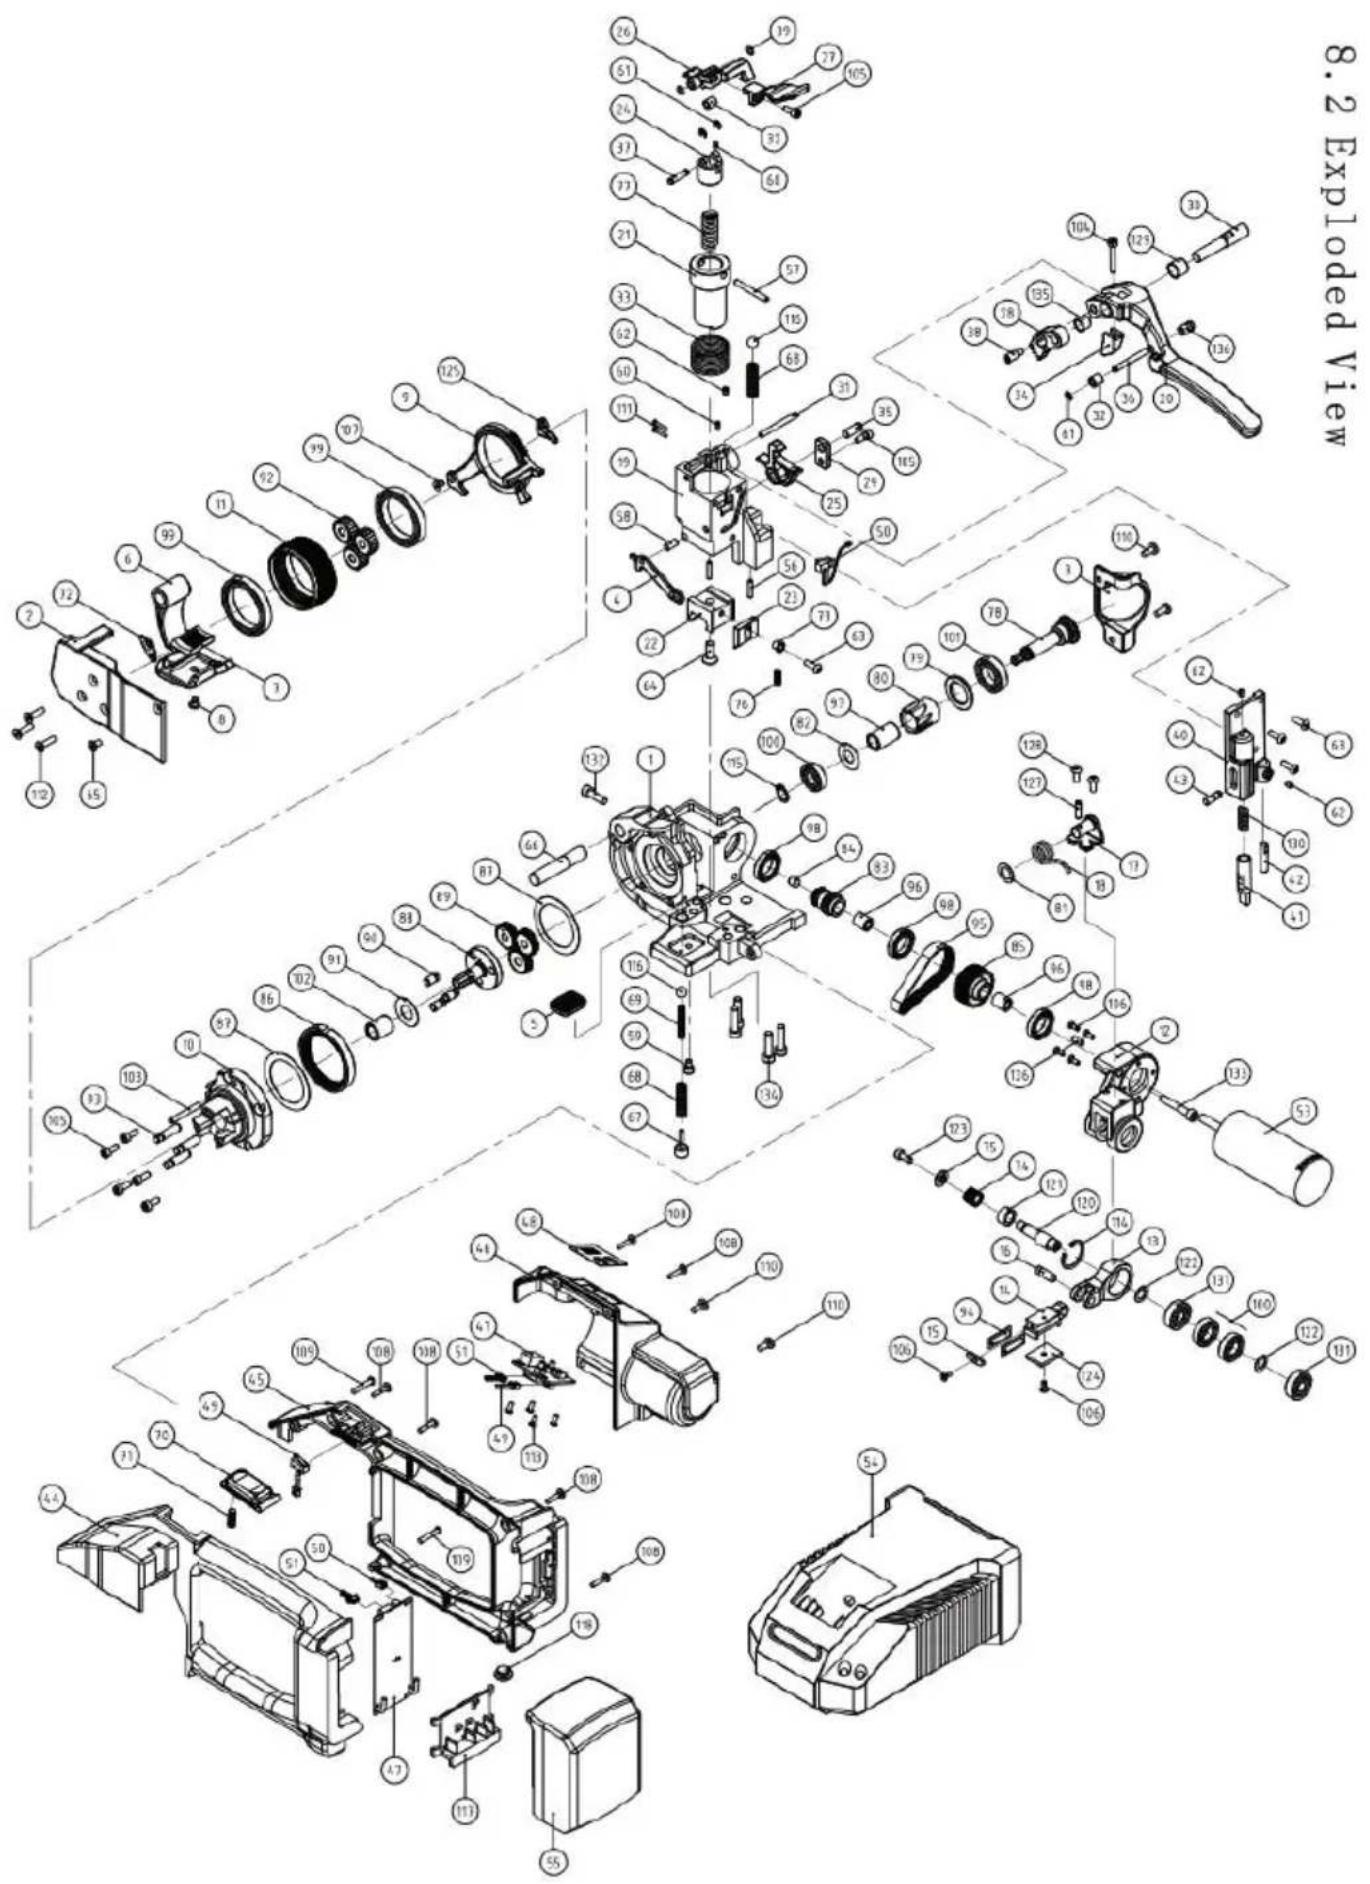
- Recommended spare parts
| S/NO.: | PARTS NAME | SPEC. | MATCHING |
| 1 | Base plate | | 1 |
| 2 | Side cover | | 1 |
| 3 | Gear sheaths | | 1 |
| 4 | Drive bar | | 1 |
| 5 | Bottom Die | | 1 |
| 6 | Tension holder | | 1 |
| 7 | Tension plate tooth | | 1 |
| 8 | Plate tooth screw | | 1 |
| 9 | Cam ring | | 1 |
| 10 | Cam ring holder | | 1 |
| 11 | Tension wheel | | 1 |
| 12 | Welding shoe | | 1 |
| 13 | Welding Rod | | 1 |
| 14 | Plate tooth holder | | 1 |
| 15 | Steel ball covers | | 1 |
| 16 | Shaft | 6X17 | 1 |
| 17 | Tension spring bolt | | 1 |
| 18 | Tension spring | | 1 |
| 19 | Rack | | 1 |
| 20 | Rocker lever | | 1 |
| 21 | Guide piston | | 1 |
| 22 | Connecting rod holder | | 1 |
| 23 | Cutter knife | | 1 |
| 24 | Guide piston sleeve | | 1 |
| 25 | Handle holder fastener | | 1 |
| 26 | Welding handle holder | | 1 |
| 27 | Welding button-set | | 1 |
| 28 | Toothed segment | | 1 |
| 29 | Backing plate | | 1 |
| 30 | Step pin | | 1 |
| 31 | Cylinder pin | 4X39 | 1 |
| 32 | Piston roller | | 2 |
| 33 | Piston spring | | 1 |
| 34 | Limited block | | 1 |
| 35 | Step pin | | 1 |
| 36 | Shaft | 4X35 | 1 |
| 37 | Shaft | 4X19 | 1 |
| 38 | Threaded | | 1 |
| 39 | Spacer disk | | 2 |
| 40 | Limit cover plate | | 1 |
| 41 | the outer limited rod | | 1 |
| 42 | the inner limited rod | | 1 |
| 43 | Cylinder pin | 5X15 | 1 |
| 44 | Housing part left | | 1 |
| 45 | Housing part right | | 1 |
| 46 | Motor cover | | 1 |
| 47 | Printed circuit board | | 1 |
| 48 | Visualization film | | 1 |
| 49 | Tightening switch | | 1 |
| 50 | Welding button | | 1 |
| 51 | Data cable | | 1 |
| 53 | Motor | | 1 |
| 54 | Battery charger | | 1 |
| 55 | Battery | | 1 |
| 56 | Cylinder pin | 3X15 | 2 |
| 57 | Cylinder pin | 4X33.5 | 1 |
| 58 | Cylinder pin | 5X10 | 1 |
| 59 | Screw | M4X6 | 1 |
| 60 | Set screw | M3X5 | 2 |
| 61 | Spacer disk | 3 | 3 |
| 62 | Set screw | M4X5 | 3 |
| 63 | Screw | M4X12 | 4 |
| 64 | Screw | M6X16 | 1 |
| 65 | Screw | M4X8 | 1 |
| 66 | Cylinder pin | 10X55 | 1 |
| 67 | Threaded bolt | | 1 |
| 102 | Bearing | HK1015 | 1 |
| 103 | Cylinder pin | 4X20 | 1 |
| 104 | Screw | M4X25 | 1 |
| 105 | Screw | M4X10 | 7 |
| 106 | Screw | M3X8 | 6 |
| 107 | Screw | M4X6 | 1 |
| 108 | Self-tapping screw | ST3X16 | 6 |
| 109 | Self-tapping screw | ST3.5X20 | 2 |
| 110 | Screw | M4X10 | 4 |
| 112 | Screw | M4X16 | 3 |
| 113 | Self-tapping screw | ST2.9X8 | 4 |
| 114 | Elastic retaining ring | 22 | 1 |
| 115 | Elastic retaining ring | 10 | 1 |
| 116 | Steel ball | 8 | 2 |
| 117 | Battery sockets | | 1 |
| 118 | Bottom mat | | 1 |
| 120 | Eccentric shaft | | 1 |
| 121 | Sleeve | | 1 |
| 122 | Spacer disk | | 2 |
| 123 | Screw | M4X10 | 1 |
| 124 | Tooth plate top | | 1 |
| 125 | Strap guide | | 1 |
| 126 | Cylinder pin | 4X10 | 1 |
| 127 | Flexible pin | 4X14 | 1 |
| 128 | Screw | M4X10 | 2 |
| 129 | Sleeve | 1010 | 1 |
| 130 | Tension spring | | 1 |
| 131 | Bearing | 608 | 2 |
| 132 | Screw | M5X16 | 1 |
| 133 | Screw | M5X30 | 1 |
| 134 | Screw | M6X20 | 4 |
| 135 | Sleeve | 808 | 1 |
| 136 | spring roller | | 1 |
Address: Shuangchenglu 803nong11hao1602A-1609shi, Baoshanqu, Shanghai 200000 CN.
Imported to AUS: SIHAO PTY LTD, 1 ROKEVA STREET EASTWOOD NSW 2122 Australia
Imported to USA: Sanven Technology Ltd., Suite 250, 9166 Anaheim Place, Rancho Cucamonga, CA 91730
E-CrossStu GmbH
Mainzer Landstr.69, 60329 Frankfurt am Main
YH CONSULTING LIMITED.
C/O YH Consulting Limited Office 147, Centurion House
London Road, Staines-upon-Thames, Surrey, TW18 4A
VEVOR®
TOUGH TOOLS, HALF PRICE
Technical Support and E-Warranty Certificate
www.vevor.com/support
VEVOR®
We continue to be committed to providing you tools with competitive prices. "Save Half", "Half Price" or any other similar expressions used by us only represent an estimate of savings you might benefit from buying certain tools with us compared to top brands and does not necessarily mean to cover all categories of tools offered by us. You are kindly reminded to verify carefully when you are placing an order with us if you are actually saving half in comparison with the top major brands.
MODEL: DS-19
Have product questions? Need technical support? Please feel free to contact us:
Technical Support and E-Warranty Certificate
www.vevor.com/support
This is the original instruction. Please read all manual instructions carefully before operating. VEVOR reserves a clear interpretation of the user manual. The appearance of the product shall be subject to the product you received. Please forgive us that we won't inform you of any technology or software updates on our product.
Self-protection!
Warning
5.4 Repairs and services
Fig. 9
Fig. 10
Fig. 11
Fig. 19
7.3
Address: Shuangchenglu 803nong11hao1602A-1609shi, baoshanqu, Shanghai 200000 CN.
Imported in Australia: SIHAO PTY LTD, 1 ROKEVA STREETASTWOC
NSW 2122 Australia
UK REP YH CONSULTING LIMITED.
C/O YH Consulting Limited Office 147, Centurion House
London Road, Staines-upon-Thames, Surrey, TW18 4A
www.vevor.com/support
Strapping Machine
MODEL: DS-19
We continue to be committed to provide you tools with competitive price. "Save Half", "Half Price" or any other similar expressions used by us only represent an estimate of savings you might benefit from buying certain tools with us compared to top brands and does not necessarily mean to cover all categories of tools offered by us. We kindly remind you to verify carefully when you are placing an order with us if you are actually saving half in comparison with the top major brands.
MODEL: DS-19
Have product questions? Need technical support? Please feel free to contact us:
Technical Support and E-Warranty Certificate
www.vevor.com/support
This is the original instruction. Please read all manual instructions carefully before operating. VEVOR reserves a clear interpretation of the user manual. The appearance of the product shall be subject to the product you received. Please forgive us that we won't inform you of any technology or software updates on our product.
Self-protection!
Warning
Warning
Attention:
Waterproof!
Fig. 1
Fig. 9
Fig. 10
Fig. 11
Fig. 18
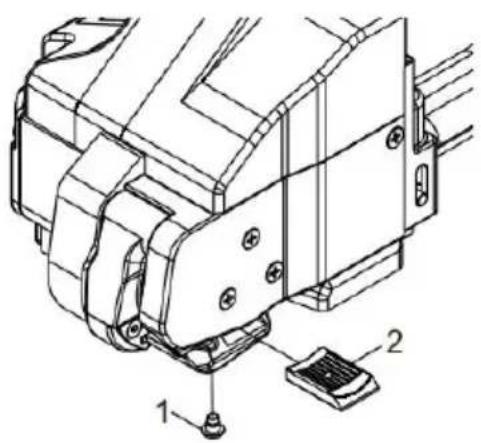
Fig. 19
7.3
Address: Shuangchenglu 803nong11hao1602A-1609shi, Baoshanqu, Shanghai 200000 CN.
C/O YH Consulting Limited Office 147, Centurion House
London Road, Staines-upon-Thames, Surrey, TW18 4A
VEVOR®
TOUGH TOOLS, HALF PRICE
We continue to be committed to providing you tools with competitive prices. "Save Half", "Half Price" or any other similar expressions used by us only represent an estimate of savings you might benefit from buying certain tools with us compared to top brands and does not necessarily mean to cover all categories of tools offered. We kindly remind you to verify carefully when you are placing an order with us if you are actually saving half in comparison with the top major brands.
MODEL: DS-19
Have product questions? Need technical support? Please feel free to contact us:
Technical Support and E-Warranty Certificate
www.vevor.com/support
This is the original instruction. Please read all manual instructions carefully before operating. VEVOR reserves a clear interpretation of the user manual. The appearance of the product shall be subject to the product you received. Please forgive us that we won't inform you of any technology or software updates on our product.
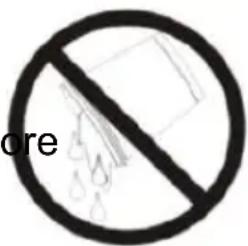
Fig. 9
Fig. 10
Fig. 11
Fig. 19
7.3
Address: Shuangchenglu 803nong11hao1602A-1609shi, Baoshan District, Shanghai 200000 CN.
Imported in AUS: SIHAO PTY LTD, 1 ROKEVA STREET, EASTWOOD NSW 2122 Australia
C/O YH Consulting Limited Office 147, Centurion House
London Road, Staines-upon-Thames, Surrey, TW18 4A
VEVOR®
TOUGH TOOLS, HALF PRICE
www.vevor.com/support
Strapping machine
MODEL: DS-19
We continue to be committed to provide you tools with competitive price. "Save Half", "Half Price" or any other similar expressions used by us only represent an estimate of savings you might benefit from buying certain tools with us compared to top brands and does not necessarily mean to cover all categories of tools offered by us. We kindly remind you to verify carefully when you are placing an order with us if you are actually saving half in comparison with the top major brands.
MODEL: DS-19
Have product questions? Need technical support? Please feel free to contact us:
Technical Support and E-Warranty Certificate
www.vevor.com/support
This is the original instruction. Please read all manual instructions carefully before operating. VEVOR reserves a clear interpretation of the user manual. The appearance of the product shall be subject to the product you received. Please forgive us that we won't inform you of any technology or software updates on our product.
Warning
Warning
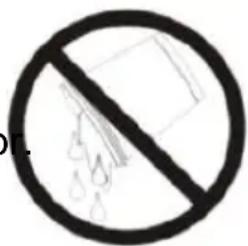
Fig. 9
Fig. 10
Fig. 11
Fig. 19
7.3
Address: Shuangchenglu 803nong11hao1602A-1609shi, Baoshan District, Shanghai 200000 CN.
Imported to AUS: SIHAO PTY LTD, 1 ROKEVA STREETEASTWOOD NSW 2122 Australia
Imported to USA: Sanven Technology Ltd., Suite 250, 9166 Anahe Place, Rancho Cucamonga, CA 91730
E-CrossStu GmbH
Mainzer Landstr.69, 60329 Frankfurt am Main
YH CONSULTING LIMITED.
C/O YH Consulting Limited Office 147, Centurion House
London Road, Staines-upon-Thames, Surrey, TW18 4A
VEVOR®
TOUGH TOOLS, HALF PRICE
www.vevor.com/support
Strapping machine
MODEL: DS-19
We continue to be committed to providing you with tools at competitive prices. "Save Half", "Half Price", or any other similar expressions used by us only represent an estimate of savings you might benefit from buying certain tools with us compared to top brands and does not necessarily mean to cover all categories of tools offered. We kindly remind you to verify carefully when placing an order with us if you are actually saving half in comparison with the top major brands.
MODEL: DS-19
Have product questions? Need technical support? Please feel free to contact us:
Technical Support and E-Warranty Certificate
www.vevor.com/support
This is the original instruction. Please read all manual instructions carefully before operating. VEVOR reserves a clear interpretation of the user manual. The appearance of the product shall be subject to the product you received. Please forgive us that we won't inform you of any technology or software updates on our product.
Self-protection!
Power protection
Warning
Warning

Fig. 9
Fig. 10
Fig. 11
Fig. 19
7.3
Address: Shuangchenglu 803nong11hao1602A-1609shi, Baoshan District, Shanghai 200000 CN.
Importer for AUS: SIHAO PTY LTD, 1 ROKEVA STREET EASTWOOD NSW 2122 Australia
Importer for USA: Sanven Technology Ltd., Suite 250, 9166 Anaheim Place Rancho Cucamonga, CA 91730
E-CrossStu GmbH
Mainzer Landstr. 69, 60329 Frankfurt am Main
YH CONSULTING LIMITED.
C/O YH Consulting Limited Office 147, Centurion House
London Road, Staines-upon-Thames, Surrey, TW18 4A
VEVOR®
TOUGH TOOLS, HALF PRICE
We continue to be committed to provide you with tools at competitive prices. "Save Half", "Half Price" or any other similar expressions used by us only represent an estimate of savings you might benefit from buying certain tools with us compared to top brands and does not necessarily mean to cover all categories of tools offered. We kindly remind you to verify carefully when placing an order with us if you are actually saving half in comparison with the top major brands.
MODEL: DS-19
Have product questions? Need technical support? Please feel free to contact us:
Technical Support and E-Warranty Certificate
www.vevor.com/support
This is the original instruction. Please read all manual instructions carefully before operating. VEVOR reserves a clear interpretation of the user manual. The appearance of the product shall be subject to the product you received. Please forgive us that we won't inform you of any technology or software updates on our product.
Self-protection!
Warning
Warning
Warning
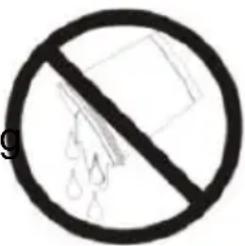
Fig. 9
Fig. 10
Fig. 11

Fig. 19
7.3
Replacing the cutting blade
Disassembly
Address: Shuangchenglu 803nong11hao1602A-1609shi, Baoshanqu, Shanghai 200000 CN.
C/O YH Consulting Limited Office 147, Centurion House
London Road, Staines-upon-Thames, Surrey, TW18 4A
VEVOR®
TOUGH TOOLS, HALF PRICE
Technical support and e-warranty certificate www.vevor.com/support
VEVOR®
www.vevor.com/support
Banding Machine
MODEL: DS-19
We continue to be committed to provide you tools with competitive price. "Save Half", "Half Price" or any other similar expressions used by us only represent an estimate of savings you might benefit from buying certain tools with us compared to top brands and does not necessarily mean to cover all categories of tools offered by us. We kindly remind you to verify carefully when you are placing an order with us if you are actually saving half in comparison with the top major brands.
MODEL: DS-19
Have product questions? Need technical support? Please feel free to contact us:
Technical Support and E-Warranty Certificate
www.vevor.com/support
This is the original instruction. Please read all manual instructions carefully before operating. VEVOR reserves a clear interpretation of the user manual. The appearance of the product shall be subject to the product you received. Please forgive us that we won't inform you of any technology or software updates on our product.
Warning
Warning
Risk of pinching:
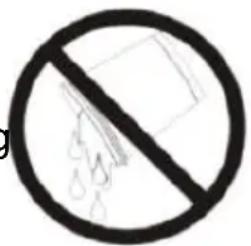
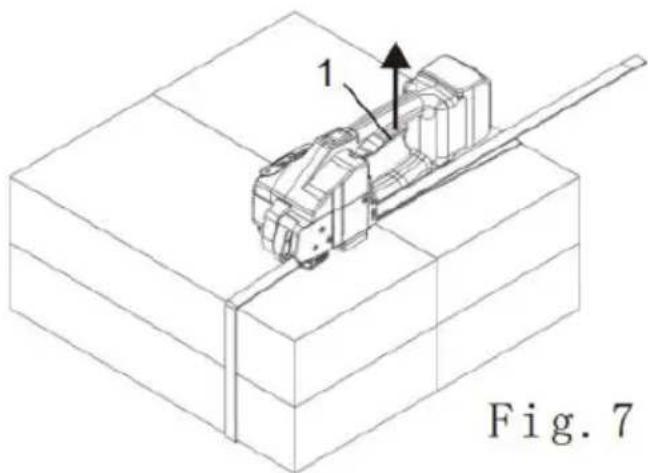
Fig. 9
Fig. 10
Fig. 11
6.3 Panel control
a) Normal indication
Fig. 19
7.3
Replacing the cutting blade
Disassembly
Address: Shuangchenglu 803nong11hao1602A-1609shi, baoshanqu, shanghai 200000 CN.
Imported to AUS: SIHAO PTY LTD, 1 ROKEVA STREETEASTWOOD NSW 2122 Australia
Imported to USA: Sanven Technology Ltd., Suite 250, 9166 Anaheim Place, Rancho Cucamonga, CA 91730
E-CrossStu GmbH
Mainzer Landstr.69, 60329 Frankfurt am Main
YH CONSULTING LIMITED.
C/O YH Consulting Limited Office 147, Centurion House
London Road, Staines-upon-Thames, Surrey, TW18 4A
VEVOR®
TOUGH TOOLS, HALF PRICE
www.vevor.com/support