
E490T - Paper cutter Vevor - Free user manual and instructions
Find the device manual for free E490T Vevor in PDF.
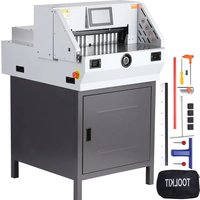


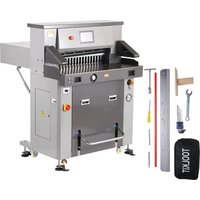
| Product Type | Electric Paper Cutter |
| Brand | Vevor |
| Model | E490T |
| Power Supply Voltage | 110 V AC, 60 Hz or 220 V AC, 50 Hz (depending on version) |
| Power | 1200 W |
| Maximum Cutting Length | 490 mm |
| Minimum Cutting Length | 30 mm |
| Maximum Cutting Thickness | 80 mm |
| Dimensions (L x W x H) | 920 x 770 x 1240 mm |
| Net Weight | 130 kg |
| Gross Weight | 183.5 kg |
| Display | Digital Touchscreen (NC/LCD) |
| Cutting Modes | Manual, Segmentation, Automatic, Shortcut, Programming |
| Safety | Infrared Sensors, Emergency Stop, Dual Cutting Button |
| Blade | 4 Reusable Sides, Up to 8 Uses |
| Maintenance | Monthly Lubrication, Daily Cleaning |
| Included Accessories | Replacement Blade, Tools, Warranty Certificate, User Manual |
| Warranty | Electronic Warranty Certificate |
| Technical Support | www.vevor.com/support |
Frequently Asked Questions - E490T Vevor
User questions about E490T Vevor
0 question about this device. Answer the ones you know or ask your own.
Ask a new question about this device
Download the instructions for your Paper cutter in PDF format for free! Find your manual E490T - Vevor and take your electronic device back in hand. On this page are published all the documents necessary for the use of your device. E490T by Vevor.
USER MANUAL E490T Vevor
Technical Support and E-Warranty Certificate https://www.vevor.com/support
WATCH WINDER
USER MANUAL
MODEL NO.: E490T
We continue to be committed to provide you tools with competitive price. "Save Half", "Half Price" or any other similar expressions used by us only represent estimate of savings you might benefit from buying certain tools with us compared to top brands and does not necessarily mean to cover all categories of tools offered. We kindly remind you to verify carefully when placing an order with us that you are actually saving half in comparison with the top major brands.
VEVOR®
TOUGH TOOLS, HALF PRICE
Electric Paper Cutter
MODEL NO.: E490T
NEED HELP? CONTACT US!
Have product questions? Need technical support? Please feel free to contact us:
Technical Support and E-Warranty Certificate www.vevor.com/support
This is the original instruction. Please read all manual instructions carefully before operating. VEVOR reserves the right to interpret the user manual. The appearance of the product shall be subject to the product you received. Please forgive us that we won't inform you of any technology or software updates on our product.

WARNING:
Please read this manual carefully before using the product. Failure to do so may result in serious injury. SAVE THIS MANUAL.

Warning: This type of machine is allowed to cut printed paper, books, or soft leathers only. It is forbidden to cut any metals or other hard objects that may harm the machine quality.

Forbid children to operate the machine.

Keep hands from underneath the blade.

Do not extract or transport the blade without protection.

Do not cut hand or splintery materials.

Must use socket with ground wire connected.
Note:
In order to have more usage information of Numerical-controlled Paper Cutting Machine, you have to read this specification carefully first. This
help you improve your working efficiency, realize the machine's
property, then the machine will have the best cutting effects. This will be good for the maintenance of the machine, and can prolong service life of the machine.
Safety caution
1. Open the box and check
When you open the package of the machine, firstly you should check machine and relevant accessories. Please contact the seller or compare there is any damage or shortage.
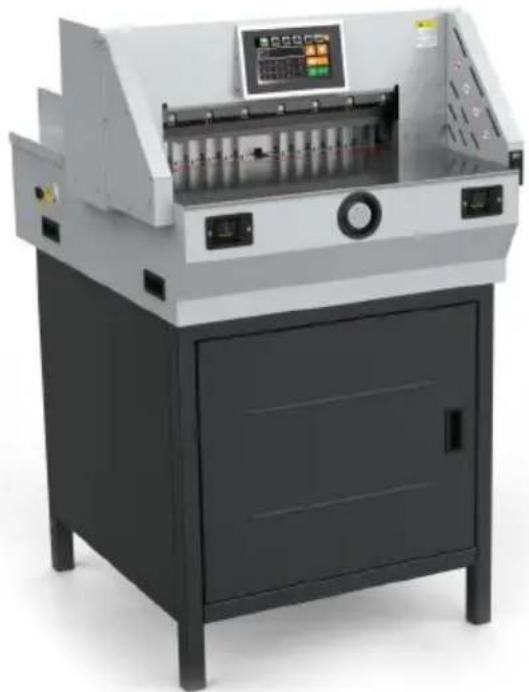
● 1 set of main engine
● 1 set of chassis
●1 instruction manual
●1 set of tools
●4 screws for tool removal
●1 Certificate
●1 blade and 1 power line
●1 warranty certificate
2. Machine installation
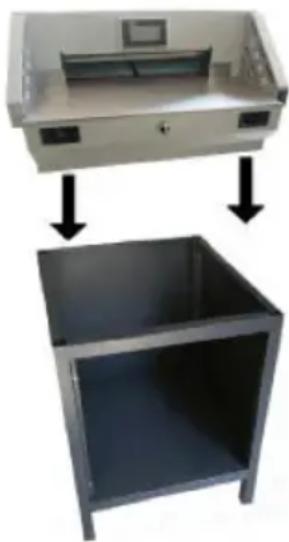
- Open the wooden crate, take out the machine and remove the fixed screws on the base of the main machine;
- The machine casing needs to be assembled completely, and the screws should be fixed firmly.
3. Environmental conditions.
- The machine should be placed in a clean work environment, kept away from direct sunlight and wind. ● Temperature of operating
environment: 10-30°C, should not exceed 32°C;
● Humidity level of the operating environment: 50-80% - Connect the ground wire correctly.
4. Special suggestions
- Remember only one professional operator is allowed to operate the machine;
- When you cut, you should operate buttons with both of your hands.
- Please don't disassemble the infrared safety covering.
- When you put your hands or other things into the cutting area, you must cut the power first.
- When you change blades, you should strictly abide by the blade changing instructions.
- You are not allowed to re-equip the construction and circuit of the machine by yourself.
TECHNICAL SPECIFICATIONS
| Model | E490T | |
| Rating(s) | AC110V, 60Hz, 1200V | AC220V, 50Hz, 1200W |
| Max cutting length | 490mm | |
| Min cutting length | 30mm | |
| Cutting thickness | 80mm | |
| Product Dimensions (LxWxH) | 920*770*1240mm | |
| Packing Size (LxWxH) | 810*1050*910mm | |
| Net Weight (kg) | 130 | |
| Gross Weight (kg) | 183.5 | |
Parts description
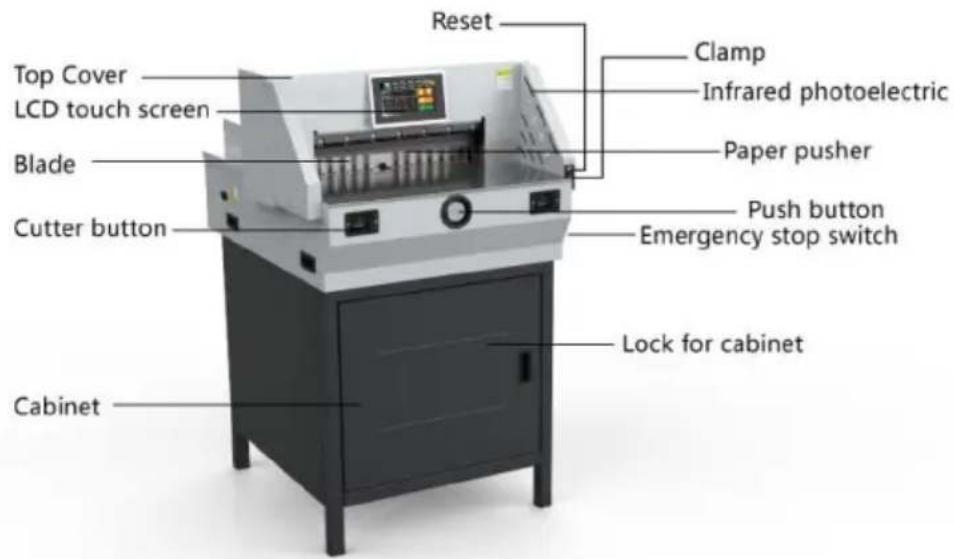
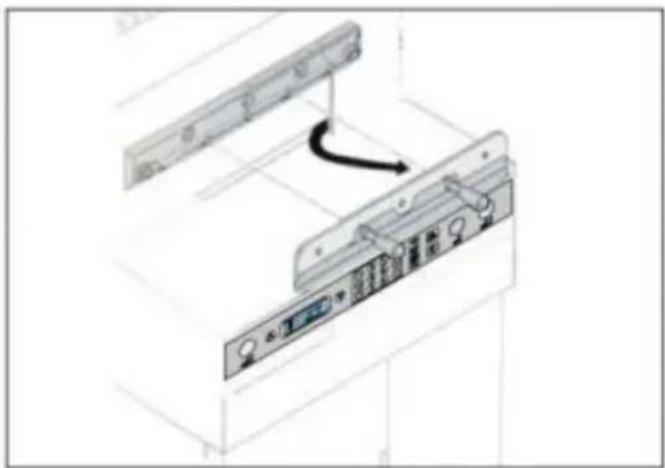
Operation panel
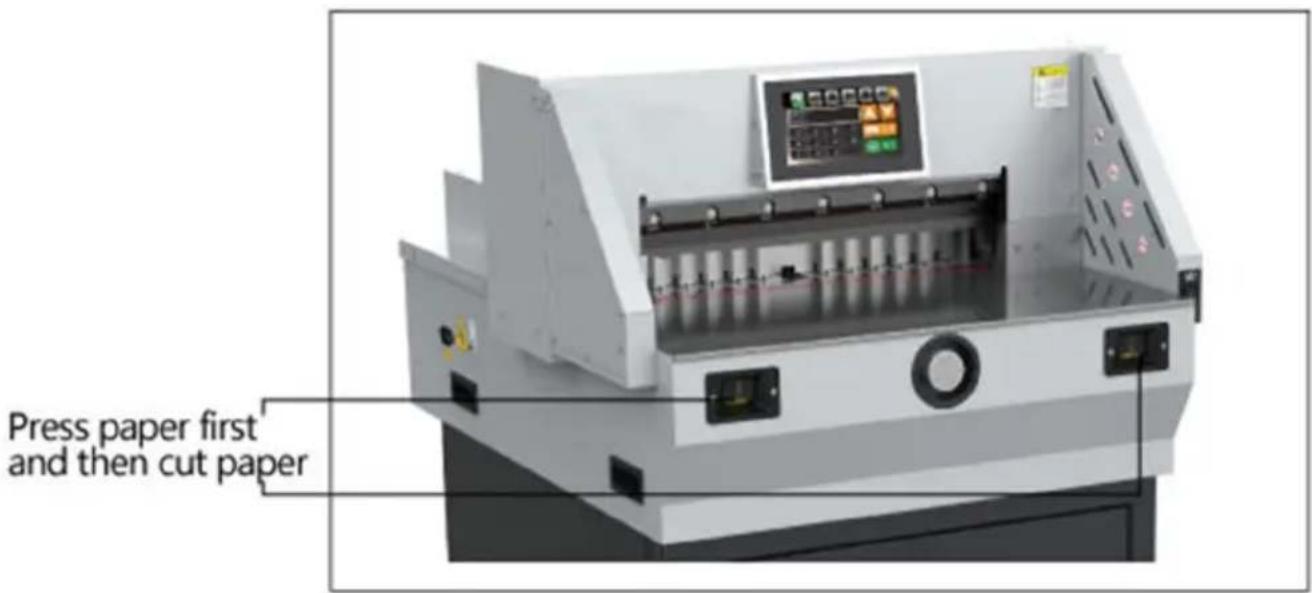
Operation diagram of paper cutter.
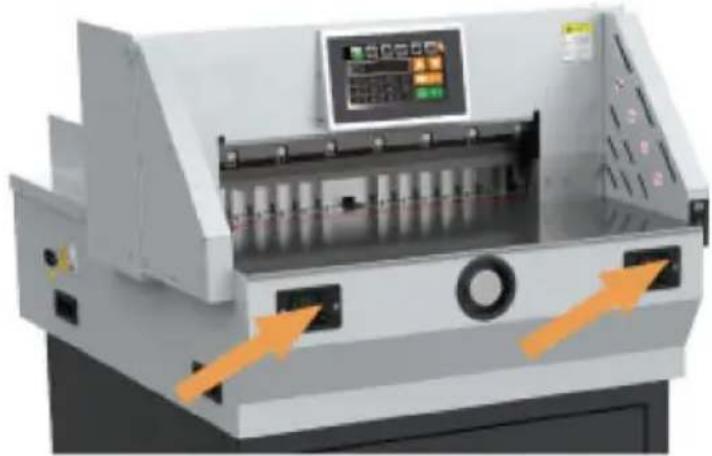
Turn on the power supply, turn on the air switch, turn on the emergency stop knob switch, and the machine will be powered on. The paper pusher resets into the working state. The correct way to operate the machine: the person stands in front of the machine, facing the paper cutter, the left hand controls the button on the left, and the right hand controls the button on the right, as shown in the picture.
Basic operation and adjustment
- Basic operation
- Power on
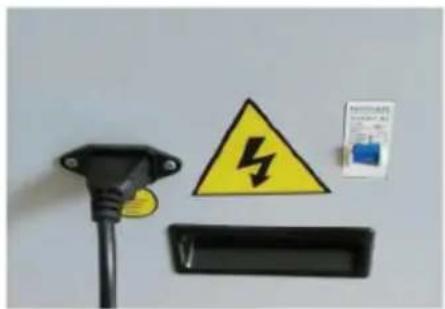
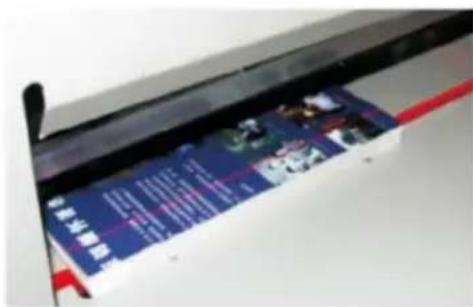
Before starting the machine, check whether there are other articles on the machine and clean them up. Turn on the power supply: Turn the electrical protection switch to the "on" position, turn on the power switch, the LCD screen will display, the position indicator line will be on, the paper pusher will be automatically calibrated, indicating that the power is normal.
- Touch screen paper guillotine operating instructions
- There are three modes for pushing paper, with the size 285mm as below:
a. Manual mode
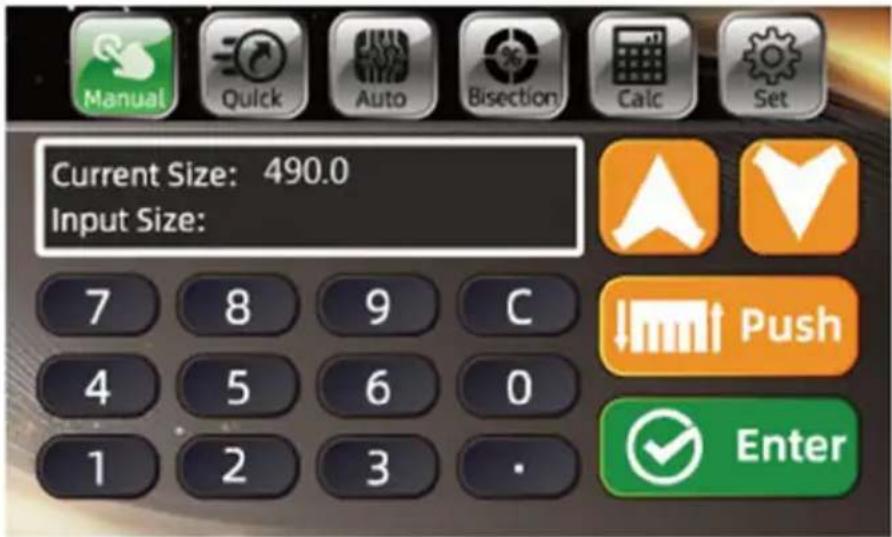
Please press Manual to switch to Manual mode, as shown in the picture. There are two ways for entering the size. One way is to use the electric handwheel, which is very slow, as the handwheel is only for fine tuning. This way is discouraged. The second way is to input 2850 and press the enter icon; the backgauge goes to the position of 285.0mm.
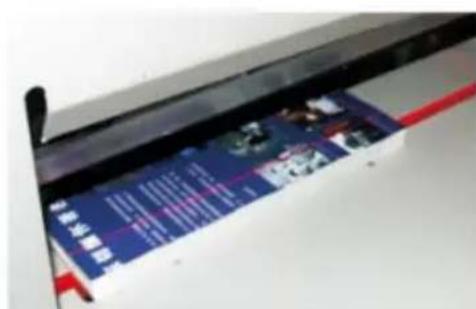
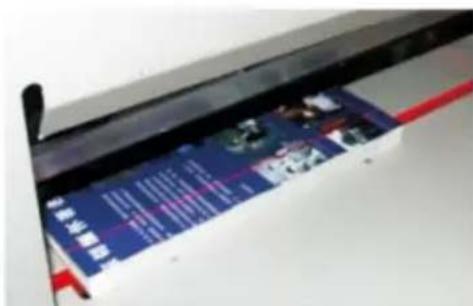
- Place the books or paper right to cut, then move the books or paper to the left.
- Start to cut after the size is entered. Then press the two CUT buttons at the same time. After that, the clamp comes down. If something goes wrong, stop pressing the two CUT buttons, and press the clamp and blade to go back to the top. After confirming the paper is correct, press the two cut buttons to finish cutting.
After the cutting is completed, the paper pusher pushes the book out (if automatic push cutting is set). The whole cutting process is completed. To continue other cuts, you only need to repeat the above steps.
b. Segmentation mode
Click to switch to bisection mode, click OK, and the paper pusher is automatically pushed to the first size. When you need to edit the dimensions, click on the programming mode to enter the first set of programming modes, as shown in the figure. To modify data, click Divide Edit, switch the Divide Edit dialog box, modify the data, and return.
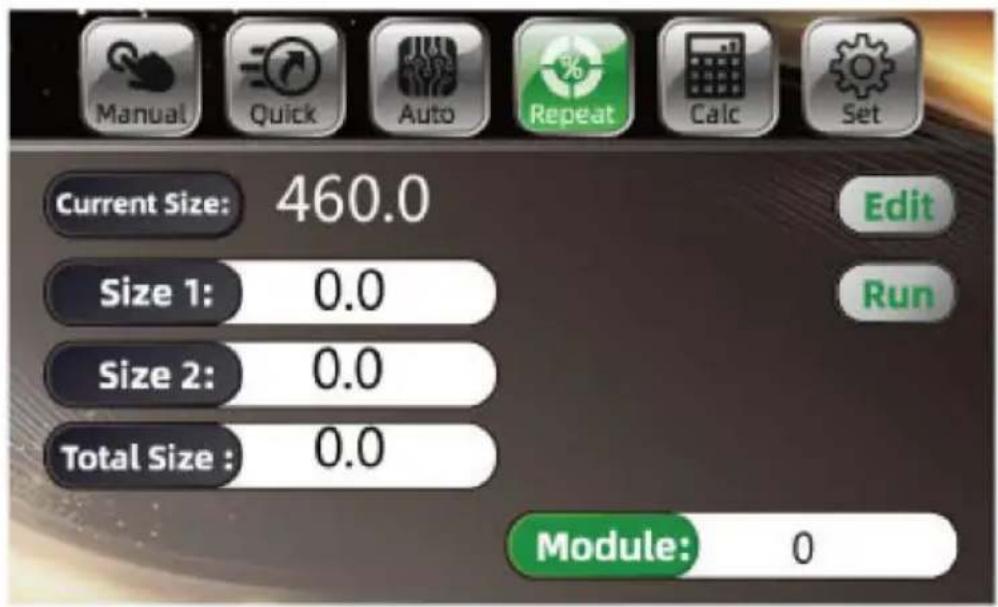
Push in the cut paper or book and place it on the left to align. Start to cut after the size is entered. Press RESET buttons first, then press the two CUT buttons at the same time. After that, the paper press comes down. If something goes wrong, stop pressing the two CUT buttons, and press the paper press and blade to go back to the top. After confirming the paper is correct, press the two cut buttons to finish cutting.
After the first cutting, the backgauge moves to the next size automatically. Continue to press the cutting button to finish cutting in the order of the settings.
● Auto mode operating instructions
Click Auto to enter auto mode; there is a lot of data as shown in the picture below. Click to turn the page. If you need to change the data, edit it in the Auto interface. Click page or change groups as shown in the picture.
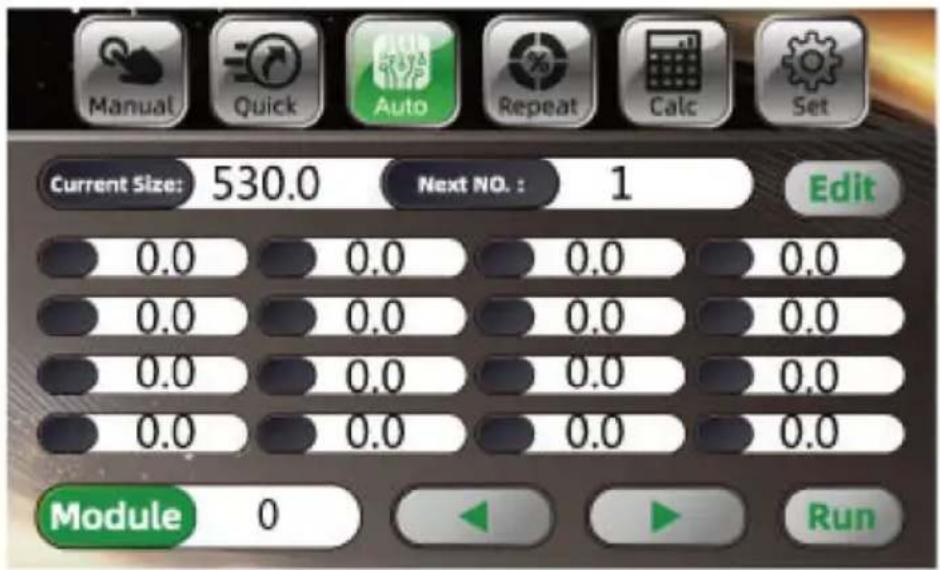
Click program control to switch to program control mode, as shown in the figure above. You can see a lot of data lists. Click to turn the page, click Edit to input cutting data, and input the data.
After entering, click Edit to save the data again, and click change module to switch data of different modules. After clicking, the paper pusher will move to the corresponding size. Push in and cut the paper or book, with the paper or book on the left, close to the ruler.
After setting the size, push in the cutting paper or book, and arrange the paper or book to the left, with the edge in line with the ruler.
After confirming the size, the paper can be cut. Step on the foot switch, and the paper presser starts to press the paper. Press the cutting button with both hands respectively, and press the paper to start cutting (or do not step on the foot switch, press the cutting button with both hands, and the paper holder starts to press the paper, and then starts cutting after pressing the paper). If any error is found, release the button, and the knife and presser return to their original position automatically, and continue to press an
hold if there is no error. The cutting button is used to cut the size of knife of 60.0 mm, and then continue to press the cutting key to cut the second knife size of 110.0 mm. After cutting the first knife and the set knife, continue to press the cutting key to automatically return to the knife 60.0.
Cut and repeat until the cutting sequence is completed (it is necessary to push books by yourself in the bisection mode).
- Shortcut mode
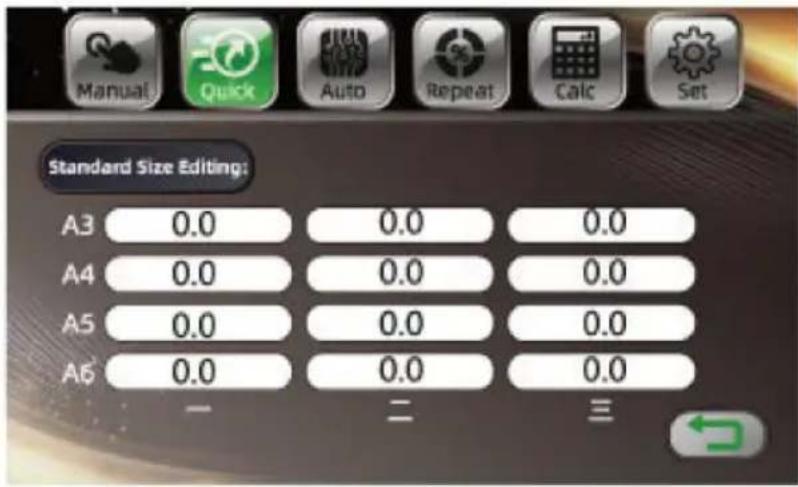
Click shortcut to switch to shortcut mode. Several common standard sizes appear. Click the required size and the paper pusher will automatically push to the final size, as shown in the figure.
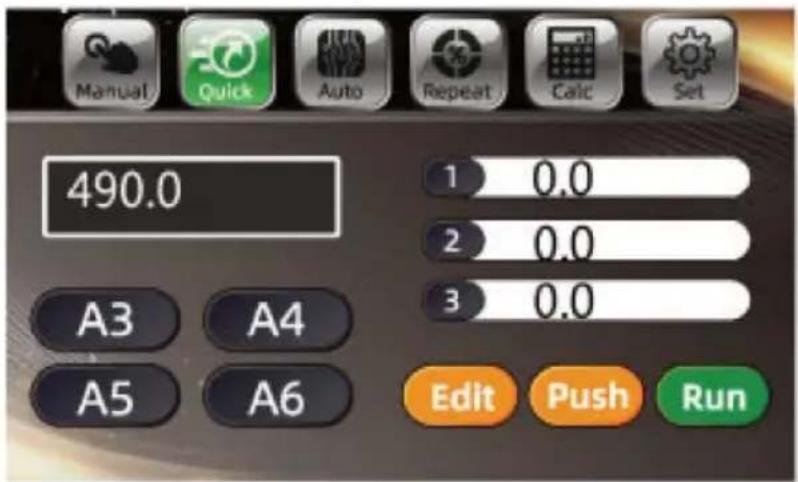
To edit the size, click Edit mode, click standard size to enter the modification interface. After modification, click the return icon, as shown in the figure.
Basic regulation
- Size correction adjustment
If you find that the size is wrong, turn off the machine first, and press the reset key after start up. If there is any problem, do as follows: cut power supply, remove the machine cover, and check whether there is foreign body stuck on the transmission screw.
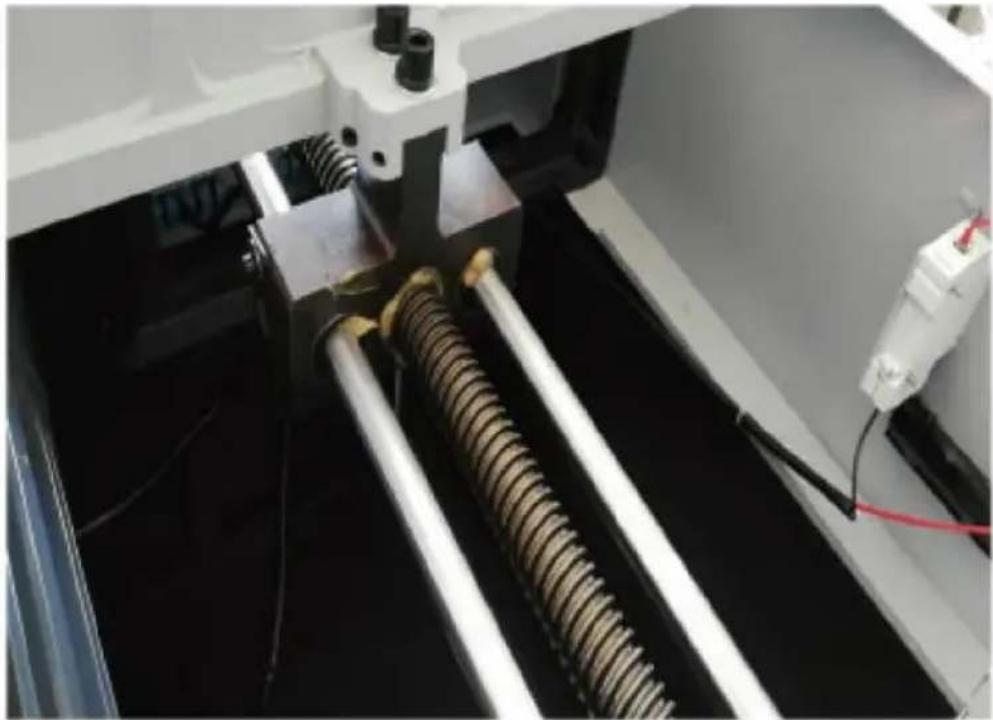
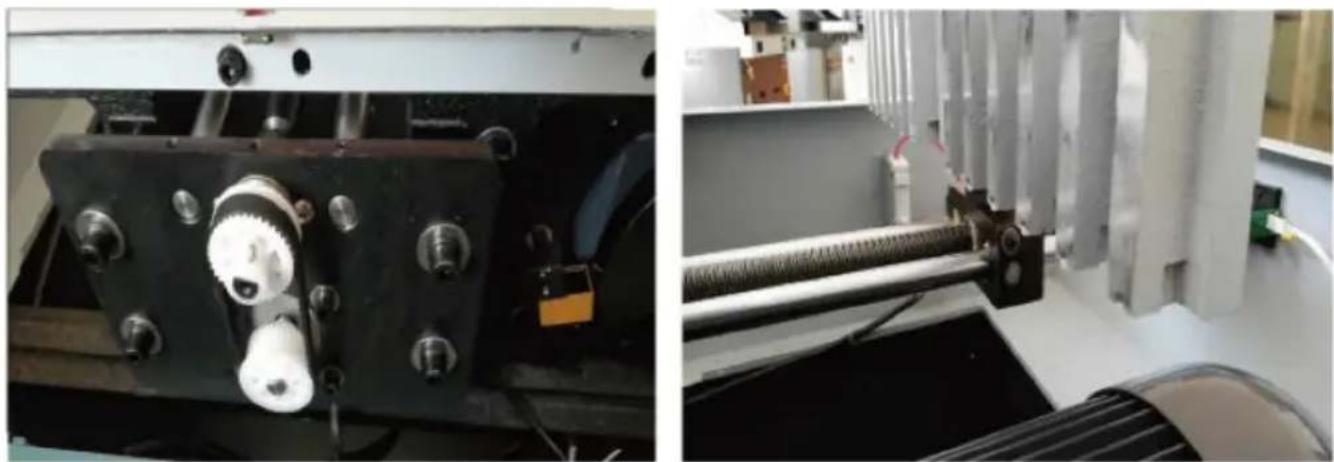
Check the stepper motor, remove the front cover, synchronize the pulley and whether the synchronization is fixed properly; adjust the limit plate and the nut, which can be adjusted back and forth until the display size matches the ruler, and then lock the fixing screw.
- Cutter adjustment
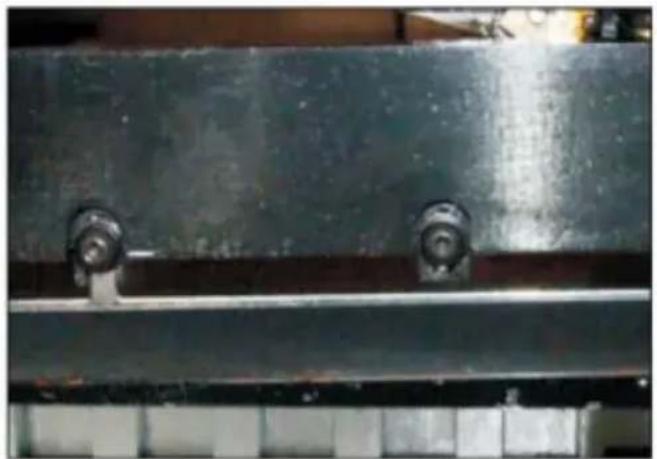
First adjust the cutter depth fine-tuning device (adjust the depth range 5mm or so) or change the cutting surface of the blade; deepen clockwise and counterclockwise.
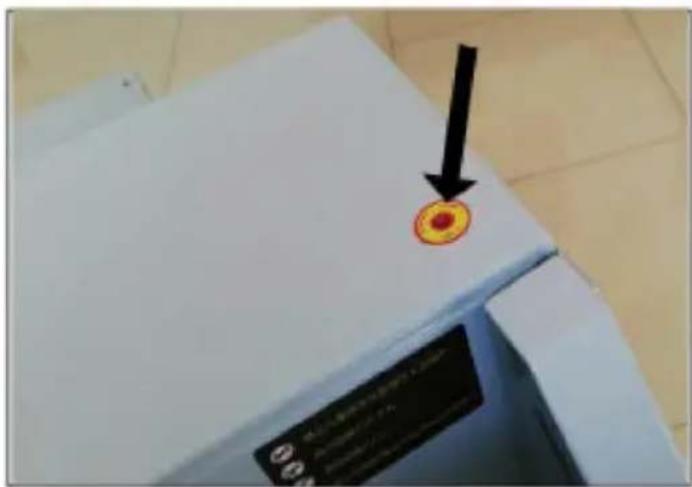
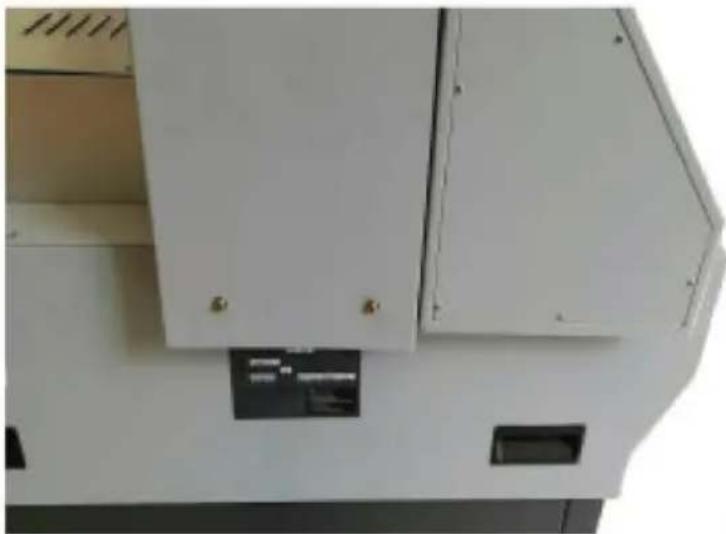
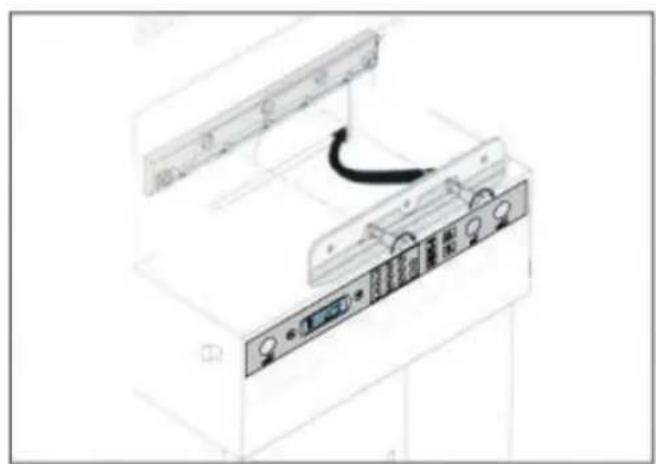
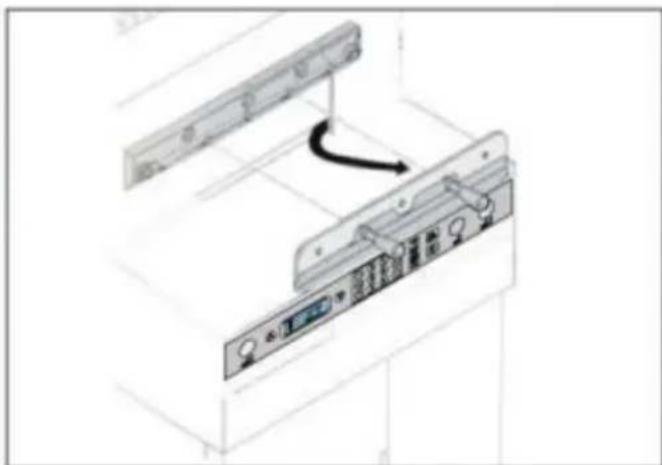
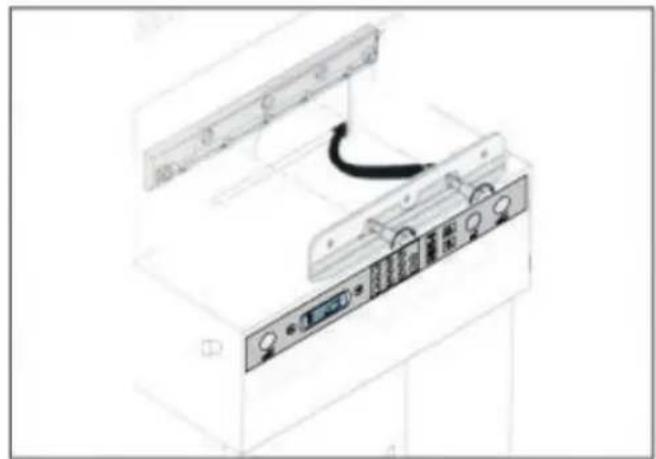
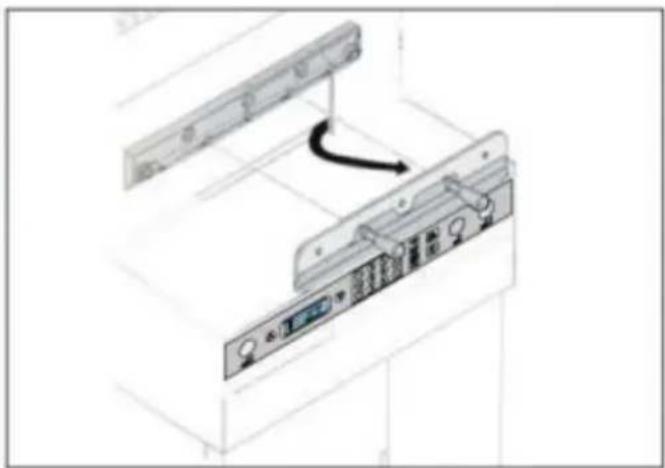
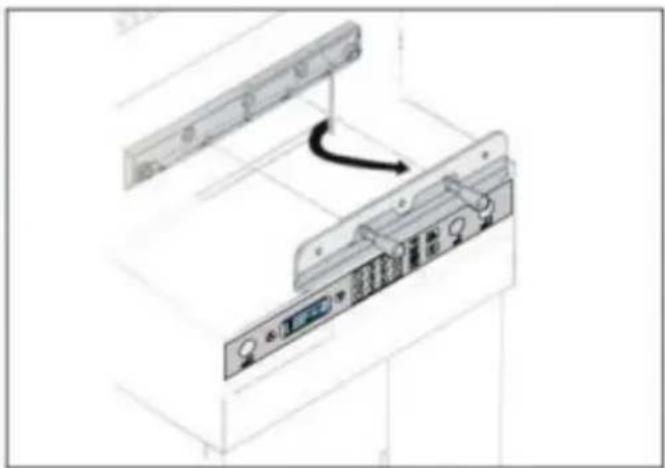
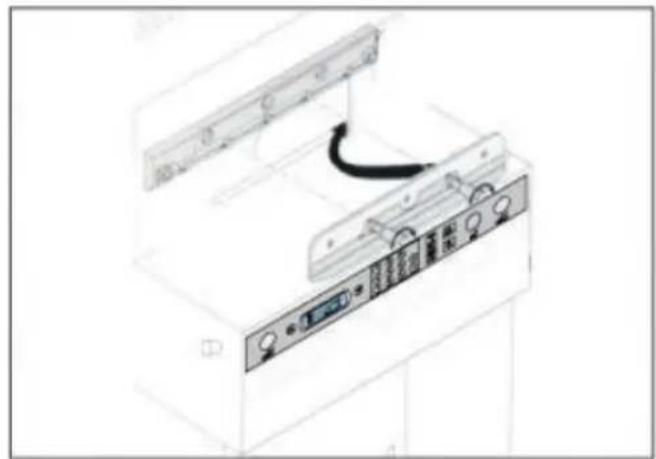
If adjusting the cutter depth fine-tuning cannot cut off a piece of paper, you can only adjust the cutter depth balance screw; remove the fixing screws at both ends of the upper cover and remove the upper cover.
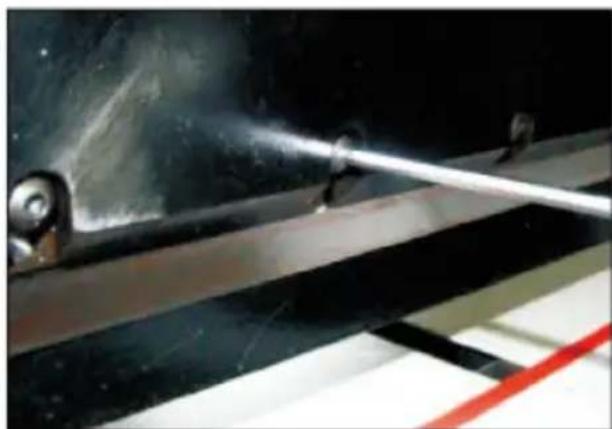
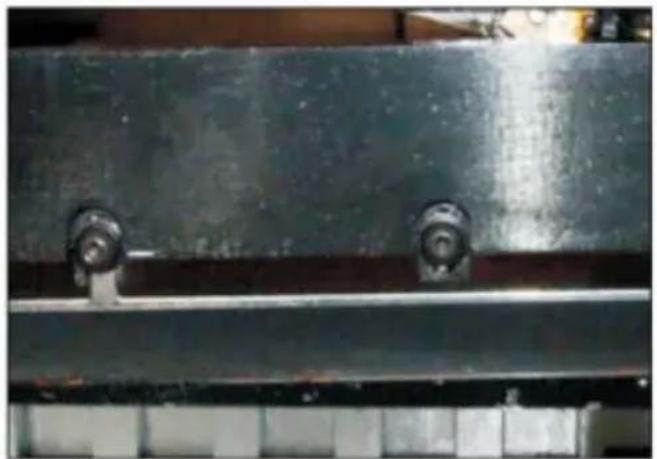
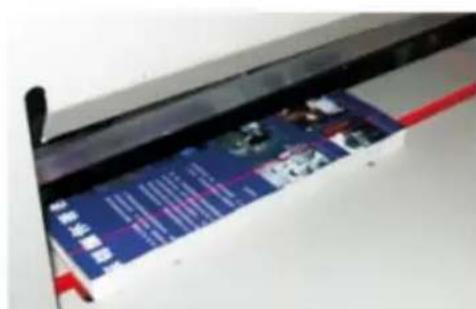
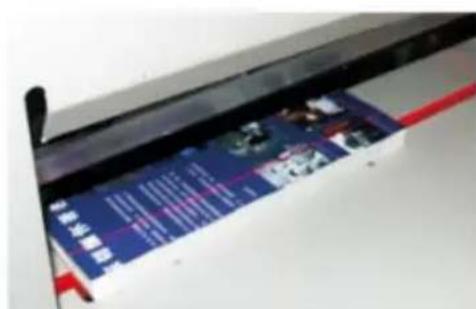
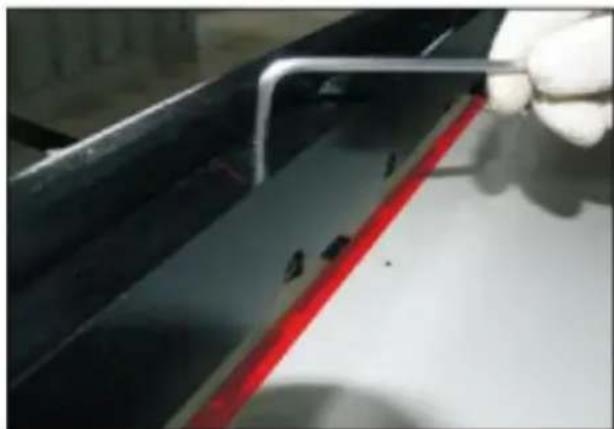
Loosen the locking screws of the 7 M6 blades fixed on the knife holder, adjust the blade depth at the upper end of the tool holder to adjust balance screws. Generally, it is appropriate to adjust the cutter to cut the knife pad 0.5mm.
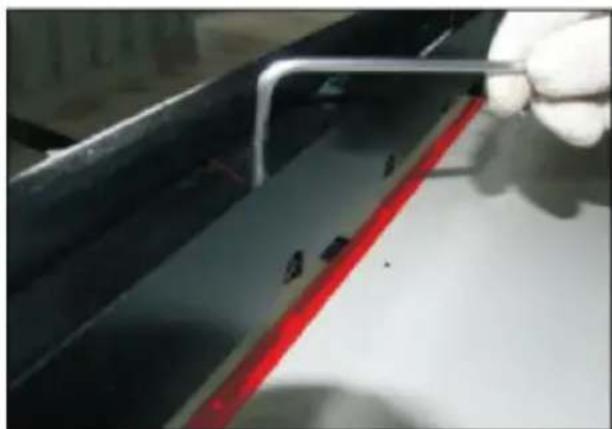
Tighten the locking screw on the tool holder, cover and fix it; use a paper to try cutting, if the cutting is continuous, you can re-adjust according to the above steps.
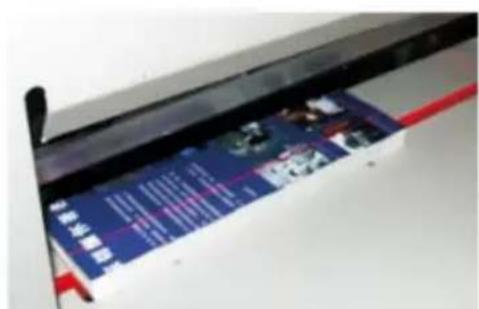
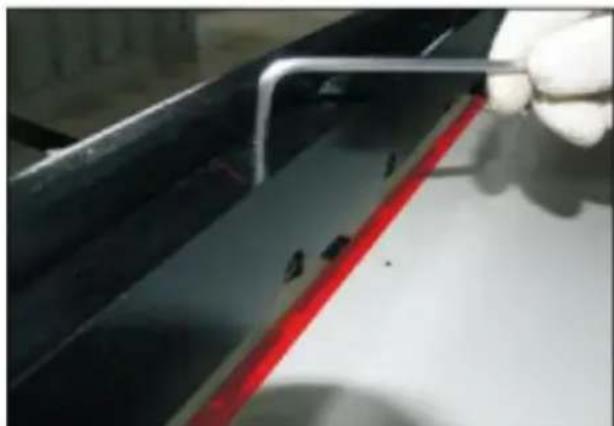
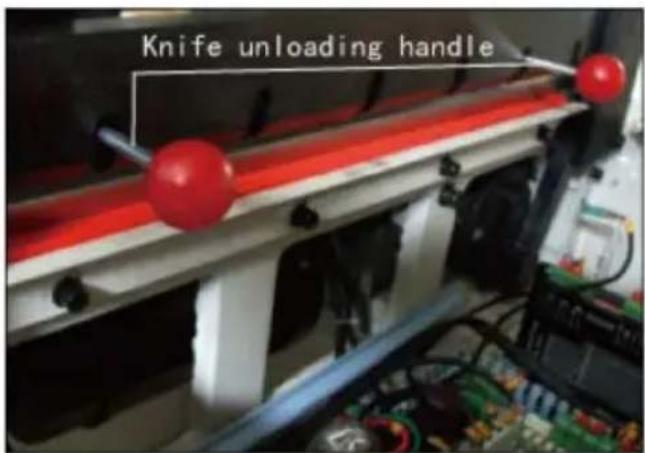
- Blade replacement (please follow the steps carefully)
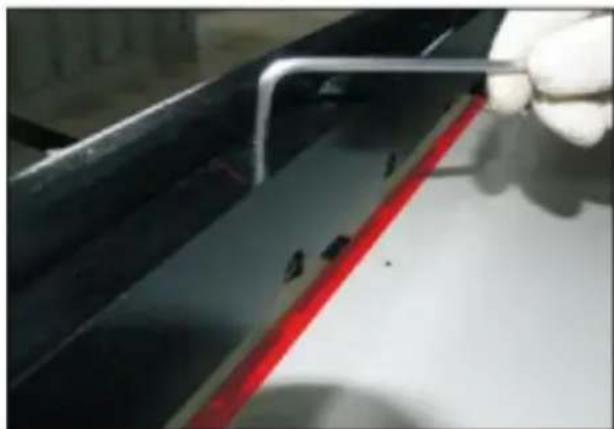
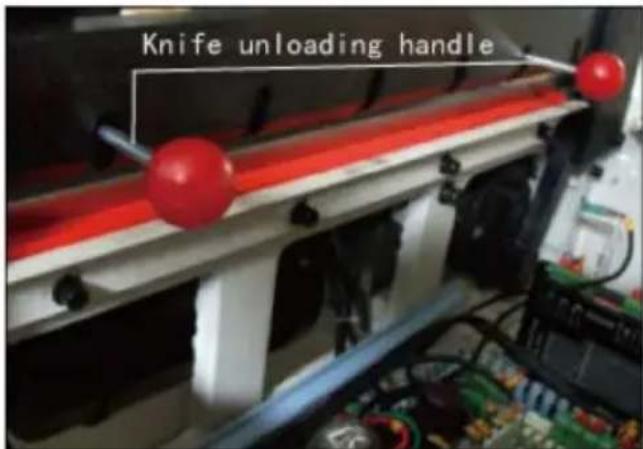
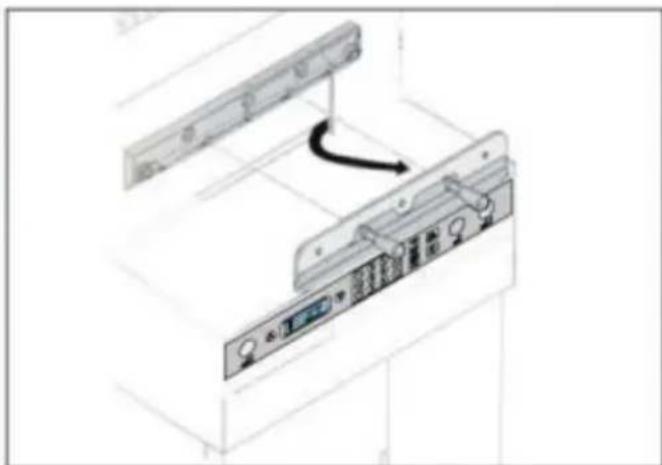
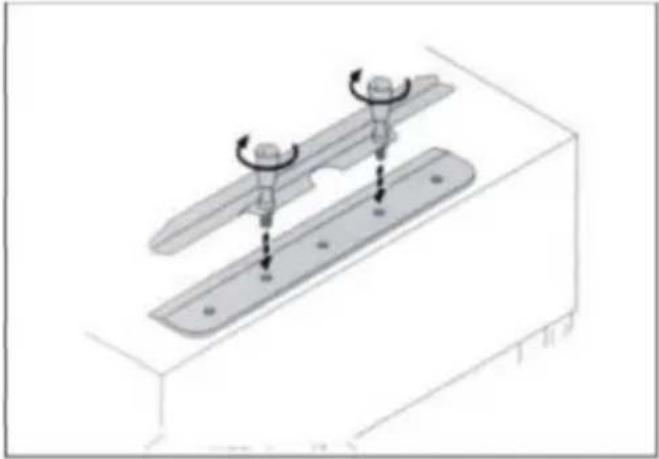
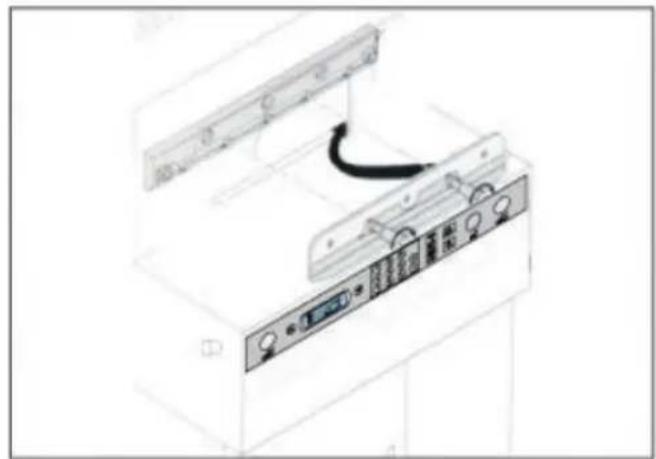
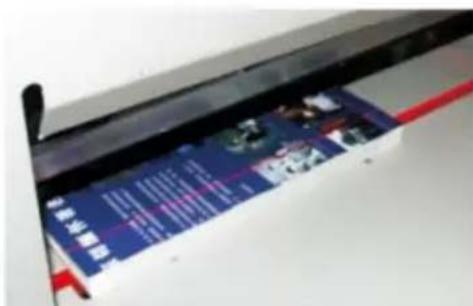
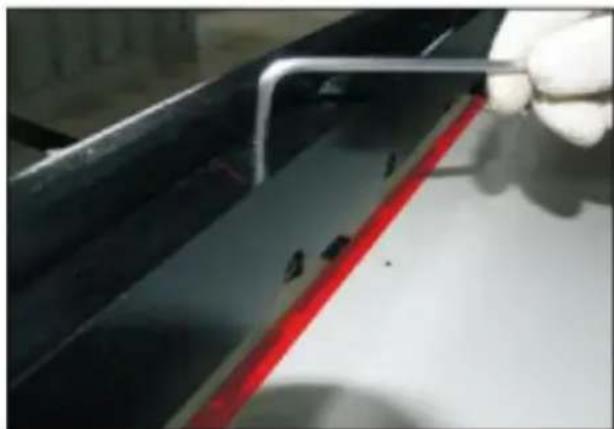
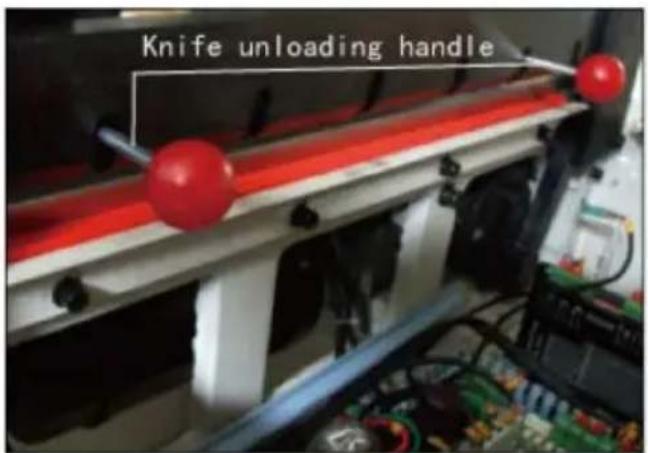
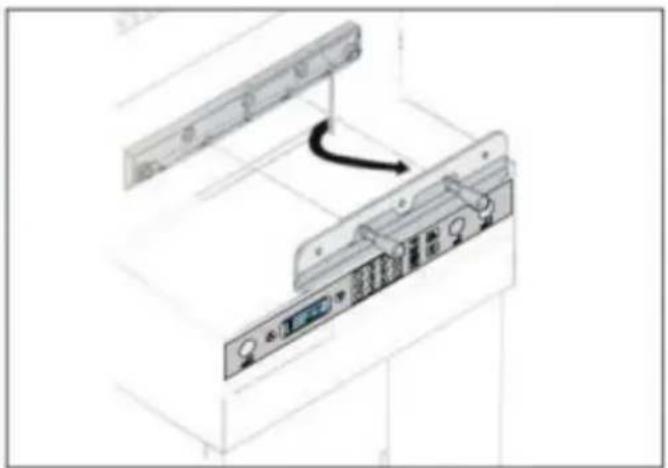
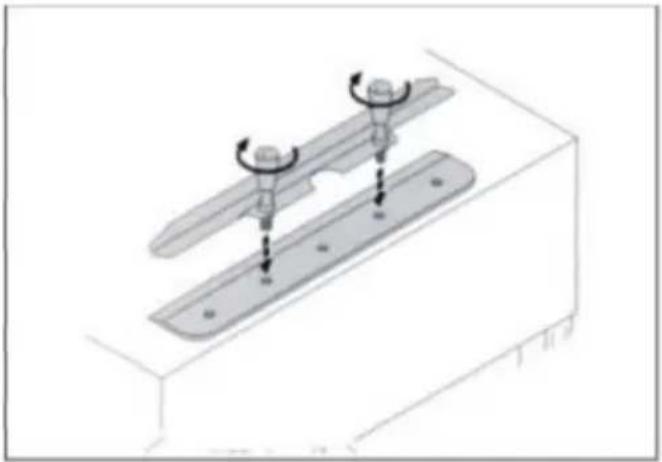
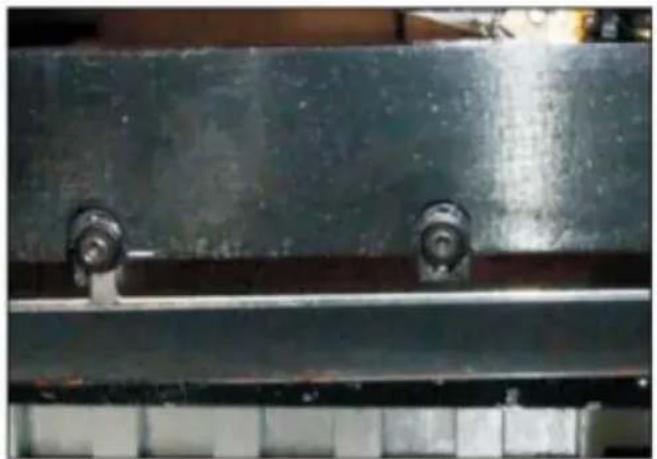
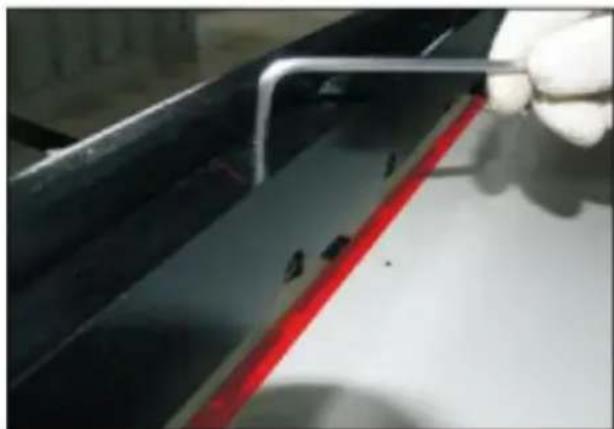
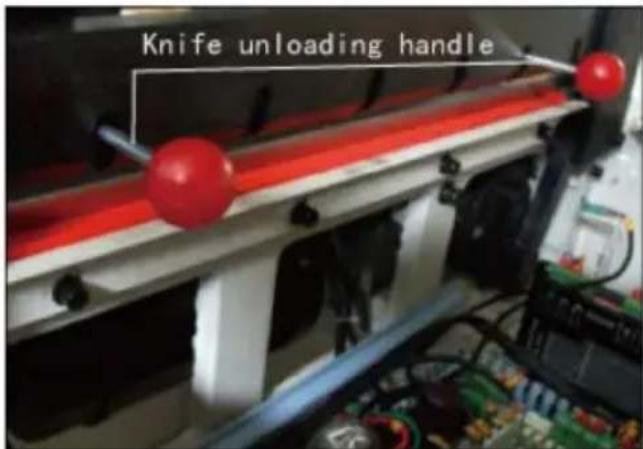
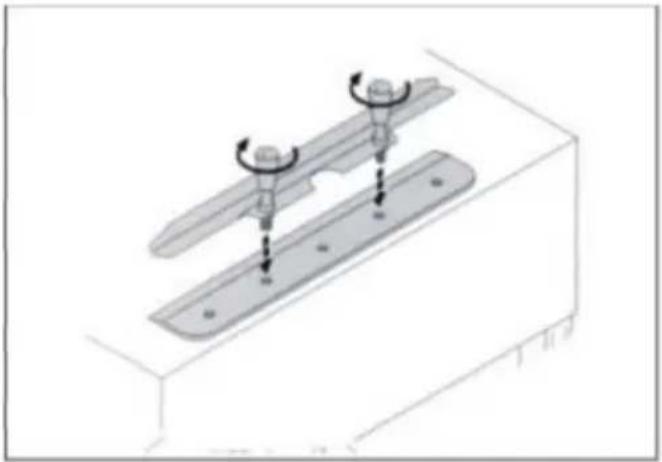
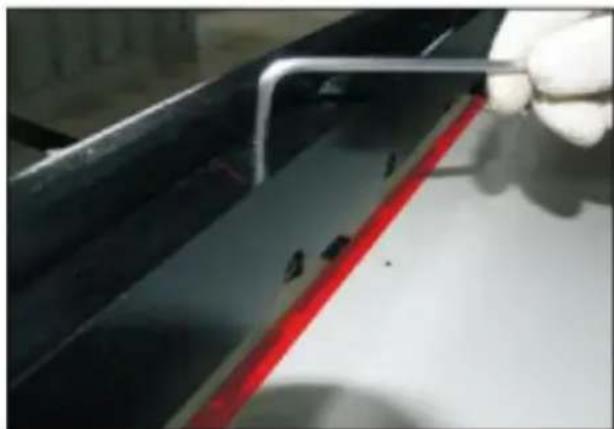
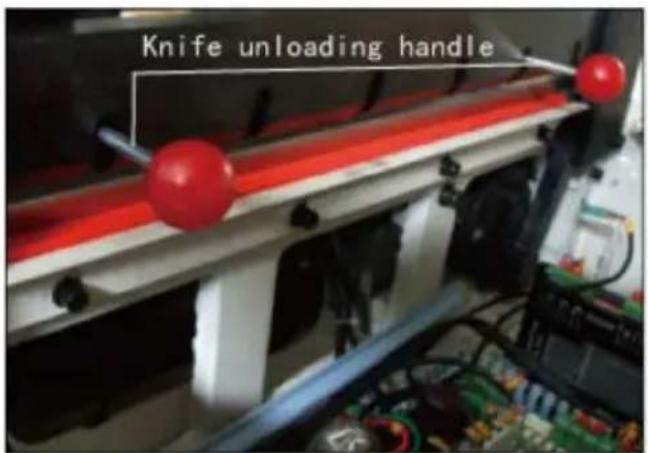
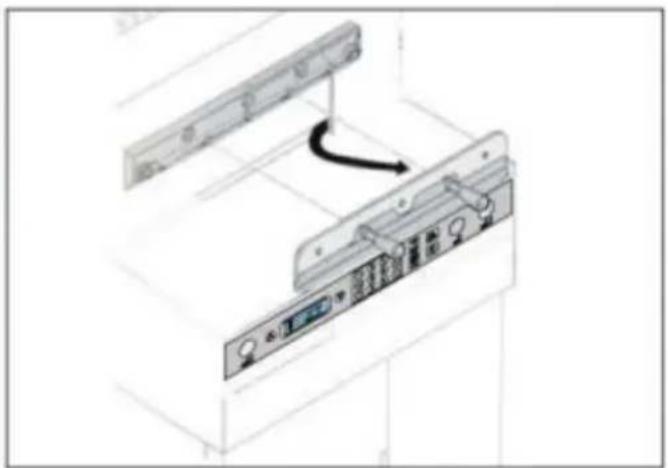
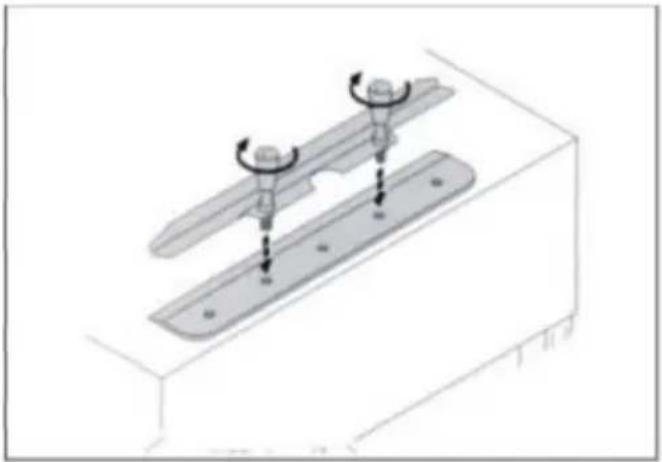
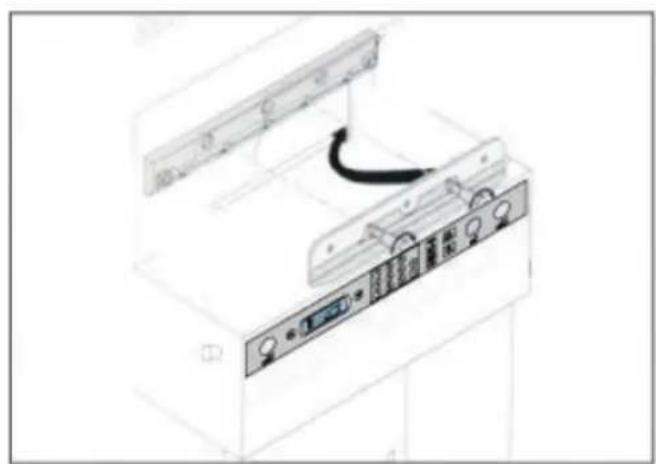
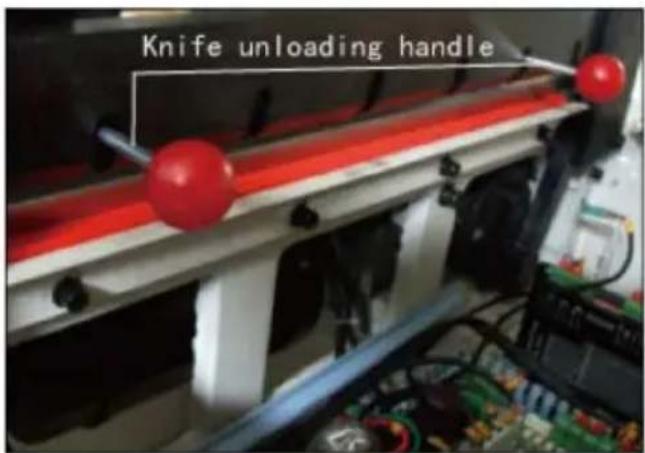
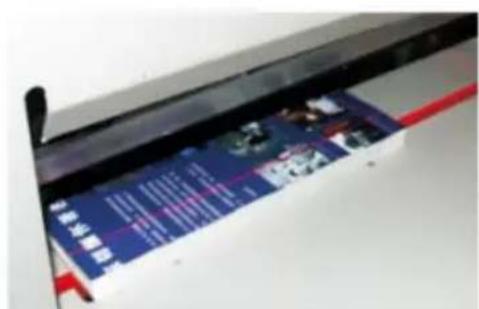
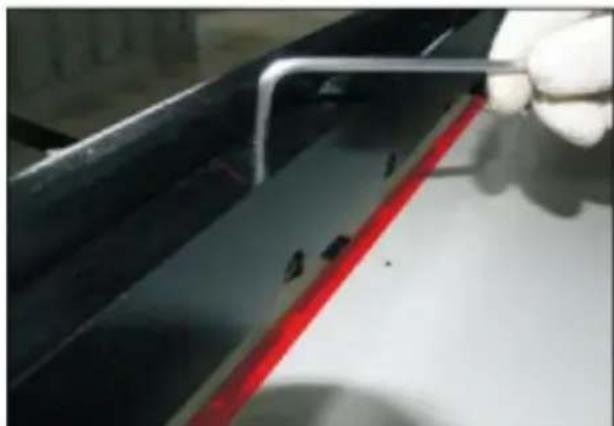
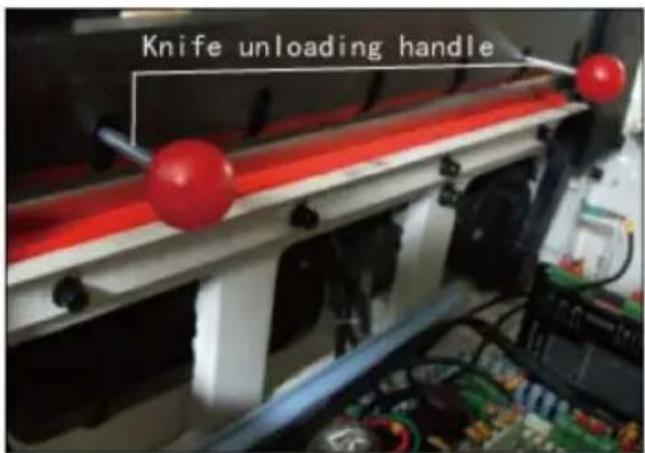
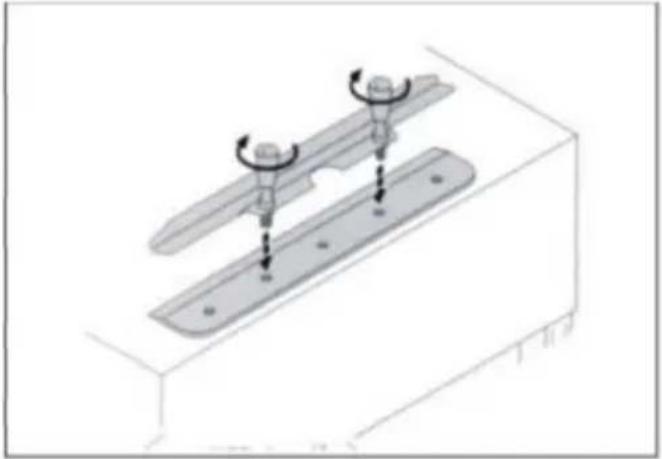
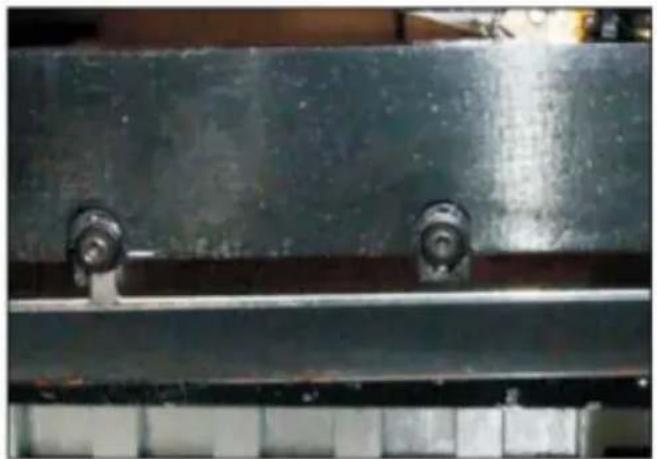
Open the upper cover; loosen and remove the locking screws with openings on the tool holder, screw the two cutter screws into the op holes in a clockwise direction and secure the locking
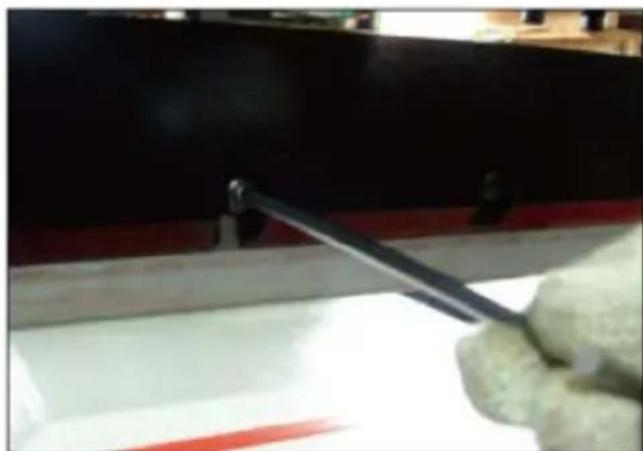
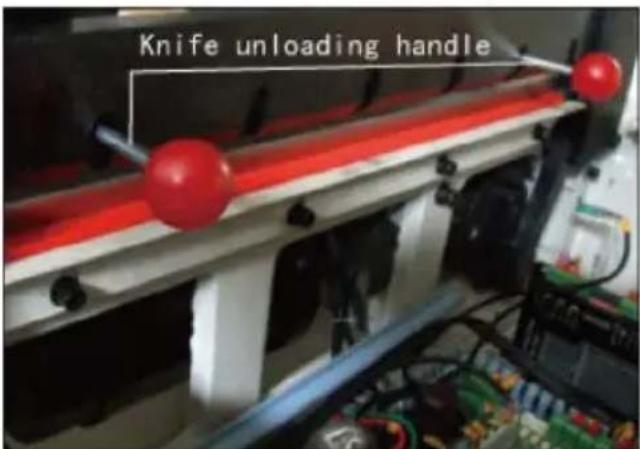
Remove the other locking screws from the tool holder; turn the two screws half a turn counterclockwise and remove the blade downwards. Please wear gloves or wrap the blade in cloth and put it into the k to avoid scratches.
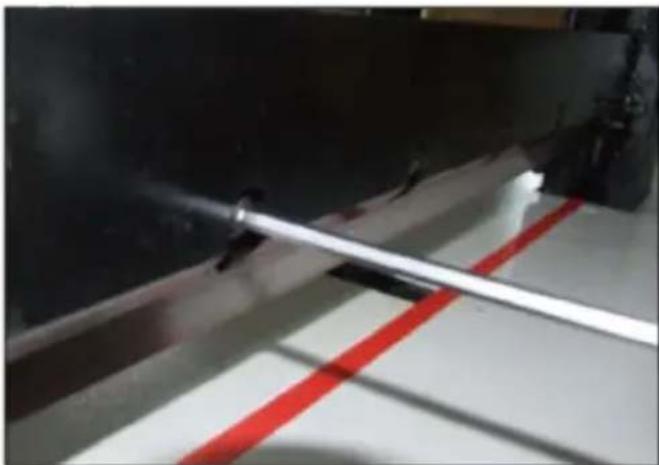
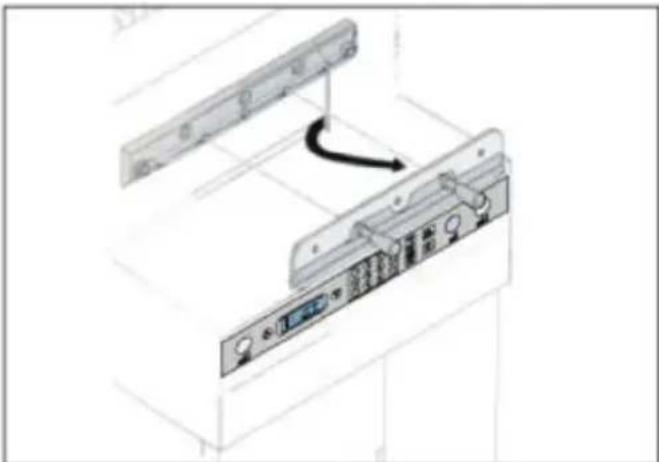
Take out a new blade, pay attention to safety, the blade is facing outward.before installing the blade, please loosen the blade at the up end of the knife holder on the knife holder, tighten and fix it with s turn, and then adjust according to the cutter depth adjustment method
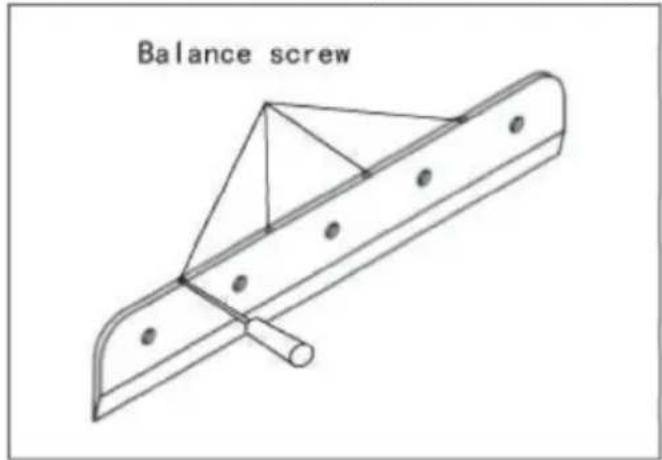
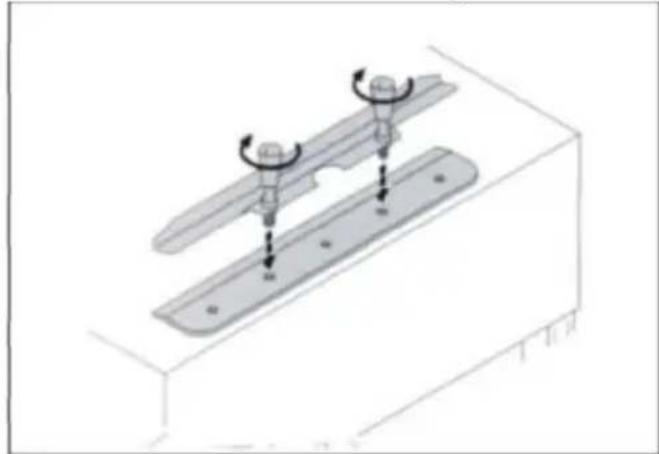
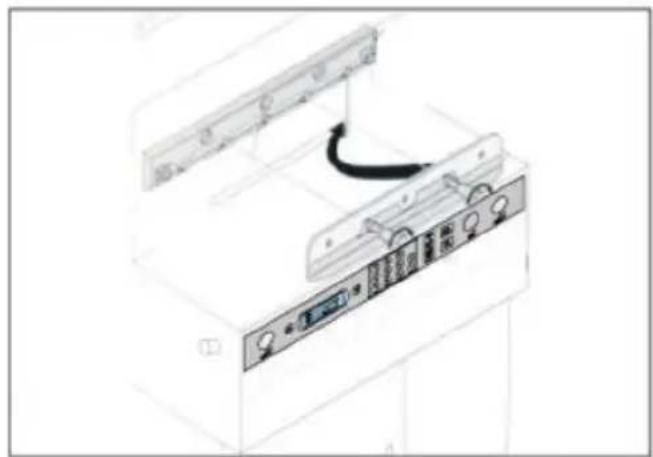
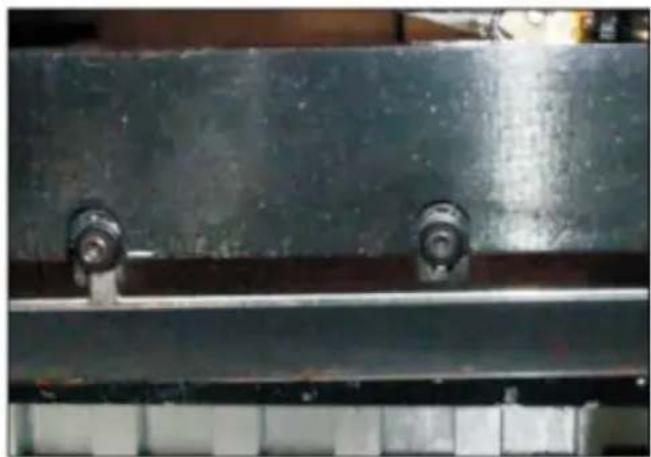
After the blade is packed, please go to a professional knife sharpening to ensure the grinding quality. Note: a blunt knife cannot cut paper or and thick paper or card-board is often cut. It's easy to blunt the blade found that the quality and accuracy of the cutting can not be found place of this cutter. When the set standard is consistent, the blade must be replaced and a replacement blade must be kept in hand at all times make the work go smoothly. When you need to change the blade. But to change it according to the blade. The steps described are correct. In order to avoid injury, the replacement of the blade must be handled carefully and carefully. and safety must be paid attention to.
- Blade adjustment
The blade has 4 sides, each side can be used twice, can be recycled times to find that the blade is too deep, it is necessary to adjust the blade; replace the blade, there are semicircular concave holes on sides of the blade and use a screwdriver to insert and pry out the
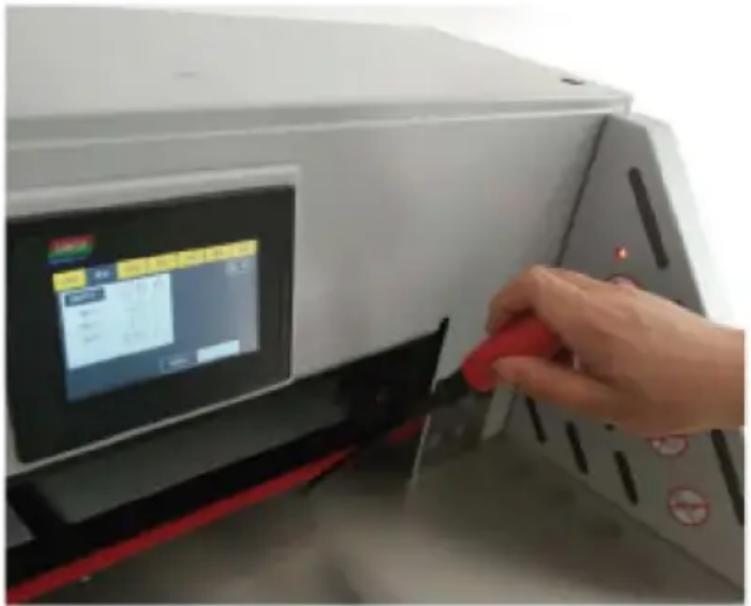
Note: When replacing the blade, some adjustments to the blade itself necessary. If the blade protrudes too deeply, it can not only damage blade holder but also accelerate blade wear.
Lubrication and maintenance
1. Lubrication
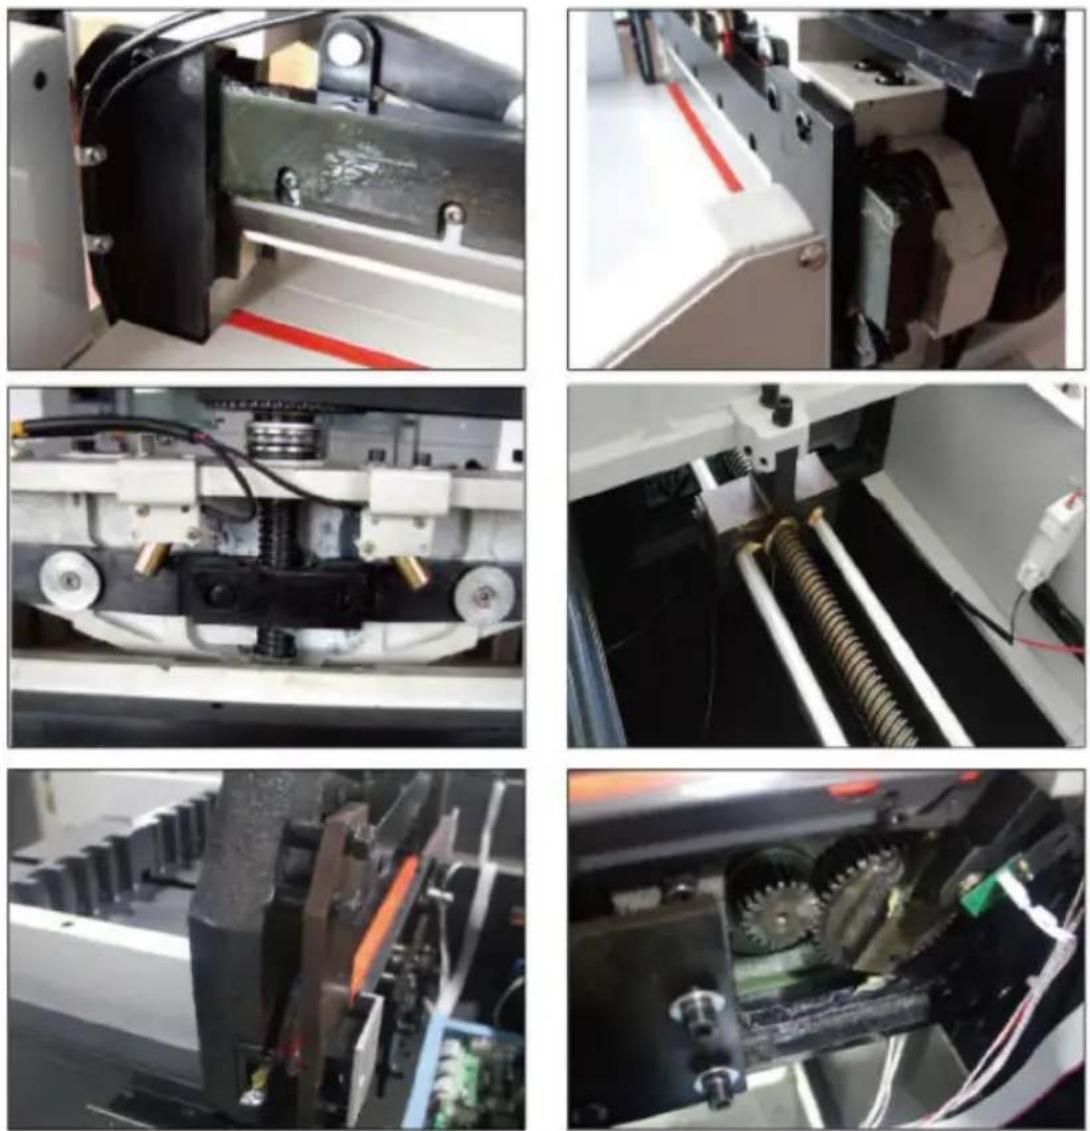
The machine should open the cover every month, check the cleaning, fasten the parts and lubricate the transmission parts once a month. F be careful to avoid dripping lubricating oil on electrical circuits or elec components when refueling; in order to avoid failure.
2. Maintenance
When working, it is forbidden to put non-cutting objects on the machi as to prevent hard objects from entering the knife and damaging the cutter. Bound books should avoid bringing staples into the cutting area as not to damage the cutter. After the work is finished every day, w machine, remove debris, and cut off the power supply.
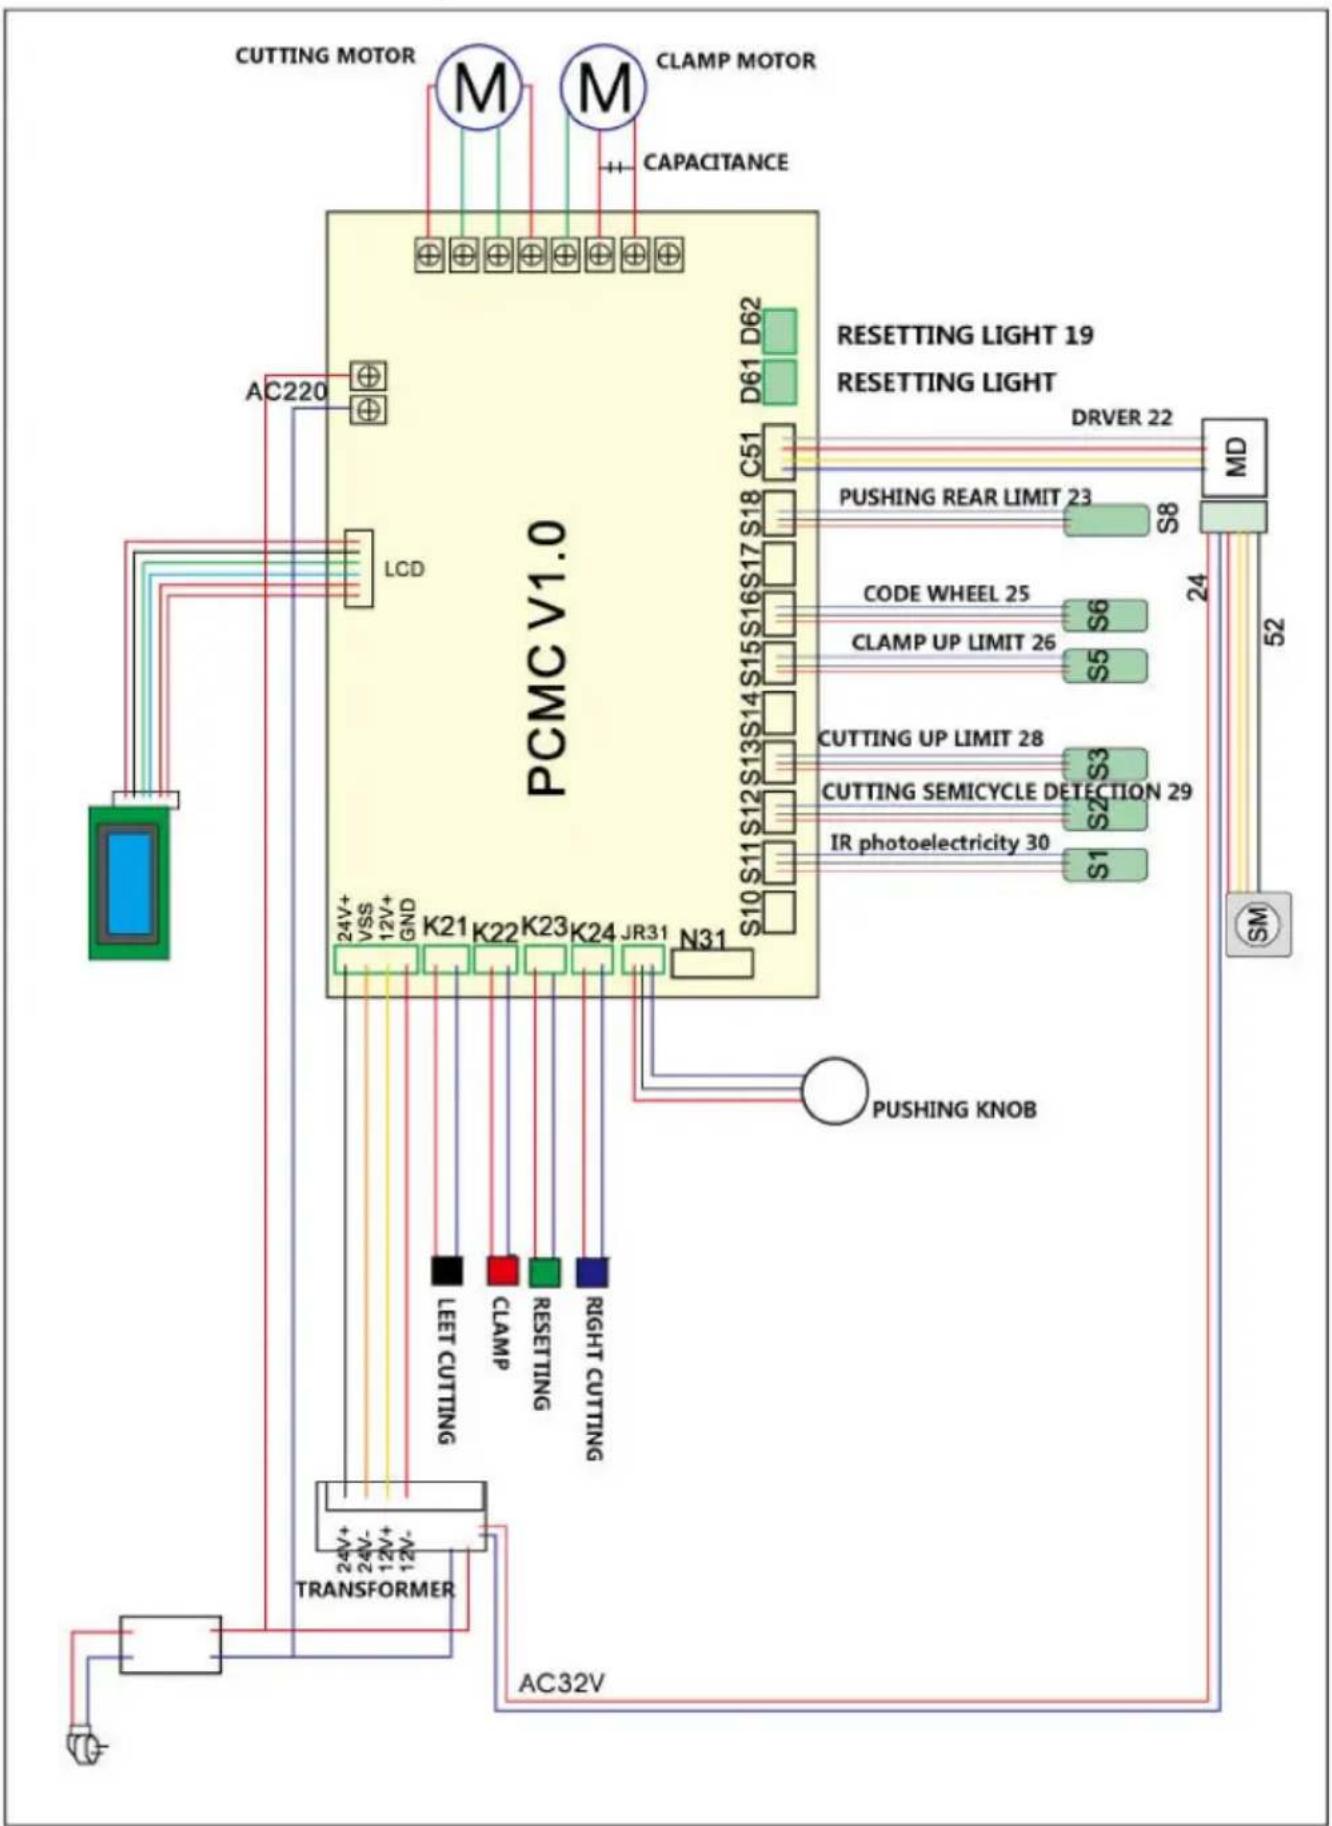
- Attached drawings
Common error and elimination
| Error | Phenomena | Solution |
| Paper cutting is not even or the cutting size is no accurate | The cutting paper is unperallel and has large and has large deviation | Remove the backguage position offset and loosen the fastening screw to agj the angle of pushing board |
| The blade can n reset or works u and down continuously | All the button is inva and can not control blade | 1. The sensorys position moves or was damaged.2.The main board has be damaged |
| The window can' display or display wrong or can't | Power buttons are invalid | Check display board,main board of the electrical equipment,and circuit parts |
| Digital-controlled circuit damsged | Paper-pushing part can't work | 1. Check stepping motor,driver2. Check whether the circ of main board is damaged |
| Alarm for displayingE-1 | The button is invalid and cutting action stops | 1. Check the flash2. Check the control pane |
| Alarm for displayingE-2 | Cut normally,but blade can't return to the original position | 1. Check limit sensor on blade shelf2. Check the control pane |
| Alarm for displayingE-4 | Press shelf return abnormal | 1. Check limit sensor on press shelf.2. Check the mainboard |
| Alarm for displayingE-5 | Pressing is abnormal | 1. Check pressing motor code-wheel sensor.2.Check the mainboard |
| Alarm for displayingE-6 | Cut normally,but pape pusher pusher can't limit and adjust | 1. Check pressing motor backward calibration sensor2.Cheek the mainboard |
E-1: Photo-electric protection. E-2: Error for cutter motor code-wheel sensor. E-4:6 error for pressing upper limit sensor. E-5: Error for pressing motor code-wheel sensor. E-6: Error for reset sensor.
Manufacturer: Shanghai Muxin Muye Youxian Gongsi
Address: Shuangchenglu 803nong11hao1602A-1609shi, Baoshanqu, Shanghai 200000 CN.
Imported to AUS: SIHAO PTY LTD. 1 ROKEVA STREETEASTWOOD NSW 2122 Australia
Imported to USA: Sanven Technology Ltd. Suite 250, 9166 Anaheim Place, Rancho Cucamonga, CA 91730
| EC | REP |
E-CrossStu GmbH
Mainzer Landstr.69, 60329 Frankfurt am Main
| UK | REP |
YH CONSULTING LIMITED.
C/O YH Consulting Limited Office 147, Centurion House, London Road, Staines-upon-Thames, Surrey TW18 4AX
VEVOR®
TOUGH TOOLS, HALF PRICE
Technical Support and E-Warranty Certificate
www.vevor.com/support
VEVOR®
TOUGH TOOLS, HALF PRICE
NEED HELP? CONTACT US!
Control panel

C/O YH Consulting Limited Office 147, Centurion
House, London Road, Staines-upon-Thames, Surrey,
TW18 4AX
VEVOR®
TOUGH TOOLS, HALF PRICE
Control panel
C/O YH Consulting Limited Office 147, Centurion
House, London Road, Staines-upon-Thames, Surrey,
TW18 4AX
VEVOR®
TOUGH TOOLS, HALF PRICE
www.vevor.com/support
VEVOR®
TOUGH TOOLS, HALF PRICE
NEED HELP? CONTACT US!
Control panel
A/S YH Consulting Limited Office 147, Centurion House, London Road, Staines-upon-Thames, Surrey, TW18 4AX
Maison, London Road, Staines-upon-Thames, Surrey, TW18 4AX
TOUGH TOOLS, HALF PRICE
NEED HELP? CONTACT US!
4. Special suggestions
Control panel
C/O YH Consulting Limited Office 147, Centurion House, London Road, Staines-upon-Thames, Surrey, TW18 4AX
C/O YH Consulting Limited, Office 147, Centurion House, London Road, Staines-upon-Thames, Surrey, TW18 4AX
TOUGH TOOLS, HALF PRICE
Warranty certificate www.vevor.com/support
VEVOR®
VEVOR®
TOUGH TOOLS, HALF PRICE
NEED HELP? CONTACT US!
Control panel
Operating schedule for paper cutter.
C/O YH Consulting Limited Office 147, Centurion House, London Road, Staines-upon-Thames, Surrey, TW18 4AX
VEVOR®
TOUGH TOOLS, HALF PRICE
www.vevor.com/support
VEVOR®
TOUGH TOOLS, HALF PRICE
C/O YH Consulting Limited Office 147, Centurion House, London Road, Staines-upon-Thames, Surrey, TW18 4AX
VEVOR®
TOUGH TOOLS, HALF PRICE
Control panel
Imported in AUS: SIHAO PTY LTD. 1 ROKEVA STREET EASTWOOD
New South Wales 2122 Australia
C/O YH Consulting Limited Office 147, Centurion
House, London Road, Staines-upon-Thames, Surrey,
Model TW18 4AX
VEVOR®
TOUGH TOOLS, HALF PRICE
electronics www.vevor.com/support

- WATCH WINDER
- USER MANUAL
- VEVOR®
- ELECTRIC PAPER CUTTER
- NEED HELP? CONTACT US
- WARNING
- NOTE
- SAFETY CAUTION
- OPEN THE BOX AND CHECK
- MACHINE INSTALLATION
- ENVIRONMENTAL CONDITIONS
- SPECIAL SUGGESTIONS
- OPERATION PANEL
- BASIC OPERATION AND ADJUSTMENT
- MANUAL MODE
- SEGMENTATION MODE
- BASIC REGULATION
- CUTTER ADJUSTMENT
- BLADE ADJUSTMENT
- LUBRICATION AND MAINTENANCE
- LUBRICATION
- MAINTENANCE
- TOUGH TOOLS, HALF PRICE
- CONTROL PANEL
- C/O YH CONSULTING LIMITED OFFICE 147, CENTURION HOUSE, LONDON ROAD, STAINES-UPON-THAMES, SURREY, TW18 4AX
Brand : Vevor
Model : E490T
Category : Paper cutter