
Espresso Bar EM640E - Coffee grinder CUISINART - Free user manual and instructions
Find the device manual for free Espresso Bar EM640E CUISINART in PDF.

| Brand | Cuisinart |
| Model | Espresso Bar EM640E |
| Product type | Espresso machine with integrated coffee grinder |
| Category | Coffee grinder and espresso machine |
| Power supply | 220-240 V, 50/60 Hz |
| Power | Approximately 1200-1500 W (estimated) |
| Pump pressure | 20 bars |
| Water tank capacity | 2.2 L |
| Bean hopper capacity | 225 g |
| Grind settings | 16 levels, from fine to coarse |
| Grinder type | Conical burrs |
| Main functions | Grinding, single/double espresso extraction, cold brew, milk frothing, hot water |
| Control panel | Buttons for single/double grind, single/double dose, cold, steam/hot water |
| Programmability | Customizable infusion volume for single (30-75 ml) and double (50-115 ml) |
| Assisted tamping | Lever with 10 kg pressure |
| Water filter | Removable charcoal filter, recommended change every 60 days |
| Included accessories | Bottomless portafilter 54 mm, single and double baskets, tamper, milk pitcher, cleaning brushes, dosing guide, water filter |
| Housing material | Stainless steel and plastic |
| Dimensions (approx.) | 35 x 30 x 40 cm (estimated) |
| Weight | Approximately 10 kg (estimated) |
| Care and cleaning | Regular cleaning of filters, portafilter, brewing head, drip tray, steam wand and grinder. Descaling with vinegar or tablets. |
| Safety | Automatic hot water shut-off after 1 minute, empty water tank detection |
| Warranty | 3 years against manufacturing defects |
| Country of manufacture | Not specified (likely China) |
Frequently Asked Questions - Espresso Bar EM640E CUISINART
User questions about Espresso Bar EM640E CUISINART
0 question about this device. Answer the ones you know or ask your own.
Ask a new question about this device
Download the instructions for your Coffee grinder in PDF format for free! Find your manual Espresso Bar EM640E - CUISINART and take your electronic device back in hand. On this page are published all the documents necessary for the use of your device. Espresso Bar EM640E by CUISINART.
USER MANUAL Espresso Bar EM640E CUISINART
Instruction & Recipe Booklet
ESPRESSO BAR™
Grind & Brew Espresso Machine
EM640E

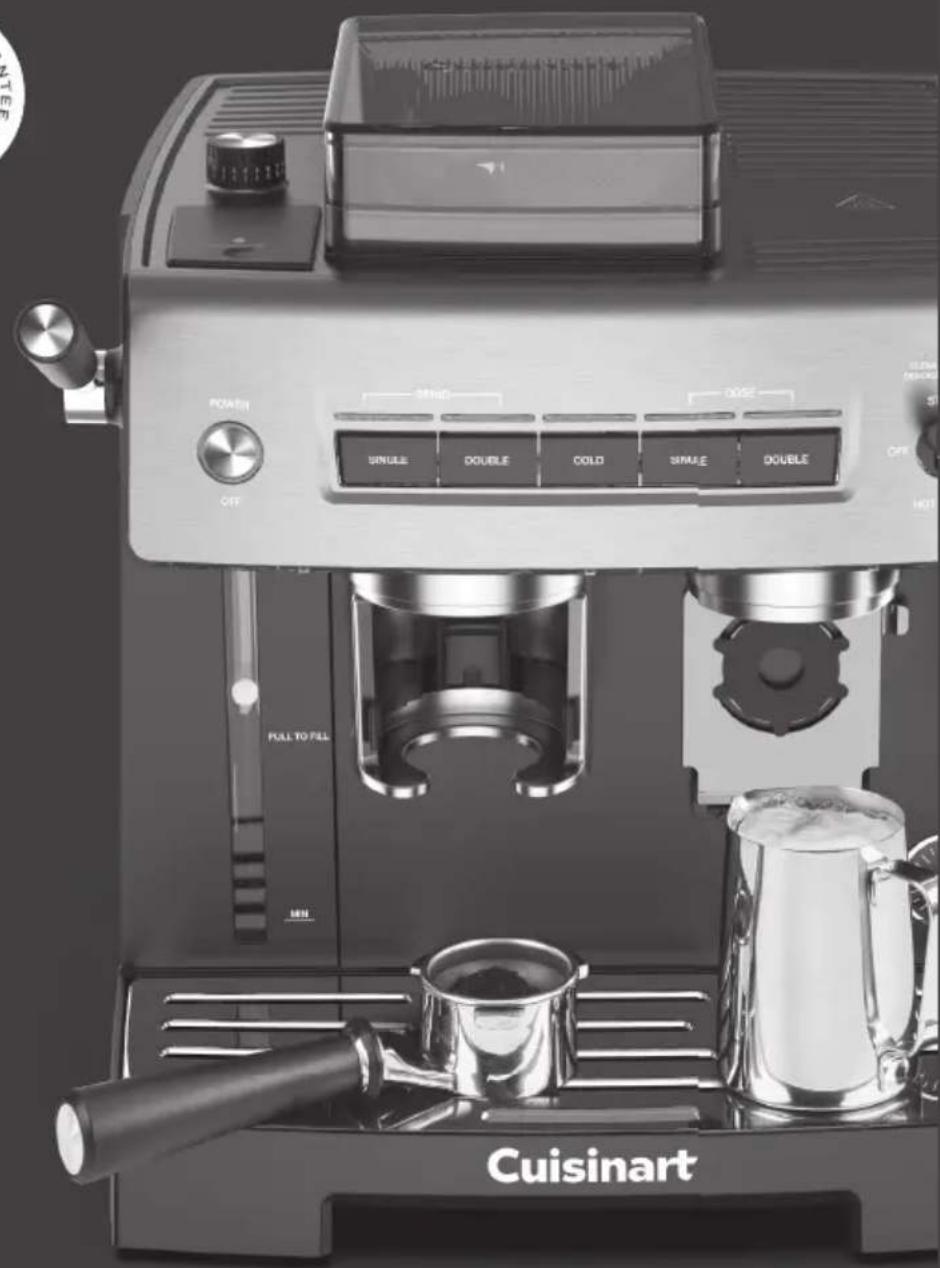
natural_image
Exterior view of a Cuisinart coffee maker with control panel and pour press (no readable text or symbols beyond branding)Contents
Unpacking Instructions .... 4
The Quest for the Perfect Cup of Espresso..... 4
Features and Benefits, Diagram.... 5
Getting to Know Your Control Panel.... 6
Accessories 7
Charcoal Water Filter 8
Preparing Your Espresso Machine....8
Programming Your Espresso Machine ..... 9
Guide to the Perfect Espresso 11
Cold Extraction 12
Guide to Milk Texturing 12
Using the Hot Water Function 13
Cleaning and Maintenance 13
Guarantee 94
Contenu
Cold extraction....71
Important Unpacking Instructions
- Place the box on a large, sturdy, fl at surface.
- Remove literature.
- Turn the box so that the back side of the box is face down and slide the inner contents out on to a fl at surface.
- After the unit has been removed, place the box out of the way and lift off the top polyfoam insert.
- Remove the Portafi lter, tamping puck and the white box labeled Espresso Accessories Box from the polyfoam.
- Unwrap the Portafi lter and place to the side. NOTE: the portafi lter is packed with the double shot fi lter basket in place.
- Open the Espresso Accessories Box and remove all contents
NOTE: Accessories packed inside include the Frothing Pitcher, Steam Wand Cleaning Pin, Burr Cleaning Brush, Chute Cleaning Brush, Dosing Guide & Single Shot Espresso Filter. See page 9 of the instruction manual for reference and integrated storage instructions.
- Remove the espresso maker from the polyfoam and remove the polybag covering the machine.
- Place unit on a fl at surface and remove all other packaging materials and tape.
NOTE: the Charcoal Water Filter and Filter Holder are stored inside the water tank.
We suggest you save all packing materials in the event that future shipping of the machine is needed. Keep all plastic bags away from children.
Save all packing materials in case you have to ship the machine in the future.
KEEP ALL PLASTIC BAGS AWAY FROM CHILDREN.
The Quest for The Perfect Cup of Espresso
It is generally agreed that there are four basic elements critical to the perfect cup:
Element 1: Water
When brewing espresso, make sure the water fl ows through the fi liter at the correct pace. The water fl ow can be adjusted by varying the pressure with which the coff ee is tamped (pressed down) in the fi liter or by altering the grind of the coff ee. If the speed of the water fl ow is too slow, the coff ee will be overextracted and will be very dark and bitter, with a spotted and uneven crema (froth) on the top. If the speed of the water fl ow is too fast, the coff ee will be underextracted and the supreme fl avour will not develop. The coff ee will be diluted and there will be an inadequate amount of crema on the top.
Element 2: Coffee
While the bulk of the liquid is water, all of the fl avour should be from the coff ee. To achieve the same great quality of coff ee you receive at a café, you need to use the same quality beans. If you choose to grind your own beans, buy the beans fresh and whole, only about a two-week supply at a time for maximum freshness. Once the coff ee bean is broken, its fl avou degrades very quickly. If it is not practical to buy smaller supplies, we recommend you separate large amounts of beans and store them in airtight containers in a cool, dry area. They should not be kept for longer than 1 month as fl avour will diminish Do not refrigerate or freeze coff ee beans.
Element 3: Grind
The grind of the coff ee is critical for proper fl avour extraction. If using a pre-ground coff ee, be sure to purchase an espresso grind that is specifi cally for espresso/cappuccino machines. If the grind is too fi ne, overextraction and bitterness will occur with a spotted and uneven crema on the top. If the grind is too coarse, the water will pass through too rapidly, and there will be an inadequate amount of crema on the top of the espresso.
Element 4: Tamping the Coffee Grounds
If you choose to use ground espresso, tamping the coff ee is a very important part of the coff ee making process. Using the provided tamping tool, tamp (press down) the grounds; the assisted tampe will deliver 10kg of pressure. Add more coff ee and tamp again if necessary to bring coff ee to level. Do not overfi ll the fi lter basket.
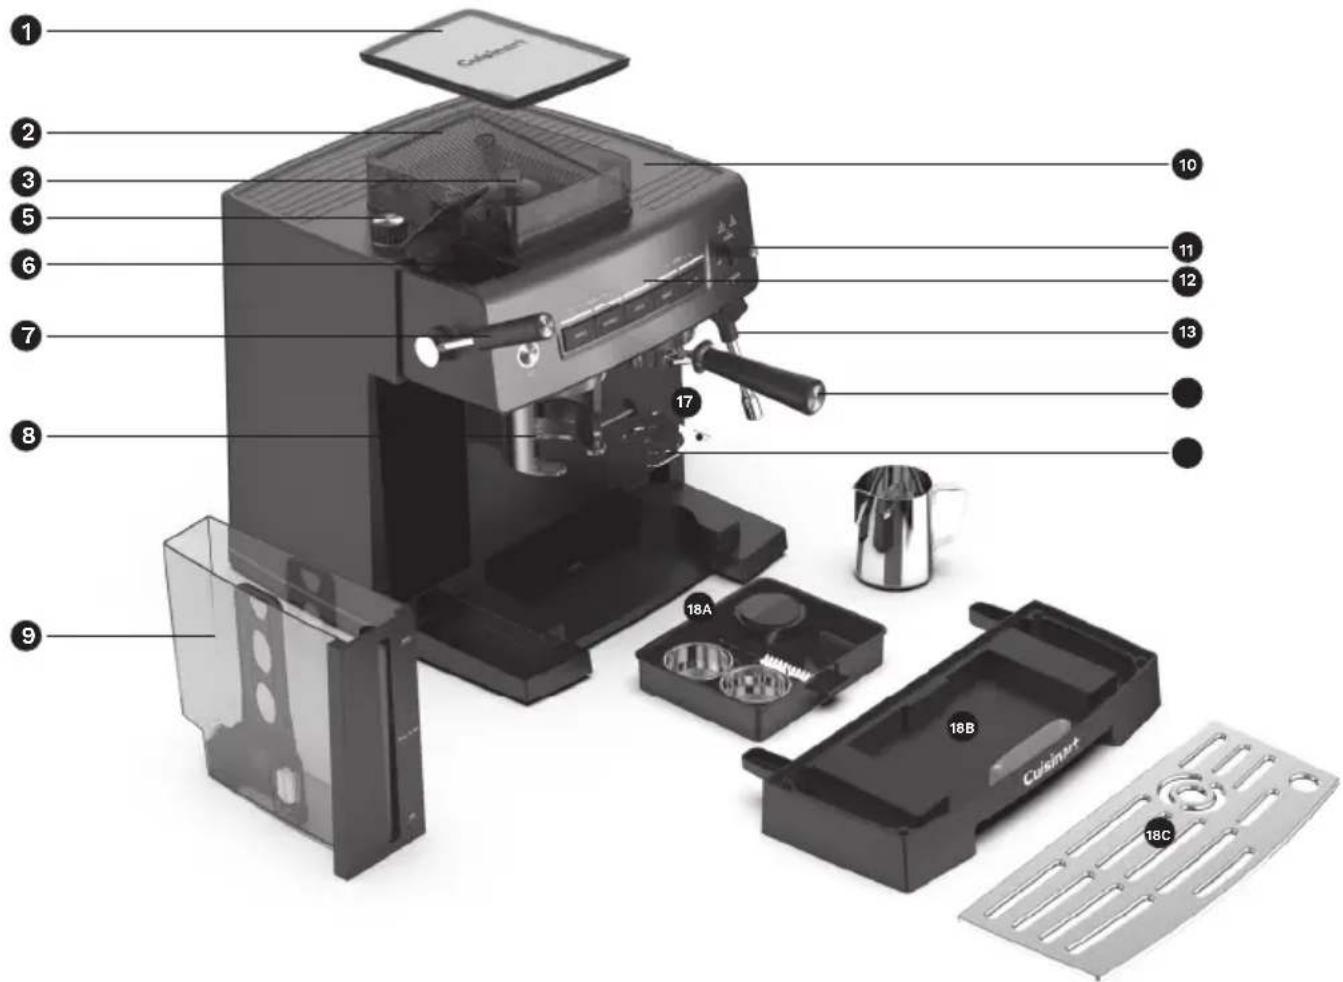
Features and Benefits
1. Hopper Lid
Seals out moisture and air to keep beans fresh.
2.BeanHopper
Holds up to 225g. of coffee beans.
3. Hopper Release Knob
Use to remove hopper and to access burr mill.
4. Conical Burr Mill (not shown)
5. Grind Size dial
16 settings allow you to customise the grind from fi ne to coarse.
6. Water Reservoir Access Door
7. Assisted Tamping Lever
Use to tamp the coff ee grinds in the filter basket prior to brewing.
8. Grinding Cradle
9. Removable 2.2L Water Reservoir
Front-loaded for easy filling. Easy-view water level window.
9A. Charcoal Water Filter Holder
9B. Charcoal Water Filter
10. Cup-Warming Plate
Used to warm the espresso cups.
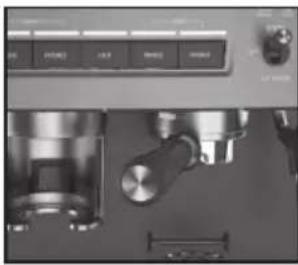
11. Steam or Hot Water Control Switch
12. Control Panel
See detailed illustration on page 7.
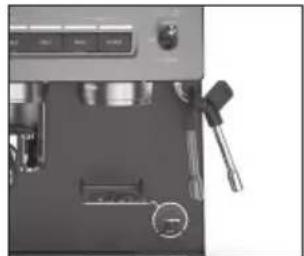
13. Steam & Hot Water Wand
Use to steam milk for cappuccinos and lattes or dispense hot water.
14. Group Head/Brew Head
For easy fi t of the portafi lter. Has two positions, lock and unlock, for ease of cleaning.
15. Bottomless Portafi lter
54mm stainless steel bottomless portafi lter.
16. Adjustable Shelf double layer
Flip-down shelf to accommodate smaller cups.
17. Espresso Extraction Pressure Gauge
Monitors extraction pressure.
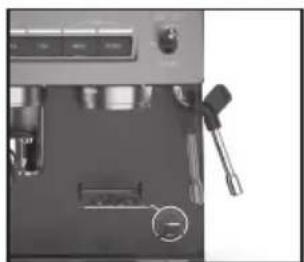
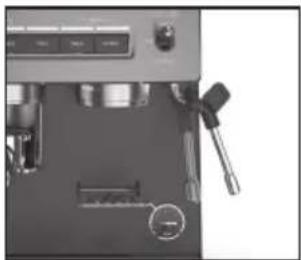
18. Removable Drip Tray
18A. Storage Compartment
Integrated tray holds accessories when not in use; see page 8 for details.
18B. Removable Drip Tray
Removes for easy cleaning and to accommodate up to a 20" travel mug.
18C. Removable Drip Tray Plate
19. 20 Bar Pump (not shown)
20 bars of pressure for balanced extraction.
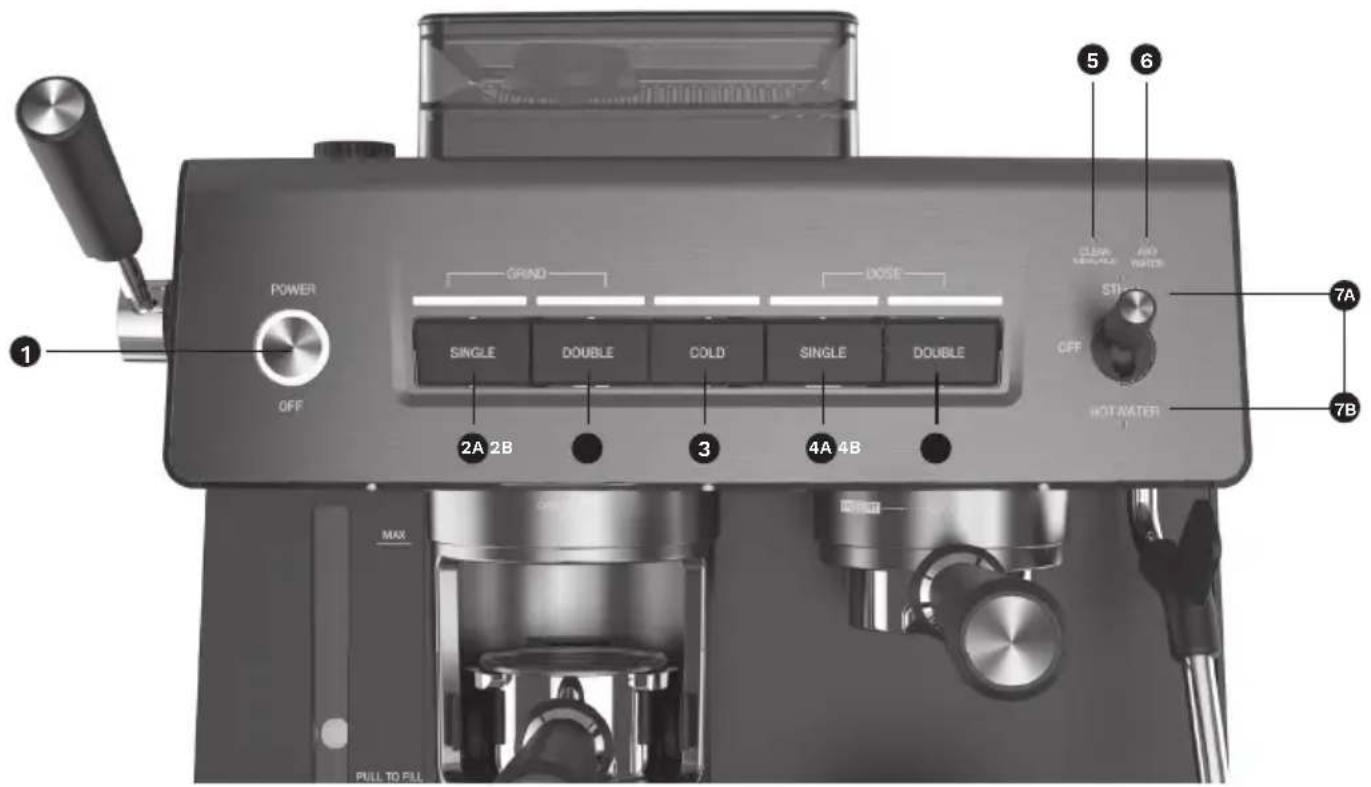
Getting to Know Your Control Panel
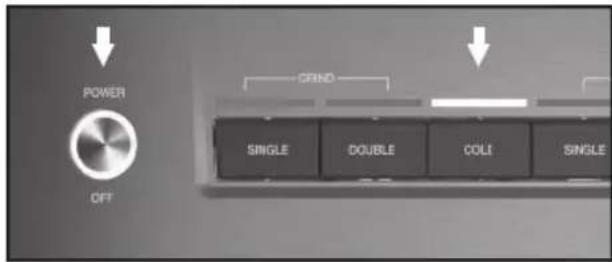
1. Power/Off Button
Use to turn the espresso maker on and off. This button illuminates when pressed.
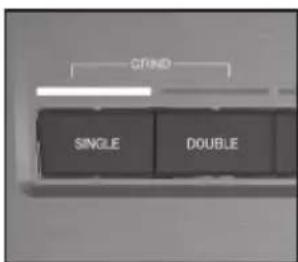
2.GrindStart
Starts the grind cycle.
2A. Single Button
Use for a single serving of espresso.
2B.DoubleButton
Use for a double serving of espresso.
3. Cold Button
Use to activate cold extraction function.
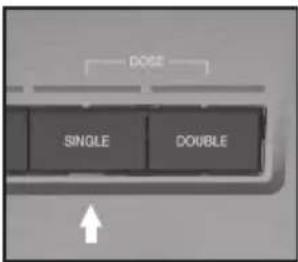
4. Dose Brew Start
Starts the brew cycle.
4A. Single Dose Button
Use for a single serving of espresso - 30ml.
4B. Double Dose Button
Use for a double serving of espresso - 60ml.
5. Clean/Descale Indicator
6. Add Water Indicator
7. Steam or Hot Water Control Switch
Use to activate steam or hot water.
7A.Steam
Use when making cappuccinos and lattes.
7B.HotWater
Use to dispense hot water.
Accessories
- Dosing Guide
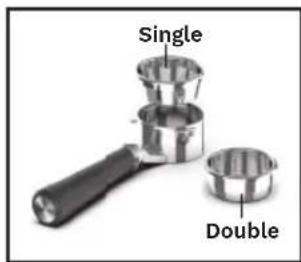
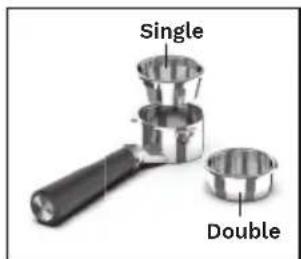
- Single Shot Espresso Filter
Use the 1-cup filter basket for a single espresso.
- Double Shot Espresso Filter
Use the 2-cup filter basket for a double espresso.
- 54mm Bottomless Portafi lter
5.Steam Wand Cleaning Pin
6.Burr Cleaning Brush - Chute Cleaning Brush
8.Tamping Puck
9. Charcoal Water Filter
10. Charcoal Water Filter Holder
11. Frothing Pitcher
12. AccessoryStorageTray
Holds accessories when not in use. Stores in unit for convenient access.
- Descaler Tablets Pack (not shown)
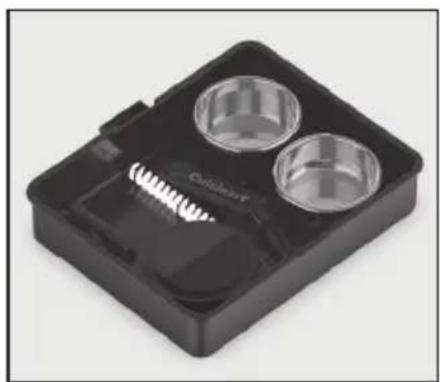
natural_image
Black plastic tray with two circular cavities and a textured base (no text or symbols visible)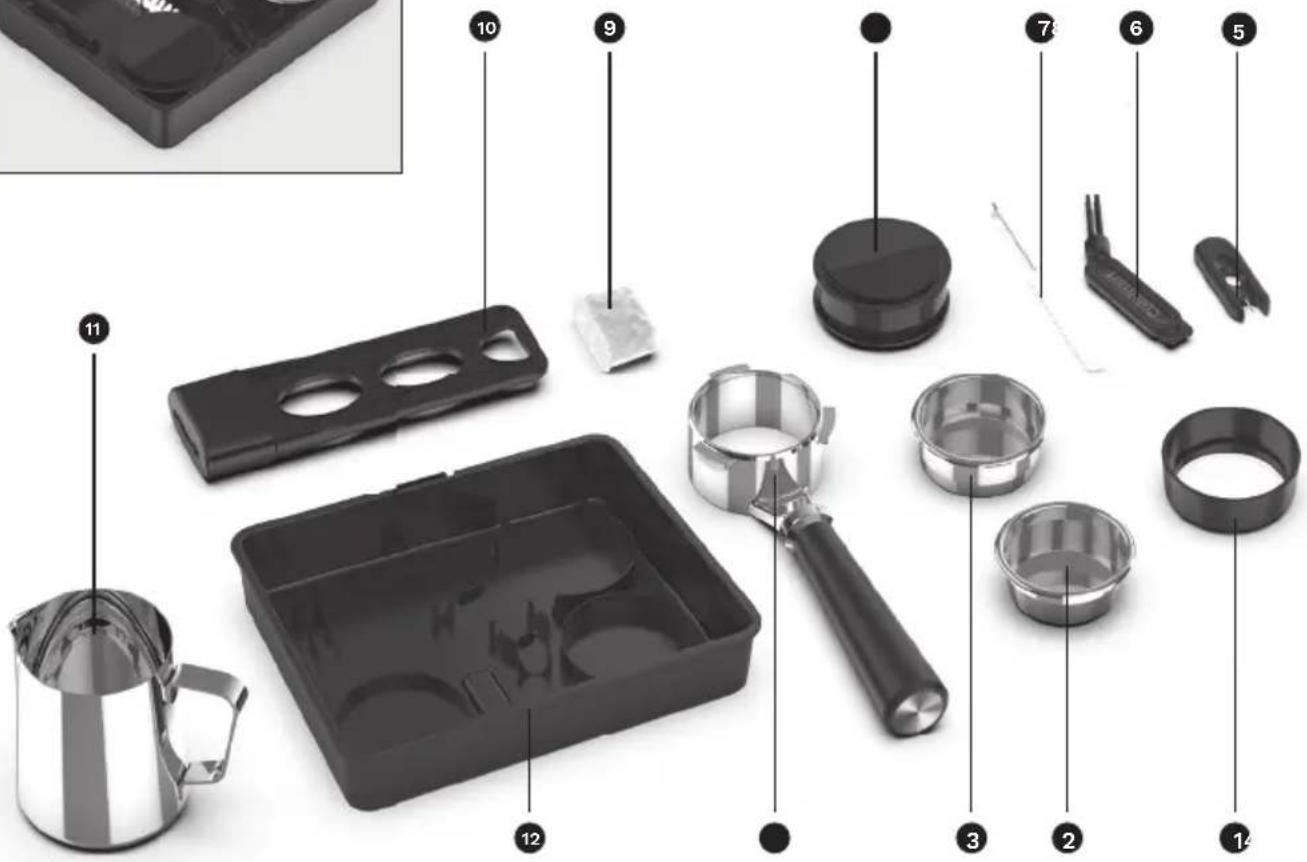
Charcoal Water Filter Inserting the Water Filter
- Remove the filter from polybag and soak it, fully immersed, in cold tap water for 15 minutes.
- Lift the water filter holder out of the water reservoir.
- Press down on the filter compartment and pull toward you to open.
- Place filter into the holder and snap it closed. Be careful – improper placement can tear the filter skin.
- Flush filter by running cold tap water through holes in bottom of compartment for 10 seconds.
- Allow the filter to drain completely.
- Slide the water filter holder back into the channel in the water reservoir, pushing it down to the base of the reservoir.
NOTE: We recommend changing the water filter every 60 days or after 60 uses, and more often if you have hard water.
Replacement filters can be purchased in stores, by calling Cuisinart Customer Service, or at www.cuisinart.eu

natural_image
Black rectangular device with circular cutouts and a small container of granular material beside it (no visible text or symbols)
natural_image
Close-up of hands holding a black plastic device with three circular cutouts (no text or symbols visible)Preparing Your Espresso Machine
Place the espresso machine on a dry, stable countertop or other surface where you will be using the machine.
IMPORTANT: For first-time use or if the machine has not been used for some time, it is important that the machine is rinsed. See instructions outlined below.
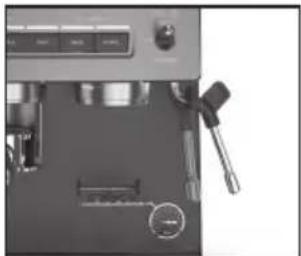
Remove the red plug from the back of the water reservoir.
Insert Drip Tray
- To access the Accessories Storage Compartment, slide the drip tray all the way out of the unit.
- Remove the desired filter basket from the compartment and replace back into position.
- Slide drip tray back into position ensuring the drip tray and drip tray plate are securely in place.
Add Water
To fill the espresso machine with water, simply press the reservoir door at the top of the espresso machine, and fill with fresh cold water or filtered water or remove the reservoir by pulling it towards you and replace back into the unit until the reservoir is firmly in place.
natural_image
Close-up of a transparent plastic sheet with a small inset showing a mechanical component (no visible text or symbols)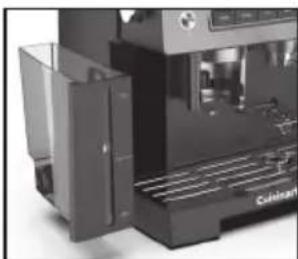
natural_image
Close-up of a modern industrial machine with visible cooling fins and control panel (no text or symbols)NOTE: The unit will not function unless the water reservoir is properly in place and has water in the reservoir.
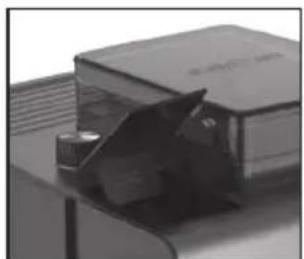
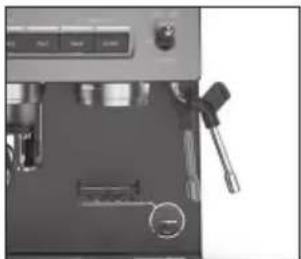
Setting up the Grinder
- Ensure the bean hopper is locked into position on the unit.
natural_image
Close-up of a transparent plastic tray with a lid and internal components, no visible text or symbols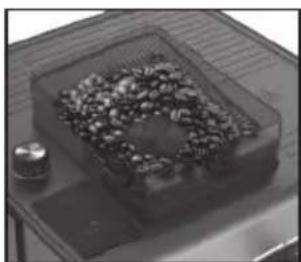
natural_image
Close-up of a transparent container with granular material inside, placed on a metal tray (no visible text or symbols)- Fill the bean hopper, and then replace the lid, making sure that the lid closes securely.
NOTE: Maximum capacity is 225g.; be sure you have enough beans to grind your desired amount of coffee.
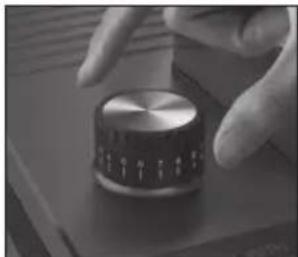
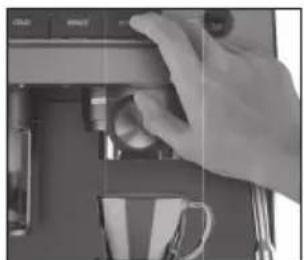
- To choose the grind size setting, rotate the Grind Size dial. The smaller the number, the finer the grind. We recommend you start at setting 8 and adjust as required.
natural_image
Close-up of a hand pressing a metallic knob on a dark surface (no visible text or symbols)NOTE: It is normal that the Grind Size dial and Grind Amount will need to be adjusted a few times to achieve the correct extraction rate. Start with the suggested settings, extract an espresso, then determine what adjustments need to be made.
NOTE: To make adjustments to the grind weight and grind time, press and hold the Single Grind or Double Grind button to program a customised amount based on preference. The machine will memorise this selection. See Default/Programmable Setting chart on page 11 for reference.
Run a Rinse Cycle
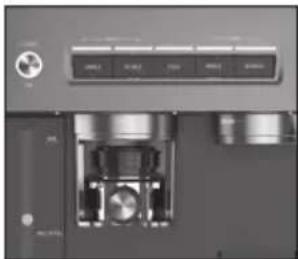
- Insert the plug into a power outlet. Press the power button once to turn the espresso machine on. The light around the power button is solid; this is to indicate that your espresso machine is on. The Dose buttons will breathe slowly to indicate that your espresso maker is heating up.
natural_image
Close-up of a mechanical device with control buttons and internal components (no visible text or symbols)NOTE: Before turning on the espresso machine, ensure that the Steam and Hot Water Control Switch is in the OFF position. If not, the Steam light or Hot Water light will flash until the switch is returned back to the Off position.
natural_image
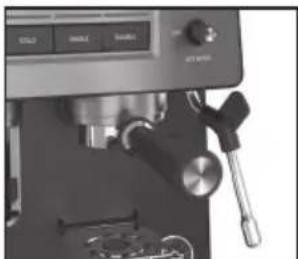
Close-up of a espresso machine with control panel and mechanical lever (no visible text or symbols)-
Make sure the drip tray and drip tray plate are in place.
-
Make sure water has been added to the water reservoir.
NOTE: If the water reservoir is empty, the unit will not function. The ADD WATER indicator will illuminate until the reservoir is filled.
- Fit the portafilter holder with either the Single or Double Shot Espresso Filter Baskets. Secure the portafilter handle to the brew head.
natural_image
Close-up of a espresso machine with a glass mug, spoon, and mechanical components (no visible text or symbols)-
Place a sufficiently large container under the bottomless portafilter.
-
Press the SINGLE DOSE button and allow the water to run through for approximately 20 to 25 seconds.
Programming Your Espresso Machine
The Cuisinart Espresso Bar™ Grind & Brew Espresso Machine has programming capabilities. Based on café settings, the Single and Double Dose Brew Start espresso functions are set at 30 and 60 ml. However, by following a few simple steps, you can program your perfect serving size down to the ml. See Default/Programmable Setting chart on page 11 for reference.
Programming Single Espresso
- Prepare the portafi liter holder with the Single Shot Espresso Filter basket and fi ll with fi nely ground espresso. Using the tamping tool, tamp the coff ee grinds. Secure the portafi liter holder to the brew head.
natural_image
Close-up of a metallic mechanical press or tap wrench with a black handle and two cup cups, one with an arrow indicating force (no text or symbols visible)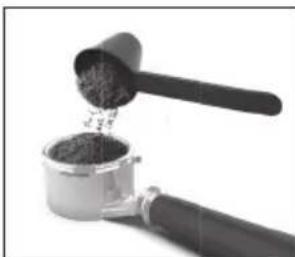
natural_image
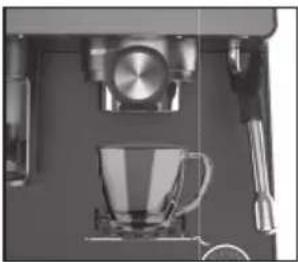
Close-up of a hand using a grater to extract dark granular material from a metal container (no text or symbols visible)- Place a cup under the bottomless portafi lter.
natural_image
Close-up of a coffee machine with a glass cup and mechanical lever (no visible text or symbols)- To begin programming, press and hold the single espresso button for 3 seconds, until the Single Dose light is breathing. The espresso machine will start the espresso pour.
-
Allow the espresso to pour until it reaches the desired level. Once that is reached, stop the espresso pour by releasing the single espresso button. A beep will signify that the new setting for the single espresso operation has been programmed and stored in the machine's memory.
-
The espresso machine will then return to normal operation mode and is ready to make another espresso at the push of a button.
Programming Double Espresso
-
Prepare the portafi liter holder with the Double Shot Espresso Filter basket and fill with finely ground coff ee. Using the tamping tool, tamp the coff ee grinds. Secure the portafi liter holder to the brew head.
-
Place a cup under the bottomless portafi liter.
-
To begin programming, press and hold the double espresso button for 3 seconds, until the Double Dose light is breathing. The espresso machine will start the espresso pour.
natural_image
Close-up of a hand pressing down on a laptop keyboard (no visible text or symbols)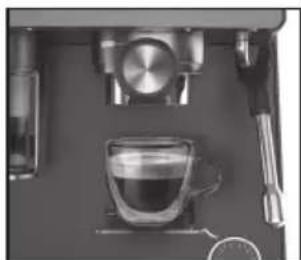
natural_image
Top-down view of a coffee machine setup with a glass cup and metal stand (no visible text or symbols)- Allow the espresso to pour until it reaches the desired level. Once that level is reached, stop the espresso pour by releasing the double espresso button. A beep will signify that the new setting for
the double espresso operation has been programmed and stored into the machine's memory.
- The espresso machine will then return to normal operation mode and is ready to make another espresso at the push of a button.
Resetting the Factory Settings
To revert to the original factory settings:
-
Press and hold down the POWER button and COLD button for approximately 3 seconds or 1 beep sound. The POWER light, GRIND light, COLD light, and DOSE light will flash 1 time.
-
The espresso machine has now returned to the original factory settings. The default programming for each function will be used for the next brew. See chart below for default settings by function for reference.
Defaults for each function are as follows:.
| Default Program Settings | Amount | Programmable Range | |
| Brew Volume | Single 30ml | 30-75ml | |
| Double 60ml | 50 - 115ml |
- The espresso machine will then return to normal operation mode and is ready to make another espresso at the push of a button.
Guide to the Perfect Espresso
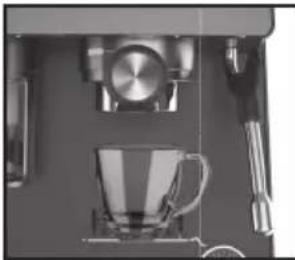
-
Placing cups on the warming plate before brewing will help preserve the crema of the espresso. Remove cups when ready to brew.
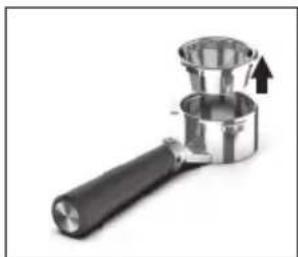
-
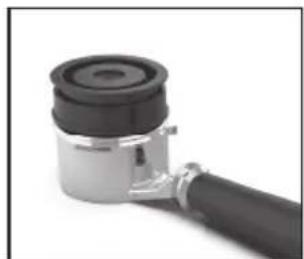
Select the appropriate fi lter basket and insert it into portafi lter.
TIP: Use the Single Shot fi lterbasket for a single espresso, and the Double Shot fi lter basket for a double espresso.
natural_image
Close-up of a hand mixer with granular powder being poured into a container (no text or symbols visible)- Place the Dosing Guide accessory onto the portafi lter.
natural_image
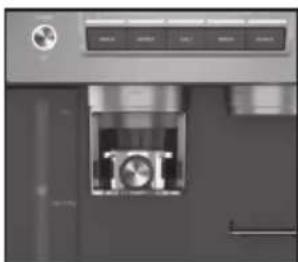
Close-up of a black cylindrical mechanical component with a black end cap and metallic shaft (no text or symbols visible)- Insert the portafi lter (with the dosing guide) into the grinding cradle until it is in the lock position.
natural_image
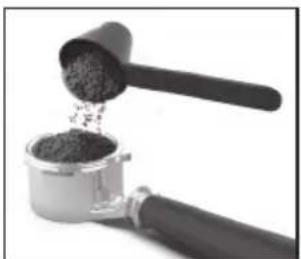
Close-up of a metallic appliance with a circular button and internal mechanism (no visible text or symbols)- Press the SINGLE or DOUBLE Grind Start Button to begin automatically grinding.
- The unit will continue to grind until the pre-programmed amount of coffee is dispensed into the portafil ter.
NOTE: To cancel grinding, press the selected grind start button once.
NOTE: Use the Manual Grind function to customise the amount ground desired. To begin, press and hold the SINGLE or DOUBLE Grind Start Buttons until the desired amount has been dispensed.
natural_image
Close-up of a mechanical device with a metallic knob and control knob (no visible text or symbols)-
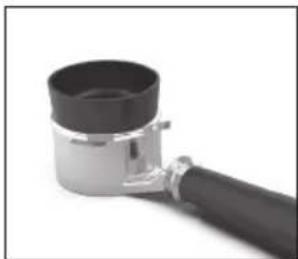
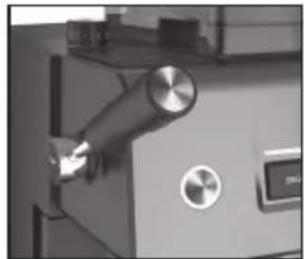
Once grinding has stopped, remove the portafi lter from the grinding cradle and remove the Dosing Guide accessory.
-
Place the Tamper Puck onto the portafi lter, make sure the fl at metal side is faceup and turn once.
natural_image
Close-up of a mechanical component with a cylindrical housing and black handle (no visible text or symbols)-
Return the portafi lter with the Tamper Puck in place, make sure the fl at metal side is facedown, back into the grinding cradle. The espresso is ready to tamp.
-
Pull lever downwards to apply pressure and release slowly.
-
Remove the portafi lter from the grinding cradle and remove the Tamper Puck.
IMPORTANT: Be sure not to overfi ll the fi lter basket with coff ee as this can cause the portafi lter holder to overfl ow.
Single Dose: recommended 9-11g (min. 6g) Double Dose: recommended 17-19g (min. 12g)
NOTE: Check to see that the espresso machine is ready for use. Remember that if the power light is solid and the Cold, Single & Double LEDs are solid, the espresso machine is on and is heating up and ready to brew coffee.
-
Brush any excess coff ee grounds from around the edge of the fi lter basket.
-
Secure the portafi lter holder to the brew head.
-
Place a cup under the portafi lter.
-
Press the Single or Double Dose Brew Start button to begin brewing.
NOTE: When using manual operation, you must press the button once to start the pour and again to stop the pour.
- Check the espresso pour. The ideal pour is dark and caramel with reddish reflections.
natural_image
Close-up of a kitchen stainless steel counter with control panel and mechanical components (no visible text or symbols)-
Serve espresso immediately.
-
Remove the portafil ter handle from the brew head.
-
Discard the used coff ee grounds.
Cold Extraction
Cold extraction pulls a heatless shot that uses ambient temperature water to extract the full fl avour of the coff ee. Convenient for on-the-go lattes or cold coff ee drinks.
-
Follow steps 3-7 under Guide to the Perfect Espresso above on page 12.
-
Press Cold button then the Single and Double will fl ash until desired size is chosen.
NOTE: Cold Single Brew is 100ml and Double Brew is 140ml.
- For on the go drinks, remove the drip tray and place your travel mug under brew head instead of the a cup.
Sleep Mode
After 30 minutes of nonuse, the espresso machine will automatically power off.
Guide to Milk Texturing
Milk texturing is the steaming of milk. The steam does two things: It heats the milk and mixes air with the milk to form a foamy texture. As with learning to make an espresso, perfecting the art of milk texturing takes time and practice.
- Determine how much milk is needed based on the number of cups being made.
TIP: Keep in mind that the volume of milk will increase during the texturing.
-
Pour cold refrigerated milk into the stainless frothing pitcher, approximately half full, but not over the MAX mark.
-
Move the Steam/Hot Water switch up to Steam position. The Steam light will be breathing.
-
Purge the steam wand of any water with the steam wand positioned over the drip tray.
-
When the Steam light becomes solid, the steam function is activated. Once any water has been purged, stop the steam by turning the Steam/Hot Water switch to the OFF position.
-
Swing the steam wand to the side of the espresso machine.
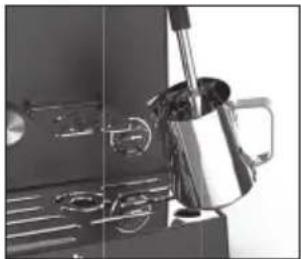
natural_image
Close-up of a kitchen utensil with a glass pitcher and metal tray (no visible text or symbols)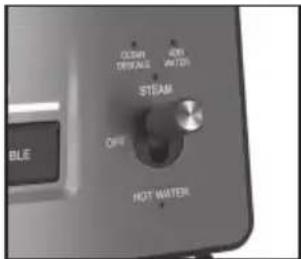

natural_image
Close-up of a mechanical device with a tool and control panel (no visible text or symbols)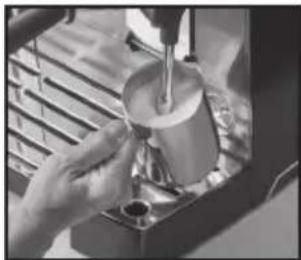
natural_image
Close-up of hands using a pour-over cup on a machine (no visible text or symbols)-
Place the steam wand into the milk so that the nozzle is about a half-inch below the surface and activate the steam function by turning the Steam/Hot Water control switch to the Steam position.
-
Angle the pitcher so that the steam wand is resting on the spout of the pitcher, and lower the pitcher until the tip of the steam nozzle is just below the surface of the milk. This will start to create a whirlpool action in the milk.
NOTE: Do not allow the steam to spurt unevenly or it will create aerated froth/large bubbles. If this is happening, raise the pitcher so that the steam nozzle is lowered farther into the milk.
-
As the steam heats and textures the milk, the level of the milk in the pitcher will begin to rise. As this happens, follow the level of the milk by lowering the pitcher, always keeping the tip of the steam nozzle just below the surface.
-
Once the foam is created, raise the pitcher until the steam nozzle is in the center of the milk.
TIP: The amount of foam required will vary depending on the drinks being made. For example, a cappuccino requires more foam than a latte.
- Stop the steam immediately by moving the Steam/Hot Water control switch to the OFF position.
IMPORTANT: Do not boil the milk.
- Remove the pitcher, immediately wipe the steam nozzle and wand with a clean damp cloth, and purge a small amount of steam.
natural_image
Hand cleaning a small electronic device with a cloth (no visible text or symbols)Using the Hot Water Function
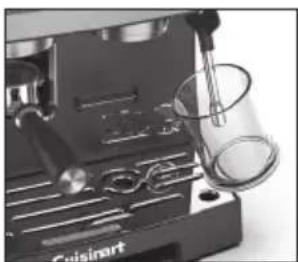
- Place the cup or container under the steam/ hot water wand and activate the hot water function by moving the Steam/Hot Water control switch to the Hot Water position.
natural_image
Close-up of a hand mixer machine with a glass beaker and control panel (no visible text or symbols)-
Once you have dispensed the required amount of hot water into the cup or container, stop the hot water by switching the Steam/Hot Water control switch to the OFF position. The Hot Water feature will be stopped after 1 minute.
-
Remove the cup or container and swing the Steam/Hot Water wand over the drip tray to catch any drips of water.
Cleaning and Maintenance
Always turn the espresso maker off and remove the plug from the electrical outlet before cleaning.
Never immerse unit in water or other liquid. To clean, simply wipe with a clean damp cloth and dry before storing.
Cleaning the Filters, Portafilter Holder, and Brew Head
- The stainless steel fi lters and portafi lter holder should be rinsed under water immediately after use to remove all coff ee particles. You may also use the gray cleaning pin (smaller pin) to clear the opening.
- Periodically run water through the machine with the portafil ter holder in place, but without any ground coff ee, to rinse out any lingering coff ee particles.
- The inside of the brew head should be wiped with a damp cloth to remove any coffee particles.
- it is recommended to regularly wash your portafi liters on the top rack of a dishwasher to prevent oil build up between the fi lter layers.
Cleaning the Outer Housing/Cup Warming Plate
- The outer housing and cup warming plate can be cleaned with a soft, damp cloth. Do not use any scouring agents or harsh cleaners.
natural_image
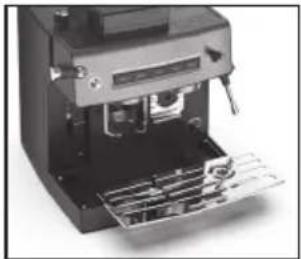
Close-up of a mechanical device with internal components and a metal grate (no visible text or symbols)Cleaning the Drip Tray Plate
- The drip tray plate should be removed, emptied, and cleaned frequently, particularly when the drip tray is full.
- The drip tray plate can be washed in warm soapy water and rinsed thoroughly. Use a non-abrasive washing liquid (do not use abrasive cleaners, pads or cloths, which can scratch the surface).
Cleaning the Drip Tray
- The drip tray can be removed after the drip tray plate is removed and then cleaned with a soft, damp cloth (do not use any scouring agents or harsh cleaners).
NOTE: Do not clean any parts or accessories in the dishwasher.
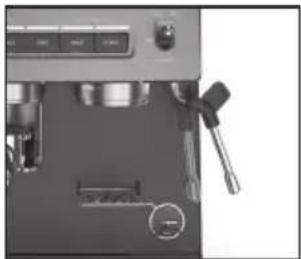
Cleaning the Steam Wand
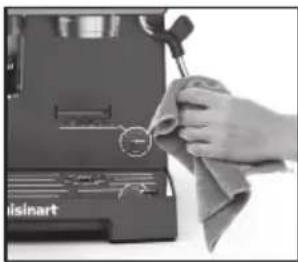
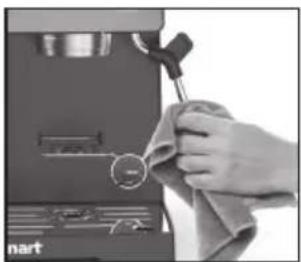
- The steam wand should always be cleaned after steaming milk.
- Wipe the steam wand with a damp cloth, then swing the steam wand back into the drip tray. Momentarily switch the Steam/Hot Water control switch to the hot water position. This will release any remaining milk from inside the steam wand.
natural_image
Close-up of a hand using a tool to press or install electronic components (no visible text or symbols)- Make sure the Steam/Hot Water control switch is in the OFF position. Press the power button off, unplug the power cord, and allow the machine to cool.
natural_image
Close-up of a hand holding a small tool next to a dark mechanical device with no visible text or symbols.- If the steam wand remains blocked, use the Steam Wand Cleaning Pin to clear the opening.
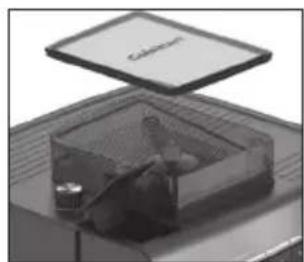
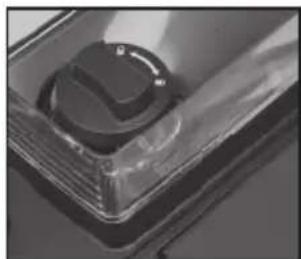
Cleaning the Hopper
- Be sure the unit is off and unplugged.
- Beans can be removed from the hopper by lifting off the lid and rotating the knob to the unlock position. Once unlocked, the hopper can be removed to pour out remaining beans.
natural_image
Close-up of a transparent plastic component with a glossy surface (no visible text or symbols)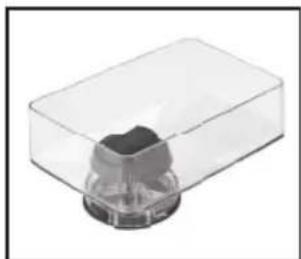
natural_image
Transparent plastic container with a small dark object inside (no text or symbols visible)Cleaning the Burr Grinder
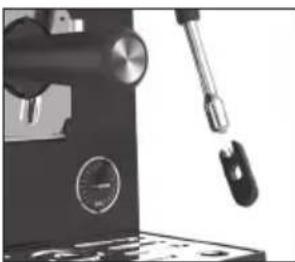
- If some beans remain in the grinder, put the hopper back on, reinsert the grind chamber, and run a grind cycle on any grind setting until all beans are ground. Once finished, you can continue cleaning as instructed.
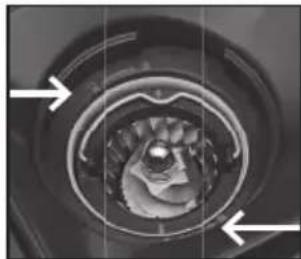
- Remove the bean hopper lid and turn the lock/unlock knob counterclockwise to release the bean hopper.
natural_image
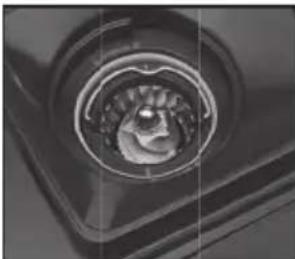
Close-up of a mechanical component with a central circular feature (no visible text or symbols)NOTE: You will notice the release arrow and arrow on the burr on the inside of unit are now aligned. They must be aligned in order to reinsert the hopper.
• After the bean hopper has been removed, remove the burr grinder by grasping the metal handle and lifting up. Use the burr cleaning brush to remove grounds or wash by hand. Replace the burr grinder on the unit and rotate until the piece is fully inserted. Push handle down, replace, and lock hopper.
NOTE: The hopper will not attach to the unit if the grinder has not been fully inserted.
natural_image
Close-up of a mechanical component with concentric rings and central cavity, no visible text or symbols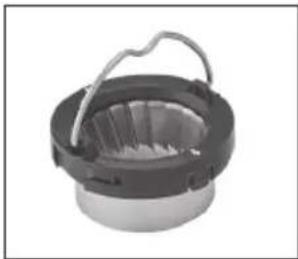
natural_image
Close-up of a mechanical component with a circular housing and handle (no visible text or symbols)- Wipe body of grinder with a damp cloth.
NOTE: The bean hopper and bean hopper lid can be washed by hand with hot, soapy water. Dry thoroughly.
Decalcification
Decalcifi cation refers to the removal of calcium deposits that form over time on the metal parts of the coff eemaker.
For best performance from your espresso maker, decalcify the unit from time to time.
The frequency depends on the hardness of your tap water and how often you use the coff eemaker.
The machine will remind to clean by switching on the DESCALE light on.
To run a Clean/Descale cycle, follow the instructions below.
- Place 2 large 1.5L (50 oz.) containers under the brew head and steam wand.
- Fill the water reservoir to capacity with a mixture of one-third white vinegar and two-thirds water or with the mixture of 1 descale tablet and water at max level.
- Press and hold COLD & SINGLE button for 3 seconds, then the CLEAN DESCALE led will fl ash.
- Move the Steam/Hot Water switch down to the Hot Water position. The CLEAN DESCALE light will be breathe. The cleaning program has started.
- Descaling: Hot water will flow from the steam wand, then switch to the brew head automatically. When water tank is empty, the CLEAN DESCALE light will flow ash and ADD WATER light will go on. Fill the water tank with water to max level. Empty the drip tray and 2 large containers and replace them in the unit. Move the Steam/Hot Water switch up to the Steam position and the CLEAN DESCALE light will be on.
- Cleaning: Hot water will flow from the brew head, then switch to the steam wand automatically. When water tank is empty, the CLEAN DESCALE light will turn off. The ADD WATER light will go on, STEAM light will be fl ashing, and the Descale is finished.
Maintenance: Any other servicing should be performed by an authorised service representative.
natural_image
Black rectangular electronic device with two metallic circular cavities and a spiral groove (no visible text or symbols)
natural_image
Close-up of hands holding a black plastic device with three circular holes (no text or symbols visible)
natural_image
Close-up of a mechanical device with a transparent lid and internal components (no visible text or symbols)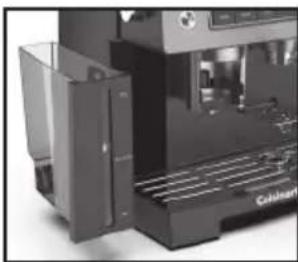
natural_image
Close-up of a modern industrial machine with visible cooling fins and a labeled component (no readable text or symbols)natural_image
Close-up of a mechanical component with a lid and internal structure (no visible text or symbols)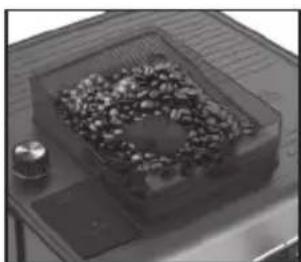
natural_image
Close-up of a small container filled with granular material, placed on a metal tray (no visible text or symbols)natural_image
Close-up of a hand holding a metallic cylindrical device with control knob (no visible text or symbols)natural_image
Close-up of a mechanical device with control buttons and a central component (no visible text or symbols)natural_image
Close-up of a coffee machine with a lever and control panel (no visible text or symbols)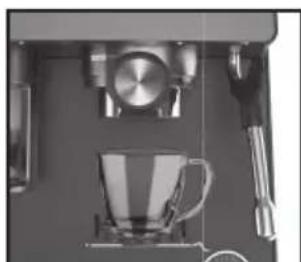
natural_image
Close-up of a coffee machine setup with a cup, stand, and kitchen utensils (no visible text or symbols)natural_image
Close-up of a metallic mechanical clamp or connector with a black handle and two cups, no visible text or symbols.
natural_image
Close-up of a hand using a metal grater to extract dark granular material from a container (no text or symbols visible)natural_image
Close-up of a coffee machine setup with a glass mug and stand (no visible text or symbols)natural_image
Close-up of a hand pressing down on a mechanical device with a cup and tray (no visible text or symbols)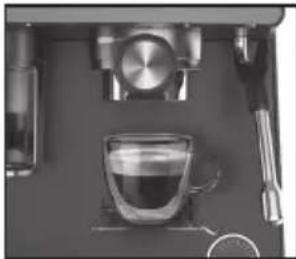
natural_image
Close-up of a coffee machine setup with a glass cup, saucers, and a stand (no visible text or symbols)natural_image
Close-up of a hand using a mallet to extract dark granular substance from a metal container (no text or symbols visible)natural_image
Close-up of a black mechanical component with a cylindrical top and handle (no visible text or symbols)natural_image
Close-up of a mechanical device with a transparent internal component and control buttons (no visible text or symbols)natural_image
Close-up of a mechanical device with a metallic knob and control panel (no visible text or symbols)natural_image
Close-up of a mechanical component with a cylindrical housing and black end caps (no visible text or symbols)natural_image
Close-up of a mechanical device with control panel and two metallic components (no visible text or symbols)After 30 minutes of nonuse, the espresso machine will automatically power off.
natural_image
Close-up of a stainless steel coffee maker with a glass pitcher, no visible text or symbols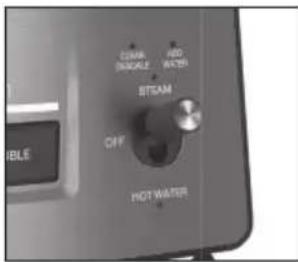
natural_image
Close-up of a mechanical device with a tool and control panel (no visible text or symbols)
natural_image
Close-up of hands using a pour-over machine to dispense liquid into a glass (no visible text or symbols)natural_image
Hand cleaning a small electronic device with a cloth (no visible text or symbols)natural_image
Close-up of a Cuisinart coffee maker with a glass beaker pouring liquid from a glass (no visible text or symbols)natural_image
Close-up of a mechanical device with internal components and a grating base (no visible text or symbols)natural_image
Close-up of a hand using a tool to clean or adjust a machine component (no visible text or symbols)natural_image
Close-up of a mechanical device with a tool and gauges (no visible text or symbols)natural_image
Close-up of a transparent plastic tray with a glossy circular button (no text or symbols visible)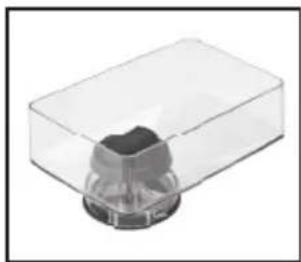
natural_image
Transparent plastic container with a small dark object inside, no visible text or symbolsnatural_image
Close-up of a mechanical component with a circular head and central hub (no visible text or symbols)natural_image
Close-up of a mechanical component with concentric rings and arrows indicating features (no visible text or symbols)
natural_image
Close-up of a mechanical component with a circular base and handle (no visible text or symbols)natural_image
Black rectangular electronic device with two circular cavities and a textured base (no visible text or symbols)
natural_image
Hand holding a black cylindrical device with three circular cutouts, no visible text or symbols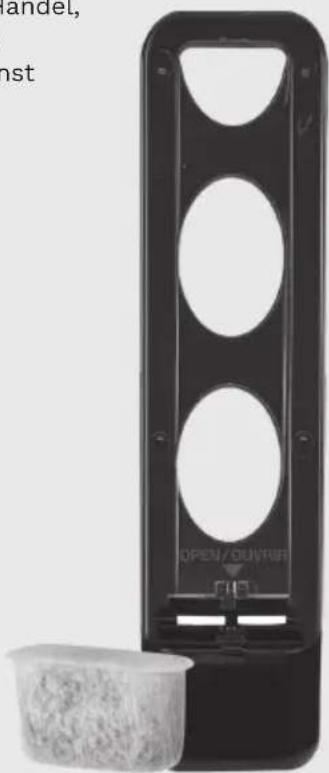
natural_image
Black rectangular device with circular cutouts and a small plastic cup beside it (no visible text or symbols)natural_image
Close-up of a mechanical component with a transparent lid and internal cutaway view (no visible text or symbols)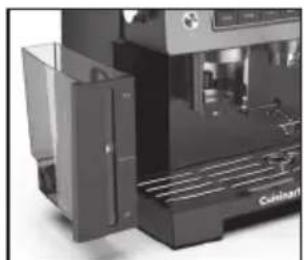
natural_image
Close-up of a modern industrial machine with visible cooling fins and control panel (no text or symbols)natural_image
Close-up of a transparent container with a lid and internal object, no visible text or symbols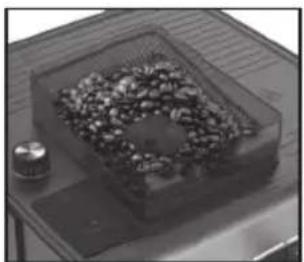
natural_image
Black-and-white photo of a tray with a container filled with granular material, no visible text or symbolsnatural_image
Close-up of a hand pressing a metallic knob on a dark surface (no visible text or symbols)natural_image
Close-up of a mechanical device with control buttons and a central mechanical component (no visible text or symbols)natural_image
Close-up of a coffee machine with a glass mug and side table (no visible text or symbols)natural_image
Close-up of a metallic mechanical device with a handle and two cups, one showing an upward arrow (no text or symbols visible)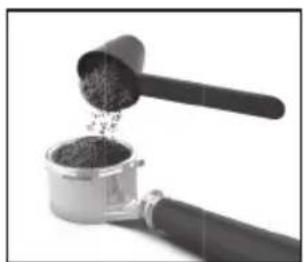
natural_image
Close-up of a hand mixer with a wooden handle pouring granular material into a container (no text or symbols visible)natural_image
Close-up of a coffee machine with a glass mug and metal stand (no visible text or symbols)natural_image
Close-up of a hand using a coffee machine to press or adjust a cup (no visible text or symbols)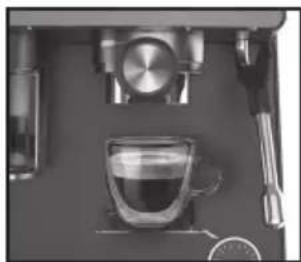
natural_image
Top-down view of a coffee machine setup with glass cup, stand, and side table (no visible text or symbols)natural_image
Close-up of a hand using a small container with dark granular powder being poured into it (no text or symbols visible)natural_image
Close-up of a mechanical clamp or connector with a black cylindrical component and metallic shaft (no visible text or symbols)natural_image
Close-up of a metallic mechanical device with control panel and internal component (no visible text or symbols)natural_image
Close-up of a mechanical device with a metallic knob and control knob (no visible text or symbols)natural_image
Close-up of a mechanical component with a cylindrical housing and black handle (no visible text or symbols)natural_image
Close-up of a mechanical device with control panel and mechanical components (no visible text or symbols)natural_image
Close-up of a kitchen setup with a metal pitcher and circular fixtures (no visible text or symbols)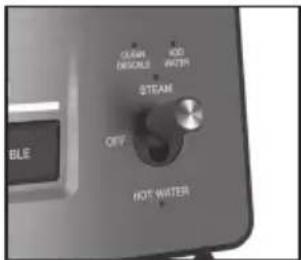
natural_image
Close-up of a coffee machine with a hand tool and control panel (no visible text or symbols)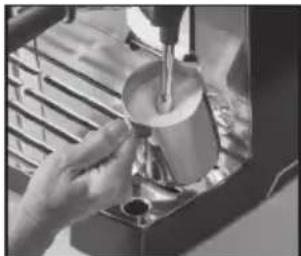
natural_image
Person pouring liquid into a cup using a lathe machine (no visible text or symbols)natural_image
Hand cleaning a small electronic device with a cloth (no visible text or symbols)natural_image
Close-up of a coffee maker's grater with a glass beaker and metal stand (no visible text or symbols)natural_image
Close-up of a mechanical device with internal components and a metal grate (no visible text or symbols)natural_image
Close-up of a hand using a tool to clean or adjust a machine component (no visible text or symbols)natural_image
Close-up of a mechanical device with a lever and gauges (no visible text or symbols)natural_image
Close-up of a transparent plastic component with a circular button (no visible text or symbols)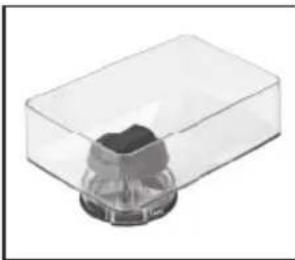
natural_image
3D rendering of a transparent plastic container with a small black cap on top (no text or symbols visible)natural_image
Close-up of a mechanical component with a central circular feature (no visible text or symbols)natural_image
Cross-sectional view of a mechanical component with concentric rings and central cavity, marked by white arrows (no text or symbols)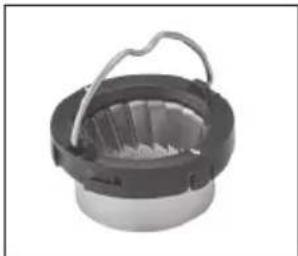
natural_image
Close-up of a mechanical component with a handle and internal structure (no visible text or symbols)natural_image
Black rectangular electronic device with two metallic circular cavities and a spiral groove (no visible text or symbols)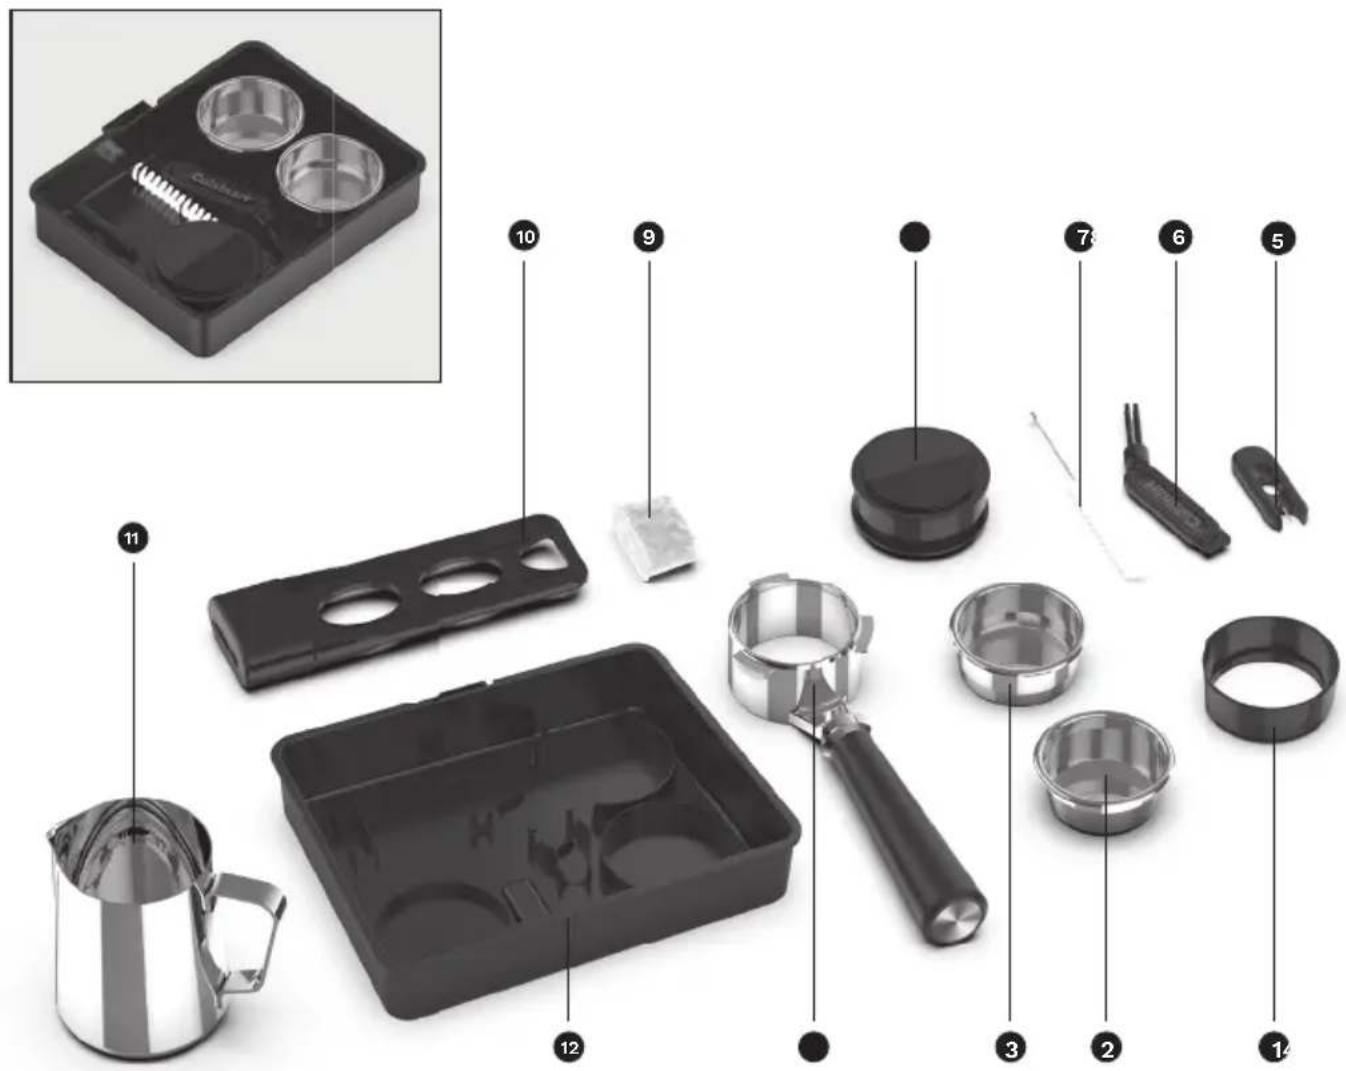
natural_image
Close-up of hands holding a black plastic device with three circular cutouts and a small white component (no text or symbols visible)natural_image
Black rectangular device with three circular cutouts and a label reading 'OPEN OUVIR' (no other text or symbols visible)natural_image
Close-up of a mechanical device with transparent casing and internal components (no visible text or symbols)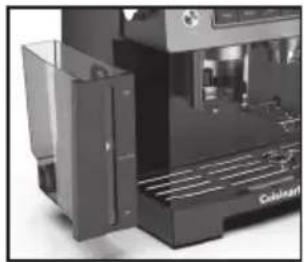
natural_image
Close-up of a Coldcat machine with visible cooling fins and control panel (no text or symbols)natural_image
Close-up of a transparent plastic tray with a lid and internal mechanical component (no visible text or symbols)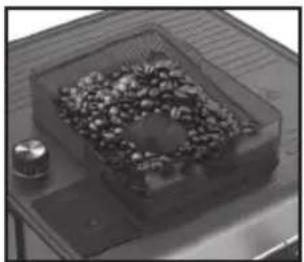
natural_image
Top-down view of a transparent container filled with granular material, placed on a tray with a small cylindrical object nearby (no visible text or symbols)natural_image
Close-up of a hand pressing down on a metallic rotary dial (no visible text or symbols)natural_image
Close-up of a mechanical device with control panel and internal components (no visible text or symbols)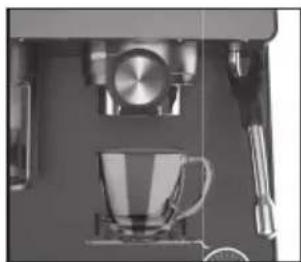
natural_image
Close-up of a coffee machine setup with a cup, stand, and utensils (no visible text or symbols)natural_image
Close-up of a metallic mechanical press or tap wrench with a black handle and two cups, one with an arrow pointing to the cup (no text or symbols visible)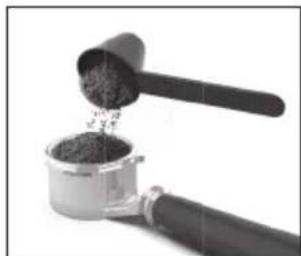
natural_image
Close-up of a hand using a small container with granular powder being poured into it (no text or symbols visible)natural_image
Close-up of a coffee machine setup with a cup and stand (no visible text or symbols)natural_image
Close-up of a hand pressing down on a mechanical device with a cup and tools (no visible text or symbols)
natural_image
Top-down view of a coffee machine with glass cup and side table (no visible text or symbols)natural_image
Close-up of a hand pouring dark granular substance from a small container into a metal tool (no text or symbols visible)natural_image
Close-up of a metallic mechanical component with a black cylindrical top and wooden handle (no text or symbols visible)natural_image
Close-up of a modern kitchen appliance with a glass door and control panel (no visible text or symbols)natural_image
Close-up of a mechanical device with a metallic knob and circular button (no visible text or symbols)natural_image
Close-up of a mechanical component with a cylindrical housing and black handle (no visible text or symbols)natural_image
Close-up of a mechanical device with control panel and mechanical components (no visible text or symbols)natural_image
Close-up of a kitchen utensil with a metal pitcher and tray (no visible text or symbols)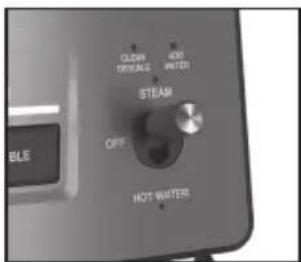
natural_image
Close-up of a coffee machine with control panel and mechanical lever (no visible text or symbols)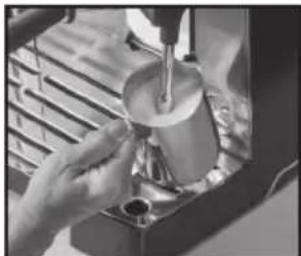
natural_image
Person pouring liquid from a glass cup into a container (no visible text or symbols)natural_image
Hand holding a tool in a suit jacket, no visible text or symbols on the device or backgroundnatural_image
Close-up of a espresso machine with a glass beaker and a hand mixer (no visible text or symbols)natural_image
Interior view of a mechanical device with a rack and internal components (no visible text or symbols)natural_image
Close-up of a hand using a tool to clean or adjust a machine component (no visible text or symbols)natural_image
Close-up of a coffee machine with a spoon and stand, no visible text or symbolsnatural_image
Close-up of a transparent plastic tray with a glossy, curved object on top (no visible text or symbols)
natural_image
Transparent plastic container with a small black object at the bottom (no text or symbols visible)natural_image
Close-up of a mechanical component with a central circular feature (no visible text or symbols)natural_image
Close-up of a mechanical component with concentric rings and arrows indicating features (no visible text or symbols)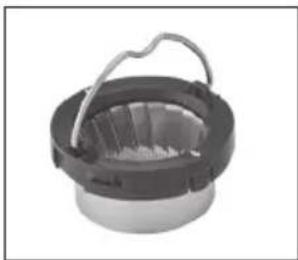
natural_image
Close-up of a mechanical component with a handle and internal structure (no visible text or symbols)natural_image
Black rectangular electronic device with two metallic circular cavities and a coiled spring (no visible text or symbols)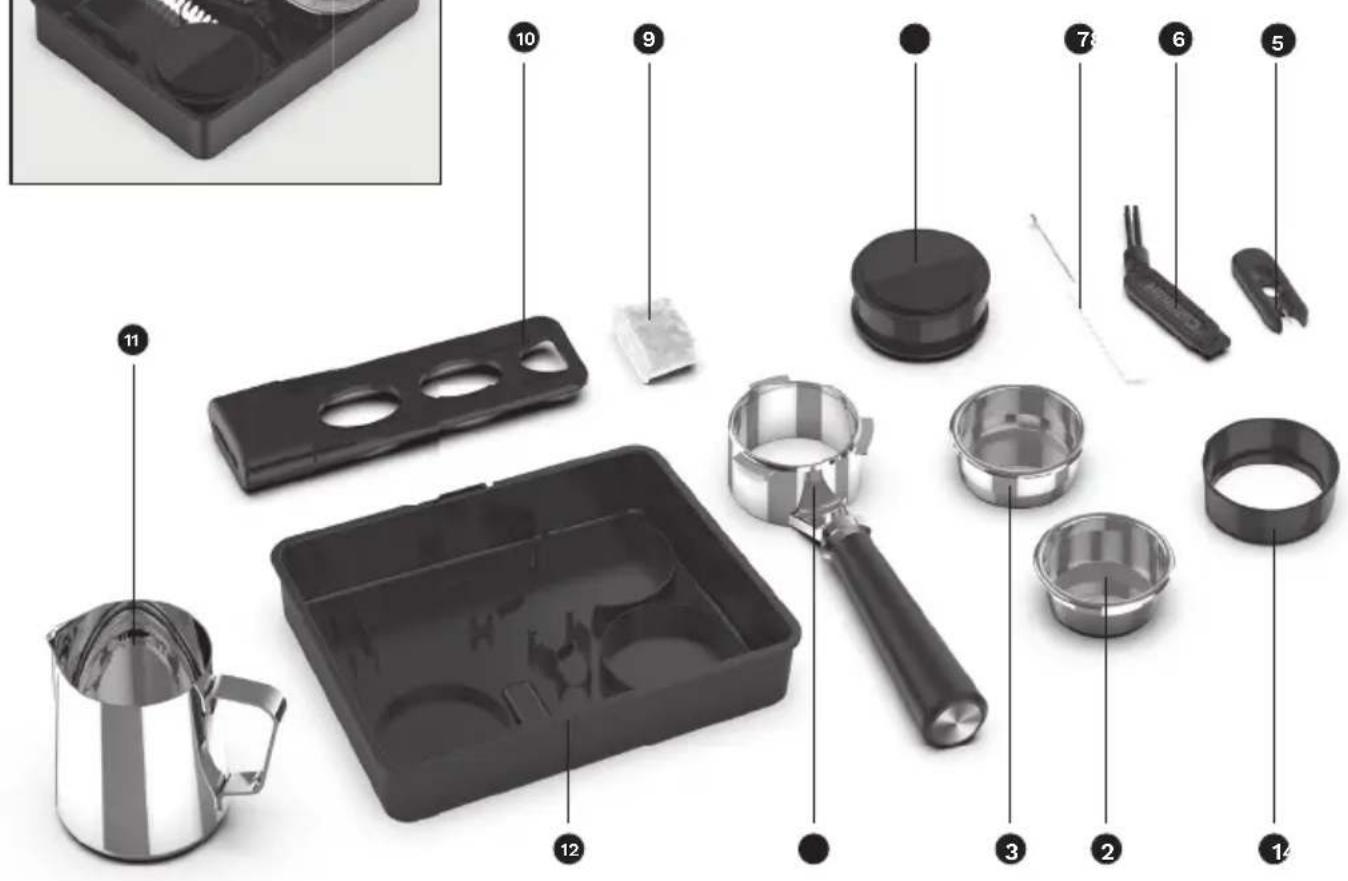
natural_image
Close-up of hands holding a black plastic device with three circular cutouts (no text or symbols visible)natural_image
Close-up of a transparent plastic electronic device with a small cylindrical component (no visible text or symbols)
natural_image
Close-up of a modern industrial machine with visible cooling fins and a labeled 'Cableon' component (no readable text beyond label)natural_image
Close-up of a transparent container with a lid and internal object, no visible text or symbols
natural_image
Top-down view of a small container filled with granular material, placed on a wooden tray with a small cylindrical object nearby (no visible text or symbols)natural_image
Close-up of a hand adjusting a metallic cylindrical knob on a dark surface (no visible text or symbols)natural_image
Close-up of a mechanical device with control panel and internal components (no visible text or symbols)natural_image
Close-up of a coffee machine setup with a glass mug, saucer, and stand (no visible text or symbols)natural_image
Close-up of a metallic mechanical tap wrench with a black handle and two cups, no text or symbols visible.
natural_image
Close-up of a hand using a small container with a wooden scoop, pouring granular material (no text or symbols visible)natural_image
Close-up of a coffee machine with a cup and side table, no visible text or symbolsnatural_image
Close-up of a hand pressing a small mechanical component with a cup on the side (no visible text or symbols)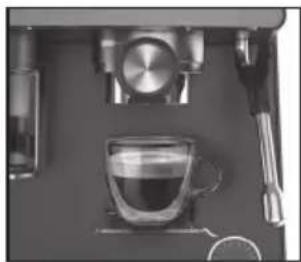
natural_image
Close-up of a coffee machine setup with a glass cup and metal stand (no visible text or symbols)natural_image
Close-up of a hand pouring dark granular substance into a metal container (no text or symbols visible)natural_image
Close-up of a mechanical pipe fitting with a black cylindrical component and metallic housing (no text or symbols visible)natural_image
Close-up of a modern kitchen appliance with a glass door and control panel (no visible text or symbols)natural_image
Close-up of a mechanical device with a metallic knob and circular ports (no visible text or symbols)natural_image
Close-up of a mechanical component with a cylindrical housing and connecting rod (no visible text or symbols)natural_image
Close-up of a mechanical device with control panel and cylindrical components (no visible text or symbols)natural_image
Close-up of a stainless steel coffee maker pouring liquid into a container (no visible text or symbols)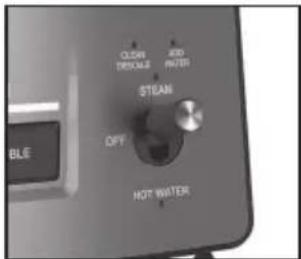
natural_image
Close-up of a coffee machine with a handle and control panel (no visible text or symbols)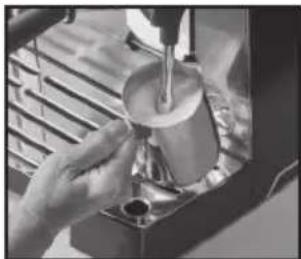
natural_image
Person pouring liquid from a glass cup into a container (no visible text or symbols)natural_image
Hand holding a tool over a cloth, with no visible text or symbols on the object itself.natural_image
Close-up of a coffee maker using a glass over a tray, no visible text or symbolsnatural_image
Close-up of a mechanical device with internal components and a metal rack (no visible text or symbols)natural_image
Close-up of a hand using a tool to clean or wash the product from a machine (no visible text or symbols)natural_image
Close-up of a hand using a screwdriver to lift a small mechanical component (no visible text or symbols)natural_image
Close-up of a transparent plastic component with a circular button (no visible text or symbols)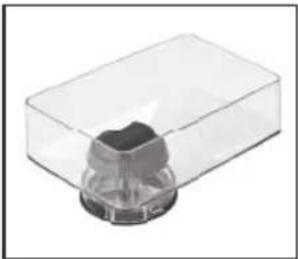
natural_image
3D rendering of a transparent plastic container with a small cylindrical object inside (no text or symbols visible)natural_image
Close-up of a mechanical component with a circular head and central bore (no visible text or symbols)natural_image
Close-up of a circular mechanical component with concentric rings and central hub, marked by white arrows (no text or symbols)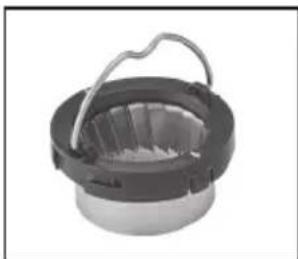
natural_image
Close-up of a mechanical component with a handle and internal structure (no visible text or symbols)11. Steam- of Hot Water-schakelaar
12.Bedieningspaneel
7. Steam- of Hot Water-schakelaar
natural_image
Black rectangular electronic device with two metallic circular cavities and a spiral groove (no visible text or symbols)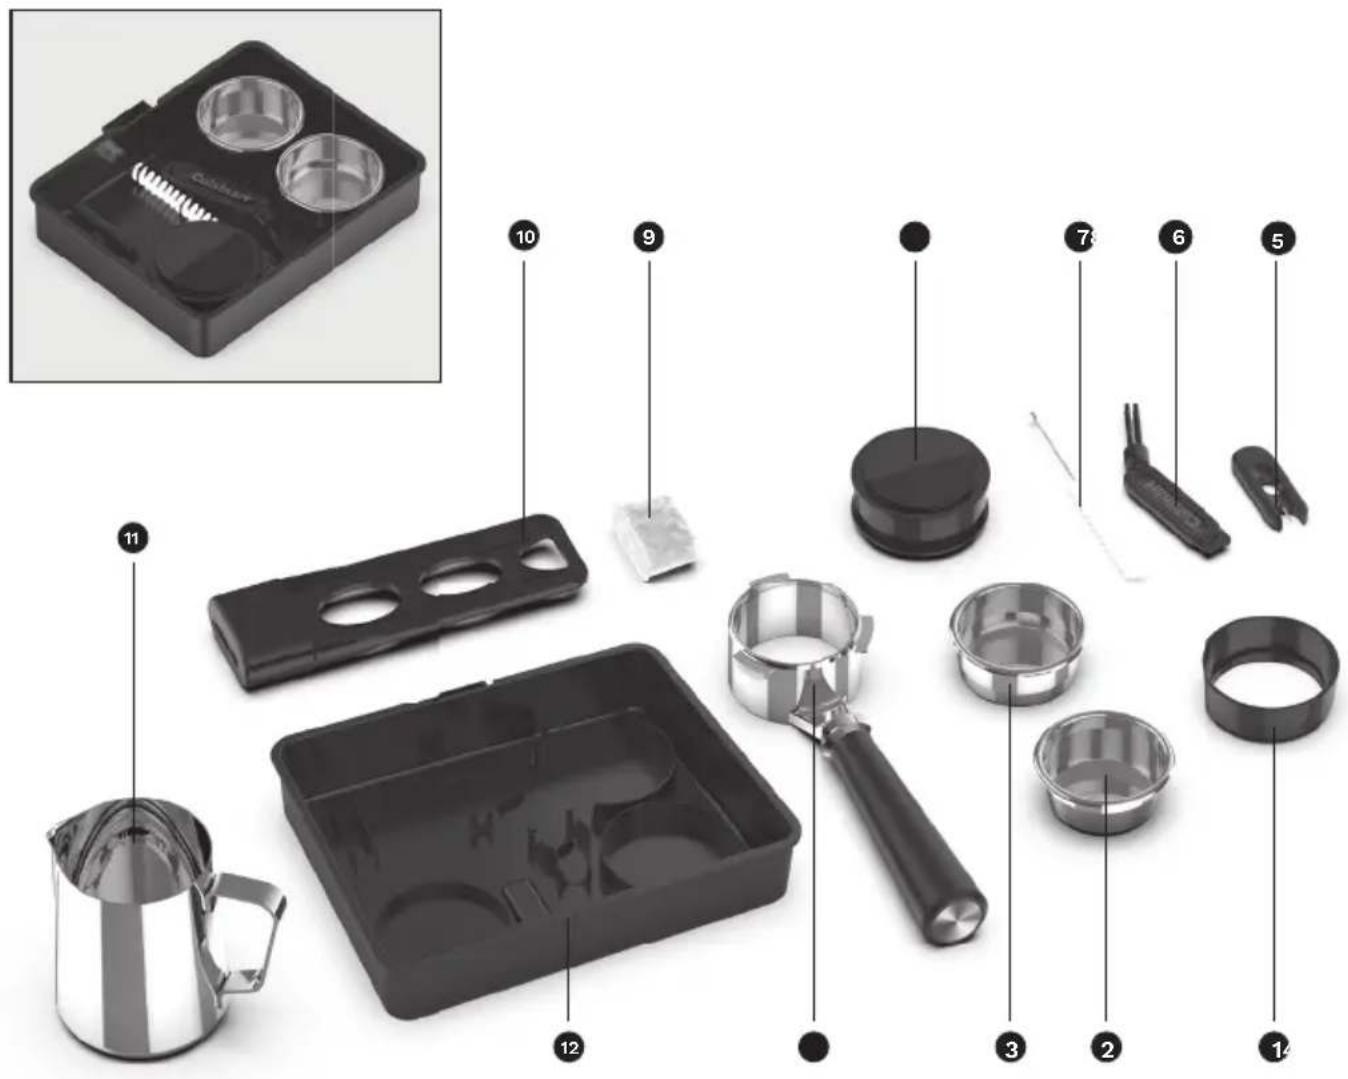
Actieve-koolfilter
natural_image
Close-up of hands holding a black plastic device with three circular cutouts (no text or symbols visible)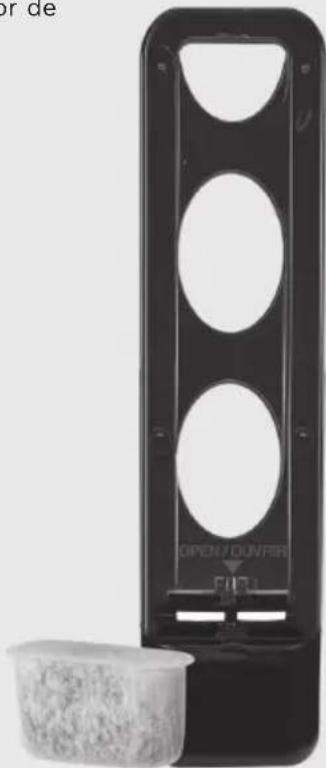
natural_image
Black rectangular device with circular cutouts and a small container of granular material (no visible text or symbols)Uw espressomachine klaarmaken
natural_image
Close-up of a transparent mechanical component with a small cylindrical part inserted, no visible text or symbols.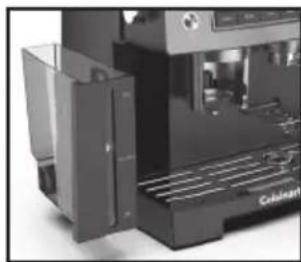
natural_image
Close-up of a modern industrial machine with visible cooling fins and control panel (no text or symbols)natural_image
Close-up of a mechanical component with a lid and internal fan-like structure (no visible text or symbols)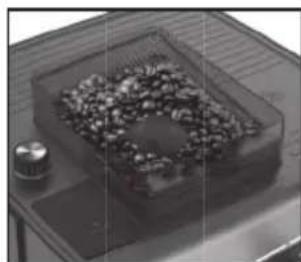
natural_image
Close-up of a small metallic object on a tray with a dark, textured substance inside, no visible text or symbols.natural_image
Close-up of a hand pressing a metallic knob on a dark surface (no visible text or symbols)natural_image
Close-up of a mechanical device with control panel and internal components (no visible text or symbols)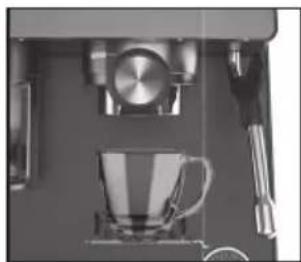
natural_image
Close-up of a coffee machine setup with a glass mug, saucer, and utensils (no visible text or symbols)natural_image
Close-up of a metallic mechanical tap wrench with a black handle and two cup holders (no text or symbols visible)
natural_image
Close-up of a hand using a grater to extract dark granular substance from a metal container (no text or symbols visible)natural_image
Close-up of a coffee maker with a cup and stand mixer (no visible text or symbols)natural_image
Close-up of a hand pressing down on a mechanical device with a circular component and a cup (no visible text or symbols)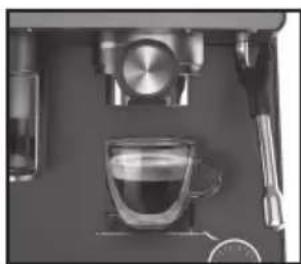
natural_image
Close-up of a coffee machine setup with glass mug, saucer, and stand (no visible text or symbols)natural_image
Close-up of a hand pouring dark granular substance from a metal container (no text or symbols visible)natural_image
Close-up of a mechanical clamp or connector with a black cylindrical component and metallic base (no visible text or symbols)natural_image
Interior view of a modern kitchen appliance with a glass door and control panel (no visible text or symbols)natural_image
Close-up of a mechanical device with a metallic knob and control knob (no visible text or symbols)natural_image
Close-up of a mechanical component with a cylindrical housing and black shaft (no visible text or symbols)natural_image
Close-up of a kitchen appliance with control panel and mechanical components (no visible text or symbols)OPMERKING: Cold Single Brew is 100 ml en Cold Double Brew is 140 ml.
natural_image
Close-up of a kitchen utensil with a metal pitcher and glassware (no visible text or symbols)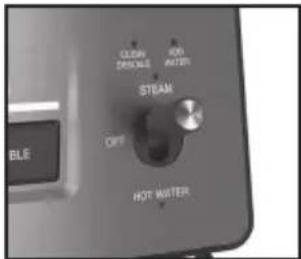
natural_image
Close-up of a mechanical device with a tool and control panel (no visible text or symbols)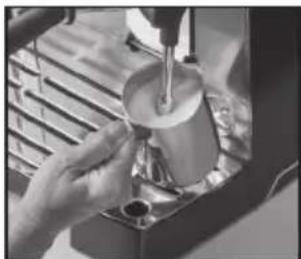
natural_image
Person pouring liquid into a container using a lathe (no visible text or symbols)natural_image
Close-up of a hand cleaning a small electronic device with a cloth (no visible text or symbols)natural_image
Close-up of a espresso machine with a glass beaker and metal stand (no visible text or symbols)natural_image
Exterior view of a mechanical device with internal components and a metal grate (no visible text or symbols)natural_image
Close-up of a hand using a tool to clean or adjust a machine component (no visible text or symbols)natural_image
Close-up of a mechanical device with a lever and circular dial (no visible text or symbols)natural_image
Close-up of a transparent plastic component with a circular recessed top (no visible text or symbols)
natural_image
Transparent plastic container with a small dark object inside, no visible text or symbolsnatural_image
Close-up of a mechanical component with a central circular feature (no visible text or symbols)natural_image
Close-up of a mechanical component with concentric rings and arrows indicating features (no text or symbols)
natural_image
Close-up of a mechanical component with a circular base and handle (no visible text or symbols)18B. Avtagbar droppbricka
natural_image
Black rectangular electronic device with two metallic circular cavities and a textured base (no visible text or symbols)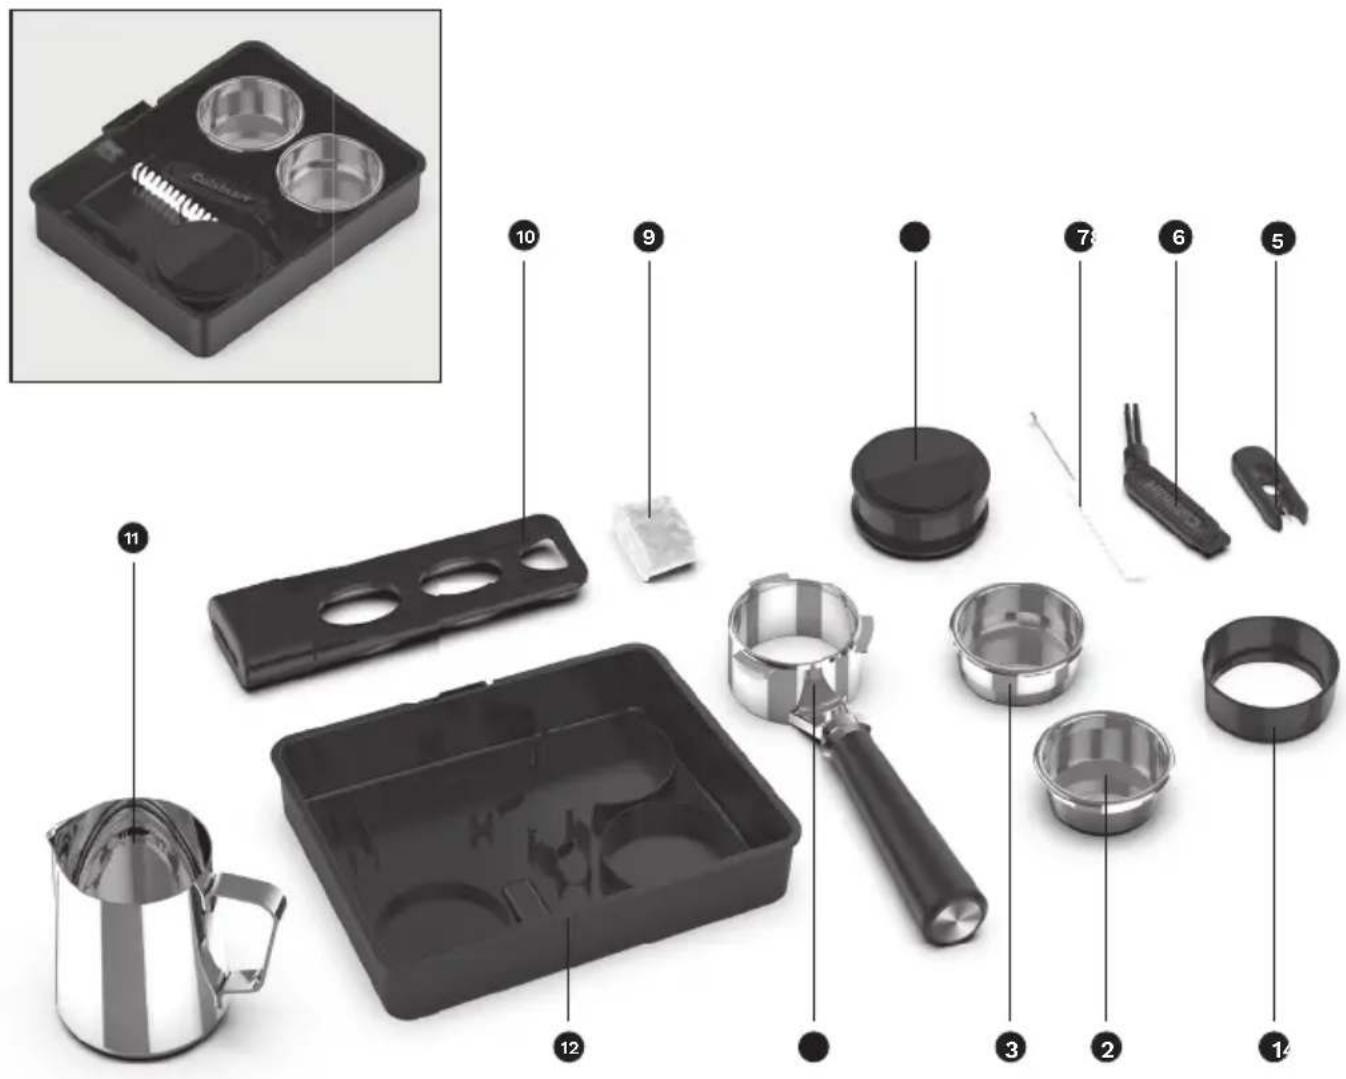
natural_image
Black rectangular device with circular cutouts and a small plastic cup beside it (no visible text or symbols)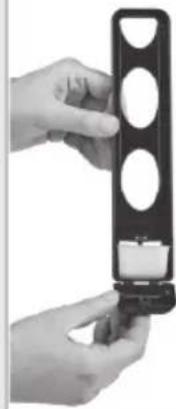
natural_image
Close-up of a hand holding a black cylindrical device with three circular holes, next to a small white component (no visible text or symbols)natural_image
Close-up of a transparent plastic electronic device with a small inset showing internal components (no visible text or symbols)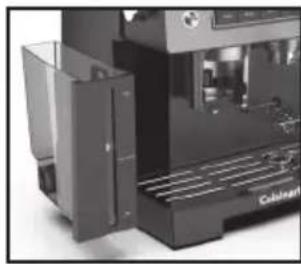
natural_image
Close-up of a black industrial machine with open door and side panel (no visible text or symbols)natural_image
3D rendering of a transparent box with a lid and internal components, no visible text or symbols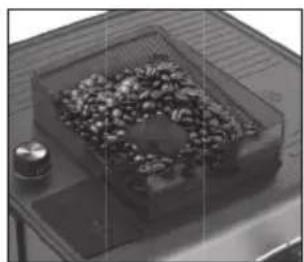
natural_image
Close-up of a transparent container with scattered granular material inside, placed on a metal tray (no text or symbols visible)natural_image
Close-up of a hand adjusting a metallic knob on a dark surface (no visible text or symbols)natural_image
Close-up of a kitchen appliance with control panel and door (no visible text or symbols)natural_image
Close-up of a coffee machine setup with a glass mug, saucer, and kitchen utensils (no visible text or symbols)natural_image
Close-up of a metallic coffee maker with a handle and spout, no visible text or symbols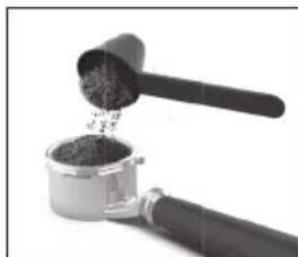
natural_image
Close-up of a hand mixer with a wooden scoop pouring granular material into a container (no text or symbols visible)natural_image
Close-up of a coffee machine setup with a glass mug and stand (no visible text or symbols)natural_image
Close-up of a hand using a espresso machine to press or adjust a coffee cup (no visible text or symbols)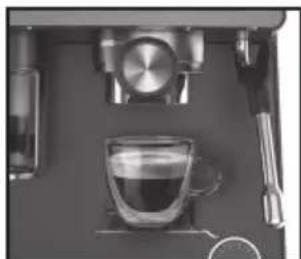
natural_image
Top-down view of a coffee machine setup with a glass cup, saucer, and stand (no visible text or symbols)natural_image
Close-up of a hand pouring dark granular substance from a metal container into a black tool (no text or symbols visible)natural_image
Close-up of a mechanical clamp or connector with a black cylindrical body and metallic handle (no text or symbols visible)natural_image
Close-up of a metallic door with a transparent glass and control panel (no visible text or symbols)natural_image
Close-up of a mechanical device with a metallic knob and control knob (no visible text or symbols)natural_image
Close-up of a mechanical component with a cylindrical housing and black handle (no visible text or symbols)natural_image
Close-up of a mechanical device with control panel and mechanical components (no visible text or symbols)natural_image
Close-up of a stainless steel coffee maker with a glass pitcher, placed on a metal tray (no visible text or symbols)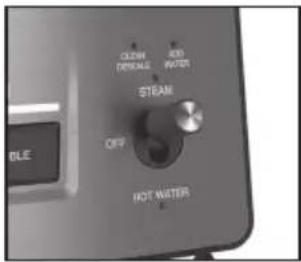
natural_image
Close-up of a mechanical device with a tool and circular annotation (no visible text or symbols)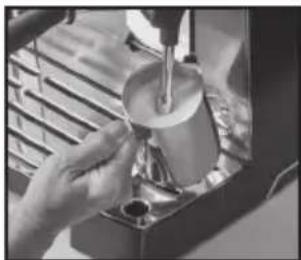
natural_image
Person pouring liquid into a container using a lathe machine (no visible text or symbols)natural_image
Hand cleaning a small electronic device with a cloth (no visible text or symbols)natural_image
Close-up of a Cuisinart coffee maker with glass beaker and mechanical components (no visible text or symbols)natural_image
Close-up of a mechanical device with a grating and control panel (no visible text or symbols)natural_image
Close-up of a hand using a tool to clean or adjust a machine component (no visible text or symbols)natural_image
Close-up of a hand holding a small mechanical component, possibly a tool or device, with no visible text or symbols.natural_image
Close-up of a transparent plastic component with a circular knob (no visible text or symbols)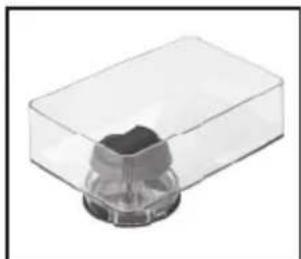
natural_image
Transparent plastic container with a small cylindrical object inside (no text or symbols visible)Rengöra kvarnen
natural_image
Close-up of a mechanical component with a central circular feature (no visible text or symbols)natural_image
Cross-sectional medical scan showing internal anatomical structures with two white arrows pointing to specific regions (no text or labels visible)
natural_image
Close-up of a mechanical component with a circular base and metal handle (no visible text or symbols)ENGLISH : CUISINART guarantees easier contact with its customer services in every country. For details of the customer services in your area, call:
Cuisinart offers you a 3-year warranty. We offer a standard exchange of the appliance (identical or equivalent) during this period. To benefit from the warranty, the original proof of purchase (sales ticket or receipt) must be attached to this warranty slip along with your full contact details. The warranty does not cover damage resulting from misuse, falls, dismantling, or repair by unauthorized persons. This guarantee in no way affects your rights under statutory law.


- Grind & Brew Espresso Machine
- Contents
- Contenu
- Important Unpacking Instructions
- The Quest for The Perfect Cup of Espresso
- Element 1: Water
- Element 2: Coffee
- Element 3: Grind
- Element 4: Tamping the Coffee Grounds
- Features and Benefits
- Hopper Lid
- 2.BeanHopper
- Hopper Release Knob
- Conical Burr Mill (not shown)
- Grind Size dial
- Water Reservoir Access Door
- Assisted Tamping Lever
- Grinding Cradle
- Removable 2.2L Water Reservoir
- Cup-Warming Plate
- Steam or Hot Water Control Switch
- Control Panel
- Steam & Hot Water Wand
- Group Head/Brew Head
- Bottomless Portafi lter
- Adjustable Shelf double layer
- Espresso Extraction Pressure Gauge
- Removable Drip Tray
- 18A. Storage Compartment
- 18B. Removable Drip Tray
- 18C. Removable Drip Tray Plate
- 20 Bar Pump (not shown)
- Getting to Know Your Control Panel
- Power/Off Button
- 2.GrindStart
- 2A. Single Button
- 2B.DoubleButton
- Cold Button
- Dose Brew Start
- 4A. Single Dose Button
- 4B. Double Dose Button
- Clean/Descale Indicator
- Add Water Indicator
- Steam or Hot Water Control Switch
- 7A.Steam
- 7B.HotWater
- Accessories
- Charcoal Water Filter Inserting the Water Filter
- Preparing Your Espresso Machine
- Insert Drip Tray
- Add Water
- Setting up the Grinder
- Run a Rinse Cycle
- Programming Your Espresso Machine
- Programming Single Espresso
- Programming Double Espresso
- Resetting the Factory Settings
- Guide to the Perfect Espresso
- Cold Extraction
- Sleep Mode
- Guide to Milk Texturing
- Using the Hot Water Function
- Cleaning and Maintenance
- Cleaning the Filters, Portafilter Holder, and Brew Head
- Cleaning the Outer Housing/Cup Warming Plate
- Cleaning the Drip Tray Plate
- Cleaning the Drip Tray
- Cleaning the Steam Wand
- Cleaning the Hopper
- Cleaning the Burr Grinder
- Decalcification
- Steam- of Hot Water-schakelaar
- 12.Bedieningspaneel
- Steam- of Hot Water-schakelaar
- Actieve-koolfilter
- Uw espressomachine klaarmaken
- 18B. Avtagbar droppbricka
- Rengöra kvarnen
Brand : CUISINART
Model : Espresso Bar EM640E
Category : Coffee grinder