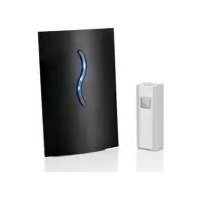
STKK 16 B1 - Wireless doorbell SILVERCREST - Free user manual and instructions
Find the device manual for free STKK 16 B1 SILVERCREST in PDF.

| Brand | SilverCrest |
| Model | STKK 16 B1 |
| Product type | Wireless doorbell |
| Receiver power supply | 100-240 V ~, 50/60 Hz |
| Power consumption (receiver) | 30 mA (operation), 1.3 mA (standby) |
| Protection class (receiver) | II (double insulation) |
| Transmission frequency | 433 MHz |
| Transmission power | < 5 dBm |
| Range (free field) | 100 m |
| Number of ringtones | 16 |
| Signal types | Acoustic and optical, or optical only |
| Protection rating (transmitter) | IPX4 (protection against water splashes) |
| Operating temperature (receiver) | 0 °C to +40 °C |
| Operating temperature (transmitter) | -25 °C to +50 °C |
| Transmitter mounting | Wall mounting (screws and plugs included) or double-sided tape |
| Items included | 1 receiver, 1 transmitter, 3 label holders, 2 plugs, 2 screws, 1 double-sided adhesive tape, quick start guide |
| Volume adjustment | Mute, quiet, moderate, loud, very loud |
| Safety | Do not open the receiver; do not expose to water (except transmitter IPX4); keep out of reach of children |
| Recycling | Device subject to WEEE directive; do not dispose of with household waste |
Frequently Asked Questions - STKK 16 B1 SILVERCREST
User questions about STKK 16 B1 SILVERCREST
0 question about this device. Answer the ones you know or ask your own.
Ask a new question about this device
Download the instructions for your Wireless doorbell in PDF format for free! Find your manual STKK 16 B1 - SILVERCREST and take your electronic device back in hand. On this page are published all the documents necessary for the use of your device. STKK 16 B1 by SILVERCREST.
USER MANUAL STKK 16 B1 SILVERCREST
GB/IE Short manual Page 1
Contents
Introduction 3
Information about this short manual ..... 3
Proper use 4
Safety....4
Basic safety instructions 5
Appliance description ..... 8
Package contents and transport inspection ....9
Handling and operation ..... 10
Power supply: receiver 10
Setting the signal type 10
Selecting the ringer tone ..... 1 1
Adjusting the volume 12
Mounting the transmitter ..... 1 2
SILVERCREST®
Disposal....16
Disposal of the device 16
Disposal of the packaging ..... 17
Appendix 18
Technical specifications ..... 1 8
Notes on the Declaration of Conformity ..... 1 9
Service 20
Importer 20
Introduction
Information about this short manual
This document is a shortened print version of the complete operating instructions.

Scanning the QR code will take you directly to the Lidl Service page (www.lidl-service.com), where you can view and download the full version of the operating instructions by entering the article number (IAN) 373415_2104.

WARNING!
Observe the information in the complete operating instructions and the safety instructions to avoid personal injury and damage to property.
The short manual is an integral part of this product. Before using the product, please familiarise yourself with all operating and safety instructions. Keep the short manual in a safe place and hand over all documents when passing the product on to any future owner/user.
Proper use
This appliance serves as a wireless doorbell system to announce visitors, allowing for the operation of a door bell without any wiring. It is not intended for any other purpose nor for use beyond the scope described. The appliance is not intended for use in commercial or industrial environments.
Claims of any kind for damage resulting from mis-use, incompetent repairs, unauthorised modification or the use of unauthorised replacement parts will not be accepted. The risk is borne solely by the user.
Safety
This section contains important safety instructions for handling the device. This device complies with the statutory safety regulations. Improper use may result in personal injury and property damage.
Basic safety instructions
This device may be used by children aged 8 years and above and by persons with limited physical, sensory or mental capabilities, or lack of experience and knowledge, provided that they are under supervision or have been told how to use the device safely and are aware of the potential risks. Do not allow children to play with the device. Cleaning and user maintenance tasks may not be carried out by children unless they are supervised.
■ The mains plug is used as a separator from the electricity grid and must always be readily accessible.
- Do not place any open flames, such as lit candles, on the appliance.
Before use, check the appliance for visible external damage. Do not operate an appliance that has been damaged or dropped.
- Do not expose the device to direct sunlight or high temperatures. Otherwise, it may become overheated and irreparably damaged.
- Do not expose the receiver to water spray or dripping water, and do not place liquid-filled objects such as vases or open drink containers on or near the receiver.
Warning: electrical voltage! Never open the housing of the receiver. None of the components in the appliance can be serviced or replaced by the user.
■ Do not make any unauthorised modifications or alterations to the appliance.
All repairs to the appliance must be carried out by authorised specialist companies or by the Customer Service department. Improper repairs may put the user at risk. They will also invalidate any warranty claim.
■ Unplug the appliance immediately if you smell burning or notice smoke. Have the device checked by a qualified specialist before using it again.

DANGER
▶ Do not allow children to play with the packaging material! Keep all packaging materials away from children.
There is a risk of suffocation!
NOTE
▶ No user action is required to switch the product between 50 and 60 Hz. The product switches automatically to either 50 or 60 Hz.
Appliance description (See fold-out page for illustrations)
Figure A: Receiver
① Signal type selection button ⚙ (optical signal/acoustic and optical signal/synchronisation)
② Ringer tone selection button ♪
③ Volume control button 🎨
4 Signal LED
⑤ Power plug
6 Speaker
Figure B: Transmitter
⑦ Ringer button
8 Nameplate
⑨ Nameplate cover
10 Wall bracket
⑪ Fixing eyelets (for wall mounting)
Figure C: Accessories
12 Double-sided tape
13 Nameplate
14 Wall plug
15 Screw
Package contents and transport inspection
The package contents include the following components (see fold-out page for illustrations):
- 1 x Receiver
- 1 x Transmitter
- 3 x Name plates
- 2 x Wall plugs
- 2 x Screws
- 1 x Double-sided tape
- This short manual
◆ Remove all parts of the appliance from the packaging and remove all packaging materials.
◆ Check the package for completeness and signs of visible damage.
If the delivery is incomplete or damage has occurred as a result of defective packaging or during transport, contact the Service hotline (see section Service).
Handling and operation
Power supply: receiver
The receiver is plugged into a properly installed mains power outlet and does not require batteries.
Setting the signal type
The receiver can indicate the reception of a door-ring signal either acoustically and optically, or only optically.
Press the signal type selection button ⚙① to select the acoustical and optical signal: when pressing the ringer button ⑦, a ringer tone sounds and the signal LED ④ flashes white.
◆ Press the signal type selection button ① again to select only the optical signal: There is no ring when pressing the ringer ⑦ button. Instead, the signal LED ④ flashes green and blue six times, then flashes green four times and finally stays green for 10 seconds.
Selecting the ringer tone
The receiver features 16 ringer tones.
◆ Repeatedly press the ringer tone selection button ⏰ ② to select a ringer tone.
- Stop the selection when you hear the desired ringer tone. The appliance will use the last selected ringer tone.
Adjusting the volume
To select the desired ringer tone volume, keep pressing the volume control button ⌘ until the desired volume is set.

flowchart
graph LR
    A["quiet"] --> B["low"] --> C["medium"] --> D["loud"] --> E["very loud"]
Mounting the transmitter
NOTE
▶ You will need a Phillips screwdriver and a drill with a 5 mm drill bit to mount the transmitter.
▶ Only use the screws 15 and wall plugs 14 provided to mount the transmitter.
▶ Ensure that there are no electric lines, water or heating pipes installed at the proposed drilling location!
NOTE
The supplied wall plugs 14 are only suitable for mounting in concrete or stone. Before starting the installation, please check your installation location carefully for its suitability for the wall plugs 14. The assembly material must be suitable for the respective location. If in doubt, consult a professional.
▶ Alternatively, you can mount the transmitter using the double-sided adhesive tape 12 onto a suitable surface (maximum height 2 m).
- Select a suitable positioning for the transmitter, close to your outer door.
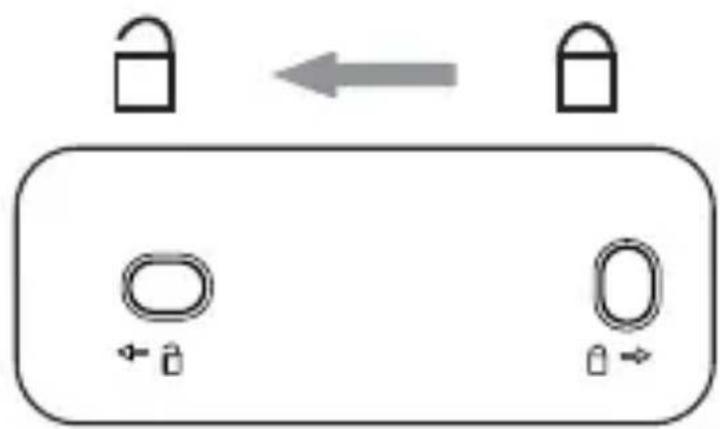
Remove the wall bracket 10 from the rear side of the transmitter by sliding it in the direction of the open lock symbol ⏻ (see fig. 1).
flowchart
graph TD
    A["Lock Symbol"] <--> B["Lock Symbol"]
    C["Open Ring"] --> D["Open Ring"]
    style A fill:#fff,stroke:#000
    style B fill:#fff,stroke:#000
    style C fill:#fff,stroke:#000
    style D fill:#fff,stroke:#000
Fig. 1
Mark the positions for the two required drill holes by holding the wall bracket 10 against the wall at the desired mounting location (maximum height 2 m). Then mark the drill holes with the two fixing eyelets 11.
Use a drill with a 5 mm drill bit to drill the two holes for the supplied wall plugs 14.
Insert the wall plugs 14 into the drill holes.
♦ Screw the wall bracket 10 onto wall at the desired mounting location using the screwdriver and the supplied screws 15.
Write on one of the nameplates 13. If marking the nameplate 13 by hand, we recommend using a waterproof pen.
◆ Pull the nameplate cover ⑨ upwards away from the transmitter and place your nameplate ⑧ into the recess in the transmitter.
Place the nameplate ⑨ back onto the transmitter.
Place the transmitter on the wall bracket ⑩ so that the retaining tabs on the wall bracket ⑩ protrude into the two openings on the back of the transmitter. Then slide the transmitter towards the ringer button ⑦ so that the retaining tabs glide into the openings and the transmitter sits firmly on the wall bracket ⑩ (see fig. 2).
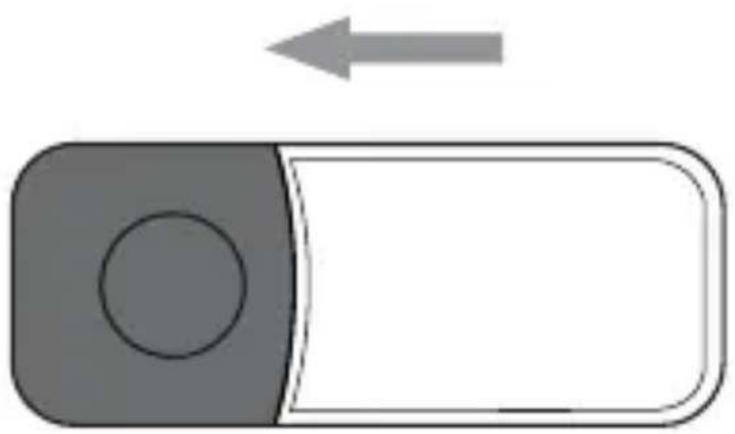
natural_image
Simple diagram of a toggle switch with an arrow indicating leftward motion (no text or symbols)Fig. 2
Disposal
Disposal of the device

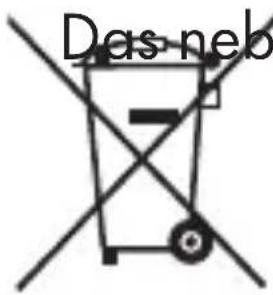
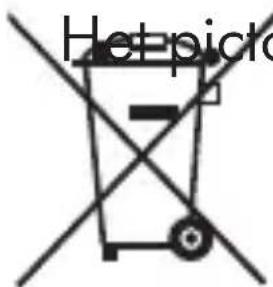
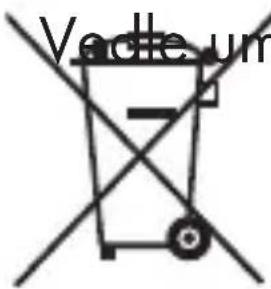
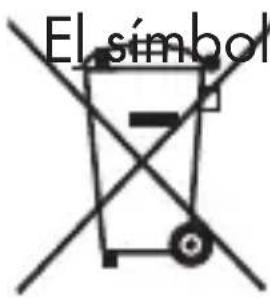
ent symbol of a crossed-out wheelie bin means that this device is subject to Directive 2012/19/EU. This directive states that this device may not be disposed of in normal household waste at the end of its useful life, but must be taken to a specially set-up collection point, recycling depot or disposal company. The integrated rechargeable battery in this device cannot be removed for disposal.
This disposal is free of charge for the user. Protect the environment and dispose of this device properly.

natural_image
Silhouette of a person sorting trash into a bin (no text or symbols)Your local community or municipal authorities can provide information on how to dispose of the worn-out product.

natural_image
Symbolic icon of a person moving with arrows, enclosed in a circle (no text or symbols)The product is recyclable, subject to extended producer responsibility and is collected separately.
Disposal of the packaging

natural_image
Simple line drawing of a five chasing recycling symbol (three chasing arrows in a triangle)The packaging materials have been selected for their environmental friendliness and ease of disposal and are therefore recyclable.
Dispose of packaging materials that are no longer needed in accordance with applicable local regulations.
Dispose of the packaging in an environmentally friendly manner.
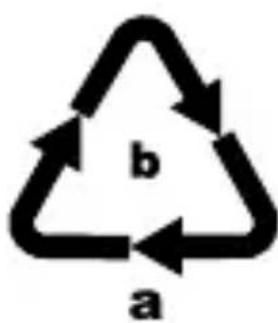
Observe the labels on the different packaging materials and separate them as needed. The packaging material is labelled with abbreviations (a) and numbers (b) with the following meanings: 1–7: plastics, 20–22: paper and cardboard, 80–98: composites.
Appendix
Technical specifications
| Power supply: receiver | 100-240 V ~ (AC) 50/60 Hz |
| Power consumption of the receiver | Operation: 30 mA Standby: 1.3 mA |
| Protection class: receiver | II / (double insulation) |
| Transmitting frequency | 433 MHz |
| Transmission output < 5 dBm | |
| Range 100 m (free field) | |
| Number of ringer tones | 16 |
| Protection class: transmitter | IPX4 |
| Operating temperature receiver | 0°C to 40°C |
| Operating temperature transmitter | -25°C to 50°C |
Notes on the Declaration of Conformity
CE This device complies with the essential requirements and other relevant provisions of the RE Directive
2014/53/EU and the RoHS Directive 2011/65/EU.
You can download the complete EU conformity declaration from
https://dl.kompernass.com/373415_DOC.pdf.
Service

Service Great Britain
Tel.: 0800 404 7657
E-Mail: kompernass@lidl.co.uk

ServiceIreland
Tel.: 1890 930 034
(0,08 EUR / Min., (peak))
(0,06 EUR / Min., (off peak))
E-Mail: kompernass@lidl.ie
IAN 373415_2104
Importer
Please note that the following address is not the service address. Please use the service address provided in the operating instructions.
KOMPERNASS HANDELS GMBH
BURGSTRASSE 21 • 44867 BOCHUM
GERMANY
www.kompernass.com
Inhaltsverzeichnis
Einführung 23
natural_image
Simple diagram of a toggle switch with an arrow indicating leftward motion (no text or symbols)Abb. 2
Entsorgung
Gerät entsorgen
natural_image
Silhouette of a person disposing of trash into a bin (no text or symbols)natural_image
Symbolic icon of a person walking with arrows indicating rotation or cycle (no text or numbers)natural_image
Simple line drawing of a recycling symbol (three chasing arrows), no text or labels present.KOMPERNASS HANDELS GMBH
BURGSTRASSE 21
44867 BOCHUM
DEUTSCHLAND
www.kompernass.com
Table des matières
Introduction 45
natural_image
Simple diagram of a toggle switch with an arrow indicating leftward motion (no text or symbols)Fig. 2
Recyclage
natural_image
Silhouette of a person disposing of trash into a bin (no text or symbols)natural_image
Symbolic icon of a person walking with arrows, enclosed in a circle (no text or numbers)natural_image
Simple line drawing of a recycling symbol (three chasing arrows), no text or labels present.chemical
Recycling symbol with arrows labeled a and b, indicating two cycles of recyclingKOMPERNASS HANDELS GMBH
BURGSTRASSE 21
44867 BOCHUM
ALLEMAGNE
www.kompernass.com
Inhoud
Inleiding 67
natural_image
Simple diagram of a button with an arrow indicating leftward motion (no text or symbols)Afb. 2
Afvoeren
Apparaat afvoeren
natural_image
Silhouette of a person sorting trash into a bin (no text or symbols)natural_image
Abstract black-and-white icon of a person walking with arrows, enclosed in a circle (no text or symbols)natural_image
Simple line drawing of a recycling symbol (three chasing arrows) with no text or labelshttps://dl.kompernass.com/373415_DOC.pdf.
Service

ServiceNederland
KOMPERNASS HANDELS GMBH
BURGSTRASSE 21
44867 BOCHUM
DUITSLAND
www.kompernass.com
Obsah
Úvod....89
natural_image
Simple diagram of a toggle switch with a circular button and rectangular body (no text or symbols)Obr. 2
Likvidace
Likvidace prístroje
natural_image
Silhouette of a person disposing of trash into a bin (no text or symbols)natural_image
Symbolic icon of a person pushing a circular arrow, representing waste or disposal (no text or symbols)natural_image
Simple line drawing of a recycling symbol (three chasing arrows) with no text or labelshttps://dl.kompernass.com/373415_DOC.pdf.
Servis

ServisČesko
Tel.: 800143873
KOMPERNASS HANDELS GMBH
BURGSTRASSE 21
44867 BOCHUM
NĚMECKO
www.kompernass.com
Spis treści
W step 109
natural_image
Simple diagram of a toggle switch with a circular button and rectangular body (no text or symbols)Rys. 2
Utylizacja
natural_image
Silhouette of a person disposing of trash into a bin (no text or symbols)natural_image
Symbolic icon of a person pushing a large arrow, enclosed in a circle (no text or symbols)natural_image
Simple line drawing of a recycling symbol (three chasing arrows) with no text or labelshttps://dl.kompernass.com/373415_DOC.pdf.
Serwis

SerwisPolska
Tel.: 22 397 4996
E-Mail: kompernass@lidl.pl
IAN 373415_2104
Importer
KOMPERNASS HANDELS GMBH
BURGSTRASSE 21
44867 BOCHUM
NIEMCY
www.kompernass.com
Obsah
Úvod....131
natural_image
Simple diagram of a toggle switch with a circular button and rectangular body (no text or symbols)Obr. 2
Likvidácia
natural_image
Silhouette of a person disposing of trash into a bin (no text or symbols)natural_image
Symbolic icon of a person walking inside a circular arrow, representing waste or disposal (no text or symbols)natural_image
Simple line drawing of a recycling symbol with three chasing arrows (no text or labels)https://dl.kompernass.com/373415_DOC.pdf.
Servis

ServisSlovensko
Tel. 0850 232001
E-Mail: kompernass@lidl.sk
IAN 373415_2104
Dovozca
KOMPERNASS HANDELS GMBH
BURGSTRASSE 21
44867 BOCHUM
NEMECKO
www.kompernass.com
Índice
natural_image
Simple diagram of a button with an arrow indicating leftward motion (no text or symbols)Fig. 2
Desecho
Desecho del aparato
natural_image
Silhouette of a person disposing of trash into a bin (no text or symbols)natural_image
Symbolic icon of a person walking with arrows, enclosed in a circle (no text or symbols)natural_image
Simple line drawing of a five chasing recycling symbol (no text or labels)KOMPERNASS HANDELS GMBH
BURGSTRASSE 21
44867 BOCHUM
ALEMANIA
www.kompernass.com
Indholdsfortegnelse
natural_image
Simple diagram of a button with an arrow indicating leftward motion (no text or symbols)Fig. 2
Bortskaffelse
natural_image
Silhouette of a person disposing of trash into a bin (no text or symbols)natural_image
Symbolic icon of a person walking with arrows indicating cycle (no text or numbers)natural_image
Simple line drawing of a recycling symbol (three chasing arrows) with no text or labelsKOMPERNASS HANDELS GMBH
BURGSTRASSE 21
44867 BOCHUM
TYSKLAND
www.kompernass.com


natural_image
Symbolic icon of a person pushing a circular arrow, with curved arrows indicating rotation or cycle (no text or symbols)KOMPERNASS HANDELS GMBH
BURGSTRASSE 21
44867 BOCHUM
GERMANY
www.kompernass.com
Last Information Update · Stand der Informationen · Version des informations · Stand van de informatie · Stav informací · Stan informacji · Stav informácií · Estado de las informaciones · Tilstand af information: 09 / 2021 · Ident.-No.: STKK16B1-072021-2
IAN 373415_2104
8