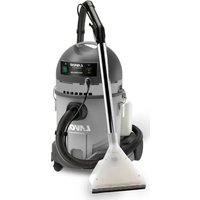
Hydrus - Vacuum Cleaner Lavor - Free user manual and instructions
Find the device manual for free Hydrus Lavor in PDF.


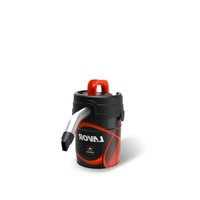
| Product Type | Wet and dry vacuum cleaner |
| Brand | Lavor |
| Model | Hydrus |
| Intended use | Non-professional, wet and dry vacuuming |
| Main functions | Dust vacuuming, liquid vacuuming, washing with injection-aspiration system |
| Power supply | Mains 230 V ~ 50 Hz |
| Tank capacity | 20 L (dust/liquid tank) + 5 L (water tank for detergent solution) |
| Included accessories | Suction head (A), hose (L), extension tube (M), upholstery nozzle (P), small nozzle (P2), round brush (V), squeegee holder (N), floor frame (T), crevice nozzle (D), carpet tool (C), straight lance (R) |
| Filters | Liquid filter (S), washable dust filter (S2), paper filter (Z) |
| Safety | Automatic shut-off by float in liquid vacuuming, double insulation (if included) |
| Maintenance | Clean the exterior with a dry cloth, wash the S2 filter with water and let it dry |
| Warranty | Legal warranty against manufacturing defects |
| Country of origin | Italy |
Frequently Asked Questions - Hydrus Lavor
User questions about Hydrus Lavor
0 question about this device. Answer the ones you know or ask your own.
Ask a new question about this device
Download the instructions for your Vacuum Cleaner in PDF format for free! Find your manual Hydrus - Lavor and take your electronic device back in hand. On this page are published all the documents necessary for the use of your device. Hydrus by Lavor.
USER MANUAL Hydrus Lavor
Technical data plate
CE
IT In base al modello si possono verificare delle differenze nella fornitura. Depending on the model, there are differences in the scopes of delivery. FR Suivant le modèle, la fourniture peut varier. DE Je nach Modell gibt es Unterschiede im Lieferumfang. ES Según el modelos, hay diferencias en el contenido suministrado. EL Aváloya με το μοντέλο ενδέχεται να υπάρχουν διαφορές στην προμήθεια. PT Consoante o modelo, existem diferenças no volume de fornecimento. Afhankelijk van het model zijn er verschillen in de leveringspakketten LT Atskirų modelių komplektacija gali skirtis LV Komplektācija var atškirties atkarībā no modela. RU В данном руководстве по эксплуатации дано описание прибора с максимальной комплектацией. Комплектация отличается в зависимости от модели
DE MONTAGEANLEITUNG
EN ASSEMBLY INSTRUCTIONS
FR INSTRUCTION DE MONTAGE
IT ISTRUZIONI DI MONTAGGIO
ES INSTRUCCIONES DE MONTAJE
NL MONTAGEHANDLEIDING
PT INSTRUÇÃO DE MONTAGEM
EL OΔΗΓΙΕΣ ΣΥΝΑΡΜΟΛΟΓΗΣΗΣ
LT SURINKIMAS
LV MONTĀŽA
RU MOHTAX
OPTIONAL
DE WENN VORHANDEN
EN IF PRESENT
FR SI INCLUSE
IT SE PRESENTE
ES SI ESTUVIERA PRESENTE
NL INDIEN AANWEZIG
PT SE PRESENTE
EL E'AN YΠAPXEI
LT PRIEDAS
LV PAPILDU PIEDERUMS
RU ЕСЛИ ЕСТЬ
fig.2
natural_image
Diagram of a curved mechanical device with directional arrows indicating motion or flow (no text or symbols)
natural_image
Line drawing of a curved mechanical device with no visible text or symbolsfig.3
natural_image
Illustration of hands using a tool to secure electrical protection, with no text or symbols present.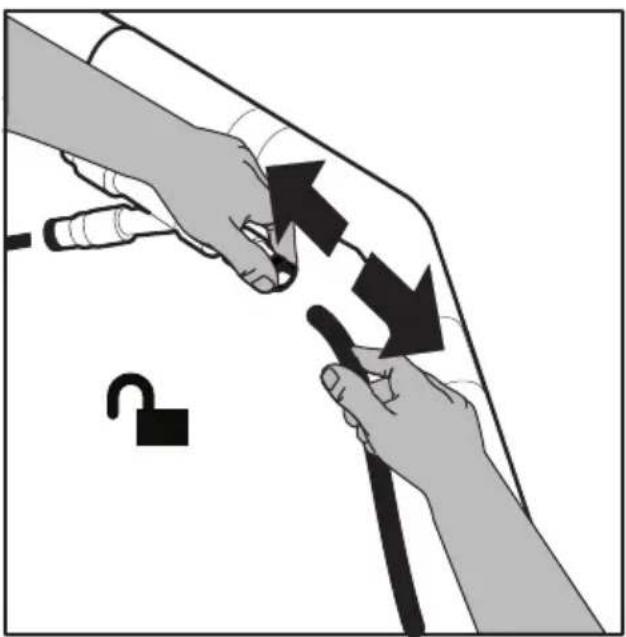
natural_image
Illustration of two hands holding a tool with arrows indicating movement or force, no text or symbols present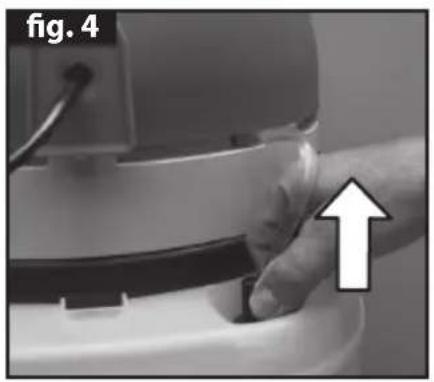
natural_image
Close-up of a hand pressing down on a small mechanical component, with an arrow pointing upward (no text or symbols visible)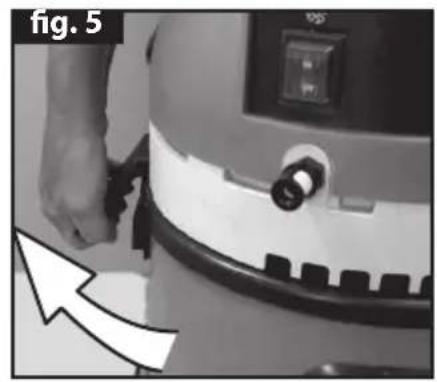
natural_image
Close-up of a hand pressing down on a robotic device component (no visible text or symbols)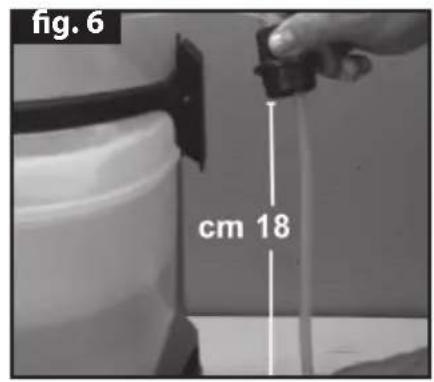
natural_image
Close-up of hands assembling a mechanical component in a bowl (no visible text or symbols)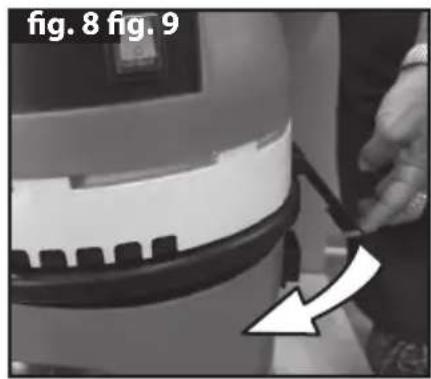
natural_image
Close-up of a hand holding a small object next to a device component, with arrow indicating direction (no text or symbols visible)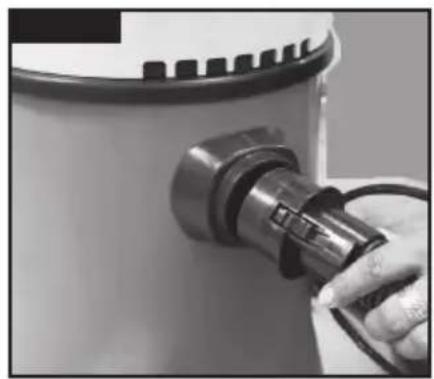
natural_image
Close-up of a hand holding a small mechanical component, possibly a brush or tool, with no visible text or symbols.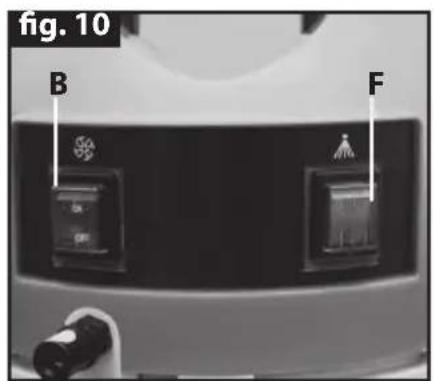
natural_image
Close-up of a mechanical device with a black component and an upward arrow indicator (no text or symbols)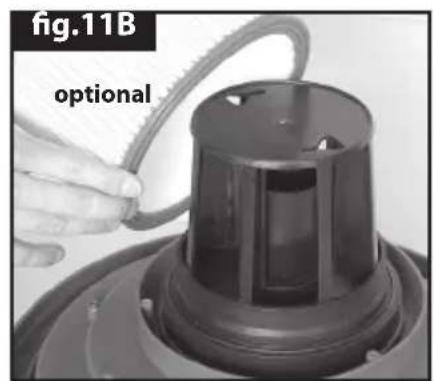
natural_image
Close-up of a hand holding a cable or wire next to a black plastic component, labeled 'fig.11B' and 'optional' (no other text or symbols visible)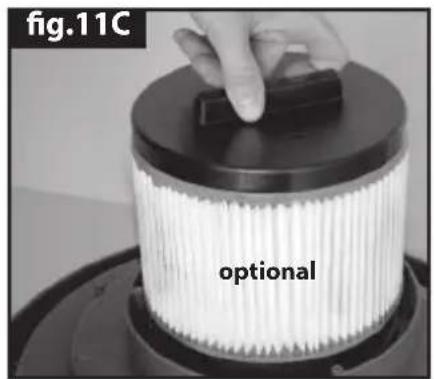
natural_image
Close-up of a white plastic bag attached to a white container, with a black cable inserted (no visible text or symbols)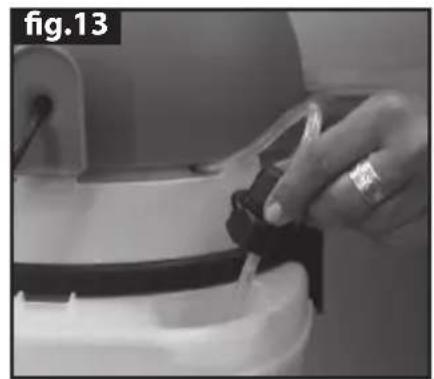
natural_image
Close-up of a hand using a tool to clean or install a white cylindrical object, no visible text or symbols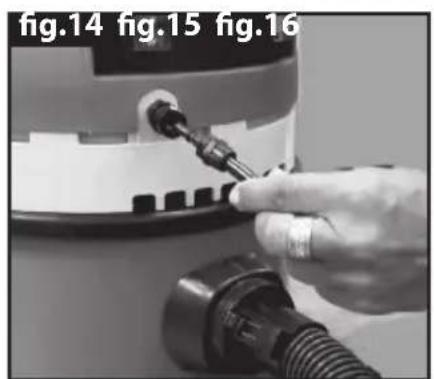
natural_image
Close-up of a hand using a hairdryer to adjust or install a component, no visible text or symbols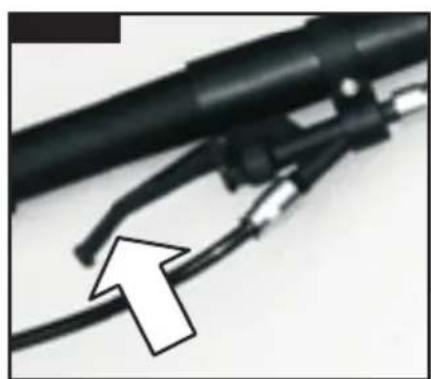
natural_image
Close-up of a black cable with wires and connectors, no visible text or symbols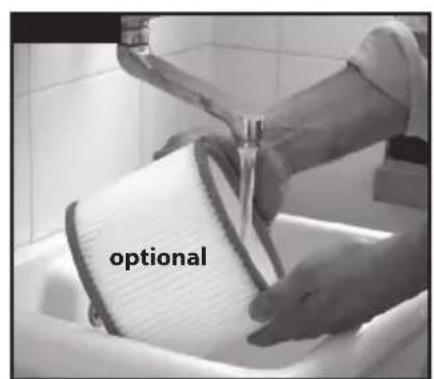
DESCRIPTION AND ASSEMBLY INSTRUCTIONS
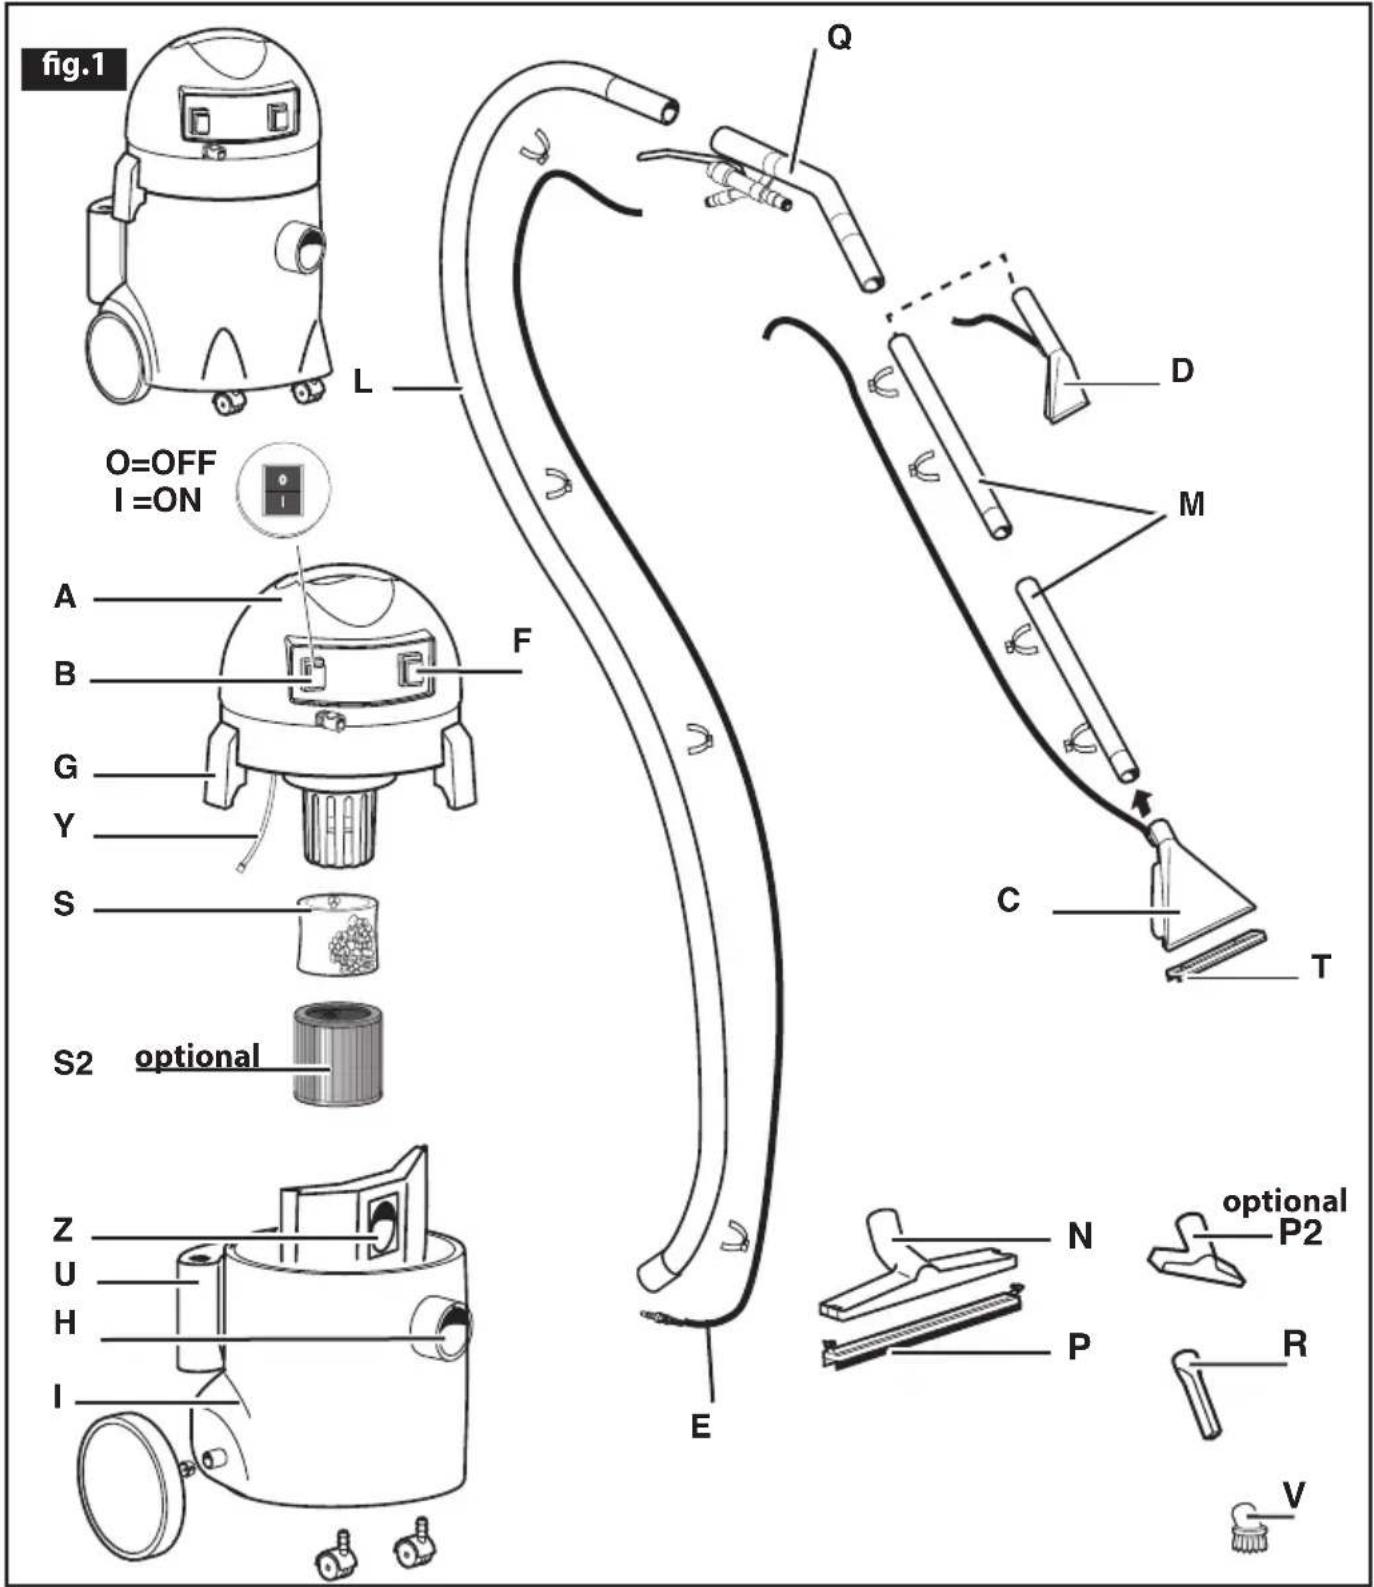
A - Motor head
B - (I) ON/(0) OFF switch on vacuum
C - Fitted carpet accessory
D- Armchair washing tool
E - Hydraulic pipe
F - Pump I/O switch (light)
G - Latches for closing head/drum
H - Vacuum connection
I - Drum
L - Hose
M - Extension tube
N - Accessory holder
P - Accessory with bristles
P2-Small brush *
Q - Handpiece with tap lever
R - Straight spray stick
S - Liquid filter (filter on liquid intake)
S2- Washable filter (Dry suction) *
T - Floor accessory (slide-on fitting)
U - Water tank
V - Round brush
Y - Water level sensor
Z - Paper filter to be applied directly onto the vacuum intake (dry vacuum)
* OPTIONAL
INTENDED USE
- The appliance is intended for non professional use
- The appliance is intended for use as a wet and dry vacuum cleaner
SYMBOLS

CAUTION! It is important to be careful on safety grounds.

IMPORTANT

LOCKED

OPEN

OPTIONAL: IF PRESENT

Double insulated (IF PRESENT): supplementary insulation is applied to the basic insulation to protect against electric shock in the event of failure of the basic insulation.
SAFETY
GENERAL WARNING
- Components used in packaging (if plastic bags) can be dangerous keep away from children and animals.
- Operators shall be adequately instructed on the use of these machines.
- The use of this machine for anything not specified in this manual may be dangerous and must be avoided.
- Only use the socket outlet on the appliance for purposes specified in the instruction manual. (note: this is only for appliance provided with the socket outlet.
- Before emptying the tank, switch off the machine and disconnect the plug from the power outlet.
• Always check the appliance before use. - The suction nozzle should be kept away from the body, especially delicate areas such as the eyes, ears and mouth.
- This appliance can be used by children aged from 8 years and above and by persons with reduced physical, sensory or mental capabilities or lack of experience and knowledge if they have been given supervision or instruction concerning use of the appliance in a safe way and if they understand the hazards involved. Cleaning and user maintenance shall not be made by children unless they are older than 8 and supervised. Children shall not play with the appliance.
- The equipment should be correctly assembled before use.
- Ensure that power sockets used are correct for the machine
- Never grasp the mains plug with wet hands.
- Check the voltage indicated on the rating plate is the same as the supply voltage.
- These machine are not designed for picking up health endangering dusts or inflammable/explosives substances (like ash and soot).
- Never leave the equipment unattended whilst in use.
- Never carry out any maintenance on the machine without first disconnecting from the mains supply or when it is left unattended or reachable by children or disables.
- The mains supply cable should not be used to pull or lift the machine.
-
The machine should never be immersed and never use the water jet against the appliance to clean it.
-
When using the machine in wet rooms (e.g. in the bathroom) only connect it to sockets which are connected in series with a ground fault circuit interrupter. In case of doubt, consult an electrician.
Periodically examine the power cord and machine for damage. If any damage is found, do not use the appliance but contact your service centre for repair. - If the supply cord is damaged, it must be replaced by the manufacturer, its service agent or similar qualified persons in order to avoid a hazard.
- Should extension cables be used, ensure that these lay on dry surfaces and protected against water jets.
- Before vacuuming liquids, check the float functions correctly. When vacuuming liquids, and when the tank is full, a fl oat closes the suction opening, and the vacuum operation is interrupted. Then switch off the machine, disconnect the plug and empty the tank. Regularly clean the water level limiting device (float) and examine it for signs of damage.
- If the equipment should overturn it is recommended that the machine should be stood up before switching off.
- If foam or liquid escape from the appliance, switch off immediately.
- The equipment should not be used to pick up water from containers lavatories, tubs, etc.
- Aggressive solvents or detergents should not be used.
- Service and repairs must be carried out by qualified personnel only. Only use manufacturer original spare parts for service repair.
- The manufacturer cannot be held responsible for any damage/injury caused to persons, animals or property caused by misuse of the appliance, not in compliance with manual instructions.
USAGE
REMOVING THE HEAD
- Before taking the head (A) off of the shaft (I), remove the cap from the tank (fig. 4).
-
Release the hooks (G) and raise the head (A) (fig. 5).
-
Check that the minimum distance between the cap and the filter is 18 cm (fig. 6), to permit proper priming of the liquid from the jerry can.
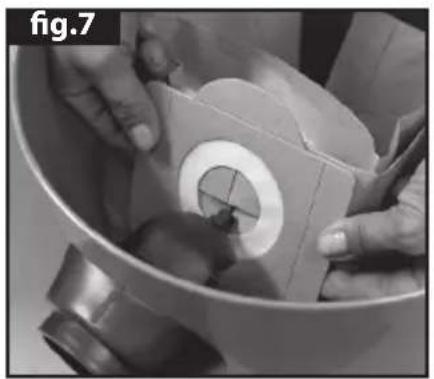
- Use the filter (Z) (fig. 7) only with dry shaft and accessories.
VACUUMING DUST
- Fit the filter (Z) in the shaft (I) (fig. 7).
- Fit the filter (S2) OPTIONAL (fig. 11B-11C).
- Fit the vacuum head (A) on the shaft (I) and tighten with the fasteners (G) (fig. 8).
- Fit the flexible hose (L) in the vacuum opening (H) (fig. 9).
- Fit the extensions (M) in the end of the flex hose (L) and connect the most suitable accessory.
- Connect the device to a suitable electrical outlet.
- Start vacuuming by pressing switch (B) (fig. 10).
- Never use the appliance without a filter!
- If the appliance is used with especially fine dust (size below 0.3 m ) the filter supplied will require cleaning more frequently. For especially demanding applications, the use of specific filters supplied as an optional (Hepa - cod. 5.212.0010) may be necessary.
VACUUMING LIQUIDS
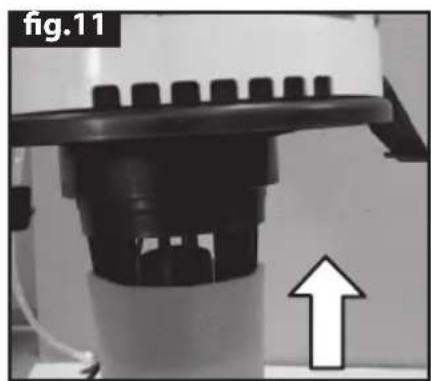
- Fit the filter (X) under the head (A) (fig. 11)
- Insert antifoam additive (Optional, not supplied) in the tank (I), PREFOAM 3.697.0072.
- Fit the vacuum head (A) on the shaft (I) and tighten with the fasteners (G) (fig. 8).
- Fit the flex pipe (L) in the vacuum opening (H) (fig. 9).
- Fit the extensions (M) in the end of the flex hose (L) and connect the most suitable accessory.
- Connect the device to a suitable electrical outlet.
- Start vacuuming by pressing switch (B) (fig. 10).
- Never use the appliance without a filter!
WASHING WITH INJECTION-VACUUMING SYSTEM
Preparation:
- Fit filter (X) under the head (A) (fig. 11)
- Insert antifoam additive (Optional, not supplied) in the tank (I), PREFOAM 3.697.0072.
EN
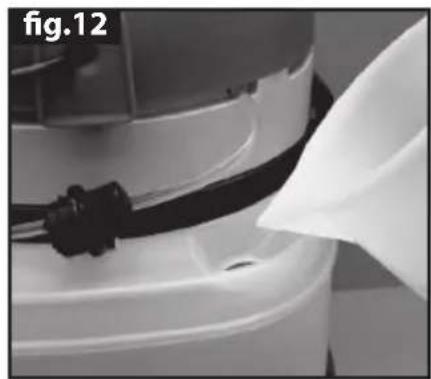
- Pour the detergent product into the solution tank (U) (fig. 12).
- Fit the vacuum head (A) on the shaft (I) and tighten with fasteners (G) (fig. 8).
- Fit the hydraulic pipe (Y) in solution tank (U) (fig. 13)
- Fit the flex hose (L) into the vacuum opening (H) (fig. 9).
- Fit the end of the hydraulic pipe (E) on the quick coupling on head (fig. 14).
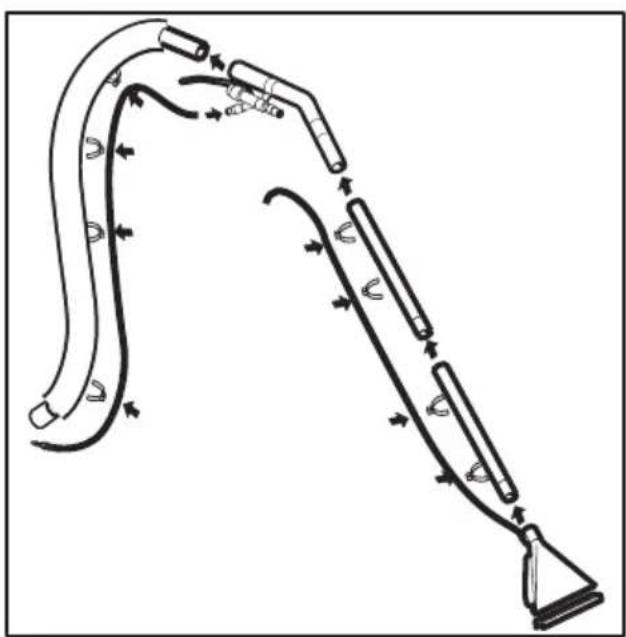
- Fit accessory (D) in the end of flex hose (L), or fit the extensions (M) with accessories (C and T) (fig.2) (fig.3).
- Secure the hydraulic hoses with the clips (fig. 2).
- Never use the appliance without a filter!
Use:
- Connect the device to a suitable electrical outlet.
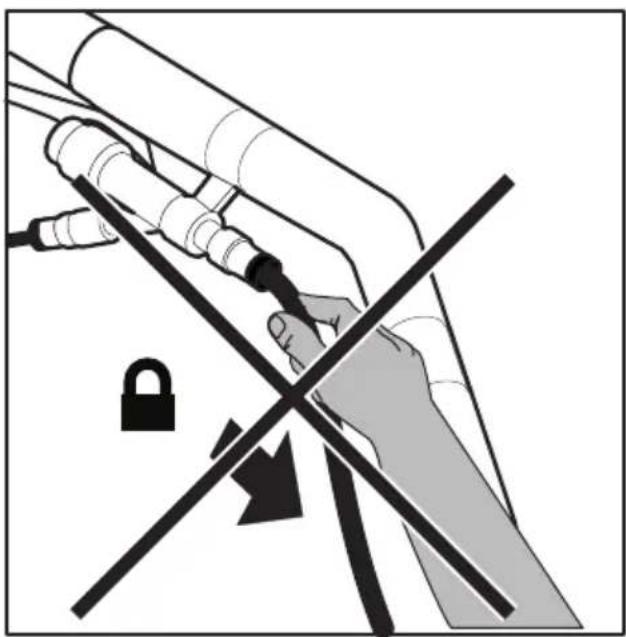
- Press the lever on the tap (Q) (fig. 15) and both the switches (F) (B) (fig. 10).
Hold the lever down and wait for detergent to come out.
- To go ahead and wash, place the accessory on the surface and, pressing the lever of tap, pull it towards you.
- After completing the operation, turn off switches (F) and (B) (fig. 10).
Do not leave the pump running with no detergent in the tank or without dispensing detergent for more than 5 minutes, to prevent damaging the pump.
CARE AND MAINTENANCE
The unit is maintenance-free.
- The machine shall be disconnected from its power source, by removing the plug from the socket-outlet, during cleaning or maintenance
- Clean the exterior part of the machine with a dry cloth.
- Move the appliance only by catching the carrying handle located on the motor head.
- Store the appliance and the accessories in a dry safe place, out of the reach of children.
FILTER CLEANING (S2)
1- Remove the filter
2- wash tge filter
3- Let the filter drying before reassemble it
- Once the filter has been cleaned, check whether it is suitable for further use. If it has been damaged or broken, replace it with an original filter.
WARRANTY CONDITIONS
All our machines are subjected to strict tests and are covered against manufacturing defects in accordance with applicable regulations. The warranty is effective from the date of purchase.
The following are not included in the warranty: - Parts subject to normal wear. - Rubber parts, charcoal, filters and the accessories and optional accessories. - Accidental damage, caused by transport, neglect or inadequate treatment, incorrect or improper use and installation failing - The warranty shall not cover any cleaning operations to which the operative components may be subjected, such as clogged nozzles and filter blocked due to limestones. This pressure cleaner is intended to be used for domestic and hobby work: the warranty does not cover any other different kind of use.

DISPOSAL (WEEE)
As the owner of electrical or electronic equipment, the law (in accordance with the EU Directive 2012/19/EU) prohibits you from disposing of this product or its electrical / electronic accessories as municipal solid waste and obliges you to make use of the appropriate waste collection facilities.
The product can be disposed of by returning it to the distributor when a new product is purchased. The new product must be equivalent to that being disposed of.
CONDITIONS DE GARANTIE
ALGEMENE WAARSCHUWINGEN
EN EC/EU DECLARATION OF CONFORMITY according to Directive (and following amendments):
FR DÉCLARATION CE/UE DE CONFORMITÉaux termes des directives européennes (et leurs modifications successives):
Giancarlo Lanfredi (Legal Representative
Lavorwash S.p.A.)
LpA 75 dB(A) Kpa [2dB(A)]
EN Sound pressure level


- OPTIONAL
- DESCRIPTION AND ASSEMBLY INSTRUCTIONS
- INTENDED USE
- SYMBOLS
- SAFETY
- GENERAL WARNING
- USAGE
- REMOVING THE HEAD
- VACUUMING DUST
- VACUUMING LIQUIDS
- WASHING WITH INJECTION-VACUUMING SYSTEM
- Preparation:
- EN
- CARE AND MAINTENANCE
- FILTER CLEANING (S2)
- WARRANTY CONDITIONS
- DISPOSAL (WEEE)
- CONDITIONS DE GARANTIE
- ALGEMENE WAARSCHUWINGEN
- LpA 75 dB(A) Kpa [2dB(A)]
Brand : Lavor
Model : Hydrus
Category : Vacuum Cleaner